9 Upgrading to WebLogic Version 10.3.5.0
This chapter discusses these topics:
9.1 Before You Begin
Before you begin upgrading your existing WebLogic Server version to WebLogic 10.3.5.0:
-
Shut down all WebLogic processes you want to upgrade such as:
-
Node Manager
-
Admin Server
-
All Managed Servers
-
-
Download a new version of JDK, where your options are:
-
JRockit-R28.1.3-1.6.0_24+
-
Oracle Sun JDK 1.6.0_24+
Note:
A plus sign '+' after the fourth digit in the version number indicates that this and its subsequent versions are supported. -
-
Download this patch set for Oracle WebLogic 10.3.5.0: 12395574. (p12395574_ 1035_Generic.zip)
Unzip the file in a temporary location and confirm the extracted contains this file:
wls1035_upgrade_generic.jar
9.2 Installing and Verifying the JDK Version
In order to meet the MTRs for the requisite JDK, if you need to install a new JDK you should install it to a different location. Otherwise you should completely uninstall the existing JDK and replace it with the newer version.
To install and verify the level of an existing JDK, refer to the section of this guide entitled: Section 6.4, "Installing and Verifying the JDK Version."
9.3 Running OUI to Upgrade an Existing WebLogic Server to 10.3.5
This section describes running the Oracle Universal Installer (OUI) to upgrade an existing WebLogic Server to 10.3.5.
-
Locate this patchset from the temporary location where you downloaded it in Section 9.1, "Before You Begin":
wls1035_upgrade_generic.jar -
Open a Command window with Run as Administrator option and run this command from the prompt:
Upon execution, the installer starts preparing the OUI install program.
-
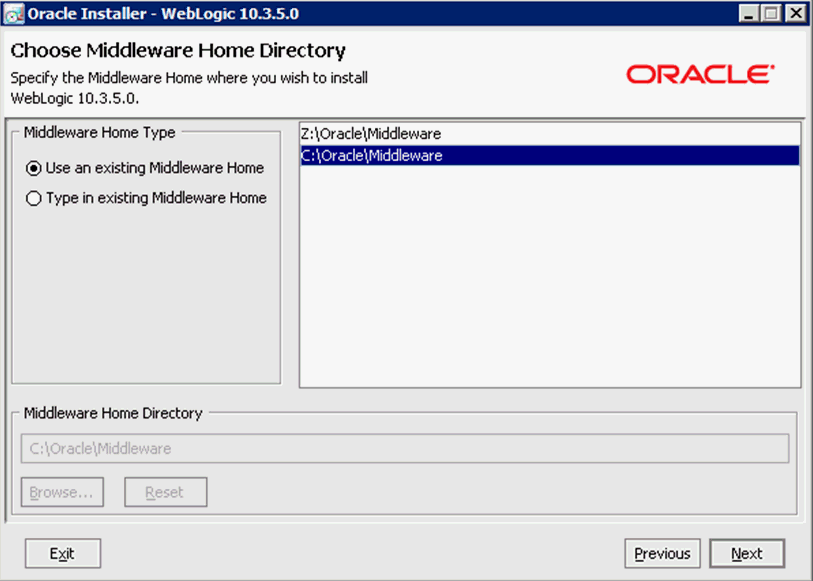
On Choose Middleware Home Directory, select the existing Middleware home you wish to upgrade.
-
Click the Next button.
-
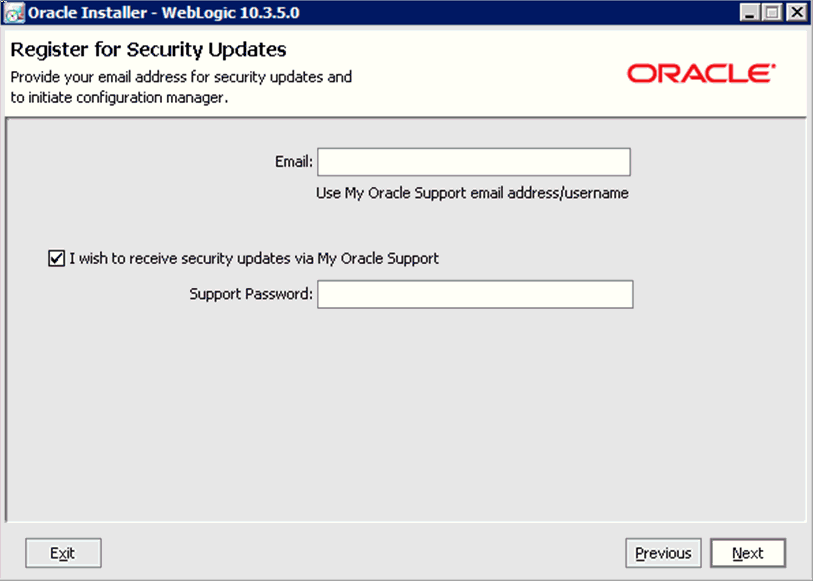
On Register for Security Updates, the Email address and/or the My Oracle Support Password fields as applicable.
-
Click the Next button.
-
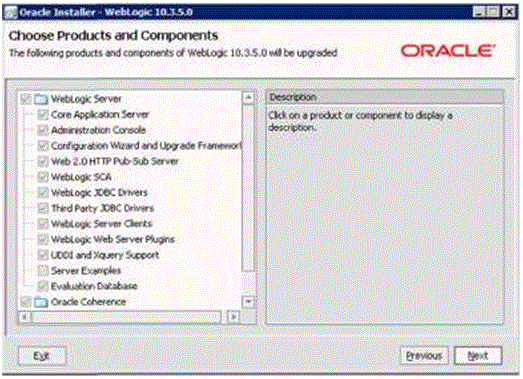
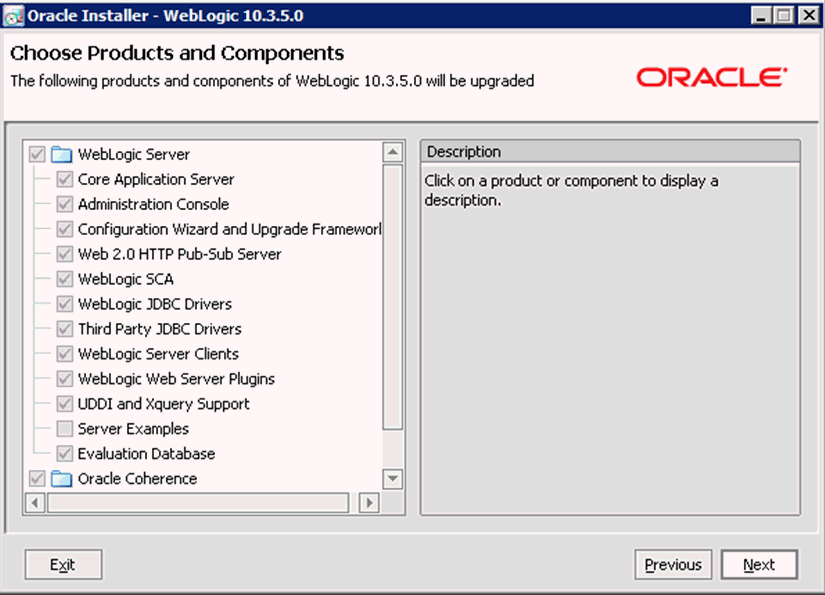
On Choose Products and Components, verify the components.
Note:
The Oracle Coherence Server is a new component for 10.3.5. The OUI installer automatically selects this component. You can choose to select or deselect this component, keeping in mind that this server type has not yet been verified with Oracle JD Edwards EnterpriseOne. -
Click the Next button.
-
On Choose Product Installation Directories, verify the directory locations for the previously selected products and components.
-
Click the Next button.
OUI begins copying the files and performs the upgrade.
-
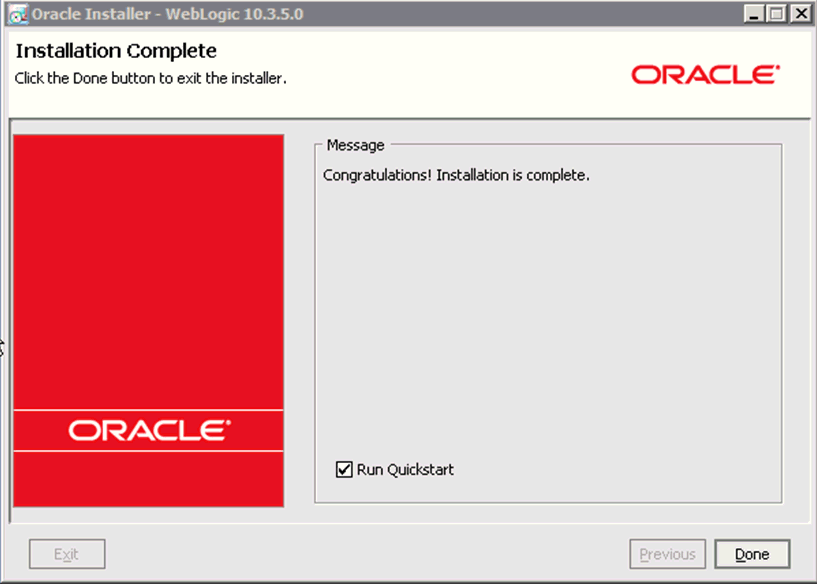
On Installation Complete, click the check box for Run Quickstart to continue with the upgrade of the Oracle WebLogic domains.
-
Click the Done button to complete the installation and exit OUI.
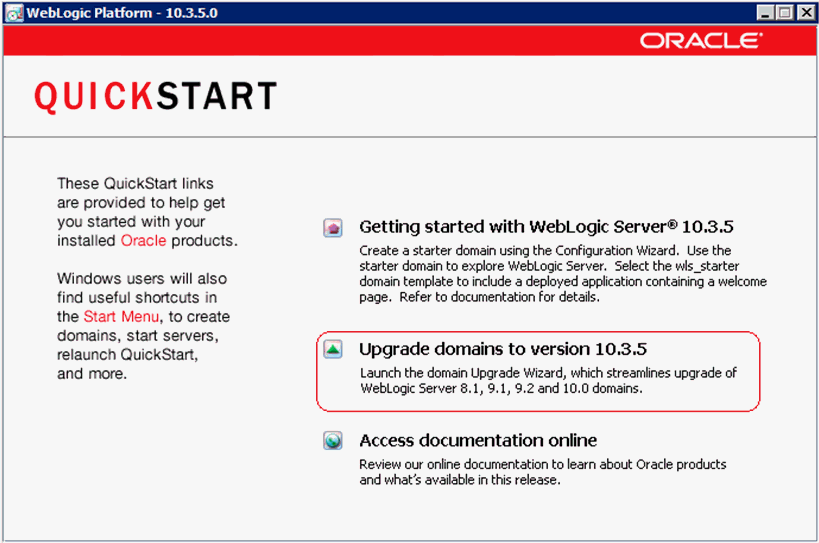
The Quickstart configuration screen appears.
-
On the QuickStart links panel, select this link:
Upgrade domains to version 10.3.5
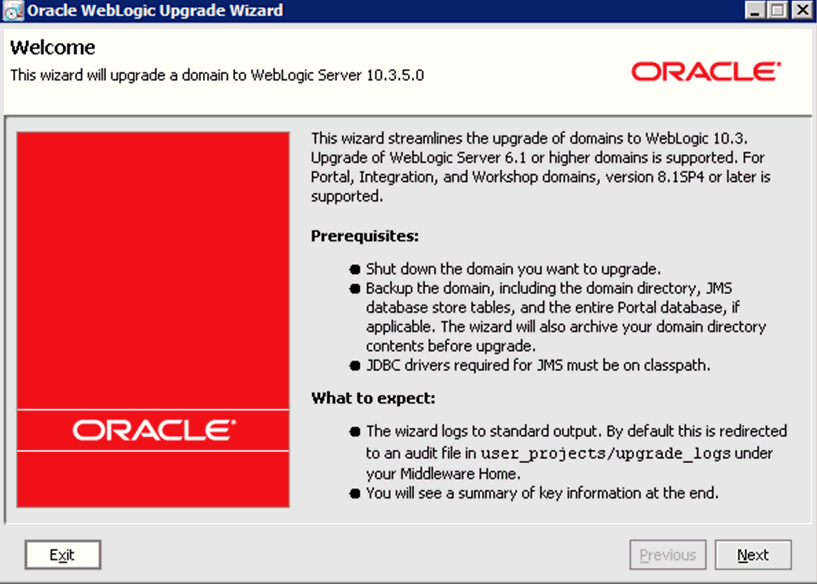
An Upgrade Wizard is launched.
-
On the Welcome panel of the Upgrade Wizard, review and complete the tasks listed in the Prerequisites section of the above screen.
-
When the Prerequisite tasks are complete, click the Next button.
-
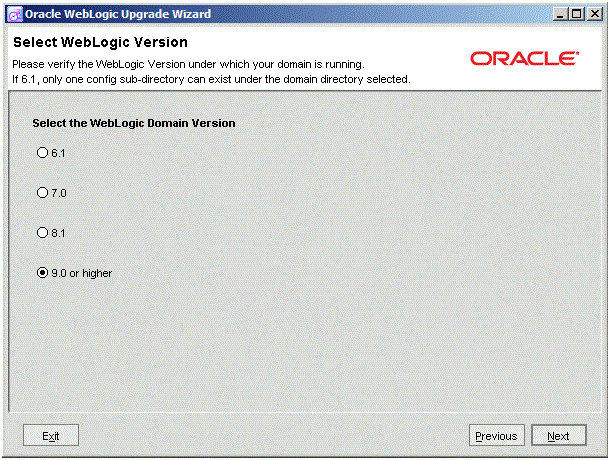
On Select WebLogic Version, select this radio button:
9.0 or higher
-
Click the Next button.
-
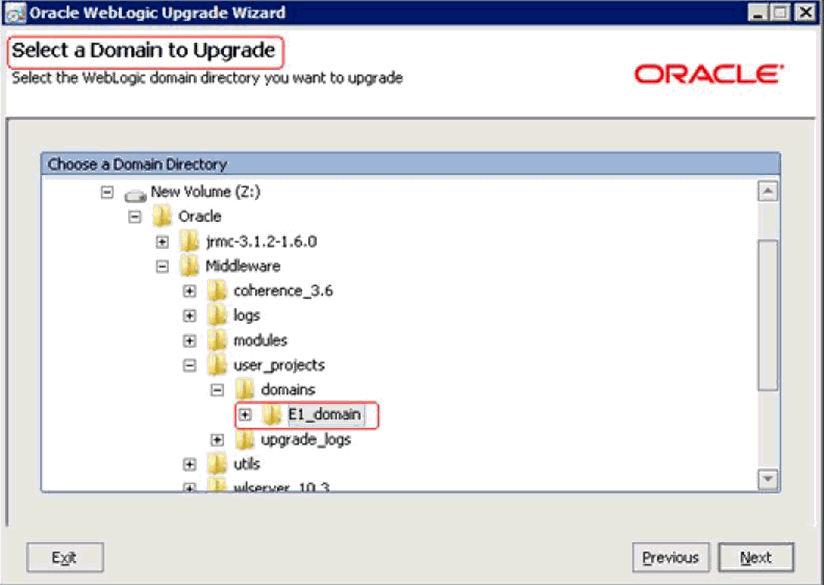
On Select a Domain to Upgrade, drill down through the
Oracle\Middleware\user_projects\domainsdirectory structure and select the Oracle JD Edwards domain. For example:E1_domain
-
Click the Next button.
-
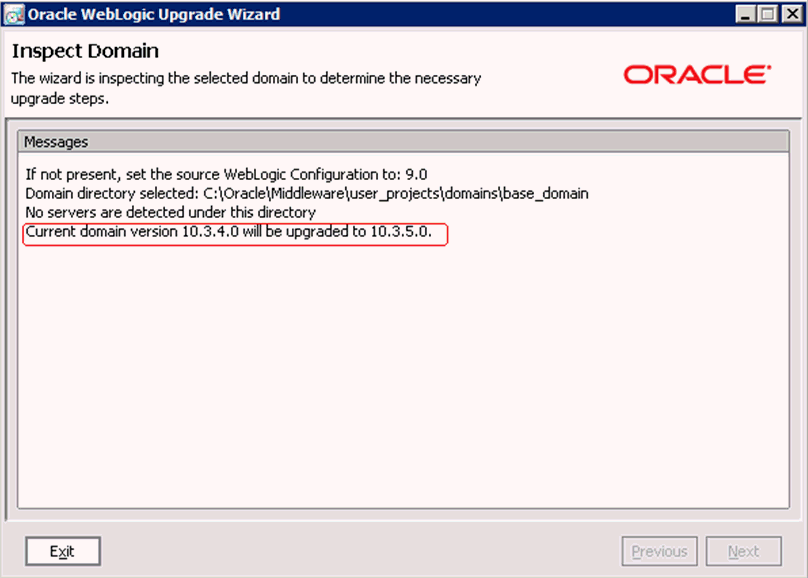
On Inspect Domain, review the upgrade configuration selections.
-
Click the Next button.
-
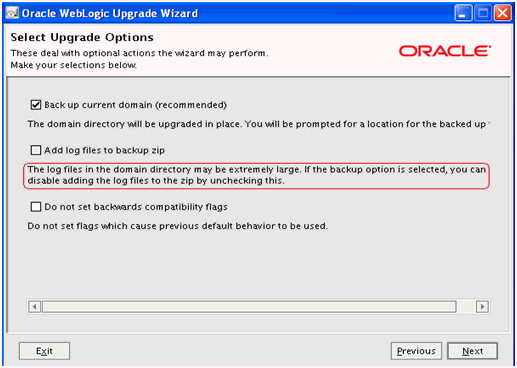
On Select Upgrade Options, select this check box:
Back up current domain (recommended)
Caution:
The wizard advises you that if you choose the check box or Add log files to backup zip, the resultant zip file can be extremely large.
-
On Domain Backup, review the message.
-
Click the Next button.
-
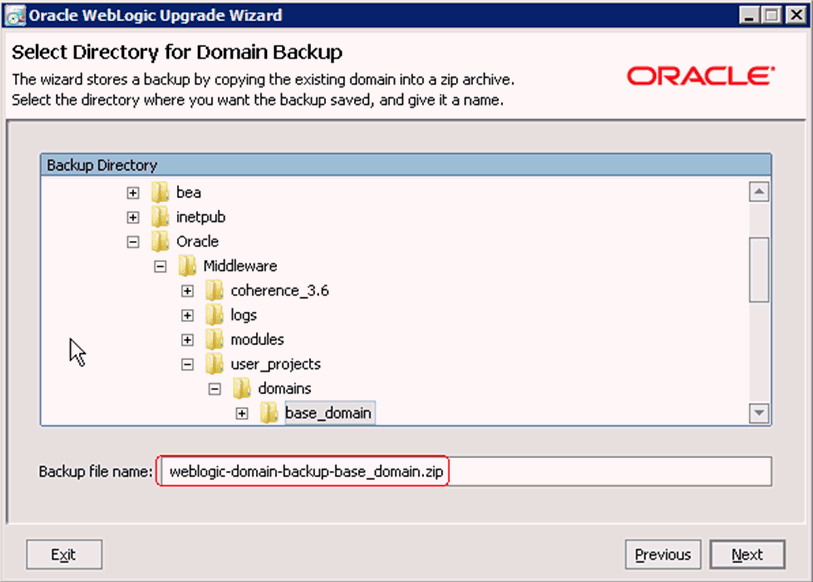
On Select Directory for Domain Backup, you can accept or change location and filename of the backup zip file.
-
Click the Next button.
-
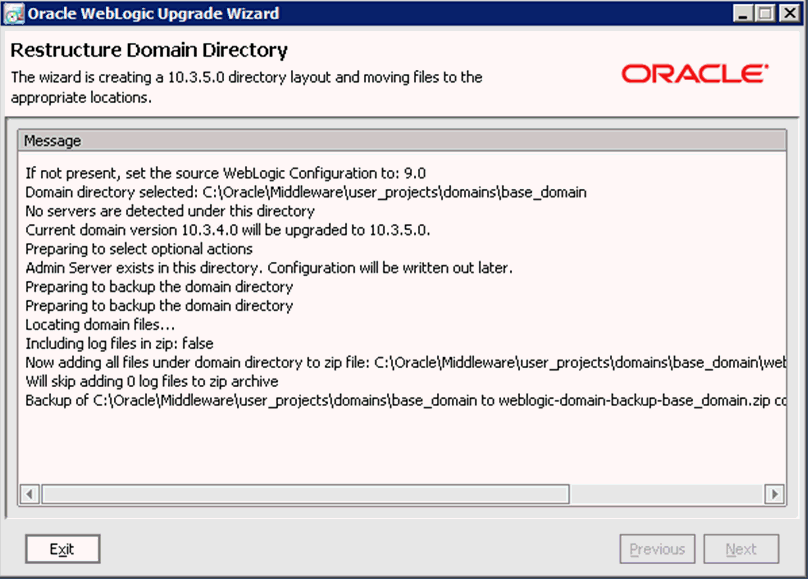
On Restructure Domain Directory, review the message.
-
Click the Next button.
-
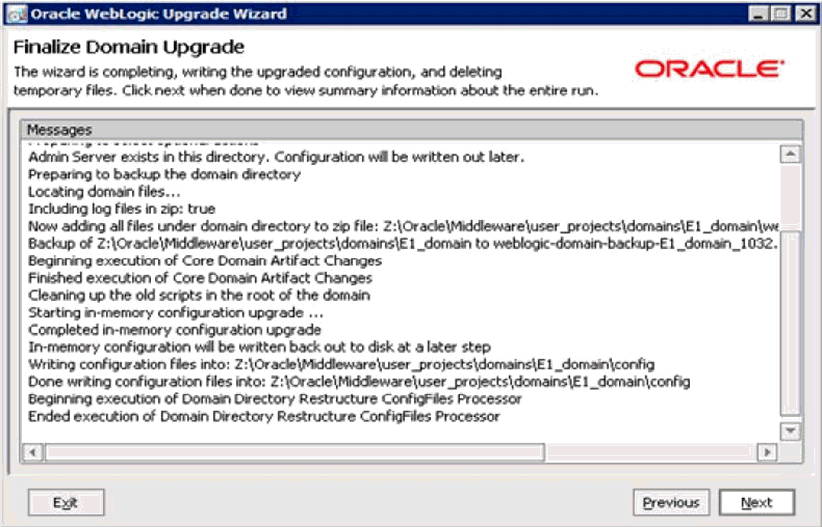
On Finalize Domain Upgrade, review the message.
-
Click the Next button to begin the Upgrade.
-
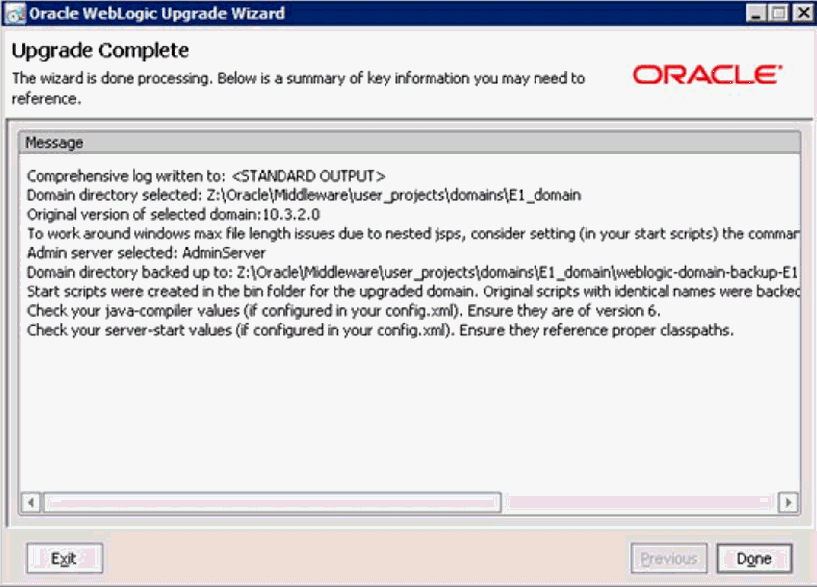
On Upgrade Complete, click the Done button to exit OUI.
Note:
As a result of this domain upgrade, you do not need to individually upgrade any Managed Server. -
Start the WebLogic NodeManager.
-
Start the WebLogic Administration Console.
-
Start the existing Managed Server such as the Oracle JD Edwards EnterpriseOne HTML server.
-
Test and verify the upgrade.