3 Installation Methods
This chapter contains the following topics:
3.1 Overview
Depending on several factors, you can install the Standalone Client using one of these methods:
| Method | Method Requirements |
| From a copy of a set of installation DVDs | You have a set of installation DVDs.
Use the procedures described in the section in this chapter entitled: Chapter 3, "Copying the Installation DVD". |
| From a Oracle Software Delivery Cloud download | You have access to the Oracle Software Delivery Cloud site.
Use the procedures described in the section in this chapter entitled: Chapter 3, "Downloading from the Oracle Software Delivery Cloud Site". |
3.2 Copying the Installation DVD
Perform these steps if you are expanding a set of installation DVDs to a hard drive, either locally or to a network location. You may want to use a network location so additional users can install from a single location.
To copy the installation DVD
-
On the hard drive onto which you want to expand the installation DVDs, create a temporary installation directory. The recommended name is:
\Standalone_9.10 -
Expand the contents of the installation DVDs to the temporary installation directory you created in Step 1 above.
-
Place the expanded contents of the DVD(s) that contain the 64-bit Oracle database into this directory:
\Standalone_9.10\ThirdParty\ORACLENote:
JDBC Drivers and JDK. All files necessary to perform the installation, including JDBC drivers and a JDK, now reside in the temporary installation directory. If you followed the recommendation, the directories are named:\Standalone_9.10\ThirdParty\WebDevFeature\OH4A\JDBC\Standalone_9.10\ThirdParty\WebDevFeature\OH4A\JDK
3.3 Downloading from the Oracle Software Delivery Cloud Site
Complete these instructions if you are downloading the Standalone Client software from the Oracle Software Delivery Cloud site:
If you are installing the Standalone Client from an expanded set of installation DVDs or a network share location, and therefore have performed the steps in the preceding section of this chapter, you can skip this section and proceed to Section 3.4, "Updating the tnsnames.ora File".
To download the Standalone Client from the Oracle Software Delivery Cloud:
-
On your client machine, create a temporary installation directory. The recommended name is:
\Standalone_9.10
-
Access the Oracle Software Delivery Cloud site, continue through the screens, and select these values on the Media Pack Search screen:
-
Select a Product Pack: JD Edwards EnterpriseOne
-
Platform: Microsoft Windows x64 (64-bit)
-
-
Click the Go button to display the results.
-
In the results grid, click the radio button next to the proper description. There are not separate downloads for English and non-English languages. The description is entitled:
-
JD Edwards EnterpriseOne 9.1 Applications/9.1 Tools Media Pack for Microsoft Windows (64-bit)
-
-
Click Continue.
-
Locate the item with the description:
-
JD Edwards EnterpriseOne 9.1 English and Language Standalone
or
-
JD Edwards Applications 9.1 Update 2 Stand Alone
-
-
Click the Download button next to the item that you wish to download. Make sure you have downloaded all the files for each CD image. For Standalone in English there are four (4) images. For Standalone with Languages, there is an additional image for a total of five (5) images.
Note:
Multiple Parts Downloads. Due to the maximum file size restrictions for downloads on Oracle Software Delivery Cloud, you will need to download multiple parts for a selected part number. -
Save the
.zipfiles of the CD images to the temporary installation directory you created in Step 1. If you followed the recommendation, the directory is named\Standalone_9.10 -
After you finish downloading the first item, labeled (Part 1 of 4), select the corresponding row for the second item labeled (Part 2 of 4) and click the Download button. Do the same for the remaining parts 3, 4, and 5 (if downloading languages). The parts are organized as follows:
English Standalone (4 images)
Part 1 of 4 (download into the Standalone install location)
Part 2 of 4 (download into the Standalone install location)
Part 3 of 4 (download into the OEE install location)
Part 4 of 4 (download into the OEE install location)
Languages Standalone (5 images)
Part 1 of 5 (download into the Standalone install location)
Part 2 of 5 (download into the Standalone install location)
Part 3 of 5 (download into the Standalone install location)
Part 4 of 5 (download into the OEE install location)
Part 5 of 5 (download into the OEE install location)
-
Again, save the
.zipfile to the same directory where you saved the previous.zipfile. -
After you finish downloading all parts of your item, use your preferred unzip program to extract the contents of the first two parts (English Standalone) or the first three parts (Languages Standalone) to the temporary installation directory that you created in Step 1. If you followed the recommendation, the directory is named:
\Standalone_9.10Note:
Extract Option. When extracting, be sure to click in the check box to enable this option:Use folder names
-
In the same manner, extract the final two
.zipfiles (for English Standalone, parts 3 and 4; for Languages Standalone, parts 4 and 5), which contain the 64-bit Oracle database, into this directory:\Standalone_9.10\ThirdParty\ORACLENote:
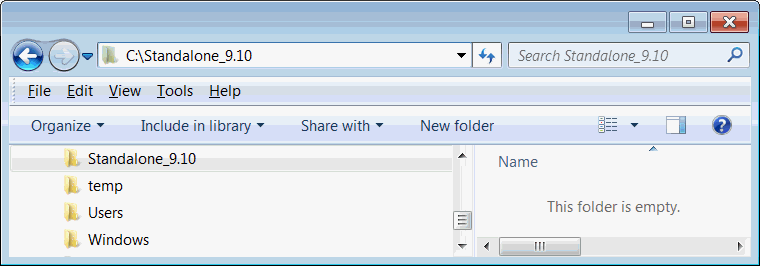
JDBC Drivers and JDK. All files necessary to perform the installation, including JDBC drivers and a JDK, now reside in the temporary installation directory. If you followed the recommendation, the directories are named:\Standalone_9.10\ThirdParty\WebDevFeature\OH4A\JDBC\Standalone_9.10\ThirdParty\WebDevFeature\OH4A\JDKThis example screen illustrates the directory structure when the
.zipfiles are extracted into the recommended temporary installation directory (\Standalone_9.10):
3.4 Updating the tnsnames.ora File
The file tnsnames.ora contains information about how to connect to an Oracle database. A default tnsnames.ora file is provided in the \Standalone_9.10\client directory that provides the necessary information to connect to an Oracle database called E1Local that will be installed on the workstation where you are installing the Standalone Client.
If you have other Oracle databases installed on this machine, or if you access remote Oracle databases, you will have other tnsnames.ora files to define those connection parameters.
By design, the tnsnames.ora for the last installed Oracle database is used by any software running on your local machine to access all the Oracle databases. Because the E1Local database is normally installed during the installation of the Standalone Client, it is likely that it will be the last database installed. Therefore, in order to regain connectivity to other Oracle databases, you must update the tnsnames.ora file used by E1Local with the database connection information that is stored in the other tnsnames.ora files on your machine.
Later instructions in this document will have you copy the tnsnames.ora that resides in the \Standalone_9.10\client directory to various places on your workstation. Because this file will be copied, you should update it before performing any copies or the installation of the Standalone Client.
To update the tnsnames.ora file:
-
Edit the new tnsnames.ora file located in this path:
\Standalone_9.10\client\tnsnames.ora -
Edit the
tnsnames.orafiles on your machine for any other Oracle databases that you may access (whether remote or local databases). Thesetnsnames.orafiles will be located in the\NETWORK\ADMINpath under the installation paths of the Oracle database clients. For example:C:\Apps\Mydb\oracle112\NETWORK\ADMIN\tnsnames.ora -
Copy the contents of these other tnsnames.ora files and append them to the version of the file that is in this directory:
\Standalone_9.10\client