6 Working With Installation Workbench
This section discusses:
6.1 Understanding Workbench Components
After planning the Release 9.1 upgrade using Installation Planner, you should run the plan using Installation Workbench. The logic of this program runs specific workbench programs according to the plan you created.
For example, if you are upgrading and not installing, when performing a data-only upgrade, you do not incorporate the specification merges into your plan; therefore, the Specification Table Merge Workbench is not displayed.
Installation Workbench can be run in attended mode or unattended mode. In attended mode, you start each workbench after the previous workbench completes. In unattended mode (the default value), each workbench runs without user intervention. You can set task breaks before or after any specific workbench to stop the process at any point. If using unattended mode, you must check that each task ran successfully.
This section describes:
-
Section 6.1.1, "Verifying the Network Share on the Deployment Server"
-
Section 6.1.2, "Loading Data (Demo Data and Production Data)"
-
Section 6.1.4, "Deferring Indexes for Table Conversion Workbench (Tools Release 9.1 Update 2)"
As listed in this table, Installation Workbench includes the components, some or all of which might be used for your upgrade, depending on your installation plan:
| Installation Workbench Component | Functional Description |
|---|---|
| Initial Tasks Workbench | When using unattended workbench mode, this workbench runs Media Object Conversion (only for Xe and ERP 8.0), Release Master, Copy Data Dictionary, Copy System Tables, and Security Copy (applies to upgrades from Xe and ERP 8.0) after Installation Workbench is started and before Location Workbench begins. |
| Location Workbench | This workbench copies all locations that are defined in the plan from the F9654 and F984021 tables in the Planner data source to the System - 910 data source. |
| Data Source Workbench | Copies all data sources that are defined in the plan from the F98611 and F986115 tables in the Planner data source to your System - 910 data source. It also updates the F98401 table to indicate completion. |
| Environment Workbench | Copies the F0094, F00941, and F00942 tables, as well as the F986101 table for each environment, from your Planner data source to your System - 910 data source. It then updates the F98403 table to indicate completion. Depending on the plan settings, it also runs a batch application to copy new generic text and to create and populate Object Management Workbench and version tables. |
| Machine Workbench | Copies the F9650 and F9651 tables from the Planner data source to the System - 910 data source. It then updates the F98402 table to indicate completion and uses the environment information to populate the F986101 and F98611 tables in the Server Map data source. Only valid environments, data sources, and server map tables are created. |
| Control Table Workbench | Runs the batch applications for the planned merges that update the data dictionary, user defined codes (UDCs), Solution Explorer, and other Control Tables. It then updates the F98405 table to reflect completion, and writes a conversion log record to the F984052 table.
Also runs the batch applications for the planned merges to update language files. This workbench runs only for users who are adding an alternate language to their installations. For Tools Release 9.1 Update 2. If you wish to defer index builds, you can choose to do so beginning with Tools Release 9.1 Update 2. During your upgrade you may choose to defer index builds for very large tables, for tables that are converted several times during the Table Conversion Workbench, or if you are planning on a Unicode conversion. For details and instructions on deferring index builds, refer to the subsection in this guide entitled: Chapter 6, "Deferring Indexes for Table Conversion Workbench (Tools Release 9.1 Update 2)". |
| Table Conversion Workbench | Runs the table conversions that convert the technical and application tables to the new format forRelease 9.1. It then updates the F98405 table to indicate completion, and writes a conversion log record to the F984052 table. |
| Specification Table Merge Workbench | Runs the batch applications that merge custom modifications into the new specification tables.It then updates the F98405 table to indicate completion, and writes a conversion log record. The Object Librarian and Versions List merges are now a part of the specification merge. |
| Package Workbench | Transfers the F9603 and F9631 tables from the Planner data source to the System - 910 data source. It then updates the F98404 table to indicate completion. |
See Also
Chapter 24, "Major Technical Tables" in this guide for more information about individual tables and their uses.
Chapter 18, "Performing a Data-Only Upgrade" for more information about data-only upgrades.
6.1.1 Verifying the Network Share on the Deployment Server
When you created the plan, this network share was created:
\\depsvrname\E910
where depsvrname is the name of your Deployment Server.
Because several of the Workbenches update files through the network share, these workbenches will fail if the share is not writeable. Sometimes the security settings on your Deployment Server will prevent the Planner from creating the share as a writeable share.
Use this procedure to ensure that the share is writeable before proceeding:
-
On the Deployment Server, navigate to Start | My Computer | Manage
-
Open Shared Folders.
-
Open Shares.
-
Right click on E910 and select Properties and then Share Permissions.
-
Select properties then select Share Permissions
-
Make sure that Everyone is set to Full Control, Change, Read permissions.
Note:
Even after the Workbenches are complete, you will still need these settings on the Deployment Server's share in order to successfully perform client installs.6.1.2 Loading Data (Demo Data and Production Data)
While previous versions of JD Edwards EnterpriseOne used Workbench components to load data, for Release 9.1 the Platform Pack Installer loads appropriate data into specific environments as follows:
-
Demo data to Development and Pristine environments.
-
Production data to Production and Prototype environments.
To load demo data in Production or Prototype environments, you must run a UBE (R98403E) to copy the data to those environments.
Note:
The "from" (source) environment can be the Planner environment or your Pristine environment.Caution:
You should not change the record selection on this UBE.-
Run R98403E using the XJDE0009 version and set the processing options as follows:
-
On Processing Options 1-4, complete these fields:
-
Option 1
Enter the name of the source environment, which is the environment of the table to be copied. For example, JDEPLAN.
-
Option 2
This field must be blank because this UBE is used to copy a mixture of business data and control tables which are specified to environments, not data sources.
-
Option 3
Enter the name of the target environment, which is the environment to which you wish to copy the table. In this case, you would specify either the Production or Prototype environments. For example, PD910.
-
Option 4
This field must be blank because this UBE is used to copy a mixture of business data and control tables which are specified to environments, not data sources.
-
-
Click OK to continue specifying processing options.
-
On Processing Options 5-9, complete these fields:
Field Description Option 5 The recommended value is 1, which copies the table. The default value is 0, Proof Mode.
Option 6 The recommended value is N, which copies tables only if they exist in the source. Enter Y to copy tables whether or not they exist in the source data source.
The default value is N.
Option 7 The recommended value is Y, which recreates tables that already exist in the target data source. Note: If you do not recreate the tables, you will end up with a mixture of production and demo data in the tables.
The default value is N.
Option 8 The recommended value is N, which forces a copy of the data, ignoring the CPYD flag. Note: A value of Y will leave almost all tables empty. That is, a production data load.
The default value is N.
Option 9 The recommended value is N, which creates the indexes on the tables before copying the data. This prevents duplicate rows. Note: A value of Y copies the data and then create the indexes.
The default value is N.
-
Click OK to accept the values and start the UBE.
6.1.3 Creating the Job Queue
You may set up the job queues before running the Installation Workbench. If you do not, Initial Tasks Workbench will create a default entry for QBATCH with a setting of maximum=4.
To create the job queue:
-
Enter GH9013 in the Fast Path field and start the Job Queues program (P986130).
-
Click Add.
-
On Job Queue Revisions, add a queue by completing these fields:
Field Description Host Enter the Enterprise Server name. Job Queue Enter the job queue name. Default Queue Turn on this option by clicking the check box. Job Queue Status Enter 01. Queue Type Enter 01. Maximum Batch Jobs Enter a value that equals the number of processors on the Enterprise Server machine. Port Number Enter 6016. If you receive a Network Failed error, you can safely ignore it in this case.
-
Add another queue called I-ACTIVE.
-
On Job Queue Revisions, add a queue by completing these fields:
Field Description Host Enter the Enterprise Server name. Job Queue Enter the Job Queue name: I-ACTIVE. Default Queue Turn off this option by clicking the radio button. Job Queue Status Enter 01. Queue Type Enter 01. Maximum Batch Jobs Enter a value that equals the number of processors on the Enterprise Server machine. Port Number Enter 6016.
6.1.4 Deferring Indexes for Table Conversion Workbench (Tools Release 9.1 Update 2)
Beginning with Tools Release 9.1 Update 2, if you wish to delay building indexes during the Table Conversion Workbench, you must set that attribute in the Table Conversion Plan before running the Installation Workbench. For implementation details, refer to Section 6.13.5, "Deferring Index Builds During Table Conversion Workbench (Tools Release 9.1 Update 2)".
6.2 Working with Unattended Workbench Mode
This section discusses:
-
Section 6.2.1, "Selecting Attended or Unattended Workbench Mode"
-
Section 6.2.2, "Setting a Task Break in Unattended Workbench Mode"
6.2.1 Selecting Attended or Unattended Workbench Mode
The workbenches can be run manually (attended workbench mode) or automatically (unattended workbench mode). When running Workbench in unattended mode, start Installation Workbench as described below, and then the status of each workbench is displayed as the workbench begins. Unattended workbench is the default value.
In unattended workbench, if an error is encountered in any of the individual workbenches, the process stops. After fixing the error, unattended workbench resumes where it left off.
To choose attended workbench mode:
-
Open the System Installation Tools menu (GH961).
-
Right-click on Installation Workbench.
-
Select Prompt For and then Values.
The Processing Options form appears.
-
In the appropriate field, enter 1 for unattended workbench mode or 0 (zero) for attended workbench mode.
The default value is 1 (unattended).
-
Click OK.
Work with Installation Plan appears.
6.2.2 Setting a Task Break in Unattended Workbench Mode
In unattended workbench, you can set task breaks before or after any of the individual workbenches. You can use the task break to verify successful completion of a workbench or for other tasks. For example, set a task break after Table Conversion Workbench to verify that all table conversions completed successfully. An automatic task break occurs after Control Table Workbench, preceding Table Conversion Workbench.
To set a task break in unattended workbench mode:
-
Open the System Installation Tools menu (GH961).
-
Select Advanced Operations.
-
Double-click Work with Task Breaks.
The Work with Task Breaks form appears.
-
Click Find.
A list of the workbenches appears.
-
To set a break before or after a workbench, choose the workbench name, and, on the Row menu, select Break Before or Break After.
You can clear task breaks on the Row menu.
-
On Task Break Revisions, specify the following fields:
-
email Address (optional)
Specify (or choose from a list) the address book number of the person who is to be notified when the task break occurs.
-
Task Break
Specify (blank) for no task break or 2 for a customer task break. If the field is left blank, then no task break is configured.
-
Task Break Short Text (required)
Enter a short text description of the task break.
-
Optional Detail (optional)
Enter detailed information about the task break.
-
-
Click OK.
Task Break Revisions closes, and Work with Task Breaks reappears. Specify any further task breaks.
-
Click Close.
6.3 Solution Explorer
If you used both Menu and Solution Explorer Task tables in the previous release, you need to synchronize the Menu tables. If you used Solution Explorer Task tables in the previous release, you need to disable the R9000C report before running the Control Table Workbench.
6.4 Changing the Status of the Control Table Workbench Tasks
To change the status of a Control Table Workbench task:
-
Enter GH961 in the Fast Path field to open the System Installation Tools menu.
-
Double-click Custom Installation Plan.
-
On Work with Installation Plans, select your installation plan.
-
On the Row menu, click Expand.
The plan components, including the Control Table Merge, are displayed.
-
Choose the task whose status you want to change.
-
On the Row menu, click Disable, Enable, or Complete (see the list below).
The task status changes.
-
Disable
Displays a status of 70 to indicate the task is incomplete, and will not be rerun.
-
Enable
Displays a status of 10 to indicate the task will be rerun.
-
Complete
Displays a status of 60 to indicate the task is complete, and will not be rerun.
-
6.5 Verify and Update P98MOQUE Settings
To verify and update the P98MOQUE settings:
-
Log into Release 9.1 as JDE in the JDEPLAN environment.
-
Enter P98MOQUE in the Fast Path field.
-
Click Find.
-
Ensure your P98MOQUE grid lines are set to point to the location of the previous release media objects.
-
Click OK.
6.6 Starting Installation Workbench
Caution:
Do not lock the Deployment Server during Installation Workbench processes (for example, with a screen saver password); doing so pauses some processes.Do not run Installation Workbench from a remote access program that simulates a local connection.
To start the Installation Workbench:
-
On your Deployment Server, log in to the Planner environment, which is JDEPLAN.
-
From the System Installation Tools menu (GH961), choose Installation Workbench.
When this application is run the first time, the system downloads all required objects using Just In Time Installation (JITI).
-
If you specified attended workbench mode, use the following procedures, including the Initial Tasks Workbench, to complete the workbenches.
-
If you specified unattended workbench mode, the process begins and all workbenches are completed automatically, unless task breaks are set. If you did not set any task breaks, continue with Chapter 7, "Working With the Enterprise Server".
-
-
On Work with Installation Plan, double-click your plan.
-
If you have selected that you want to run Table Conversions on the Enterprise Server, the Installation Workbench displays the following message:
This message warns that before proceeding with the Upgrade, you must delete the glbltbl, ddtext, and dddict spec files from the target path code on the Enterprise Server. Failure to do this usually causes data corruption due to customized Display Decimals.
At this point you should delete these spec files as instructed, and then click the OK button in the Message to continue.
6.7 Working With Initial Tasks Workbench
Before the workbench is run, the F00945 table in the System data source is blank because it is no longer populated when a plan is validated. However, after you run the Initial Task Workbench several tables in the System data source are populated including the F00945 table.
The Initial Tasks Workbench form lets you complete the following preliminary tasks before the individual workbenches begin:
-
Security copy
-
Media Object (Inplace) Unicode Conversion (applies to upgrades from Xe and ERP 8.0)
-
Data Dictionary Media Object Unicode Conversion (applies to upgrades from Xe and ERP 8.0)
-
Copy data dictionary
-
Copy system tables
-
Release Master
You can also change the status of any of the initial tasks, for example, if you need to rerun a task.
You use this procedure if you are running Workbench in attended mode or if you set a task break before Initial Tasks Workbench.
6.7.1 Using Initial Tasks Workbench
To use Initial Tasks Workbench:
On Initial Tasks Workbench, click the Form menu and select Configure.
The tasks are performed, and the Location Workbench form appears.
During the Initial Tasks Workbench, there are two UBEs scheduled for media object Unicode Conversion if upgrading from ERP 8.0 or earlier:
-
The R8900165 report converts the media objects stored in Business Data.
-
The R8900165U report converts the Data Dictionary media objects.
The following list of error messages and the corresponding resolutions, (inspect the jde.log for more information):
| Error Message | Resolution |
|---|---|
| SelectKeyed to F00165T failed | Check F00165T spec, and run again. |
| Read Failed: Media Object data not available in F00165T blob | The object is missing or corrupted, and must be added manually. |
| Read Failed: Cannot allocate memory for Media Object Blob | Check virtual memory, and run again. |
| Read Failed: Missing records for BLOB concat - Total(###) - Read(###) | The object is missing or corrupted, and must be added manually. |
| Cannot allocate memory for Generic Text Blob | Check virtual memory, and run again. |
| Fail to open OLE storage file (<Queue Path>) -<.stg file name> | Make sure the file exists in the path that defined in the System - 910 F98MOQUE table (based on <Queue Path>), and run again. |
| OLE storage file might be corrupted - <.stg file name> | The object is missing or corrupted, and must be added manually. |
| OLE substorage file might be corrupted - <.stg file name> | The object is missing or corrupted, and must be added manually. |
| OLE Fail: Insufficient memory to create new file (<Queue Path>) - <filename> | Check virtual memory, and run again. |
| OLE Fail: Access Denied - cannot create new file (<Queue Path>) - <filename> | Check security setting on OLE queue path folder, and run again. |
| OLE Fail: Program error - cannot create new file (<Queue Path>) - <filename> | The object is missing or corrupted, and must be added manually. |
| OLE Fail: Cannot create new file (<Queue Path>) -<filename> | Check rights and disk space on OLE queue path, and then run again. |
| JDB CommitUser Fails | Check Database (blocks) setting, and run again. |
| Invalid Shortcut Data - <file name> | The object is missing or corrupted, and must be added manually. |
| Invalid Shortcut Data - cannot allocate memory | Check virtual memory, and run again. |
| Invalid Document ID - <vendor name> | The object is missing or corrupted, and must be added manually. |
| Secondary RTF File fails to open (<Queue Path>) -<filename> | Make sure the file exists in the path that defined in "System - 910" F98MOQUE (based on <Queue Path>), and run again. |
| Cannot allocate memory for RTF Blob | Check virtual memory, and run again. |
6.7.2 Changing the Status of Initial Tasks Workbench
You use this procedure if you are running Workbench in attended mode or if you set a task break before Initial Tasks Workbench.
To change the status of Initial Tasks Workbench:
You might want to change the status of one or more of the initial workbench tasks. To change the status of a task, use the following procedure.
-
Enter GH961 in the Fast Path field to open the System Installation Tools menu.
-
Double-click Custom Installation Plan.
-
On Work with Installation Plans, select your installation plan.
-
Select Expand on the Row menu.
The plan components, including the initial tasks, appear.
-
Select the task whose status you want to change.
-
On the Row menu, click Disable, Enable, or Complete (see the table below).
The task status changes.
-
Disable
Displays a status of 70 to indicate the task is incomplete, and will not be rerun.
-
Enable
Displays a status of 10 to indicate the task will be rerun.
-
Complete
Displays a status of 60 to indicate the task is complete, and will not be rerun.
-
6.8 Configuring Your Locations
Location Workbench copies all locations that are defined in the plan from the F9654 table in the Planner data source to the System - 910 data source. It also updates the F984021 table. Use this procedure when running Workbench in attended mode or if you set a task break before Location Workbench.
-
On Location Workbench, verify that all of your locations are listed.
-
Select Configure from the Form menu.
Locations are configured, and the Data Source Workbench form appears.
The system updates the Detail Status to 60 and changes the Status Description from Validated to Installed.
6.9 Configuring Your Data Sources
Data Source Workbench copies all data sources that are defined in the plan from the F98611 table and the F986115 table in your Planner data source to your System - 910 data source. It also updates the F98401 table to indicate completion. Use this procedure when running Workbench in attended mode or if you set a task break before Data Source Workbench.
-
On Data Source Workbench, verify that all of your data sources are listed as illustrated in this example.
-
Select Configure from the Form menu.
Your data sources are configured, and the Environment Workbench form appears.
When the system has configured your data sources, it updates Detail Status to 60 and changes the Status Description from Validated to Installed.
6.10 Configuring Your Environments
Environment Workbench copies the F0094, F00941, and F00942 tables, as well as the F986101 table for each environment, from your Planner data source to your System - 910 data source. It then updates the F98403 table to indicate completion. Depending on the plan settings, it also runs a batch application to copy new generic text and to create and populate Object Management Workbench and version tables.
Environment Workbench can run multiple batch applications simultaneously, which enables Release 9.1 to load multiple environments at the same time. This reduces the amount of time it takes to load environments.
Use this procedure when running Workbench in attended mode or if a task break is set before Environment Workbench.
-
On Environment Workbench, review each environment and its associated parameters to make sure the values are correct.
-
After you review the environments, select Configure.
-
When Environment Workbench has completed, verify that the status of each environment has been updated to 60 and that the status description has changed from Validated to Installed.
-
Using Adobe Acrobat, review all XJDE reports, and confirm that all configuration statuses indicate Success.
6.11 Using Machine Workbench
Machine Workbench copies the F9650 and F9651 table from the Planner data source to the System - 910 data source. It then updates the F98402 table to indicate completion and uses the environment information to populate the F986101 and F98611 tables in the Server Map data source.
Note:
Only valid environments, data sources, and server map tables are created.
-
On Machine Workbench, review each server and its associated parameters for the correct values.
-
Select Configure from the Form menu.
When the system has configured your servers, it changes the detail status to 60, and Status Description changes from Validated to Installed.
6.12 Understanding Control Table Merges
Control Table Workbench runs the batch applications for the planned merges that update the data dictionary, user defined codes (UDCs), Solution Explorer, and other control tables. It then updates the Table Conversion Scheduler table (F98405) to indicate completion, and writes a conversion log record to the Table Conversion - History Log table (F984052).
Note:
The number of control tables to be merged varies, depending on the upgrade being performed. Your Control Table Workbench form may list fewer or more tables than shown in the figure above. If you used Solution Explorer task tables in a previous release, disable R9000C before running the Control Table Workbench.6.12.1 Language Installation
This information applies to users installing an alternate language. The distributed language tables consist of control tables, system tables, and data dictionary tables. The UDC tables contain only the desired language text, while the Solution Explorer text and data dictionary files add the desired language on top of the already-installed English records.
Control Table Workbench also copies the language text from the Oracle tablespace that contains the language text into the control table database and central object database.
You use this procedure when running Workbench in attended mode, or if a task break is set before Control Table Workbench.
6.12.2 Configuring Control Tables
To configure your control tables:
-
On Control Table Workbench, Release 9.1 displays all control table merges in the detail area.
If you are installing an alternate language, on the Control Table Workbench form, the Plan Name field will contain the name of your language plan.
-
If you want to do one merge at a time, choose the appropriate grid row, then click Merge. Otherwise, choose Merge All from the Form menu.
For an explanation on merges, see Chapter 9, "Performing Merges".
-
The system displays all control table merges in the detail area.
-
Select Merge All from the Form menu.
-
When running Installation Workbench in unattended mode, a task break automatically occurs after Control Table Workbench, and before Table Conversions.
After each merge finishes, verify the output of the report produced. Refer to Working with Reports for more detailed information.
6.13 Understanding Table Conversions
Table Conversion Workbench runs the table conversions that convert technical and application tables to the new format for Release 9.1. It updates the F98405 table to indicate completion, and writes a conversion log record to the F984052 table for each conversion.
Use the following procedures when running Workbench in attended mode or if a task break is set before Table Conversion Workbench.
All users must run the table conversions that appear in the Release 9.1 Table Conversion Workbench.
Tip:
You can safely ignore GT98DSA and GT98DSB errors reported in R8900165_XJDE0001.Note:
If you have chosen to run TCs on the Enterprise Server (the default), the following TCs will still run on the Deployment Server:-
Any TC below sequence 100
-
Any TC with the Run On Deployment Server flag turned on
The Data Message column is a flag that tells the TC Workbench NOT to check the table to see if it is already in the target format. For other TCs, the workbench will not run the Table Conversion if the table is already converted.
This section discusses:
6.13.1 Running Table Conversions
Note:
For Tools Release 9.1 Update 2. If you wish to defer index builds, you can choose to do so beginning with Tools Release 9.1 Update 2. During your upgrade you may choose to defer index builds for very large tables, for tables that are converted several times during the Table Conversion Workbench, or if you are planning on a Unicode conversion. For details and instructions on deferring index builds, refer to the subsection in this guide entitled: Section 6.13.5, "Deferring Index Builds During Table Conversion Workbench (Tools Release 9.1 Update 2)".To run table conversions:
-
If it is not already open, open Installation Workbench, double-click your plan on Work with Installation Plan, and click Next until Table Conversion Workbench appears.
-
To override where the Table Conversions will be run, click on Run TC on Deployment Server.
-
To change how many Table Conversions are submitted simultaneously to the Enterprise Server, change the value in TC Throttle. This value should match the maximum jobs set up for the QBATCH queue on the Enterprise Server. You control how many TCs are actually running at any time by your queue set up by using WRKJOBQE.
On your IBM i machine, make sure JOBQ MAX ACT is set to match the TC Throttle that you choose.
Tip:
To set the maximum number of simultaneous jobs submitted, refer to Section 6.13.3.3, "Select Enterprise Server and Maximum Jobs On Select Environments - Advanced Exit". -
Select Convert All from the Form menu.
Tip:
To do one conversion at a time, select the appropriate detail records, and then select Convert Selected from the Form menu. While the conversions run, you can track their progress by choosing Table Conversion\Merge Log (P984052). To do so, on the System Installation Tools menu (GH961), double-click Advanced Operation, and then Table Conversion\Merge Log. The program shows a scrolling list of the conversions that have processed.6.13.2 Table Conversion Workbench Architecture
Select Convert All (this is used automatically when running unattended) or Convert Selected to run the TC Workbench program (P98413).
The Convert All selection causes the program to run with two loops. The outer loop keeps running until there are no more TCs to run, and there are no more TCs in a running status. The inner loop runs through the F98405 table looking for all TCs at a status less than 60. As it reads each new record, it then checks to see if there are any TCs waiting at status 35 for dependencies. It first tries to run those (checks again if their dependencies are satisfied), before trying to run the new TC that it just read.
The Technical TCs (those that are at conversion sequence < 100) run one at a time. For TCs above sequence 100, Convert All uses the maximum batch jobs specified in the Plan (4 by default), meaning it submits up to that number of TCs at once. You control how many are actually running at any time by your queue set up by using the P986130 program. The default setup is four (4) batch jobs at once. Selecting Convert All submits 4, then loops waiting for a job to end and submits the next job. If you set your queue to a number larger than 4, only 4 are submitted at a time.
For each TC it tries to submit, it first checks whether that TC has dependencies and checks the status of those dependencies. If any of the dependencies is still running (status 45), this TC is changed to status 35 (waiting for dependencies).
The Convert Selected option can be used to submit several TCs at once and keeps looping till they are submitted. It does not keep looping till they have run. Press Find to see if they are done.
The P98413 program monitors and updates the F98405 table, which is maintained locally in JDEPLAN. The TCs update the F984052 table, which is maintained in System - 910. At any point in time, there are records in the F98405 table at status 45 for TCs that actually have completed. The TC Workbench calls a business function at various points in its loop, which compares the F984052 and F98405 table, and updates the status in the F98405 to completed (60) or failed (50). If the TC Workbench fails (for example, you cancel out of it), go into the Custom Plan application and drill down into your TCs, and press Find. This synchronizes the F98405 table with the F984052 table. Clicking the Find button on the TC Workbench also synchronizes the F98405 and F984052 tables.
If the Enterprise Server fails while running the TC Workbench, you may have up to 4 jobs at status 45 (running), even though they may have failed. Follow the instructions in the write-up on restarting the TC Workbench, to get everything back into sync. (Remember the Find button on the Custom Plans [Table Conversions] synchronizes the F98405 with F984052 tables.) If a TC actually fails on the server (for example, you cancel the job) it will never get as far as updating the F984052 table, and the process is not able to update the F98405 table correctly. Selecting either Convert Selected or Convert All, does not re-submit anything that is at status 45. When restarting the TC Workbench, you need to resolve manually whether any of the jobs at status 45 are still running, and set the status back to 30 or 50 if you want the TC Workbench to re-submit them.
All the Table Conversions have the same job name, which is R98405A. When looking in the jde.log for that job, there is a message stating which TC is running.
6.13.3 Configuring Table Conversions to Run on the Enterprise Server
There are three settings that control the location for running Table Conversions. These are:
-
Section 6.13.3.3, "Select Enterprise Server and Maximum Jobs On Select Environments - Advanced Exit"
6.13.3.1 Table Conversion Schedule
When the table conversions are scheduled using JD Edwards EnterpriseOne, schedule owners decide whether their conversions can run on the Enterprise Server. If not, then the Run TC on Deployment Server option is selected. Most conversions can run on the Enterprise Server. Table conversions that cannot include Technical Conversions (sequence < 100), UBEs, and cross-data source conversions (for example, printers, user preferences). The Table Conversion Schedule is accessed through the Advanced Operations Menu (GH9611).
6.13.3.2 Upgrade Plan Definition
It is not required to run table conversions on an Enterprise Server. The main advantage to doing so is performance. If you have a small database you may decide to run them on the Deployment Server by selecting Run TC on Deployment Server when defining your plan. The default is to run conversions on the Enterprise Server.
6.13.3.3 Select Enterprise Server and Maximum Jobs On Select Environments - Advanced Exit
After selecting an environment on Select Environments, select Advanced on the Form menu to access Advanced Parameters. Select the logic data source for the Enterprise Server where table conversions will be run for that environment. If you do not follow these steps, Installation Planner will select a default Enterprise Server. The port number is specified in the Deployment Server JDE.INI. Also on Advanced Parameters, you can override the maximum jobs for the default job queue on the Enterprise Server.
6.13.3.4 Configuring Queues
The job queues (GH9013) are implemented in the queue kernel. During the Initial Tasks Workbench, the Release Master copies the default queue set up during the plan to the Enterprise Server job queue table.
On your IBM i, make sure you set up QBATCH to match the TC Throttle you set in the plan. You must also select a Queue Type of iSeries and use IBM i tools to configure the queue (CHGJOBQE).
6.13.3.5 Starting Table Conversions
To start Table Conversions, run Installation Workbench. If you are in Unattended Mode, a task break is displayed before Table Conversion Workbench reminding you to set up your Enterprise Server. If you press Stop on the task break, you will need to press the Convert All exit to start the conversions.
When running conversions on the Deployment Server, the R98405 program is launched and runs all conversions, producing a report when complete.
When running conversions on the Enterprise Server, Table Conversion Workbench launches a R98405A program for each conversion including any conversions that run locally. This is the UBE that is displayed in Submitted Reports (GH9011). When all conversions are complete, the R984052 program produces a report.
6.13.3.6 Monitoring Table Conversions
Table Conversion Workbench implements a throttling mechanism to control conversions. If conversions are run on the Deployment Server, it launches one conversion at a time. If conversions are run on the Enterprise Server, it looks up the maximum number of batch jobs in the queue table and submits that many conversions at a time. Either way, technical conversions are always throttled to 1. The list of submitted conversions can be seen in Table Conversion Planner.
-
Go to the System Installation Tools menu (GH961)
-
Open Typical Installation Plan or Custom Installation Plan.
-
Click Find.
-
Expand the plan. Drill down to Environments, Environment Name, Table Conversions.
-
Highlight the Table Conversions node and click Select.
-
Enter 45 into the Detail Status QBE.
-
Click Find.
Use Submitted Reports (GH9011) to view the status of submitted conversions. Notice all the jobs show the R98405A program. To link the jobs to conversions, note the job number. The jde.log, jdedebug.log, and conversion log all have the job number in the name. The jde.log contains a message with the conversion name. For more on the log files, see the section below.
Server Manager can be used to monitor processes and queues, and view
JDE.LOG,,JDEDEBUG.LOG,, andJDE.INI.Platform-specific utilities such as Task Manager can also be used to monitor the conversions.
Database Specific Queries that query unconverted tables, temp tables, converted tables, and database system tables can be helpful in monitoring conversions.
6.13.3.7 Working With Table Conversion Log Files
The log files are stored in these specific locations:
-
The
jde_ProcessId.logandjdedebug_ProcessId.logare stored inJDEdwardsE910\Logswhile the conversion is running.Once the conversion has finished, the logs are moved to
JDEdwardsE910\PrintQueueand renamed to these names:R98405A_XJDE0001_EnterpriseOne_Job_Number_PDF.jde.logR98405A_XJDE0001_EnterpriseOne_Job_Number_PDF.jdedebug.log -
The conversion logs are stored in the
Printqueuedirectory. The log will be named one of the following:-
Report_Version_Ddate_Ttime_Jjob_number.log -
Table_ALTERTABLE_Ddate_Ttime_Jjob_number.log -
Table_MERGETABLE_Ddate_Ttime_Jjob_number.log
-
-
The directory for the printqueue is
Oracle\E910\PrintQueue
INI Settings
-
[DEBUG]
;Turn off jdedebug.log, set to FILE to turn on jdedebug.log
Output=NONE
;Turn on jde.log, set to 0 to turn off jde.log
LogErrors=1
;Do not send logging info to client, set to 1 to send logging info to client (not recommended)
ClientLog=0
-
[JDENET]
;Turn off JDENET tracing. Set to 1 to turn on JDENET tracing.
netTrace=0
-
[TCENGINE]
;Turn on minimal table conversion tracing. Set to 0 to turn off tracing (not recommended). Set to 10 for maximum tracing (useful for troubleshooting).
TraceLevel=1
Note:
There is a possibility that there may be invalid errors in the JDE.log. You can ignore any error along the lines that read:No rounding record found in table tablename - datasource
where tablename is the name of the table and datasource is the name of the datasource.
Tip:
You can run the TC verification report prior to running spec merge to ensure tables are in the correct format. Refer to Section 25.7.4, "Compare Tables and Indexes Against Central Objects or TAM Specifications (R9698711)" in the chapter entitled: Chapter 25, "Working with Reports".6.13.3.8 Stopping Table Conversions
To stop table conversions:
-
Close Workbench.
-
On the Deployment Server, open Task Manager (press Ctl+Alt+Del and choose Task Manager).
-
On the Applications tab, select Installation Workbench and click End Task.
-
Locate waiting jobs from Submitted Reports (GH9011) by entering W in Status QBE and clicking Find.
-
Highlight any row you wish to delete and click Delete.
All conversions should now be stopped. There are several more steps involved with cleaning up the database and resetting Table Conversion Workbench. You may choose to leave one or more table conversions running but close Installation Workbench and restart the remaining conversions. See Section 6.13.3.9, "Restarting Installation Workbench".
Note:
Installation Workbench should not be closed if Table Conversions are running normally. Only close it if problems have occurred and conversions need to be restarted.
6.13.3.9 Restarting Installation Workbench
When you restart Installation Workbench, these items create a temporary table in the new format:
-
Temp tables (used for in-place table conversions)
-
Alter conversions
-
Merge conversions
The temporary table is named TableNameTCTEMP. If you are restarting a conversion, first verify the original table was not dropped, then drop the temp table. For a Table Conversion, the base table must be in the old format. For Alter and Merge Conversions, no further action is necessary.
For performance reasons, several conversions use their own temporary table that has been defined in the specifications. The recovery for each of these may be different.
Check in the JD Edwards EnterpriseOne Programmers Guide for individual Table Conversions that may have special re-run instructions.
To rerun a conversion, reset the status of the conversion in Table Conversion Planner from 35, 45, or 50 to 30. If a conversion is still running when workbench is restarted, leave its status at 45.
6.13.3.10 Troubleshooting Table Conversions
If Table Conversion Workbench fails to submit a conversion to the server, such as services are not running, it sets the conversion status to 50 and it does not submit any more conversions.
6.13.3.10.1 General Problems
This section describes these general problems:
TC Has No Saved Input Table Specs
This error indicates that the table conversion cannot be run from the Table Conversion Workbench because it does not have saved input table specifications. To resolve the error, you must either fix the table conversion using TC Design Aid or run it from batch versions.
This error indicates that the table conversion cannot be run because the input table does not exist. This problem can be caused by DBMS or host operating system security issues. Use these steps to resolve the issue:
-
The table that is being reported as missing is the input table for the specified table conversion. Review the description of this table conversion in the online document entitled: JD Edwards EnterpriseOne Programmer's Guide. Usually the missing table is the based-on table in the TC Schedule, but in some cases it is not.
-
Check the
jde.logand your security setup in the DBMS to determine whether this is a security issue. If so, take corrective actions. -
If this is not a security issue, you must determine why the table is missing and whether you have a business purpose for this particular table conversion to be run.
This error may occur when you choose to run your TCs on the Enterprise Server but the TC Workbench was unable to submit the TC to the server. You should check to ensure the JD Edwards EnterpriseOne services on the Enterprise Server are up and running. Also check the logs on the Enterprise Server.
Unknown Table Conversion Error
The error occurs when the table conversion shell UBE (R98405A) to due to an unknown error. If you ran the table conversion locally, check the jde.log and the table conversion log (if it exists). If you ran the table conversion on the Enterprise Server, check the logs on that machine.
Detailed instructions for re-running some table conversions are in the online documented entitled: JD Edwards EnterpriseOne Programmer's Guide. If you cannot locate any special re-run instructions for this table-conversion, use these procedures to resolve:
-
Correct the problems that caused the failure.
-
Restore tables if necessary.
-
Drop the temporary table (FTCTEMP) if necessary.
-
Re-run the process.
Unknown Error TC Input Checking
This error occurs when the Table Conversion Workbench checks the input table against the saved input table specifications in the table conversion and it encounters an unknown error. As a result, the table conversion was marked as failed. Check the jde.log to diagnose this error.
This error occurs when a scheduled table conversion program did not complete successfully. If you ran the table conversion locally, checked the jde.log and the TC Engine log (if it exists). If you ran the table conversion on the Enterprise Server, check the R98405A log and the TC Engine log on the server.
Detailed instructions for re-running some table conversions are in the online documented entitled: JD Edwards EnterpriseOne Programmer's Guide. If you cannot locate any special re-run instructions for this table-conversion, use these procedures to resolve:
-
Correct the problems that caused the failure.
-
Restore tables if necessary.
-
Drop the temporary table (FTCTEMP) if necessary.
-
Re-run the process.
Conversion Has Unprocessed Dependencies
This error occurs when a conversion program could not be launched because it is dependent on other scheduled conversion programs which did not run to successful completion. You must correct the errors for the conversion program on which this conversion is dependent. You must either run Convert All or run the dependency conversion and then run this conversion. If you choose Convert All, it will automatically retry this table conversion.
Default Environment Missing on Server
This error occurs if your Upgrade Plan indicates to run table conversions on the server and the default environment defined in the server jde.ini file has not been installed on your server. For example, JD Edwards EnterpriseOne includes this default setting in the jde.ini on your Enterprise Server:
[SERVER ENVIRONMENT MAP]
JDEPLAN=PSnnn
where nnn is the JD Edwards EnterpriseOne application release level. For example, 910. Ensure that the specified environment exists.
Inconsistent Queue Definitions
This error occurs if your Upgrade Plan indicates to run table conversions on the server and the default queue defined in Queue Control Status Master (F986130) in JDEPlan does not exist in the Queue Control Status Master on the Enterprise Server. To resolve the error condition, perform either of these steps:
-
Change the default queue defined in the planner environment to match the queue that is defined on the server.
-
Sign in to the Deployment Environment (for example, DEP910), or a deployed development client, and add a queue definition on the server to match the default queue that is defined in the Planner environment.
In either case, you must run application P986130 to update the table.
Note:
This error may also be generated by a failure to open the Queue table in the System datasource. Use to thejde.log to verify if this is the case.This error indicates your plan has specified the maximum table conversion job as 0 while the Table Conversion Workbench is assuming the maximum jobs are set to 4.
This error indicates you have turned on the Security Server in the jde.ini file on the Deployment Server, Enterprise Server, or both. As previously stated, you cannot run Table Conversions with the Security Server turned on. Refer to the jde.log for more details.
This setting in the jde.ini indicates whether the Security Server is turned on:
[SECURITY}
SecurityServer=value_or_blank
In order to turn off the Security Server, the value for the SecurityServer= setting must be blank.
Services Inactive, Cannot Run on Server
This error occurs if your Upgrade Plan specifies to run table conversions on the Enterprise Server but the services are not started. You must ensure that the JD Edwards EnterpriseOne services on your Enterprise Server are up and running before running table conversions on the server.
This section discusses troubleshooting submission problems for these tables:
The Table Conversion Schedule (GH9611) application reads these tables to find all conversions that will be run. They are conversion types 3, 31, and 32. Table Conversions that must run on the Deployment Server are flagged here.
These tables reside in the System Local and System - 910 data sources.
The Workbench Status (GH961)application reads this table to find table conversion scheduler records (among others) that are copied from F9843 to F98405 during Finalize Plan. The Workbench uses records in this table, which resides in the Planner - 910 data source..
The History (GH9611) application uses this table to store table conversion history. A new record is created in this table every time a conversion is launched. The R98405A report writes the status for a completed conversion to this table. Table Conversion Workbench polls this table for completion status and updates the status in the F98405 table.
This table resides in the System - 910 data source. The table is originally mapped to the OneWorld Planner The B7334 data source. It is copied to the System - 910 data source and remapped during Release Master. The table must be in the System data source so conversions on the Enterprise Server can communicate their completion status back to Table Conversion Workbench.
The Submitted Reports (GH9011) application creates records in this table for conversions that are launched on the server. They can be viewed using Submitted Reports. This table resides in the Server Map data source.
The Job Queues (GH9013) application is used to define job queues that can be used by the Installation Planner in the JDEPLAN environment. If any queues have been defined, they are copied to the system data source during Release Master. If no queues have been defined, Release Master creates default queues in the system data source. The Enterprise Server is mapped to the table in the system data source. The job queues can be viewed by logging into the DEP9 environment and opening the Job Queues application. This table resides in the System - Local and System - 910 data sources.
6.13.4 Verifying the Table Conversion Process
To verify that the table conversion process completed successfully:
See Also
JD Edwards EnterpriseOne Programmers Guide for a more thorough understanding of the table conversions performed during the upgrade process.
For each Table Conversion that runs locally, you will see error messages in jde.log similar to the following:
-
TAMInitX (path\jdeblc.xdb): Error opening index file "path\jdeblc.xdb" : The system cannot find the path specified. WinErrNum=3.
The path name will vary by environment and release, where references to TAM are only applicable to releases prior to Release 8.12, at which point TAM is superceded by Metadata.
-
2248\2420 Thu Dec 26 11:18:36.326 ODBC_U1.C823 ODB0000154 - SQLPrepare failed. Table F00926, ODBC DSN JDE_DEV.
-
2248\2420 Thu Dec 26 11:18:36.326 JDBODBC.C2695 ODB0000027 - JDBODBC_DescribeTable failed. Table F00926.
The exact syntax varies by database type and environment.
-
Because they do not affect the table conversion, you can disregard any error messages for these tables:
-
F00921
-
F00926
-
F98830
-
F9100TCTEMP
-
6.13.4.1 Understanding Table Conversion Dependencies
Table conversions with a conversion sequence number of 99 or below are technical table conversions; conversions with a sequence number of 100 or above are application (business data) conversions. The sequence numbers are shown in the Conv Seq column. Note that application conversions are dependent on technical conversions: all technical conversions must complete successfully for application conversions to complete.
6.13.4.2 Verifying Table Conversions
Before continuing the upgrade process, verify that the table conversions ran successfully. Run R9698711 from the Deployment Server. Verify that the amount of data in the log file and the converted table are the same.
The report R984052 lists all of the conversions that ran. Refer to the JD Edwards EnterpriseOne Progammers Guide for information on verifying individual table conversions.
Note the following information about the table conversions:
-
Conversion programs listed as Process Type 1 generate a
.pdfand a.logfile in theprintqueuedirectory. -
Conversion programs listed as Process Type 5 generate a
.logfile in the printqueue directory. -
The table conversions shown below are cumulative: for whatever previous version you are upgrading from, the conversions shown in the table are carried out, plus conversions shown in all subsequent tables. For example, if you are upgrading from OneWorld version B73.3, the conversions shown in the first table occur, plus those shown in the subsequent tables.
Note:
The table F76B0411 is not shipped in Xe base. If you did not apply the localization ASU which contained the table, you will see a status of 'TC Inp Spec\Tbl Mismatch ' next to this TC. This is normal.6.13.4.3 Understanding Table Format Verification
The best way to verify table formats is to run R9698711 (version XJDE0001). Audit results of TC Workbench to make sure all tables in correct format. Change Environment name to your upgraded environment.. This UBE lists all of the tables that differ from the specifications.
Before You Begin
Before you run the report, you should add Data Selection with these values:
| Operator | Left operand | Comparison | Right Operand |
|---|---|---|---|
| Where | BC Product Code (F9860) (SY) | is not equal to | "55,89" |
| And | BC Data Class (F9860) (CLDF) | is equal to | " ,B,T"
where the first value is a space character that specifies blank, B specifies Business Data, and T specifies Control Tables. |
| And | BC Object Type (F9860) (FUNO) | is equal to | "TBLE" |
Or, look in the table conversion logs that are created in the pathcode printqueue directory. Review the table conversion logs, JDE.LOG and JDEDEBUG.LOG, to make sure the table conversion program finished successfully. The table conversion log states Completed Successful or Completed with Errors.
If the table conversion finishes with errors, review the entire table conversion log for specific error messages, and then review the JDE.LOG and JDEDEBUG.LOG for more specific messages about the failure.
If the table conversion log states that the table conversion finished successfully, review the table being converted in the data source that it is mapped to for the new release. The following task shows what to verify for each table being converted.
6.13.4.3.1 Verifying Table Formats
To verify table formats:
-
Verify table conversions that have a conversion sequence number of 99 or below by reviewing the
.pdfand.logfiles generated to the printqueue directory.These conversions also can be verified by reviewing the log for R8998504.
-
Verify conversions with a conversion sequence number of 100 or above and process type 5 by reviewing the .log file generated in the printqueue directory. The following illustration shows the last few lines of a sample .log file for the R8903B20 report:
TCEngine Level 1 D:\E910\system\TCEngine\tcinit.c(1581): Format F03B20 contains 55 column(s) TCEngine Level 1 D:\JDEdwards\E910\system\TCEngine\tcinit.c(1581): TCEngine Level 1 D:\JDEdwards\E910\system\TCEngine\tcinit.c(1581): Format F03B20 contains 61 column(s) TCEngine Level 1 D:\JDEdwards\E910\system\TCEngine\tcinit.c(1581): TCEngine Level 1 D:\JDEdwards\E910\system\TCEngine\tcinit.c(1581): There is ER logic associated with the event Row Fetched from F03B20 TCEngine Level 1 D:\JDEdwards\E910\system\TCEngine\tcinit.c(1581): System function Insert Row into format F03B20 TCEngine Level 1 D:\JDEdwards\E910\system\TCEngine\tcinit.c(1581): TCEngine Level 1 D:\JDEdwards\E910\system\TCEngine\tcrun.c(689): Conversion R8903B20 XJDE0001 done successfully. Elapsed time - 1.843000 Seconds. TCEngine Level 1 D:\JDEdwards\E910\system\TCEngine\tcrun.c(697): Fetched 11 rows from F03B20 TCEngine Level 1 D:\JDEdwards\E910\system\TCEngine\tcrun.c(705): Inserted 11 rows, failed to insert 0 rows into F03B20 -
Use the information above to verify the conversion program using the following procedures:
-
If the bottom of the .log file says the conversion was unsuccessful, review the rest of the .log from the beginning for specific errors. Also review the jde.log and jdedebug.log for more specific error information.
-
If the bottom of the .log file says that the conversion was successful, review the file format of the physical file to see that the number of columns has changed.
From the example .log shown above, F03B20 should now have 61 columns in the target data source instead of 55.
-
Verify the record count in the physical file based on the log information.
From the example .log shown above, F03B20 should now have 11 rows in the target data source.
-
If the .log file says that there were insert failures, review the jde.log and jdedebug.log for more detailed information.
-
If the conversion cannot be verified through the above procedures, check the table in Section 6.13.4.2, "Verifying Table Conversions" for more specific verification information.
-
For more information about which tables have been changed or added in the new release, see the JD Edwards EnterpriseOne Database Changes Guide for the release from which you are upgrading.
6.13.4.4 Verifying Table Formats in SQL Server
This section discusses two methods to verify tables formats in SQL Server:
To verify tables formats in SQL Server using method one:
-
Run this SQL Server query:
Select * from owner.filenamewhere owner is the owner of the table to be verified.
This query returns the records in the table as well as their columns. Use the information above to verify that the number of columns and record counts are consistent between the log file and the actual table. The information in the log file should be correct.
-
If you are verifying only the column layout, click Cancel to stop the query.
To verify tables formats in SQL Server using method two:
-
Run the SQL Server Enterprise Manager Graphical Application.
A tree view of the servers, databases, tables, owners, and other related information is displayed.
-
Find the table on the appropriate server or database.
-
Double-click the table.
The columns that make up the table are shown graphically. Use the information above to verify that the number of columns and record counts are consistent between the log file and the actual table. The information in the log file should be correct.
6.13.4.5 Rerunning Table Conversion Programs
To rerun table conversion programs:
-
Technical conversions can be rerun without restoration. For process type 5 only, when you run a table conversion program from Table Conversion Workbench, the following occurs:
-
All table conversions should be rerun through the Table Conversion Workbench. If the status of the conversion is 60, you might need to change it back to 30.
-
The table conversion engine uses the object map to locate the table being converted in both the From and To environments.
In the upgrade to Release 9.1, most application tables being converted will reside on the same data source on the from and to environments. This creates an in-place conversion.
The physical table on the data source should be formatted following the specifications for the previous release.
The table conversion engine creates a temporary table on this data source. Drop all temporary tables before starting the Table Conversion rerun procedure. The temporary file name has the notation <Table>TCTemp 'for example, F03B20TCTEMP.
To find these tables:
-
Test List is Upgrade only
-
Use the Query Analyzer to connect to your enterprise environment database (for example, PS_DEV) and enter this command:
Select a.name as 'Table name' from sysobjects a
where a.name like 'F%TCTEMP'
-
Do not drop temp tables for conversions still running.
-
If restarting a conversion, first verify the original table was not dropped, then drop the temp table. For a Table Conversion, the base table must be in the old format. For Alter and Merge Conversions, this is not necessary.
Data is copied to the temporary table, the original table is deleted, and the temporary table is renamed to the original table name.
Clear out tables F40941, F40942, F40943, F0618TA, F42140A, F42150A, F42160A, F3201, F3211, F3215, F3216, F3290.
See the JD Edwards EnterpriseOne Programmers Guide for any additional instructions when rerunning Table Conversions.
-
-
If the table conversion program has run but the table is still in its original format in the data source for the release from which you are upgrading, run the conversion program without file restoration. If the table conversion program has run but the table format in the data source has changed in the release from which you are upgrading, restore the table to its original format before running the conversion program again.
When the table conversion engine runs an in-place table conversion, the temporary table required for an in-place conversion could be created and never dropped. In this case, rerunning the conversion program fails when creating the temporary table because the table already exists. To resolve this, drop or rename the temporary table before rerunning the table conversion. The temporary table has the name of the table being converted followed by the initials "TC" followed by the report name of the conversion program being run. The temporary name has the notation TableTCTEMP, for example, F03B20TCTEMP.
-
When the upgrade is complete and you are satisfied with the results, delete all SY = 89 tables from their data sources.
6.13.5 Deferring Index Builds During Table Conversion Workbench (Tools Release 9.1 Update 2)
Beginning with Tools Release 9.1 Update 2, before running the Installation Workbench, you can mark specific Table Conversions to direct the TC Engine not to build indexes during those conversions. You may wish to defer building indexes on such table conversions where:
-
The underlying table is very large (for example, F0911)
-
The underlying table is very large and is converted several times during the Table Conversion Workbench. For example, if upgrading from Xe or ERP8:
-
F42199
-
F49219
-
F42119
-
F43199
-
F43121
-
F4101
-
F4102
-
F3111
-
F0618
-
-
You are planning to do a Unicode conversion directly after the Upgrade and before you return the system to the end users. (The Unicode conversion recreates all indexes in any case).
When you mark a table with the Defer Index flag, the TC Engine creates the primary key and any other unique keys on that table before marking the conversion as complete. In almost all cases there is only one unique key on the tables and that is the primary key. However, there are a few tables with more than 1 unique key (for example F0902 has 4 unique keys, while F4101 has 3 unique keys).
Caution:
The absence of non-unique keys will not stop EnterpriseOne from working, but will have a severe impact resulting in poor performance. If you choose to defer index builds, you are responsible for creating the missing indexes once the Workbench is complete.To use the Defer Index Build functionality, you must have the latest Planner Update and JD Edwards EnterpriseOne Tools Release 9.1 Update 2 or higher on both Deployment Server and Enterprise Server. The Planner Update must be applied to the Pristine path code (PS910) and an update package must be built and deployed to PS910.
To use the Defer Index Build functionality:
-
Run the Custom Plan application on menu GH961.
-
Drill down into Upgrade Plan, highlight Table Conversions, click on Select, and go into TC Planner.
If Tools Release 9.1 Update 2 or higher is not installed on the Deployment Server, the Advanced button will be disabled as shown in this example:
If Tools Release 9.1 Update 2 or higher installed on the Deployment Server, the Advanced Button is available as shown in this example:
-
On Table Conversion Planner, click on Advanced button. As shown in the example below, a new column called Defer Index is displayed next to the Dependency Sequence column.

Note:
By default, all values for the Defer Index column are set to N (do not defer index build). -
Change the value in the Defer Index column to Y for any TC for which you do not want to build indexes during the Table Conversion Workbench.
-
Click the Save button.
-
Run the Upgrade plan to execute the Table Conversion Workbench that includes your specified Defer Index settings. If the TC Workbench does not complete successfully, you will see that the Error Text / History Status field is updated with the below value for any table that was marked as Defer Index:
** Build Indexes! **
Below is an example TC Workbench where the Defer Index value was set:
For the above TC Workbench results screen, the values of the Defer Index column are:
-
Y
Indicates the TC Engine created the table with only Unique indexes and Primary key and returned as successful.
For TCs that have run where the "Y" was specified, you will see the ** Build Indexes! ** messages. This is not usually true for *ALTER as the TC Engine does not recreate the table for *ALTER.
-
N
Indicates the TC Engine completed successfully as it normally does, which includes the index build.
-
-
Review the Table Conversion Merge log (P984052).
If the TC ran with value set to Y, the Conversion Merge log (P984052) includes the ** Build Indexes! ** messages, as shown in the example below:
-
Review the R984052 report that runs at end of TC Workbench.
Each TC that ran with "Y" will have the ** Build Indexes! ** message text as shown in the example below:
-
It is important to remember that at the complete of the TC Workbench, prior to using the tables, you must manually create the missing indexes. To do so, you can use one of the following methods:
Method One
-
Using the the GUI for your database (SQL Management StudioOracle Enterprise ManagerDB2 UDB Control CenterSystem i Navigator for IBM i), highlight the same table in the Pristine database (for example, F0911) and generate DDL to a file.
-
Edit the SQL statements, substituting the tablespace names, owners, and databaselibrary for your target schema. For example, replace ps910dta with proddtaPS910DTA with PRODDTA.
-
Run the SQL script from your database's GUI. Note that you should delete those CREATE INDEX statements that refer to indexes that already exist on the target table. The database GUI will tell you which indexes already exist.
Method Two
-
Generate the indexes on a trial run, with jdedebug turned on, and harvest the CREATE INDEX statements from the jdedebug log.
-
Use the GUI for your database (SQL Management StudioOracle Enterprise ManagerDB2 UDB Control CenterSystem i Navigator for IBM i) to run the identified index builds as a sql script.
Method Three
-
Run R9698713 and select the tables where you deferred the indexes. It will create the indexes one table at a time, one index at a time. It is possible to run different versions of R9698713 from different 9.1 Admin clients, selecting different tables for each version.
-
It is not necessary to be signed into the target environment because you can override the environment in the Processing Options. Set the value for Processing Option 3 to a value of 2 to generate only missing indexes, as shown in the screen below:
Method Four (if your business data is Unicode)
The advantage of this method is that the RSTxxx commands all do multiprocessing while building the indexes.
-
Save the indexes for the table marked with Defer Index from the pristine library. For example:
SAVOBJ F0911_* PS910DTA *SAVF(X) -
Restore the indexes to the PRODDTA library. For example:
RSTOBJ OBJ(*ALL) SAVLIB(PS910DTA) DEV(*SAVF) SAVF(X) OPTION(*NEW) RSTLIB(PRODDTA)
Method Five (if your business data is not Unicode, such as when upgrading from Xe)
-
Temporarily create the table in another non-Unicode datasource using OMW in 9.1. For example, another such non-Unicode datasource is Control Tables - Prod.
-
Save the indexes from the non-Unicode datasource. For example:
SAVOBJ F0911_* PRODCTL *SAVF(X) -
Restore the indexes from the SAVF of PRODCTL to the PRODDTA library. For example:
RSTOBJ OBJ(*ALL) SAVLIB(PRODCTL) DEV(*SAVF) SAVF(X) OPTION(*NEW) RSTLIB(PRODDTA) -
After the restore is done, drop the "temporary" table from PRODCTL.
-
6.14 Understanding Obsolete Tables
This section discusses these tables that were obsoleted in Release 8.9 at either system code 88 or 89.
6.14.1 System Code 88 Obsolete Tables
The following lists obsolete tables which may be deleted from an environment after the table conversion for that environment has completed successfully.
Note:
You will not have all of the below obsolete tables.F00001
F0004SL
F0004HI
F0004LI
F0004LS
F0004S
F00053
F0005LS
F000531
F000532
F0005HI
F0005LI
F0005S
F0017
F0005SL
F00165X
F00165XJ
F0016D
F00171
F0040
F00172
F00173
F0018VI
F0031
F00530
F009109
F00530E
F00530P
F00825
F0090
F0101D1
F03465
F0101QA
F0101QAA
F0114W
F01800
F03B01
F03C04
F03B15P
F03BUI06
F03C02
F03C03
F03C05
F03C15
F03C11
F03C12
F03C13
F03C14
F03C16
F06400
F03CUI01
F04516
F04550
F04552SB
F06403
F07402
F06406
F06410
F06445
F07401
F07403
F07409
F07404
F07405
F07406
F07408
F07410
F07416
F07411
F07412
F07413
F07414
F07417
F07422
F07418
F07419
F07420
F07421
F07423
F07431
F07424
F07425
F07426
F07429
F07432
F07441
F07434
F07435
F07437
F07438
F07442
F07448
F07443
F07444
F07445
F07447
F07449
F085541
F07451
F075506
F078332
F078332A
F085542
F09UI001
F087710
F08901WF
F0911Z3
F09E111
F09UI002
F14104
F09UI003
F09UI012
F105503
F12UI001
F14110
F30UI003
F14111
F16UI002
F3003J
F3016J
F30UI009
F31UI003
F3104
F3112J
F31950
F31UI001
F31UI004
F3211Z1
F31UI005
F31UI410
F31UI418
F3211Z
F3411Z1
F34A04
F34A00
F34A01
F34A02
F34A03
F34A05
F34W01
F34A06
F34A07
F34A08
F34A09
F34W012
F34W04
F34W02
F34W03
F34W031
F34W032
F34W05
F34W10
F34W06
F34W07
F34W08
F34W09
F34W11
F34W142
F34W12
F34W121
F34W13
F34W141
F34W15
F34W19
F34W16
F34W17
F34W17B
F34W18
F34W20
F34W25
F34W21
F34W22
F34W23
F34W24
F34W26
F35UI01J
F34W27
F34W28
F34W29
F34W30
F4021W
F4311KAY
F40336
F40343
F4213
F4215T
F48S618T
F48126
F48098
F48099
F4810
F4811
F489111
F53015
F49090
F49711
F52801
F53001
F5302
F7302
F53021
F53024
F53034
F55MOIN
F74100
F74P04W
F74800
F74M0411
F74P0018
F74P03BW
F74S0101
F75K0101
F74S347
F74S349
F74SN34
F75C01Z1
F75K0201
F76012
F75K0211
F75KUI01
F760018A
F760090A
F76031
F7691SSA
F7611BA
F7618B
F7691CBA
F7691CSA
F76A01
F76A05
F76A02
F76A03
F76A04
F76A0403
F76A06
F76A8121
F76A07
F76A31
F76A40
F76A8120
F76A8122
F76A9003
F76A8123
F76A8124
F76A8125
F76A9002
F76A9004
F76AUI25
F76A91
F76A92
F76A94
F76AUI15
F76AUI87
F76CI1
F76AUI94
F76AUI95
F76B126
F76C4001
F76CI2
F76CUI02
F76CI3
F46CT1
F76CT2
F76CUI01
F76CUI03
F76H0904
F76H0301
F76H0401
F76H0402
F76H0903
F76H0905
F80004
F76H0906
F80001
F80002
F80003
F80005
F8009E10
F800110
F800130
F800140
F8009E00
F8009E20
F800910
F800900
F800900S
F800901
F800901S
F800920
F8011
F800930
F800940
F80100
F80101
F80111
F801610
F80151
F80160
F801600
F801600S
F801620
F80300
F801630
F80170
F80171
F80200
F804110
F804300S
F804210
F804210S
F804220
F804300
F804301
F804305
F804302
F804302S
F804303
F804304
F804810
F8399
F809E00S
F81A13
F81A14
F81A15
F8800
F8916V
F8916
F8916L
F8916RS
F8916S
F8916V2
F8926RS
F8916X
F8916Y
F8916Z
F8926
F8926Y
F9002HI
F8926Z
F89500
F89500G
F89601
F9002LI
F91013
F9002LS
F9002S
F9002SL
F9066
F95000
F9752
F95020
F950900
F95100
F9751
F9753
F98612
F9754
F98SYSGR
F98311
F98500
F986120
F98768
F98614
F98701
F98744
F98751A
F98790
F99FSAR3
F98FLATM
F99FCOEX
F99FSAR1
F99FSAR2
F99FST02
FD3N015
F99F9911
F99WFMSG
F99WFSYS
FD3N010
FD3N017
FD3N025A
FD3N018
FD3N020
FD3N021
FD3N025
FD3N026
FD3N056
FD3N030
FD3N040
FD3N050
FD3N055
FD3N120L
FD3N901
FD3N120P
FD3N120T
FD3N120W
FD3N120X
FD3N902
FD3N913
FD3N903
FD3N904
FD3N910
FD3N911
FD3N915
JDECODE
6.14.2 System Code 89 Obsoleted Tables
For system code 89 there are two types of obsoleted tables:
-
Business Data tables that JD Edwards EnterpriseOne no longer uses, but are required to access the data within for the upgrade. It is recommended to back these up somewhere until they're satisfied everything runs as should be.
-
New temporary tables that are used by TCs. After the TC runs successfully, these can be deleted. They are not full tables, just a couple of columns used for performance (with millions of rows...) These are:
Note:
You will not have all of the below obsolete tables.
F00151
F05290T
F06116T
F06116TZ
F0618TA
F063951T
F0901T
F0911T
F0911Z1T
F0917S
F186407D
F186407T
F32UI002
F3214
F3294
F3294Z
F32941
F32942
F32943
F32944
F32945
F3295
F3296
F3296T
F32961
F329611
F4009T
F4100T
F41001T
F4101TT
F4102TT
F31172TE
F4072TEM
F41021A
F40344A
F42005A
F42140A
F42150A
F42160A
F31172TE
F42199A
F4311TA
F43199A
F43121TA
F4211A
F4211B
F4074TEM
F4094TEM
F42119A
F42119B
F4600T
F4600TPU
F46011T
F46091T
F4611T
F4611TPU
F7460
F750401A
6.15 Understanding Specification Table Merges
Specification Table Merge Workbench runs the batch applications that merge custom modifications into the new specification tables. It then updates the Table Conversion Scheduler table (F98405) to indicate completion, and writes a conversion log record. The Object Librarian and Versions List merges are now a part of the specification merge.
For all users, the Specification Merge merges data in the following order:
-
Object Librarian
-
Versions
-
Specifications
For users installing an alternate language, the Specification Merge Workbench merges the central objects and language text from the previous release into the new central objects database.
The central objects tables contain the alternate language records needed for displaying text in the selected language. Language-enabled tables include the Processing Option Text table (F98306), the Report Design Aid Text Information table (F98760), and the Forms Design Aid Text Information table (F98750). Depending on the environment choices made during the English installation, you might have several sets of central objects; for example, one set for each environment loaded during the English-language installation.
This section discusses:
6.15.1 Merging Specification Tables
To merge your specification tables:
To merge your specification tables:
-
On Specification Table Merge Workbench, choose Merge All from the Form menu.
If you are installing an alternate language, the Plan Name field on the Specification Table Merge Workbench form will contain the name of your language plan.
-
After the merge finishes, verify the output of the report that is produced.
6.15.2 Restarting the Specification Merge
If the Specification Merge stops with a status of 50 before it completes successfully, you can restart it from the point at which it stopped. If the merge completed successfully, you can skip this task and continue with the next task.
To restart the specification merge:
-
Check the Specification Merge status as shown in the Specification Merge Workbench.
If the status is 50, you can restart the Specification Merge by clicking Merge or Merge All. The Specification Merge restarts and processes all non-processed objects. Before restarting, review all objects with merge status of error and follow the procedures in Section 25.7.3.1, "Modifying the Merge Status of an Object" to reset the merge status using P98700.
6.16 Using the Package Workbench
Package Workbench transfers the F9603 and F9631 tables from the Planner data source to the System - 910 data source. It then updates the F98404 table to indicate completion.
Use this procedure when running Workbench in attended mode or if a task break is set before Package Workbench. Refer to the JD Edwards EnterpriseOne Tools Package Management Guide for complete information about building and configuring packages.
-
On Package Workbench, review your packages.
-
Select Configure from the Form menu.
6.17 Using Remote Location Workbench
Note:
This workbench only appears when Remote Locations have been set up.Remote Location Workbench loads business (master and constant), control, data dictionary, and system tables from base location to remote location servers, by launching different versions of R98403 (XJDE0043, XJDE0044, XJDE0045, XJDE0046 and XJDE0047). It also pushes delivered packages to primary Deployment Servers at remote locations by launching the multi-tier UBE (R98825C). This workbench is processed only if you opted to install remote locations and chose to load replicated data and push packages.
Use this procedure when running Workbench in attended mode or if a task break is set before Remote Location Workbench.
6.17.1 Configuring Remote Locations
To configure remote locations:
To configure your remote locations:
-
On Remote Location Workbench, Release 9.1 displays all remote location activities in the detail area.
-
On the Form menu, select Configure to launch the workbench.
-
After all remote location activities are complete, click Next.
6.18 Finishing Installation Workbench
Note:
In order to avoid issues with the JD Edwards EnterpriseOne Data Dictionary after an Upgrade, if you are running Table Conversions on the Enterprise Server, the Installation Workbench displays the following Message: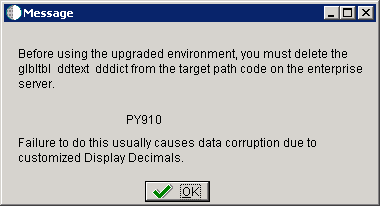
This message warns that before using the upgraded environment, you must delete the glbltbl, ddtext, and dddict spec files from the target path code on the Enterprise Server. Failure to do this usually causes data corruption due to customized Display Decimals.
At this point you should delete these spec files as instructed, and then click the OK button in the Message to continue.
To finish the Installation Workbench:
-
From Congratulations, on the Form menu, click Finish.
-
From Work with Installation Plans, click Close.
Note:
Post Install Procedures still need to be completed from a client. See Chapter 11, "Performing Post Upgrade Tasks".
6.19 Disabling Table Access for Prior Releases
Once you have completed your upgrade tasks, and you no longer need to access tables from your previous release, you should disable the owners of those tables in order to prevent unauthorized access to your database. Consult with your DBA for advice applicable to your installation.
Note:
While you are retrofitting modifications, you still need to access the old Central Objects tables. Depending on how you disable the old owners, this may not be possible.