21 Creating a Language-Only Installation Plan
This section discusses:
-
Section 21.1, "Understanding Language-Only Installation Plans"
-
Section 21.2, "Reviewing Requirements for a Language Installation"
-
Section 21.3, "Installing Languages on the Deployment Server"
-
Section 21.10, "Building and Deploying Alternate Language Packages"
21.1 Understanding Language-Only Installation Plans
To make the language-only installation as easy and quick as possible, you should use the procedures in this chapter when installing an alternate language or multiple languages for the first time. These tasks will help you organize the pre-installation preparation required for a language-only installation:
-
Install alternate languages at the same time that you install Release 9.1, or after completing a working upgrade .
-
Implement a language-only plan only for installations in which a language has not been previously installed.
It is important that you complete all tasks in this chapter to achieve a successful language installation.
21.2 Reviewing Requirements for a Language Installation
To review the basic requirements for performing a language installation:
-
Review the language installation process.
The detailed information regarding the language installation process is found in Section 1.6, "Language Process Overview".
-
Review the disk space requirements.
Verify that the disk space requirements are available for each language and each environment that you are installing on the deployment and Enterprise Servers.
-
Review the directory structure.
The detailed information about directory structures is found in the Chapter 23, "Understanding JD Edwards EnterpriseOne Directory Structures" chapter of this guide.
21.3 Installing Languages on the Deployment Server
To install languages on the Deployment Server:
-
Obtain the JD Edwards EnterpriseOne language and run the
setup.exe.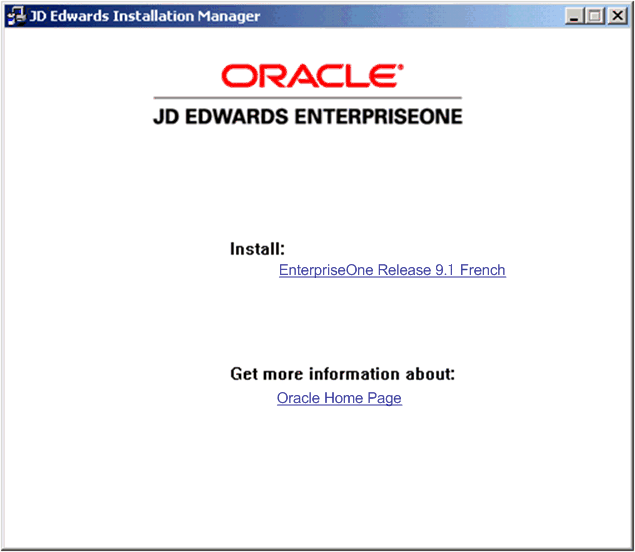
-
On JD Edwards Installation Manager, click the link for the language that you want to install.
In this example, the language installation image is for French.
-
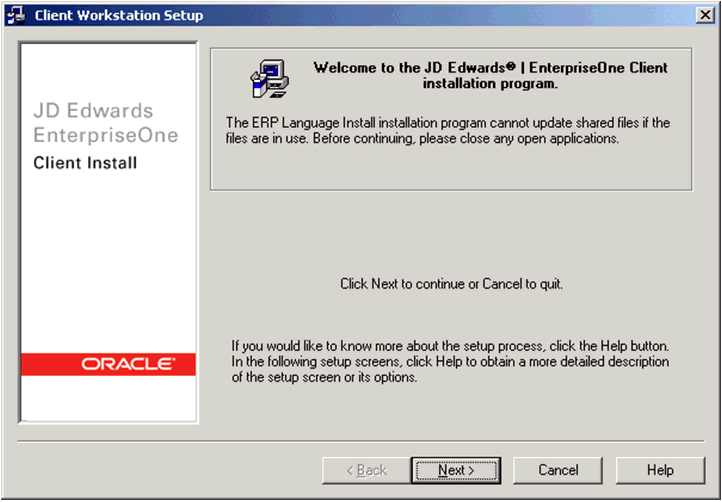
On the Welcome screen, click Next.
-
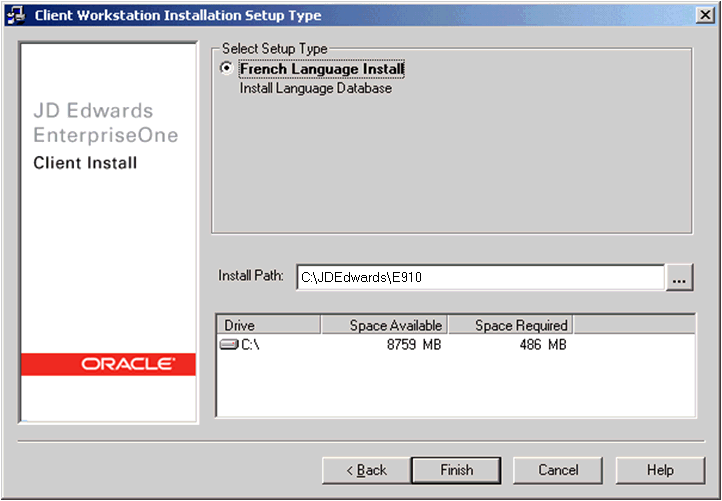
On Client Workstation Installation Setup Type, complete these fields:
Field Description Select Setup Type Ensure the radio button for your language is selected. Install Path The Installer provides a default path to the existing client installation on this machine: c:\JDEdwards\910You must verify that this drive and path is valid for your installation. You can use the browse function to locate the directory.
-
Click Finish.
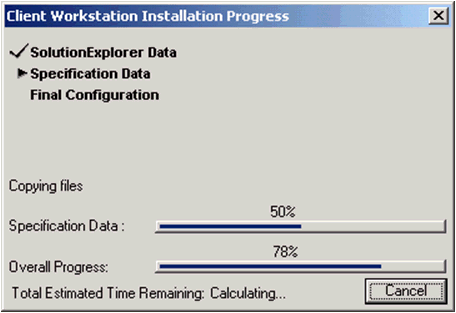
The Client Workstation Install Progress displays the progress of the language installation.

When the installation finishes, the Oracle Deployment Server Setup form indicates whether the installation was successful.
-
On Installation Complete, click OK.
Note:
To access more than one language within the same package, you need to build a custom package that includes all available languages.
21.4 Running Installation Planner
Once you have installed languages on the Deployment Server, run Installation Planner. These tasks highlight the critical language-related stages of this operation.
21.4.1 Accessing Installation Planner
For details on accessing the Installation Planner, refer to the chapter of this guide entitled: Working with the Installation Planner.
Note:
If you choose a custom installation plan, you can choose which language to install for each environment. This section assumes you are defining a custom plan.21.4.2 Entering Information into Installation Planner
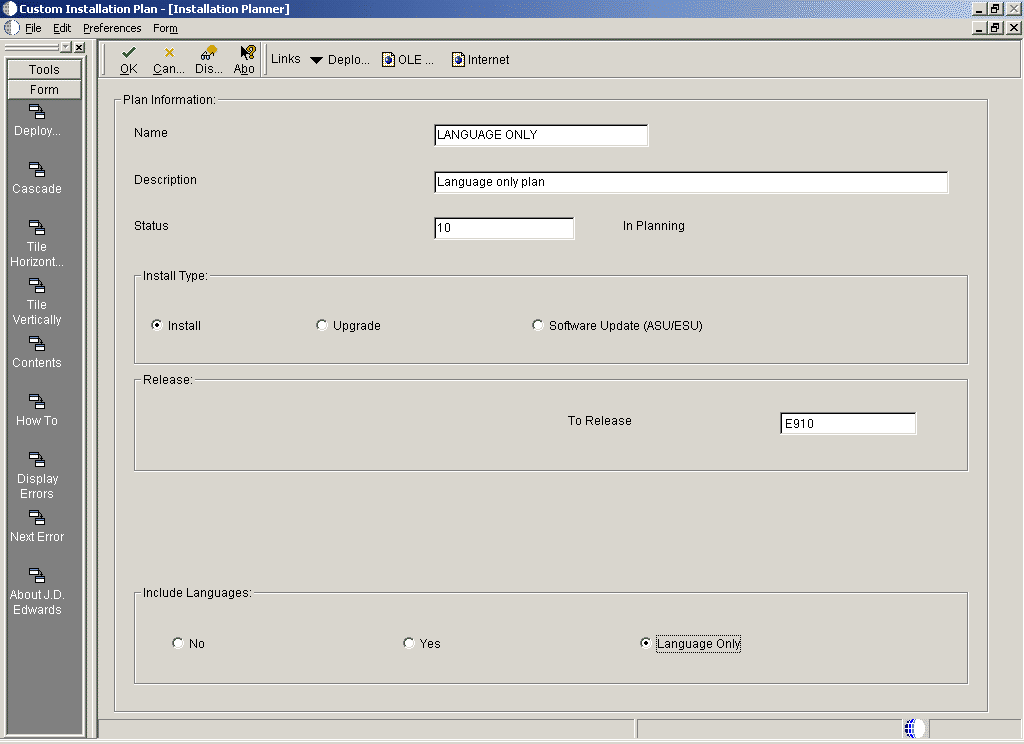
To enter information into the Installation Planner:
-
On Installation Planner, enter the basic plan information.
-
In the Include Language area, select the Language Only option.
21.4.3 Selecting Custom or Default Parameters
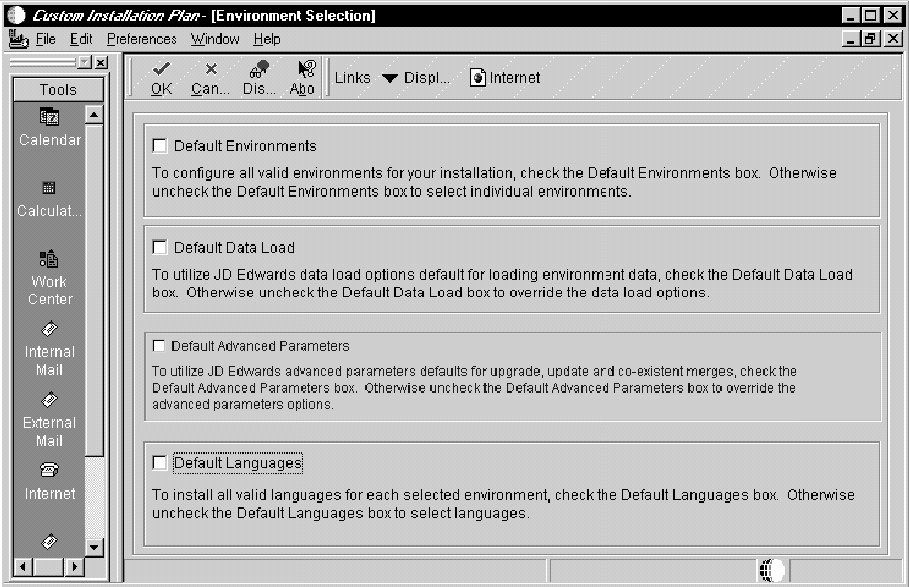
To select custom or default parameters:
-
From Environment Selection, all environments and languages are the default values. Clear the options for Default Environment and Default Languages if you want to specify which language or languages to install for each environment.
21.4.4 Selecting an Environment
To select an environment:
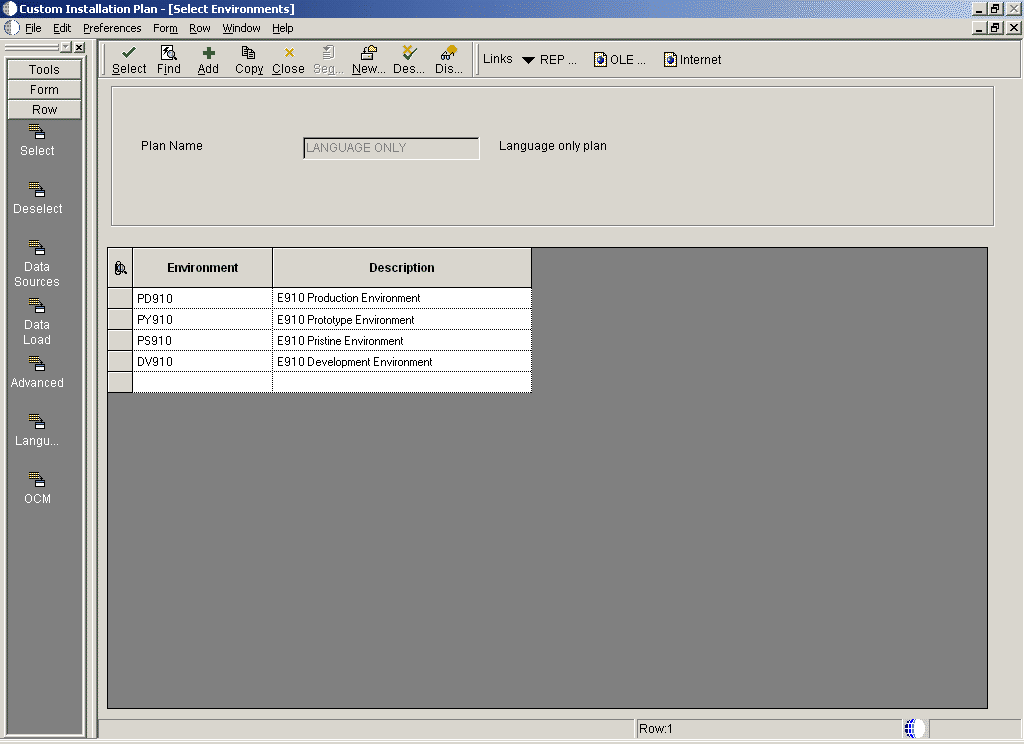
Choose the environment for which you wish to install a language.
The Language Selection form appears.
21.5 Selecting a Language
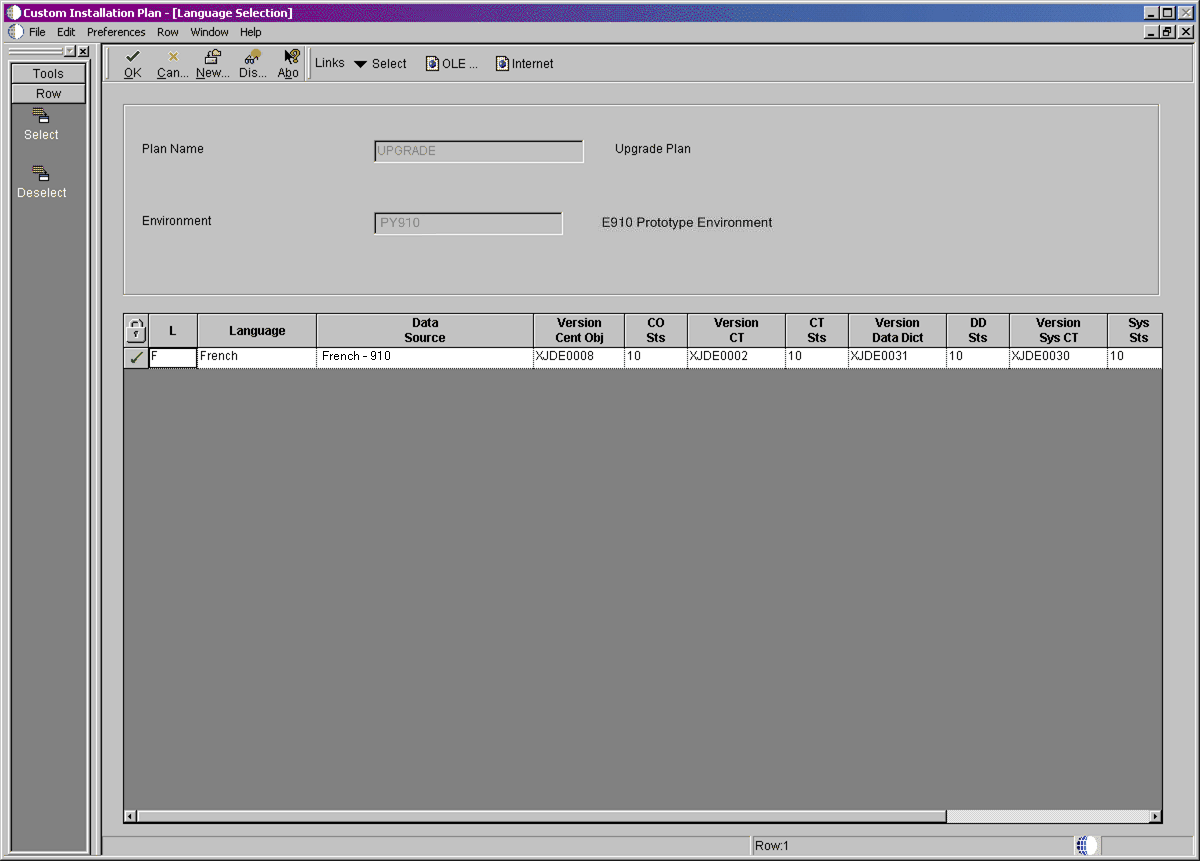
To select a language:
-
On Language Selection, to set up a language for the selected environment, choose the appropriate language.
-
From the Row menu, click Select.
-
Repeat the above steps until all your languages have been selected.
-
Click OK.
21.6 Running Installation Workbench
After you create the language-only plan, you must run it through a series of workbenches in order to load the language tables to the appropriate data sources. The language installation process is the same for every database.
To run the Installation Workbench:
-
Complete the procedures for Control Table Workbench and Specification Table Merge Workbenches.
The control tables, data dictionary, and central objects will be loaded by the Control Table Workbench and the Specification Table Merge Workbench.
21.7 Verifying Enterprise Server Requirements
To verify Enterprise Server requirements:
-
Verify that the Enterprise Server hardware and software meet all requirements.
-
Verify that the Enterprise Server disk space meets all requirements.
-
Verify that the JDE.INI settings for local code set and code page values are set for your preferred language. These values are found in the National Language Support tables in Section 1.6, "Language Process Overview".
21.8 Verifying Workstation Requirements
To verify workstation requirements:
-
Verify that the workstation hardware and software meet all requirements.
-
Install the appropriate language character set to a workstation.
-
Complete the step to verify the JDE.INI settings on the Deployment Server for Interactive Runtime, Install, and Network Queues.
-
Complete the tasks in Chapter 8, "Installing the Development Clients for Developers and System Administrators".
-
Verify that the group and user profiles are set up properly.
21.9 Completing the Language Installation
Once you have verified that the Enterprise Server and workstation hardware and software meet your language install requirements, you can complete the installation.
See the JD Edwards EnterpriseOne Tools Package Management Guide for more information about how to transfer language specifications to the Enterprise Server.
21.10 Building and Deploying Alternate Language Packages
Once you have concluded the installation, it is time to build and deploy the alternate language packages. See Package Build in the JD Edwards EnterpriseOne Tools Package Management Guide for the details of including a language or creating language-only packages.