B Oracle RAC with Oracle ASM Configuration
This appendix provides information required in order to install JD Edwards EnterpriseOne on Oracle Real Application Clusters (Oracle RAC) with Oracle Automatic Store Management (Oracle ASM) configuration.
This appendix discusses these topics:
-
Section B.1, "Precreating the Oracle Tablespaces for JD Edwards EnterpriseOne on UNIX"
-
Section B.2, "Oracle RAC Environment Configuration Examples"
-
Section B.5, "Deinstalling the Platform Pack from an Oracle RAC with Oracle ASM Environment"
Tip:
To determine tablespace disk space requirements, you can inspect the supplied tablespace creation scripts to see those values. To view the tablespace creation scripts, unzip ORCL.jar inside the ORCL folder.B.1 Precreating the Oracle Tablespaces for JD Edwards EnterpriseOne on UNIX
You must precreate the Oracle tablespaces in the RAC with ASM environment before you can successfully run the Platform Pack installer on a database machine (or node). You must run the Platform Pack installer in order to lay down the load scripts and dump files and configure environment variables in the database scripts. After the database scripts are configured by the Platform Pack installer, you will manually run the scripts to populate the Oracle database for JD Edwards EnterpriseOne in each node of the RAC with ASM environment.
Note that you must use the standard tablespace names. For example:
-
proddtat -
proddtai -
prodctlt -
prodctli -
pd910t -
pd910i
Tip:
To determine tablespace disk space requirements, you can inspect the supplied tablespace creation scripts to see those values. To view the tablespace creation scripts, unzip ORCL.jar inside the ORCL folder.Once the Platform Pack install has successfully completed on your Enterprise Server, the Oracle database creation scripts and dump files are located in the EnterpriseOne install location on the Enterprise Server. For example:
/u01/jdedwardsppack/e910/ORCL
As it runs, the Platform Pack installer edits the script that sets the environment variables. You can review this script for accuracy:
ORCL_set.sh
You can review and change the tablespace scripts if desired. Do not change the tablespace names. The tablespace creation scripts are called:
crtabsp_xx.unx
B.2 Oracle RAC Environment Configuration Examples
This section contains two possible examples of reference configurations for a 2-node Oracle RAC with Oracle ASM environment:
B.2.1 Oracle RAC Node 1: Example
This section contains an example of a properly configured Node 1 of an Oracle RAC environment.
RAC Node 1:
Server:  dnhpbl31
Instance Name:  rac1
ASM Storage:  Instance Name ASM1 - Centrally shared by both RAC Nodes
Oracle Single Client Access Name (SCAN) Name:  dnhpbl-scan
tnsnames.ora file:
RAC =
  (DESCRIPTION =
    (ADDRESS = (PROTOCOL = TCP)(HOST = dnhpbl-scan)(PORT = 1521))
    (CONNECT_DATA =
      (SERVER = DEDICATED)
      (SERVICE_NAME = rac.mlab.jdedwards.com)
    )
  )
B.2.2 Oracle RAC Node 2: Example
This section contains an example of a properly configured Node 1 of an Oracle RAC environment.
RAC Node 2:
Server:  dnhpbl32
Instance Name:  rac2
ASM Storage:  Instance Name ASM2 - Centrally shared by both RAC Nodes
Oracle Single Client Access Name (SCAN) Name:  dnhpbl-scan
tnsnames.ora file:
RAC =
  (DESCRIPTION =
    (ADDRESS = (PROTOCOL = TCP)(HOST = dnhpbl-scan)(PORT = 1521))
    (CONNECT_DATA =
      (SERVER = DEDICATED)
      (SERVICE_NAME = rac.mlab.jdedwards.com)
    )
  )
B.3 Running the Platform Pack for a Database Server that is in an Oracle RAC with Oracle ASM Configuration
This section describes the complete process for running the JD Edwards EnterpriseOne Platform Pack installer when the database being used is an Oracle Real Application Clusters (Oracle RAC) with Oracle Automatic Storage Management (Oracle ASM) configuration. For complete details regarding running the Platform Pack, refer to the section of this guide entitled: Chapter 4, "Working with the Platform Pack".
You must run the Platform Pack installer on a database machine (or node of an Oracle RAC with Oracle ASM environment) in order to lay down the load scripts and dump files and configure environment variables in the database scripts that you must run in order to populate the Oracle database for JD Edwards EnterpriseOne. Refer to the section of this guide entitled: Manually Running the Database Creation Scripts.
You must specify the same ORACLE_HOME as that which you selected for System Database during the initial installation of the Platform Pack.
Caution:
If you are installing the Enterprise Server and the Database Server on different machines, you cannot run the installer on the Enterprise Server and install the Database Server remotely. You must copy the installer images to the Database Server and run the installer on that machine. For the Enterprise Server only, you will need the image for disk1. For a Database Server, you will need the disk1 image plus the database disk images.Note:
On the Linux platform, you must install the Korn Shell (ksh) scripting language because all the database install scripts use this language. If ksh is not installed in the/bin directory, you must create a link to the install location within the /bin directory. For example, if your ksh is installed in /usr/local/bin, run this command:
ln -s /usr/local/bin/ksh /bin/ksh
To run the JD Edwards EnterpriseOne Platform Pack Installer:
-
Create a folder into which you will copy the .zip file of the Platform Pack image. In addition to the Platform Package image, you will copy one .zip file image of the Oracle database into this same directory. The directory can be any name but cannot contain spaces or special characters in the directory path. For example, the folder might be named:
/u01/UnixPPackCaution:
Do not extract the database files into a directory other than the same base directory for the Platform Pack installation. You cannot end up with a functional installation with a structure such as:/u01/UnixPPack/ORCL/ORCL -
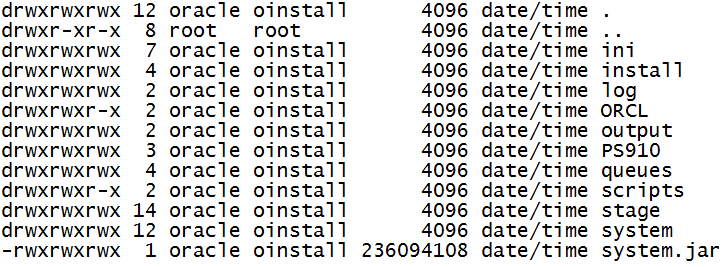
Extract the two zip files within the root of the folder created above. Using the example in this guide, a correctly extracted structure is:
Note:
The byte counts in this example will likely not match those of your unzipped files. -
In the above extracted structure, locate and execute the
runInstallfile under the/installsubdirectory.Caution:
You must sign on as the Oracle instance owner in order to run therunInstallfile. You cannot run an OUI installer as root.The installer requires that you are signed on as the Oracle database user, even if you are only installing the Logic portion of the Platform Pack. You must install the Oracle database client software and sign on as the owner of that install when running the Platform Pack. The Installer uses information about this account to configure the
enterpriseone.sh. If you sign on as any other user, you will see errors during the install and will need to manually configure the database variables inenterpriseone.sh.Note:
The Oracle Universal Installer takes a few minutes to start up.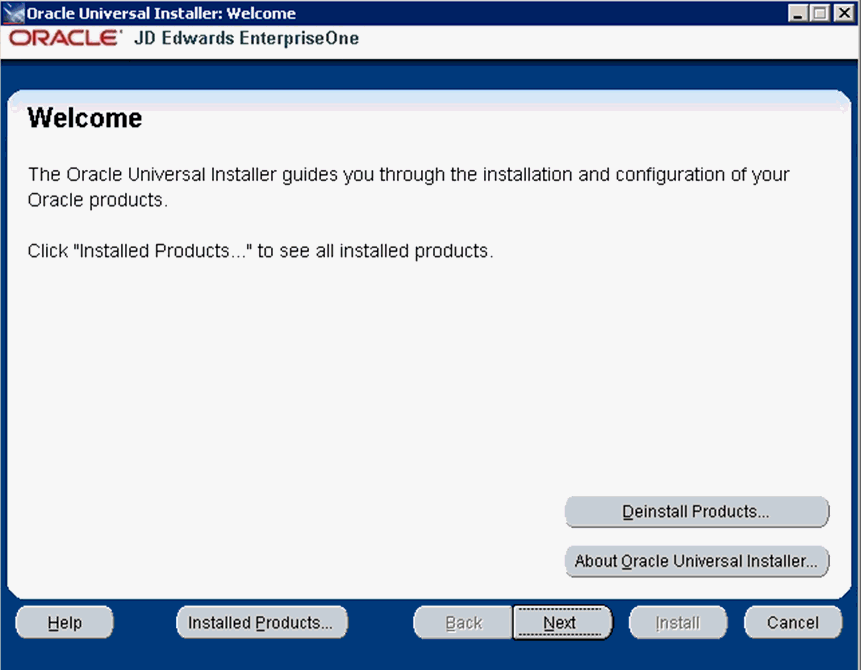
-
On Welcome, click the Next button.
-
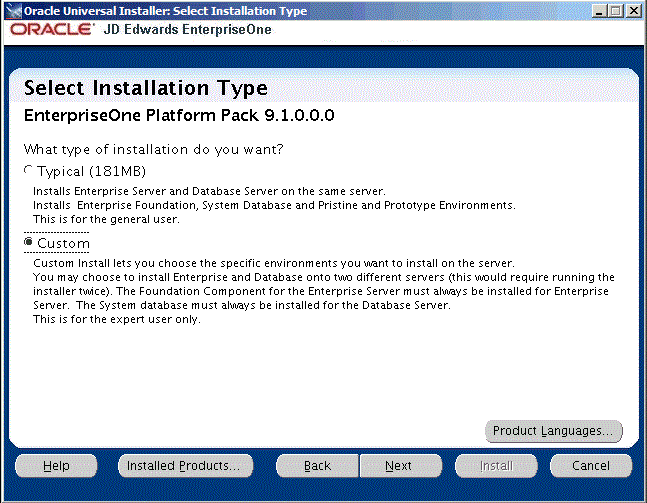
On Select Installation Type, choose the radio button for Custom installation type.
-
Click the Next button.
-
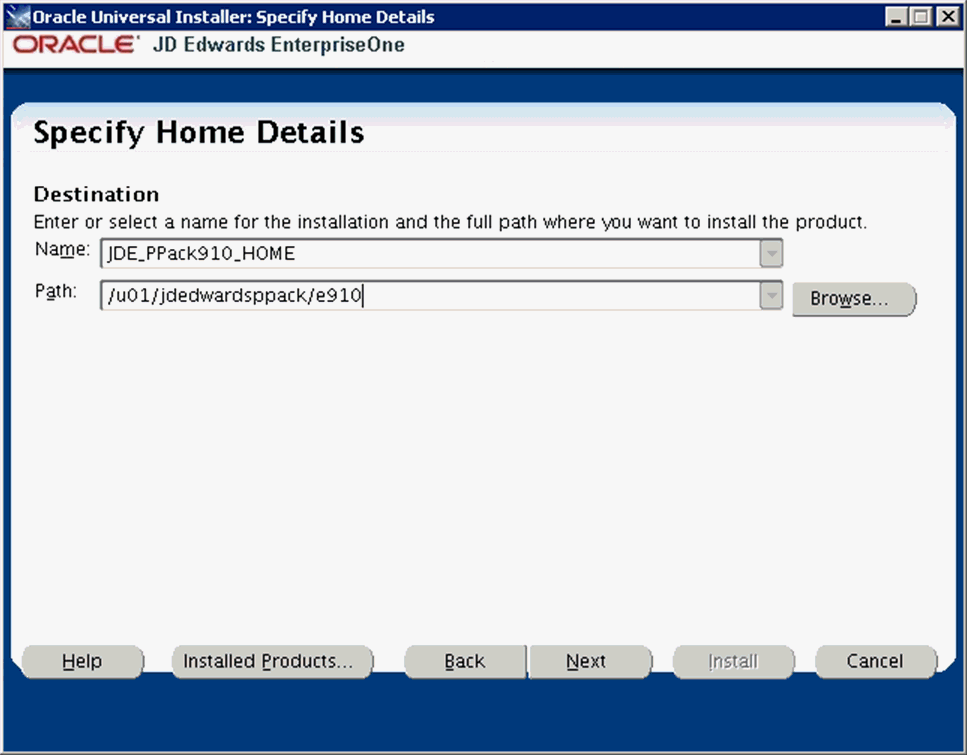
On Specify Home Details, complete these fields:
-
Name
Caution:
Do not accept the default value for this field. If any Oracle product is already installed, the installer automatically populates this field with the existing ORACLE_HOME values, which will be incorrect for JD Edwards EnterpriseOne.You must specify the same ORACLE_HOME as that which you selected for System Database during the initial installation of the Platform Pack on the Enterprise Server.
-
Path
Caution:
Do not accept the default value for this field. If any Oracle product is already installed the installer automatically populates this field with the value corresponding to the home for the ORACLE_HOME of the installed product, which will be incorrect for JD Edwards EnterpriseOne.Enter the mount point where you want the load scripts and dump files installed on your Enterprise Server.
/u01/jdedwardsppack/e910
-
-
Click the Next button.
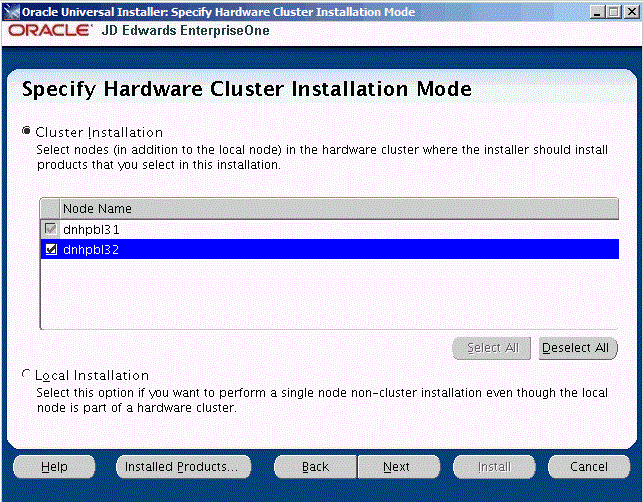
On Specify Cluster Installation Mode, click the Cluster Installation radio button. Ensure that the checkbox for each Node Name is selected. It is very important that you manually select all of the database nodes that are associated with the Oracle RAC environment.
-
Click the Next button.
Tip:
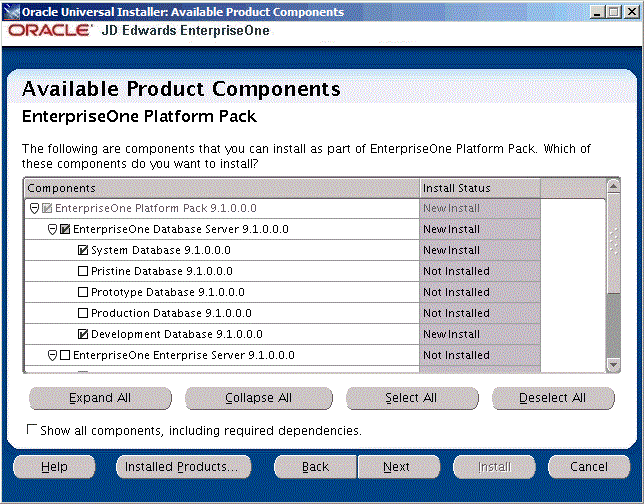
Use the scroll bar to on the right hand side of the screen to view the complete list of available components.On Available Product Components, select from these choices:
JD Edwards EnterpriseOne Database Server
-
System Database
Note:
This selection includes mandatory system tables. If you do not select this box and the OUI installer does not detect that the component was previously installed, it selects this component automatically. Likewise, if you rerun the JD Edwards EnterpriseOne Platform Pack Installer to add an environment it will check to ensure that this component has already been installed and you will not be given an option to install the environment on a machine, drive, or directory that is different from that which contains the JD Edwards EnterpriseOne System Database. -
Production Databases
-
Prototype Databases
-
Development Databases
-
Pristine Databases
JD Edwards EnterpriseOne Enterprise Server
For database only installation, you should not select any components in this category.
Note:
In this sample screen, only the EnterpriseOne Database Server 9.1.0.0.0 Component is selected. The System Database 9.1.0.0.0 and the Development Database 9.1.0.0.0 are the only selected items. Your selections may be different. It is important to note here that all of the tablespaces for each of the selected Database items must be pre-created. -
-
After you have verified your selection of components, click the Next button.
-
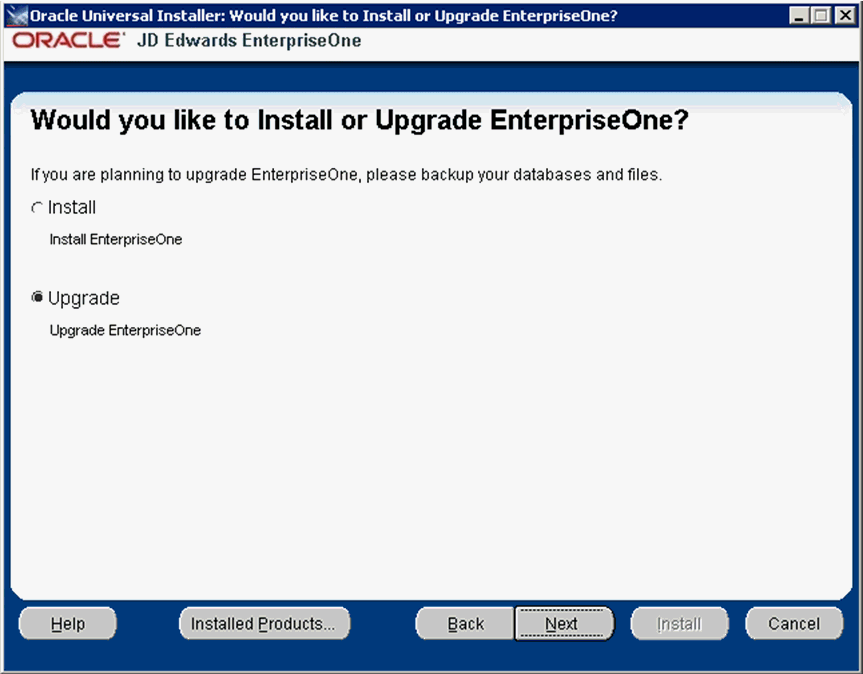
On Would you like to Install or Upgrade EnterpriseOne?, choose whether you want to install or upgrade JD Edwards EnterpriseOne. The list below describes each run mode.
-
Install (Install EnterpriseOne)
In this mode, the JD Edwards EnterpriseOne Platform Pack Installer checks for the existence of JD Edwards EnterpriseOne business data and control tables; if either exists, the JD Edwards EnterpriseOne Platform Pack Installer aborts. This prevents the inadvertent overwriting of existing critical business data and control tables. If the JD Edwards EnterpriseOne Platform Pack Installer does not detect pre-existing JD Edwards EnterpriseOne data or control tables, the installation process continues normally.
Caution:
You should always back up all databases that you want to preserve. -
Upgrade (Upgrade EnterpriseOne)
In this mode, the JD Edwards EnterpriseOne Platform Pack Installer checks for the existence of JD Edwards EnterpriseOne business data and control tables which are prerequisites to an upgrade of JD Edwards EnterpriseOne.
Caution:
You should always back up all databases that you want to preserve.
-
-
Click the Next button.
-
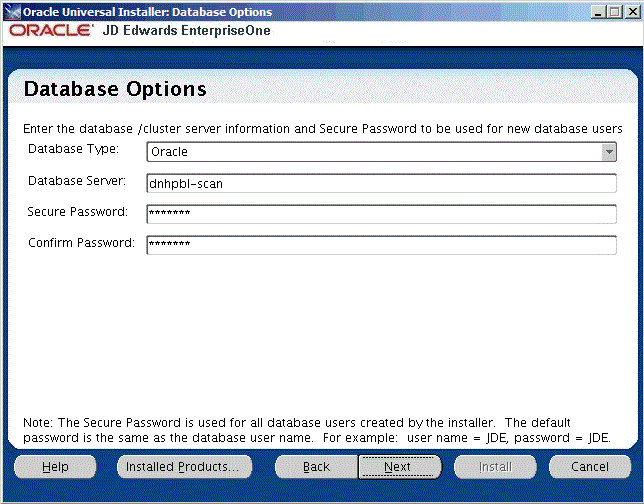
On Database Options, complete these fields:
-
Database Type
Use the pulldown to choose Oracle as the database type.
-
Database Server
By default, the JD Edwards EnterpriseOne Platform Pack Installer automatically detects and populates this field with the machine name on which it is running.
Caution:
You must change this field to the Oracle Single Client Access Name (SCAN) for your Oracle RAC.The JD Edwards EnterpriseOne Platform Pack Installer validates the Database Server name and compares it against the name of the local computer. If these values are different (for example, if you manually change the value of this field), the JD Edwards EnterpriseOne Platform Pack Installer assumes the Database Server is either a clustered or remote server. If you have selected to install databases, and the database server name that you entered cannot be validated, an error dialog is displayed with resolution instructions.
For additional details on all Platform Pack error conditions, refer to the section of this guide entitled: Section 4.12, "Troubleshooting Platform Pack Installation".
Caution:
If you are installing the Enterprise Server and the Database Server on different machines, you cannot run the installer on the Enterprise Server and install the Database Server remotely. You must copy the installer images to the Database Server and run the installer on that machine. For the Enterprise Server only, you will need the image for disk1. For a Database Server, you will need the disk1 image plus the database disk images. -
Secure Password
If you wish to change the default password that the JD Edwards EnterpriseOne installer uses when creating Oracle users, you can enter a secure password. The maximum length of the password is 10 characters.
Note:
If you do not change the default value (DEFAULT), the system creates a password for each user where the password is the same as their user ID. For example, if a user ID is JDE, then by default the system creates a corresponding password of JDE for that user.Caution:
If you change the default password in the Platform Pack installation for your Enterprise Server and/or Database Server, you must also manually change the[DSPWD]section in thejde.inion the Deployment Server and specify the new secure password that you are using. If you fail to synchronize these database password settings, the various Installation Workbenches will not be able to connect to the database. -
Confirm Password
Re-enter the password.
-
-
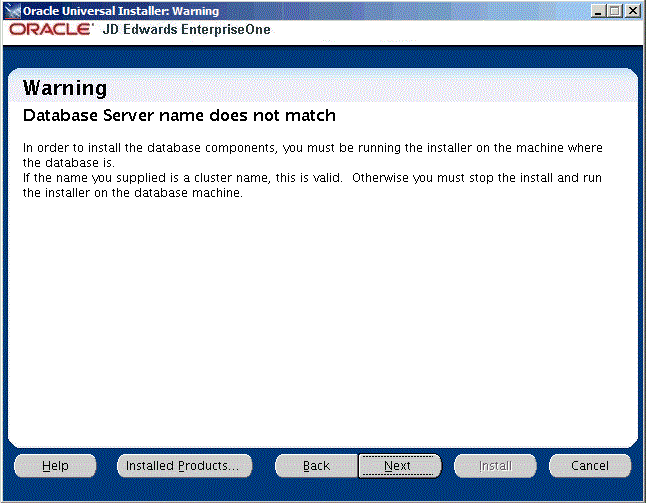
The screen entitled: Warning -- Database Server name does not match is displayed because the actual server name is not the same name that was entered on the previous screen. You can ignore this Warning because in this case the name entered references the entire Oracle RAC Environment rather than just one of the Oracle RAC Nodes.
-
Click the Next button to continue past the Warning screen.
-
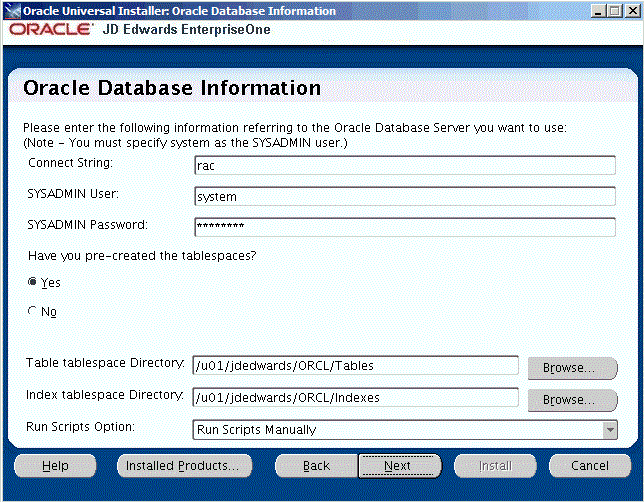
On Oracle Database Information, complete these fields referring to the Oracle Database Server that you want to use:
Note:
You must specify the SYSADMIN user as system. The Oracle portion of the install will fail if you supply sys or any other user that must connect with "as SYSDBA".-
Connect String
Enter a valid value for your Oracle connect string. You may need to obtain this value from your Oracle DBA. You cannot proceed with the installation until this value can be validated by the JD Edwards EnterpriseOne Platform Pack Installer; that is, the Installer will not allow you to proceed if it cannot connect to the database.
-
SYSADMIN User
The value system (or equivalent) identifies the system administration user for your Oracle installation. This user must have full DBA privileges which are standard for Oracle installations. The OUI installer uses the Oracle export / import tool (data pump).
Caution:
Unlike versions of the JD Edwards EnterpriseOne Platform Pack installer for Oracle databases which were previous to Release 9.1, you cannot use the value sys here. Oracle recommends you use the default value of system. -
SYSADMIN Password
Enter a valid password for the system administration (SYSADMIN) user under which you will be installing the JD Edwards EnterpriseOne Oracle databases.
-
Have you pre-created the tablespaces?
In order to install the JD Edwards EnterpriseOne database components into Oracle RAC environments, you must have already precreated the tablespaces. Select the Yes button.
-
Tablespace Directory
Enter the path where you want the JD Edwards EnterpriseOne Platform Pack Installer to create your Oracle database tables. For example:
/u01/JDEdwardsPPack/ORCL/Tables -
Index Tablespace Directory
Enter the path where you want the JD Edwards EnterpriseOne Platform Pack Installer to create your Oracle database indexes. For example:
/u01/JDEdwardsPPack/ORCL/Indexes -
Run Scripts Option
For Oracle databases on Oracle RAC with Oracle ASM, you must use the pulldown to choose Run Scripts Manually.
-
-
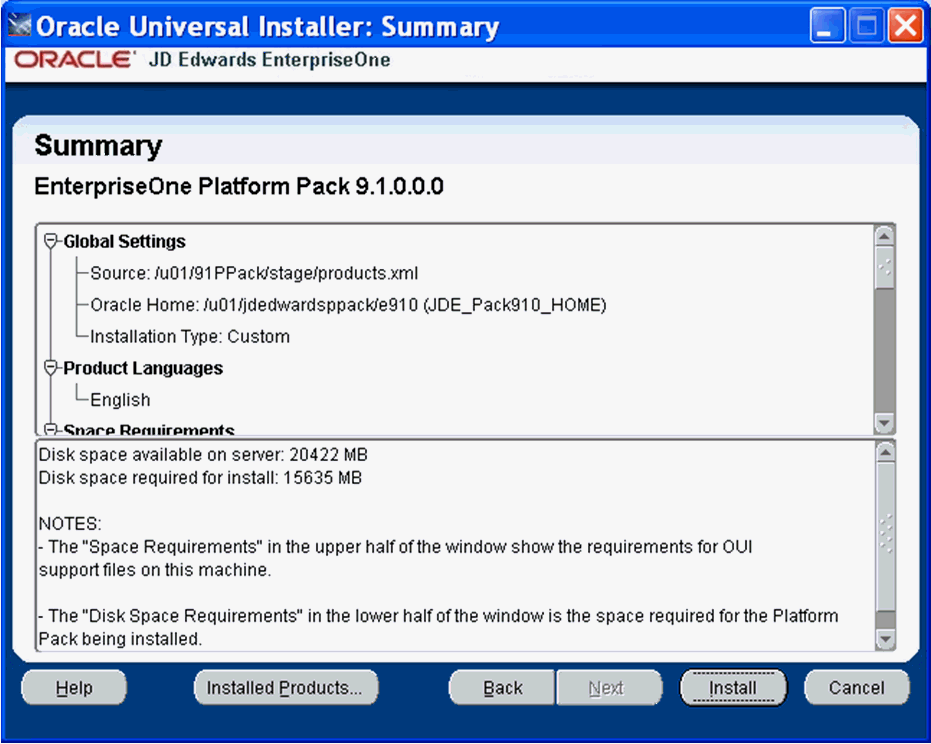
On Summary, in the top half of the screen, review your selections and in the bottom half of the screen review the NOTES, which detail the disk space requirements for OUI support files and also for the Platform Pack being installed on this machine.
-
Click the Install button.
As the installer runs it displays the Install progress, as shown in the following example.
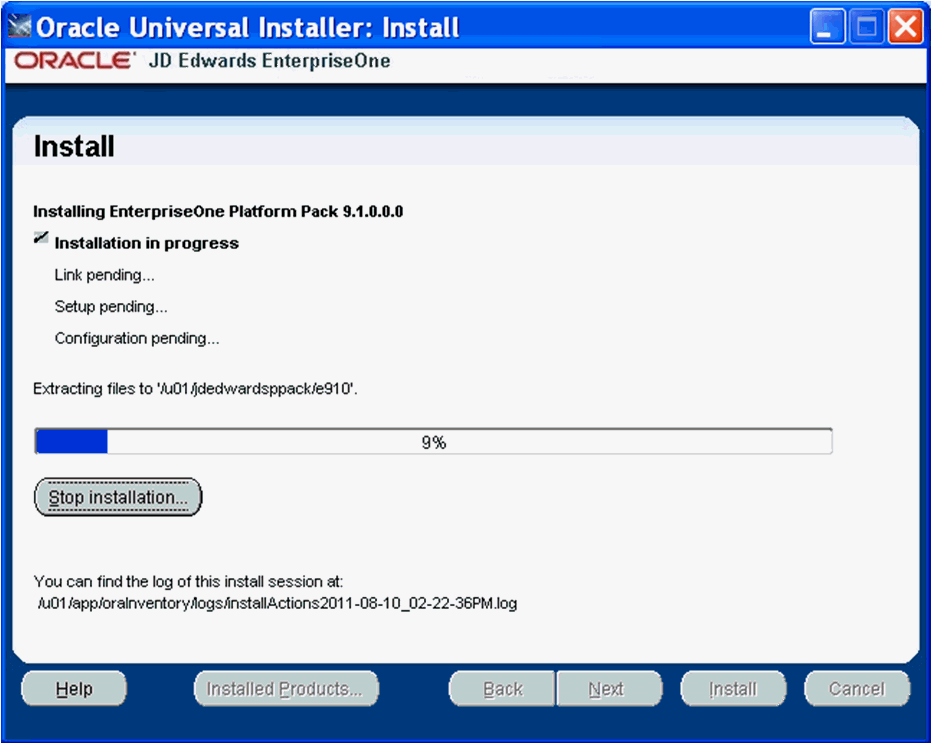
As the installation process progresses, an additional Oracle RAC-specific step is performed called Remote operations in progress. This step copies all of the directories and sub-directories from the original Oracle RAC Node to all of the Remote Oracle RAC Nodes. In the following example the Remote Node is dnhpbl32. Also in this example the
/u01/jdedwards/e910set of directories are duplicated onto the Remote Oracle RAC Node.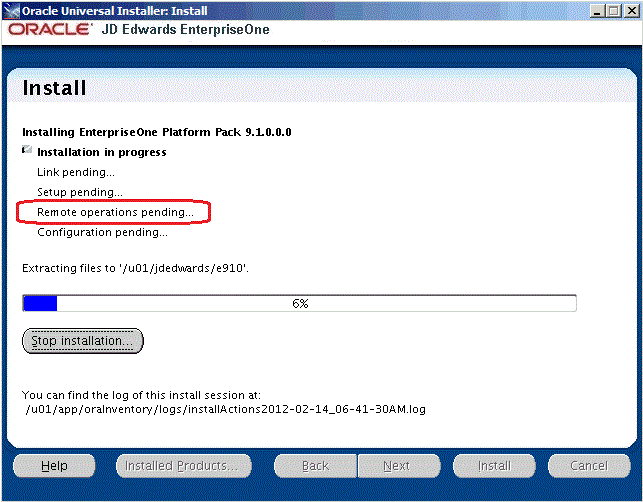
Note:
Because this is an Oracle RAC environment, when you manually run the JD Edwards EnterpriseOne Platform Pack database load scripts, later in this procedure, the database connections may be made on any of the Oracle RAC Nodes. This is under the control of the Oracle Datapump utility. The JD Edwards EnterpriseOne Platform Pack directories must be on every Oracle RAC Node because the scripts cannot determine on which Oracle RAC Node animpdpcommand will be run.As shown in the example below, the final Oracle RAC-specific step in the installing process is Saving Cluster Inventory.
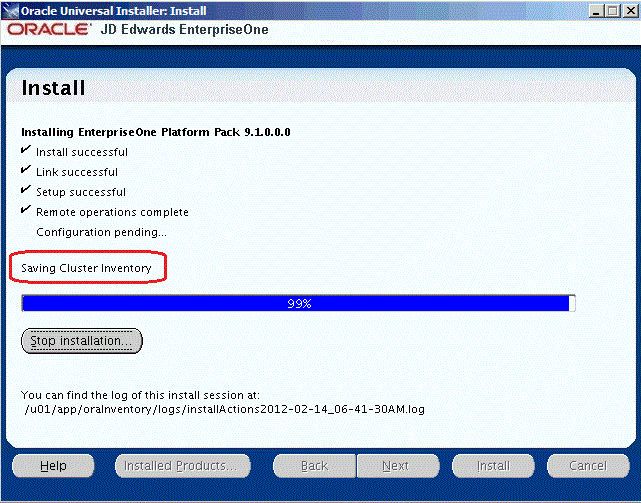
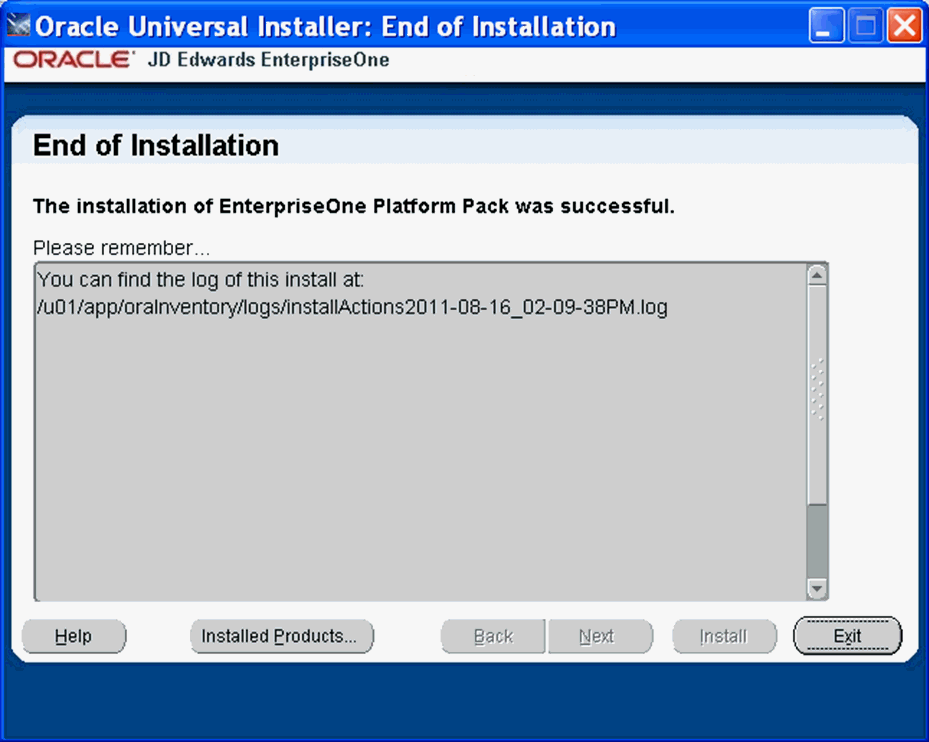
After the installation is complete, the End of Installation screen is displayed.
-
On End of Installation, verify the installation of the EnterpriseOne Platform Pack was successful.
Review the Please remember ... portion for the installer log file location. The log file name is specified with the date and stamp when the installer ran. For example:
/u01/app/oraInventory/logs/installActions2011-08-16-02-09-38PM.log -
Click the Exit button to exit OUI.

-
On Exit, click the Yes button.
B.4 Running the Database Load Scripts
To manually run the Oracle database installation scripts:
-
Sign on to the Enterprise Server as the Oracle owner. For example, oracle.
-
Change directory to the EnterpriseOne install location. For example:
cd /u01/jdedwardsppack/e910 -
You can review and change the tablespace scripts if desired. Do not change the tablespace names.
The tablespace creation scripts are called:
crtabsp_xxx.unxwhere
xxxis the variable portion of the tablespace name. -
Navigate to the ORCL folder under the install path. For example:
/u01/jdedwards/e910/ORCL -
Verify the settings in the
InstallOracleDatabase.shscript:export DATABASE_INSTALL_PATH=/u01/jdedwardsppack/e910/ORCL -
Run the
InstallOracleDatabase.shscript.This script begins the actual set of steps to populate the RAC Database for the environments you chose during the Platform Pack installation.
-
When the database load process completes, this message is displayed:
Check that all load commands ended successfully
Caution:
It is very important that you perform these checks because there could have been some issue that caused one of the load steps to fail. You can use the information in the logs to determine the cause. -
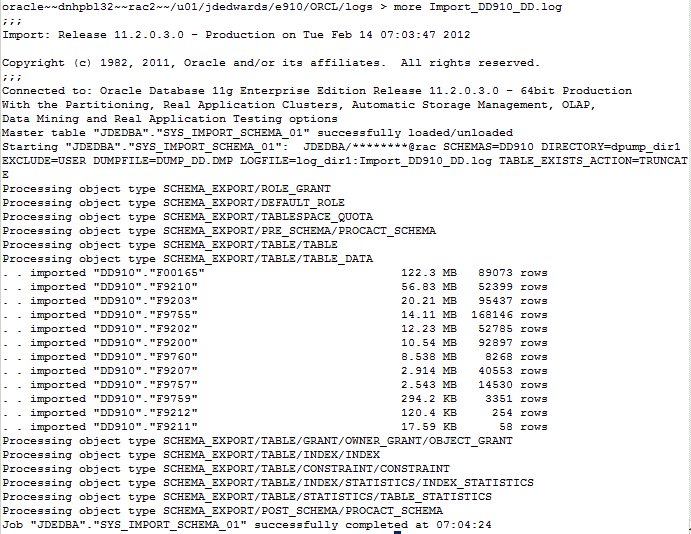
The Import logs are located in the
logsdirectory, which is a subdirectory of the Home Details Path. For example:/u01/jdedwards/e910/ORCL/logsYou should inspect the contents of each of the
Import_xyx_xy.logfiles. Examples of log file names include:-
Import_SY910_SY.log -
Import_OL910_OL.log -
Import_DD910_DD.log -
Import_DV910.log -
Import_TESTDTA_DTA.log -
Import_TESTCTL_CTL.log
The following example illustrates the type of information in each of the logs. Of greatest important is the final line; if any other message is shown different than "successfully completed" then there was a problem that you must troubleshoot to ensure the successful deployment of the JD Edwards EnterpriseOne database components.
-
B.5 Deinstalling the Platform Pack from an Oracle RAC with Oracle ASM Environment
It is very important to use the OUI-based Platform Pack installer to properly and completely deinstall the JD Edwards EnterpriseOne database components from an Oracle RAC with Oracle ASM environment. A proper deinstallation includes the removal of Oracle Home information. The deinstallation procedures are described in the chapter of this guide entitled: Chapter 26, "Deinstalling the Software". In particular, this chapter describes these applicable topics for Oracle database installations:
Caution:
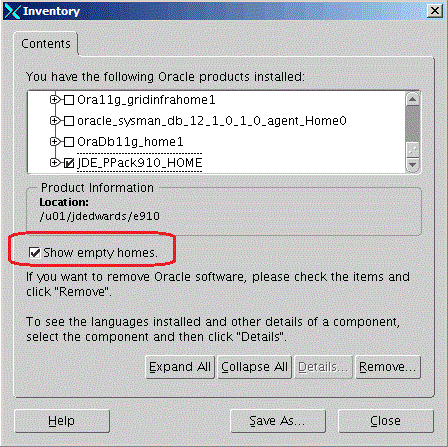
For Oracle RAC with Oracle ASM environments, if you had a failed installation and are deinstalling, it is important that (in the OUI installer) you select the checkbox for Show empty homes. For example: