11 Deinstalling the Software
This chapter includes these tasks:
-
Section 11.2, "Deinstalling the Software from the Workstations"
-
Section 11.3, "Deinstalling the Local OEE from the Deployment Server"
-
Section 11.4, "Deleting Virtual machines for JD Edwards EnterpriseOne Servers"
11.1 Understanding the Deinstallation
The installation and upgrade processes do not automatically remove any JD Edwards EnterpriseOne databases. You should have a database administrator (DBA) for your relational database management system (RDMS) manually remove any unused databases according to the list of databases and associated components, which are provided in this document.
The deinstallation program restricts you from deinstalling a mandatory component without also removing all associated optional components that were previously installed. The relationship between the mandatory and optional components is shown in this table:
| Server | Mandatory Component | Optional Components |
|---|---|---|
| Deployment Server | JD Edwards EnterpriseOne Files | Production Environment
Prototype Environment Development Environment Pristine Environment |
| Enterprise Server | JD Edwards EnterpriseOne Foundation | ES Production
ES Prototype ES Development ES Pristine |
11.2 Deinstalling the Software from the Workstations
You can remove previous JD Edwards EnterpriseOne installations from workstations by running the deinstallation program as described in the JD Edwards EnterpriseOne Development Client Installation Guide.
11.3 Deinstalling the Local OEE from the Deployment Server
Note:
Oracle products use the term ”deinstall” to refer to removing an Oracle product.To deinstall the local Oracle database:
-
Either export the local database tablespaces or deinstall JD Edwards EnterpriseOne using Start > Programs > Oracle - <Home_Name> > Oracle Installation Products > Universal Installer where <Home_Name> is the name that you gave the installation of EnterpriseOne on the Deployment Server.
-
Locate this file:
<Oracle_Home>\deinstall\deinstall.bat -
Right click on the file that you located in Step 2 and select Run as administrator, where
<Oracle_Home>is the directory where you installed the local Oracle database. For example, your directory might be:c:\Oracle\E1Local -
At the end of the deinstallation, verify that the Oracle_Home directory has been deleted (for example,
c:\Oracle\E1local). If it still exists, you should attempt to manually delete it.Caution:
Prior to any reinstall an Oracle local database on this same machine, the Oracle_Home directory (for example,c:\Oracle\E1local) must not exist. If you attempt to reinstall the local Oracle database and this directory still exists, it is likely that the new installation will fail.Tip:
You may not be able to delete the Oracle_Home directory (for example,c:\Oracle\E1local) if a process has it locked. In that case, to determine which process(es) has it locked, run the steps in the section of this guide entitled: Section 3.9.5.4, "Process Explorer".
11.4 Deleting Virtual machines for JD Edwards EnterpriseOne Servers
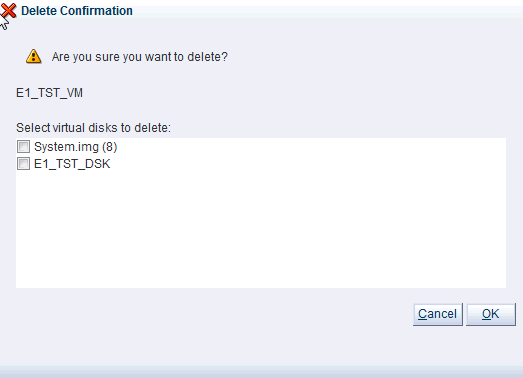
When uninstalling the VM Guest with this release of OVM, select the VM guest that you want to delete and select the delete icon (the red X) from the command menu. The user will be prompted to delete the disk images associated with theVM guest.
Use these steps for each VM guest you want to deinstall:
-
Access the Oracle VM Manager.

-
On Oracle VM Manager, with the Servers and VMs tab selected and with the Server Pools node expanded to your pool, highlight the VM guest you want to delete and click the Delete icon (red X).

-
On Delete Confirmation, select the checkbox for the virtual disk that you want to delete.
-
Click the OK buttonn to complete the deletion of the selected disk.
Note:
Up to this point in this procedure, only the VM guest is deleted. Continue with the following steps to delete the VM template.
-
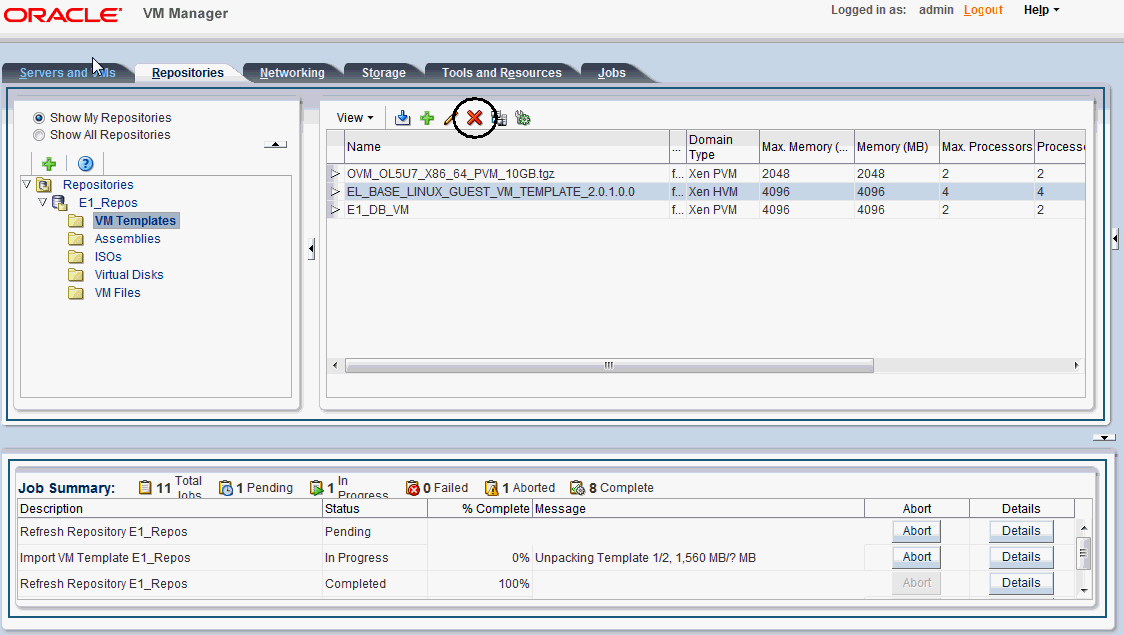
On Oracle VM Manager, with the Repositories tab selected and with the VM Templates node selected, highlight the VM template you want to delete, and click the Delete icon (red X).

-
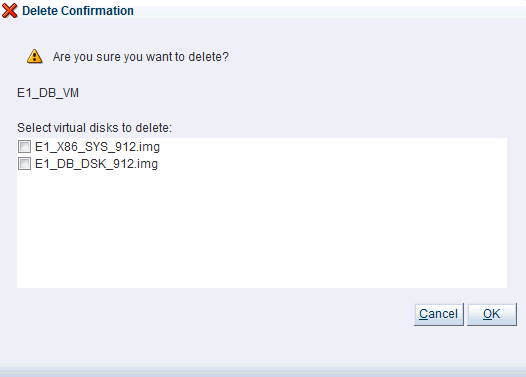
On Delete Confirmation, select the checkbox for the virtual disk that you want to delete.
-
Click the OK button to complete the deletion of the selected disk.