5 Working with VM Templates for Oracle Exalogic using EMOC
The installation, configuration, and setup of an Oracle Exalogic machine is beyond the scope of this document. Refer to this link for applicable Oracle Exalogic documentation:
http://docs.oracle.com/cd/E18476_01/index.htm
However, for purposes of this documentation, this section illustrate one method of uploading and creating Virtual machine using Oracle Enterprises Manager Ops Center (EMOC). This method covers the creation of a virtual machine and the configuration of the network setting on that virtual machine. The example in this section assumes the uploading of the BIP template in support of OneView reporting application. The procedure is the same for other templates.
Caution:
This example does not cover the configuration of the Exalogic inside of EMOC including the configuration of networks and IP. The use of the information on the Pre-Install Worksheet is still valid (refer to the section of this guide entitled: Section 4.2, "Completing the Pre-Install Worksheet").Caution:
The setup and configuration of a vServer Types on Oracle Exalogic is beyond the scope of this guide. Refer to the Oracle Exalogic guide for more information.The section describes these tasks:
-
Section 5.1, "Uploading VM Templates to Oracle Exalogic Using EMOC"
-
Section 5.2, "Create a VM on Exalogic from the Server Template"
5.1 Uploading VM Templates to Oracle Exalogic Using EMOC
To upload VM templates to Oracle Exalogic using EMOC:
-
Log on to EMOC.
-
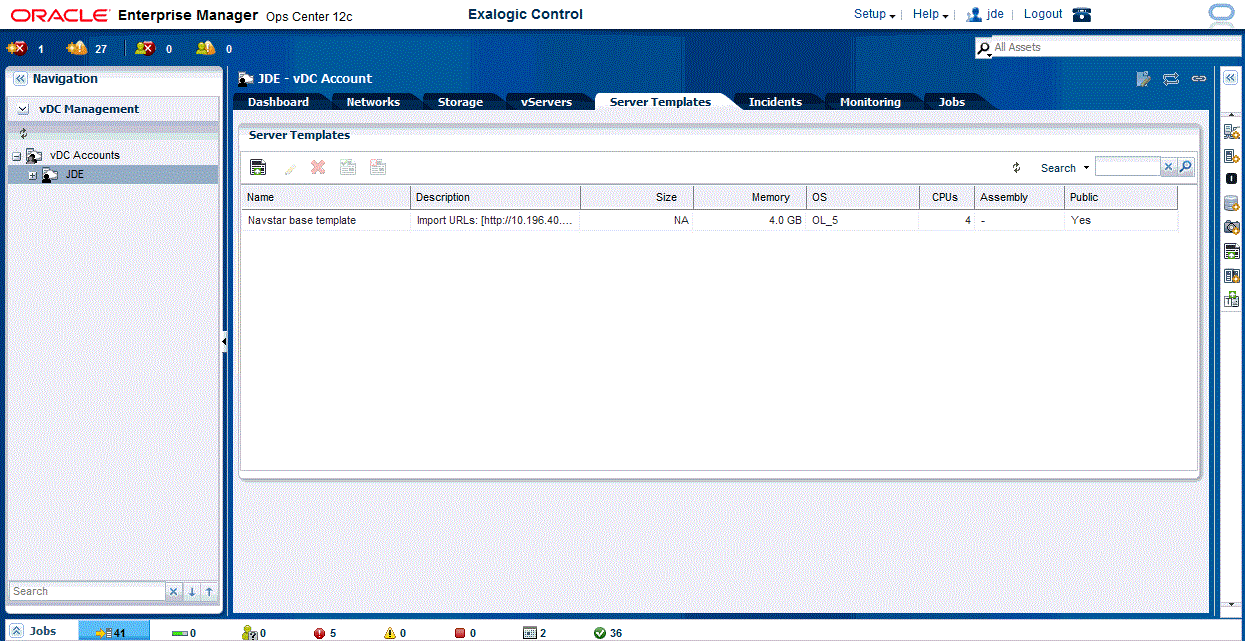
On EMOC, select the account on the left side menu, in this example JDE, and then select the Server Templates tab.
-
Click the Upload icon (left-most).
-
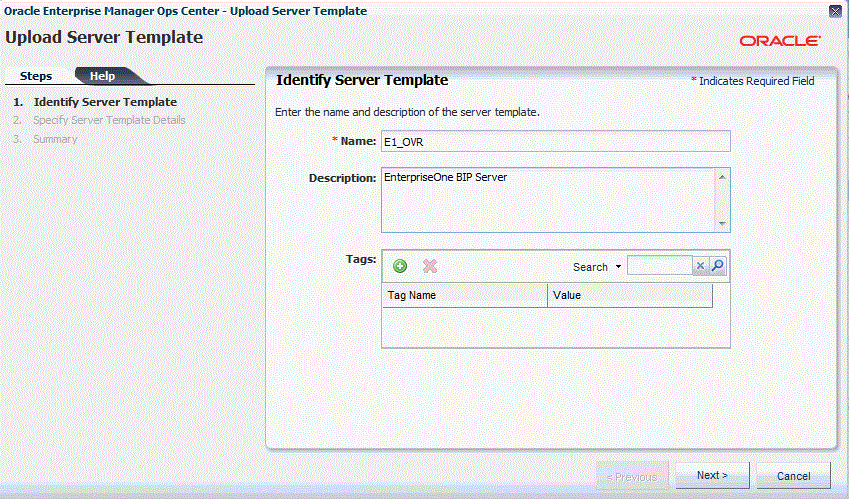
On Identify Server Template, complete these fields:
-
Name
Enter a name for the template. For example, E1_OVR.
-
Description
Enter a description for the template. For example, EnterpriseOne BIP Server.
-
-
Click the Next button.
-
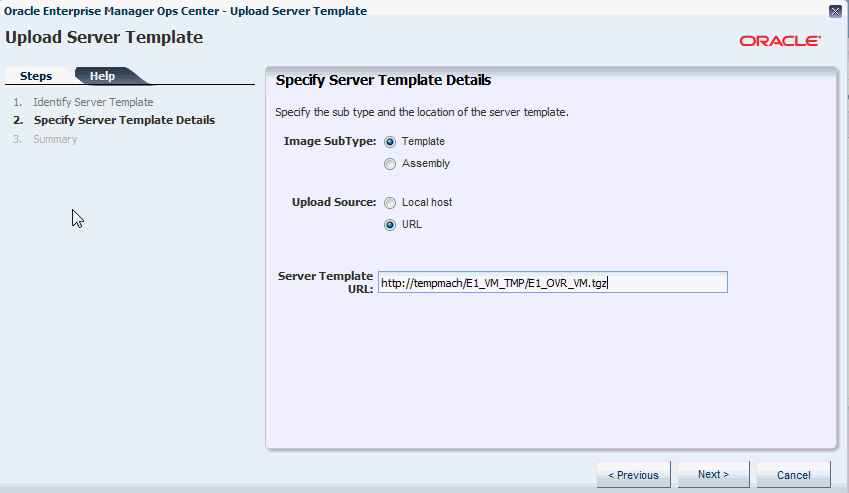
On Specify Server Template Details, select these radio buttons:
-
Templates
-
URL
Complete this field:
-
Server Template URL
Enter the URL for the Server Template that you want to upload. For example:
http://tempmach/E1_VM_TMP/BIP/E1_OVR_VMNote:
The value that defaults into this field is the temporary space which was previous enabled with WEB/DAV. You must modify this value with the actual location of your files to upload, where "tempmach" is the machine on which you are creating the temporarily uploaded directory. The directory value that you would specify in this example is consistent with the values in the preceding sections of this document describing the setup of the temporary upload location.Note:
The setup and configuration of a vServer Types on Oracle Exalogic is beyond the scope of this guide. Refer to the Oracle Exalogic guide for more information.
-
-
Click the Next button.
-
On Summary, verify your entries and click the Finish button.
Note:
You can monitor the status of the upload from the jobs tabs. When complete, the following screen is displayed.Note:
The setup and configuration of a vServer Types on Oracle Exalogic is beyond the scope of this guide. Refer to the Oracle Exalogic guide for more information.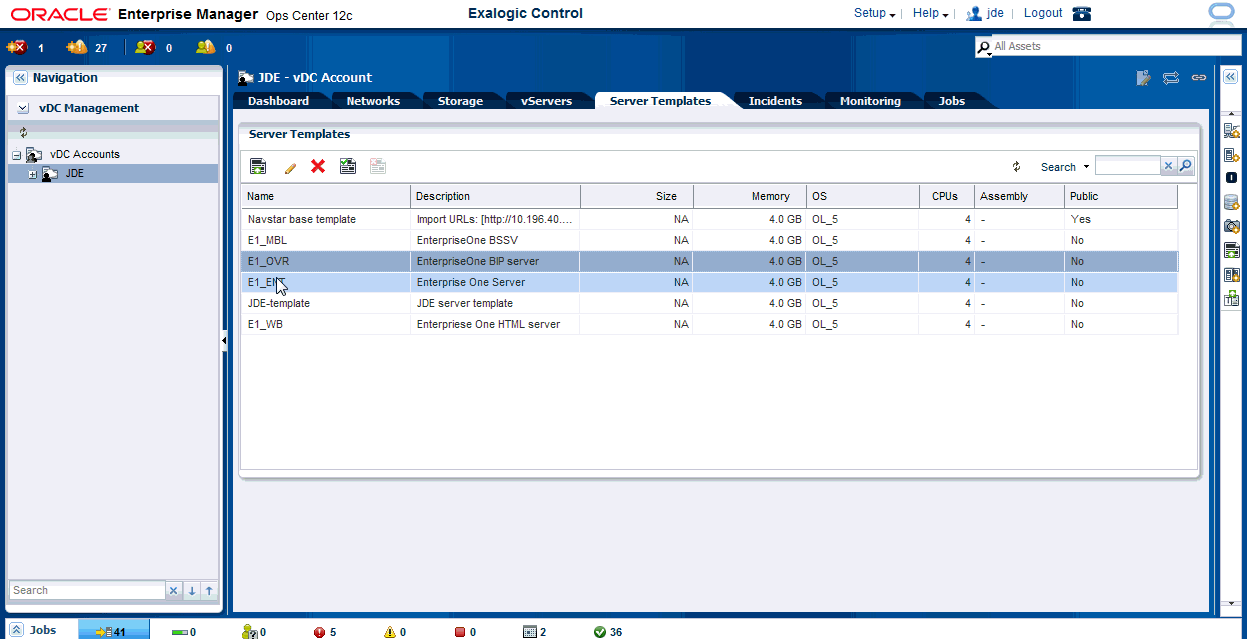
-
On Server Templates, verify that the template you uploaded is displayed in the list.
-
Repeat this process for each of the Oracle VM templates for JD Edwards EnterpriseOne that want to install on Exalogic, making appropriate changes for the name of the template and the location of the tgz file to upload.
5.2 Create a VM on Exalogic from the Server Template
To create a VM from the Server Template that you uploaded in the previous section:

-
From EMOC, in the left hand pane, navigate to vDC Management > vDC Accounts > JDE, where JDE is the name of the account used in this guide for the VM Templates for JD Edwards EntepriseOne on Oracle Exalogic.
-
Right click on the JDE node to display the action dialog and select this option:
Create Virtual Server
-
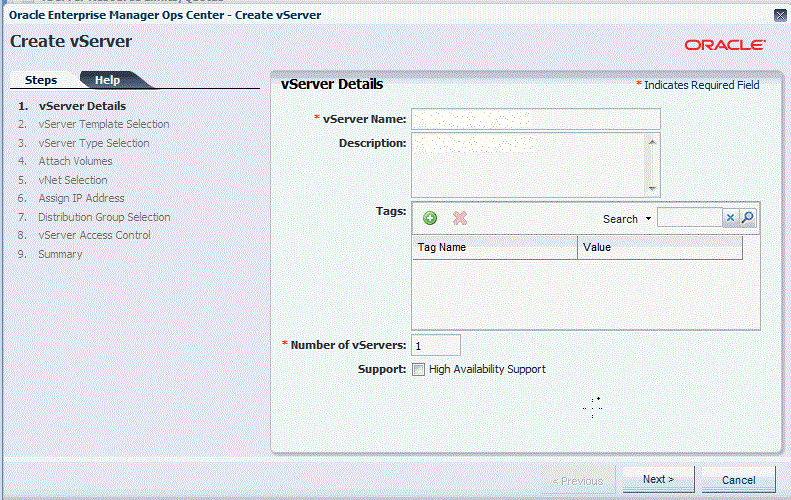
On vServer Details, complete these fields:
-
VServer Name
This field is required. Enter any name for the VM of the EnterpriseOne server you are creating. This must be the machine name.
-
Description
Enter a description for the VM of the EnterpriseOne server you are creating. For example, you might enter such values as EnterpriseOne BSSV, EnterpriseOne BIP, EnterpriseOne Enterprise Server, or EnterpriseOne HTML Server.
Also on vServer Details, ensure this radio button is not checked:
-
Support: High Availability Support
-
-
Click the Next button.
-
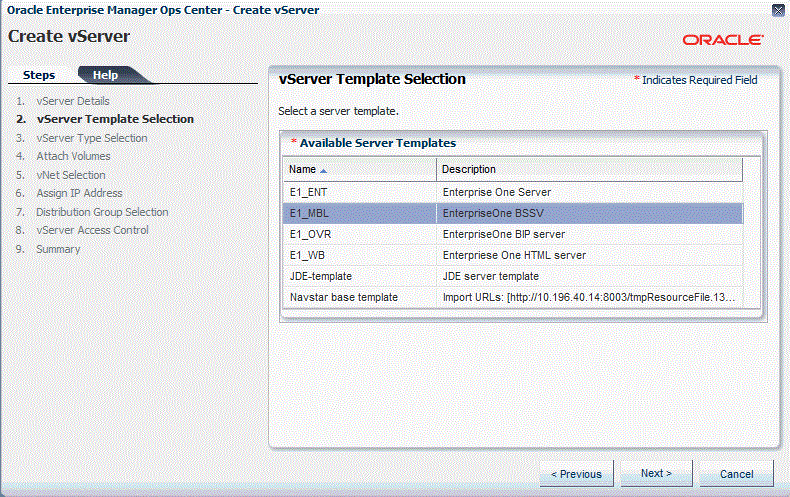
On vServer Template selection, highlight the available server template that you want to create. The names displayed are those you chose when you uploaded the template. For example, E1_MBL.
-
Click the Next button.
-
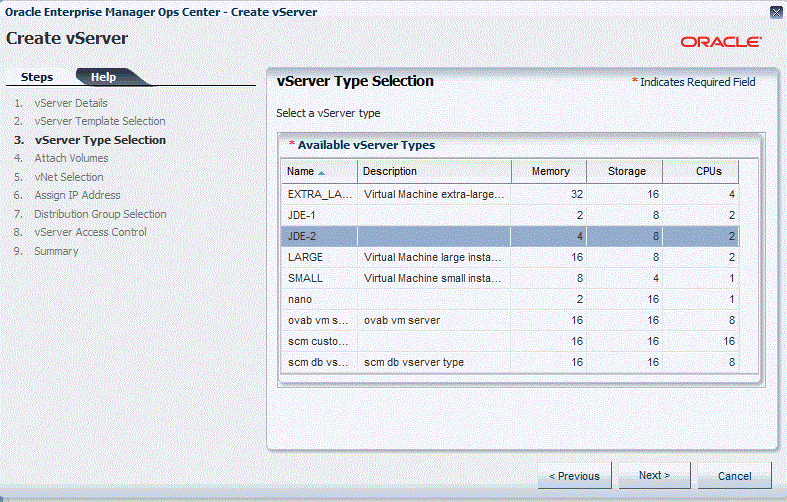
On vServer Type Selection, highlight the available vServer Type that you want to create. This examples shows two vServer types that were previously created:
-
JDE-1
As shown, this vServer is defined for 2 GB of memory, 8GB storage, and 2 CPUs.
-
JDE-2
As shown, this vServer is defined for 4 GB of memory, 8GB storage, and 2 CPUs.
-
-
Click the Next button to continue with the highlighted vServer type.
-
The next step is for attaching volume groups. In this example, no volume groups are selected. Therefore, you can click Next to continue.
-
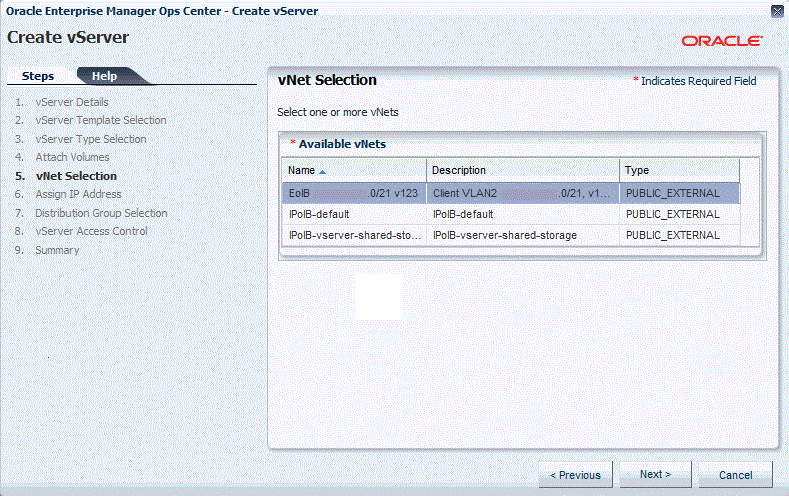
On vNet Selection, highlight a configured network that you want to use with the VM.
Note:
The setup and configuration of a vNet on Exalogic is beyond the scope of this guide. Refer to the Exalogic guide for more information. -
Click the Next button.
-
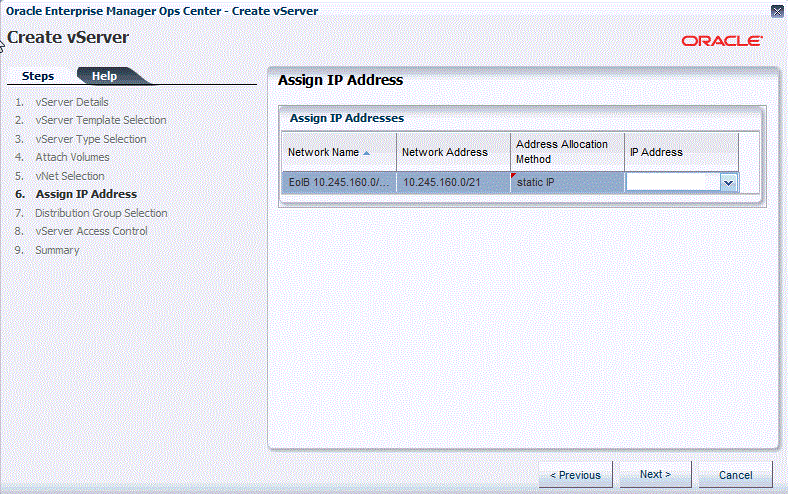
On Assign IP Address, it is assumed the for Address Allocation Method the static IP address is selected, and that for IP Address the particular IP address for this VM is selected. This example also assumes that the Address Allocation Method and the IP address have been previously configured with the Exalogic. This must be the same IP address that was supplied using to the
config.shscript.Note:
The setup and configuration of IP addresses on Exalogic is beyond the scope of this guide. Refer to the Exalogic guide for more information. -
Click the Next button.
-
The next steps are for Distribution Group Selection and vServer Access Control. In this example, these are not configured so you can click Next until you get to the Summary screen.
-
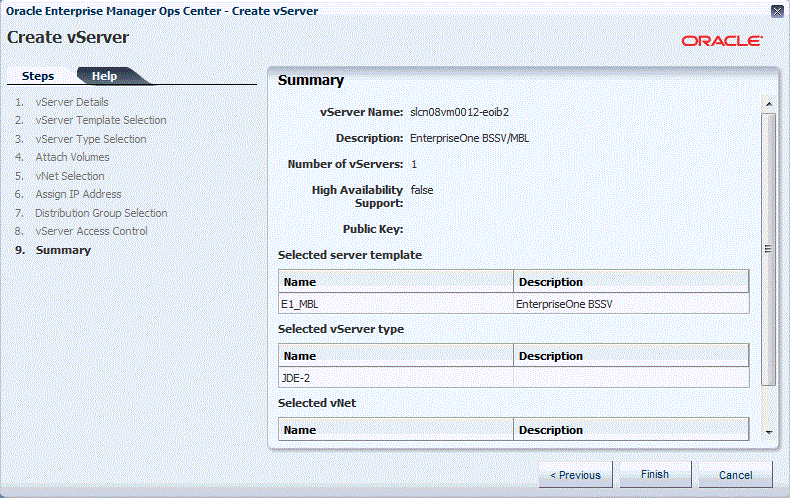
On Summary, review your selections and click Finish.
You can review the progress of the VM from the Jobs tab as shown in the example below.
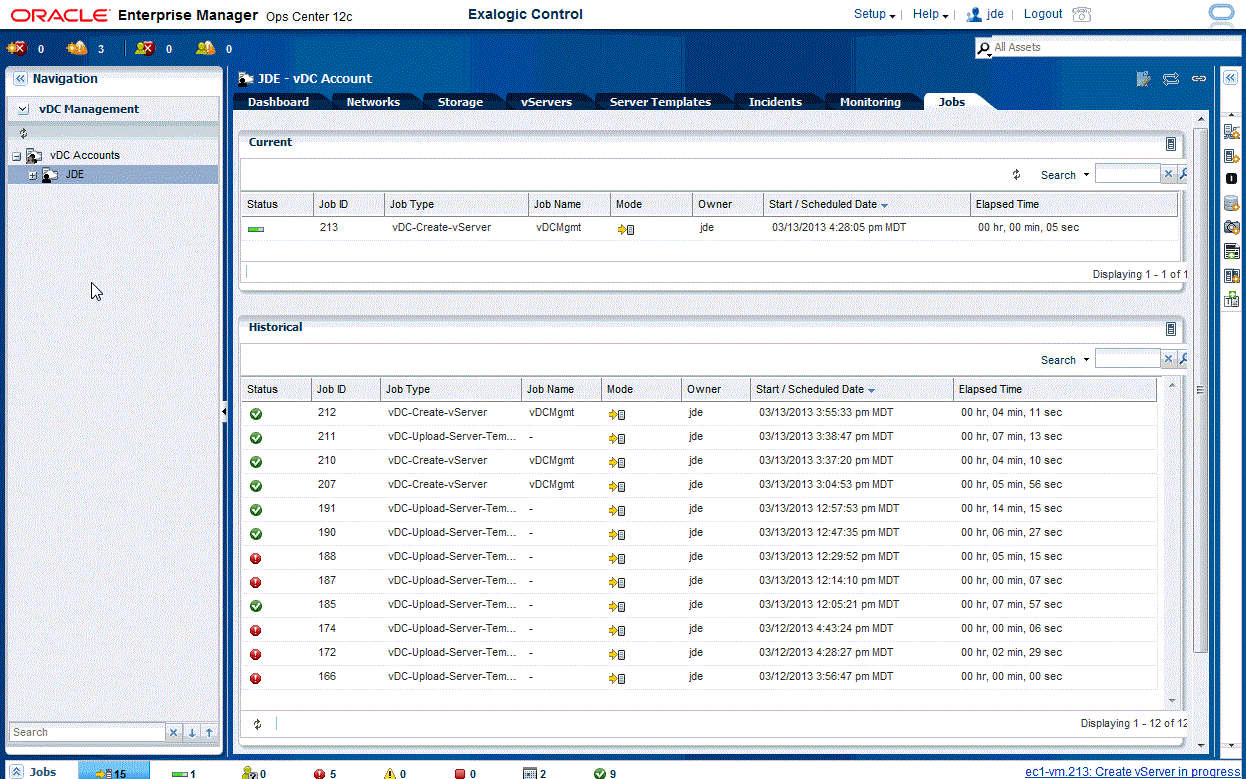
When the VM creation is complete, the new VM is displayed in the vServer tabs listing and under the account (JDE in the example shown below) in the left hand menu of EMOC.
