6 Phase Six - Upgrade the Production Environment
This chapter contains these topics:
-
Section 6.3, "Sign on as JDEINSTAL to Access the Software Upgrade Menu,"
-
Section 6.6, "Run Special Application Jobs, and Perform Post Upgrade Tasks, Upgrade Reports,"
Note:
Do not start this phase until you are satisfied with the performance of the upgraded alternate environment.6.1 Overview
This phase details all steps needed to upgrade your A9.3 production environment to A9.3 Update 1 ONLY.
If your production environment is A9.3, continue with the Pre Upgrade Application and Technical Instructions step and the remainder of Phase 6 of this guide.
Caution:
If your production environment is A7.3, A8.1, A9.1 or A9.2, do not use Phase Six of this guide. Instead, use Phase Six of the JD Edwards World Upgrade, Version A9.3.6.2 Pre-Upgrade Application and Technical Instructions for the A9.3 Production Environment
6.2.1 Run Integrity Reports
Run all standard integrity reports to ensure that all critical files are in balance before starting the upgrade.
6.2.2 Accounts Payable
The F04571, F04572, and F04573 files are cleared in your data library as part of the upgrade process. If you have open payment groups, you need to use the Undo key to remove payments that cannot be completed before the upgrade.
6.2.3 Contract Billing and Service Billing
All Invoice Generation and Journal Generation processes must be completed before starting the upgrade process. After you complete these processes, the F48910 and F48911 work files are empty.
6.2.4 Check for DDM Files
DDM files cannot exist in the data libraries. You need to convert for the upgrade to work successfully. Use the WRKDDMF command to check for DDM files. If any exist, delete the files using the DLTF command.
6.2.5 IBM Journaling
IBM Journaling must be turned off on files that are part of the upgrade plan before you start the A9.3 Update 1 upgrade.
6.2.6 Database Audit Manager and Other Triggers
Deactivate Triggers in Database Audit Manager. Access G946 option 4 and verify if any files have the Status *ACTIVE, if yes, then enter a 5 in front of each file listed to turn the trigger off. If you have Option 7, Deactivate All Configurations, on menu G946, you can use this option.
Note:
Triggers cannot be turned off or on if the file is locked.To identify other triggers, use the PRTTRGPGM command to produce a report. Use the RMVPFTRG command to remove triggers from the files.
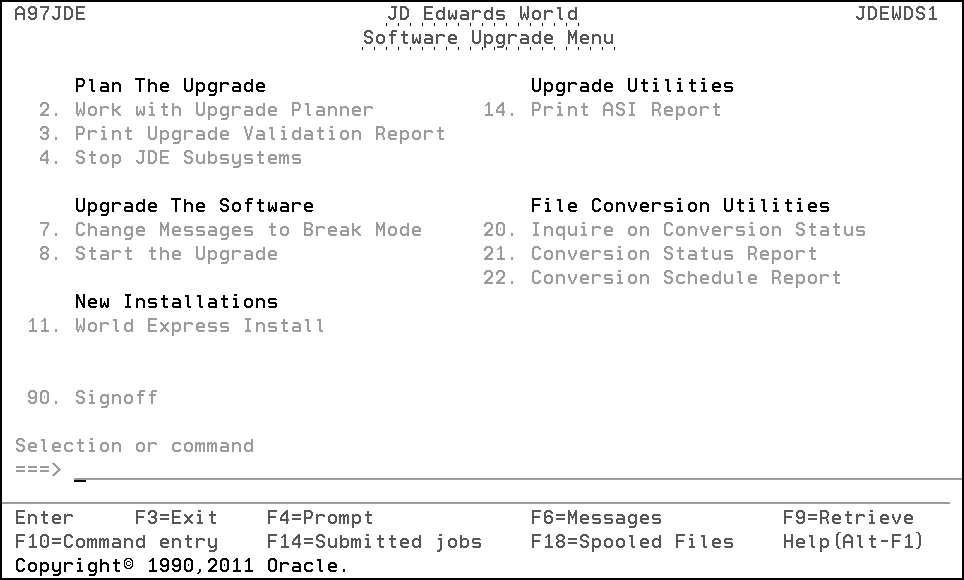
6.3 Sign on as JDEINSTAL to Access the Software Upgrade Menu
6.3.1 Set Up an Upgrade Plan for the Production Environment
You must create an upgrade plan that is based on the ZJDE model plan. In addition to the setup instructions given for the upgrade planner in Phase One, follow these guidelines.
-
Inquire on the ZJDE upgrade plan and add a new plan to upgrade your production environment to A9.3 Update 1.
-
Change the library names to match the libraries in your production environment. For instance, type the name of the common library that is in your production environment in the Library Name field for library type COM.
-
The Install Source Library and Install Object/Data Libraries fields must be set to 1.
-
Leave the Production LSF Library line blank.
-
Verify the library names on the Merge Information screen. JD Edwards World recommends that you do not change the merge modes.
-
The settings on the Data Dictionary Field Ownership screen must be the same as the plan used to upgrade the alternate environment to A9.3 Update 1.
-
Run the Upgrade Planner Validation Report (R96004YR) to validate this upgrade plan. Be sure that your plan does not have errors or duplicate files before you continue to the next item. Use *UPD for the 4th processing option.
6.3.3 Sleeper (required)
-
From the Software Upgrade Menu (A97JDE), select Stop JD Edwards World Subsystems.
-
From the Stop JD Edwards World Subsystems menu, select Sleeper.
6.3.4 Order Processing (If Installed)
-
From the Stop JD Edwards World Subsystems menu (A97JDE2), select Order Processing (If Installed).
-
Enter the name of your Order Processing subsystem, and repeat this step for each additional subsystem you may have.
6.3.5 Human Resources (If Installed)
-
Be sure your Human Resources monitor has finished processing any history entries.
-
After processing completes, from the Stop JD Edwards World Subsystems menu (A97JDE2), select Human Resources Management (if installed).
-
Enter the name of your Human Resources subsystem, and repeat this step for each additional subsystem you may have.
6.3.6 Back Up Libraries
Back up all libraries that appear in the upgrade plan for the production environment.
6.3.7 Be Sure Users are Not Accessing the Libraries You Want to Upgrade
Perform the following procedure for any common, production, object, and security libraries you want to upgrade.
-
On the command entry line, type WRKOBJLCK, then press F4 (Prompt).
The Work with Object Locks screen appears.
-
In the Object field, type the production data library name.
-
In the Library field, type QSYS.
-
In the Object Type field, enter *LIB.
-
Repeat for each library you want to upgrade.
6.4 Start the Upgrade and Track Progress
6.4.1 Start the Upgrade
-
From the Software Upgrade Menu (A97JDE), enter DSPMSG JDEINSTAL to display messages issued during the upgrade process for the alternate environment.
-
Press F13 to clear all of these messages.
-
From the Software Upgrade Menu (A97 JDE), select Start the Upgrade.
-
In the Upgrade Type field, enter *UPD.
-
In the Plan Name field, type the name of the upgrade plan that defines the environment you want to upgrade.
MULTI-PLANS: If you are upgrading more than one environment (multiple plans), enter a plus character (+) in the second Plan Name field, press Enter and then enter the additional plans in the fields provided.
-
In the Source Media field, type *SAVF.
-
In the Current JDE Release Level field, type A93.
-
In the New JDE Release Level field, type A93PC00001 for Single Byte or A93PC000X1 for Double Byte and press Enter.
This release level must match the new JD Edwards World release level specified in the upgrade plan.
-
Leave the Run Validator program field set to 1.
-
In the Product Library field, type JDEA9301 for Single Byte or JDXA9301 for Double Byte.
-
In the Update Library field, type A93PC00001 for Single Byte or A93PC000X1 for Double Byte.
-
Leave the Update Step Option field set to 0.
-
Press F10 if you want to change the Hold on job queue option.
-
After you verify the information, press Enter.
6.4.2 Track the Progress of the Upgrade
The first part of the upgrade process (PTF_STEP1) restores the software from the save files in library JDEA9301 for Single Byte or JDXA9301 for Double Byte and sends you messages as it restores the object, data, and source files to the PTF library (A93PC00001 or A93PC000X1). The following messages display:
-
PTF objects and data files have been restored and PTF source has been restored.
The second part of the upgrade process (PTF_STEP2) submits merges and converts files. These jobs run in the JDEINSTAL subsystem in separate job queues.
Note:
Step 2 halts if there are trigger programs attached to files in your alternate environment data libraries. A query report is produced listing the files with triggers attached. Use the RMVPFTRG command to remove the triggers. You can restart the upgrade by typing *UPD for the Upgrade Type and *DISK for Source Media on the Start the Upgrade command and run Step 2 only.After PTF_STEP2 completes, the upgrade process submits the following job automatically:
-
"Rebuild field reference files (FRFs) and the JD Edwards World message file (J98FRFGEN).
6.4.3 Inquire on File Conversion Status
After the PTF_STEP1 and PTF_STEP2 jobs complete, check for file conversion problems as you did in Phase Two. When you inquire on file conversion status, specify the common and production data libraries that appear in the upgrade plan you used to upgrade your production environment.
MULTI-PLANS: You must inquire on file conversion status for each plan. Specify each plan name and the associated library name. Do not check file conversion status for an upgrade plan until the associated STEP2 job has finished. The message PTF_STEP2 Completed appears for each plan where name is the name of the plan.
6.4.4 Create New Files
See Section 3.3, "Create New Files." You must create new files in the common and data libraries in your production environment.
6.5 Update Your Applications
This section explains what you must do to update your JD Edwards World system applications in the production environment.
If you were able to monitor control file changes as described in Phase One, follow the guidelines in Control File Changes Monitored.
If you were not able to follow one of the methods for monitoring control file changes, follow the guidelines in Control Files Changes Not Monitored.
Control File Changes Monitored
If you monitored control file changes, you can copy most of the control files from the alternate common library (ALTCOM) to the common or data library in your production environment. If a file can be copied, you do not have to reapply manual changes.
The control files that can be copied are as follows:
| Control File Type | Control File |
|---|---|
| Automatic Accounting Instructions | F0012 |
| Menu | F0082, F00821, F0083, F009190, F009690, F009790 |
| Data Dictionary | F9200, F9202, F9203, F9204, F9207, F9210, F9816, F98163 |
| DREAM Writer | F98301, F98302, F98303, F9831, F98310, F98311, F98312, F9835, F9836, F98361, ,F983610, F9837 |
| User Defined Codes | F0004, F0004D, F0005, F0005D |
| Software Versions Repository | F9801, F9802 |
| Vocabulary Overrides | F9220, F9601, F9601D, F9611, F9620, F9621 |
| World Writer | F8201, F8202, F82013, F82100, F82101, F82102, F82103, F82104, F82105, F82106, F82107, F82108, F82100E, F82109, F9401
Note: World Writer and Automatic Accounting Instructions are not considered control files but are files that can be copied from the alternate environment if changes were monitored. |
To copy files, sign on as JDEINSTAL and issue the CPYF command:
CPYF FROMFILE(ALTCOM/ctrlfile) TOFILE(PRODXXX/ctrlfile) MBROPT(*REPLACE) where ctrlfile is the control file name you want to copy.
Note:
The Next Number file (F0002) cannot be copied. You must apply the manual changes to the newly converted file in the common library of your production environment. Any A9.3 Update 1 Special Instructions ASIs also need to be completed.Note:
If you use system 12 (Fixed Assets) or system 83 (FASTR), and if you will be copying DREAM Writer files, you must copy the following files also.For system 12 - F12603 through F12609
For system 83 - F8303 through F8309
You must have used the dual maintenance method of monitoring DREAM Writer, FASTR, and STAR changes as described in Phase One. See the IMPORTANT NOTE in Section 1.1.4, "Monitor Changes to JD Edwards World Control Files."
Control File Changes not Monitored
If you cannot copy some or all of the control files, you must reapply manual changes to the files.
Perform all the procedures in Phase Three, with the following guidelines:
-
If you were unable to copy the Menu files, run the Menu Comparison Report, print the Menu Merge reports (R97883A, R97883B) and update menus if required.
-
If you were unable to copy the User Defined Code (UDC) files, print, or view online the UDC report (R987241) and perform the manual changes.
-
If you were unable to copy the Automatic Accounting Instruction (AAI) file, print the AAI report (R98727) and perform the manual changes.
-
If you were unable to copy the Data Dictionary (DD) files and had some of the values on the Data Dictionary Field Ownership screen of the upgrade plan set to C, use the Data Dictionary workbench to apply changes.
-
Print and perform the any ASIs pertaining to the control files you could not copy.
Note:
Any ASIs for files that are not on the list to copy need to be performed. An example is Special Instructions ASIs.-
Additional Special Instruction:
CPYF FROMFILE(templib/F74R0411) TOFILE(dtalib/F74R0411) MBROPT (*REPLACE) FMTOPT(*NOCHK).
Templib is the library you created.
-
Review the DREAM Writer (DW) Review Workbench only if you were unable to copy the DW files.
6.6 Run Special Application Jobs, and Perform Post Upgrade Tasks, Upgrade Reports
Perform the procedures in Phase Four and Phase Five with the following guidelines:
-
When the instructions ask for an upgrade plan name, enter the one you used to upgrade your production environment.
-
If you made manual changes in the data dictionary, using the Data Dictionary Workbench, run the Rebuild DD/VO from G97R6
-
If you made manual changes on menus, run the Rebuild Menu Word Search.
6.7 Start JD Edwards World Subsystems
6.7.1 Order Processing (If Installed)
-
From the Post Upgrade Menu (G97R4), select Start JD Edwards World Subsystems.
-
From the System Specific Startup menu, select Start Subsystem under ORDER PROCESSING.
-
Enter the name of your Order Processing subsystem, and repeat this step for each additional subsystem you may have.
6.8 End the JD Edwards World Monitor
After you completely upgrade your production environment, end the JD Edwards World monitor.
-
From the Post Upgrade Menu (G97R4), select Utilities.
-
From the Upgrade Utilities menu (G97R42), select End JD Edwards World Monitor.
6.9 Activate Triggers
If you deactivated Database Audit Manager triggers prior to upgrading your production environment, use option 8 on menu G946 to activate those triggers.
If you removed other triggers as a result of the PRTTRGPGM report or the query report produced by Step 2 of the upgrade, you can reattach those triggers to your files in the production environment.
6.10 Install A9.3.1 Group Software Update 1
Install either A9311 (Single Byte) or D9311 (Double Byte) to the production environment. Include your JDFDATA on the Configuration screen of the Software Update install.
Note:
A9311 is the first Group Software Update for A9.3.1. You will install the Group Software Update that is generally available on the Update Center.