Implementation Process
Overview
You can install and use the Oracle Mobile Field Service (MFS) Store and Forward Multiplatform application on Windows, iOS and Android platforms.
The implementation process involves the following steps:
-
Defining the attributes required to use the MFS Store and Forward Multiplatform application
-
Installing the application on a smartphone, tablet or laptop
-
Synchronizing with the enterprise server to download application data
Defining attributes
The following tasks must be completed prior to installing the Mobile Field Service Store and Forward application:
-
Set up profile options for Mobile Field Service.
-
Schedule concurrent programs for Mobile Field Service.
-
Create a Mobile Field Service user.
Setting Profile Options for Mobile Field Service
Profiles control various features of the Mobile Field Service Store and Forward Multiplatform application. You can set up profiles within the Windows or Self Service applications (Functional administrator: Core Services > Profiles).
The table below indicates the profile name,a brief description, the level at which to be set, and the recommended value (the default value).
Scheduling Concurrent Programs for Mobile Field Service Store and Forward Multiple Platform
The following table lists the concurrent programs that are used in the MFS Store and Forward Multiple Platforms application:
| Concurrent Program Name | Description | Default/Recommended Schedule |
|---|---|---|
| JTM Master Concurrent Program | The JTM master concurrent program runs all concurrent jobs registered by mobile applications. The JTM Master concurrent program accepts the lookup, transaction, inventory, and customer categories as parameters. | TRANSACTION: Every five to fifteen minutes. LOOKUP: Once a week or on demand. INVENTORY: Once a day. Sub programs that must be run more frequently can be scheduled into a custom category. PURGE: As often as required (once per month) |
| Manages Mobile Users | Automatically creates, removes, or updates mobile users based on assigned mobile responsibilities. | Every one hour or on demand. |
| Processes Uploaded Mobile Data | Processes uploaded mobile data and applies it to the enterprise system. | Every one minute. |
The JTM master concurrent program runs all concurrent jobs registered by Oracle Mobile Field Service Store and Forward applications. The JTM master concurrent program uses the following category types:
-
TRANSACTION
-
LOOKUP
-
INVENTORY
-
CUSTOMER
-
PURGE
For a complete description of these category types use the Mobile Field Service Administration responsibility. The Mobile Concurrent Program Summary page displays the JTM concurrent program details for all the concurrent programs related to Oracle Mobile Field Service Store and Forward. The mobile concurrent program displays how many times the program has currently run, and the maximum and the minimum times taken to finish the program.
The concurrent program screens enable you to view the status of mobile logic (PL/SQL) modules, which process the various business events for the Oracle Mobile Field Service Store and Forward applications. The mobile logic modules are grouped in various categories and the frequency of their execution is based on the category. You can change the mobile logic modules from one category to another or add a new category and hence change the frequency of execution, based on the business requirements.
These screens can also be used to understand the resources used by mobile logic modules, and identify and resolve any performance bottlenecks.
Creating a Mobile Field User
Before you can use the Oracle Mobile Field Service Store and Forward Multiplatform application you must create a mobile field service user. The Manages Mobile Users (MMU) concurrent program creates Mobile Field Service users that are assigned the Oracle Mobile Field Service responsibility.
You must specify a value for the Create Multiple Platform User parameter in the Manages Mobile Users concurrent program. This program periodically allocates resources for users that have a mobile responsibility, so there will be a delay between the time the responsibility is assigned and the change to take effect.
The MMU program has several parameters that should be specified. In case of multiple platform application users, you must specify 'Yes' for the Create Multiple Platform User parameter.
Mobile Field Service leverages existing Field Service setup to configure a mobile user. Once an E-Business Suite user is created and assigned various sub-inventories as per Field Service requirements, the next step is to provide mobile access to this user.
To create a user:
-
Select an FND user who is also a CRM resource of the type Employee.
-
Add the Oracle Mobile Field Service responsibility to this user. You can also assign custom responsibilities.
Refer Implementing Oracle Mobile Application Foundation of the 12.1.3 Mobile Field Service Implementation Guide for a description of the ASG: Enable Mobile User profile.
-
Run the Manages Mobile Users concurrent program. The following parameters must be set as 'Yes' for creating users. Default values of these parameters are Yes.
-
Create users
-
Create multiple platform user
The remaining parameters are optional as shown below.
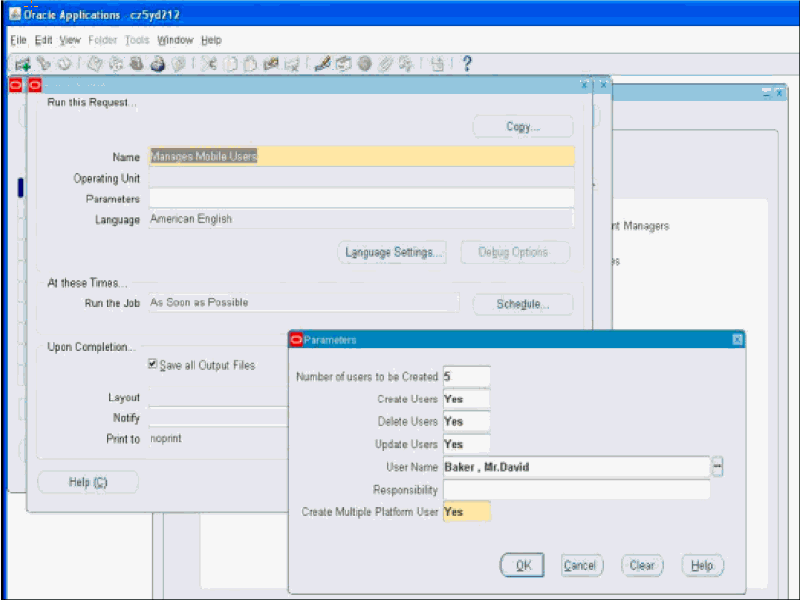
Note: If you want to create a specific user, then select a user name from the User Name LOV in the Parameters window. By default, all users with a valid mobile responsibility are created.
-
The mobile user is created after the successful completion of the concurrent program. The user is now ready to synchronize and access the MFS Multiple Platform application.
Creating Users for Mobile Field Service (Multiplatform) multi-user Laptop:
The Oracle Mobile Field Service Store & Forward Multiplatform application installed on a laptop can be configured such that it can be used by multiple technicians belonging to the same group. While the single user multiplatform laptop application is best suited for the individual Field engineer who does the break fix job independently, a multi-user laptop is useful when the business requires to save on hardware costs or when working in a highly secured environments such as defense organizations where hundreds of field operations can be consolidated into one single laptop.
Implementing the multi-user laptop feature is optional. In a multi-user laptop environment, field service users must be assigned to various field service groups. A Group consists of group owner, group administrator(s) and group member(s).
-
Field Service Group Owner refers to the seeded JTF Resource role of type field service mobility. User assigned this role can install, access MFS application and synchronize all data.
-
Field Service Group Administrator role refers to seeded JTF Resource role of type field service mobility. User assigned this role can access MFS application, synchronize all data for the multiple user laptop and view/reassign data to all members within their group.
-
Field Service Group members are restricted to view only tasks assigned to them.
To set up users and groups for a multi-user laptop:
-
Create the Mobile Field Service User (resource) using FND users.
-
Import the resources to CRM with the proper role type and the corresponding roles.
-
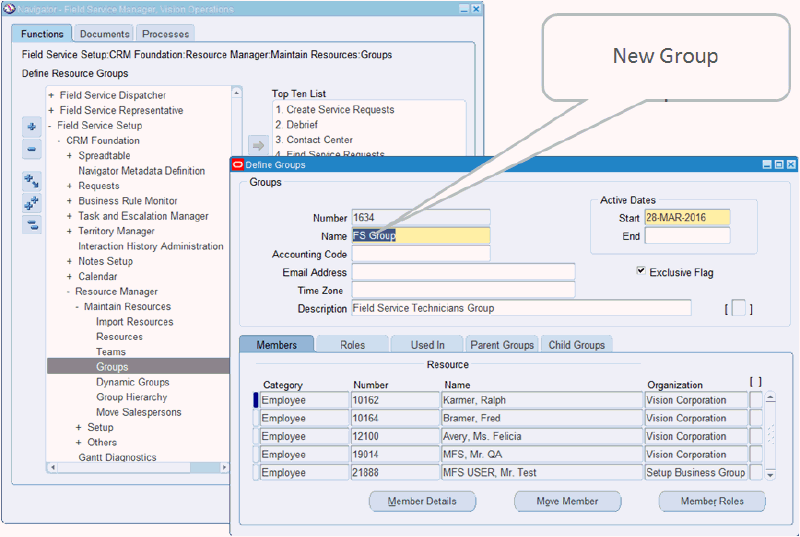
Create a group as shown in the screenshot below. While creating the group, check the “Exclusive Flag” check box.
-
Assign the role types and roles to the user using Members tab. Click on Member Roles.
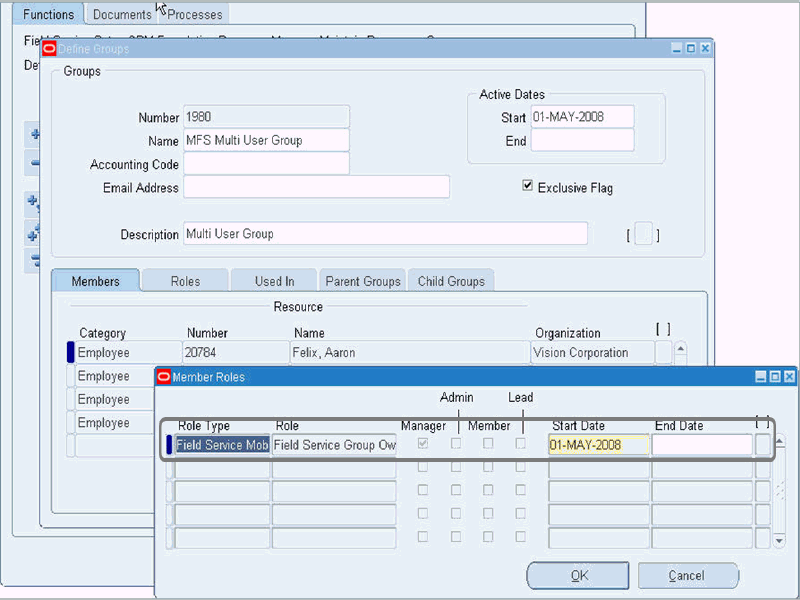
For example, if you want to create group owner, assign “Field Service Group Owner” role, if you want to create group Admin, assign “Field Service Group Administrator” role, and if you want to create group member, assign “Field Service Group Member” role.
-
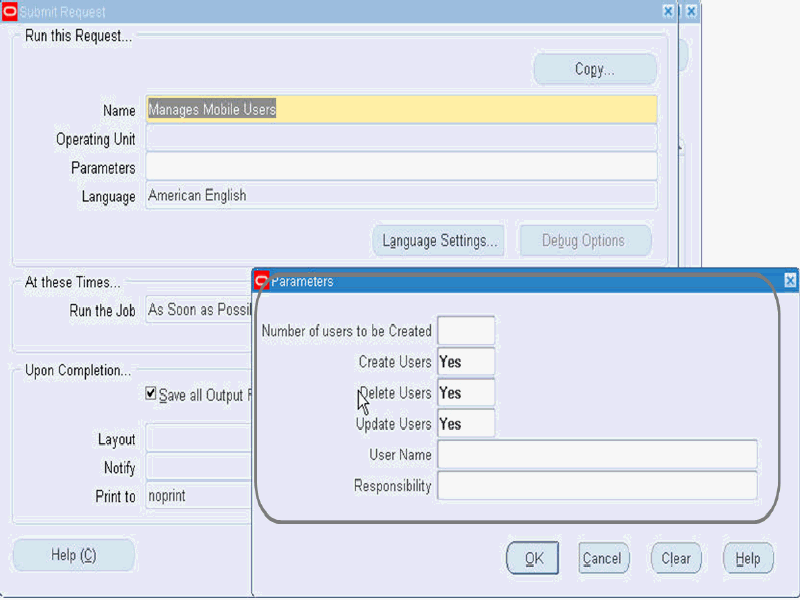
Submit concurrent program - Manages Mobile Users as shown in the screenshot below. You must set the Create Users parameter to Yes (which is the default value) in order to create new users. The additional parameters shown here provide various options to create users. For example, you may create n number of user under a specific responsibility. Or you can create an individual user by just mentioning the user name. Successful completion of this program will enable all mobile users.
-
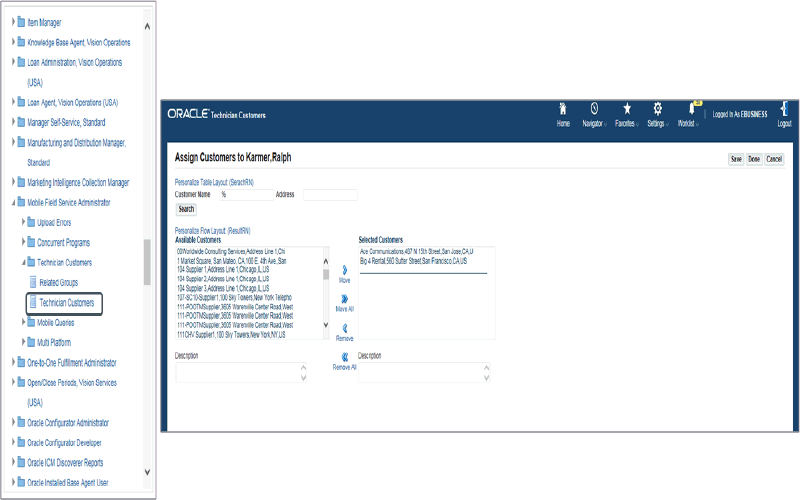
Optionally, using the Technician Customer UI, you can associate additional customer to your group. This feature allows the technician to create service request for any products installed at this customer site.
-
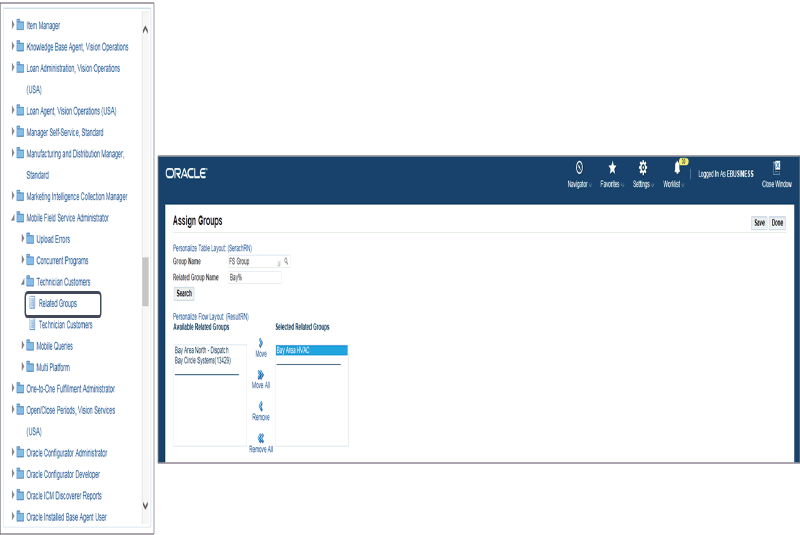
You can create relationship between two different groups. When groups are related, service requests can be transferred from one group to the second group. This is also an optional step.
-
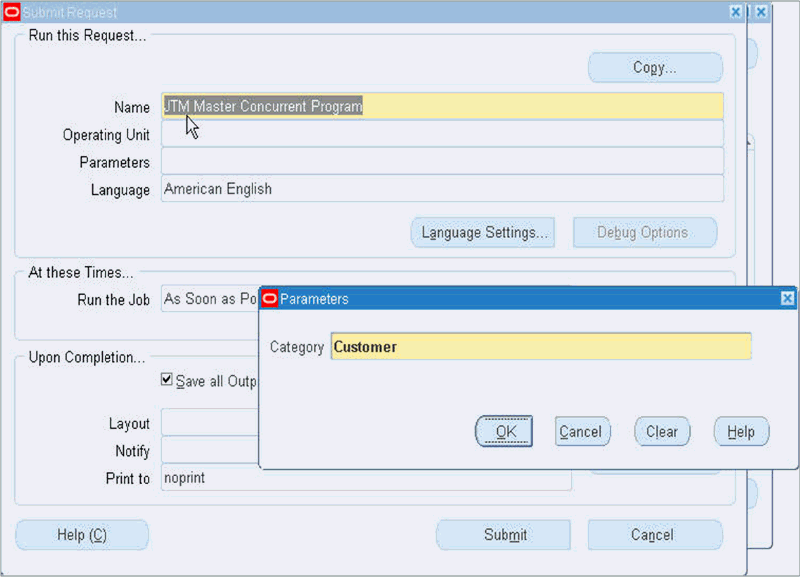
If customers have been associated with groups, submit the Concurrent Program - JTM: Master Concurrent Program with category “Customer”. This program will download the details of all customers who have been associated with the groups.
Installing the application
The following sections list the steps that must be followed to install and use the Mobile Field Service Store and Forward application. Post installation, users need to launch and synchronize the application with the enterprise system in order to download the application data.Upon successful synchronization, technicians will be able to access the application.
Installing Mobile Field Service on iOS
-
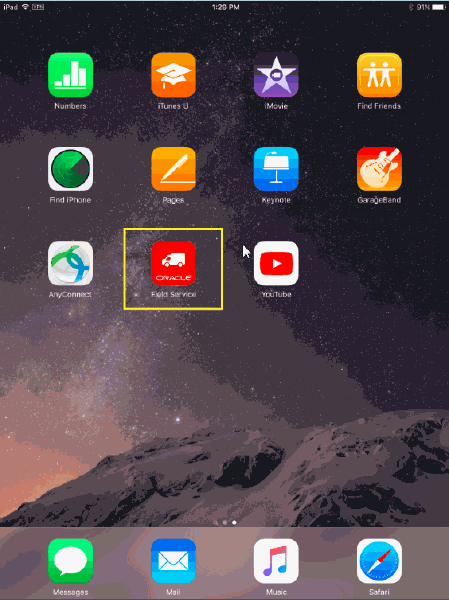
Install the iOS MFS application by downloading it from the App store. The following figure shows the UI once the application is installed on an iPad.
-
Tap the Field Service icon to launch the application.
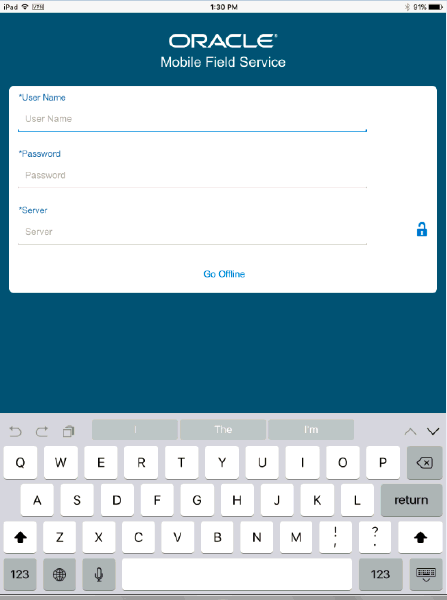
The login screen appears.
-
Enable SSL by tapping on the lock icon next to the Server text field. Once SSL is selected, the UI changes.
-
Enter the username, password, and the server information to initiate synchronization. The server field must contain both the server name and port name in the format: ServerName:Port.
-
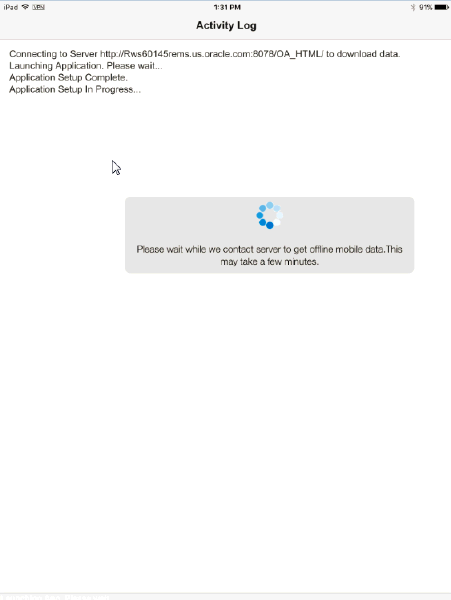
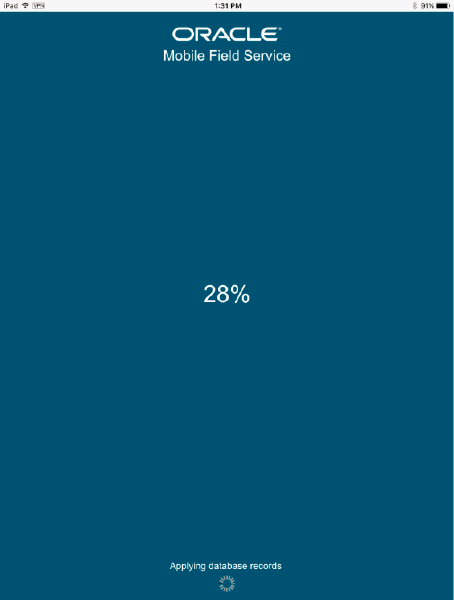
The server name and port are the same as the server name and port of the Apache URL of the EBS instance. Synchronization progresses as shown below:
-
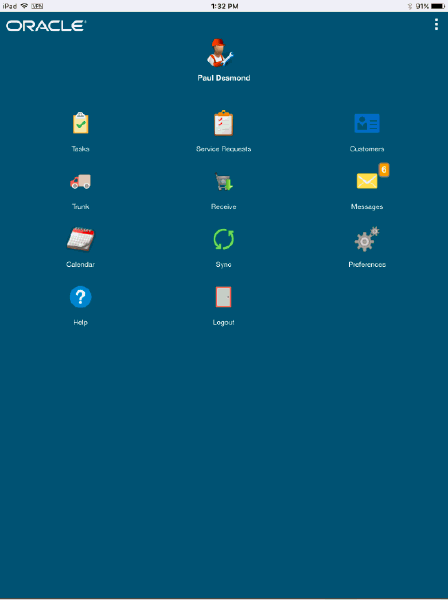
Once the synchronization process is complete, the Home screen appears.
-
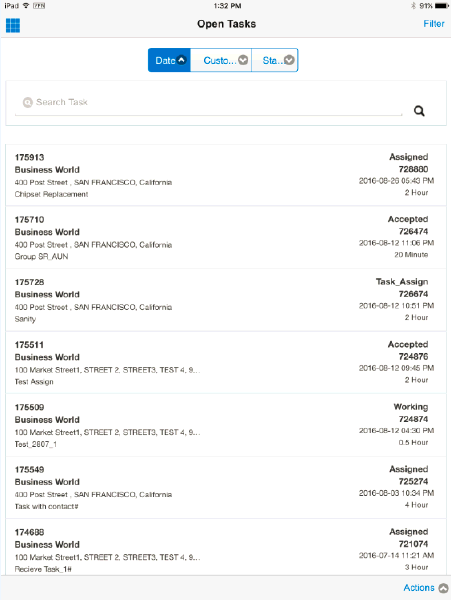
Tap the Tasks icon to access the current tasks view. Tap the Filter icon on the top right to change the view from Today's Tasks (default) to Open Tasks view.
-
Tap the Home icon on the top left to access other features of the application.
-
Tap the Sync icon to initiate subsequent synchronizations. You can change the default view in the Preferences screen.
-
To log out of the application, navigate to the Home screen and tap on Logout.

Important: While the app is downloading/installing for the first time, do NOT turn off the iOS device (by pressing the power button to put it in standby) as that will lead to a "Socket not connected" error and the install will not complete. If this happens inadvertently, uninstall anything of the MFS app that is left, restart the device and try again. This problem only happens when the device is manually turned off. It does not happen when the device goes to normal inactive mode automatically after a few minutes of inactivity (to save battery power). This is an issue in the Mobile Application Framework (MAF) layer and happens because iOS cannot process any background java threads while in hibernation mode.
-
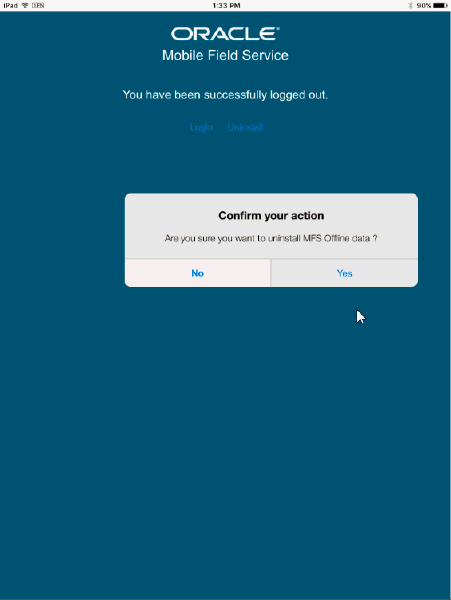
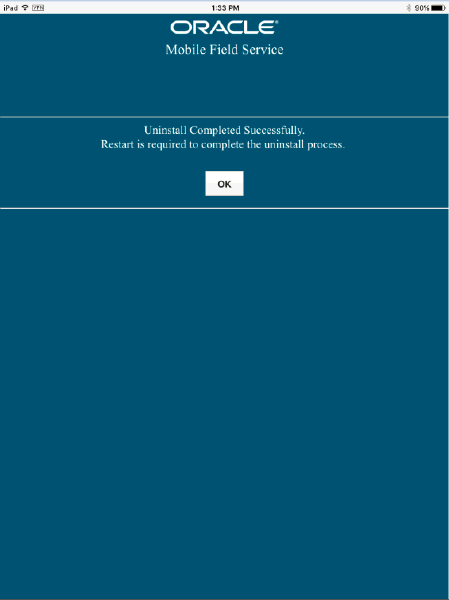
To uninstall the application, tap on the Uninstall option in the Home screen. You will need to confirm your action, following which the application will be uninstalled.
Installing Mobile Field Service on Android
You can download the Android version of the MFS application from the E-Business Suite instance.
-
Login to the personal homepage of the E-Business Suite (from the Android device) as a mobile user and select the Oracle Mobile Field Service responsibility.
-
Click on the Android icon to download and install the APK file on the Android device. Once installed, follow the same steps as in iOS.
Mobile Users can access this link directly on their Android devices and install on their mobile devices. The client application is also available for download on the Googleplay appstore.
Installing Mobile Field Service on Windows
-
Login to the E-Business Suite Personal Homepage (AppsLogin) with the mobile user, having the “Oracle Mobile Field Service” responsibility.
-
Navigate to “Oracle Mobile Field Service”.
-
Click on the windows image to download windows installer file “OMFS.msi”.
-
Install the OMFS.msi file.
Important: 32bit JRE 1.6 or higher should be installed on the machine.
-
Install visual studio 2012 redistributable "vcredist_x86.exe". This file will be present in c:\OMFS folder. This needs to be done only the first time the application is installed on the windows machine.
-
Run "OMFS.exe" or "OMFS" shortcut from Desktop and choose yes/allow in all the warnings (if any).
Additional Information: Windows platform users must note the following:
-
uninstalling data can be done by selecting the 'Logout' menu option in the applicaiton, then click Uninstall. This will remove the client database but leave the application itself. It can then be restarted to connect with a different user for example.
-
uninstalling the entire application can be done through the windows Control Panel / Programs and Features -> Mobile Field Service -> Uninstall. When it is finished, manually delete all remaining files from C:\OMFS.
Tip: In order to troubleshoot or debug:
-
Create a file “debug.txt” under c:\OMFS folder. Just create the file; it does not need to contain anything.
-
Restart the application (OMFS.exe). It will create a file console.log in C:\OMFS.
-
Collect the files files from c:\OMFS folder after reproducing:
console.log
appsdb
mfsapp”
Upgrading the MFS Application
When the MFS application is changed, a notification is sent to the technician's device with a link to the respective App store. The local database is maintained during an upgrade and the application is reinstalled.
Synchronizing with the Enterprise Server
To use the Mobile Field Service Store and Forward – Multiple Platform Support application, technicians and administrators must launch the application post installation and then synchronize with the enterprise system to download application data. Users must then synchronize regularly to receive new data that has been assigned such as new tasks. Likewise, to upload the changes that technicians make such as creating debrief lines and updating task statuses, they must synchronize the device with the enterprise system. During subsequent synchronizations, only incremental data is downloaded or uploaded. New updates, if any, to the application modules is also downloaded. The sync process is described in the previous section.
Mobile users can also set up automatic synchronization triggered by the client (ie the client decides when to initiate a synchronization based on settings). Automatic synchronization is described in detail in the Mobile Field Service User Guide.
Confirming Required Enterprise Setups
This section describes how to set up the enterprise-side system so certain mobile features work properly on the mobile computer device.
Setting Up Service Requests
The following table lists the service request setups that can be used to create, view, and update tasks in an Oracle Mobile Field Service Store and Forward application.
| Component | Required or Optional |
|---|---|
| Service Request Statuses | Required |
| Service Request Severities | Required |
| Service Request Types | Required |
| Service Request Urgencies | Optional |
| Problem Codes | Optional |
| Resolution Codes | Optional |
| Service Request Templates | Optional |
For details, refer to the Oracle TeleService Implementation Guide.
Linking Service Request Statuses to Service Request Types
Service request statuses have to be linked to service request types. Use the following procedure:
-
Switch to the Field Service Manager responsibility.
-
Navigate to
Field Service Setup > Service Requests > Request Types. -
Click to select a service request type from the table.
-
Click Related Statuses.
-
In the window, link Service Request Statuses to the Service Request Type.
-
Click Save.
-
To finish, close the window.
For more information, refer to the Oracle TeleService Implementation Guide.
Setting Up Tasks
The following table lists the task setups that can be used to create, view, and update tasks in an Oracle Mobile Field Service Store and Forward application.
| Component | Required or Optional |
|---|---|
| Task Statuses | Required |
| Task Status Transitions | Required |
| Task Types | Required |
| Task Priorities | Required |
| Task Templates | Optional |
Set up the required components listed above. For details, refer to the Oracle Field Service Implementation Guide for these Field Service-specific setups.
-
The task status that is selected during service-task-creation is the one from the Field Service profiles: CSF: Default In Planning Status. You cannot change this.
-
When a service task is created, there will be no task assignment automatically created.
Setting Up Oracle Field Service Debrief
Oracle Field Service Debrief is part of the Oracle Field Service application and is used to report all material, expense, and labor transactions. From the Oracle Field Service Debrief page, you can update inventory, install base, and charges.
When material, expense, and labor transactions are recorded in one of the Oracle Mobile Field Service Store and Forward applications, all transactions are shown and updated to inventory, install base, and charges from the Oracle Field Service Debrief.
Ensure that Oracle Field Service Debrief is fully implemented and set up as described in the Oracle Field Service Implementation Guide.
Setting Up Install Base
This procedure is only required if you are using Install Base. If so, Install Base should be set up to support Install Base updates when doing material transactions in an Oracle Mobile Field Service Store and Forward application. This should be set up after performing the setup steps necessary for debrief reporting.
An Oracle Mobile Field Service Store and Forward application supports two scenarios that affect Install Base:
-
Removing a part
-
Installing a new part
The following procedures are required to set up Install Base:
-
Setting up system items for Install Base transactions
-
Setting up Install Base profile options
-
Removing and installing parts in Oracle Mobile Field Service Store and Forward - Laptop
See Appendix A Item Handling for the Oracle Mobile Field Service Store and Forward Applications for complete details.
Note: Changing the install base replication profiles during operation becomes effective when the value is changed. Information will not be changed with retroactive effect based on the profiles.
Setting Up Counters
The set up of counters is only required if you are using Install Base. The following are the setups for counters that must be performed to report counter readings in an Oracle Mobile Field Service Store and Forward application:
-
Counters
-
Counter groups
-
Counter properties
-
Miscellaneous reading types
Refer to the Oracle TeleService Implementation Guide.
Note: Only counters of type REGULAR are supported by the Oracle Mobile Field Service Store and Forward applications. Both counter values and counter property values can be entered in an Oracle Mobile Field Service Store and Forward application.
Setting Up Messaging
Confirm that Messaging has been successfully installed and implemented.