Oracle Mobile Field Service (S&F) Multiplatform - Laptop Edition
Introduction
This section describes some additional features that are available only on the laptop edition of the MAF based Store & Forward Multiplatform application such as:
-
Multi-user access
-
Enhanced Field Service Technician Dashboard
-
Mobile Administrator UI
-
Customer and asset data download
-
Data integrity, synchronization and privacy in a multi-user laptop
-
Flexfield support
-
Customization support
-
On-Hand Inventory Report
Single User Laptop
Laptops that have the Oracle Mobile Field Service (S&F) Multi-Platform application installed can be used either by a single user or a group of users. Single user laptop is best suited for the individual field engineers who work independently. Only those data (such as tasks, parts order and associated data) pertaining to the engineer are downloaded to the laptop. If a second technician wants to use the laptop, then they have to uninstall the previous engineer's data and load the new data.
Multi-User Laptop
Setting up a multi-user laptop provides technicians the ability to share the laptop with more than one user without uninstalling the previous client data. This solution is especially useful in an environment with very strict budgetary constraints or in a highly secured environments such as defense organizations where hundreds of field operations need to consolidated into one single laptop. In a multi-user laptop scenario, a group of field service users needs to created along with a field service owner/administrator who manages the group. Following are some of the features of a multi-user laptop:
-
Field Service Owner/Administrator manages the group
-
Administrator monitors the group activities. Administrator can also transfer the service request to a different group.
-
Field Engineers can open service request against any product
-
Group consists of group owner, group administrator(s) and group member(s).
-
Group owner has ability to download, install and activate MFS application
-
Group administrator has the ability to view and reassign tasks to the group members
-
Group members are restricted to view only tasks assigned to them
-
Setting up a multi-user laptop:
As multiple users can use the same laptop to access the application, the following implementation steps must have been completed prior to installing and accessing the multiplatform application on the laptop:
-
Field Service responsibility must have been assigned to each user
-
Users must be assigned to the multi user group using CRM foundation
-
The following member roles must be assigned to every user:
-
Field Service Group Owner
-
Field Service Group Administrator
-
Field Service Group Member
-
-
The Manage Mobile User concurrent program must have been run to ensure that mobile users based on their assigned roles are created.
These steps have been described in detail in the Oracle Mobile Field Service Implementation Guide. The sections that follow describe the additional features on the laptop edition in detail.
Using the Mobile Administrator User Interface
Field Service Administrators manage the flow of work assigned to a group of field service technicians. In addition to all the common features and functionalities of the Mobile Field Service Store & Forward Multiplatform application, technicians with Field Service Group Administrator role can access the Mobile Administrator Dashboard in the laptop installation to accomplish the following:
-
authenticate users that belong to their groups
-
schedule a newly created task to one of the group member
-
view the task assignments of all their group members
-
reassign the task among the group members
-
update the task on behalf of their group members
-
synchronize data between server and the device
Prerequisites
- The Mobile Field Service Administrator/Group Owner must: .
-
install the application
-
authenticate each user that belongs to the group by his/her own user login credentials. Note: Each user will sign in with his/her enterprise user id and password
-
sync the application. Data such as Group Details, Member Details, Service Requests and Tasks associated with each member are downloaded when the Group Owner installs the application and syncs it for the first time.
Incremental data changes for every group member are automatically uploaded to the server whenever there is network connectivity. Similarly, any assignment (for any resource) is downloaded to the client.
To use the Mobile Administrator Dashboard
-
Launch the application to access the login screen.
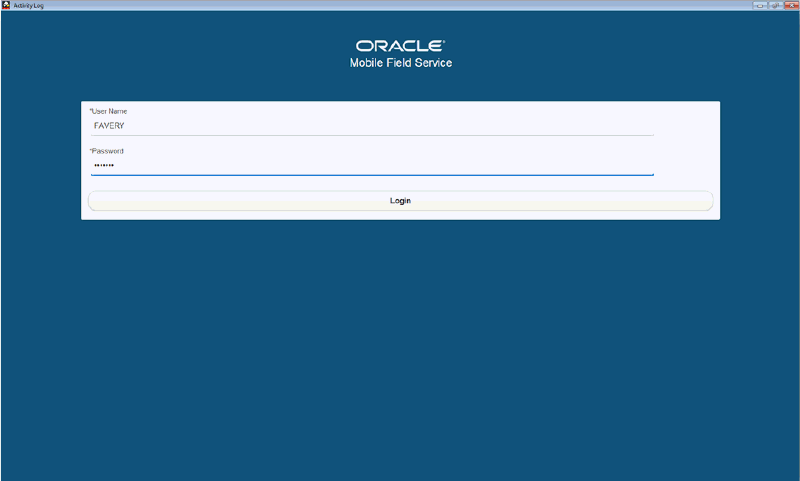
Enter the user name and password. Based on the role, appropriate screens are rendered. For instance, for users with group owner and administrator role, the Mobile Administrator Dashboard is launched. For other users, the Field Service Technician Dashboard will be launched.
-
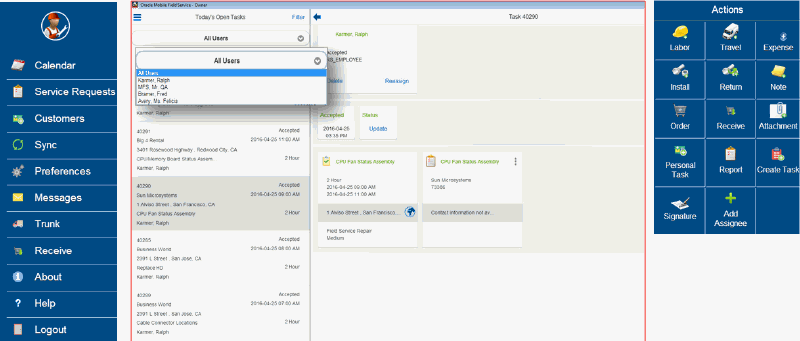
The Mobile Administrator Dashboard screen allows the administrator/group owner to manage their group. It has the following components:
-
The main panel displays tasks belonging to each member.
-
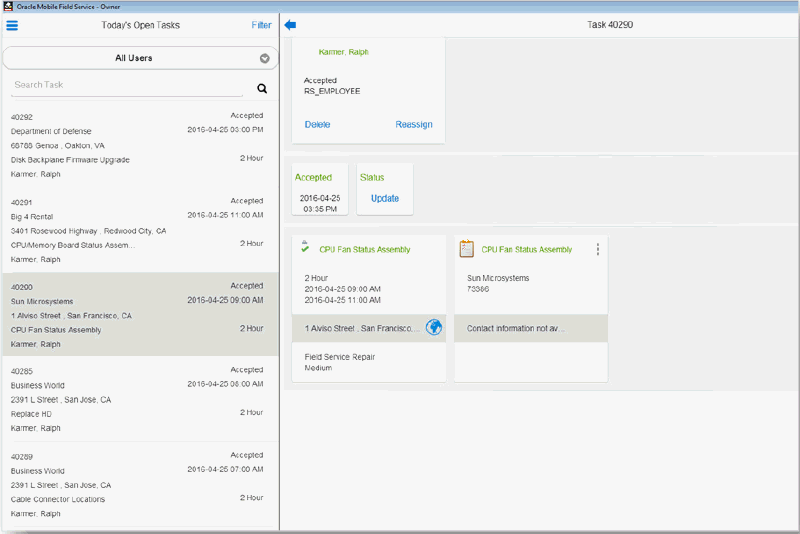
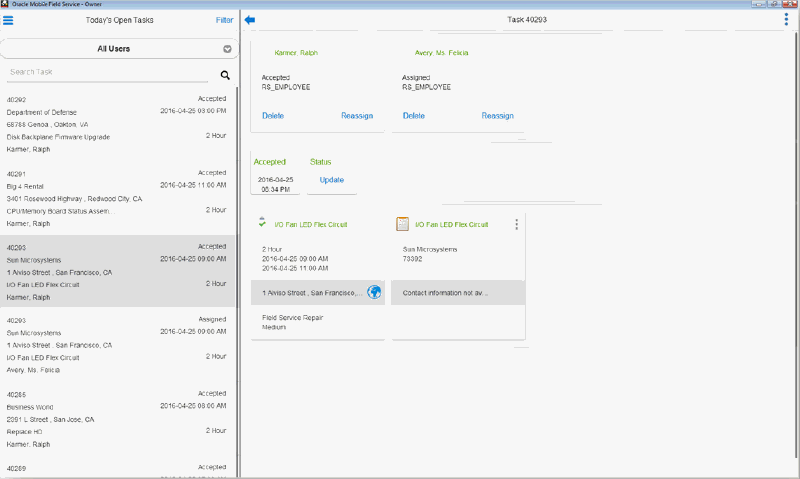
A task list that displays a list of all the tasks assigned to various members of the group. It displays the name of the resource that is currently assigned to the task. Two task records will be displayed in the task list if the task has been assigned to more than one resource. On the right frame, the top swim lane will then display more than one infotile
-
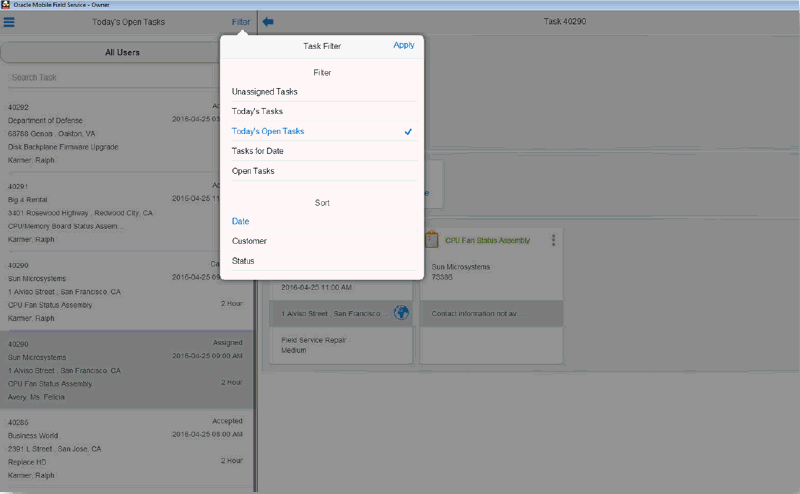
A task filter that allows you to choose the type of task query you want to perform. For example, "Todays Task" query display all tasks that are assigned to the field engineer, "Unassigned Task" which shows all tasks that are created in the client but not assigned to anyone yet.
-
An All Users filter to narrow down the task list based on individual member/resource.
-
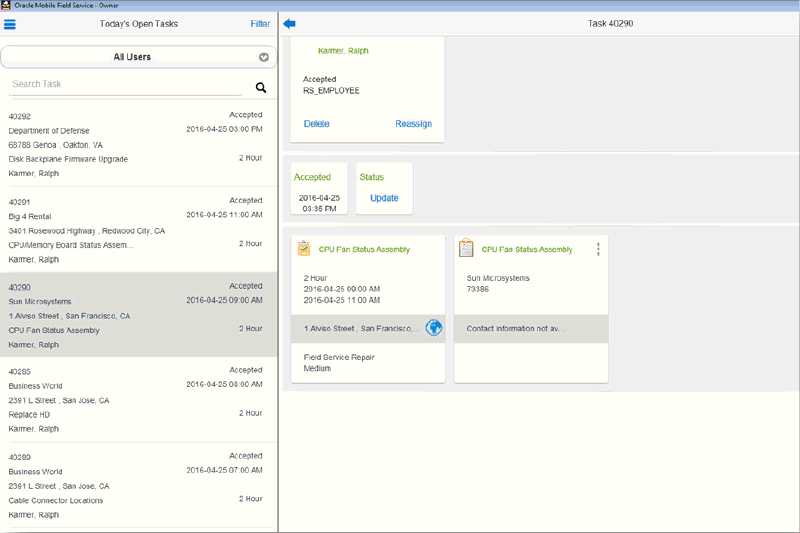
Details of the task assignment are displayed on the right side of the task pane when a particular task assignment is selected.
-
A Reassign button on the task details infotile that allows the administrator to reassign the task to a different user. The existing task assignment is then cancelled and a new task assignment is created for the new resource.
-
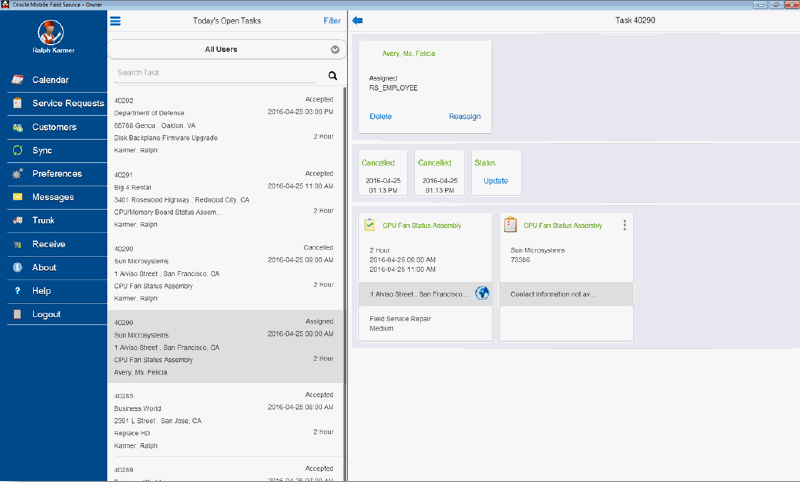
A slide out menu on the left side to access the home screen. Home screen allows you to perform additional tasks such as viewing the calendar information, customer details, trunk stock, receiving parts, creating service requests and syncing the application.
-
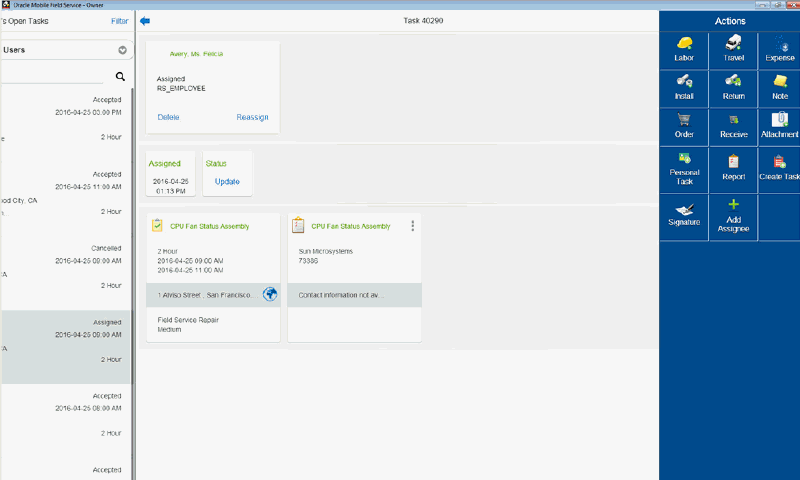
An Actions menu on the right side that allows the administrator/group owner to fulfil various task-related activities such as adding travel, material, expense, and labor debrief, creating notes and so on.
-
-
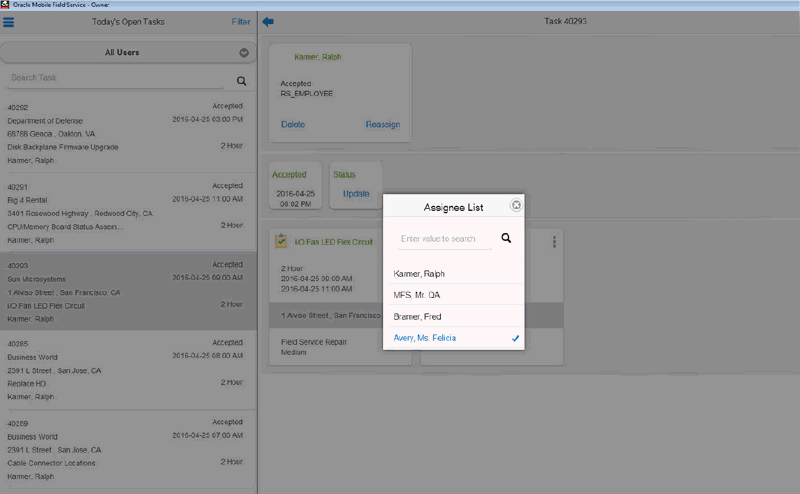
Mobile Field Administrators can add additional resources to a task. To add an assignee, select the task and then click on the Add Assignee option in the Actions menu. A pop-up window is launched displaying the list of resources who are the members of that group.
-
Select the appropriate technician name and the new resources will be automatically created. Once you add the additional resource, the task list will display a task record for the newly added resource The two assignees are now displayed in the right frame. Also, two active task records will be displayed in the task list.
Download Customer and Asset Data
When the Field Service Group Administrator or Group Owner syncs the multiplatform client device with the enterprise server, all the customer and equipment data associated with all the technician is downloaded to the device. This allows the field service technicians to access the list of customers and assets assigned to them so that they have the ability to create an ad-hoc service request for that customer when needed.
The following details are downloaded:
-
Customer data must include all Contacts and Addresses for the Customer being downloaded. Customers are TCA Organization and Person Parties. Contacts are the Person Parties associated to these Customer Parties with the “Contact of” relationship type. Addresses are the Party Sites and Locations associated to these Customer Parties.
-
Equipment data must include the Asset/Product records in the Installed Base that are owned by the Customer Parties being downloaded.
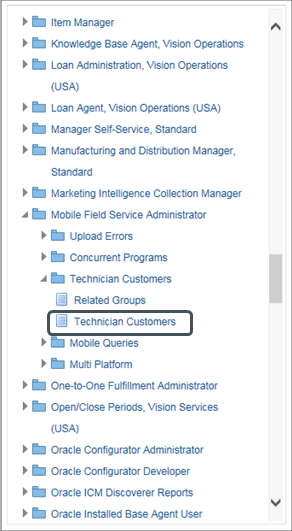
To assign customers to the field service technicians in your group, use the Assign Customers screen in the Enterprise Server as shown below.
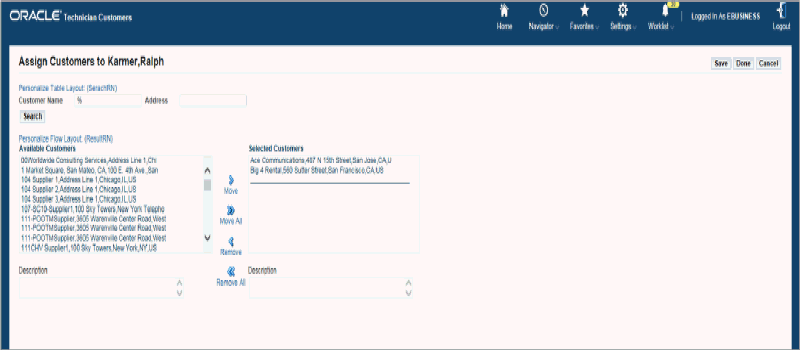
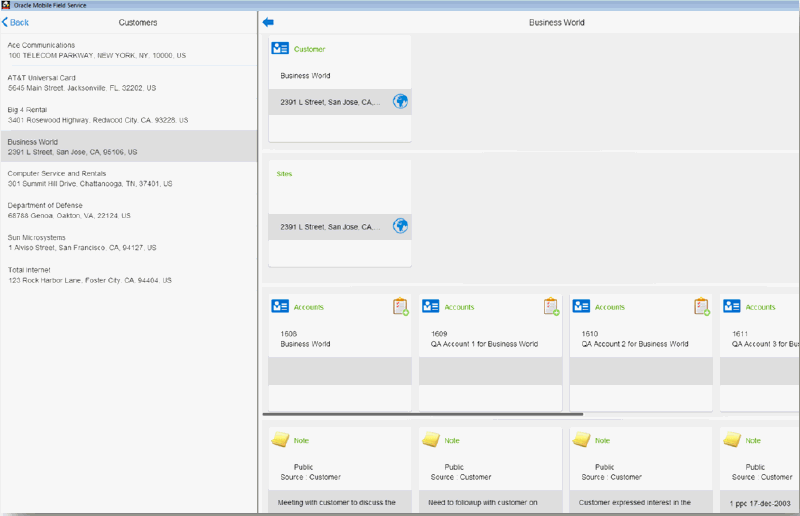
During the next sync, all those customer details are downloaded and displayed in the customer screen.
Reassign Service Request
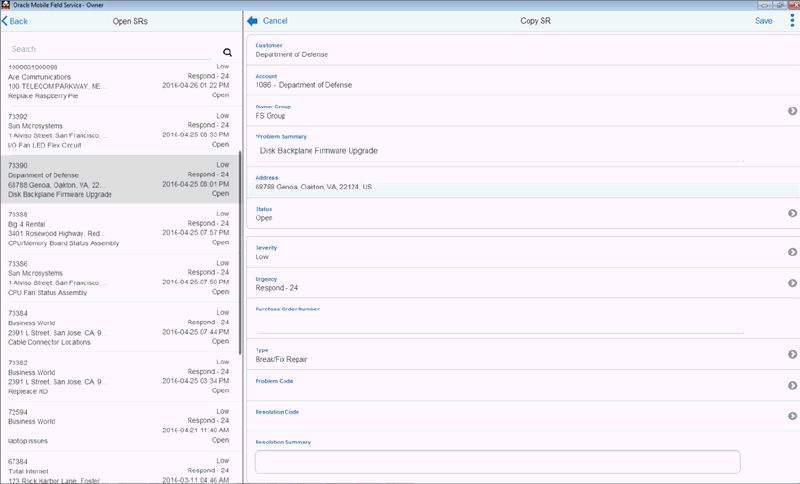
In a multi-user laptop scenario, the field service administrator/group owner can transfer the service request assigned to the field service technician in their group to another group when the technicians do not have the expertise to perform the job.
Using the Field Service Technician Dashboard
Field service technicians with the Field Service Group Member role can access the Field Service Technician Dashboard using their unique user id and password. The functionality available to the field service technician is described in detail in the section Using Oracle Mobile Field Service Store and Forward – Multiplatform. This section provides snapshots of the dashboard as rendered on the laptop. It also provides information on some additional functionality that is available only in a multi-user laptop.
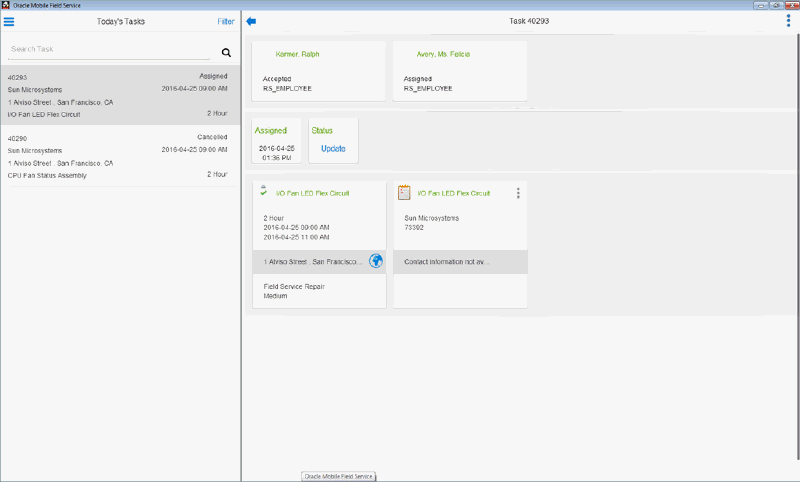
Field Service technicians unlike the Mobile Field Service Administrator do not have access to features such as Task Reassignment and Add Assignee.
To use the Field Service Technician Dashboard
-
Launch the application and login using your unique user id and password. In a multi-user laptop, data relevant to only the technician logging in will be downloaded and displayed in the dashboard.
-
To create a service request and task, launch the Home screen from the task list.
-
Click the Customers link. The customer list will be displayed in the left frame.
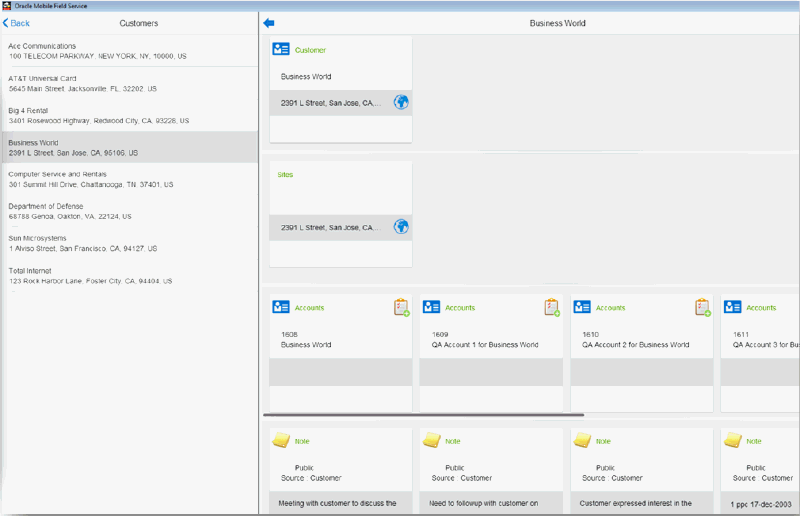
Customer list displays all customers that have open service requests and tasks assigned to them. Optionally, technicians can download additional customers with whom they work closely in their territory.
-
Select the customer from the list. Various customer attributes such as customer name, Site, Accounts, Product Installed, and existing open service requests are displayed in the right frame.
-
Click the create service request icon (plus icon ) located near any one of these attributes. The Create Service Request UI is launched. Enter all required fields and save the service request.
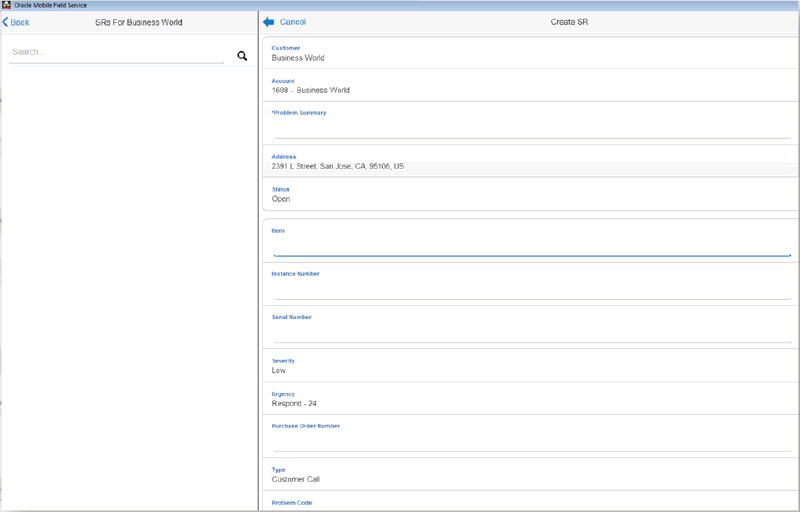
-
The service request details will be displayed in the Service Request summary region. Field Service technicians can now do the following: Create a new task for this service request.
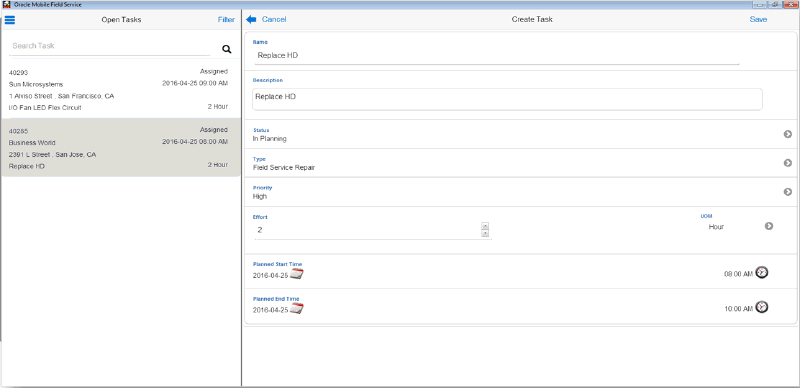
-
Once the task is created, the field service technician can click on the slide menu icon on the top right of the task details screen to launch the Actions menu to perform other task related activities such as adding debrief lines, notes, attachments, ordering parts, creating personal or follow up tasks and capturing the customer signature.
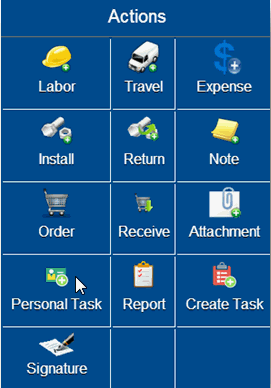
Additional Information: The ability to create a service request/task for customer/asset downloaded to the laptop is available only in a multi-user environment. In a single user environment, the field service technician will access their task list and perform the actions highlighted below.
-
To add a labor line, click on the Labor icon in the Actions menu. Add Labor screen is launched with default information in most of the fields. Change the values as required. Save the record. A new labor line will be displayed the summary on the left frame.
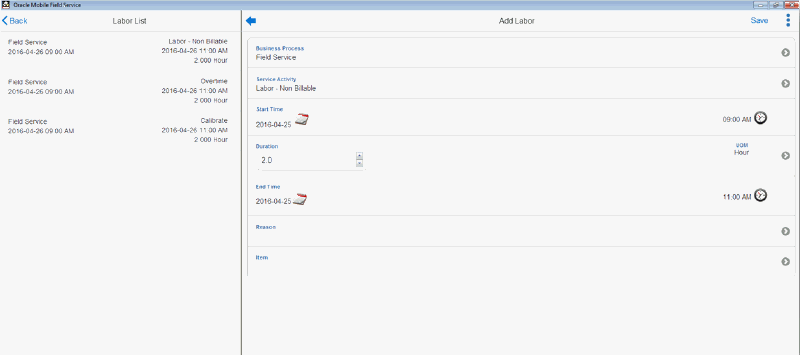
-
Click Install to add a material line to the task.
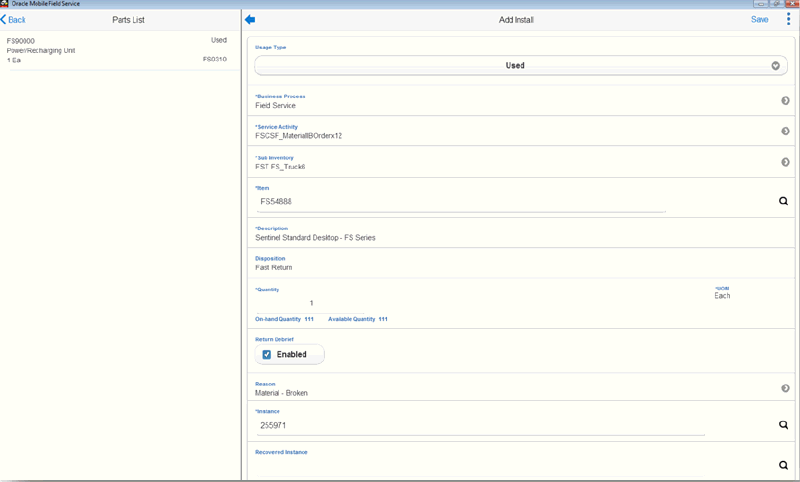
-
Click Return to create a material return for the task.
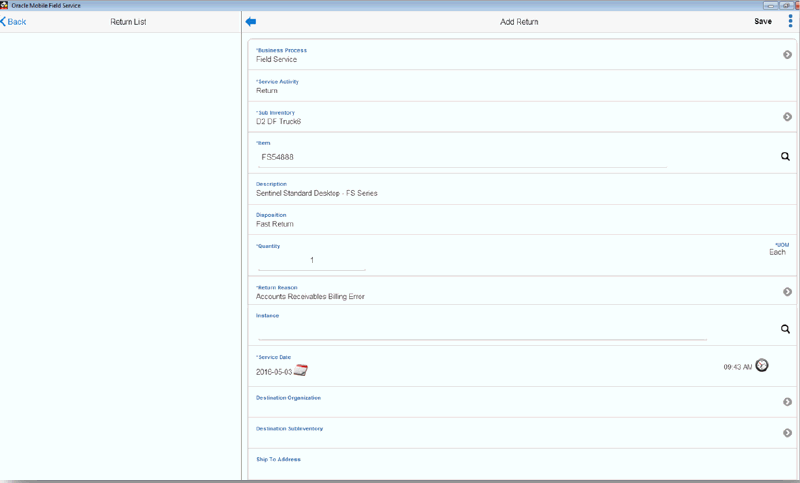
-
Click Expense to create expense debrief for the task.
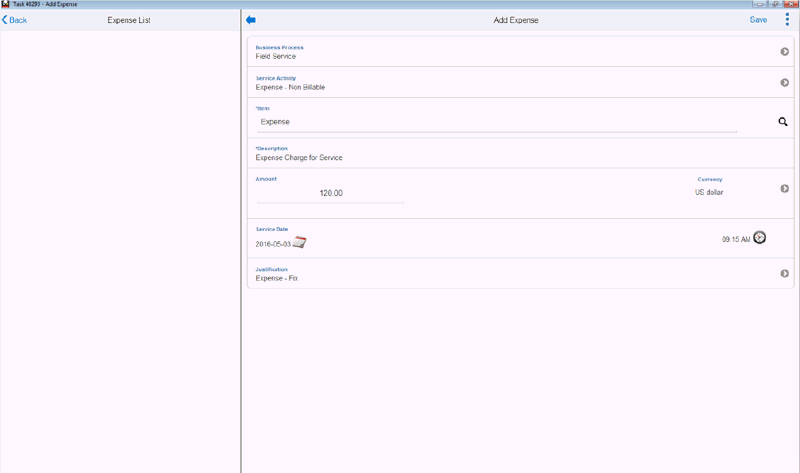
-
Click Report to launch the Field Service Report and review the action summary.
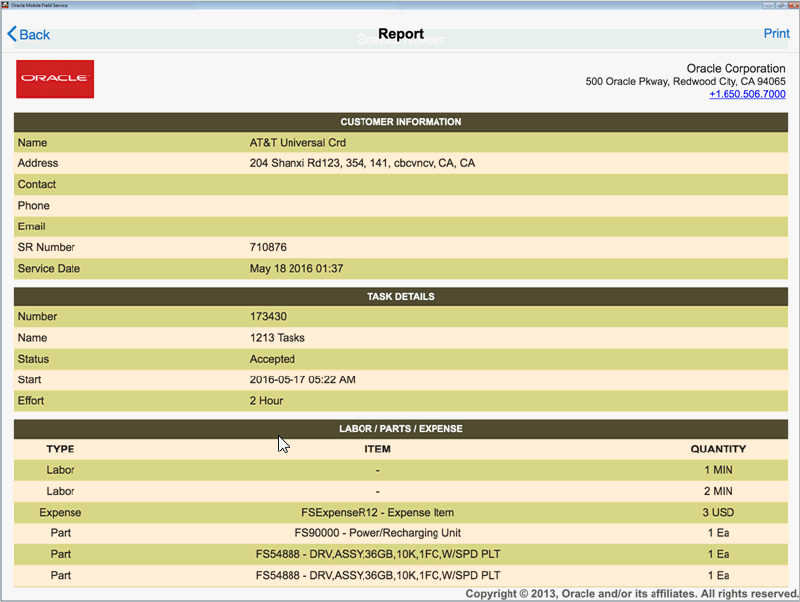
-
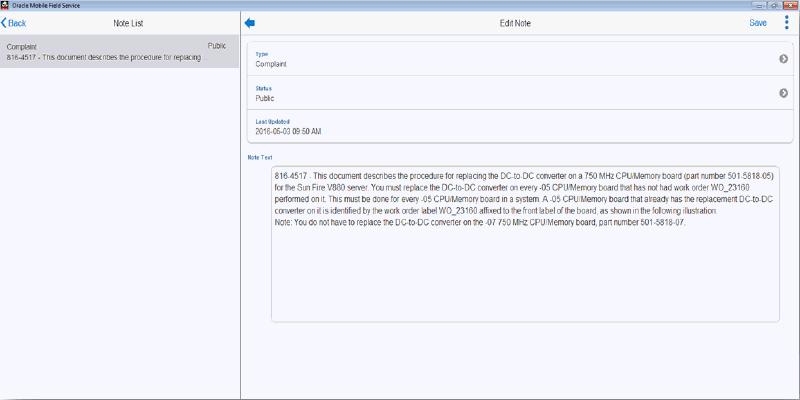
To add a note to the task, click Note.
-
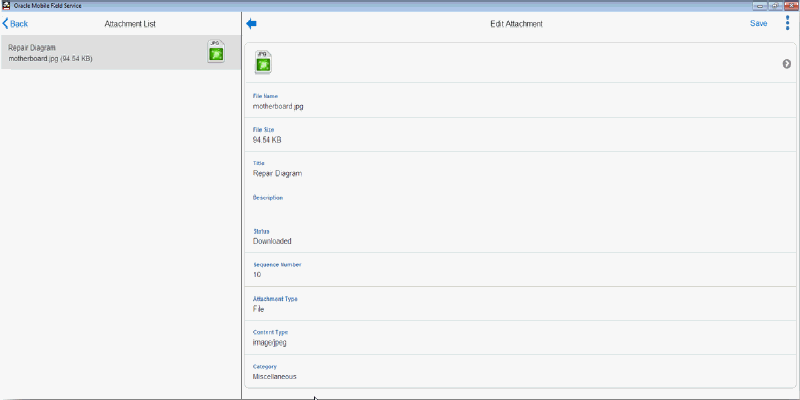
To attach photos, videos or web urls, click on Attachment.
-
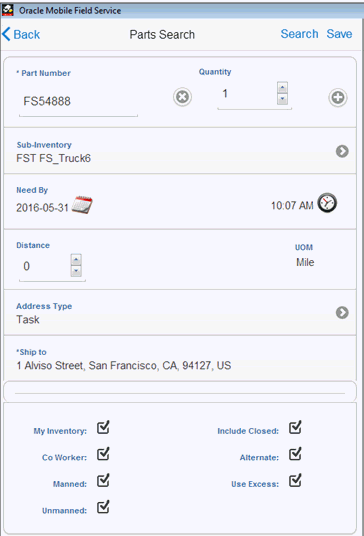
Click Order to search for parts and create parts requirement.
-
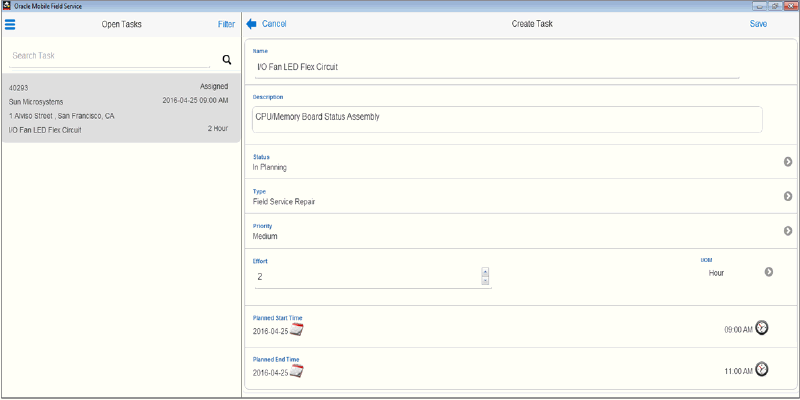
Click Create Task to create a follow-up task.
-
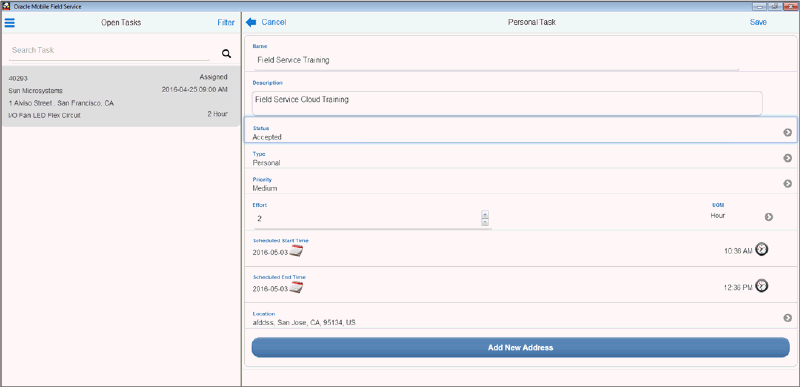
To record personal time, click Personal Task.
-
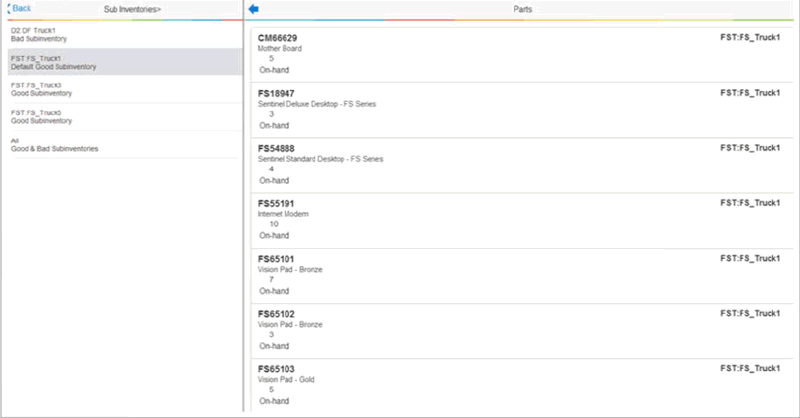
To view the trunk stock, click on the Trunk option in the Home page menu.
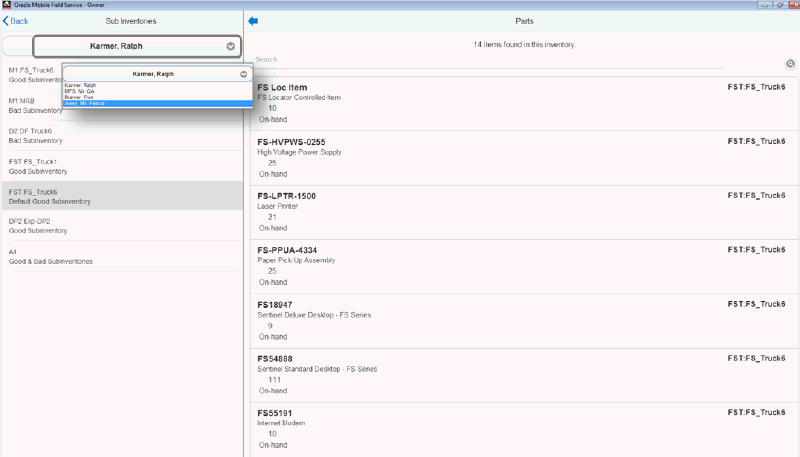
This screen renders slightly different for Mobile Field Service Administrators/Group Owners. In the Administrator Dashboard, users can query each technician's trunk using filter as shown in the screen below. This filter option is not available in the Technician's responsibility.
-
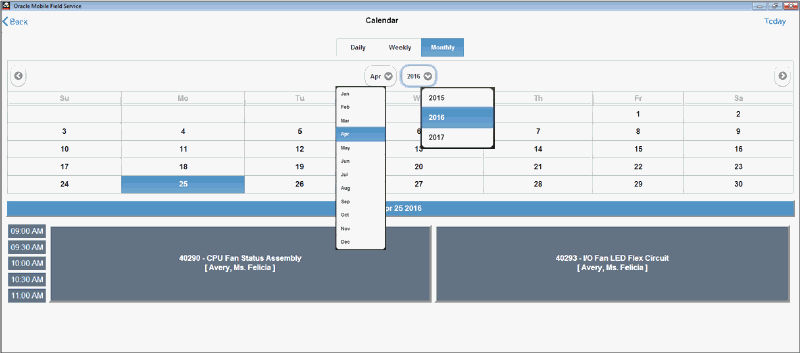
The Calendar feature present in all form factors of the multiplatform application provides field service technicians with the ability to view the field service tasks in Calendar view. Technicians can view a snapshot of their daily, weekly, or monthly tasks. To open the calendar, click on the Calendar option in the Home screen menu. You can also set Calendar as the default home page.
Left frame of the calendar screen shows following calendar views: Daily, Weekly, and Monthly. Upon tapping one of the menu item, corresponding calendar page will be displayed on the right frame. In the Weekly and Monthly sections, dates that are colored light blue have tasks that are scheduled. In a Day's time table, green colored tasks are Personal Tasks and the light blue ones are Field Service Tasks. Time table shows time in 30 minute blocks consecutively right from start time of the first task till the end-time of the last task for the day.
