4 Syslog Collection Cartridge
This chapter contains information for creating and configuring the Oracle Communications Offline Mediation Controller Syslog Collection cartridge (CC) to collect syslog files from multiple devices.
Creating the Syslog CC
To create the Syslog CC, complete the following steps:
-
In the Offline Mediation Controller Administration window, go to the Nodes on Mediation Host panel and click New.
The Create a Node window appears.
-
Select the Voice over IP (VoIP) service solution and click Next.
-
Select Collection Cartridge (CC) and click Next.
-
Select Syslog Collection Cartridge and click Finish.
The node configuration window appears. To configure the Syslog CC node, see "Configuring the Syslog CC".
Configuring the Syslog CC
To configure the Syslog CC, complete the following steps:
-
In the node configuration window, enter a name for the node and accept the default rule file.
-
On the General tab, accept the default settings.
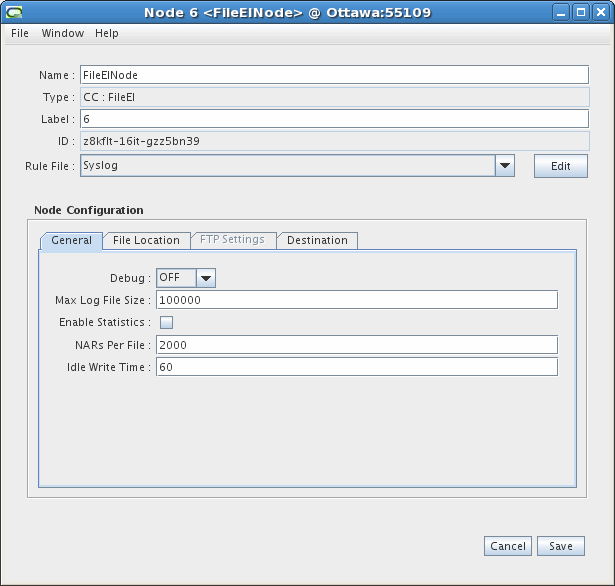
Description of the illustration syslog_1001.gif
-
On the File Location tab, follow these guidelines to configure the settings:
-
Select a method for obtaining files:
If you select Files are pushed to this node, you must set the Check for new files period - enter a value in the field and then select seconds or minutes from the drop-down list. This is the amount of time the node waits before checking the input directory for new files. If you have a high data traffic rate, Oracle recommends lowering the time period setting to allow records to be processed more frequently. For this option, you must also set the Suffix of files to collect field - accept the default suffix or enter a different suffix so that the CC knows which files to process.
If you select Files are pulled (via FTP), the CC will pull files from an FTP server. You can configure the FTP information on the FTP Settings tab, as explained in the next step.
-
Configure the fields:
In the Local Directory field, enter the input directory where the node checks for files. In the Prefix of files after collection field, enter a prefix the CC appends to all files after processing. In the Suffix of files after collection field, accept the default or enter a suffix the CC appends to all files after processing. Select the Delete files after processing checkbox if you want the CC to delete files after it processes them.
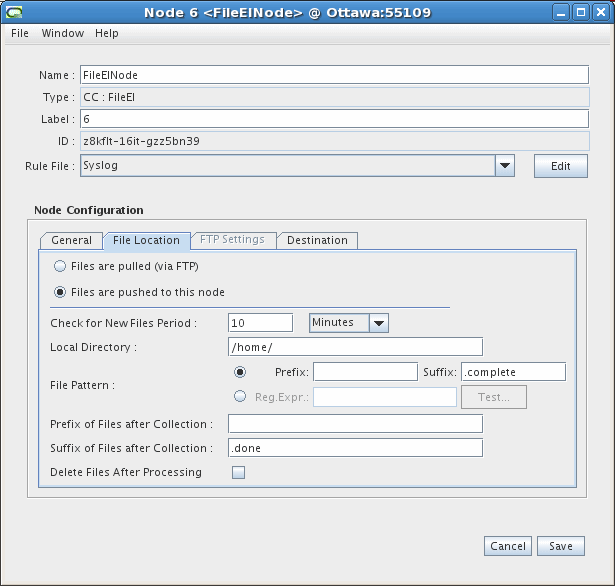
Description of the illustration syslog_2001.gif
When you select the Files are pulled (via FTP) option, the FTP Settings tab becomes active.
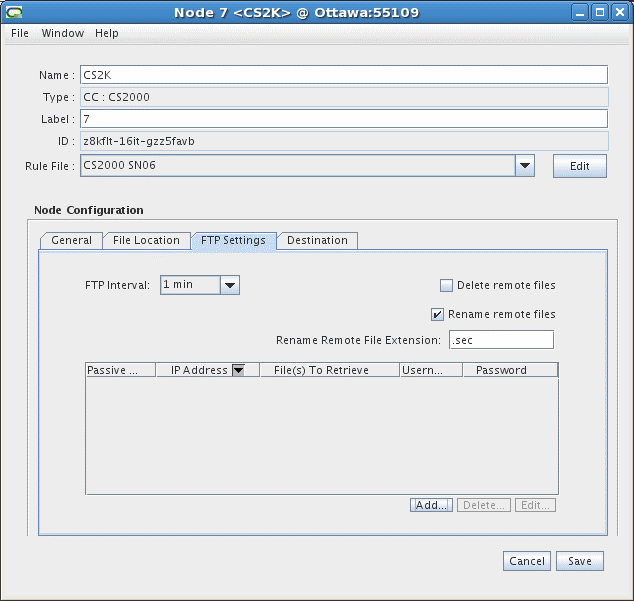
Description of the illustration syslog_3001.gif
-
-
Follow these guidelines to configure the FTP Settings tab:
-
Set the FTP Interval - select a value from the drop-down list to configure how often the node will pull files from the FTP server. If you have a high data traffic rate, Oracle recommends lowering the time period setting to allow records to be processed more frequently.
-
Set the checkbox options to Delete remote files or Rename remote files on the FTP server. If you select the rename option, the CC will rename the remote files with an .ftp extension.
Note:
If you run the CC with the Rename remote files option activated, and then decide to deactivate this option, ensure you stop the CC, go to the remote directory on the FTP server, remove all the data files that were previously renamed, then restart the CC. -
Click the Add button to add an FTP server configuration.
The FTP Configuration window appears.
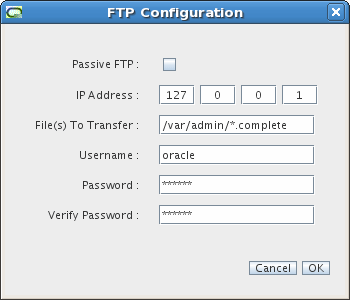
Description of the illustration syslog_3_ftp001.gif
-
Configure the fields in the FTP Configuration window as follows:
FTP Type - select the FTP method you wish to use: regular, secure FTP (SFTP) or passive
IP Address - enter the IP address of the FTP server
File(s) To Transfer - enter the directory path on the FTP server where the log files reside that you want to transfer. Enter an asterisk (*) after the directory path to pull all files from that directory, or if you know the file type, enter the directory path and file type with an asterisk. For example, /var/admin/*.complete
Username - enter the user name for the FTP server
Password - enter the password for the FTP server
Verify Password - enter the password again to verify its accuracy
-
You can Delete or Edit existing FTP configurations by using the corresponding buttons on the FTP Settings tab.
You do not need to configure any values on the Destinations tab.
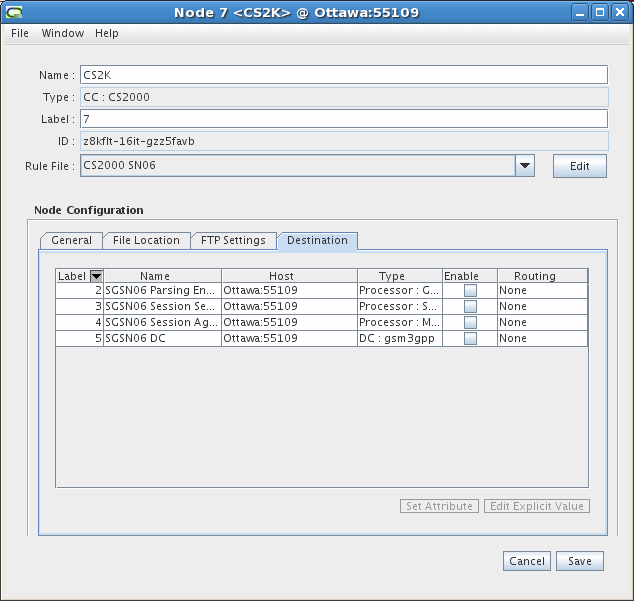
Description of the illustration syslog_4001.gif
-
-
Click the Save button.