A Using OAAM
Oracle Adaptive Access Manager can be used to protect businesses and their customers through multifactor authentication, proactive, real-time fraud prevention, risk evaluation at transaction runtime, and tools for fraud analyst to investigate a possible fraud.
The following are scenarios for developers who integrate OAAM with OAM in security solutions, fraud analysts who investigate fraud, and database administrators who archive and purges records to free space in the system.
A.1 Investigation - Alert Centric Flow
A fraud analyst on the BigMart team reviews suspect transactions to identify fraud. The alert severity level and specific dollar totals have been found to indicate fraud. The deployment primarily utilizes a manual case creation and investigation flow. Analysts start each investigation by searching for transactions with high severity alerts. When fraud is identified analysts record findings, black list entities of various sorts and close out cases with a disposition.
-
Search for Retail Ecommerce transactions with high severity alerts.
-
Log in to the OAAM Administration Console as an investigator.
-
Click the Search Transactions tab.
-
Filter the transactions by Transaction Type as equal to "Retail Ecommerce," Alert level as equal to "High," and your criteria for Transaction Date likely to pick up the transactions; and then, click Search.
-
The results table contains a Transaction Data column that can be sorted in ascending or descending order by clicking the Transaction Date column header. The up/down arrow next to it indicates the current order of the data. Click the Transaction Date column header to filter results by ascending time stamp.
-
Select the orange square next to the alerts you are interested in for the total count of alerts and detailed messages about potentially fraudulent activity, which will be displayed in the popup.
-
Go back to the search filters and select Transaction Type as Retail Ecommerce.
-
Use the Add Fields drop-down box and from the list of fields provided, select Retail.ecommerce.total.dollar.amount as a filter on which you want to search.
-
For the Retail.Ecommerce.total.dollar.amount, select Greater than as the operator, and type in "500"; then, click Search.
-
Click Transaction Date result header to filter results by ascending time stamp.
-
-
To view the details on the oldest transaction, click the Retail Ecommerce link in the Transaction Type column to open the Transaction Details page.
-
View the transaction and entity data for details.
Locate important details of the transaction that took place including the amount of the item, addresses, card numbers, customer identity, device, and IP address location for the transaction.
-
To filter the transactions for the device used in the transaction, drag the device ID in the Summary panel into the Filtered Items panel on the right side of the page.
-
-
To find matching transactions in the first seven days, in the Filtered Items panel, select 7 Days for Time Range, click Find Matching Items, and then click the number of transactions.
A Filtered Transactions page appears with a list of transactions which the device was used.
-
View list of transactions returned.
-
Select the orange square next to the alerts you are interested in so that information about the total count and alert messages will be displayed in the popup.
-
To select all transactions to compare at once, click the Row column header.
-
-
Click the Compare button on the search results toolbar to compare parameters of the transactions and customer details.
-
Click the Detach button on the search results toolbar to detach the Compare Transactions page for a larger view.
-
Link selection of transactions/sessions to a new Agent case. Click Link to Case in the upper right corner to open a case to link sessions. Either search and select an existing case or create a new case, and then link the sessions. Click the Create New Case button in the Link to Case dialog.
-
-
From the Compare Transaction page, delete the Device ID as a filter in the Filtered Items panel and drag user names involved in suspect transactions one by one to the Filtered Items panel to see if they had other activity which needs evaluation.
-
Once you have selected the transactions, add the device ID utilized in the fraudulent orders to the OAAM Restricted Devices blacklist group. This will black list future activity originating from this device.
-
Select transactions, and click the Add to Group button in the toolbar. In the Add to Group dialog, select Device as the data type to add and click Next.
-
Select the Search from existing groups radio button and search for the OAAM Restricted Devices group and click Next.
-
-
Add the credit cards used to a Stolen Cards group to prevent future credit card fraud.
-
Select transactions, and click the Add to Group button. In the Add to Group dialog, select Credit Card as the data type to add and click Next.
-
Select the Search from existing groups radio button and search for the Stolen Cards watch group and click Next.
-
-
Create the new group as part of the flow.
-
Select transactions, and click the Add to Group button. In the Add to Group dialog, select Credit Card as the data type to add and click Next.
-
Select the Create New Group radio button and provide the group name, cache policy, and description, and click Next.
-
-
Close the Agent case with a confirmed fraud disposition.
A.2 Investigation - Session Centric Flow
A security analyst working for BigUniversity reviews suspect access attempts to identify attempted fraud. The deployment primarily utilizes a manual case creation and investigation flow. The analyst starts each investigation by searching for sessions which were blocked. When attempted fraud is identified analysts record findings, black list entities of various sorts and close out cases with a disposition.
-
Search for sessions with a blocked authentication status.
-
Log in to the OAAM Administration Console as an investigator.
-
Click the Sessions tab.
-
In the Sessions search page, filter the sessions by Blocked for Authentication Status and then, click Search.
-
The results table contains a Session Date column that can be sorted in ascending or descending order by clicking the Session Date column header. The up/down arrow next to it indicates the current order of the data. Click the Session Date column header to filter results by ascending time stamp.
-
In the results table, select the orange square next to the alerts for the total count of alerts and detailed messages about potentially fraudulent activity, which will be displayed in the popup.
View the full set of alerts triggered in the session. The alert messages provide insight into what occurred in the situation. Click the alert message link to go to an Alert Details page where information can be viewed about the generation of the alert, the message, alert level, message type, and the alert's relationship to other data types such as user, device, location, sessions, browser, operating system, locales, and others.
-
To filter the sessions for the device used in the session, drag the device ID in the results table into the Filtered Items area of the Utility Panel on the right side of the page.
-
-
To find matching sessions in the last 24 hours, in the Filtered Items panel, select 24 Hours for the Time Range, click the Find button, and then click the number of sessions link under Matching Items Found.
A Filtered Sessions page appears with a list of sessions in which the device was used.
The results table shows Session ID, Alerts, Transactions, Organization ID, User Name, Device ID, IP Address, Location, Authentication Status, Session Date, Pre-authentication action, Pre-authentication score, Post-authentication score, Post-authentication action, client type, User ID, and Internal Session ID.
-
View list of sessions returned.
-
View the alerts: In the results table of the Filtered Sessions page, select the orange square next to the alerts for information on the total count of alerts and detailed messages about potentially fraudulent activity, which will be displayed in the popup.
-
Link sessions to a case: Select the sessions and click Link to Case in toolbar to link the sessions to a new Agent case or an existing one.
A dialog appears with the instructions, "Open a case to link sessions. Either search and select an existing case or create a new case, and then link the sessions." Three buttons are shown: Create New Case, Open existing case, and Cancel.
Click Create New Case. A Link to Case dialog appears with instructions to enter details. The case type is Agent and cannot be changed. Enter details for the following fields:
Organization ID
Severity Level: Choices are Low, Medium, High
Canned Descriptions: Choices are Cannot Login, Forget Question Answers, Possible Fraud, and OTP Override.
Description
Click Next. Another Link to Case dialog appears with the message, "The following sessions have been selected to link to the case 1. Enter a note for this action." As part of the linking the investigator enters notes describing why the sessions were linked. Enter Canned Notes: Choices are "These sessions contain suspected fraud" and "These sessions contain corporate misuse." Click Link Sessions. A dialog appears with a message, "The selected sessions were linked to Case_<number> successfully." Click OK to dismiss the dialog.
The case log records the notes as well as the user who performed the link action. These sessions stay linked to the case unless they are unlinked by an investigator or manager.
-
-
Drag IP addresses involved in suspect sessions one by one to Filtered Items panel to see if they had other activity which needs evaluation.
-
Delete Device ID as one of the filters if it does not seem to be relevant to the case.
-
Drag IP address into the Filtered Items panel.
-
Click the Find button.
-
Click the number of Sessions to see the Filtered Sessions page.
-
View the alerts.
-
Click the Session ID to view the Session Details page. Then close the page, and go back to Filter Sessions page.
-
-
Add the IPs utilized in the fraudulent access requests to the OAAM Restricted IPs group. This will blacklist future activity originating from these IPs.
-
In the Results table of the Filtered Sessions page, click the IP address link.
-
In the IP Address details page, click Add IP Address to Group
-
-
Close the Agent case with a confirmed fraud disposition.
An investigator closes the case, by providing notes and a disposition. A disposition contains information about why and how the investigator came to a conclusion.
-
Go back to the Case Details page and click Change Status.
-
Enter Closed for Status.
-
Enter Confirmed Fraud for Disposition.
-
Enter canned notes.
-
Enter additional notes.
-
Click Submit.
-
A.3 Investigation - Auto-generated Agent Case Flow
Jeff is a fraud analyst on the BigMart team. The deployment primarily utilizes automated case creation and investigation flow. Analysts start each investigation by searching for new cases. They drill in on the sessions for which the case was generated. When fraud is identified analysts record findings, black list entities of various sorts and close out cases with a disposition.
An auto-generated case is created when a security administrator configures an action to create an Agent case when specific rules trigger. In other words, the new Agent case is dynamically created as a result of a particular event. This Agent case contains the session data for which it was created.
-
Search for Agent cases with current status ""New".
-
Log in to the OAAM Administration Console as an investigator.
-
Filter the cases by Case Type as "Agent," Case Status as "New," and Expired as "Hide Expired"; and then, click Search.
-
Filter results by ascending time stamp.
The results table contains a Last Action Date column that can be sorted in ascending or descending order by clicking the Last Action Date column header. The up/down arrow next to it indicates the current order of the data. Click the Last Action Date column header to filter the view by cases with the least time to overdue at the top.
-
-
Open top case to start working it.
When a case with a status of New is accessed for the first time the status automatically changes to Pending. Other investigators can now see that the case is actively being worked on since the case has an owner and the status is not New.
-
View the session that contains the alerts generated.
-
View alert messages in popup.
In the table of Case Details page of Linked Sessions tab, select the orange square next to the alerts you are interested in for the alert total count and alert message, which will be displayed in the popup. If you want, you could click the Alert link and look through the Alert detail page. Go back to the Case Details page, and click the Session ID of the session you are interested in.
-
In the Session Details page, view list of transactions from the Session Transactions panel. Go to Transaction search, and search for transactions.
-
-
Compare the transactions.
-
Select transactions from the Transaction search results and click Compare.
-
Drag the credit cards used into the Filtered Items panel one by one to find related sessions and transactions in the last 7 days.
A list of filtered transactions are shown in the Filtered Transactions page.
-
-
Link transactions found to the Agent case.
-
Select the transactions and click the Link to Case button in the search results toolbar.
A dialog appears with the instructions to open a case to link sessions. Either search and select an existing case or create a new case, and then link the sessions.
-
Click the Open existing case button to open an existing case.
-
In the Link to Case dialog, enter criteria and click Search.
-
Click Next.
Another Link to Case dialog appears listing sessions that have been selected to link to the case. Instructions are given to enter a note for this action.
-
Select the list item that best describes the situation. Enter any additional comments.
-
Click Link Sessions.
-
Click OK in the Link to Case confirmation dialog to confirm.
-
-
Enter case notes in the notes panel.
-
Add the IPs utilized in the fraudulent transactions to the OAAM Restricted IPs group.
-
Close the Agent case with a confirmed fraud disposition.
A.4 Escalated Agent Case
This morning John Smith called customer service claiming to have lost money out of his account. John claims that there was a wire transfer for $129 out of his account last week that he did not initiate. The CSR opens case 321 for John via his username jsmith and enters notes based on the information he provided. The case displays John's username in the title so any CSR viewing the case can always see what user this case is for. The CSR escalates the case and tells jsmith he will be contacted within 24 hours by an investigator. Mike works on the BigBank Security team. He is responsible for investigating customer service related security issues. He searches for cases with an escalated status and filters by date. Mike opens the newly escalated case from the CSR. Mike can view customer/user specific data and the notes from the CSR as a starting point. He searches for wire transfer transactions John Smith has performed for values between $100 and $200. Mike compares the transactions returned to determine if this looks like fraud.
-
CSR opens a new case for the customer.
-
Log in to the OAAM Administration Console as a CSR.
-
In the Cases Search page, click the New Case button.
The Create Case screen is displayed.
-
Enter the John Smith's user name, xxxx, in the User ID field and select the Organization ID (group John Smith belongs to).
-
For severity level, select High from the Severity Level list.
-
In Canned field, selects Possible Fraud.
-
-
Enters into note box, "Customer claims that there was a wire transfer for $129 out of his account last week that he did not initiate." Then clicks Create.
-
On the toolbar of Case Details page, clicks More Actions and then selects Escalation.
The Escalation screen is displayed.
-
In the Type list, selects the Agent as type of case and escalates the case to investigation team.
-
Investigator searches for cases.
-
Filter by escalated status.
-
Filter results by ascending time stamp.
-
-
Searches for transactions.
-
Wire transfer transactions.
-
Between $100 and $200.
-
-
Compares transactions.
A.5 Search Transactions: Add Filter 1
Jeff is a security analyst at Acme Corp. Acme has online purchase and user profile change transactions defined in the deployment. Jeff is searching for transactions that involved addresses in the 95060 zipcode. He selects all transaction types and adds a filter for address.zipcode. When he runs the query the zipcode column appears in the results. When the zipcode column is added the rest of the columns resize horizontally to optimize the screen real estate available.
-
In Agent page, click the Transactions tab.
-
In the Transaction Name field, select Retail Ecommerce and other items.
-
Click the Add Fields down arrow button.
-
From the list, choose address.zipcode as the additional filter.
-
Use the search operator, Equals, to refine your query in the text field.
-
In the search field, enter 95060.
The transactions that match the search criteria, 95060, appear in the Search Results table. You can view a transaction in detail by clicking the transaction name link.
A.6 Search Transactions: Add Filter 2
Jeff is a security analyst at Acme Corp. Acme has online purchase and user profile change transactions defined in the deployment. Jeff is searching for ecommerce transactions that involved dollar totals greater than $500. He selects the ecommerce transaction type and adds a filter for total dollar amount. The add fields menu contains all the specific entities, entity data and linked entity data. When he runs the query the dollar total column appears in the results. When the new column is added the rest of the columns resize horizontally to optimize the screen real estate available.
-
In Agent page, click the Transactions tab.
-
In the Transaction Name field, select ecommerce.
-
Click the Add Fields down arrow button.
-
From the list, choose Transaction Amount as one of the additional filters.
-
Use the search operator, Greater Than, for the Transaction Amount.
-
In the search field, enter 500, to search for Transaction Amounts greater.
The transactions that are greater than $500 appear in the Search Results table. You can view a transaction in detail by clicking the transaction name link.
A.7 Wire Transfer Dollar Amount Pattern
Mike is a security administrator who needs to profile user's behavior based on the online banking wire transfers they complete. In this case Mike wants to track the ranges of dollar amounts each user normally transfers. He creates a user multi-bucket pattern to create dollar ranges of $100. Mike then implements a rule to challenge if the current dollar range bucket transfer has fallen into is one the user has hit less than 5% of the time in the last three months.
Prerequisites: Default snapshot is loaded. A transaction that represents a banking wire transfer, such as the "Internet Banking" transaction is configured for the application.
Create a multi-bucket pattern on the Internet Banking transaction with User as the Member Type and add Transaction Amount as a range attribute with a $100 increment.
-
Open the OAAM Administration Console.
-
In the Navigation tree, double-click Patterns. The Patterns Search page is displayed.
-
Click the New Pattern button.
-
Create a new multi-bucket pattern on the Internet Banking transaction to create dollar ranges of $100.
-
In the "New Pattern" dialog, select Transaction Type as "Internet Banking," Creation Method as "Multi-Bucket," Member Types as "User," and Evaluation Priority as "High".
-
In the Attributes tab, add a new attribute, selecting "Transaction Amount" from the list. For the Attribute Details, select Compare Operator as "Range," Start Value as " 0", End Value as blank, and Increment Step as "100."
The transaction amount is collected in ranges of 100.
-
Create a rule to challenge if the current dollar range bucket transfer has fallen into is one the user has hit less than 5% of the time in the last three months.
-
Create a new policy to run in the Transaction Update checkpoint.
-
Create the transaction definitions in OAAM.
-
Create an alert group with an alert for unusual wire transfer amounts.
-
Add a rule to the Transaction Update policy.
-
Add the "Transaction: Check Current Transaction using the filter conditions" to check if the current transaction type is Internet Banking.
-
Add the "Transaction: Check Transaction Count using filter conditions" to check if this user has had at least five successful Internet Banking transactions over the last 3 months.
-
Add the "Pattern (Transaction): Entity is member of pattern less than some percent times" to check if this user has been a member of this pattern less than 5% of the time over the last 3 months.
Values to enter are: Pattern Hit Percent less than as "5," Pattern name for membership as the name of the pattern created, Is Membership Count Less than patternHitPercent as "True," Time period type for pattern membership as "Months," Time period for pattern membership as "3", and Member type for pattern membership as "User."
-
Set the rule results to trigger the alert and challenge the user.
Set the rule result Action Group to "OAAM Challenge."
Set the rule result Alert Group to the alert for unusual wire transfer amounts.
-
Perform 5 Internet Banking transactions for the same user, all with a dollar amount between 1 and 99.
-
Perform an Internet Banking transaction for the same user, with a dollar amount of 250. You should be presented with a challenge question, because this transaction amount is outside the user's normal range. If you answer the question correctly, you should see a "success" message.
A.8 Shipping Address Country Pattern and Billing Mismatch
Mike is a security administrator who needs to profile ecommerce transactions based on the country the goods are shipping to and if the billing and shipping addresses are from different countries. He creates a pattern to create a bucket for each country and count the transactions shipped to each. He then implements a rule to alert if a transaction is shipping to a country that less then 5% of all other orders have shipped to in the last 3 months and if the shipping address country and billing address country are not the same.
Prerequisites: Default snapshot is loaded. System has a defined transaction that represents the ecommerce transaction, such as the "Retail Ecommerce" transaction. The transaction has entities or attributes that indicates the country in the shipping address and the country in the billing address.
-
Open the OAAM Administration Console.
-
In the Navigation tree, double-click Patterns. The Patterns Search page is displayed.
-
Click the New Pattern button.
-
Create a new multi-bucket pattern on the ecommerce transaction to create a bucket for each country and count the transactions shipped to each.
-
In the "New Pattern" Dialog, select Transaction Type as "Retail Ecommerce," Creation Method as "Multi-Bucket," Member Types as "Shipping Address," and Evaluation Priority as "High."
-
In the Attributes tab, add a new attribute, selecting "Country" from the list and selecting "for Each" as the Compare Operator.
-
Create a rule to generate an alert if a transaction is shipping to a country that less than 5% of all other orders have shipped to in the last 3 months and if the shipping address country and billing address country are not the same.
-
Create a new policy to run in the Transaction Update checkpoint.
-
Create the transaction definitions in the OAAM Administration Console.
-
Create an alert group with an alert for if the billing and shipping addresses are from different countries.
-
Add a rule to the Transaction Update policy.
-
Add the "Transaction: Check Current Transaction using the filter conditions" to check if the current transaction type is Retail Ecommerce.
-
Add the "Transaction: Check Transaction Count using filter conditions" to check if this user has had at least five successful Retail Ecommerce transactions over the last 3 months.
-
Add the "Session: Compare two parameter values" condition to the rule, with Parameter key 1 as "Transaction.billingAddress.country," Operation as "Not Equal To," Parameter key 2 as "Transaction.shippingAddress.country," Ignore case as "True," and if no data, return as "False".
-
Add the "Pattern (Transaction): Entity is member of pattern less than some percent times" condition to the rule, with Pattern Hit Percent less than as "5," Pattern name for membership: pattern created in step 4, Is Membership Count Less than patternHitPercent as "True," Time period type for pattern membership as "Months," Time period for pattern membership as "3," and Member type for pattern membership as "Shipping Address."
-
Set the rule result to generate an alert.
Post conditions: If a user ships to a country different from his billing address, and the shipping country is one that is used less than 5% of the time, then an alert is generated.
A.9 Browser Locale Pattern
Mike is a security administrator who needs to profile users based on the browser locales they utilize when accessing. He creates a multi-bucket pattern for users by locale. This will create a bucket for each locale. He then develops a rule to challenge if the locale being used is one this user has never used previously.
Prerequisites: Default snapshot is loaded.
-
Open the OAAM Administration Console.
-
In the Navigation tree, double-click Patterns. The Patterns Search page is displayed.
-
Click the New Pattern button.
-
Create a new multi-bucket pattern on the authentication transaction to track each browser locale.
-
In the "New Pattern" Dialog, select Transaction Type as "Internet Banking," Creation Method as "Multi-Bucket," Member Types as "User," and Evaluation Priority as "High."
-
In the Attributes tab, add a new attribute, selecting "Locale" from the list and select Compare Operator as "for Each".
-
Create a rule to challenge if the locale being used is one this user has never used previously.
-
Create a new policy to run in the Transaction Update checkpoint.
-
Create the transaction definitions using the OAAM Administration Console.
-
Create an alert group with an alert for locale being used is one this user has never used previously.
-
Add a rule to the Transaction Update policy.
-
Add the "Transaction: Check Current Transaction using the filter conditions" to check if the current transaction type is Internet Banking.
-
Add the "Pattern (Transaction): Entity is member of pattern for first time in certain time period" condition to the rule, with Is condition True as "True," Time period type for bucket membership as "Years," Time period for bucket membership as "999," Member type for pattern-bucket membership as "User," and First Time count as "1."
-
Set the rule result Action Group to "OAAM Challenge."
A.10 Credit Card by Shipping Address Country Pattern
Mike is a security administrator who needs to profile ecommerce transactions based on the credit card and country the goods are shipping to. He creates a pattern to create a bucket for each credit card and shipping address country and count the transactions. He then implements a rule to alert if a transaction uses a credit card that has been used more then 5 items and has shipped to the current country less then 5% of the time in the last 3 months.
Prerequisites: Default snapshot is loaded. System has a defined transaction that represents the ecommerce transaction. The transaction has entities that represent the credit card and the shipping address.
Create a multi-bucket pattern on the Retail Ecommerce transaction with User as the Member Type. Add Shipping Address.Country as a For Each attribute.
-
Open the OAAM Administration Console.
-
In the Navigation tree, double-click Patterns. The Patterns Search page is displayed.
-
Click the New Pattern button.
-
Create a new multi-bucket pattern on the ecommerce transaction for each credit card and shipping address country and count the transactions.
-
In the "New Pattern" Dialog, select Transaction Type as "Retail Ecommerce," Creation Method as "Multi-Bucket," Member Types as "User," and Evaluation Priority as "High."
-
In the Attributes tab, add a new attribute, selecting "Shipping Address.Country" for the shipping address from the list and select "for Each" as the Compare Operator.
-
Create a rule to alert if a transaction uses a credit card that has been used more than five items and has shipped to the current country less than 5% of the time in the last 3 months.
-
Create a new policy to run in the Transaction Update checkpoint.
-
Create the transaction definitions using the OAAM Administration Console.
-
Create an alert group with an alert for unusual shipping address country.
-
Add a rule to the Transaction Update policy.
-
Add the "TRANSACTION: Check Current Transaction using the filter conditions" to check if the current transaction type is Internet Banking.
-
Add the "TRANSACTION: Check Transaction Count using filter conditions" to check if this user has had at least five successful Internet Banking transactions over the last 3 months.
Values: Select Transaction to check as "Retail Ecommerce," Select Entity or Element to count as "User," Specified Condition for Count as "Greater Than," Specified Check value for Count as 5, Duration as "3 Rolling months," Ignore Current Transaction in count? as "True," for the same user? as "False," and apply the filter checks on Current Transaction as "False."
-
Use the "PATTERN (TRANSACTION): Entity is member of pattern less than some percent times" to check if this user has been a member of this pattern less than 5% of the time over the last 3 months.
Values: Pattern Hit Percent less than as "5," Pattern name for membership: pattern created, Is Membership Count Less than patternHitPercent as "True," Time period type for pattern membership as "Months," Time period for pattern membership as "3," and Member type for pattern membership as "User."
-
Set the rule results to trigger the alert and challenge the user.
-
Perform 5 Internet Banking transactions for the same user, all with a dollar amount between 1 and 99.
-
Perform an Internet Banking transaction for the same user, with a dollar amount of 250. You should be presented with a challenge question, because this transaction amount is outside the user's normal range.
A.11 Linked Entities
Adam is an security administrator at Acme Corporation. He has defined a Customer entity that will be used in an ecommerce transaction. As part of the customer entity definition Adam links the Address entity twice. He links Address as a Shipping Address and as a Billing Address. The ecommerce transaction has been defined to include both the Customer entity and the linked Address entities. At runtime the transaction will include all this data and risk evaluations can be made against the data.
-
Figure out what fields are needed for the Customer entity in Retail Ecommerce transactions.
The Retail Ecommerce transaction fields for Customer are First Name, Last Name, Is Shipping Address Same, Credit Card, CC Expiration Date, CC Issuing Country, Item, Count, Price, Address Line1 (for Shipping Address), Address Line2 (for Shipping Address), Address Line3 (for Shipping Address), City (for Shipping Address), State (for Shipping Address), Country (for Shipping Address), Pin Code (for Shipping Address), Address Line1 (for Billing Address), Address Line2 (for Billing Address), Address Line3 (for Billing Address), City (for Billing Address), State (for Billing Address), Country (for Billing Address), and Pin Code (for Billing Address).
-
Figure out the transaction definition and the mapping of the source data to transaction definition. Source data elements are the fields from the customer application. Make sure the source data keys match the keys used by the customer application.
An example is provided below for a transaction with Transaction Name Retail Ecommerce and Transaction Key trx_re.
Table A-1 Data Fields and Source Keys
Data Name Internal ID Item
itemId
Price
itemPrice
Count
itemCount
First Name
customer.firstName
Last Name
customer.lastName
Credit Card
creditCard.number
CC Expiration Date
creditCard.expDate
CC Issuing Country
creditCard.issuingCountry
Is Shipping Address Same?
shippingAddress.addressSame
Address Line1
shippingAddress.addressLine1
Address Line2
shippingAddress.addressLine2
Address Line3
shippingAddress.addressLine3
City
shippingAddress.city
State
shippingAddress.state
Country
shippingAddress.country
Pin Code
shippingAddress.pinCode
Address Line1
billingAddress.addressLine1
Address Line2
billingAddress.addressLine2
Address Line1
billingAddress.addressLine3
City
billingAddress.city
State
billingAddress.state
Country
billingAddress.country
Pin Code
billingAddress.pinCode
-
Log in to the OAAM Administration Console and double-click Entities in the Navigation tree to create entities for item, Customer, and Address.
An entity is a data structure you reuse in multiple transactions. For example, an address entity could be used as a shipping address, billing address, home address, and so on. Most entities also combine multiple datapoints into this structure for data optimization. For example, an address may have street number, street name, apartment number, city, state, postal code and country.
-
Create the Address entity by clicking the New Entity button in the Entities search page.
-
In the Summary tab, specify the following values:
Entity Name: Address
key: <key>
Description: <description>
-
In Data tab, click the Add button to add a data element. Numeric data types cannot be encrypted (use string type).
Note:
Internal ID must have a unique valueLabel: Text used to identify component data in a web page.
Description: Description about the data element.
Data Key: The Data Key is used to identify a data element in the Entity. The data keys specified in the Data tab are for internal use. They are typically used in rule conditions. Do not change this key after it is defined.
Required: True/False. Some data elements are not populated all the time as the data might not be available. For example "Address Line 2" in an address is not required since many addresses will not have "Address Line2."
Is Encrypted?: If encrypted is set to true, data is encrypted before it is stored in the database. This feature protects sensitive data. These fields should not be used in rules. If they are used, you cannot specify regular values for comparing against these fields; the values will have to be encrypted values. These fields cannot be used in the search criteria while querying for transactions through the query screen. Numeric fields cannot be encrypted.
Data Type: A data type is an attribute that specifies the type of data that the attribute can take: Boolean data type, Date data type, Name value profile, Numeric data type, and String data type.
-
In ID Scheme tab, use the table to add, configure and edit data elements of the entity. Also choose Data Identification Scheme: By Key or By Digest.
Identification Scheme determines how an entity is uniquely identified using the elements that are part of the entity. The elements that are selected should be stored as plain text (key) or encrypted (digest).
By Key: This scheme creates a unique identifier by simply concatenating the selected elements of the entity.
By Digest: This scheme creates a unique identifier by hashing the values of the selected elements of the entity. The resultant key is usually cryptic. Use this scheme when the data values are large or if they need to be secured.
-
In Display tab, use the table to add, configure and edit display elements of the entity.
The Address entity has Street Address Line1, Street Address Line2, City, State, Country, Zip, and Phone as attributes. The Street Address Line1, City, Country, and Zip attributes can be used to identify the address uniquely. The Street Address Line2 and Phone attributes are not necessary.
Street Address Line1 alone would not uniquely identify an address. For example, 150 Main Street can exist in more than one location.
-
In Purging tab, set the values to determine when the entity data should be purged from the database.
Purge all entity data that has not been updated over the past [number] days
Do not purge any entity data
-
Click Activate.
-
Create the Customer entity by clicking the New Entity button in the Entities search page.
-
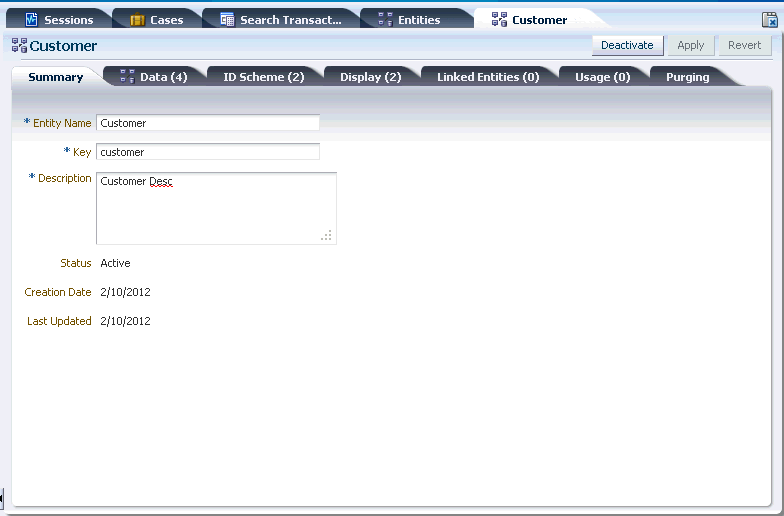
In the Summary tab, specify the following values:
Entity Name: Customer
key:
Description: <description>
-
In Data tab, click the Add button to add a data element. Numeric data types cannot be encrypted (use string type).
Note:
Internal ID must have a unique value -
In ID Scheme tab, use the table to add, configure and edit data elements of the entity. Also choose Data Identification Scheme: By Key or By Digest.
-
In Display tab, use the table to add, configure and edit display elements of the entity.
-
In Purging tab, set the values to determine when the entity data should be purged from the database.
Purge all entity data that has not been updated over the past [number] days
Do not purge any entity data
-
Click Activate.
-
In the Linked Entity tab, link entity. Click Link Entity button in toolbar.
-
In Link Entity dialog, search for Address entity to link to Customer entity.
-
Select entity and click Next.
-
Provide a name for the link to Customer entity and click the Add button. The data Preview shows:
Address Line1
Address Line2
Address Line3
City
State
Country
Zip
Pin Code
-
In the Linked Entity tab, link entity. Click Link Entity button in toolbar.
-
In Link Entity dialog, search for Address entity to link to Customer entity.
-
Select entity and click Next.
-
Provide a name for the link to Customer entity and click the Add button.
-
Click Activate.
-
Create the Item entity.
-
Double-click Transactions.
-
Enter the following information to start the creation of a transaction definition.
-
Transaction Type
-
Description
-
Definition Key
-
-
Add existing or new entities to this transaction.
-
Add transaction data. This data is unique for each transaction occurrence and therefore not reusable across different transactions. For example, the total dollar amount of a transaction would not be reused in multiple transactions so it should be transaction data and not an entity.
-
In Data Source, provide:
-
Source Data Name
-
Internal ID
-
Description
-
-
Connect the source data to OAAM entities and transaction data using mapping.
-
In Purging, Set the values to determine when the transaction data should be purged from the database.
-
Link Shipping Address to Customer.
-
Log in to the application and create/generate some test transactions.
-
Log in to the OAAM Administration Console and check the transaction data to make sure the transactions are created.
-
Determine which transaction rule conditions can be used to model the rules you want.
-
Create a policy of transaction rules by creating a new policy first.
-
Use your application to create transactions that trigger the rules.
-
Use the OAAM Administration Console to verify whether the rules you configured are triggering.