| Oracle® Fusion Applications Installation Guide 11g Release 1 (11.1.4) Part Number E16600-20 |
|
|
PDF · Mobi · ePub |
| Oracle® Fusion Applications Installation Guide 11g Release 1 (11.1.4) Part Number E16600-20 |
|
|
PDF · Mobi · ePub |
This appendix presents the Oracle Fusion Applications Repository Creation Utility (Fusion Applications RCU) creation interface and describes the purpose of each of the following screens:
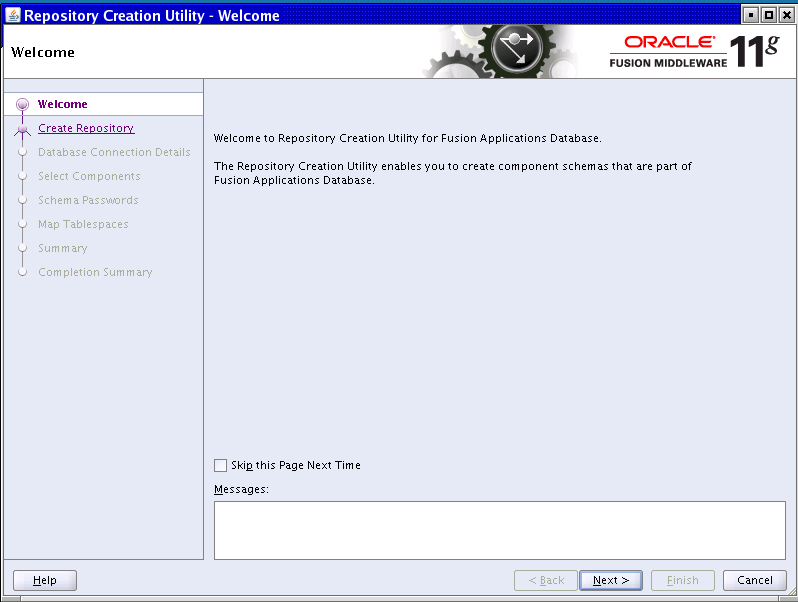
No action is necessary on this standard read-only screen. Click Skip this Page Next Time if you do not want to see it the next time you log in to the Applications RCU.
Click Next to continue.
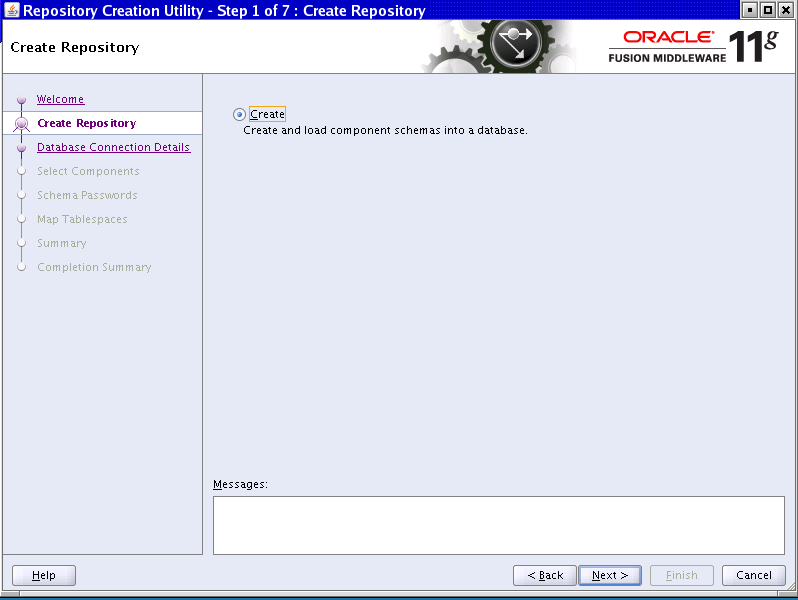
Select Create to create and load component schemas into the database.
Click Next to continue.
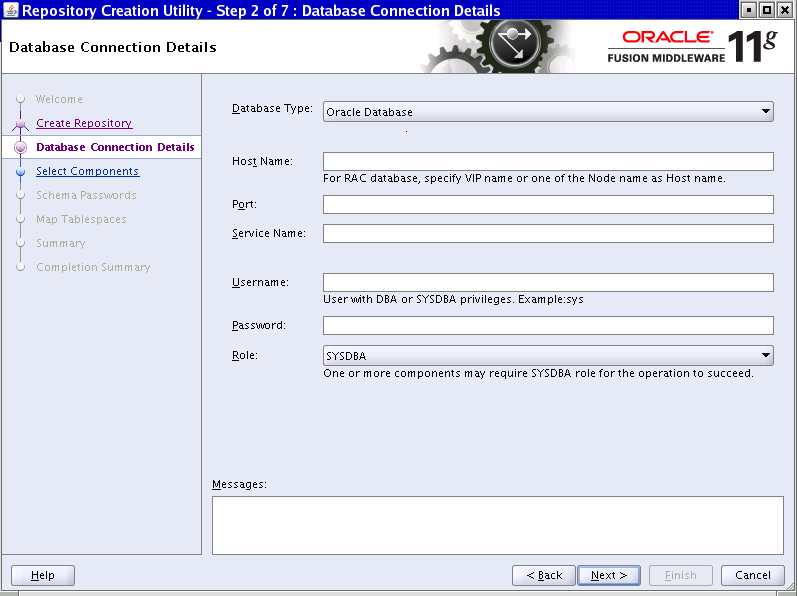
For Oracle Database, specify the following connection credentials:
Database Type: Select the database type.
Host Name: Enter the name of the node on which the database resides, for example, myhost.mydomain.com. For Oracle RAC, specify the VIP name or one of the node names as the host name.
Port: Specify the listener port number for the database. The default port number is 1521.
Service Name: This is the global database name. If you do not know it, see the SERVICE_NAMES parameter in the database initialization file. If it is not there, use the global name in DB_NAME and DB_DOMAIN. For Oracle RAC, specify the service name of one of the nodes, for example, examplehost.exampledomain.com.
User Name: Supply the name of the user with DBA or SYSDBA privileges. The default user name with SYSDBA privileges is SYS.
Password: Enter the password for the database user.
Role: Select Normal or SYSDBA. All schemas installed for Oracle Database require the SYSDBA role. For Oracle Internet Directory (OID) database schemas, use SYS and SYSDBA.
Click Next to continue.
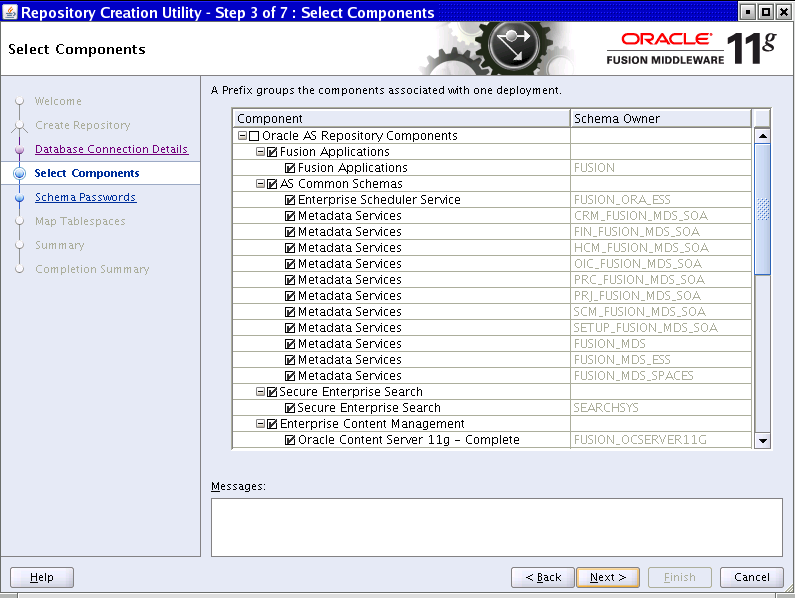
The Applications RCU retrieves the names of the Oracle Fusion Middleware and Oracle Fusion Applications components. You cannot change the schema owner names on this screen. By default, all components are checked so that they are included in the prerequisite check process. Click Next to begin the process.
The Applications RCU verifies the global prerequisites. When the progress bar reports 100 percent complete and all prerequisites report a check mark, click OK.
Click Next to continue.
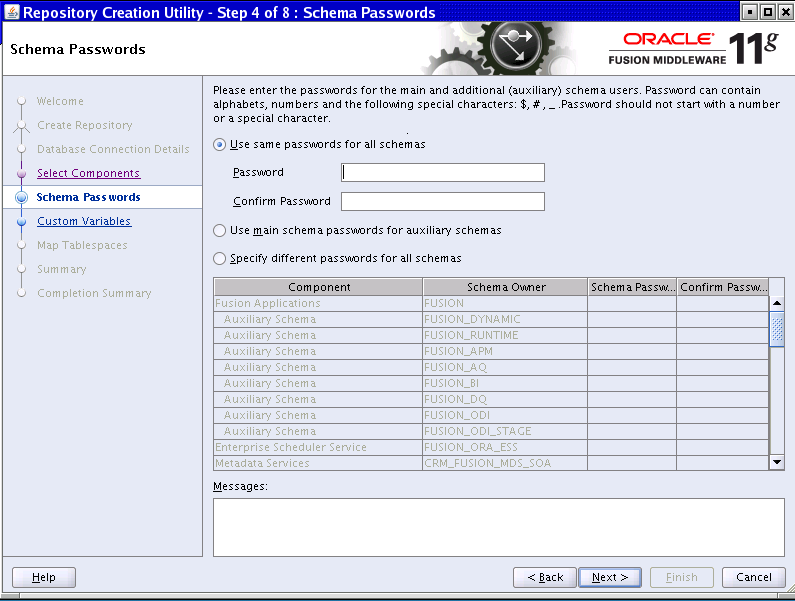
To specify the passwords for main and additional (auxiliary) schemas, select one of the following options:
Use same passwords for all schemas: Specify a single password for both schemas. Retype to Confirm.
Use main schema passwords for auxiliary schemas: Specify a different password to use for each main schema and for the associated auxiliary schema. Only the main schemas are visible. Retype the password to Confirm.
Specify different passwords for all schemas: Specify a unique password for each main schema and its auxiliary schema. All schemas are visible. Retype to Confirm.
Note the passwords that you enter. You must supply them when you create a response file.
Click Next to continue.
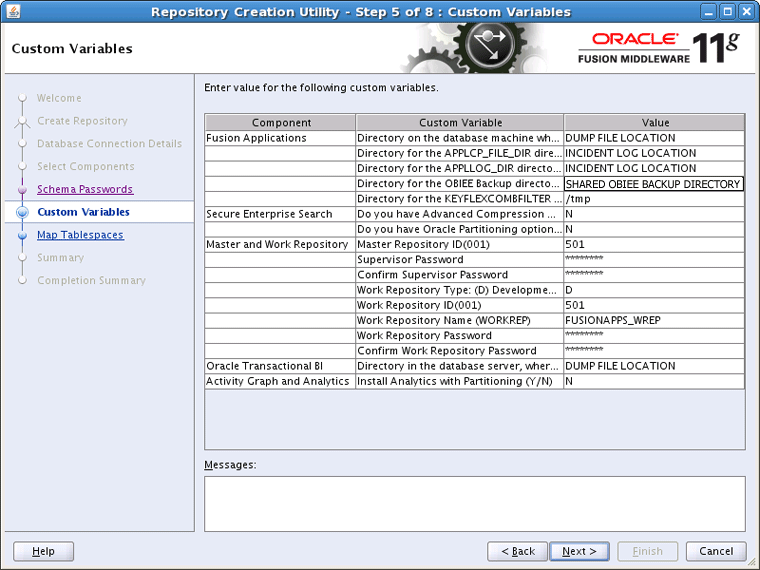
In the Value column, enter a pre-existing physical directory on the database server where the custom variables for each component should be created.
Fusion Applications
FUSIONAPPS_DBINSTALL_DP_DIR: The directory on the database server where you unzipped export_fusionapps_dbinstall.zip and copied the otbi.dmp file.
APPLCP_FILE_DIR: Used by Oracle Enterprise Scheduler to store the log and output files. Must be valid on the database server with read-write permissions to the database owner. For Oracle RAC, must point to a location that is shared across all nodes.
APPLLOG_DIR: Location of the PL/SQL log file from Oracle Fusion Applications PL/SQL procedures, on the database server. Ensure that the database owner has read-write privileges.
KEYFLEXCOMBFILTER: Location of the Filter XMLSchema. This variable is used for reloading components after patching. You can upload the variable to register it to the database. Note: You must specify a value for this property, however, its function is obsolete in this release of Oracle Fusion Applications.
OBIEE Backup Directory: Location of the Oracle Business Intelligence Enterprise Edition dump files. These files are used for enabling a restart action.
Secure Enterprise Search
Do you have Advanced Compression Option (ACO) License? Yes (Y) or No (N): Default is No.
Do you have Oracle Partitioning option License? Yes (Y) or No (N): Default is No.
Master and Work Repository
Note: The default values are the only valid values. If you change any of these values, the ODI-related provisioning process will not work.
Master Repository ID: Default = 501
Supervisor Password: Enter and confirm your ODI supervisor password.
Work Repository Type: (D) Development or (R). Default = D
Work Repository ID: Default = 501
Work Repository Name: Default = FUSIONAPPS_WREP
Work Repository Password: Enter and confirm your Work Repository supervisor password.
Oracle Transactional BI
Directory on the database server where Oracle Transactional Business Intelligence import and export files are stored.
Activity Graph and Analytics
Install Analytics with Partitioning (Y/N): Default is N.
Click Next to continue.
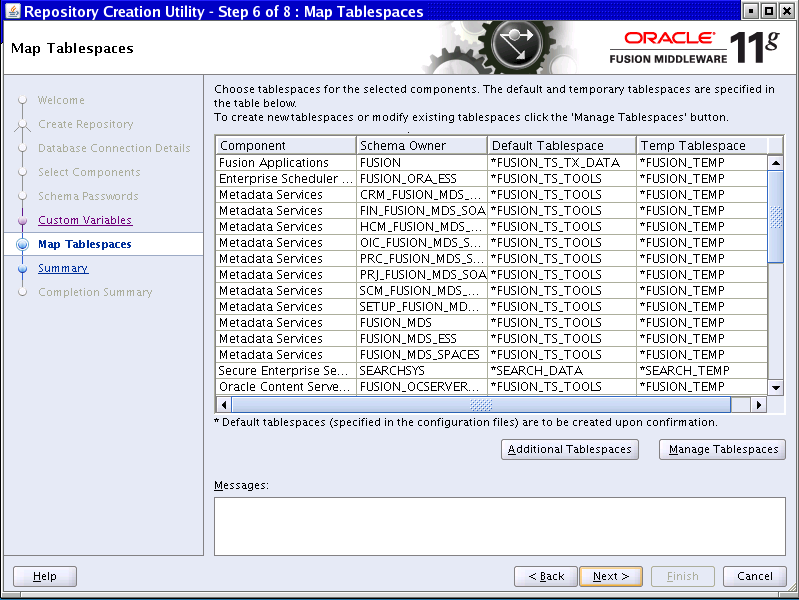
If you want to start the tablespace create process without making any changes, click Next on this screen. A message informs you that any tablespaces that do not already exist will be created. Click OK to continue. The Creating Tablespaces progress screen appears. Click OK when the operation is completed.
However, before you create the tablespaces, you can perform the following operations:
Change Default and Temporary Tablespaces
View and Change Additional Tablespaces
Manage Tablespaces and Datafiles (add, modify, or remove)
To view default and temporary tablespaces, click a tablespace cell in the Default Tablespace or Temp tablespace column. A list of default tablespace names appears.
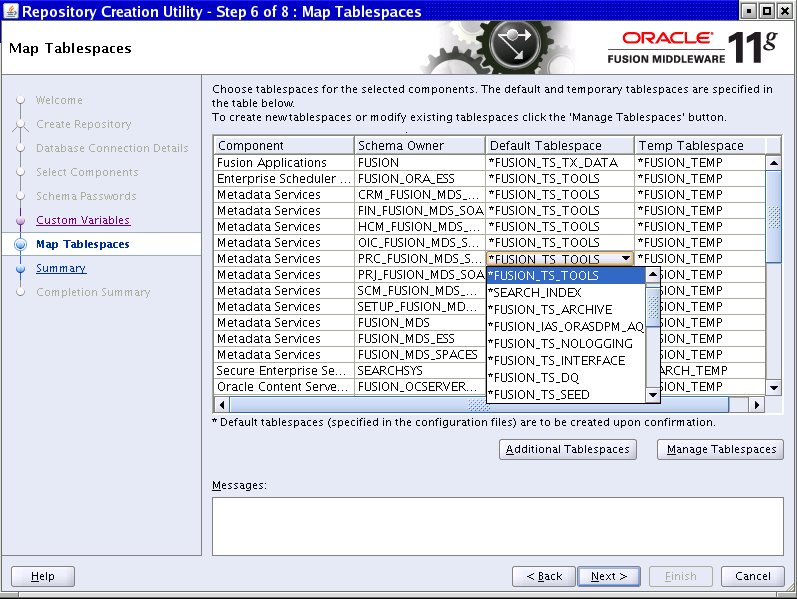
The default values are as follows:
FUSION_TEMP: For temporary tables.
FUSION_DYN_TS: For dynamically generated PL/SQL statements.
FUSION_IAS_ORASDPM_AQ: For advanced queuing JMS data and indexes.
FUSION_TS_AQ: For advanced queuing JMS data and indexes.
FUSION_TS_DQ: For data quality data and indexes.
FUSION_TS_TOOLS: Associated with Oracle Fusion Middleware data and indexes.
FUSION_TS_QUEUES: For advanced queuing and dependent tables and indexes.
FUSION_TX_TX_DATA: For transactional data.
FUSION_TS_TX_IDX: Indexes for transactional data.
FUSION_TS_SEED: For seed or reference data and indexes.
FUSION_TS_INTERFACE: For temporary or interface data and indexes.
FUSION_TS_SUMMARY: For summary management objects.
FUSION_TS_NOLOGGING: For materialized views and other temporary or scratch pad objects.
FUSION_TS_ARCHIVE: For tables and objects that are no longer used.
FUSION_TS_MEDIA: Contains multimedia objects such as text, video, and graphics.
For tablespaces that need to be created, the datafile defaults to %DATAFILE_LOCATION%\%sid%\%tablespace_name%.dbf. You can select from existing tablespaces if they are already defined in the database.
To change the default tablespace for a component, select the tablespace name in the Default Tablespace column, and then select the tablespace name you want to use from the list. You can assign components to use any number of default tablespaces.
To change a temporary tablespace for a component, select a tablespace name in the Temp Tablespace column, and then select the tablespace name from the list.
When components have additional tablespaces associated with their schemas, the Additional Tablespaces button is active. Click to view or modify additional tablespaces.
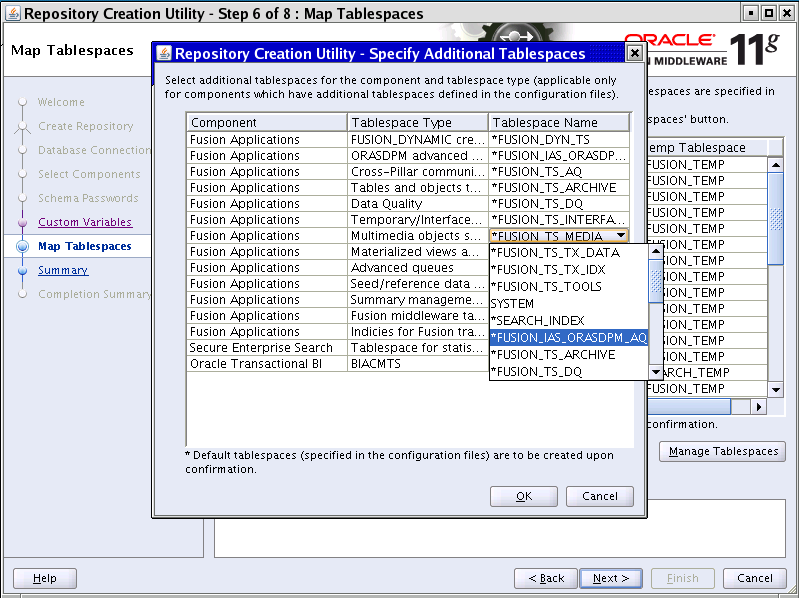
To change a tablespace, click in the Tablespace Name column and select the tablespace from the list.
Click OK when you are finished.
Click Manage Tablespaces to add, modify, or remove tablespaces.
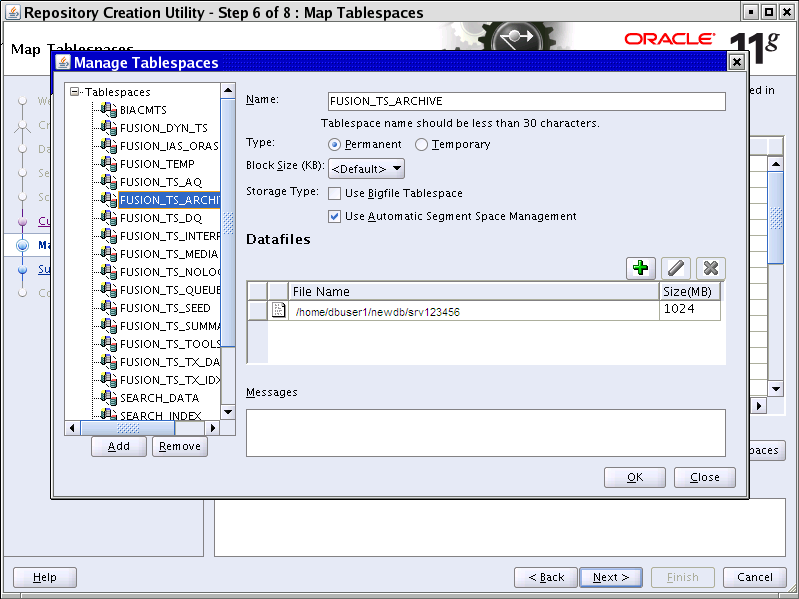
Only tablespaces that have not yet been created can be modified or removed. Existing tablespaces are visible, but grayed out. You can specify a new tablespace, but unless it is used by a component, it will not be created.
Select a tablespace from the navigation tree and make changes where necessary:
Name: Specify a new name for the tablespace.
Type: Indicate whether this tablespace is temporary or permanent.
Block Size: Specify the block size (in kilobytes) to be used for data retrieval.
Storage Type: Select Use Bigfile Tablespace if you have single large files. Select Use Automatic Segment Space Management to use bitmaps to manage free space within segments.
To Add a tablespace, specify the same details as for modifying one. Select a tablespace name from the navigation tree and click Remove to prevent it from being created.
Manage Datafiles
Click the Plus (+) icon and complete the Add Datafile details:
File Name: The name of the datafile.
File Directory: The location where the datafile will reside.
Size: The initial size of the datafile.
Automatically extend datafile when full (AUTOEXTEND): Select this option to extend the datafile size automatically when it becomes full. In the Increment, field, select the size by which the datafile should be increased.
To limit the maximum size, specify a value in the Maximum Size field.
Select a datafile and click the pencil icon. Modify the details on the Edit Datafile screen. Select a datafile and click the X icon to delete the file.
Edit a Datafile Size
To change the size of a tablespace:
Click a tablespace name to select it.
Click the pencil icon to bring up the Edit Datafile screen.
In the Size field, enter a new file size. For tablespaces with multiple data files, such as FUSION_TS_TX_DATA, you may delete the additional data files using the Remove Data File icon (X).
Click OK when you have configured all the tablespaces to return to the Map Tablespaces screen.
Click OK to dismiss the screen.
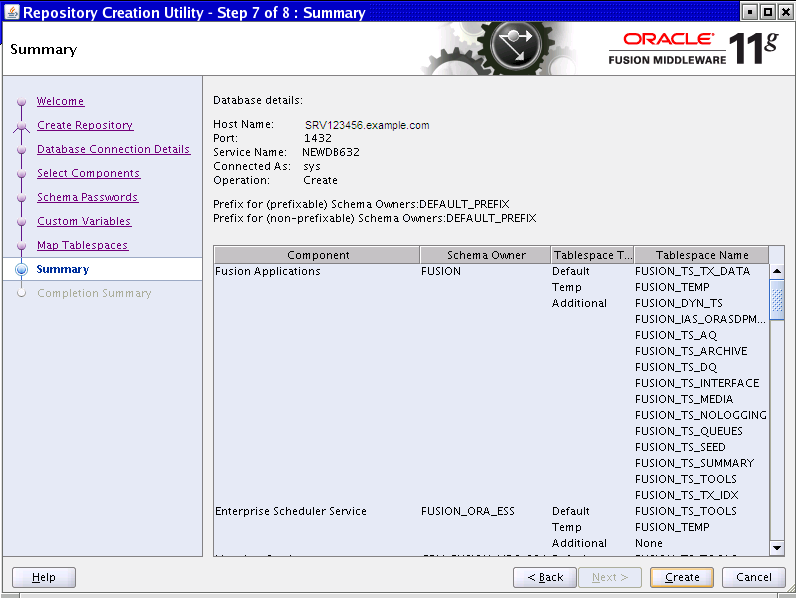
Review the information you have specified. If it is what you expected, click Create to begin creating schemas. The Applications RCU displays the Repository Creation Utility – Create screen, showing the schema creation process.
Typically, it takes 1 to 10 minutes to create each schema; however, the entire process may run for an additional half hour or more.
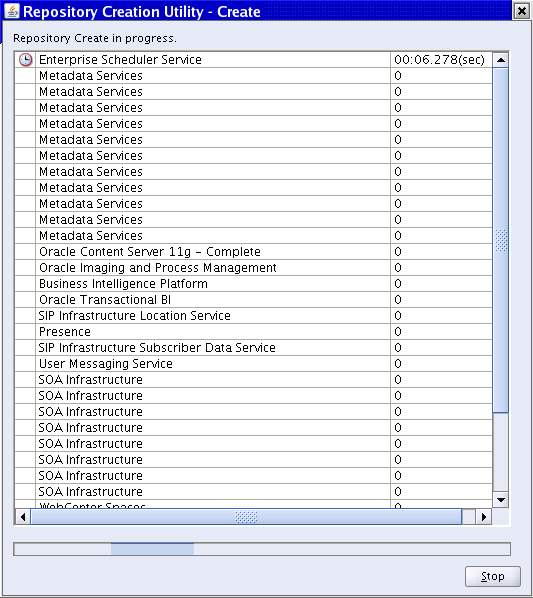
A Clock indicates which schema creation is in progress. A Check indicates that the schema has been created successfully. To stop creating the schemas, click Stop.
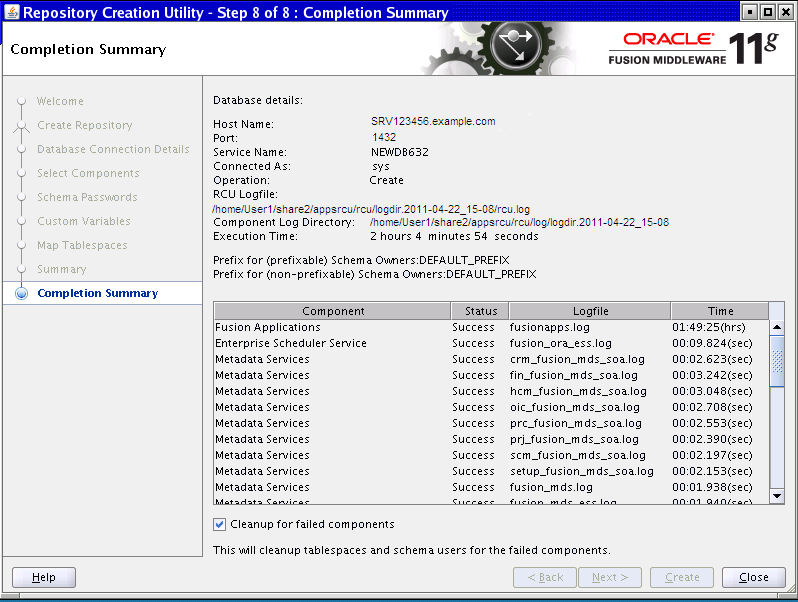
The names of the log files for each component are listed in the Logfile column. The main Applications RCU log (rcu.log) and the component log files are written to the following directory:
(UNIX)
APP_RCU_HOME/rcu/log/logdir.date_timestamp.log
(Windows)
APP_RCU_HOME\rcu\log\logdir.date_timestamp
If problems were encountered during the Create operation, check the log files for details. For more information about log files, see "Troubleshooting for Database Installations" in Oracle Fusion Applications Installation Guide.
If errors occur during the Create operation, or if the operation fails for any component, the Cleanup for failed components check box appears on this page and is selected by default. If you leave the check box selected, the Applications RCU automatically performs cleanup actions for the components that failed.
Click Close to dismiss the screen and exit the Applications RCU.