| Oracle® Fusion Middleware User's Guide for Oracle B2B 11g Release 1 (11.1.1.6.2) Part Number E10229-09 |
|
|
PDF · Mobi · ePub |
| Oracle® Fusion Middleware User's Guide for Oracle B2B 11g Release 1 (11.1.1.6.2) Part Number E10229-09 |
|
|
PDF · Mobi · ePub |
This chapter describes the process of creating document guideline files by using Oracle B2B Document Editor.
The first step in the Oracle B2B process flow, shown in Figure 3-1, is to create document guideline files.
Oracle B2B Document Editor is a guideline creation and implementation application for defining and managing custom document definitions for Oracle B2B transactions.
This chapter contains the following topics:
For complete documentation on the document editor, see the Oracle B2B Document Editor Help menu.
Oracle B2B Document Editor is a guideline creation and implementation application for business-to-business (B2B) electronic commerce (e-commerce). Use the document editor to simplify developing, migrating, testing, distributing, and printing your electronic business (e-business) guideline documents. You can create new guideline documents or use the document editor's comprehensive library of standards as templates.
Using an existing standard as a template, you can create new guidelines by changing the attributes of underlying segments, elements, and codes. You can also create a guideline file from a data file.
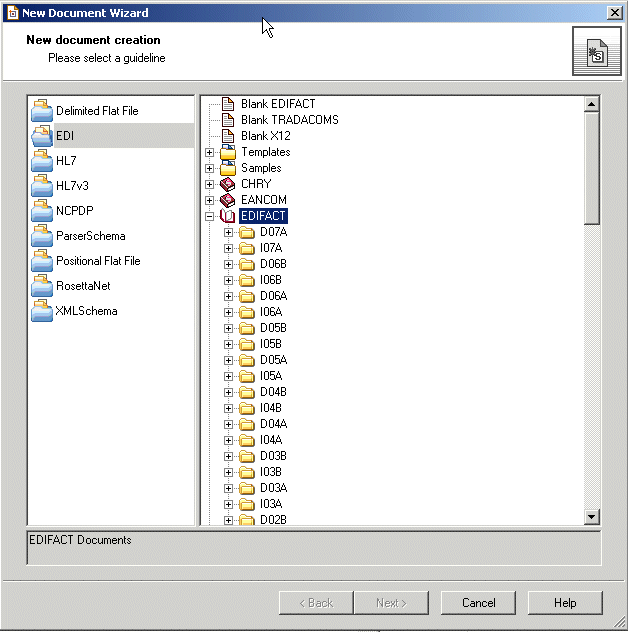
Figure 3-2 shows the types of available document guidelines: delimited flat file, EDI, HL7 2.x, HL7v3, NCPDP, ParserSchema, positional flat file (which includes SAP iDocs), RosettaNet, and XMLSchema.
Figure 3-2 Document Guidelines Available in Oracle B2B Document Editor
In addition to using the RosettaNet document guide lines in the document editor, you can also download standard DTD files from the RosettaNet Web site.
After creating a custom guideline file, use the Oracle B2B interface to include the documents in the document definition, as shown in Figure 3-3. See Section 4.2, "Creating Document Definitions," for more information about this step.
Figure 3-3 Importing XSD and ECS File Created in Oracle B2B Document Editor
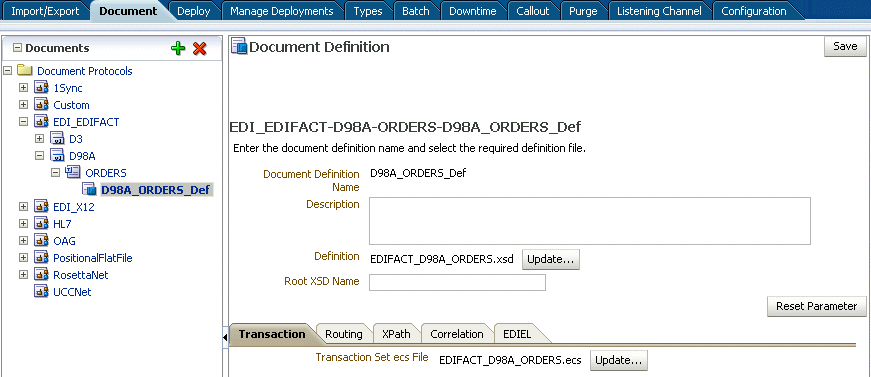
In Figure 3-3, EDIFACT_D98A_ORDERS.xsd and EDIFACT_D98A_ORDERS.ecs are imported to create the document definition. The ECS file is required in B2B for translating and validating documents. The XSD is optional in B2B; however, it provides an easy reference to the document schema when modeling a SOA composite for sending and receiving the document.
Note:
The MapBuilder component of Oracle Document Editor is not certified or supported.
Oracle B2B Document Editor can be obtained by product CD or downloaded from the Oracle Technology Network Software Downloads page:
http://www.oracle.com/technetwork/middleware/downloads/fmw-11-download-092893.html#depends
To install the Oracle Document Editor, extract the downloaded files onto your disk drive, and run Install.exe. Several installation scripts guide you through the process of installing each of the Oracle Document Editor components.
Oracle B2B Document Editor runs on Microsoft Windows only (Win 2000, WinXP, VistaFoot 1 32-bit and 64-bit, and Windows Server 2003), and requires the Microsoft .NET framework (installed automatically from the CD) for full support of W3C XML Schema guidelines.
Complete usage instructions are available from the Oracle B2B Document Editor Help menu by searching on installation and displaying the Preparation topic. A list of new features in this release of the document editor is also provided.
The following example describes how to create the guideline files—the ECS and XSD files— required to send an EDIFACT D98A purchase order, and how to generate and validate test data files based on the D98A–ORDERS guideline.
To create the EDIFACT transaction documents for this scenario, do the following:
Using an existing EDIFACT guideline (standard) as a template, create a purchase order guideline file called orders.ecs.
Open Oracle B2B Document Editor.
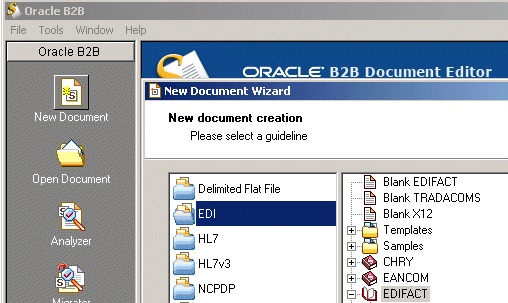
Click New Document and then EDI, as shown in Figure 3-4.
Figure 3-4 Creating a New Document in Oracle Document Editor
Expand EDIFACT and D98A.
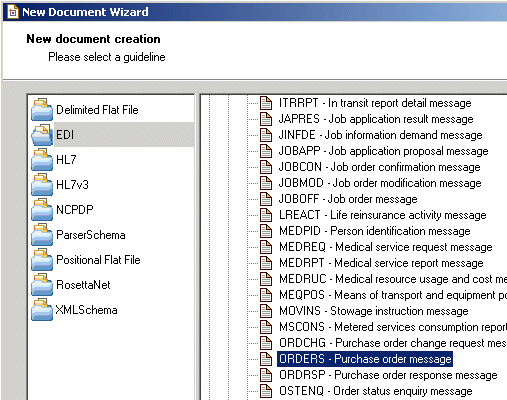
Select ORDERS - Purchase order message, as shown in Figure 3-5, and click Next.
Figure 3-5 Creating a New Document: Selecting a Guideline
Ensure that Insert Envelope Segments is not selected, as shown in Figure 3-6, and click Finish.
Figure 3-6 Creating a New Document: Envelope Segments
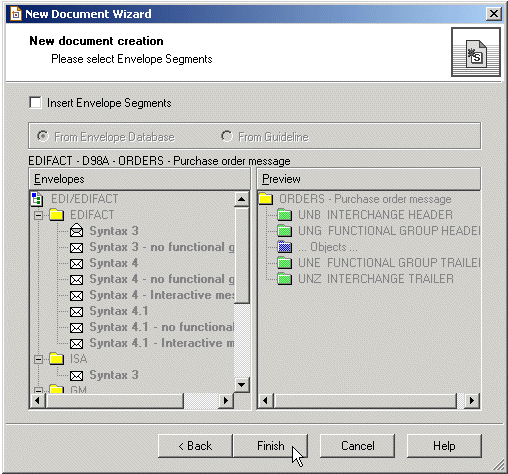
Oracle B2B Document Editor is preseeded with all versions of the interchange (envelope). Oracle B2B handles the envelop based on the settings.
To override the default preseeded envelope information, create a separate ECS file with only the required envelope information (without the transaction details) and then upload it using the envelope override option available in the document version.
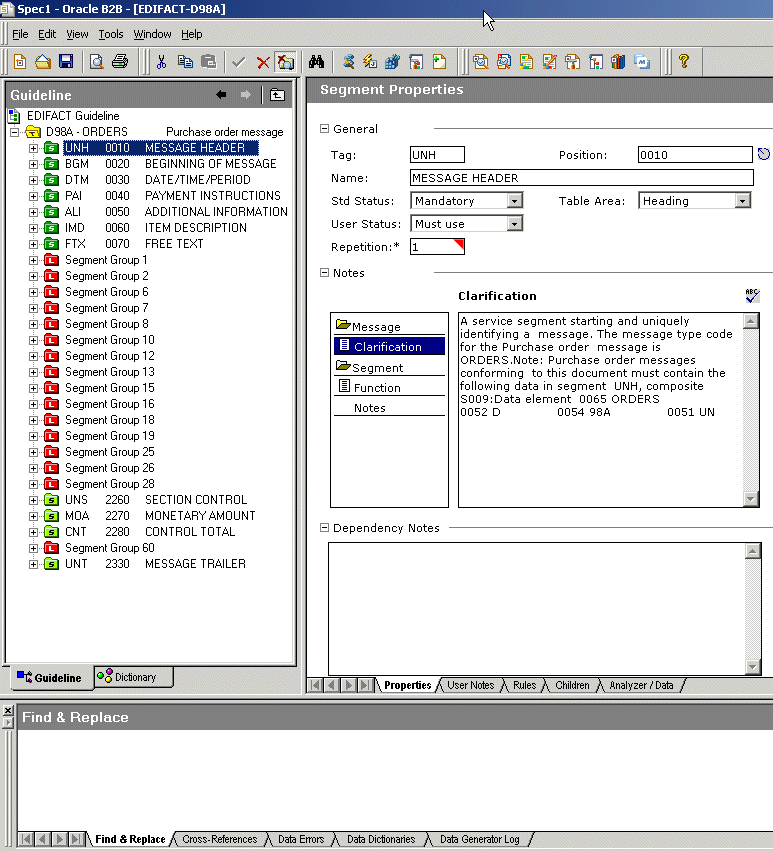
(Optional) Edit the segment-level details.
No edits are needed for this scenario, as shown in Figure 3-7.
Figure 3-7 Creating a New Document: Segment-Level Details
From File, select Save.
Accept the default directory and enter orders.ecs for the file name.
By default, the ECS file is saved to My Documents\Oracle\Oracle B2B\ Guidelines.
Using the guideline file in its internal format (the ECS file), create an XML schema definition file (the XSD format) to use with Oracle B2B.
From File, select Open.
Select orders.ecs and click Open.
From File, select Export.
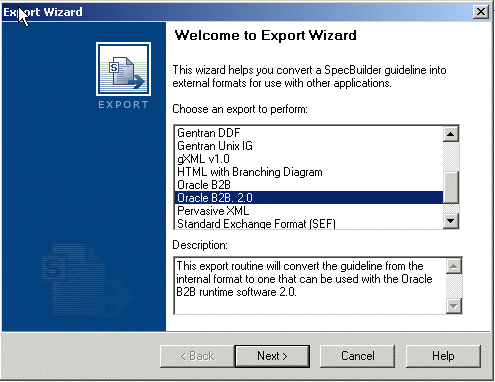
In the Export Wizard, select Oracle B2B 2.0 from the list of export types, as shown in Figure 3-8, and click Next.
Use the Oracle B2B 2.0 export type to provide a namespace of your choice, as in urn:oracle:b2b:EDIFACT/D98A/ORDERS for this example. (Use the Oracle B2B option to have a fixed namespace provided for you.)
Figure 3-8 Selecting the Oracle B2B 2.0 Export Type
In the Export Destination dialog, do the following and click Next.
Accept the default directory
Select Save guideline before exporting
Select Show advanced options
The XSD file is saved with the ECS file in My Documents\Oracle\Oracle B2B\Guidelines.
In the XSD Namespace Options dialog, do the following and click Next.
Select Custom namespace
Provide a namespace, in this example, urn:oracle:b2b:EDIFACT/D98A/ORDERS
In the Templates Configuration dialog, click Next.
No edits to the elements in the template are needed in this scenario.
In the Conversion Options dialog, shown in Figure 3-9, do the following and click Next.
Check the Suppress Enumeration in XSD option. This is recommended because code lists are in the ECS file. Suppressing enumeration reduces the XSD size considerably.
Check the Use this export module instead of default during XData generation option.
In the Document Conversion Options dialog, accept the default, Allow to use SegmentCount macro, and click Next.
The SegmentCount macro counts the number of segments. The data type of the XSD element is changed from numeric to string to enable the count.
Ensure that the Launch Oracle B2B option is not select (it is not needed in this scenario) and click Next.
If you want to start Oracle B2B, enter the URL for your B2B interface (http://host_name:port/b2b).
In the Macro Nodes dialog, click Next.
No macros are needed for any of the nodes in this scenario.
If you see the message "Some characters were replaced in XSD names because they are not allowed," click OK.
Click Finish.
The orders.xsd file is created in Oracle B2B 2.0 format.
Using the Data Generator, create a test data file based on the guideline.
Click Data Generator.
Select New Test Case and click Next.
Click Generate and click Next.
This step generates new data using the specified data dictionaries.
Select From a guideline file, select ORDERS.ecs, and click Next.
Select Select Envelope Segments from the Standards Database and click Next.
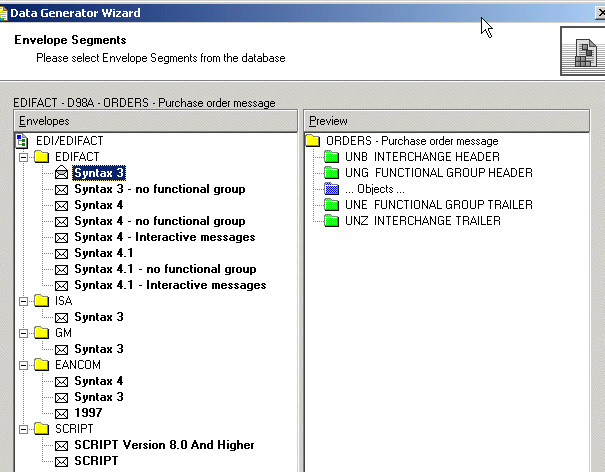
Select the Syntax 3 envelope segment, as shown in Figure 3-10, and click Next.
Figure 3-10 Selecting Envelope Segments from the Database
Select Use directly from the Standards Database and click Next.
The envelope segments are not incorporated in the guideline file.
Select Mandatory + Percentage of optional data and move the slider to indicate the percentage.
Select User Option and click Next.
Select Any size and click Next.
Select Do not reset and click Next.
Set the repeat count options, depending on how many messages you want generated.
Select any data dictionaries you want to use.
Accept the default delimiters and click Next.
Click Output Data file name, enter C:\D98A_ORDERS.dat and click Next.
The DAT file opens, as shown in Figure 3-11.
Save and close the file.
Using the Analyzer, validate the data file against the orders.ecs guideline file, and test the data file against the standard to check for required segments or elements that may be missing.
Click Analyzer, shown in Figure 3-12.
Browse for D98A_orders.dat and click Next.
Ensure that Show Advanced Options is selected, as shown in Figure 3-13, and click Next.
Figure 3-13 Selecting Show Advanced Options
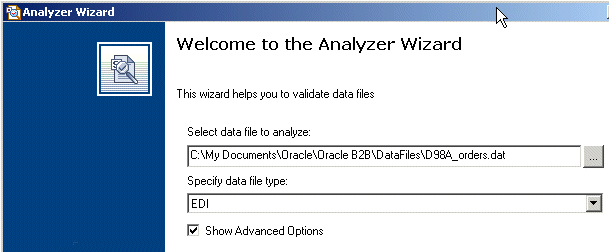
In the Clean Up Data File dialog, click Next.
No preprocessing is needed in this scenario.
In the Data Structure dialog, click Next.
The entire document is validated by default.
Select the guideline file (ECS file) against which to check the data, as shown in Figure 3-14. Do the following and click Next.
Select From a guideline file.
Select orders.ecs.
Figure 3-14 Selecting a Guideline (ECS) File
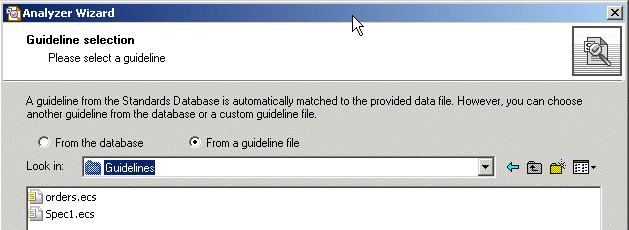
Select Select Envelope Segments from the Standards Database and click Next.
The selected guideline file (ECS file) does not contain envelope segments.
Select the Syntax 3 envelope segment, as shown in Figure 3-15, and click Next.
Figure 3-15 Selecting the Envelope Segment

Select Use directly from the Standards Database and click Next.
The envelope segments are not incorporated in the guideline file.
In the Analyzer Mode and Outputs dialog, accept the default settings, set Generate XData (XML) to Always and click Next.
The results, including any error messages, are displayed, as shown in Figure 3-16.
To view the data in XML format, click the XML icon in the upper right corner, as shown in Figure 3-17.
Figure 3-17 Viewing the Data in XML Format

Use the View as XML (shown in Figure 3-18) and View as HTML options to view the data. Click the Save Data As icon to export the XML report as an XML file.
Footnote Legend
Footnote 1: When using Microsoft Vista, do not install Oracle Document Editor in the program folder, for which admin privilege is needed.