B Customizing a Resource Bundle
This appendix explains how an administrator of either Oracle Business Process Management Workspace or Oracle BPM Worklist can add or modify strings shown in the application by creating a custom resource bundle.
Note:
Create a temporary directory at any location, for example,/scratch/jstein/sharedLib. This will contain all the individual JAR files as well as the shared library JAR file, custom.client.applib.jar. Do this step before doing any of the following steps.B.1 How to Customize a Resource Bundle
This section tells you how to customize a resource bundle.
To customize a resource bundle:
-
Create an Oracle Application Development Framework Project in Oracle JDeveloper. Figure B-1 shows the Create Fusion Web Application (ADF) dialog box.
Figure B-1 Creating an ADF Project in JDeveloper
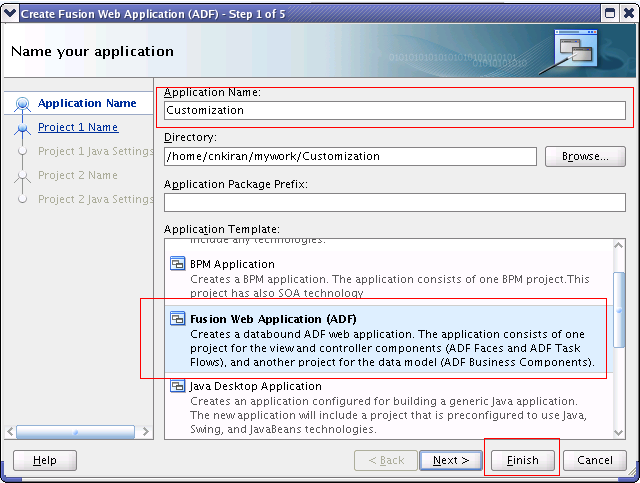
Description of "Figure B-1 Creating an ADF Project in JDeveloper"
-
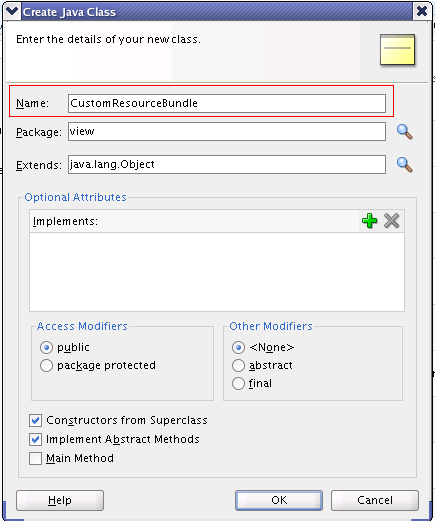
Create a Java class and name it
CustomResourceBundle. Figure B-2 shows the Create Java Class dialog box. -
Include Worklist Application
JARfiles. Figure B-3 shows the BPM Worklist Components library being added.To include the Worklist Application JAR files:
-
From the Project Properties panel, select Libraries and Classpath.
-
Select Add Library.
-
From the Libraries list, select BPM Worklist Components.
-
Click OK.
Figure B-3 Including Worklist Application in the Library
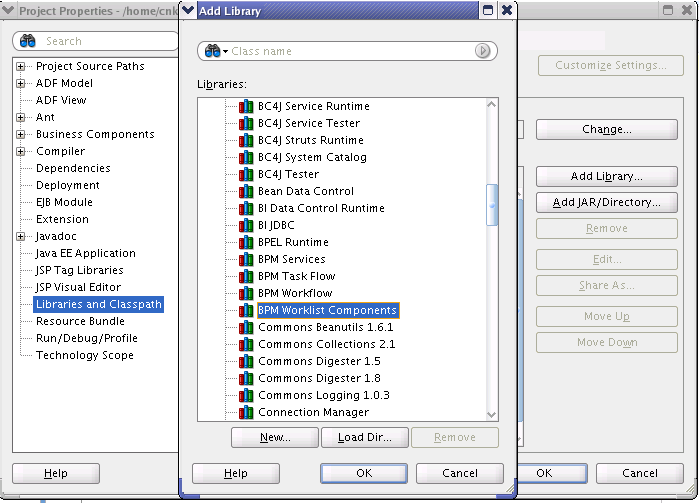
Description of "Figure B-3 Including Worklist Application in the Library"
-
-
Modify the CustomResourceBundle class. The class should look as in Figure B-4:
Figure B-4 Modifying the CustomResourceBundle Class
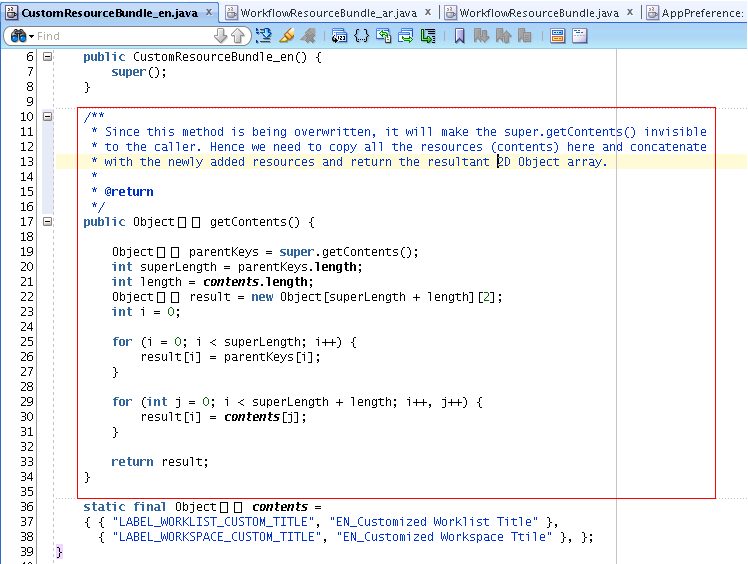
Description of "Figure B-4 Modifying the CustomResourceBundle Class"
Make sure that this class extends the correct WorklistResourceBundle and that the
getContents()method is implemented the same way in all the supported language bundles. -
Create various custom resource bundles for other language support.
You can create various custom resource bundles with different names under the same package. When you do so, you must append the locale to the file name. For example, for English US, your Custom Resource Bundle name will be
CustomResourceBundle_en.java. Make sure you implement thegetContents()method the same way as described in Step 4.Note:
By default, you need to create both the fileCustomResourceBundle.javaand the fileCustomResourceBundle_en.java. This is because we use the English (_en) resource bundle by default during the application login. Otherwise, login would fail. -
Create a new
JARdeployment profile as shown in Figure B-5.Figure B-5 Creating a Deployment Profile for a JAR File
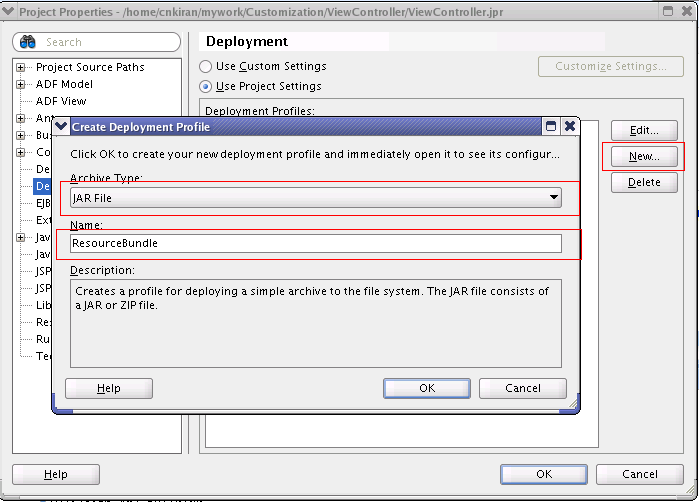
Description of "Figure B-5 Creating a Deployment Profile for a JAR File"
-
Make sure your JAR deployment profile looks like what is shown in Figure B-6.
Figure B-6 Verifying JAR Deployment Profile
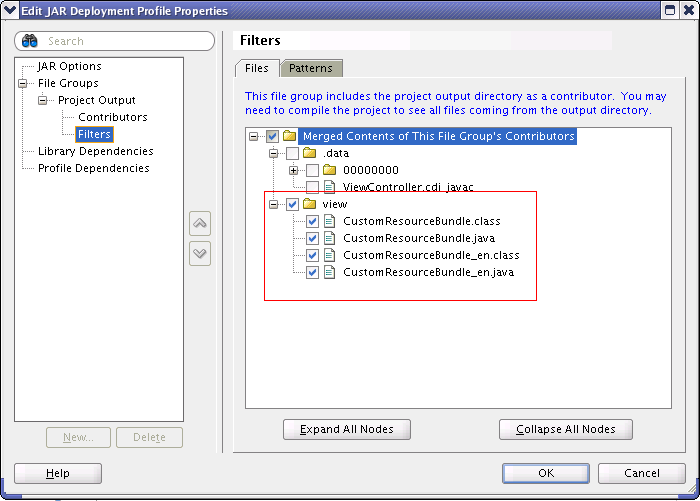
Description of "Figure B-6 Verifying JAR Deployment Profile"
-
Edit the JAR file location to point to the newly created directory as shown in Figure B-7.
Figure B-7 Editing the JAR Deployment Profile
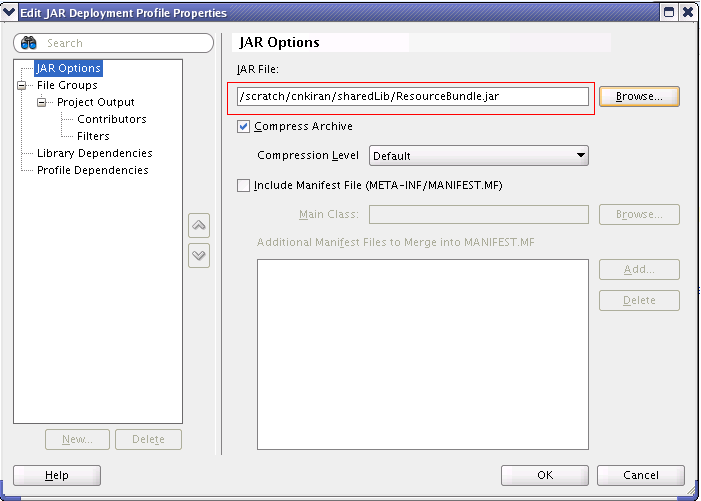
Description of "Figure B-7 Editing the JAR Deployment Profile"
-
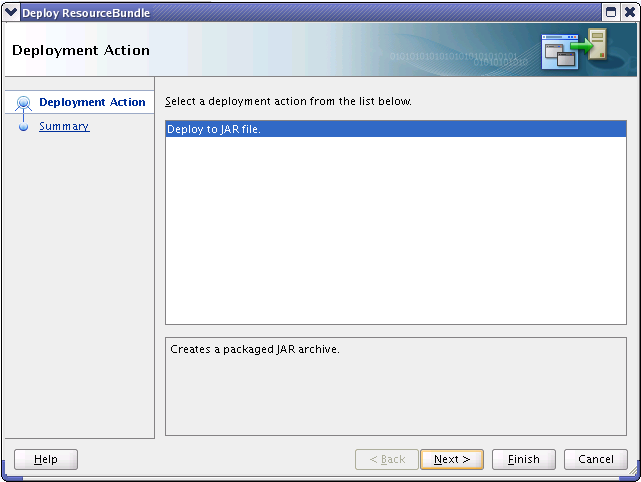
Deploy the resource bundle as a JAR file as shown in Figure B-8.
The file is then deployed to the pre-defined location, namely, the shared library directory.
For more information about resources bundles and how to customize them, see Oracle Fusion Middleware Developer's Guide for Oracle SOA Suite.