5 Creating and Editing Custom Pages in Process Workspace
This chapter describes how to customize the default layout in Oracle Business Process Management Workspace, and also how process designers and administrators can create new layouts and associate them with different sets of roles. This enables them to define the experience for the various kinds of users of each project.
A layout is a set of pages. It contains information about the pages it contains and about the panels each page contains.
Process Workspace provides its own default layout, but you can customize that layout by adding new pages and panels.
You can choose which pages to hide or show by selecting from the Hide Tabs list in the toolbar.
Depending on your roles, you may see several layouts at the same time.
This chapter contains these topics:
-
Section 5.2, "Establishing Communication Between Panels in Process Workspace"
-
Section 5.3, "Editing Custom Pages and Panels in Process Workspace"
For information about troubleshooting human workflow issues, see Oracle Fusion Middleware Administrator's Guide for Oracle SOA Suite and Oracle Business Process Management Suite, "Human Workflow Troubleshooting".
5.1 Creating Custom Pages in Process Workspace
You can design and add new pages and panels to customize your layout. This section contains these topics:
-
Section 5.1.1, "How to Create a Custom Page in Process Workspace"
-
Section 5.1.3, "How to Add an Applications Panel to a Customized Page in Process Workspace"
-
Section 5.1.4, "How to Add a Dashboards Panel to a Customized Page in Process Workspace"
-
Section 5.1.5, "How to Add a Process Instance Panel to a Customized Page in Process Workspace"
-
Section 5.1.6, "How to Grant and Manage Access to Customized Pages in Process Workspace"
5.1.1 How to Create a Custom Page in Process Workspace
-
In the toolbar at the top center of Process Workspace, select More, then select Add Custom Page. The new page appears.
-
In the upper right corner of the new page, click Add Panel. The Add Panel dialog box appears with the Applications item selected, as shown in Figure 5-1.
You can choose the type of application panel to add: application, dashboard, or process instance.
5.1.2 How to Add an External URL to a Customized Page in Process Workspace
You can set your customized page to open an external web page such as cnn.com or oracle.com. To do this, in the newly created page, select Show External URL and add the URL.
Note:
Do not enter the external URL of a website that has frame bursting enabled. To include such websites, add them as external applications as explained in Section 9.2.8, "How to Enable Customized Applications and Links in Process Workspace."5.1.3 How to Add an Applications Panel to a Customized Page in Process Workspace
To add an Applications panel to a customized page:
-
In the toolbar at the top center of Process Workspace, select More, then select Add Custom Page. The new page appears.
-
In the upper right corner of the new page, click Add Panel. The Add Panel dialog box appears with the Applications item selected.
-
From the Add Panel dialog box, select Applications, then click Ok. The Applications panel appears on the page.
-
Specify the name of the Applications panel and any configurable properties.
-
Click Apply.
5.1.4 How to Add a Dashboards Panel to a Customized Page in Process Workspace
From the Add Panel dialog box, you can also select Dashboards (Charts), as shown in Figure 5-2.
Figure 5-2 Adding a Dashboards (Charts) Panel
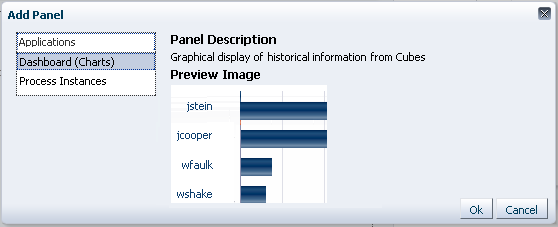
Description of "Figure 5-2 Adding a Dashboards (Charts) Panel"
This dialog box enables you to include either charts or a chart selector in your new page. Choosing either one provides you with the corresponding preview image.
To add a Dashboards panel to a customized page:
-
In the toolbar at the top center of Process Workspace, select More, then select Add Custom Page. The new page appears.
-
In the upper right corner of the new page, click Add Panel. The Add Panel dialog box appears with the Applications item selected.
-
From the Add Panel dialog box, select Dashboards (Charts), then click Ok. The Dashboards panel appears on the page.
-
In the Panel label section, specify the name of the Dashboards panel.
-
In the Panel properties section, from the Data Source list, select a data source for this dashboard panel. The default options are:
-
Workload per Process
-
Performance per Process
-
Workload per Participant
-
Performance per Participant
You can also specify a custom data source. To do this:
-
In the Dashboards panel, in the Panel Properties section, to the right of the Data Source field, click the spy-glass icon. The Data Sources dialog box appears.
-
In the navigator pane on the left, click New. A Data Source dialog box appears for you to create a new data source.
-
Specify the fields as described in Section 6.2.1, "Specifying Graph Content."
-
When you are finished specifying the data source, click Ok.
-
-
Specify the action to be triggered when clicking the graph or widget. Options are:
-
Update another widget: Updates any widget configured to listen to this widget
-
Update a view: Updates any view configured to listen to this widget
-
-
Specify any communication that is to take place with other panels. For information, see Section 5.2, "Establishing Communication Between Panels in Process Workspace".
5.1.5 How to Add a Process Instance Panel to a Customized Page in Process Workspace
From the Add Panel dialog box, you can select Process Instances, as shown in Figure 5-3.
Figure 5-3 Adding a Process Instances Panel
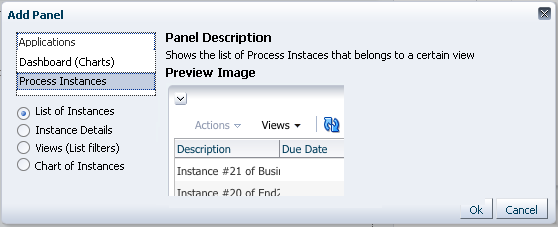
Description of "Figure 5-3 Adding a Process Instances Panel"
Selecting this option enables you to include one of the following types of process instance panels in your new page: list of instances, instance details, views (list filters), and chart instances. Choosing any one of these displays the corresponding preview image.
To add a Process Instance panel:
-
In the toolbar at the top center of Process Workspace, select More, then select Add Custom Page. The new page appears.
-
In the upper right corner of the new page, click Add Panel. The Add Panel dialog box appears with the Applications item selected.
-
From the Add Panel dialog box, select Process Instances, select the type of Process Instances panel, then click Ok. The type of Process Instances panel you selected appears on the page.
-
In the Panel label section, specify the name of the Process Instance panel.
-
If the Panel properties section appears for the type of panel you selected, set the properties as required.
-
Specify any communication that is to take place with other panels. For information, see Section 5.2, "Establishing Communication Between Panels in Process Workspace."
5.1.6 How to Grant and Manage Access to Customized Pages in Process Workspace
An administrator can specify the roles that can access a custom page that the administrator has created. Non-administrative users cannot grant access to custom pages.
To specify access to a custom page:
-
In the custom page you are adding, next to the Access field, click Add Access Properties.
Figure 5-4 Specifying Access to a Custom Page

Description of "Figure 5-4 Specifying Access to a Custom Page"
The Add Access Properties dialog appears.
-
In the Add Access Properties dialog box:
-
Enter an identifier and a name for this page layout.
-
From the Roles list on the left, select the roles to which you are granting access in this layout. Move them to the list on the right by clicking the arrow icons, then click OK.
Note:
-
Only an administrator can grant access to custom pages that the administrator has created. Non-administrative users cannot grant access to custom pages.
-
To grant access to a role, you yourself must be associated with that role, otherwise it will not appear in the Role list.
-
The layout you have just created appears in the Access list. That layout now specifies the roles with access to this custom page.
-
To edit access properties for a custom page:
-
In the custom page you are adding, next to the Access field, click Edit Access Properties. The Edit Access Properties dialog box appears.
-
Enter your changes, then click OK. The layout as you have just edited it appears in the Access list. It now specifies the roles with access to this custom page.
Note:
You can add new roles to a layout without removing previously granted roles.
To delete access properties for a custom page:
In the custom page you are adding, next to the Access field, click Delete Access Properties.
If the layout is a custom one, then you are prompted to confirm the deletion.
To maintain the custom page for the current user when a custom layout is deleted, the user must first save the page to the default layout. Only then should the user create the custom layout, modify the page, and save it to the new layout. If the user does not first save the page to the default layout, then the page is deleted for all members of the roles defined in the custom layout, including the current user.
If the user had right away created the custom layout and set it on the page before saving the page, then
Any custom pages previously associated with this custom layout remain, but are now associated with the default layout.
If the custom page uses the default layout, then the custom page is deleted. Users previously authorized to see this custom page will no longer see it.
5.2 Establishing Communication Between Panels in Process Workspace
You can establish communication between two panels so that an action in one panel is triggered by an action in the other. For example, you can configure a Process Instance panel to listen for actions that occur in a View List panel. Then, when a user selects a given view in the View List panel, that action triggers the use of that view in the Process Instance panel.
5.2.1 How to Establish Communication Between Panels in Process Workspace
To establish communication between panels, you configure one panel, designed with listening capabilities, to monitor actions in one or more source panels. An action occurring in a source panel then triggers an action in the listening panel.
Note:
Communication can be established only between panels on the same page.To establish communication between panels:
-
In the custom page, click Edit Mode. The entire page is available for editing.
-
Create a source panel and select the appropriate option from the Data Source list.
-
Create a listening panel. This time, do not select anything from the Data Source list.
-
Expand Communication with other panels, and, in the Selected event sources window, select the source panel created in step 2.
-
In each panel, click Apply.
Once you have done this, any action in the source panel triggers a corresponding action in the listening panel. For example, when two dashboard panels are communicating, clicking any graphical bars in the source panel triggers the use of that view in the listening panel.
5.3 Editing Custom Pages and Panels in Process Workspace
The custom page has three sections:
-
Panel Label, which has a text field for specifying a name for the page
-
Panel Properties, which has a field labeled Data Source, in which you can enter all or part of the name of a data source. You can also click the adjacent Browse button to search for a data source. This section also has a field labeled When clicking on the widget. It has an adjacent list from which you select the action you want triggered when clicking a widget.
-
Communication with Other Panels described in Section 5.2.1, "How to Establish Communication Between Panels in Process Workspace"
This editable display of the panel enables you to define the name and properties for the new page and establish communication with other panels. In addition, the icons in the upper right corner of the new page enable you to:
-
Switch to View Mode—that is, the manner in which the page is ordinarily viewed. After you switch to View Mode, you can switch back to Edit Mode.
-
Move the panel up, right, left, or down.
-
Add another panel to the right, left, above, or below this one.
-
Remove this panel.