11g Release 5 (11.1.5)
Part Number E20376-05
Contents
Contact
Us
|
Oracle® Fusion
Applications Compensation Management Implementation Guide 11g Release 5 (11.1.5) Part Number E20376-05 |
Contents |
Contact Us |
|
Previous |
Next |
This chapter contains the following:
Define Elements, Balances, and Formulas: Overview
Payroll Relationships: Explained
Manage Organization Payment Methods
The Define Elements, Balances, and Formulas task list contains the tasks required for creating payroll elements for compensation and HR management. You can use this task list if you are recording earnings, deductions, and other payroll data for reporting, compensation and benefits calculations, or transferring data to a third-party payroll provider.
Note
If you are using Oracle Fusion Global Payroll, use the Define Payroll task list instead. The Define Payroll task list includes additional tasks required to set up payroll processing.
The Define Elements, Balances, and Formulas task list is included in the Workforce Deployment and Compensation Management offerings. These offerings contain other tasks that must be completed first. In particular:
Ensure that you have defined the payroll statutory units that you require using the Manage Legal Entities task.
Associate a legislative data group with each payroll statutory unit using the Manage Legal Entity HCM Information task.
Performing these tasks ensures that payroll relationship records are created automatically when you hire employees. Employees must have a payroll relationship so that you can create element entries for them.
The Define Elements, Balances, and Formulas task list includes the following tasks.
Use this task to create rules for legislations not initially provided by Oracle. It guides you through configuring some payroll objects and values required for creating elements. These include tax year start date, period of service on rehire rules, default currency, element classifications, and payment types. Complete this task before the other tasks in this task list.
You must have at least one consolidation group for each legislative data group for which you are defining elements. A consolidation group is a required value when you create payroll definitions.
If you want to record personal payment methods for your employees, you must create organization payment methods and associate them with your payroll definitions. Organization payment methods define the combination of payment type and currency to use for payments to employees or external parties.
Employees must be assigned to a payroll if you want to create element entries for them. The payroll definition determines the payroll period end date, which is the end date of nonrecurring element entries. You create at least one payroll definition for each payroll frequency, such as weekly or semimonthly, within a legislative data group.
Note
If you are creating elements for coexistence only, to pass basic compensation data from your source application, you do not need to create payroll definitions. You must create recurring elements only.
Primary element classifications are predefined. If you run the Calculate Gross Earnings process (provided with Oracle Fusion Global Payroll Interface), you might create subclassifications to feed user-defined balances.
You can write formulas for a number of uses, including validating user entries into element input values, and configuring compensation, benefit, and accrual plan rules. If you use the Calculate Gross Earnings process, you can write payroll calculation and element skip rule formulas for earnings elements. The payroll calculation formula calculates the periodic value to be passed to the third-party provider.
Most of the balances you require are predefined. You can create additional balances for reporting or system extracts. If you are using Payroll Interface, additional balances are created automatically when you create earnings elements. You can edit the definition of these generated balances.
Use the Manage Elements task to create earnings and deductions. Create each element and then edit it to create or edit input values and at least one element eligibility record. You can also create balance feeds. If you run the Calculate Gross Earnings process, you can add a status processing rule to associate an earnings element with a formula.
Note
Make sure the Payroll License parameter in the default process configuration group is set to the appropriate value (HR_ONLY, PAYROLL_INTERFACE, or PAYROLL) before you start creating elements. This parameter determines which element templates are available to you and therefore which objects are generated when you create an element. The default process configuration group must be specified in the Process Configuration Group (ACTION_PARAMETER_GROUPS) profile option.
You can create object groups to specify subsets of elements or payroll relationships to include in a report or process, such as the Calculate Gross Earnings process.
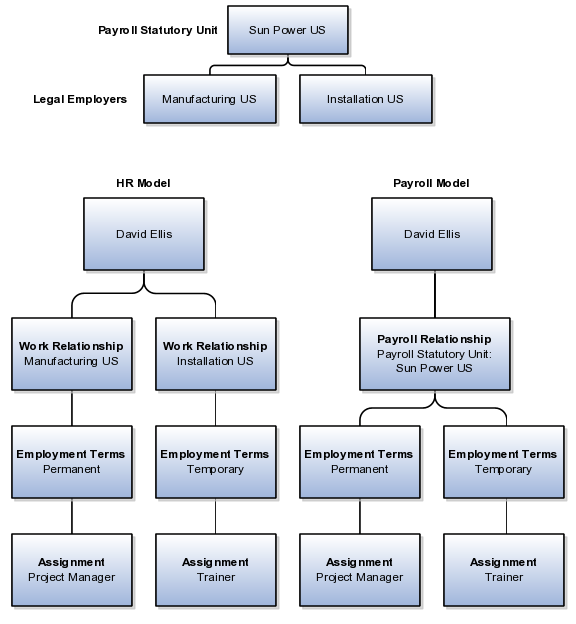
A payroll relationship exists between a person and a payroll statutory unit, which is the legal entity responsible for employee payment. Payroll relationships group person records based on payroll regulatory and statutory calculation and reporting requirements. This grouping enables the aggregation of balances across multiple employment terms and assignment records.
Important aspects of payroll relationships include:
Creation of payroll relationship records
Multilevel aggregation for payroll calculation
Payroll employment model
When an HR administrator processes a new hire, the application automatically creates a payroll relationship record for that person. As an administrator adds employment terms or assignments for that person, the application uses several factors, such as system person type, payroll statutory unit, and country-specific relationship mapping rules, to determine whether to create a new payroll relationship record. Predefined mapping rules for payroll relationships also define the payroll relationship types that indicate whether payroll processing can occur. These predefined rules can vary by localization. For example, in the US, the Employee person type maps to the payroll relationship type that is defined to be processed in payroll runs, whereas the Contingent Worker person type maps to a payroll relationship type that is not be processed in payroll runs.
Note
There is no direct association between payroll relationships and work relationships.
Payroll relationships represent the association between a person and the payroll statutory unit, which provides the highest level of aggregation for payroll calculation purposes. Payroll processing occurs at the payroll relationship level. This means that to access the results of any payroll process, such as calculation or payment distribution, you start by selecting a payroll relationship record.
Note
Although a person may have multiple payroll relationships, payroll balances for that person cannot span payroll relationships.
The payroll relationship structure provides the capability to have employment terms and assignments that can be linked together for calculations based on the payroll statutory unit. Therefore, information must be stored at the various levels of the payroll relationship model. This information is used by the various payroll processes.
Your enterprise might be defined to use two-tier and three-tier employment models. The three payroll employment levels are:
Payroll relationship
The payroll relationship is the highest level for which to accumulate balances. Elements assigned at the payroll relationship level are processed in every payroll run. Payroll relationship elements are typically deduction elements, such as tax, pension, social insurance, or court orders.
Payroll relationships are also used outside of Oracle Fusion Global Payroll to facilitate the extraction of data from HCM that is sent to a third-party payroll provider for payroll processing. For example, payroll coordinators use Oracle Fusion Global Payroll Interface to extract benefits data from HCM and send that data through payroll relationships, along with payroll-related data.
Employment terms (three-tier model only)
Employment terms are commonly used as a middle layer in the payroll employment model to help manage multiple assignments and to satisfy tax and reporting requirements at a lower level than the payroll statutory unit. Elements assigned at the employment terms level are typically salary, pension, or social insurance elements that vary based upon the employment terms.
Note
Employees with multiple terms or assignments that are paid on payrolls using different frequencies, such as Monthly and Semimonthly, must have different employment terms or assignments for each payroll. In a two-tier configuration, payrolls can be assigned to the assignment record; in a three-tier configuration, payrolls can be assigned to the terms record.
Assignment
Because the assignment is the lowest level of the payroll employment model, elements assigned at this usually level vary from one assignment to another or are specifically for a single assignment. Assignment elements are typically used for monetary terms and conditions, such as overtime rules, rates, or bonuses.
The following figure illustrates the comparison between the HR employment model and the payroll employment model in a US example with two legal employers belonging to one payroll statutory unit. In this example, David Ellis has two different employment terms and assignments, and therefore has two work relationships in the HR employment model and one payroll relationship in the payroll employment model.
Banks, branches, and accounts fit together on the premise of the Bank Account model. The Bank Account model enables you to define and keep track of all bank accounts in one place and explicitly grant account access to multiple business units, functions, and users. This eliminates the redundant duplicate bank account setup under different business units when these business units share the same bank account.
Creating a bank is the first step in the bank account creation. The user can search for existing banks, view and update them, or create new banks. You can create a new bank from an existing party. The option to create from an existing party is implicitly implemented by the matching option. The option is available only after the existing party has been found with the same bank. If you choose the matching option, the page repopulates the information from the matched party.
Once you have created your bank, the next step is create a branch or branches associated to the bank. The matching option is also available when creating branches. To create a new branch without using the matching option, manually enter in the information required. You can define other branch-related attributes in the page. If you do not use the matching option when an existing party is found, a branch with the same party name is created.
Once the bank and branch are created, you can proceed to the bank account setup. Select the bank branch you want to associate to your bank account. Assign the owner of the bank account. There are four areas associated to defining the account: general information, control of the account, security access to the account, and business unit assignment. If this is a Payable or Receivable account, the accounts are identified by business unit, and if a Payroll account, by legal entity.
Banks, branches and accounts fit together on the premise of the Bank Account model. The Bank Account model allows you to define and keep track of all bank accounts in one place and explicitly grant account access to multiple business units, functions, and users. Consider the following when you set up bank accounts:
Assigning a unique general ledger cash account to each account and use it to record all cash transactions for the account. This will facilitate book to bank reconciliation
Granting bank account security; bank account security consists of bank account use security, bank account access security, and user and role security.
Account use refers to accounts created for Oracle Fusion Payables, Oracle Fusion Receivables and Oracle Fusion Payroll. When creating an account to be used in one or more of these applications you must select the appropriate use or uses.
Payables and Receivables account access is secured by business unit. In addition to selecting the appropriate application use or uses, one or more business units must be granted access before the bank account can be used by Payables and Receivables. Only business units who use the same ledger as the bank accounts owning legal entity can be assigned access
You have the option to further secure the bank account so that it can only be used by certain users and roles. The default value for secure bank account by users and roles is No. In Payables and Receivables even if the secure bank account by users and roles is no, you must have the proper Multi-Organization Access Control (also known as MOAC) to access a bank account. If the secure bank account by users and roles is set to Yes, you must be named or you must carry a role that is named expressly on the bank account in order to use it.
Note
The security role Bank and Branch Management Duty is used to set up banks and branches.
The security role Bank Account Management Duty is used to set up accounts.
Organization payment methods identify the payment type and the currency to use for payroll payments to workers and for disbursing employee deductions to third parties.
You must define at least one organization payment method for each type of payment and currency that you use to disburse wages and other compensation to your employees. You can also define rules for validating or processing the distribution of payments when you offer more than one option.
A typical configuration is to have one organization payment method for each combination of legislative data group, payment type, and currency.
Any payment method that you define must belong to one of the payment types that your enterprise supports.
Each payroll must have at least one valid organization payment method for each payment type available to employees on that payroll. There may be more than one payment method with the same payment type.
The most common payment types are:
Electronic funds transfer (EFT)
Check
Cash
Your enterprise may support a different range of types that are appropriate for your localization. For example, some localizations do not allow cash, some do not support checks, and very few support postal money orders.
The names of payment types can vary by localization. For example, in the US, the payment type for EFT is NACHA; in the UK it is BACS, and in Australia it is BECS.
Note
When you select the EFT payment type, you can enter EFT information at the organization payment method level, the payment source level, or both. Entries at payment source level take priority over entries at organization payment level.
Payment sources associate bank accounts and other sources of funds with organization payment methods. If you are using Oracle Fusion Global Payroll for payroll processing, each organization payment method that is in use must have at least one valid payment source.
For check and EFT payment methods processed by Global Payroll, the payment source must be associated with an active bank account defined in Oracle Fusion Cash Management. If an organization payment method is associated with multiple payment sources, then the payment method rules determine which payment source is to be used for each disbursement.
You can use the same bank account as a payment source in more than one organization payment method. For example, one checking account may be used to pay both check and EFT payments. The application will not prevent specifying the same name for different payment sources, but it is best practice to use different naming for each occurrence.
When you have one organization payment method for each combination of legislative data group and payment type, you can use payment rules to determine the appropriate payment source based on tax reporting unit. However, there are several reasons why a company might need multiple organization payment methods and multiple payment sources, such as these examples:
Company X has only one tax reporting unit, but prefers to pay its executive staff from a separate bank account for security and confidentiality.
Company Y must comply with state laws and union agreements requiring that checks are drawn on an in-state bank. It uses different organization payment methods for each bank used to pay people based upon their locale.
Company Z may use different currencies to pay foreign nationals and expatriates working in a different country than their home.
Note
You can use the same organization payment method for both employee payments and third-party payments, but you must define different payment sources for each of them and name them differently.
The first payment source defined is the default payment source. If you add more payment sources, you can add subsidiary information as payment rules. For example, if you have multiple tax reporting units, you can specify which payment source to use for each tax reporting unit.
Having a default payment source ensures that employees are paid if there is a change in tax reporting unit. For example, Company A has multiple independent franchises, each with its own tax reporting unit. If a franchise sells, it will have a new tax reporting unit number, and the payment rule will fail. Instead of issuing errors, payment is made using the default payment source.
You might rather not specify a default payment source when payments cannot be made from the specified payment source in the payment rule. For example, Company B has 30 bank accounts and is very careful not to comingle funds. They leave the default unspecified to instead receive notifications that they can resolve manually.
You can define as many payment methods as required for your enterprise. When you create a payroll, you can select which of these methods are valid for employees assigned to that payroll. You select one method as the default method for the payroll. The default payment method is used to determine how to disburse a payment when an employee does not have any personal payment methods specified.
Note
The application does not support EFT payment methods as default payment methods because each payee must have a personal payment method with account information to know where the money will be deposited.
You select organization payment methods when defining other objects, such as payroll definitions and other payment methods. Organization payment methods are only available for selection if they are effective as of the date the object is being defined or updated.
For example, if you create a payroll definition effective as of 4/1/2012 and want to associate a particular organization payment method as the default, the organization payment method must have an effective start date on or before 4/1/2012. Similarly, when updating or correcting objects to change the organization payment method, the organization must have an effective start date on or before the effective date of the change.
The functional relationship of organization payment methods with other objects is described in this table.
|
Object |
Functional Relationship |
|---|---|
|
Personal Payment Method |
Associates a person to a particular organization method. If the payment type is EFT, the person's bank information is included in the personal payment method. |
|
Third-Party Payment Method |
Enables separate payment information for payments to third parties who are not on the payroll. Payments to third parties, such as garnishments or other involuntary deductions, are typically check payments processed separately from the payroll. |
|
Payroll Definition |
Establishes the default payment method for payments to employees who have no personal payment method defined. |
|
Run-Type Payment Method |
Overrides a payroll's default payment method for payments to employees with no personal payment method defined. For example, your regular payroll is by EFT but you issue check bonuses once a year. Using the Separate Payment run type, the payment method will overwrite the one of the payroll. However, if a personal payment method of type EFT has been defined for any employee on the payroll, the application will use the personal payment method instead. |
This example demonstrates how to set up payment sources when defining organization payment methods to be used in Oracle Fusion Global Payroll for payroll processing.
The following table summarizes the key decisions for this scenario.
|
Decisions to Consider |
In This Example |
|---|---|
|
How many organization payment methods are needed? |
Two methods to pay employees by check and electronic funds transfer (EFT), and one method to pay external third-party consultants by check. |
|
How many payment sources are needed? |
One payment source for each of organization payment method to pay employees, and two payment sources for the organization payment method to pay external third-party consultants. |
|
How many bank accounts will be used? |
One for each payment source. |
|
What payment method rules will be used? |
Rules for in-state bank accounts used to pay third-party consultants. |
|
Is notification required to alert the source financial institution before processing EFT payments? |
Yes. Ten days before EFT payments to executive employees |
In this example, the InFusion US company pays its employees by check and EFT payments. Two bank accounts have been set up for funds used to pay the executive staff and the regular employees separately. The company occasionally distributes payments to external third-party consultants, but must comply with state regulations and pays them from two different banks based on their tax reporting unit.
Note
The available payment types for organization payment methods may be limited by the legislation.
This worked example assumes that the following prerequisites of organization payment methods have already been set up:
Perform the following steps three times, once for each of the three organization payment methods.
|
Field |
Non-Executive Value |
Executive Value |
Consultant Value |
|---|---|---|---|
|
Name |
Employee Payroll Check |
Executive Payroll Direct Deposit |
In-State Consultant Check |
|
Payment Type |
Check |
NACHA |
Check |
|
Currency |
US Dollar |
US Dollar |
US Dollar |
On the Create Payment Source page, complete the fields as shown in this table, and then click Continue.
|
Field |
Non-Executive Value |
Executive Value |
|---|---|---|
|
Name |
Employee Check Source |
Executive Direct Deposit Source |
|
Bank Account Name |
InFusion US Your Bank |
InFusion US Bank of America |
Note
Keep your payment source names as specific as possible for each scenario. This will help when managing more complicated combinations of organization payment methods and payment rules.
Perform this step twice, once for each payment source.
On the Create Payment Source page, complete the fields as shown in this table, and then click Continue.
|
Field |
First Source Value |
Second Source Value |
|---|---|---|
|
Name |
Texas Check Source |
California Check Source |
|
Bank Account Name |
Comerica Bank |
Bank of the West |
Note
If a single organization payment method has payment sources defined for both employees and third parties, the names of the payment sources must not be the same.
In this example, the organization payment method you set up for the external third-party payments with two different payment sources requires payment rules to determine how payments are distributed.
Perform these steps for the In-State Consultant Check organization payment method created in the previous task.
|
Field |
Texas Check Source |
California Check Source |
|---|---|---|
|
Default |
No |
No |
|
Tax Reporting Unit |
Texas TRU |
California TRU |
|
Payment Source |
Texas Check Source |
California Check Source |
In this example, the bank information for the EFT payments to executive employees must be added.
When you select the EFT payment type, you can enter EFT information at the organization payment method level, the payment source level, or both. Entries at payment source level take priority over entries at organization payment level. In this example, the EFT information is set at the organization payment method level because the US company requires notification of any electronic transfers of funds 10 days prior to the planned transfer date.
|
Field |
Value |
|---|---|
|
Prenotification Required |
Yes |
|
Prenote Days |
10 |
Use the Manage Third-Party Payment Methods task to create payment methods for all external payees who are not on the payroll. A third party can be either a person or an organization. Payments to third parties are normally involuntary deductions, such as court-ordered garnishments.
For all third-party payment methods, the organization method that determines the payment source to use must already be defined. Use the Manage Organization Payment Methods task in the Payment Distribution work area to define the payment source for third-party payments.
When you create a third-party payment method for a person, you select the payroll relationship for the employee whose pay is subject to the deduction. This makes the third-party person payment method available for selection as a payee on the employee's involuntary deduction card.
For example, you might set up an electronic funds transfer (EFT) payment to Mary Smith for a child-support deduction for employee John Smith. When you create the third-party payment method, you select the payroll relationship for John Smith. When you add the child support order to John Smith's involuntary deduction card, you can select Mary Smith in the Order Amount Payee field.
When you create a third-party payment method for an organization, you select External Payee in the Party Usage Code field to make the organization available for selection as a payee on the employee's deduction card.
For example, you might set up an EFT payment method for a County Sheriff that receives a processing fee on garnishment payments. When you create the payment method, you designate the County Sheriff as an External Payee. When you add the garnishment order to the employee's involuntary deduction card, you can select the County Sheriff in the Processing Fee Payee field.
Payroll definitions contain calendar and offset information, which determines when payments are calculated and costed. Using payroll definitions, you can specify payment frequency, processing schedule, and other parameters for a particular payroll. Payroll period types, such as weekly or monthly, determine the interval at which you pay employees.
Each payroll definition can use only one payroll period type, and you must set up at least one payroll definition for each payroll period type that you use to pay employees. For example, to pay employees semimonthly, create a payroll definition using the semimonthly payroll period type, ensuring that tax calculations and other calculations will produce correct results for those employees.
When you create a payroll definition, the complete payroll schedule is automatically generated, based on the payroll period type, any offsets or calendar adjustments, and the number of years that you specify. Once you have saved a payroll definition, you can assign employees to it on the Manage Payroll Relationships page.
A common scenario for modifying an existing payroll definition is to increase the number of years and generate more payroll time periods to extend the payroll calendar. A common scenario for creating a payroll definition is to replace one that is expired or end-dated.
Each payroll must belong to a consolidation group, which is required by the application for processing purposes. Before you can create a payroll definition, the legislative data group and the consolidation group to use for it must already be defined.
When you create or modify payroll definitions, the application automatically generates a calendar of payroll periods based on your selections. The choices you make for the following values determine exactly how the schedule of payroll periods is generated:
Effective start date
First period end date
Number of years
Offsets
Changes to specific dates
The effective start date is the first date that the payroll definition can be used for employee data. The start date must be on or before the earliest date of any historical data you want to load. For example if you want a payroll to be in use starting on 1/1/2013, and you have 5 years of historical payroll data to load, then the start date of the payroll definition must be on or before 1/1/2008.
The effective start date does not affect the generated calendar of payroll periods. The start date for the first payroll period is based on the first period end date.
The first period end date is the end date of the first payroll period that the application generates for a payroll definition. It is typically based on the date of implementation, tax year, benefits enrollments, or a particular payment cycle. For example, if your weekly payroll work week is Saturday through Friday, and your first payment date is planned to be on 1/6/12, you could use 12/30/11 as your first period end date.
The number of years you enter represents how many years of time periods to generate starting from the beginning of the first payroll period. For example, a payroll definition with an effective start date of 1/1/1985, a payroll period type of semimonthly, a first period end date of 6/15/2012, and the number of years as 5 would generate a calendar of payroll time periods from 6/1/2012 through 5/31/2017. Once you save a payroll definition, you can later only increase but not reduce its number of years because a calendar of time periods for the payroll has already been generated.
Depending on the payroll period type, you can elect for your payroll cycle events to occur on specific dates or be based on offsets from period start or end dates.
This table describes the predefined payroll cycle events that you can offset.
|
Date |
Meaning |
|---|---|
|
Cutoff Date |
Final date that payroll information can be entered for the payment period. |
|
Payslip Availability Date |
Date on which the payslip is available for viewing. |
|
Payroll Run Date |
Date scheduled for the regular run of this payroll. |
|
Date Earned |
Date on which element entries are added to the payroll run. |
|
Date Paid |
Date the employee is marked as paid. For check payments, this is the date that the check can be cashed or deposited. For electronic funds transfer (EFT) payments, it is the transfer date. |
When creating a payroll definition, you can use dynamic offsets for payroll cycle events. All of the predefined payroll time periods you can use support dynamically generated dates for offsets. Using dynamic offsets, you have the option to offset each payroll cycle event by a specified number of calendar or work days before or after the start date or the end date of the payroll period. For example, you might want to set the payroll run date three work days before the payroll end date, which accommodates differences in the number of days in the payroll period and also accounts for weekends and holidays.
The predefined Monthly (Calendar) payroll time period supports using both dynamic offsets and fixed-date offsets. Using fixed dates, you can adjust the exact date of each of the payroll cycle events for the first payroll period and any adjustments that you make will be reflected in the payroll calendar for subsequent payroll time periods. For example, you might set the cutoff date as the 25th of the month and the payroll run date as the 26th of the month, then all payroll periods in the calendar will have those offsets.
Once you have generated the payroll time periods, you can further adjust any specific calendar dates, as desired. For example, if you know of a particular bank holiday that falls on a payroll run date or a payment date, you might want to adjust the dates manually on the payroll calendar's time period. You can make these adjustments when creating a payroll definition or any time after then, as long as the time period is in the future.
This example demonstrates how to create two payroll definitions for different payment frequencies that are associated with one consolidation group and one legislative data group.
The following table summarizes the key decisions for this scenario.
|
Decisions to Consider |
In This Example |
|---|---|
|
Which consolidation group should be used? |
User-defined consolidation group: InFusion US Emp Group |
|
What is the legislative data group for the consolidation group? |
User-defined legislative group: InFusion US LDG |
|
What are the payroll periods to use? |
Predefined payroll period types: Semimonthly Monthly (Calendar) |
|
What are the names of the new payroll definitions? |
InFusion US Emp Semimonthly InFusion US Emp Monthly |
|
What is the name of the organization payment method to use for all employees? |
User-defined payment methods: InFusion US Emp Check Infusion US Emp EFT |
In this example, the InFusion US company is creating payrolls for its employees. There are two sets of employees, permanent employees who are paid a set amount on a semimonthly basis, and temporary employees that are paid using time card data on a monthly basis.
The business requires that a single monthly costing process be run against results from different payroll runs by using the consolidation group name as an input parameter in the costing run. This example creates two payroll definitions with different payment periods, but the same consolidation group. Both definitions are effective starting on 1/1/11 and will generate payroll time periods covering 5 years.
Create two payroll definitions:
One for permanent employees that are paid a flat amount by electronic funds transfer (EFT) on a semimonthly basis. This payroll definition includes dynamically generated offset dates.
One for temporary employees that are paid by check using time card data on a monthly calendar basis.
Perform the following steps twice, first using the semimonthly values and then using the monthly values.
In this example, all employees that will use this payroll definition are hired after 1/1/11, so there is no issue with loading historical employee data.
|
Field |
Semimonthly Value |
Monthly Value |
|---|---|---|
|
Name |
InFusion US Emp Semimonthly |
InFusion US Emp Monthly |
|
Consolidation Group |
InFusion US Emp Group |
InFusion US Emp Group |
|
Period Type |
Semimonthly |
Monthly (Calendar) |
|
First Period End Date |
6/15/12 |
6/30/12 |
|
Default Payment Method |
InFusion US Emp EFT |
InFusion US Emp Check |
|
Field |
Falls Value |
Day Type Value |
Offset Value |
Base Date Value |
|---|---|---|---|---|
|
Cutoff Date |
5 |
Work Days |
Before |
Period End Date |
|
Payroll Run Date |
3 |
Work Days |
Before |
Period End Date |
|
Field |
Value |
|---|---|
|
Fixed Date |
Yes |
|
Cutoff Date |
6/25/12 |
|
Date Earned |
6/30/12 |
|
Payroll Run Date |
6/27/12 |
|
Date Paid |
6/30/12 |
|
Column |
Semimonthly Value |
Monthly Value |
|---|---|---|
|
Payroll Run Date |
Old Value: 11/28/13 New Value: 11/27/13 |
Old Value: 5/27/13 New Value: 5/28/13 |
Closing a payroll period can interfere with changes to recurring entries. Payroll periods are not like General Ledger periods. You do not need to close payroll periods.
Because the payment method you are looking for is not effective from the start date of the payroll definition. The start date of the organization payment method must be on or before the start date of the payroll definition.
Fast formulas are generic expressions of calculations or comparisons that you want to repeat with different input variables.
You can use fast formulas to:
Calculate payrolls
Define the rules for paid time off accrual plans
Define custom calculations for benefits administration
Validate element inputs or user-defined tables
Edit the rules for object group population for elements or people
Calculate absence duration
Write payroll calculations and skip rules for elements that you define to represent earnings and deductions. Associate more than one formula with each element to perform different processing for employee assignments with different statuses. You will define elements and formulas for earnings and deductions with highly complex calculations requiring a number of different calls to the database.
Edit the delivered accrual type formulas or write your own. Each accrual plan needs two formulas: one to calculate the gross accrual and the other to return information to the PTO carry over process.
Configure your plan design to the requirements of your enterprise. For example, you can write a formula to calculate benefits eligibility for those cases where eligibility determination is most complex.
Validate user entries into element input values using lookups or maximum and minimum values. However, for more complex validations write a formula to check the entry. Also, use a formula to validate entries in user tables.
Define a payroll relationship group, HR relationship group, or element group by defining a formula based on the criteria entered. If you want to change the sequence in which the criteria are checked for each assignment, edit the formula.
Calculate the duration of an absence from the start and end dates.
When developing a formula you must understand formula language, the rules that the application imposes on the formula, and the calculation requirements. Formulas are created using various components.
Formula components include:
Assignment statements
Return statements
Variables
Input statements
Expressions
Conditions
Comments
Note
There are several other components used in formulas. These include literals, database items, working storage area, calls to other formulas, functions, and operators.
To illustrate how each component is used in a formula, suppose you wanted to calculate the pay value for the element WAGE by multiplying the number of hours an employee works each week by the hourly rate. The formula can be written as follows:
WAGE = HOURS_WORKED * HOURLY_RATE
RETURN WAGE
The first line is an assignment statement that
simply assigns a value to the element WAGE.
The second line is a return statement that passes
back the WAGE value to the payroll run.
A return statement can be used to stop the formula execution without
passing back any values.
Local
variables occur in a single formula only. You can change a
local variable within the formula by assigning a value to it using
an assignment statement. To calculate the WAGE value, the formula needs to get the value for the variable HOURS_WORKED.
You can use local variables to store data in a formula.
You might want to hold data temporarily while you perform some other
calculations, or to pass data back to the application. Below is an
example showing the use of a variable, ANNUAL_LEAVE.
/* Formula: Annual Leave Formula */
IF YEARS_SERVICE >= 10
THEN
ANNUAL_LEAVE = 25
ELSE
ANNUAL_LEAVE = 20 + FLOOR (YEARS_SERVICE/2)
RETURN ANNUAL_LEAVE
The HOURS_WORKED could
be an input value of the element WAGE. To pass the element input values to the formula during processing,
define an inputs statement as follows:
INPUTS ARE HOURS_WORKED
WAGE = HOURS_WORKED * HOURLY_RATE
RETURN WAGE
Note
This is a payroll application example. The name used
in the input statement must be the same as the name of the element
input value, and multiple words must be joined by underscores. Other
input statements that have nothing to do with elements would have
their own rules for formula input variables. In this example, the
input variable HOURS_WORKED is numeric.
If the input variable is not numeric, you must specify the type. For
example,
INPUTS ARE START_DATE (DATE)
Each function or calculation is one expression, and you can nest expressions to create more complex calculations. Brackets can be used to control the order in which calculations are performed. Expressions within brackets are evaluated first. Within nested brackets, evaluation proceeds from the least inclusive set to the most inclusive set. When brackets are not used the following hierarchal order or execution is implied: multiplication and division then addition and subtraction.
Expressions combine constants and variables with operators
(+, -, *, /), array methods, and functions to return a value of a
certain data type. For example, the expression (3 + 2) returns a value
of 5, and is of NUMBER data type. The
format of an expression is:
SUBEXPRESSION [operator SUBEXPRESSION ...]
A number of sub-expressions can combine in a single
expression. For example, the sub-expressions (3 + 2) and MONTHS_BETWEEN(start_date, end_date) can combine
in a single expression as follows:
(3 + 2) + MONTHS_BETWEEN(start_date, end_date)
Expressions can also be used inside functions, such as:
salary = GREATEST(minimum_wage, (hourly_rate * hours_worked))
Operands in an expression are usually of the same data type which is the data type of the expression as a whole. For example, in the following expression all the operands are numeric and the expression itself is numeric:
GREATEST(MINIMUM_WAGE, (HOURLY_RATE * HOURS_WORKED)) + BONUS
The operands for the above expression are BONUS, and the return value from GREATEST. The arguments for GREATEST are separate expressions.
Conditions are used to process expressions based on whether a certain condition occurs. For example,
TRAINING_ALLOWANCE = 0
IF (AGE < 20) THEN
TRAINING_ALLOWANCE = 30
This formula checks if the condition (AGE < 20)
is true or false. If it is true, the formula processes the statement
that follows the word THEN. If the condition
is not true, the formula ignores this statement.
Use comments to explain how all or part of a formula is used. Also, you can change some formula lines into comments until they are ready to be used. Comments are designated by the comment delimiters of /* and */. Anything written inside these delimiters is a comment. You can place comments anywhere within a formula. The beginning of a formula should contain the following comments:
The formula title and a short purpose statement.
A description of the formula inputs.
A list of variables and literals that may require updating.
An explanation of the formula's calculation.
The dates of any modifications, the name of the person modifying the formula, and the reason for the change.
An example of a comment is:
/* Use this formula to determine the bonus percentage for staff */
INPUTS ARE SALARY_AMOUNT,
START_DATE (DATE),
END_PERIOD_DATE (DATE),
BONUS_PERCENTAGE /* Decided at board level. */
Note
Do not put a comment within a comment. This causes a syntax error when the formula is compiled.
Compilation errors display in the Manage Fast Formulas page when you compile the formula. The formula compiler returns line numbers starting at 1 from the beginning of a formula, and character positions starting at 1 from the beginning of a line in its error messages. The compiler aborts compilation when an error is encountered.
This table lists the type and description of several common formula compilation errors.
|
Formula Error |
Description |
|---|---|
|
Syntax Error |
The formula text violates the grammatical rules for
the formula language. An example is using |
|
Incorrect Statement Order |
|
|
Misuse of |
Occurs when any of these conditions occurs:
|
|
Misuse of |
An |
|
Missing |
A database item with defaulting specified must have
a |
|
Misuse of |
A DEFAULT statement is specified for a variable other than an input or database item. |
|
Uninitialized Variable |
The compiler detects that a variable is uninitialized when used. The compiler cannot do this in all cases. This error often occurs when you want to use a database item, but a database item is not available in the formula. |
|
Missing Function Call |
A function call is not recognized. The combination of return type, function name, and parameter types does not match any available function. |
|
Incorrect Operator Usage |
An instance of a formula operator use does not match the permitted uses of that operator. For example, the + operator has two permitted uses.
The operands are both of data type |
|
Inconsistent Data Type Usage |
A formula variable is being used as if it is of more than one data type. Or a database item or context is being used with the wrong data type. For example, Variable A is assigned a |
|
|
A condition that eventually becomes false, or an |
|
Misuse of Context |
A variable is used as a context, or a context is used as a variable. For example, |
Fast formula execution errors occur when a problem arises while a formula is running. The usual cause is a data problem, either in the formula or in the application database. These errors contain the formula line number where the error occurs.
This table lists the type and description of each formula execution error.
|
Formula Error |
Description |
|---|---|
|
Uninitialized Variable |
Where the formula compiler cannot fully determine if a variable or context is initialized when it is used, it generates code to test if the variable is initialized. When the formula executes and the variable or context is not initialized an error is raised. |
|
Divide by Zero |
Raised when a numeric value is divided by zero. |
|
No Data Found |
Raised when a non-array type database item unexpectedly fails to return any data. If the database item can return no data then it should allow defaulting. This error is also raised from within a formula function. The cause is an error in the formula function code. |
|
Too Many Rows |
Raised when a non-array type database item unexpectedly returns more than a single row of data. The cause is an incorrect assumption made about the data being accessed. This error can also be raised from within a formula function. The cause is an error in the formula function code. |
|
|
Raised when a database item unexpectedly returns a |
|
Value Exceeded Allowable Range |
Raised for a variety of reasons, such as exceeding the maximum allowable length of a string. |
|
Invalid Number |
Raised when an attempt is made to convert a non numeric string to a number. |
|
User Defined Function Error |
Raised from within a formula function. The error message text is output as part of the formula error message. |
|
External Function Call Error |
A formula function returned an error, but did not provide any additional information to the formula code. The function might have output error information to the logging destination for the executing code. |
|
Function Returned |
A formula function returned a |
|
Too Many Iterations |
A single |
|
Array Data Value Not Set |
The formula attempted to access an array index that has no data value. This is an error in the formula code. |
|
Invalid Type Parameter for |
An invalid data type was specified in the |
|
Incorrect Data Type For Stored Item |
When retrieving an item using |
|
Called Formula Not Found |
The called formula could not be resolved when attempting to call a formula from a formula. This could be due to an error in the calling formula, or because of installation issues. |
|
Recursive Formula Call |
An attempt was made to call a formula from itself. The call could be directly or indirectly via another called formula. Recursive formula calling is not permitted. |
|
Input Has Different Types In Called and Calling Formulas |
When calling a formula from a formula, the actual formula input data type within the called formula does not match the data type specified from the calling formula. |
|
Output Has Different Types In Called and Calling Formulas |
When calling a formula from a formula, the actual formula output data type within the called formula does not match the data type specified from the calling formula. |
|
Too Many Formula Calls |
There are two many formula from formula calls. This is due to a problem with the formulas. |
This example demonstrates, using the text editor, how to create a fast formula that returns the range of scheduled hours for managers and a different range for other workers.
The following table summarizes key decisions for this scenario:
|
Decisions to Consider |
In This Example |
|---|---|
|
Is the formula for a specific legislative data group? |
No, this is a global formula that can be used by any legislative data group. |
|
What is the formula type for this formula? |
Range of Scheduled Hours |
|
Are there any contexts used in this formula? |
No |
|
Are there any database item defaults? |
Yes, ASG_JOB |
|
Are there any input value defaults? |
No |
|
What are the return values? |
MIN_HOURS, MAX_HOURS, FREQUENCY |
|
Field |
Value |
|---|---|
|
Formula Name |
Manager Range of Scheduled Hours |
|
Formula Type |
Range of Scheduled Hours |
|
Description |
Manager's Range of Hours |
|
Effective Start Date |
1-Jan-2010 |
/* DATABASE ITEM DEFAULTS BEGIN */
DEFAULT FOR asg_job IS ' '
/* DATABASE ITEM DEFAULTS END */
JOB_1 = ASG_JOB
IF JOB_1 = 'Manager' then
(MIN_HOURS = 25
MAX_HOURS = 40
FREQUENCY = 'H')
else
(MIN_HOURS = 20
MAX_HOURS = 35
FREQUENCY = 'H')
return MIN_HOURS, MAX_HOURS, FREQUENCY
You can specify the following accrual plan rules on the Accrual Plan page in accordance with the leave policy of your enterprise:
Accrual start rule
Accrual term and frequency
Ineligibility period
Gross accrual maintenance
Accrual bands
Net accrual calculation rules
Note
If you do not specify values for any of the above plan rules, the accrual plan uses the default values in the associated accrual formula.
You use an accrual start rule to determine when newly enrolled employees start to accrue time. For example, some accrual plans allow new hires to accrue time from the date of their hire. If the predefined start rules that are available on the Accrual Plan page do not meet your requirements, you can add your own rule directly in the accrual formula.
You can specify the type of the accrual term and its length during which employees accrue time. For example, you can define an accrual term of one calendar year that restarts on January 1, or on the employee's annual hire date. You define the frequency at which employees accrue time during an accrual period, for example, two days every pay period, or two days every month.
You can define a period, such as six months from the date of hire in which newly hired employees accrue time, but not use it until the end of the period. Although you can define the ineligibility period in the Accrual Plan page, if you have more complex rules to incorporate, you can include those rules in the accrual formula.
Oracle Fusion Global Payroll users can choose to store gross accruals in a payroll balance. The advantage is that the gross accruals are calculated since the last payroll run, and not for the entire accrual term, thus reducing the number of calculations.
Use accrual bands to define accrual benefits for employees. You can create as many bands as you require.
The accrual plan generates the net accrual calculation for enrolled employees. By default, the absence types that you associate with the accrual plan appear as deductions in the calculation. However, you can include other elements to customize the calculation.
By default, the payroll accrual formulas (Accrual Payroll Calculation formula and Accrual Payroll Balance Calculation formula) start the accrual from January 1, and the simple accrual formulas (Accrual Simple Multiplier and Accrual Simple Balance Multiplier), from June 1.
The formula uses the start rule you specified for the accrual plan in the Accrual Plan page.
On the basis of the start rule, the formula calculates the start date from the employee's hire date and compares it with the plan enrollment date. Accrual begins on whichever of these two dates is later.
The following table describes how the formula interprets each start rule.
|
Start Rule |
How the Formula Interprets It |
|---|---|
|
Hire Date |
Accruals begin from the first full pay period following the hire date. If the hire date is on the first day of the pay period, the participant starts to accrue time as of that date. For example, if the hire date of a participant on a monthly payroll falls on January 10, 2011, and the pay period starts on the first of every month, accruals start on February 1, 2011. If the hire date falls on January 1, 2011, then the participant starts to accrue time on the same day. |
|
Beginning of calendar year |
Accruals begin from the start of the year following the year of hire. For example, a participant with a hire date of January 1, 2011 starts to accrue time from January 1, 2012. |
|
Six months after hire |
Accruals begin from the first full pay period after the six-month anniversary of the hire date. If the six-month anniversary falls on the first day of the pay period, the participant starts to accrue time as of that date. For example, a participant on a semi-monthly payroll who is hired on 9 February, 2011 completes six months service on 9 August, 2011. The participant starts to accrue time on the first day of the second pay period in August. If the hire date was on 1 February, 2011, the participant starts to accrue time on the first day of the first pay period in August. The period of ineligibility does not apply to accrual plans using this start rule. |
There are two ways to change the start rules:
You can enter additional start rules as values for the ACCRUAL_START_TYPE lookup type, which provides a list of values for the Accrual Start field. You must add a statement to your copy of the predefined formula to calculate the accrual start date using your new start rule.
You can ignore the Accrual Start field and calculate the start date entirely within the formula. To do this, copy the predefined formula and replace the section that calculates the accrual start date with your own formula statements.
The accrual formula calculates the gross accrual on the basis of time that employees accrue in each accrual period. The type of accrual formula that you want to associate with your accrual plan depends on how you want to implement the following plan rules:
Type of accrual period
Gross accrual maintenance
Use the following table to decide which formula to select for your accrual plan. For example, if you want your employees to accrue time per payroll period and you want to maintain gross accruals using a payroll balance, you must base your formula on the Accrual Payroll Balance Calculation formula.
|
Plan Rule Implementation |
Accrual Payroll Calculation Formula |
Accrual Payroll Balance Calculation Formula |
Accrual Simple Multiplier Formula |
Accrual Simple Balance Multiplier Formula |
|---|---|---|---|---|
|
Accruals per payroll period |
Yes |
Yes |
No |
No |
|
Accruals per calendar period, such as month |
No |
No |
Yes |
Yes |
|
Gross accrual maintenance using payroll balance |
No |
Yes |
No |
Yes |
Note
The Accrual Payroll Calculation formula and the Accrual Simple Multiplier formula incorporate the same rules as the accrual formulas that use balances, except that they cannot be called from the payroll run to maintain a balance of gross accruals.
Use the following table to compare the differences in the default calculation methods of the Accrual Payroll Balance Calculation formula and the Accrual Simple Balance Multiplier formula. You can also use the table to check if you can change a particular plan rule on the Accrual Plan page
|
Plan Rule |
Default Calculation Method (Accrual Payroll Balance Calculation) |
Default Calculation Method (Accrual Simple Balance Multiplier) |
Changeable on Accrual Plan Page |
|---|---|---|---|
|
Length of accrual term |
One year. |
One year. |
Yes |
|
Accrual term start date |
January 1. Accrual calculations restart at the beginning of each calendar year. |
June 1. Accrual calculations restart at the beginning of each June. |
Yes |
|
Accrual frequency |
On the basis of the enrolled employee's pay periods. For example, employees on a monthly payroll accrue time on the last day of their pay period, independently of payroll runs. |
Monthly. |
Yes, if you select Simple as the accrual frequency type. |
|
Accrual amount |
2 days per pay period. |
2 days per month. |
Yes |
|
Ceiling |
20 days. |
20 days. |
Yes |
|
Maximum carryover |
20 days. |
20 days. |
Yes |
|
Length of service calculation (for accrual bands and ineligibility period) |
Uses continuous service date (if present) or hire date. |
Uses continuous service date (if present) or hire date. |
No, but you can enter the continuous service date in the accrual plan element using the Manage Element Entries page. |
|
Accrual start date for new hires |
Based on start rules that you can select when you create the accrual plan. |
Based on start rules that you can select when you create the accrual plan. |
Yes |
|
Period of ineligibility |
Based on the period that you can define in the Accrual Plan page. Accrued time is not credited to the employee until the end of the ineligibility period. |
Based on the period that you can define in the Accrual Plan page. Accrued time is not credited to the employee until the end of the ineligibility period. |
Yes |
|
Effective dates of carried-over time |
Sets the effective start date to December 31 of the accrual term year that was processed by the Calculate Carry-Over process. Carried-over time expires a year later. For example, the carried-over time with the effective start date December 31, 2010 expires on December 31, 2011. |
Sets the effective start date to May 31 of the accrual term year that was processed by the Calculate Carry-Over process. Carried-over time expires a year later. For example, the carried-over time with the effective start date May 31, 2010 expires on May 31, 2011. |
Yes. The Calculate Carry-Over process calculates the effective dates according to the carryover expiry duration that you specify. |
|
Calculation of gross accruals |
Sums accruals in all full pay periods that end on or before the calculation date in the current accrual term. The formula also considers in its calculation any employee termination date, and changes in assignment status. |
Sums accruals in all full months that end on or before the calculation date in the current accrual term. The formula also considers in its calculation the employee termination date (if present). |
No |
|
Calculation of gross accruals for suspended assignments |
Calculates the number of active working days of the assignment in the payroll period, multiplies the normal accrual rate by the number of active days, and divides it by the number of total working days, to prorate the accrual. |
Does not process changes in assignment status |
No |
If you decide to customize the predefined accrual plan formulas, you can incorporate your own plan rules, using functions and database items to access extra inputs. However, there are constraints on what you can change in the formulas.
You must take a copy of any predefined formula that you want to use and associate the copy with your accrual plan. This approach enables you to refer to the predefined formula if the changes you make to your own formula do not work to your expectations.
Use the predefined accrual formula functions and database items to access extra inputs for calculations in your custom accrual plan formulas. You can define and register any additional functions you require to incorporate your plan rules. However, your formula must use the same input statements and return statements that exist in the predefined formula.
The predefined accrual formulas contain calculations to ensure that the employee is entitled to accrue time. Although you can include your own calculations in the custom formula, your formula must include the following calculations:
|
Calculation |
Description |
|---|---|
|
Termination date |
Check whether there is a termination date for the assignment. If the termination date is before the calculation date, calculate the accrual as of the termination date. If your formula does not handle partial accrual periods, check whether the termination date is before the end of the first accrual period; if yes, set gross accrual to zero. |
|
Enrollment end date |
Check whether an end date exists for the assignment's enrollment in the plan. If the end date is before the calculation date, calculate the accrual as of the end date. If your formula does not handle partial accrual periods, check whether the enrollment end date is before the end of the first accrual period; if yes, set gross accrual to zero. |
|
Calculation date |
Check whether the calculation date is before the end of the first accrual period; if yes, set gross accrual to zero (unless your formula handles partial accrual periods). |
|
Hire date |
Check the employee's hire date or continuous service date. If your formula handles partial accrual periods, check that this date is before the calculation date, and if not, set the gross accrual to zero. If your formula does not handle partial periods, check that this date is before the start of the last full accrual period used in the current calculation. If the employee has not worked for a full accrual period before the calculation date, set the gross accrual to zero. |
|
Start date for newly enrolled employees |
Check when the employee must start to accrue time. This is typically the date of enrollment in the plan or, if your formula does not handle partial accrual periods, the first period starting on or after the date of enrollment in the plan. If this date (or period) is after the calculation date (or period), set the gross accrual to zero. |
|
Ineligibility period |
Check if an ineligibility period exists. Set the gross accrual to zero if the ineligibility period is still in force on either of these dates:
|
|
Inactive assignments |
Check whether the employee's assignment is active throughout the period for which you want to calculate accruals. Depending on your plan rules, your employees might not accrue time when their assignments are inactive, or they might accrue time at a reduced rate during this period. You can use the GET_ASG_INACTIVE_DAYS function to check the assignment status on each day from the start date to the end date of the period and return the number of inactive working days. |
Although you can incorporate accrual plan rules from the Manage Accrual Plans page, you can incorporate more complex rules in the accrual formula directly. Use these examples to incorporate your plan rules into the Accrual Simple Multiplier formula.
Caution
Before modifying a predefined formula, you must copy it first and then modify the copy.
If you want to use an accrual start rule other than the predefined ones, you must first define the new rule as a value for the PER_ACCRUAL_START_RULE lookup type. Then modify the formula section that determines the accrual start rule on the basis of the following sample statements:
     .
     .
     .
ELSE IF (ACP_START_RULE = <your new lookup value>) THEN
        (
     First_Eligible_To_Accrue_Date  = <your new calculation to determine the start date>
     )
To determine the accrual rate, the predefined formula by default considers the amount of time that an employee must accrue in the accrual term and the number of accrual periods, both of which you can define on the Accrual Plan page. You can override the default calculation. In the following example, part-time employees accrue 3 hours for every 75 hours worked:
Accrual_Rate = ACP_HOURS_WORKED / 75
In the above statement, ACP_HOURS_WORKED is a database item that you must add to the accrual plan element input value that contains the number of hours worked by the enrolled employee.
The accrual amount that you define on the Accrual Plan page enables enrolled employees to accrue time each period. If, for example, you want employees to accrue their full entitlement of 20 days at the start of every calendar year, use the following basic formula:
INPUTS ARE
Calculation_Date (date)

Accrued_amt = 20

Effective_start_date = to_date('0101'||to_char(calculation_date, 'YYYY'),'DDMMYYYY')
Effective_end_date = to_date('3112'||to_char(calculation_date, 'YYYY'),'DDMMYYYY')
Accrual_end_date = to_date('0101'||to_char(calculation_date, 'YYYY'),'DDMMYYYY')

RETURN Accrued_amt,
       Effective_start_date,
       Effective_end_date,
       Accrual_end_date
Note
The above formula does not contain ineligibility rules or start rules, and does not calculate the accrual for part years (for example, for employees joining the plan midway through a year).
The predefined formula uses the continuous service date (if it was entered for the enrolled employee) to determine when a newly hired employee begins to accrue time. The formula uses the ACP_CONTINUOUS_SERVICE_DATE database item for this purpose. If you are using a different database item for the continuous service date, then replace the database item used in the following formula lines with the new database item:
IF (ACP_CONTINUOUS_SERVICE_DATE WAS DEFAULTED) THEN
(
	Continuous_Service_Date = ACP_HIRE_DATE
)
ELSE IF(ACP_CONTINUOUS_SERVICE_DATE > Calculation_Period_SD) THEN
(
	Total_Accrued_Amt = 0
	Continuous_Service_Date = ACP_CONTINUOUS_SERVICE_DATE
)
ELSE
(
	Continuous_Service_Date = ACP_CONTINUOUS_SERVICE_DATE
)
.
.
.
IF Continuous_Service_date = ACP_CONTINUOUS_SERVICE_DATE THEN
(
	Actual_Accrual_Start_Date = Continuous_service_Date
)
If you want employees to accrue no time (or accrue time differently) while on certain types of leave, such as maternity leave or study leave, use the GET_ASG_INACTIVE_DAYS function to check the status of the assignment, and include the appropriate rules. In the following example, employees do not accrue time while their assignment is inactive:
Assignment_Inactive_Days = GET_ASG_INACTIVE_DAYS(Period_SD, Period_ED)
IF Assignment_Inactive_Days <> 0 THEN
	(
		Working Days = GET_WORKING_DAYS(period_SD, Period_ED)
		IF Working_Days = Assignment_Inactive_Days THEN
			(
				Multiplier = 0
			)
		ELSE
			(
				Multiplier = 1 - (Assignment_Inactive_Days / Working Days)
			)
	)
If you plan to write your own accrual formula for use with accrual plans, you must ensure that the formula uses the same input and return statements that exist in the predefined formula.
You can use functions and database items to access additional inputs. Contexts are available to the formulas automatically.
Contexts
Without using inputs or database items, you can directly access the following values for use with functions in formulas of type Accrual:
PAYROLL_ASSIGNMENT_ID
ACCRUAL_PLAN_ID
LEGISLATIVE_DATA_GROUP_ID
PAYROLL_ID
Input Variables
The following table lists the input variables that you must use in your accrual formula.
|
Input Variable |
Description |
|---|---|
|
Calculation_Date |
Date through which you want to calculate the gross accrual |
|
Accrual_Start_Date (only if you are using a payroll balance) |
Date when accrual calculations must start. If this value is null, accrual calculations start from the beginning of the accrual term. |
|
Accrual_Latest_Balance (only if you are using a payroll balance) |
Latest accrual balance for the accrual term up to the day before the start of the accrual calculations (Accrual_Start_Date). A payroll balance stores the latest balance. |
Return Values
The following table lists the return values that you must use in your accrual formula.
|
Return Value |
Description |
|---|---|
|
Enrollment_Start_Date |
Date when the employee has enrolled in the accrual plan |
|
Enrollment_End_Date |
Date when the accrual plan enrollment expires |
|
Continuous_Service_Date |
The service date that was entered using an input value on the accrual plan element |
|
Accrual_Start_Date |
Start date of the accrual term. Depending on plan rules, this date may be the plan enrollment date, hire date, adjusted service date, or other date. |
|
Accrual_End_Date |
Date through which you want to calculate the gross accrued time. However, if the employee was terminated, this return value contains the termination date. If the employee has left the plan, this value contains the end date of the plan's element entry. |
|
Accrual_Rate |
Amount of time that the employee accrues per year. The value that is returned depends on accrual bands. |
|
Ceiling_Amt |
The maximum time that the employee can accrue. The value that is returned depends on accrual bands. |
|
Max_Carryover |
Maximum time that the employee can carry over to the next accrual term. The value that is returned depends on accrual bands. |
|
Accrued_Amt |
Gross accrued time for the current accrual term |
|
Entitled_Amt |
Net accrual for the current accrual term |
|
Pay_Rate_Per_Unit |
The monetary value of one unit of time that the employee has accrued |
|
Currency_Code |
The currency code used to express the monetary value of one unit of accrued time. |
If you plan to write your own carryover formula for use with accrual plans, you must ensure that the formula uses the same input and return statements that exist in the predefined formula.
You can use functions and database items to access additional inputs. Contexts are available to the formulas automatically.
Input Variables
The following table lists the input variables that you must use in your carryover formula.
|
Input Variable |
Description |
|---|---|
|
calculation_date |
Any date within an accrual term |
|
accrual_term |
Method to calculate the time to carry over. Specify PREVIOUS as the value for this input if you want the formula to calculate carryover for the previous accrual term (before the calculation date). Specify CURRENT if you want the formula to calculate carryover for the accrual term that the calculation date spans. |
Return Values
The following table lists the return values that you must use in your carryover formula.
|
Return Value |
Description |
|---|---|
|
max_carryover |
Amount of time the employee can carry over to the next accrual term. |
|
effective_date |
Last day of the accrual term for which the carryover is calculated |
|
expiry_date (optional) |
Date when the carryover expires if employees do not use it |
If you plan to write your own ineligibility formula for use with accrual plans, you must ensure that the formulas use the same input and return statements that exist in the predefined formula
Input Variables
You must specify as input the calculation date that indicates the effective date of the enrolled employee's accrual plan element entry.
Return Values
You must specify the assignment_eligible return value. The value will be set to Y (eligible) or N (ineligible).
You can use the predefined accrual formula functions for calculations in your custom accrual plan formulas.
You can create and register any additional functions you require to incorporate your plan rules.
CALCULATE_PAYROLL_PERIODS ( )
The function uses the payroll id context. It calculates the number of payroll periods in one year for that payroll, and sets the global variable PAYROLL_YEAR_NUMBER_OF_PERIODS to that value.
For example, the function sets the global variable to 12 for a calendar month payroll.
GET_ABSENCE (calculation date, start date)
Returns the total number of whole absences (having start and end dates) that an accrual plan covers between a date interval.
For example, the following formula statement returns the total number of absences that were taken between January 1, 2010 and 31 December, 2010.
TOTAL_ABSENCE = GET_ABSENCE ('01-JAN-2010(date), '31-DEC-2010'(date))
Parameters
Start Date
Date when you want to start searching for absences.
End Date
Date up to which you want to search for absences.
GET_CARRY_OVER (calculation date, start date)
Returns the number of days or hours recorded on the carryover element entry with an effective date on or between the two input dates. If more than one element entry is effective between these dates, the function sums the hours or days.
Carryover element entries may also have an expiry date, after which any unused carryover time is lost. If the calculation date is after the expiry date, the function calculates the absences between the start date and the calculation date. If the total absence duration equals or exceeds the carryover, the function returns the total carryover because all of the time was used before it expired. If the total duration is less than the total carryover, the function returns the total duration of the absences taken before the carried over time expired. The rest of the carried over time is lost.
For example, if an employee carried over ten days, and takes six days of leave up to the expiry date, the function returns six. The employee loses the four days of carried over time remaining after the expiry date.
GET_NET_ACCRUAL (calculation date, plan id, accrual start date, accrual latest balance)
Returns the net accrual at the calculation date.
Parameters
Calculation Date
Date through which you want to calculate the net accrual.
Plan ID
Identifies the accrual plan to use to calculate the net accrual.
Accrual Start Date
Start date of the accrual term.
Accrual Latest Balance
Latest gross accrual stored in a payroll balance.
RESET_ACCRUALS ( )
Returns a value (Y or N) that indicates whether the PTO_RESET_ACCRUALS pay action parameter was set.
GET_OTHER_NET_CONTRIBUTION (calculation date, start date)
Returns between two dates the total amount of time stored in elements that you added to the net calculation on the Accrual Plan page. This calculation does not consider absence entries stored in the absence element or carried-over time stored in the carryover element.
GET_PAYROLL_PERIOD (date)
Determines the payroll period that spans the specified date and assigns values to the following global variables:
PAYROLL_PERIOD_START_DATE
PAYROLL_PERIOD_END_DATE
PAYROLL_PERIOD_NUMBER
Use the GET_DATE and GET_NUMBER functions to retrieve the values from the global variables.
GET_ACCRUAL_BAND (years_of_service)
Determines the appropriate accrual band for the specified length of service of the employee. The function assigns values to the following global variables:
ANNUAL_RATE: Amount of time to accrue for the current accrual term at this band
UPPER_LIMIT: Length of service that the employee must complete for the next band to apply.
CEILING
The following statements show how to use this function then use the GET_NUMBER function to retrieve the values it sets in the global variables:
   .
   .
   .
   .
IF ( GET_ACCRUAL_BAND(Years_Service) = 0 THEN

Annual_Rate = GET_NUMBER('ANNUAL_RATE')
Upper_Limit = GET_NUMBER('UPPER_LIMIT')
Ceiling = GET_NUMBER('CEILING')

ELSE

( <your statements to include error processing> )

)
GET_ASSIGNMENT_STATUS (date)
Determines the status of an assignment at a given date. The function assigns values to the following global variables:
ASSIGNMENT_EFFECTIVE_SD (effective start date of the assignment)
ASSIGNMENT_EFFECTIVE_ED (effective end date of the assignment)
ASSIGNMENT_SYSTEM_STATUS (status of the assignment)
For example, the following statement returns the status of the assignment on 01 January, 2011:
ERROR = GET_ASSIGNMENT_STATUS
('01-JAN-2011' (date))
GET_ASG_INACTIVE_DAYS (period start date, period end date)
Returns the number of working days between the input dates when the assignment status was inactive.
GET_EARLIEST_ASGCHANGE_DATE (p_legislative_data_group_id, p_pay_assignment_id, p_event_group, p_start_date, p_end_date, p_recalc_date)
Returns the earliest date when changes to the assignment were first detected between two dates.
Parameters
p_legislative_data_group_id
The legislative data group ID of the assignment.
p_pay_assignment_id
The assignment's pay assignment ID
p_event_group
The name of the event group that contains the events you want to track
p_start_date
Date when you want to start scanning for retrospective changes to the assignment
p_end_date
Date through which you want to scan for retrospective changes to the assignment
p_recalc_date
Date, normally today's date or the effective date you selected, on which you want to scan for retrospective events that may have occurred during the input dates.
GET_PERIOD_DATES (base date, UOM, calculation date, number)
Returns the start and end dates of the accrual period that spans the input date. The function assigns the start date to the PERIOD_START_DATE global variable, and the end date, to the PERIOD_END_DATE global variable.
For example, assume that an accrual plan was set up to allow employees to accrue time once in two months in a calendar year. The following usage of the GET_PERIOD_DATES function populates the PERIOD_START_DATE global variable with 1-MAR-2010, and the PERIOD_END_DATE global variable, with 30-APR-2010.
GET_PERIOD_DATES('1-JAN-2010',
'M', '15-APR-2010', 2)
If the calculation date is earlier than the base date, then the function calculates the accrual periods backwards from the base date.
Parameters
Base Date
Date to start calculating the accrual period dates from. Usually, this is the start date of the accrual term.
Calculation Date
Date for which you want to determine the accrual period that spans it.
UOM
Type of division that determines accrual periods. Valid units are D (days), M (months), W (weeks).
Number
The duration of the accrual period.
GET_START_DATE (accrual start date, start of accrual term)
Returns the date when the accrual formula must start calculating accruals.
If you are using a payroll balance and there are retrospective absence entries that have not already been used in an accrual calculation, the function returns the earliest start date of these entries.
However, in the predefined formula, if any unprocessed retrospective element entries are found, the formula always calculates accruals from the beginning of the accrual term.
If you are not using a payroll balance, the function returns the start date of the accrual term.
GET_WORKING_DAYS (start date, end date)
Returns the number of working days between the input dates
CALCULATE_HOURS_WORKED (p_std_hours, p_std_freq, p_range_start, p_range_end)
Returns the number of working hours between two dates.
For example, assuming that the assignment works 40 hours per week, the following statement returns the number of working hours between 01 January, 2010 and 31 January, 2010:
E = CALCULATE_HOURS_WORKED (40, "Weekly", '01-Jan-2010', '31-Jan-2010')
The values that you can specify for the p_std_freq parameter are:
Weekly
Monthly
Yearly
PUT_MESSAGE (expression)
Adds a message for debugging purposes.
For example, use this function to generate a message from the accrual formula if an employee is not eligible to accrue time.
GET_ELEMENT_ENTRY ( )
Returns a value that indicates whether an assignment has enrolled in the accrual plan. the value 1 indicates that an element entry exists, and the value 0 indicates that no element entry exists.
GET_PAYROLL_DETAILS (p_payroll_id, p_date_in_period)
Returns payroll details, such as the start date of the payroll period, the end date, and the number of the payroll period that spans the input date. The function accepts the following parameters:
p_payroll_id: The ID of the payroll
p_date_in_period: The date for which you want to determine the payroll details
Parameters
p_payroll_id
The ID of the payroll
p_date_in_period
The date for which you want to determine the payroll details
GET_PAYROLL_DTRANGE (p_payroll_id)
Returns the start and end dates of the specified payroll.
GET_PAYROLL_ID (p_pay_assignment_id, p_payroll_id, p_date_in_period)
Returns the effective payroll ID for an assignment on an input date.
GET_RETRO_ELEMENT ( )
Retrieves retrospective elements to be tagged as processed.
GET_TERMINATION_DATE (p_assignment_id)
Returns the termination date of an assignment and sets the PER_TERMINATION_DATE context with this value.
SET_ACCRUAL_BALANCE (p_pay_assignment_id, p_element_type, p_element_type_id, p_input_value_id, p_accrual_band_id, p_absence_type_id, p_absence_attendance_id, p_start_date, p_end_date, p_contributed_amt)
Sets the accrual balance details. The function accepts the following parameters:
Parameters
p_pay_assignment_id
The assignment for which you want to set the accrual balance details
p_element_type
The type of element for which you want to set the details. Valid types are Accrual, Carryover, Absence, or other types of elements you may have added to the net calculation rules when you created the accrual plan.
p_element_type_id
The ID of the element for which you want to set the balance details
p_input_value_id
The ID of the input value of the element for which you want to set the balance details
p_accrual_band_id
The ID of the accrual band that applies to the assignment
p_absence_type_id
The name of the absence type. This parameter is applicable when you want to set details for the absence element type.
p_absence_attendance_id
The ID of the absence record. This parameter is applicable when you want to set details for the absence element type.
p_start_date
If you are using this function to set details for the Absence element type, then set the value of this parameter to the start date of the absence. For setting details for the Carryover element type, specify the effective date of the carried over time.
p_end_date
If you are using this function to set details for the Absence element type, then set the value of this parameter to the end date of the absence. For setting details for the Carryover element type, specify the date when the carried over time expires.
p_contributed_amt
If you are using this function to set details for the additional elements you added in the net calculation rules, set the value of this parameter to the total amount of time recorded in those elements.
The Evaluate Absence Plan Participation process runs the Participation and Rate Eligibility formula to enroll eligible employees in an absence benefit plan. The formula output indicates whether an absence entitlement plan exists for the type of absence recorded.
You must associate the formula with an eligibility profile of an absence benefit plan. The formula must belong to the Participation and Rate Eligibility formula type. Provide a meaningful name for the formula so that you can easily identify it.
Contexts
The following contexts are available to this formula.
BUSINESS_GROUP_ID
ASSIGNMENT_ID
DATE_EARNED
PGM_ID
PL_ID
OPT_ID
LER_ID
Database Items
The following database items are available to formulas of this type.
All columns except attribute columns from the tables:
ben_ler_f
ben_pgm_f
ben_pl_f
ben_pl_typ_f
ben_opt_f
The database items are based on the employee's assignment ID.
Return Values
The following return value is available to this formula.
|
Return Value |
Data Type |
Required |
Description |
|---|---|---|---|
|
ELIGIBLE |
Char |
Yes |
The value of this variable is Y if an entitlement plan exists for the type of absence recorded. The value is N if no entitlement plan exists. |
Errors
If any other return value is passed back to the formula, then you can process errors with BEN_91329_FORMULA_RETURN.
Sample Formula
You can either write your own formula, or use the following text to create the formula on the Fast Formula page:
DEFAULT FOR BEN_ABS_ABSENCE_CATEGORY IS '_DEFAULT_'
DEFAULT FOR BEN_ABS_ABSENCE_TYPE_ID  IS -987123654
DEFAULT FOR BEN_PLN_PL_ID IS -987123654

l_yn = 'N'
l_error = 0
l_absence_type_lookup_code = ' '
l_absence_type_list_name = ' '
l_truncated_yes_no = ' '
l_error_message = ' '
l_absence_type_meaning = ' '
l_absence_category = ' '


l_pl_id = BEN_PLN_PL_ID
l_absence_type_id = BEN_ABS_ABSENCE_TYPE_ID
l_abs_typ_id = to_char(l_absence_type_id)


l_absence_type_meaning = BEN_CHK_ABS_TYPE (l_abs_typ_id,l_yn)

IF NOT ISNULL(l_absence_type_meaning) = 'Y' THEN
(
  l_yn = 'Y'
)

ELIGIBLE = l_yn
RETURN ELIGIBLE
When an employee records a long term absence, the Evaluate Absence Plan Participation process enrolls the employee in an absence benefit plan and runs the Extra Inputs formula to update the payroll element with details, such as the absence type, absence start and end dates, and the ID of the absence benefit plan that the employee was enrolled in.
You must associate the formula with a benefit rate for an absence benefit plan. The formula must belong to the Extra Input formula type. Provide a meaningful name for the formula so that you can easily identify it.
Contexts
The following contexts are available to this formula:
BUSINESS_GROUP_ID
ASSIGNMENT_ID
DATE_EARNED
ORGANIZATION_ID
JURISDICTION_CODE
PGM_ID
PL_ID
OPT_ID
LER_ID
PL_TYP_ID
ACTY_BASE_RT_ID
Database Items
The following database items are available to formulas of this type:
All columns except attribute columns from tables:
ben_ler_f
ben_pgm_f
ben_pl_f
ben_pl_typ_f
ben_opt_f
ben_acty_base_rt_f
The database items are based on the employee's assignment ID.
Input Variables
The following input values are available to this formula.
|
Input Value |
Data Type |
Required |
Description |
|---|---|---|---|
|
BEN_ABS_IV_ABSENCE_ATTENDANCE_ID |
Char |
Yes |
Absence record ID |
|
BEN_ABS_IV_ABSENCE_ATTENDANCE_TYPE_ID |
Char |
Yes |
Absence type ID |
|
BEN_ABS_IV_DATE_START |
Char |
Yes |
Absence start date |
|
BEN_ABS_IV_DATE_END |
Char |
Yes |
Absence end date |
|
BEN_ABS_IV_ABSENCE_DAYS |
Char |
Yes |
Absence duration |
Return Values
The following return values are available to this formula.
|
Return Value |
Data Type |
Required |
Description |
|---|---|---|---|
|
l_absence_id |
Char |
Yes |
Absence record ID |
|
l_plan_id |
Char |
Yes |
Absence benefit plan ID that the employee enrolled in |
|
l_absence_start_date |
Char |
Yes |
Absence start date |
|
l_absence_end_date |
Char |
Yes |
Absence end date |
|
l_absence_type |
Char |
Yes |
Type of absence recorded |
Errors
If type casting of variables causes errors, then you can process those errors with BEN_92311_FORMULA_VAL_PARAM.
Sample Formula
You can either write your own formula, or use the following text to create the formula in the Fast Formula page:
/*
Set default values for database items.
*/
DEFAULT FOR BEN_ABS_ABSENCE_TYPE IS '_DEFAULT_'
DEFAULT FOR BEN_PLN_PL_ID IS -987123654

/* Other database items.
DEFAULT FOR BEN_ABS_ABSENCE_TYPE_ID IS -987123654
DEFAULT FOR BEN_ABS_ABSENCE_CATEGORY IS '_DEFAULT_'
DEFAULT FOR BEN_ABS_ABSENCE_CATEGORY_CODE IS '_DEFAULT_'
DEFAULT FOR BEN_ABS_ABSENCE_CATEGORY_ID IS -987123654
DEFAULT FOR BEN_ABS_REASON IS '_DEFAULT_'
DEFAULT FOR BEN_ABS_REASON_CODE IS '_DEFAULT_'
DEFAULT FOR BEN_ABS_REASON_ID IS -987123654
DEFAULT FOR BEN_ABS_DATE_START IS '1951/01/01 00:00:00'(DATE)
DEFAULT FOR BEN_ABS_DATE_END IS '1951/01/01 00:00:00'(DATE)
DEFAULT FOR BEN_ABS_SICKNESS_START_DATE IS '1951/01/01 00:00:00'(DATE)
DEFAULT FOR BEN_ABS_SICKNESS_END_DATE IS '1951/01/01 00:00:00'(DATE)
DEFAULT FOR BEN_ABS_DATE_NOTIFIED IS '1951/01/01 00:00:00'(DATE)
DEFAULT FOR BEN_SMP_DUE_DATE IS '1951/01/01 00:00:00'(DATE)
DEFAULT FOR BEN_SMP_MPP_START_DATE IS '1951/01/01 00:00:00'(DATE)
DEFAULT FOR BEN_SMP_ACTUAL_BIRTH_DATE IS '1951/01/01 00:00:00'(DATE)
DEFAULT FOR BEN_SMP_LIVE_BIRTH_FLAG IS 'Y'
DEFAULT FOR BEN_SSP_EVIDENCE_DATE IS '1951/01/01 00:00:00'(DATE)
DEFAULT FOR BEN_SSP_EVIDENCE_SOURCE IS '_DEFAULT_'
DEFAULT FOR BEN_SSP_MEDICAL_TYPE IS 'SICKNESS'
DEFAULT FOR BEN_SSP_EVIDENCE_STATUS IS 'ACTIVE'
DEFAULT FOR BEN_SSP_SELF_CERTIFICATE IS 'N'
DEFAULT FOR BEN_ABS_ACCEPT_LATE_NOTIFICATION_FLAG IS 'Y'
DEFAULT FOR BEN_ABS_PREGNANCY_RELATED_ILLNESS IS 'N'
DEFAULT FOR BEN_SMP_NOTIFICATION_OF_BIRTH_DATE IS '1951/01/01 00:00:00'(DATE)
DEFAULT FOR BEN_SSP_EVIDENCE_RECEIVED_DATE IS '1951/01/01 00:00:00'(DATE)
DEFAULT FOR BEN_SSP_ACCEPT_LATE_EVIDENCE_FLAG IS 'Y'
*/

/*
Set default values for formula inputs.
*/
DEFAULT FOR BEN_ABS_IV_ABSENCE_ATTENDANCE_ID IS '_DEFAULT_'
DEFAULT FOR BEN_ABS_IV_ABSENCE_ATTENDANCE_TYPE_ID IS '_DEFAULT_'
DEFAULT FOR BEN_ABS_IV_DATE_START IS '_DEFAULT_'
DEFAULT FOR BEN_ABS_IV_DATE_END IS '_DEFAULT_'
DEFAULT FOR BEN_ABS_IV_ABSENCE_DAYS IS '_DEFAULT_'

/* Other available inputs.
DEFAULT FOR BEN_ABS_IV_ABS_ATTENDANCE_REASON_ID IS '_DEFAULT_'
DEFAULT FOR BEN_ABS_IV_ABSENCE_HOURS IS '_DEFAULT_'
DEFAULT FOR BEN_ABS_IV_DATE_NOTIFICATION IS '_DEFAULT_'
DEFAULT FOR BEN_ABS_IV_DATE_PROJECTED_END IS '_DEFAULT_'
DEFAULT FOR BEN_ABS_IV_DATE_PROJECTED_START IS '_DEFAULT_'
DEFAULT FOR BEN_ABS_IV_SSP1_ISSUED IS '_DEFAULT_'
DEFAULT FOR BEN_ABS_IV_LINKED_ABSENCE_ID IS '_DEFAULT_'
DEFAULT FOR BEN_ABS_IV_SICKNESS_START_DATE IS '_DEFAULT_'
DEFAULT FOR BEN_ABS_IV_SICKNESS_END_DATE IS '_DEFAULT_'
DEFAULT FOR BEN_ABS_IV_PREGNANCY_RELATED_ILLNESS IS '_DEFAULT_'
DEFAULT FOR BEN_ABS_IV_MATERNITY_ID IS '_DEFAULT_'
DEFAULT FOR BEN_PIL_IV_PER_IN_LER_ID IS '_DEFAULT_'
DEFAULT FOR BEN_ABS_IV_ATTRIBUTE_CATEGORY IS '_DEFAULT_'
DEFAULT FOR BEN_ABS_IV_ATTRIBUTE1 IS '_DEFAULT_'
DEFAULT FOR BEN_ABS_IV_ATTRIBUTE2 IS '_DEFAULT_'
DEFAULT FOR BEN_ABS_IV_ATTRIBUTE3 IS '_DEFAULT_'
DEFAULT FOR BEN_ABS_IV_ATTRIBUTE4 IS '_DEFAULT_'
DEFAULT FOR BEN_ABS_IV_ATTRIBUTE5 IS '_DEFAULT_'
DEFAULT FOR BEN_ABS_IV_ATTRIBUTE6 IS '_DEFAULT_'
DEFAULT FOR BEN_ABS_IV_ATTRIBUTE7 IS '_DEFAULT_'
DEFAULT FOR BEN_ABS_IV_ABS_INFORMATION_CATEGORY IS '_DEFAULT_'
DEFAULT FOR BEN_ABS_IV_ABS_INFORMATION1 IS '_DEFAULT_'
DEFAULT FOR BEN_ABS_IV_ABS_INFORMATION2 IS '_DEFAULT_'
DEFAULT FOR BEN_ABS_IV_ABS_INFORMATION3 IS '_DEFAULT_'
DEFAULT FOR BEN_ABS_IV_ABS_INFORMATION4 IS '_DEFAULT_'
DEFAULT FOR BEN_ABS_IV_ABS_INFORMATION5 IS '_DEFAULT_'
DEFAULT FOR BEN_ABS_IV_ABS_INFORMATION6 IS '_DEFAULT_'
DEFAULT FOR BEN_ABS_IV_ABS_INFORMATION7 IS '_DEFAULT_'
*/

/*
Declare input values.

Use the following naming convention for the inputs:
BEN_ABS_IV_
*/

INPUTS ARE BEN_ABS_IV_ABSENCE_ATTENDANCE_ID(TEXT)
,BEN_ABS_IV_ABSENCE_ATTENDANCE_TYPE_ID(TEXT)
,BEN_ABS_IV_DATE_START(TEXT)
,BEN_ABS_IV_DATE_END(TEXT)
,BEN_ABS_IV_ABSENCE_DAYS(TEXT)

/* Other available inputs
,BEN_ABS_IV_ABS_ATTENDANCE_REASON_ID(TEXT)
,BEN_ABS_IV_ABSENCE_HOURS(TEXT)
,BEN_ABS_IV_DATE_NOTIFICATION(TEXT)
,BEN_ABS_IV_DATE_PROJECTED_END(TEXT)
,BEN_ABS_IV_DATE_PROJECTED_START(TEXT)
,BEN_ABS_IV_SSP1_ISSUED(TEXT)
,BEN_ABS_IV_LINKED_ABSENCE_ID(TEXT)
,BEN_ABS_IV_SICKNESS_START_DATE(TEXT)
,BEN_ABS_IV_SICKNESS_END_DATE(TEXT)
,BEN_ABS_IV_PREGNANCY_RELATED_ILLNESS(TEXT)
,BEN_ABS_IV_MATERNITY_ID(TEXT)
,BEN_PIL_IV_PER_IN_LER_ID(TEXT)
,BEN_ABS_IV_ATTRIBUTE_CATEGORY(TEXT)
,BEN_ABS_IV_ATTRIBUTE1(TEXT)
,BEN_ABS_IV_ATTRIBUTE2(TEXT)
,BEN_ABS_IV_ATTRIBUTE3(TEXT)
,BEN_ABS_IV_ATTRIBUTE4(TEXT)
,BEN_ABS_IV_ATTRIBUTE5(TEXT)
,BEN_ABS_IV_ATTRIBUTE6(TEXT)
,BEN_ABS_IV_ATTRIBUTE7(TEXT)
,BEN_ABS_IV_ABS_INFORMATION_CATEGORY(TEXT)
,BEN_ABS_IV_ABS_INFORMATION1(TEXT)
,BEN_ABS_IV_ABS_INFORMATION2(TEXT)
,BEN_ABS_IV_ABS_INFORMATION3(TEXT)
,BEN_ABS_IV_ABS_INFORMATION4(TEXT)
,BEN_ABS_IV_ABS_INFORMATION5(TEXT)
,BEN_ABS_IV_ABS_INFORMATION6(TEXT)
,BEN_ABS_IV_ABS_INFORMATION7(TEXT)
*/

/*
Initialise standard default values.
*/
l_null                         = RPAD('X',0,'Y')
l_default                      = '_DEFAULT_'
l_default_date                 = '1951/01/01 00:00:00'(date)
l_default_canonical_date       = '1951/01/01 00:00:00'
l_default_number               = -987123654
l_default_canonical_number     = '-987123654'

l_absence_id_iv = BEN_ABS_IV_ABSENCE_ATTENDANCE_ID

/* 1. Check that a default value was not used for the absence attendance ID.

If an absence attendance id was not found, the default value is used.
This may occur if this formula is used in a plan that does not have an absence
"context" available. Ensure that you select Absence as the option type of the
associated plan type. Ensure that you select Absence as the type of the associated
life event reasons.
*/
IF NOT l_absence_id_iv = l_default THEN
(

l_absence_id = TO_NUMBER(l_absence_id_iv)
l_plan_id = BEN_PLN_PL_ID
l_absence_start_date_dt = BEN_ABS_IV_DATE_START
l_absence_type = BEN_ABS_ABSENCE_TYPE
l_absence_end_date = BEN_ABS_IV_DATE_END
)
ELSE
(
l_absence_id                   = l_default_number
l_plan_id                      = l_default_number
l_absence_start_date           = l_null
l_absence_end_date             = l_null
l_absence_type                 = l_null
)

RETURN l_absence_id
,l_plan_id
,l_absence_start_date
,l_absence_end_date
,l_absence_type
When an employee records a long term absence, the Evaluate Absence Plan Participation process enrolls the employee in an absence benefit plan and runs the Rate Value Calculation formula to determine the enrolled employee's length of service. The process uses the length of service to determine the entitlement bands that apply during the absence period.
You must create the formula for the standard benefit rate that you want to associate with the absence benefit plan. The formula must belong to the Rate Value Calculation formula type. Provide a meaningful name for the formula so that you can easily identify it.
Contexts
The following contexts are available to this formula:
BUSINESS_GROUP_ID
ASSIGNMENT_ID
DATE_EARNED or p_effective_date
Database Items
The database items available to this formula are based on the employee's assignment ID.
Return Values
The following return value is available to this formula.
|
Return Value |
Data Type |
Required |
Description |
|---|---|---|---|
|
LENGTH_OF_SERVICE |
Number |
Yes |
A number that indicates the length of service of the enrolled employee. |
Sample Formula
You can either write your own formula, or use the following text to create the formula in the Fast Formula page:
/*
Set default values.
*/

DEFAULT FOR BEN_ABS_DATE_START IS '1951/01/01 00:00:00'(date)
DEFAULT FOR PER_ASG_REL_DATE_START IS '1951/01/01 00:00:00'(date)

/*
Initialize standard default values.
*/
l_null = RPAD('X',0,'Y')
l_default = '_DEFAULT_'
l_default_date = '1951/01/01 00:00:00'(date)
l_default_canonical_date = '1951/01/01 00:00:00'
l_default_number = -987123654
l_default_canonical_number = '-987123654'
l_length_of_service = -987123654

/*
Determine the absence start date and the employee hire date.
*/
l_absence_start_date = BEN_ABS_DATE_START
l_employee_hire_date = PER_ASG_REL_DATE_START

/*
Check that an absence start date is available for processing.

If an absence start date was not found, the default value is used.
This may occur if this formula is used in a plan that does not have
an absence "context" available. Ensure that you select Absences as
the option type of the associated plan type. Ensure that you select
Absence as the type of the associated life event reasons.
*/
IF NOT l_absence_start_date = l_default_date THEN
(
/*
Check that an absence start date is available to process.

If an employee hire date was not found, the default value is used.
This may occur if the person was not an eligible person type.
Check the associated eligibility profile to ensure that only persons
belonging to the Employee person type are selected for plan enrollment.
*/
IF NOT l_employee_hire_date = l_default_date THEN
(
  /*
  Calculate the length of service.
  */

  l_length_of_service = FLOOR( MONTHS_BETWEEN (l_absence_start_date, l_employee_hire_date)))
)

LENGTH_OF_SERVICE = l_length_of_service
RETURN LENGTH_OF_SERVICE
The Compensation Start Date formula can be used to determine the start date of compensation awarded using an individual compensation plan.
When setting up a compensation plan, you can select the defined formula after you select Formula as the Compensation Start Date value.
Contexts
The following contexts are available to formulas of this type:
EFFECTIVE_DATE
HR_ASSIGNMENT_ID
Database Items
Database items are not available to formulas of this type.
Input Variables
The following input variables are available to formulas of this type:
|
Input |
Data Type |
Required |
Description |
|---|---|---|---|
|
CMP_IV_EFFECTIVE_DATE |
Varchar2 |
N |
Input effective date |
|
CMP_IV_ASSIGNMENT_ID |
Number |
N |
Assignment ID |
|
CMP_IV_PERSON_ID |
Number |
N |
Person ID |
|
CMP_IV_PLAN_ID |
Number |
N |
Plan ID |
|
CMP_IV_OPTION_ID |
Number |
N |
Option ID |
Return Values
The following return variables are available to formulas of this type.
|
Return Value |
Data Type |
Required |
Description |
|---|---|---|---|
|
COMPENSATION_START_DATE |
Varchar2 |
N |
Compensation Start Date |
Errors
CMP_VC_ALLOC_FORMULA_FAILURE - Error occurred during formula processing.
Sample Formula
This sample formula calculates the compensation start date to be 3 months later from the given date.
/*********************************************************
FORMULA NAME : Compensation Start Date Formula
FORMULA TYPE : Compensation Start Date
DESCRIPTION  : Formula that returns Compensation Start Date to be 3 month later of the given date
*******************************************************/
/*=========== DATABASE ITEM DEFAULTS BEGIN ==============*/
N/A
/*=========== DATABASE ITEM DEFAULTS ENDS ===============*/
/*=========== FORMULA SECTION BEGIN =====================*/

INPUTS ARE CMP_IV_EFFECTIVE_DATE (text)
DEFAULT FOR CMP_IV_EFFECTIVE_DATE IS '4012/01/01'

l_date = ADD_MONTHS(TO_DATE(CMP_IV_EFFECTIVE_DATE, 'YYYY/MM/DD'),3)
compensation_start_date = TO_CHAR(ldate, 'YYYY/MM/DD')

RETURN compensation_start_date
/*=========== FORMULA SECTION END =======================*/
The Compensation End Date formula can be used to determine the end date of compensation awarded using an individual compensation plan.
When setting up a compensation plan, you can select the defined formula after you select Formula as the Compensation End Date value.
Contexts
The following contexts are available to formulas of this type:
EFFECTIVE_DATE
HR_ASSIGNMENT_ID
Database Items
Database items are not available to formulas of this type.
Input Variables
The following input variables are available to formulas of this type:
|
Input |
Data Type |
Required |
Description |
|---|---|---|---|
|
CMP_IV_EFFECTIVE_DATE |
Varchar2 |
N |
Input effective date |
|
CMP_IV_ASSIGNMENT_ID |
Number |
N |
Assignment ID |
|
CMP_IV_PERSON_ID |
Number |
N |
Person ID |
|
CMP_IV_PLAN_ID |
Number |
N |
Plan ID |
|
CMP_IV_OPTION_ID |
Number |
N |
Option ID |
Return Values
The following return variables are available to formulas of this type.
|
Return Value |
Data Type |
Required |
Description |
|---|---|---|---|
|
COMPENSATION_END_DATE |
Varchar2 |
N |
Compensation End Date |
Errors
CMP_VC_ALLOC_FORMULA_FAILURE - Error occurred during formula processing.
Sample Formula
This sample formula calculates the compensation end date to be 6 months later of the given date.
/*********************************************************
FORMULA NAME : Compensation End Date Formula
FORMULA TYPE : Compensation End Date
DESCRIPTION  : Formula that returns Compensation End Date
*******************************************************/
/*=========== DATABASE ITEM DEFAULTS BEGIN ==============*/
N/A
/*=========== DATABASE ITEM DEFAULTS ENDS ===============*/
/*=========== FORMULA SECTION BEGIN =====================*/

INPUTS ARE CMP_IV_EFFECTIVE_DATE (text)
DEFAULT FOR CMP_IV_EFFECTIVE_DATE IS '4012/01/01'

l_date = ADD_MONTHS(TO_DATE(CMP_IV_EFFECTIVE_DATE, 'YYYY/MM/DD'),6)
compensation_end_date = TO_CHAR(ldate, 'YYYY/MM/DD')

RETURN compensation_end_date
/*=========== FORMULA SECTION END =======================*/
The Compensation Currency Selection formula determines the currency associated with a workforce compensation component.
You select the formula on the Configure Compensation Components page.
Contexts
The following contexts are available to formulas of this type:
EFFECTIVE_DATE
HR_ASSIGNMENT_ID
Database Items
Database items are not available to formulas of this type.
Input Variables
The following input variables are available to formulas of this type.
|
Input |
Data Type |
Required |
Description |
|---|---|---|---|
|
CMP_IV_PLAN_ID |
Number |
Y |
Plan ID |
|
CMP_IV_ASSIGNMENT_ID |
Number |
Y |
Assignment ID |
|
CMP_IV_PERIOD_ID |
Number |
Y |
Period ID |
|
CMP_IV_COMPONENT_ID |
Number |
Y |
Component ID |
|
CMP_IV_PLAN_START_DATE |
Date |
Y |
Plan Start Date |
|
CMP_IV_PLAN_END_DATE |
Date |
Y |
Plan End Date |
Return Values
Use predefined names for return variables. The following return variables are available to formulas of this type.
|
Return Value |
Data Type |
Required |
Description |
|---|---|---|---|
|
L_CURR_CODE |
Char |
N |
Currency code from the formula |
Sample Formula
This sample formula determines if a person is selected for a plan based on their assignment_id.
/*******************************************************************
FORMULA NAME : Compensation Currency Selection Formula
FORMULA TYPE : Compensation Currency Selection
DESCRIPTION  : It returns the currency code based on
  component_id.
*******************************************************************/
/*=========== INPUT VALUES DEFAULTS BEGIN =====================*/
INPUTS ARE CMP_IV_ASSIGNMENT_ID (number), CMP_IV_PLAN_ID (number), CMP_IV_PERIOD_ID (number), CMP_IV_COMPONENT_ID (number)
/*=========== INPUT VALUES DEFAULTS ENDS======================*/
/*================ FORMULA SECTION BEGIN =======================*/

      DEFAULT FOR CMP_IV_COMPONENT_ID IS 0

      l_curr_code = 'XXX'

      IF (CMP_IV_COMPONENT_ID = 489) THEN
      (
       l_curr_code = 'USD'
      )
      ELSE IF (CMP_IV_COMPONENT_ID = 490) THEN
      (
       l_curr_code = 'GBP'
      )

      RETURN l_curr_code

/*================ FORMULA SECTION END =======================*/
The Compensation Default and Override formula determines the default values populated in a column for a workforce compensation plan.
You select the formula when you configure the worksheet display for a column using the Default Values tab on the Define Column Properties window.
Contexts
The following contexts are available to formulas of this type:
EFFECTIVE_DATE
HR_ASSIGNMENT_ID
PAYROLL_ASSIGNMENT_ID
DATE_EARNED
JOB_ID
HR_TERM_ID
Database Items
Database items are not available to formulas of this type.
Input Variables
The following input variables are available to formulas of this type.
|
Input |
Data Type |
Required |
Description |
|---|---|---|---|
|
CMP_IV_PLAN_ID |
Number |
Y |
Plan ID |
|
CMP_IV_PERIOD_ID |
Number |
Y |
Period ID |
|
CMP_IV_COMPONENT_ID |
Number |
Y |
Component ID |
|
CMP_IV_ITEM_NAME |
Char |
Y |
Item Name |
|
CMP_IV_PERSON_ID |
Number |
Y |
Person ID |
|
CMP_IV_PLAN_START_DATE |
Date |
Y |
Plan Start Date |
|
CMP_IV_PLAN_END_DATE |
Date |
Y |
Plan End Date |
Return Values
Use predefined names for return variables. The following return variables are available to formulas of this type.
|
Return Value |
Data Type |
Required |
Description |
|---|---|---|---|
|
L_DEFAULT_VALUE |
Number/Char/Date |
Y |
Default value from the formula |
|
L_DATA_TYPE |
Char |
Y |
Data type of the column |
Sample Formula
This sample formula determines if a person is selected for a plan based on their assignment_id.
/*******************************************************************
FORMULA NAME : Compensation Default and Override Formula
FORMULA TYPE : Compensation Default and Override
DESCRIPTION  : Defaults the value of a column based on its
  item_name.
*******************************************************************/

/*=========== INPUT VALUES DEFAULTS BEGIN =====================*/
INPUTS ARE CMP_IV_PLAN_ID (number), CMP_IV_PERIOD_ID (number), CMP_IV_COMPONENT_ID (number), CMP_IV_ITEM_NAME (text)
/*=========== INPUT VALUES DEFAULTS ENDS======================*/

/*================ FORMULA SECTION BEGIN =======================*/

      DEFAULT FOR CMP_IV_ITEM_NAME IS 'YYYYYYY'

      L_DEFAULT_VALUE = to_char(0)
      L_DATA_TYPE = 'NONETYPE'

      //Valid L_DATA_TYPE values can be -
//NUMBER, CHAR, DATE.

IF (CMP_IV_ITEM_NAME = 'AmountComp1') THEN
      (
       L_DATA_TYPE = 'NUMBER'
       L_DEFAULT_VALUE = to_char(3333)
      )
      ELSE IF (CMP_IV_ITEM_NAME = 'AmountComp2') THEN
      (
       L_DATA_TYPE = 'NUMBER'
       L_DEFAULT_VALUE = to_char(7777)
      )
      ELSE
      (
       L_DATA_TYPE = 'NONETYPE'
       L_DEFAULT_VALUE = to_char(-999)
      )

      RETURN L_DATA_TYPE, L_DEFAULT_VALUE

/*================ FORMULA SECTION END =======================*/
The Compensation Hierarchy Determination formula determines the hierarchy for an associated workforce compensation plan.
You select the formula on the Configure Plan Details page.
Contexts
The following contexts are available to formulas of this type:
EFFECTIVE_DATE
HR_ASSIGNMENT_ID
Database Items
Database items are not available to formulas of this type.
Input Variables
The following input variables are available to formulas of this type.
|
Input |
Data Type |
Required |
Description |
|---|---|---|---|
|
CMP_IV_ASSIGNMENT_ID |
Number |
Y |
Assignment ID |
|
CMP_IV_PLAN_ID |
Number |
Y |
Plan ID |
|
CMP_IV_PERIOD_ID |
Number |
Y |
Period ID |
|
CMP_IV_PLAN_START_DATE |
Date |
Y |
Plan Start Date |
|
CMP_IV_PLAN_END_DATE |
Date |
Y |
Plan End Date |
Return Values
Use predefined names for return variables. The following return variables are available to formulas of this type.
|
Return Value |
Data Type |
Required |
Description |
|---|---|---|---|
|
L_PERSON_ID |
Number |
Y |
Person ID of manager |
|
L_ASSIGNMENT_ID |
Number |
Y |
Assignment ID of manager |
Sample Formula
This sample formula determines the manager of a person when the assignment_id is passed.
/*******************************************************************
FORMULA NAME : Compensation Hierarchy Determination Formula
FORMULA TYPE : Compensation Hierarchy Determination
DESCRIPTION  : Hierarchy determination fast formula which is based on assignment_id
*******************************************************************/

/*=========== INPUT VALUES DEFAULTS BEGIN =====================*/
INPUTS ARE CMP_IV_ASSIGNMENT_ID (number), CMP_IV_PLAN_ID (number), CMP_IV_PERIOD_ID (number)
/*=========== INPUT VALUES DEFAULTS ENDS======================*/

/*================ FORMULA SECTION BEGIN =======================*/

      DEFAULT FOR CMP_IV_ASSIGNMENT_ID IS 0

      L_PERSON_ID = '0'
      L_ASSIGNMENT_ID = '0'

      if ( CMP_IV_ASSIGNMENT_ID = 100000008154060 ) THEN
      (
       L_PERSON_ID = to_char(-999)    //-999 indicates top level
//Manager.
       L_ASSIGNMENT_ID = to_char(-999)
      )
      ELSE
      (
       L_PERSON_ID = to_char(100000008153756)
       L_ASSIGNMENT_ID = to_char(100000008154060)
      )

      RETURN L_PERSON_ID , L_ASSIGNMENT_ID

/*================ FORMULA SECTION END =======================*/
The Compensation Person Selection formula determines whether a person is selected for an associated workforce compensation plan.
You select the formula when you run the Start Workforce Compensation Cycle process.
Contexts
The following contexts are available to formulas of this type:
EFFECTIVE_DATE
PAYROLL_ASSIGNMENT_ID
DATE_EARNED
Database Items
Database items are not available to formulas of this type.
Input Variables
The following input variables are available to formulas of this type.
|
Input |
Data Type |
Required |
Description |
|---|---|---|---|
|
CMP_IV_ASSIGNMENT_ID |
Number |
Y |
Assignment ID |
Return Values
Use predefined names for return variables. The following return variables are available to formulas of this type.
|
Return Value |
Data Type |
Required |
Description |
|---|---|---|---|
|
L_SELECTED |
Char |
N |
Y or N |
Sample Formula
This sample formula determines if a person is selected for a plan based on their assignment_id.
/*******************************************************************
FORMULA NAME : Compensation Selection Formula
FORMULA TYPE : Compensation Person Selection
DESCRIPTION  : Assignment_id based selection fast formula
*******************************************************************/
/*=========== INPUT VALUES DEFAULTS BEGIN =====================*/
INPUTS ARE CMP_IV_ASSIGNMENT_ID (number), CMP_IV_PLAN_ID (number)
/*=========== INPUT VALUES DEFAULTS ENDS======================*/
/*================ FORMULA SECTION BEGIN =======================*/

      DEFAULT FOR CMP_IV_ASSIGNMENT_ID IS 0

      l_selected = 'Y'

      /* 100000008154095 - Ariel.Aimar@oracle.com - GBI data*/

      if (CMP_IV_ASSIGNMENT_ID = 100000008154095) THEN
      (
        l_selected = 'N'
      )
      else
      (
        l_selected = 'Y'
      )

      RETURN l_selected
/*================ FORMULA SECTION END =======================*/
The Total Compensation Item formula determines compensation information that is not stored in the other predefined item source types.
You select the formula when you manage compensation items on the Create or Edit Compensation Items page.
Contexts
The EFFECTIVE_DATE (statement end date) context is available to formula of this type.
Database Items
Database items are not available for this formula type.
Input Variables
The following input variables are available to formula of this type.
|
Input Value |
Data Type |
Required |
Description |
|---|---|---|---|
|
CMP_IV_PERSON_ID |
Char |
Y |
Worker ID |
|
CMP_IV_PERIOD_START_DATE |
Date |
Y |
Statement Period Start Date |
|
CMP_IV_PERIOD_END_DATE |
Date |
Y |
Statement Period End Date |
Return Values
Use defined names for return variables. The following return variables are available to formula of this type.
|
Return Value |
Data Type |
Required |
Description |
|---|---|---|---|
|
COMPENSATION_DATES |
Date |
Y |
One to 15 transaction dates delimited by semicolon, maximum 250 characters. |
|
VALUES |
Char |
Y |
One to 15 transaction values delimited by semicolon, maximum 250 characters. Must be the same number of values as dates. |
|
ASSIGNMENTS |
Char |
N |
One to 15 transaction assignments delimited by semicolon, maximum 250 characters. Must be the same number of assignments as dates. Can return an empty space with a delimiter (; ;). |
|
LEGALEMPLOYERS |
Char |
N |
One to 15 legal employer IDs delimited by semicolon, maximum 250 characters. Must be the same number of assignments as dates. Can return an empty space with a delimiter (; ;). |
|
COMPENSATION_DATES1 |
Date |
Y |
Second variable for transaction dates from 16 to 30 if limit of 250 characters is exceeded. |
|
VALUES1 |
Char |
Y |
Second variable for transaction values from 16 to 30 if limit of 250 characters is exceeded. |
|
ASSIGNMENTS1 |
Char |
N |
Second variable for transaction assignments from 16 to 30 if limit of 250 characters is exceeded. |
|
LEGALEMPLOYERS1 |
Char |
N |
Second variable for legal employer IDs from 16 to 30 if limit of 250 characters is exceeded. |
|
COMPENSATION_DATES2 |
Date |
Y |
Transaction dates from 31 to 45. |
|
VALUES2 |
Char |
Y |
Transaction values from 31 to 45. |
|
ASSIGNMENTS2 |
Char |
N |
Transaction assignments from 31 to 45. |
|
LEGALEMPLOYERS2 |
Char |
N |
Legal employers from 31 to 45. |
|
COMPENSATION_DATES3 |
Dates |
Y |
Transaction dates from 46 to 60. |
|
VALUES3 |
Char |
Y |
Transaction values from 46 to 60. |
|
ASSIGNMENTS3 |
Char |
N |
Transaction assignments from 46 to 60. |
|
LEGALEMPLOYERS3 |
Char |
N |
Legal employers from 46 to 60. |
Sample Formula
This sample formula returns one date and one value based on the worker ID.
/*******************************************************************
FORMULA NAME : Total Compensation Simple Item Formula
FORMULA TYPE : Total Compensation Item
DESCRIPTION  : Returns one date and one value.
*******************************************************************/

/*=========== INPUT VALUES DEFAULTS BEGIN =====================*/
INPUTS ARE CMP_IV_PERSON_ID (text), CMP_IV_PERIOD_START_DATE (date), CMP_IV_PERIOD_END_DATE (date)
DEFAULT FOR CMP_IV_PERSON_ID IS '-1'
DEFAULT FOR CMP_IV_PERIOD_START_DATE IS '4712/12/31' (date)
DEFAULT FOR CMP_IV_PERIOD_END_DATE IS   '4712/12/31' (date)

/*============ INPUT VALUES DEFAULTS ENDS =====================*/

/*=================== FORMULA SECTION BEGIN =================*/

 COMPENSATION_DATES = '2005/01/01'
 VALUES             =  '500.00'

RETURN COMPENSATION_DATES, VALUES

/*================ FORMULA SECTION END =======================*/
This sample formula returns multiple variables.
/*******************************************************************
FORMULA NAME : Total Compensation Multi Item Formula
FORMULA TYPE : Total Compensation Item
DESCRIPTION  : Returns multiple variables.
*******************************************************************/

/*=========== INPUT VALUES DEFAULTS BEGIN =====================*/
INPUTS ARE CMP_IV_PERSON_ID (text), CMP_IV_PERIOD_START_DATE (date) , CMP_IV_PERIOD_END_DATE (date)

/*=========== INPUT VALUES DEFAULTS ENDS =====================*/

/*================= FORMULA SECTION BEGIN =================*/

  COMPENSATION_DATES  = '2009/01/01;2009/02/01;2009/03/01'
  COMPENSATION_DATES1 = '2009/07/01;2009/08/01;2009/09/01'
  COMPENSATION_DATES2 = '2009/10/01;2009/11/01;2009/12/01'
  COMPENSATION_DATES3 = '2009/10/01;2009/11/01;2009/12/01'
  VALUES              = '200.00;200.00;300.00'
  VALUES1             = '300.00;500.00;500.00'
  VALUES2             = '500.00;500.00;600.00'
  VALUES3             = '600.00;600.00;700.00'

  /* Returns only first two assignment */
  ASSIGNMENTS          = ';1234567890;1234567890'
  ASSIGNMENTS1         = '1234567890;1234567890;1234567890'
  /* Returns last two assignments */
  ASSIGNMENTS2         = ';1234567890;1234567890'
  /* Returns  first and last assignments */
  ASSIGNMENTS3         = '1234567890;;1234567890'


  LEGALEMPLOYERS      = '0123456789;;0123456789'
  LEGALEMPLOYERS1     = '0123456789;0123456789;0123456789'
  LEGALEMPLOYERS2     = '0123456789;0123456789;0123456789'
  LEGALEMPLOYERS3     = '0123456789;0123456789'

RETURN COMPENSATION_DATES,VALUES,COMPENSATION_DATES1,VALUES1,COMPENSATION_DATES2,VALUES2,COMPENSATION_DATES3,VALUES3,ASSIGNMENTS,ASSIGNMENTS1,ASSIGNMENTS2,ASSIGNMENTS3,LEGALEMPLOYERS,LEGALEMPLOYERS1,LEGALEMPLOYERS2,LEGALEMPLOYERS3

/*================ FORMULA SECTION END =======================*/
If you need to compile many fast formulas at the same time, you can run the Compile Formula process on the Submit a Process or Report page. Also, if you make any changes to a function after you have compiled a formula that uses it, you need to recompile the formula for the changes to take effect.
Compilation errors occur in the Manage Fast Formulas page when you compile the formula. An error message explains the nature of the error. Common compilation errors are syntax errors resulting from typing mistakes.
Execution errors occur when a problem arises while a formula is running. The usual cause is a data problem, either in the formula or in the application database.
Payroll balances show the accumulation of values over a period of time. The values can be currency, hours, or any other numeric value. You manage balance definitions from the Payroll Calculation work area. Most of the balances you require are predefined and additional balances are created automatically when you create elements. You can edit the definition of these generated balances, or create additional balances for calculations or reporting.
When you create a balance definition, you select the balance category and a unit of measure. Each balance definition is grouped in a predefined balance category for quicker processing. Balance categories are legislation-specific and cannot be modified. The predefined units of measure available for selection are Day, Hour (with different combinations of minutes and seconds), Integer, Money, and Number.
Important aspects of balance definitions are:
Balance Dimensions
Balance Feeds
Generated Balances and Database Items
Base Balances
Remuneration
Each balance can have multiple dimensions, which define the specific value to be retrieved. Balance dimensions are predefined and typically combine these components:
Time span, such as run, period to date, or fiscal year to date
Employment relationship level, either assignment, terms, or payroll relationship
Context, required for some balances only, such as tax reporting unit, element, or payroll
For example, if you select the dimension Core Assignment Tax Unit Year to Date for the balance Gross Earnings, you create the defined balance GROSS_EARNINGS_ASG_TU_YTD, which accumulates gross earnings for an assignment in a specific tax reporting unit from the beginning of the calendar year to date.
You can define balance feeds by element input values or by balance classification run results.
Balance Feeds by Element
Balance feeds by element indicate one or more element input values to add or subtract from a balance. For each balance feed, all elements must be of the same data type. For example, you would not mix money and hours in the same balance feed.
If a balance is fed by a single element, it is called a primary balance.
Balance Feeds by Classification
Balance feeds defined by primary or secondary element classification are always payroll run result values.
If you add a primary classification as a balance feed, you cannot add the children of this classification from the secondary or subclassifications. For example, if you use the Supplemental Earnings primary classification as a balance feed, you cannot also use any secondary or subclassification that are children of Supplemental Earnings. Also, you cannot use both secondary classifications and subclassifications in the same balance feed.
For any balance that you need to initialize, regardless of whether it is fed by elements or classifications during normal processing, you can select elements to feed it for balance initialization purposes only. Select one element for each level of the employment hierarchy associated with a dimension that you want to initialize.
When you create elements, balances and balance feeds are created automatically as determined by the element template. A database item is generated automatically for each balance dimension. You can use the database items in your formulas to check the value of a balance.
You can specify a base balance when there is a relationship between balances that can be relied on when processing and reporting. For example, Loan Repayment could be the base balance for Loan Repayment Arrears.
One balance in a legislation is predefined as the remuneration balance, which is used to generate payments for employees. For example, the remuneration balance might be Net Pay, which is a calculated balance that is the sum of standard earnings and supplemental earnings minus all the deductions calculated for the run.
Important
Setting the Use for Remuneration option to Yes means the balance will be defined as the remuneration balance. Only one balance in a legislation can be the remuneration balance.
Setting initial balances values is an essential task when you migrate payroll data from another system. First you load balance values into batch views then submit the Load Initial Balances process from the Payroll Calculation work area. The process validates then processes the batch.
For each balance to be initialized, you must create elements in the Balance Initialization classification and add them to the balance as balance feeds. You can create up to three elements: one to initialize assignment level balances, one for employment terms level, and one for payroll relationship level.
Each balance initialization element must:
Be nonrecurring and for balance adjustments only.
Be processable in the payroll run.
Have an input value to feed the balance and an input value for each context required by the balance. If you need to set initial values for a large number of balances you can define multiple input values for a single element with each input value feeding a different balance.
Populate the batch views with the balance values for the initialization date. You can use the Batch Loader spreadsheet, or populate the batch directly using the API in the PAY_BALANCE_BATCH_LINES_PKG API package. You can download the Batch Loader spreadsheet in the Payroll Administration work area.
The views are:
PAY_BALANCE_BATCH_HEADER
PAY_BALANCE_BATCH_LINES
Important
The PAY_BALANCE_BATCH_LINES view has a complex definition and cannot be directly inserted into. You must use the Batch Loader spreadsheet or API.
When you create the batch header and lines, consider the following points:
Divide your employees into separate batches to limit the size of each batch.
Within a batch, ensure that you include batch lines for every balance to be initialized for a person. You cannot split lines for a person across multiple batches.
The date you specify on the batch header applies to all lines unless you enter an override date at the line level. The date at line level must be on or before the date on the header.
You cannot initialize balances once you have run any payroll processes.
The Load Initial Balances process validates then processes the initial balance values you load into batch views. It creates balance adjustments to set the required values.
The data you load into the batch views determines which defined balances are initialized and the values used. Typically, you group employees into batches to manage the initialization of their balances.
The Load Initial Balances process validates that the entities referenced in the batch data exist, including balances, balance dimensions, tax reporting units, payrolls, payroll relationships, employment terms, and assignments. It checks that values are available for the contexts used by each balance dimension. It does not check, for example, that an employee is assigned to a specified organization. It sets the status of valid batch lines to V.
The process creates balance adjustments. For all the batch lines it successfully processes, the process sets the status to T and updates the PAYROLL_REL_ACTION_ID to point to the balance adjustment.
The following table shows a simple three-line batch loaded on 18 June.
|
Defined Balance |
Value |
|---|---|
|
Total_Earnings_PTD |
100 |
|
Total_Earnings_QTD |
250 |
|
Total_Earnings_YTD |
500 |
For this batch, the process creates an adjustment on the first day of the time period relevant to each dimension, as shown in the following table:
|
Adjustment Date |
Adjustment Value |
Balances Adjusted |
|---|---|---|
|
1 June |
100 |
Total_Earnings_PTD Total_Earnings_QTD Total_Earnings_YTD |
|
1 April |
150 |
Total_Earnings_QTD Total_Earnings_YTD |
|
1 Jan |
250 |
Total_Earnings_YTD |
The PAY_BALANCE_BATCH_HEADER and PAY_BALANCE_BATCH_LINES views hold the data used by the Load Initial Balances process to initialize balance values.
You must load data into these views using the Batch Loader spreadsheet or API in the PAY_BALANCE_BATCH_LINES_PKG PL/SQL package. Create each batch line with a BATCH_LINE_STATUS of U (unprocessed) and leave the PAYROLL_REL_ACTION_ID column blank. The batch upload process updates these two columns.
Note
You can view the full column listing by querying the view in the Oracle Enterprise Repository at https://fusionappsoer.oracle.com/oer/.
In PAY_BALANCE_BATCH_LINES, the columns shown in the following table are required. Where there is both an ID column and a name column for the same entity, for example, PAYROLL_ASSIGNMENT_ID and ASSIGNMENT_NUMBER, you can populate either column, but you must populate at least one. If the ID column is left blank, the batch upload process uses the name column value to derive the ID value.
|
Column |
Comments |
|---|---|
|
PAYROLL_RELATIONSHIP_ID + PAYROLL_RELATIONSHIP_NUMBER |
Identify the payroll relationship for this balance value. |
|
BALANCE_TYPE_ID + BALANCE_NAME |
Identify the balance for this balance value. |
|
BALANCE_DIMENSION_ID + DIMENSION_NAME |
Identify the balance dimension for this balance value. DIMENSION_NAME should be populated with the localization's dimension usage dimension name rather than the core DIMENSION_NAME held on PAY_BALANCE_DIMENSIONS. |
|
VALUE |
Identify the numerical value of the balance on the upload date. |
|
UPLOAD_DATE |
Identify the date of the balance value. This date must be on or before the upload date for the batch header. |
|
PAYROLL_ID + PAYROLL_NAME |
Identify the context required for evaluating a balance value, even though it may not be a context for the dimension. |
The core contexts shown in the following table must be populated if the balance dimension expects a value for this context.
|
Column |
Comment |
|---|---|
|
PAYROLL_TERM_ID + TERM_NUMBER |
Identify the payroll term for this balance value, if required. Where there is both an ID column and a number column for the same entity, you can populate either column, but you must populate at least one. |
|
PAYROLL_ASSIGNMENT_ID + ASSIGNMENT_NUMBER |
Identify the payroll assignment for this balance value, if required. |
|
LEGAL_EMPLOYER_ID + LEGAL_EMPLOYER_NAME |
|
|
TAX_UNIT_ID + TAX_UNIT_NAME |
|
|
AREA1 + AREA2 + AREA3 + AREA4 |
Identify state and country code information. In Oracle E-Business Suite these items were STATE_CODE, COUNTY_CODE and so on. |
|
THIRD_PARTY_PAYEE_ID + THIRD_PARTY_PAYEE_NAME |
|
|
TIME_DEFINITION_ID + TIME_DEFINITION_NAME |
|
|
RUN_TYPE_NAME + RUN_TYPE_ID |
|
|
ELEMENT_ENTRY_ID |
|
|
BALANCE_DATE |
|
|
CALC_BREAKDOWN_ID |
Identify the ID associated with payroll term. |
There are six legislative or user-defined contexts, which must be populated if the balance dimension expects a value for these contexts. For each context, there is a context ID, name, and value. For example:
CONTEXT1_ID + CONTEXT1_NAME
CONTEXT1_VALUE if CONTEXT1 is used by the balance dimensions
Note
The values of the core contexts are the IDs themselves, while the values of the legislative contexts are separate from the ID of the context.
Populate CONTEXT[1-6]_NAME with the name of the context usage for that legislative or user-defined context, and CONTEXT[1-6]_VALUE with the actual value of that context.
Elements are building blocks that help determine the payment of base pay, benefits, absences, and other earnings and deductions. The components of elements are set up differently based on how the element is to be used.
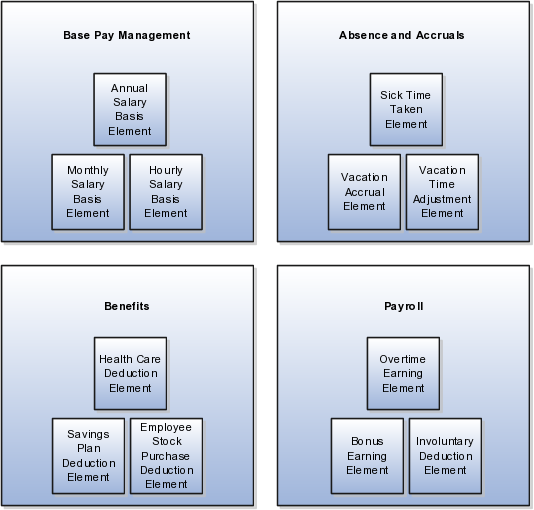
To manage base pay, you attach a single earning element to each salary basis to hold base pay earnings, and assign a salary basis to each worker. When a manager or compensation specialist enters a base pay amount for a worker, the amount is written to the payroll element input value associated with the worker's salary basis and used in payroll processing to generate payment amounts.
You can manage employee absences and leave time. To facilitate reporting and analysis of employee absences, you can distinguish between absence categories, absence types, and absence reasons. You can associate an absence type with an element to maintain an absence balance for an employee. You can associate absence types and other elements with accrual plans to determine the net accrual of an employee.
Attach elements at various levels in the benefits object hierarchy to create deductions and earnings that can be processed in a payroll run to calculate net pay.
For Oracle Fusion Global Payroll, you define earning and deduction elements, such as bonus and overtime earnings and involuntary deductions. These elements incorporate all the components required for payroll processing, including formulas, balances, and formula result rules.
Elements are the building blocks of payroll and benefits. There is no limit to the number of elements you can define. You define the policies or business rules that govern the allocation of these elements to your workers.
Elements can represent:
Earnings, such as salary, wages, and bonuses
Compensation, such as employee stock purchase and insurance plans
Absences from work
Tangible items distributed to persons, such as tools, uniforms, mobile phones, or computers
Statutory deductions, such as taxes, voluntary deductions, such as contributions to charities or savings plans, and involuntary deductions, such as court orders, as well as pretax deductions
Employer taxes and other employer liabilities
Oracle Fusion supplies many predefined elements while additional elements are generated when you define certain types of compensation and payroll elements through templates.
The predefined elements are specific to your localization. They typically include deductions for tax and wage attachments. You cannot make any changes to these predefined elements.
You can create many earnings and deductions from element templates. The templates include the elements, balances, balance feeds, and formulas required for payroll processing. You can configure any of these definitions to match your specific business requirements.
The components of an element's definition are available for entry based on the primary and secondary classification you select, for example a standard earning. This diagram illustrates element definition components and what is defined in each component.
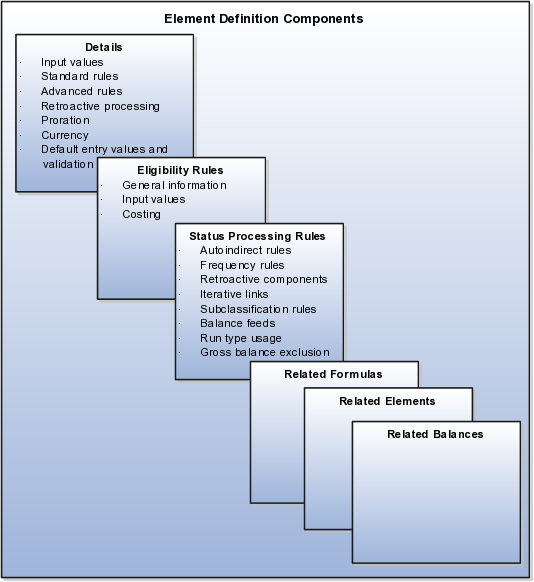
For example, you can define an element called Wage, for hourly paid workers. You classify the element in the predefined classification Earnings, which determines when it is processed in the payroll run and what payroll balances it feeds.
You must specify at least one input value, in this case Hours Worked, which must be entered in each payroll period. If required, you can define multiple input values with fixed values, defaults, or validation.
You associate a formula with the element, to calculate the wage for the payroll period. A simple formula might be hours worked, from the input value, multiplied by an hourly rate, from compensation information on the employment record. You define who is eligible for the element by assigning eligibility criteria to various components in the persons employment record, such as grade, payroll, salary basis, or organization. In this example, the wage element is available to all persons on the weekly payroll.
After you have defined and used an element, updates to the element are limited to ensure the integrity of the element for retroactive processing and the balances of the input values. You cannot remove existing input values or add new ones if you have created entries for the element. You must add an input value to an element before you create any element entries, or set the element entries effective date to the element's start date.
You can make the following changes to an element that has been previously processed:
Change a required input value to be optional.
Alter the sequence in which input values appear in the Element Entries flow.
Change the input value validation rules for minimum, maximum, lookup, or formula.
Change your specification of which input values create database items.
You can select rules for the element's entry value to define how you can update the element entries. The options are:
Automatic entry
Allow multiple entries in same period
Additional entry
Entry values can be automatically added in element entries in three ways.
Elements can be defined to default an input value at creation. The user defining the element can specify the entry value to be defaulted when an element entry is created. Users can override or change the default at any time. Changes to this type of a default value on the element do not affect existing element entries.
Elements can be defined to default an input value at run time. When this is selected, the element will automatically default the element entry value. `This value can be updated if needed. A change to the default value for an input value set to default at run time will automatically change the value to be applied at run time for everybody with an entry for that element.
Some entry values are automatically created by a service or process used with compensation, benefits, or formula results.
Important
An element with automatic entry allowed cannot allow multiple entries in the same period.
This option allows you to give a person more than one entry of the element in the same pay period. For example, if you enter overtime hours on a weekly basis for monthly-paid persons, you might need to give a person five entries of an overtime element in each period.
If you are creating a net-to-gross element, you must select Allow multiple entries in same period.
This option allows you to add an occasional one time entry for recurring elements. This additional entry can override or add to the normal entry amount.
An element's latest entry date determines how element entries process after a person is terminated or transferred to another payroll. The options are:
Final close
Last standard earning date
Last standard process date
Note
These are the predefined options, you can create others that fit your business needs.
This option allows the element to stay open for entries beyond a persons last day worked. For example, you want the element to stay open to pay a severance package to a terminated person.
This option stops all element entries on the date the person leaves. It is recommended to use this option for recurring entries such as salary.
Note
When you select the Last Standard Earning Date, also select proration for the element. This ensures the element is processed for proration purposes, even if it is not active at the end of a payroll period.
The last standard process date defaults to the last day of the pay period in which the person is terminated, but you can set it to a later period when you terminate a person. It enables all element entries to stop on the last standard process date or on the date the assignment ends, if this is earlier.
Note
This option is only available for Oracle Fusion Global Payroll users.
An element's input values defines the entry values available on each entry of this element. Each input value has a unit of measure defined, and can have validations and conditions defined to control the data entry of the element entry assigned to a person. For example, an earnings element may have an input value for hours worked, which is defined as required and has a unit of measure of number.
When you create an element, some input values are created automatically if you use Oracle Fusion Global Payroll or Oracle Fusion Global Payroll Interface. For Global Payroll Interface, this applies to earnings elements only. You can create additional input values for any element, as needed.
For each input value created you can modify these attributes:
|
Field |
Purpose |
|---|---|
|
Display Sequence |
Control the order in which the entry value is displayed on element entries. |
|
Special Purpose |
Identify how an input value is used, irrespective of the name given to it. For example, it identifies if the input value holds a percentage value, a rate, or third-party payee details. It basically assists with processing the input value based on what type of information it holds. |
|
Unit of Measure |
Select the value that describes the type of value the entry value can hold, such as number or character. |
|
Displayed |
Select to display the input value on the element entry. |
|
Allow User Entry |
Select to enter values on element entries. |
|
Required |
Select to make the input value a required entry value on the element entry. If you select Required, you must also select Displayed and Allow User Entry. |
|
Create a Database Item |
Select to have a database item created for the input value to make the values available for formulas or system extract. |
|
Default |
Enter a value that appears as the default value for this entry value in element entries, if needed. |
|
Apply default at runtime |
Select to have the default set on the element entry when the payroll process is run. Changes to the default value are reflected in the next processing after the effective date of the change. You can replace the default at runtime functionality by manually providing an entry value on the element entry. |
|
Minimum |
Enter a minimum value for the element, if needed. |
|
Maximum |
Enter a maximum value for the element, if needed. |
|
Validation Formula |
Enter a formula that validates the entry value entered on element entries, if needed. |
|
Validation Source |
Use with the other input value options to select the valid validation method, such as lookups or formulas. |
|
Lookup Type |
Specify a lookup type to provide a list of values for an element entry value. |
|
Warning or Error |
Use when you are validating the input value or entering a minimum or maximum value. It specifies whether a warning or an error displays if the entry fails the validation condition or does not meet the minimum or maximum value indicated. |
|
Reference |
Use to associate a balance context with the run result. For example, if you want to associate a context, such as jurisdiction, with an element; create an input value for jurisdiction and select the jurisdiction context in the reference field. Then the run result value of the input value will work as context value when updating the balance. If you select a reference then the lookup type and validation source values should be automatically set to the reference context. You need to provide the reference field first for the validation source value to be automatically populated. |
Note
Once an element is processed, you cannot update certain input value attributes, such as unit of measure. This ensures that changing certain attributes will not invalidate prior results.
At minimum, an element needs one standard processing rule. This identifies the formula the payroll run uses to process the element for persons with an active employment record. It is also the default formula for other assignment statuses. However, you can define additional processing rules if you need to use different formulas for assignments at other statuses. For example, you could have two rules for a Wages element: Standard Wages and Paid Training Leave.
You can add one or more of the following optional results rules to an element:
Direct result
Indirect result
Message
Order indirect
Stop
Target indirect
For all formula result types except Direct Result or Message, select the target element name to which you want to pass the formula result. This element must have a processing priority causing it to process after the element sending the result.
For the formula result types Direct Result, Indirect Result, and Target Indirect, select the target input value to update.
This is the element's run result, or a direct result updating one of the element's input values.
This result passes as an element entry to another nonrecurring element not yet processed.
The formula issues messages under certain conditions. For example, a formula can check a loan repayment balance and, if the balance is zero, issue the message "Loan is repaid."
There are three severity levels for a message rule:
Error
This causes the run to roll back all processing for the employment record.
Warning
This does not affect payroll processing but warns you of a possible problem.
Information
This does not affect payroll processing.
This result updates the subpriority of the element you select in the Target Element Name field.
This formula result uses the Date Earned of the payroll run to put an end date on a recurring entry of this or another element (which must be defined with Allow Multiple Entries not selected).
This result updates recurring entries of this or another element on the effective date of the payroll run. The receiving element must be defined with Allow Multiple Entries not selected unless you are passing a recurring element's entries to itself, that is updating another entry of the same element. With this result rule, any future-dated changes to the entry will be overwritten by the results of the current payroll run.
Element eligibility determines which people are eligible for an element. To determine eligibility, you assign element eligibility criteria to the components that persons must have to receive entries of the element. While some elements may represent compensation, deductions, and equipment available to all persons, many elements are available only to certain groups of persons. For example, your enterprise might provide company cars only to persons in the Sales Department. Eligibility criteria rule out the possibility of persons getting element entries by mistake. For example, you might want to give a production bonus only to those persons who work full time in Production and are on the weekly payroll. To do this you would define eligibility criteria for the element Production Bonus and the combination of the Production organization, the Full-Time assignment category, and the Weekly payroll.
Element eligibility can be assigned by many different criteria.
All payrolls or for specific payrolls
Payroll statutory unit
Legal employer
Payroll relationship type
Department in which the person works
Location of person's office
Job, for example, Associate Professor or Secretary
Grade
Groups to which the person belongs. You set up all the groups that are appropriate for your enterprise. For example, you could decide to group persons by company within a multi-company enterprise, and by union membership.
Position, which is a class of job performed in a particular organization, for example, Associate Professor of Chemistry, or Finance Department Secretary.
Note
In order to enter an element for a worker, you must define element eligibility for every element. This must be done for predefined elements and those you define. If you want the element to be available to all workers, you can save the element eligibility record with no criteria selected. This is the usual practice for compensation and benefit elements where you determine eligibility using eligibility profiles.
You can define more than one eligibility criteria for each element but there must be no overlap between them. For example, you could create one criteria for the combination of grade A and the job Accountant. However, you could not create one criteria for grade A and a second for the job Accountant. This would imply that an accountant on grade A is eligible for the same element twice. If you have more than one criteria for an element, you can enter different default values, qualifying conditions, and costing information for each eligibility group.
Element eligibility rules always control element entries.
After you have used an element you can make the following changes to the eligibility rules:
Change the input value default values and validation.
These changes affect all new entries. Changes to run time defaults affect existing entries. The system also uses the new validation rules to check any updates you make to existing entries.
Date-effectively end all of the rules that apply to an element and define a new set of rules, which are effective from a later date. For example, suppose you have defined eligibility for a company car based on grade. Following a change of policy you must now define eligibility based on job.
You will not be allowed to end the element eligibility if any nonrecurring entries exist at the date you want to end the rule. You must delete existing entries before you end the element's eligibility.
You can end the element eligibility if recurring entries exist. Any existing entries will be ended automatically when you end the element's eligibility.
Change the qualifying conditions of age and length of service that persons must meet to be eligible for the element.
The example shows how payroll managers create a regular earnings element using an element template.
First you create an earning element then update it to allow for multiple entries.
|
Field |
Value |
|---|---|
|
Legislative Data Group |
Your Legislative Data Group |
|
Primary Classification |
Standard Earnings |
|
Secondary Classification |
Regular |
|
Question |
Answer |
|---|---|
|
Name |
REGULAR SALARY |
|
Reporting Name |
Regular Salary. |
|
Effective Date |
1/1/2010 |
|
Input Currency |
US Dollar |
|
Should every person eligible for the element automatically receive it? |
No. |
|
What is the earliest entry date for this element? |
First Standard Earnings Date |
|
What is the latest entry date for this element? |
Last Standard Earning Date |
|
At which employment level should this element be attached? |
Assignment Level |
|
Does the element recur each payroll period, or does it require explicit entry? |
Recurring |
|
Process the element only once in each payroll period? |
Yes |
|
Can a person have more than one entry of the element in a payroll period? |
No |
|
Process and pay element separately or with other earnings elements? |
Process and pay with other earnings |
|
Question |
Answer |
|---|---|
|
What is the calculation rule? |
Flat Amount |
|
How do you want to derive the amount? |
Entered value |
|
What is the time-basis for this element? |
Periodically |
|
Is this element subject to proration? |
No |
|
Is this element subject to retroactive changes? |
No |
|
Use this element to calculate a gross amount from a specified net amount? |
No |
|
Should this element reduce regular earnings? |
No |
On the Element Summary page, review the newly created element details for accuracy.
On the Element Summary page, update the newly created element details.
This example demonstrates how to create payroll elements for salary bases (base pay) as well as individual and workforce compensation plans using the US legislative data group.
The following table summarizes key decisions for each element that you create and provides the selections for this example.
|
Decision to Consider |
In This Example |
|---|---|
|
What is the primary classification? |
For US compensation, you select one of these three choices:
|
|
What is the secondary classification? |
This item is optional. The available choices vary based on the selected primary classification.
|
|
At which employment level should this element be attached? |
Match the employment level to the level at which the salary basis is associated with workers, either Assignment Level or Term Level. |
|
Does this element recur each payroll period, or does it require explicit entry? |
The typical selections for US compensation are:
* The default value for this field. |
|
Which input values should I leave for the application to display? |
For payroll elements associated with:
|
To create payroll elements for salary bases and compensation plans, you perform these tasks:
Create the element.
Enter basic information.
Enter additional details for standard earnings elements, if you also implemented Oracle Fusion Global Payroll.
Review selections and submit the element.
Show only the Amount input value for payroll elements associated with individual and workforce compensation plans.
Skip this task for payroll elements associated with salary bases.
Set minimum and maximum amounts for supplemental earnings as well as standard earnings elements with a Regular Not Worked secondary classification.
Set up open eligibility.
|
Example Purpose or Use |
US LDG Primary Classification |
|---|---|
|
Recurring base pay, such as annual salaries and hourly earnings |
Standard Earnings |
|
Recurring payments, such as an allowance |
Standard Earnings |
|
Nonrecurring payments, such as a bonus |
Supplemental Earnings |
|
Recurring voluntary deductions, such as savings plans or charitable contributions |
Voluntary Deductions |
|
Example Purpose or Use |
US LDG Secondary Classification |
|---|---|
|
Recurring base pay |
Regular |
|
Recurring payment |
Regular Not Worked |
|
Nonrecurring payment |
Bonus |
|
Recurring voluntary deduction |
Select the relevant choice. If there is none, leave it blank. |
|
Field |
Sample Value |
|---|---|
|
Name |
Annual Salary Hourly Wages Allowance Spot Bonus Red Cross Contribution |
|
Reporting Name |
Enter the name that you want to display on reports for this earnings or deduction payroll element. |
|
Effective Date |
1/1/1951 Enter a very early date so that the payroll element is available for use immediately in your salary bases as well as individual and workforce compensation plans. |
|
What is the earliest entry date for this element? |
First Standard Earning Date |
|
What is the latest entry date for this element? |
Last Standard Process Date |
|
At which employment level should this element be attached? |
Match the employment level to the level at which the salary basis is associated with workers, either Assignment Level or Term Level. |
|
Does this element recur each payroll period, or does it require explicit entry? |
For nonrecurring payments such as a bonus, select Nonrecurring. For all other purposes or uses in this worked example, as well as in HCM coexistence implementations, accept the default (Recurring). |
These steps apply only to recurring base pay elements when you also implemented Oracle Fusion Payroll. The Compensation application does not display this page if Oracle Fusion Global Payroll is not implemented too.
For hourly payroll elements, in What is the calculation rule?, select Unit X Rate.
For annual salary and Regular Not Worked standard earning elements, complete the following steps.
|
Field |
Sample Value |
|---|---|
|
Is this element subject to proration? |
Yes |
|
Proration Group |
Entry Changes for Proration |
|
Is this element subject to retroactive changes? |
Yes |
|
Retro Group |
Entry Changes for Retro |
Skip the following steps for payroll elements associated with salary bases (base pay).
For payroll elements associated with individual and workforce compensation plans, show only the Amount input value and clear the Displayed option for all other input values.
Complete these steps for supplemental earnings elements as well as standard earnings elements with a Regular Not Worked secondary classification.
|
Value |
Usage |
|---|---|
|
Warning |
Display a message to users when they enter an amount that is less than the minimum value (if set) or greater than the maximum value (if set), while still enabling them to continue with their submissions. |
|
Error |
Display a message to users when they enter an amount that is less than the minimum value (if set) or greater than the maximum value (if set) and prevent them from continuing until the amount is within the specified limits. |
Set up the element for eligibility without any criteria. For base pay earnings elements, eligibility is determined by the salary basis assigned to the worker. For individual and workforce compensation plans, eligibility for payroll elements is typically determined by eligibility profiles assigned to the plans and options in plans.
Example: For the payroll element Allowance, the element eligibility name would be Spot Bonus Open.
The example shows how application implementation consultants create elements for Oracle Fusion Global Payroll Interface using element templates.
First you create an element then update it so that it is available to all payrolls.
The following table summarizes key decisions for each element that you create and provides the selections for this example.
|
Decision to Consider |
In This Example |
|---|---|
|
What is the primary classification? |
One of these three choices:
|
|
What is the secondary classification? |
This item is optional. The available choices vary based on the selected primary classification.
|
|
At which employment level should this element be attached? |
Match the employment level to the Assignment Level. Note Although a salary basis can be associated with a worker on either the assignment level or the terms level, most third-party payroll providers will expect salary information at only the assignment level. |
|
Does this element recur each payroll period, or does it require explicit entry? |
One of these three choices:
|
|
Example Purpose or Use |
Primary Classification |
|---|---|
|
Recurring base pay, such as annual salaries and hourly earnings |
Standard Earnings |
|
Recurring payments, such as an allowance |
Standard Earnings |
|
Nonrecurring payments, such as a bonus |
Supplemental Earnings |
|
Recurring voluntary deductions, such as savings plans or charitable contributions |
Voluntary Deductions |
|
Example Purpose or Use |
Secondary Classification |
|---|---|
|
Recurring base pay |
Regular |
|
Nonrecurring payment |
Bonus |
|
Recurring voluntary deduction |
Select the relevant choice. If there is none, leave it blank. |
|
Field |
Sample Value |
|---|---|
|
Name |
Annual Salary Hourly Wages Allowance Spot Bonus Red Cross Contribution |
|
Reporting Name |
Enter the name that you want to display on reports for this earnings or deduction payroll element. |
|
Effective Date |
1/1/1951 Enter a very early date so that the payroll element is available for use immediately. |
|
Input Currency |
US Dollar |
|
Should every person eligible for the element automatically receive it? |
No |
|
What is the earliest entry date for this element? |
First Standard Earning Date |
|
What is the latest entry date for this element? |
Last Standard Process Date |
|
At which employment level should this element be attached? |
Assignment Level |
|
Does this element recur each payroll period, or does it require explicit entry? |
For nonrecurring payments such as a bonus, select Nonrecurring. For all other purposes or uses in this worked example, select Recurring. |
|
Process the element only once in each payroll period? |
Yes |
|
Process and pay element separately or with other earnings elements? |
Process and pay with other earnings. |
|
Question |
Answer |
|---|---|
|
What is the calculation rule? |
Flat Amount |
|
How do you want to derive the amount? |
Entered value |
On the Element Summary page, update the newly created element details.
When you create an absence element for an absence type, your choice of element classification determines how absence entries display on the statement of earnings. You must use one of the following classifications:
Information classification or Absence classification
Standard Earnings classification
Use either of these classifications if you want to:
Process absences in a single calculation.
Prevent absence entries from appearing on the statement of earnings that the payroll run generates.
Note
Although both the Information classification and Absence classification work in the same way, you can select either classification depending on your reporting requirement.
Since payroll runs do not process elements in the Information or Absence classifications, you can use an Earnings element to manage the calculation and payment of absences. For example, you can define a skip rule for an Earnings element that triggers processing when it finds an entry for the absence element. The payroll formula associated with the Earnings element uses the database item of the absence element to retrieve the total number of absences. Then the formula uses another database item to retrieve the salary or hourly rate to calculate the total absence pay for the period and, if necessary, reduce the regular earnings.
The following figure depicts the relation between the Absence element, Earnings element, skip rules, and the payroll formula associated with the Earnings element:
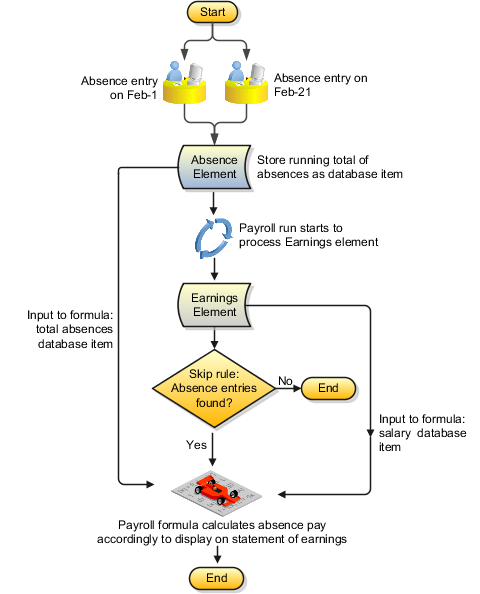
Use this classification if you want to:
Process absences individually in each payroll period.
Treat absence entries as earnings.
This approach creates a one-line entry on the statement of earnings for each absence type. For example, you can use this classification if your employees submit timecards, and you want absences taken by these employees to show on the statement of earnings.
When you set up an absence type, you can determine how absences are processed in payroll runs. Choose the type of element to associate with the absence type:
Use a nonrecurring absence element.
Use a recurring absence element (only if you use Oracle Fusion Global Payroll and enable proration).
Nonrecurring absence elements are valid for the payroll period in which the absence starts. The application creates the entry only when you enter the absence end date. The element entry records the full value of the absence duration even if the end date falls beyond the payroll period.
For example, if you enter an absence that starts on May 24 and ends on June 5 for someone on a monthly payroll, the element entry is dated May 1 to May 31 and records the full value of the absence duration (13 days).
Use a recurring absence element if you want the payroll run to process absences that have not ended. To process the absence element and calculate the absence duration in each payroll period, you use a payroll formula that handles proration.
Recurring absence element entries start on the absence start date and end on the absence end date (if there is an end date). If the absence starts or ends in the middle of a payroll period, the payroll run detects and processes the absence using the proration functionality.
This example demonstrates how to create absence types and absence elements to manage absences that employees record.
The following table summarizes key decisions for this scenario.
|
Decisions to Consider |
In This Example |
|---|---|
|
What types of absences can employees record? |
Sick leave and vacation leave |
|
Who is eligible for sick leave and vacation leave? |
All employees are eligible for sick leave. However, only full-time employees are eligible for vacation leave. |
|
Should absence entries generate payments? |
No |
|
How must payroll runs process the absences? |
Payroll runs must process the entire absence duration in the pay period in which the absence starts. |
|
Should an absence balance for each employee be maintained? |
Yes, select the Increasing option when you create the absence type so that new absence entries must add to the absence balance. |
|
How must the absence duration be calculated? |
Using work schedules. Select Yes in the Enable Work Schedules option. |
|
Can employees change the absence duration that is automatically calculated when they record an absence? |
No. |
Create two absence elements to store an aggregate of absences relating to sick leave and vacation leave. These elements must use the Absence classification so that they do not generate payments. Define eligibility criteria for the vacation leave element so that only full-time employees can record absences of this type. Create two absence types for sick leave and vacation leave.
|
Field |
Value (for the Sick Leave absence element) |
Value (for the Vacation Leave absence element) |
|---|---|---|
|
Primary Classification |
Absence |
Absence |
|
Name |
Sick Leave |
Vacation Leave |
|
Reporting Name |
Sick Leave |
Vacation Leave |
|
Effective Date |
January 1, 2010 |
January 1, 2010 |
|
Should every person eligible for the element automatically receive it? |
Yes |
Yes |
|
At which employment level should this element be attached? |
Assignment |
Assignment |
|
Does this element recur each payroll period, or does it require explicit entry? |
Nonrecurring |
Nonrecurring |
|
Process the element only once in each payroll period |
Yes |
Yes |
|
Can a person have more than one entry of this element in a payroll period? |
Yes |
Yes |
|
Field |
Value |
|---|---|
|
Name |
Duration |
|
Display Sequence |
1 |
|
UOM |
Day |
|
Field |
Value |
|---|---|
|
Employment Category |
Full Time Employment |
|
Field |
Value (for the Sick Leave absence type) |
Value (for the Vacation Leave absence type) |
|---|---|---|
|
Name |
SickLeave |
Vacation Leave |
|
Legislative Data Group |
Select the legislative data group in which you created the Sick Leave absence element. |
Select the legislative data group in which you created the Vacation Leave absence element. |
|
Valid From |
January 1, 2010 |
January 1, 2010 |
|
Auto Override |
No |
No |
|
Record at Person Level |
Yes |
Yes |
|
Allow Absence Overlaps |
No |
No |
|
Enable Work Schedules |
Yes |
Yes |
|
Element Name |
Sick Leave |
Vacation Leave |
|
Units |
Days |
Days |
|
Input Value |
Duration |
Duration |
|
Balance |
Increasing |
Increasing |
A recurring element has an entry that applies in every pay period until the entry is ended.
A nonrecurring element has an entry that applies in one pay period only. It is only processed once per pay period. The dates of the pay period are determined by the payroll to which the person is assigned.
Note
A base pay element associated with a salary basis must be recurring.
A net-to-gross element must be nonrecurring.
A skip rule is a formula that determines the circumstances in which an element should be processed. If the conditions of the formula are met, then the element is processed. Otherwise the element is skipped from processing.
An element processes entries only in the first payroll run of each period for this element.
If this option is not available for your localization, you can select a skip rule to process this element once each period.
It prevents all new element entries for the element. Selecting this option will not affect any existing element entries.
Use caution with this feature. When hiring, terminating, or updating assignments, this option will prevent element entry creation for the element, even if the element is used for automatic entries.
If you override it, then any subsequent changes to the default value on the element or element eligibility definition will not affect the element entry. However, you can clear your entry if you want to restore the default value.
|
Previous |
Next |
Copyright © 2011-2012, Oracle and/or its affiliates. All rights reserved. Legal Notices |
Contents |
Contact Us |