| Oracle® Fusion Applications Cloning and Content Movement Administrator's Guide 11g Release 5 Refresh 8 (11.1.5) Part Number E38322-12 |
|
|
PDF · Mobi · ePub |
| Oracle® Fusion Applications Cloning and Content Movement Administrator's Guide 11g Release 5 Refresh 8 (11.1.5) Part Number E38322-12 |
|
|
PDF · Mobi · ePub |
This appendix gives a quick version of the Business Intelligence Administration tool installation steps.
The Repository, or RPD, is the file that contains the metadata for the BI Server in Fusion Applications. This includes database connections, tables, joins, and the structures by which these are presented to the report writer. In order to read or make changes to the RPD file, the BI Administration Tool must be installed.
64-bit Windows OS is required to run the BI Administration tool.
The BI Admin tool version must match the Fusion Applications version you have installed.
There are two different ways to obtain the correct version of the tool:
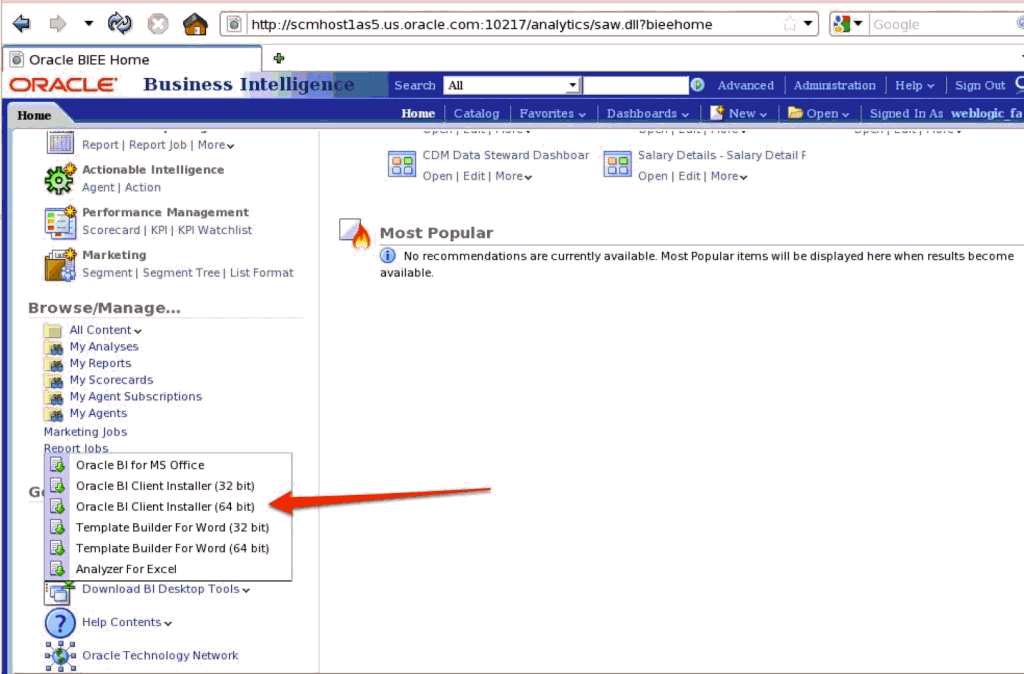
From the Oracle Fusion Applications BIEE Analytics Home, download the 64-bit Windows Oracle BI Client Installer.
OR: Copy it from the BI Server from this path:
FA_HOME/fusionapps/bi/clients/biserver/biee_client_install_x64.exe

Once you have downloaded, run the biee_client_install_x64.exeexecutable to install the tool.
To set up the ODBC connection from the Windows machine, you must locate the correct port on the Fusion Applications BI Server. Typically it is 10206, but if ports were changed as part of the FA install, perform the following steps:
Log in to the BI Server's Enterprise Manager Console.
Expand Business Intelligence within the Farm_BIDomain and select coreapplication. Select Overview and the sub tab Processes.
Expand the BI Servers, and make a note of the port number.
Armed with the correct port, you are ready to create a new ODBC connection.
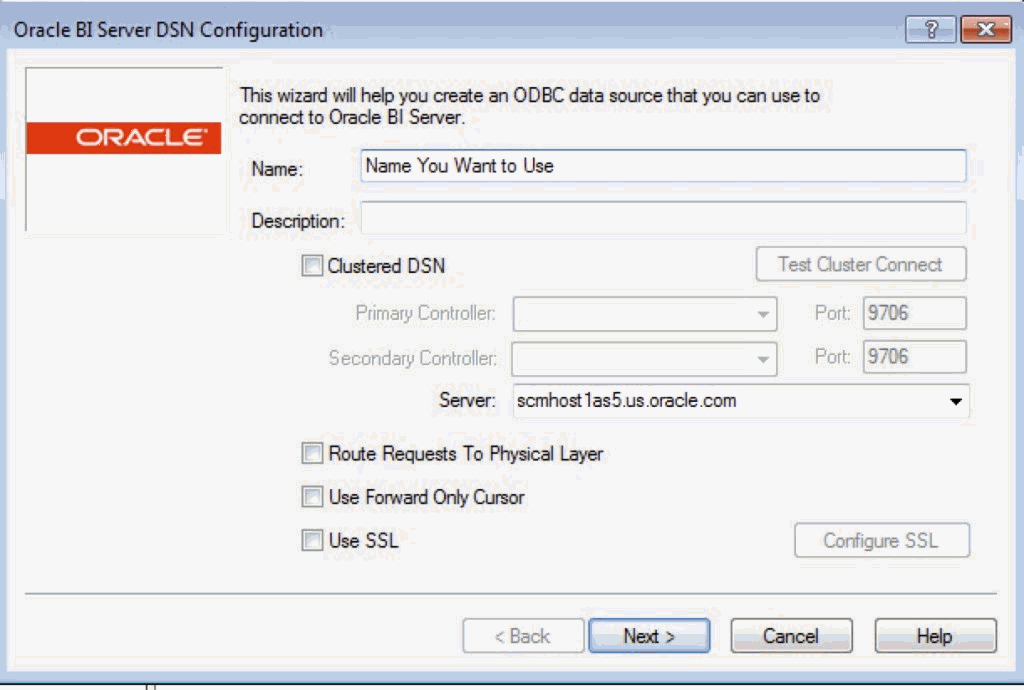
Select Oracle BI Server Driver on the Windows machine.

Enter the Server name for the host that contains the BI Domain. Click Next.
(If necessary, add an entry to the windows/system32/drivers/etc file, so that the windows machine can resolve the host name.)
On the resulting screen, enter the BI Server port (either 10205 or derived above) and the user name/password with which you plan to connect. Click Next.
The user could now connect to the BI Server in On-Line mode and could update the live RPD. CAUTION! Depending on network speed and the size of the RPD, this can be both slow and dangerous. Updating a live RPD while Fusion Applications users and reports are working with it is not advised.
A better solution is to copy the RPD file from the BI Server to a local or shared drive the Windows client can access, updating the RPD in off-line mode, and then publishing it through the BI Server's Enterprise Manager console.
The RPD files are stored in the following path on the BI Server: BIInstance/bifoundation/OracleBIServerComponent/coreapplication_obis1/repository.
To find the correct version:
Log in to Enterprise Manager, go to the Business Intelligence / coreapplication section, and select the Deployment / Repository tabs.
This will identify the current version of the RPD.
Copy that version locally or to the shared directory, to ensure you are working with the most current RPD.