11 Managing Jetty
This chapter describes how you can use Oracle Event Processing Visualizer to view and edit Jetty web server configuration, as well as how to view Jetty work manager configuration for an Oracle Event Processing server.
This chapter includes the following sections:
For more information, see Section 9.2, "Jetty Management".
11.1 Managing Jetty Web Server Configuration
This section describes:
-
Section 11.1.1, "How to View Jetty Web Server Configuration"
-
Section 11.1.2, "How to Edit Jetty Web Server Configuration"
11.1.1 How to View Jetty Web Server Configuration
Using the Oracle Event Processing Visualizer, you can view the Jetty Web server configuration for a selected Oracle Event Processing server.
To view Jetty web server configuration:
-
In the left pane, click the Domain > Server node, where Domain refers to the name of your Oracle Event Processing domain and Server refers to the name of the server instance.
-
In the right pane, click the HTTP Server tab.
-
In the right pane, the properties of the Jetty server are displayed:
-
The name of the Jetty server.
-
The network I/O object to which the Jetty server is bound.
-
The work manager name to which the Jetty server is bound.
-
The list of Web applications that are deployed to this Jetty server, along with the path of the application and its context path.
-
11.1.2 How to Edit Jetty Web Server Configuration
You can only view the configuration of the Jetty servers configured in your Oracle Event Processing server using Oracle Event Processing Visualizer. To change the configuration, you must manually update the server's config.xml file.
For details, see "Configuring Jetty for Oracle Event Processing" in the Oracle Fusion Middleware Administrator's Guide for Oracle Event Processing.
11.2 Managing Work Manager Configuration
This section describes:
11.2.1 How to View and Edit Work Manager Configuration
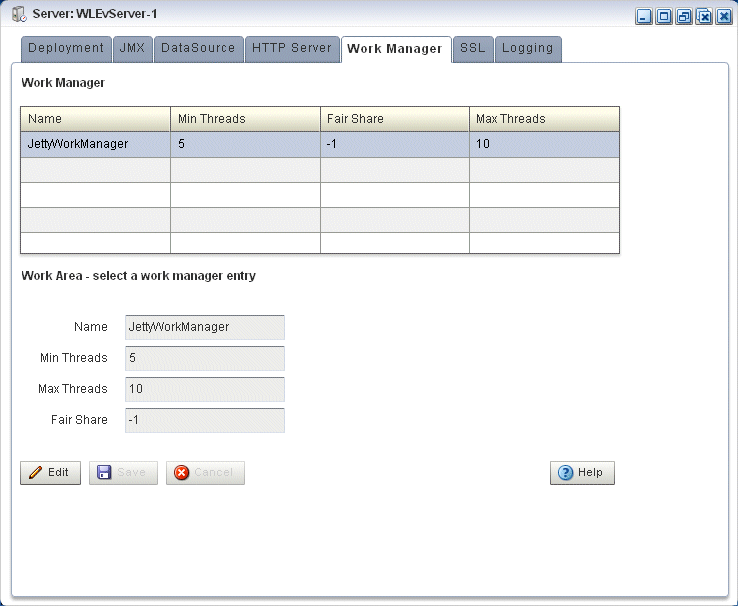
Using the Oracle Event Processing Visualizer, you can view the work manager configuration for a selected Oracle Event Processing server.
To view the work manager configuration:
-
In the left pane, click the Domain > Server node, where Domain refers to the name of your Oracle Event Processing domain and Server refers to the name of the server instance.
-
In the right pane, click the Work Manager tab.
The Work Manager tab appears as shown in Figure 11-1.
-
In the Work Manager table, select the work manager you want to configure by clicking on its name.
-
Click the Change button at the bottom of the page.
-
Update the work manager configuration properties:
-
Min threads—The minimum number of threads that the server allocates so as to reduce the initial time it takes to perform a task. -
Max threads—The maximum number of concurrent threads that execute requests from the constrained work set. -
Fair Share—The average thread-use time required to process requests.
-
-
Click Save to save your changes or Cancel to cancel the update.
11.2.2 How to Create a Work Manager
You cannot delete existing work managers or create new ones using Oracle Event Processing Visualizer; rather, you must manually update the server's config.xml file.
For details, see "Jetty Work Managers" in the Oracle Fusion Middleware Administrator's Guide for Oracle Event Processing.
11.2.3 How to Delete a Work Manager
You cannot delete existing work managers or create new ones using Oracle Event Processing Visualizer; rather, you must manually update the server's config.xml file.
For details, see "Jetty Work Managers" in the Oracle Fusion Middleware Administrator's Guide for Oracle Event Processing.
