15 Generating Community-Gadgets Deployment Files
This chapter describes how to generate the Community-Gadgets war/ ear files both graphically and silently.
This chapter contains the following sections:
-
Section 15.1, "Generating the Community-Gadgets Deployment Files Graphically"
-
Section 15.2, "Generating the Community-Gadgets Deployment Files Silently"
-
Section 15.3, "Verifying the Community-Gadgets Installation Directory Structure"
15.1 Generating the Community-Gadgets Deployment Files Graphically
The graphical installer is a configuration wizard that creates the Community-Gadgets installation directory and generates war/ear files for deployment.
Follow these steps to generate the Community-Gadgets deployment files graphically:
Note:
This section also provides the steps you need to take if your management instance of WebCenter Sites is integrated with OAM.-
Download the Community-Gadgets distribution zip file to your server and extract it into a temporary directory. The extracted folder contains the
cgInstall.batandcgInstall.shfiles, which are needed to run the Community-Gadgets installer. -
Create an installation directory in which the Community-Gadgets installer will create the necessary folders and files.
-
Set
JAVA_HOMEto the path of JDK 1.6 or a later version.For example:
export JAVA_HOME=/opt/jdk1.6.0_43
-
On remote UNIX environments, set the
DISPLAYenvironment variable.For example:
export DISPLAY=10.120.15.20:0.0
-
Execute the installer script:
-
On Windows:
cgInstall.bat -
On UNIX:
cgInstall.sh
-
-
The first screen displayed to you is the welcome screen (Figure 15-1). Click Next.
-
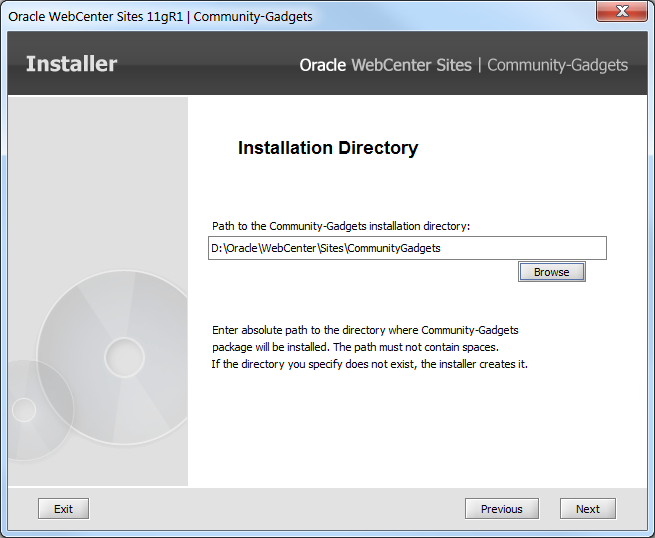
On the Installation Directory screen (Figure 15-2), specify the path to the directory (created in step 2) where the Community-Gadgets application will be installed, or click Browse and navigate to a directory.
The path must not contain spaces. If the directory you specify does not exist, the installer creates it.
-
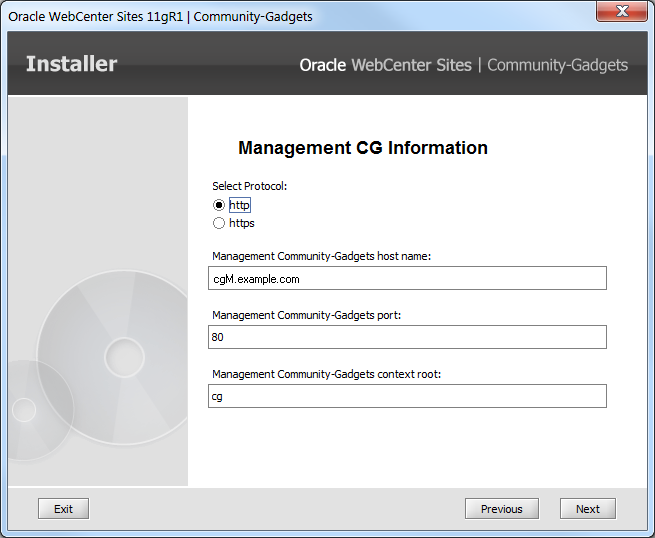
On the Management CG Information screen (Figure 15-3):
-
Select the http or https (HTTP over SSL) protocol.
-
Enter the host name or IP address of the management Community-Gadgets application server. If installing a cluster, enter the host name or IP address of the load balancer.
Note:
If WebCenter Sites on the management system is integrated with Oracle Access Manager, specify the name or IP address of the Oracle HTTP Server host. -
Enter the port number of the management Community-Gadgets application server. If installing a cluster, enter the port number of the load balancer.
Note:
If WebCenter Sites on the management system is integrated with Oracle Access Manager, specify the port of the Oracle HTTP Server. -
Enter the management Community-Gadgets application context root.
-
-
On the Management Shindig Information screen (Figure 15-4):
-
Select the http or https (HTTP over SSL) protocol.
-
Enter the host name or IP address of the management Shindig application server. If installing a cluster, enter the host name or IP address of the load balancer.
Note:
If WebCenter Sites on the management system is integrated with Oracle Access Manager, specify the name or IP address of the Oracle HTTP Server host. -
Enter the port number of the management Shindig application server. If installing a cluster, enter the port number of the load balancer.
Note:
If WebCenter Sites on the management system is integrated with Oracle Access Manager, specify the port of the Oracle HTTP Server. -
Enter the management Shindig application context root.
Figure 15-4 Management Shindig Information

Description of ''Figure 15-4 Management Shindig Information''
-
-
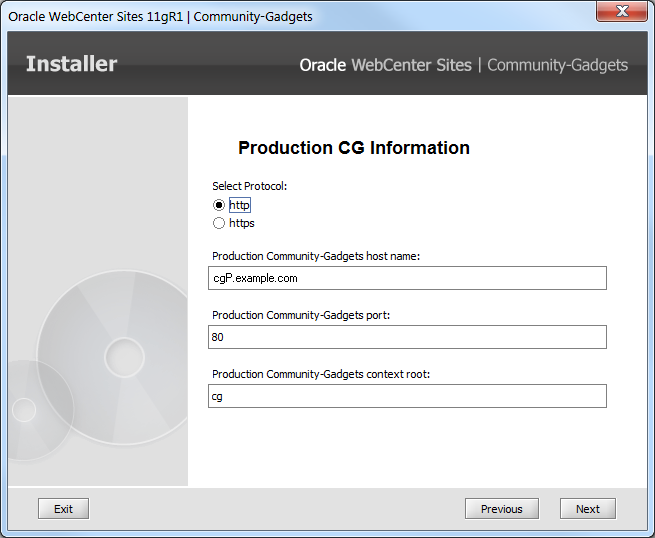
On the Production CG Information screen (Figure 15-5):
-
Select the http or https (HTTP over SSL) protocol.
-
Enter the host name or IP address of the production Community-Gadgets application server. If installing a cluster, enter the host name or IP address of the load balancer.
-
Enter the port number of the production Community-Gadgets application server. If installing a cluster, enter the port number of the load balancer.
-
Enter the production Community-Gadgets application context root.
-
-
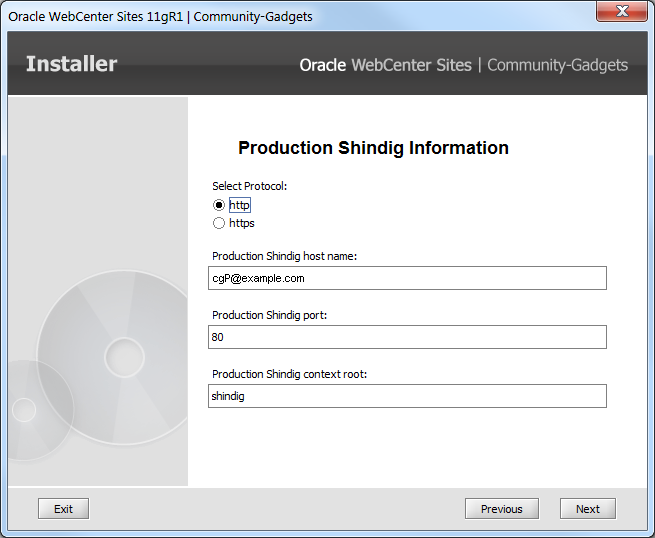
On the Production Shindig Information screen (Figure 15-6):
-
Select the http or https (HTTP over SSL) protocol.
-
Enter the host name or IP address of the production Shindig application server. If installing a cluster, enter the host name or IP address of the load balancer.
-
Enter the port number of the production Shindig application server. If installing a cluster, enter the port number of the load balancer.
-
Enter the production Shindig application context root.
-
-
On the Visitors CAS Server Information screen (Figure 15-7):
-
Select the http or https (HTTP over SSL) protocol.
-
Enter the host name or IP address of the Visitors CAS application server. If installing a cluster, enter the host name or IP address of the load balancer.
-
Enter the port number of the Visitors CAS application server. If installing a cluster, enter the port number of the load balancer.
-
Enter the Visitors CAS application context root.
-
Enter the host name or IP address of the server where Visitors CAS will be deployed.
-
For a non-clustered installation, the value of this field is identical to the value of the field above (Visitors CAS host name).
-
For a clustered installation, the value of this field is the host name of the Visitors CAS application server. (Ensure that the value of the above field, Visitors CAS host name, is set to the host name or IP address of the load balancer.)
-
Figure 15-7 Visitor CAS Server Information
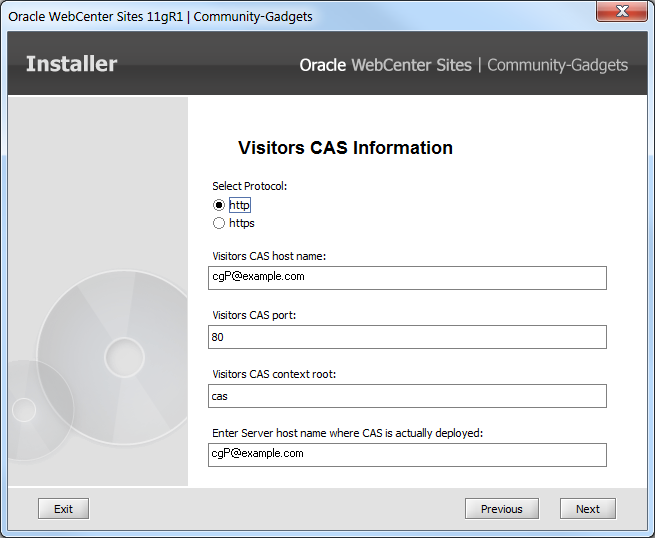
Description of ''Figure 15-7 Visitor CAS Server Information''
-
-
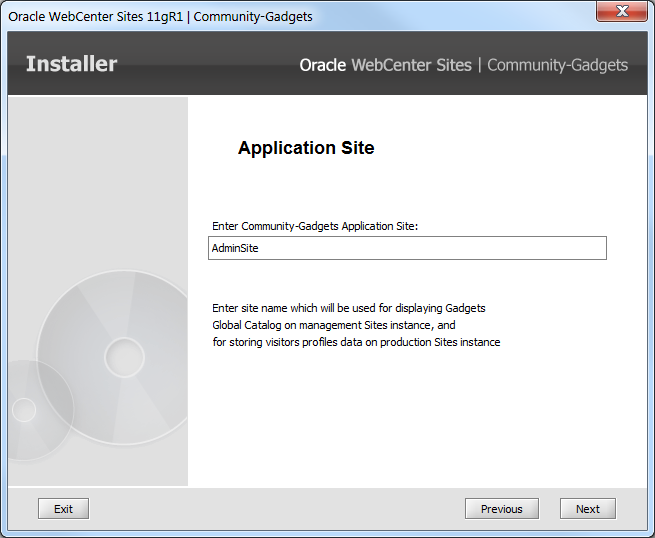
On the Application Site screen (Figure 15-8), enter the name of the
<base_site>that will be used for displaying the Gadgets Global Catalog interface on the management WebCenter Sites instance, and for storing visitors profiles data on the production Sites instance. (The Gadgets user interface and Community user interface can be available on any site,<app_site>.) -
On the Management Sites Information screen (Figure 15-9):
-
Select the http or https (HTTP over SSL) protocol.
-
Enter the host name or IP address of the management WebCenter Sites application server.
Note:
If WebCenter Sites on the management system is integrated with Oracle Access Manager, specify the name or IP address of the Oracle HTTP Server host. -
Enter the port number of the management WebCenter Sites application server.
-
Note:
If WebCenter Sites on the management system is integrated with Oracle Access Manager, specify the port of the Oracle HTTP Server. -
Enter the management WebCenter Sites application context root.
Figure 15-9 Management Sites Information
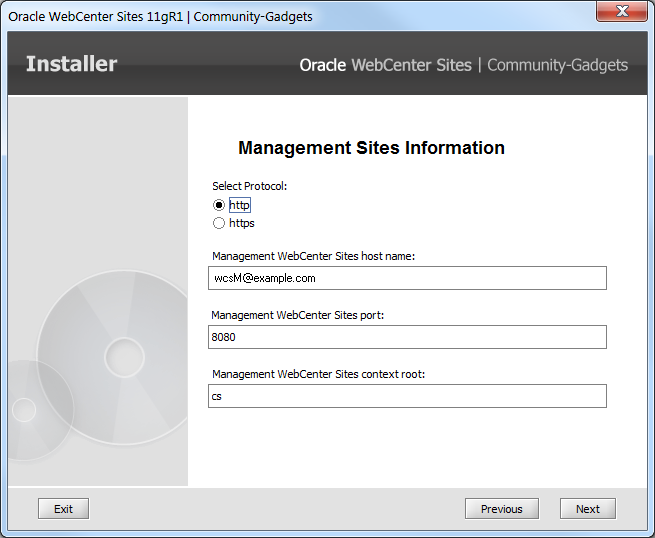
Description of ''Figure 15-9 Management Sites Information''
-
-
On the Management Sites Admin User screen (Figure 15-10):
-
Enter your general administrator user name, which you use to log in to the WebCenter Sites management system.
The user name is case-sensitive and allows from 8 to 64 alphanumeric characters. The default user is:
fwadmin -
Enter your administrator password.
The password is case-sensitive and allows from 8 to 64 alphanumeric characters.
-
For verification re-enter your password.
Figure 15-10 Management Sites Admin User
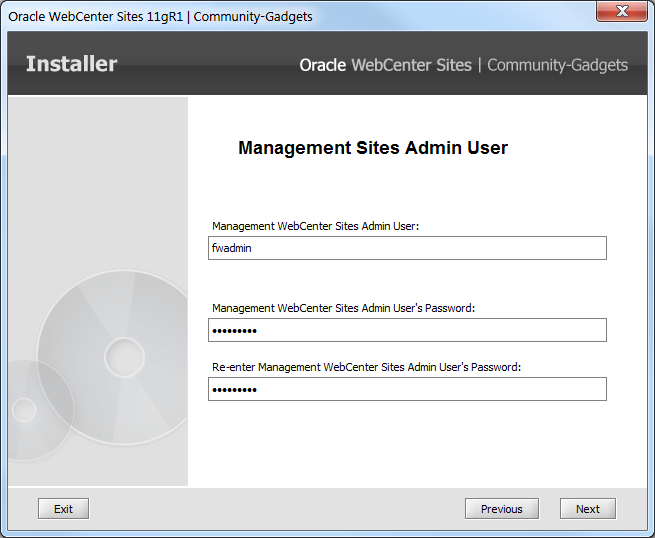
Description of ''Figure 15-10 Management Sites Admin User''
-
-
On the Management Sites CAS Information screen (Figure 15-11):
Note:
If WebCenter Sites on the management system is integrated with Oracle Access Manager, accept the default values, click Next, and continue to step 17.-
Select the http or https (HTTP over SSL) protocol.
-
Enter the host name or IP address of the management Sites CAS application server.
-
Enter the port number of the management Sites CAS application server.
-
Enter the management Sites CAS application context root.
Figure 15-11 Management Sites CAS Information

Description of ''Figure 15-11 Management Sites CAS Information''
-
-
On the Production Sites Information screen (Figure 15-12):
-
Select the http or https (HTTP over SSL) protocol.
-
Enter the host name or IP address of the production WebCenter Sites application server.
Note:
If WebCenter Sites on the production system is integrated with Oracle Access Manager, specify the name or IP address of the Oracle HTTP Server host. -
Enter the port number of the production WebCenter Sites application server.
Note:
If WebCenter Sites on the production system is integrated with Oracle Access Manager, specify the port of the Oracle HTTP Server host. -
Enter the production WebCenter Sites application context root.
Figure 15-12 Production Sites Information
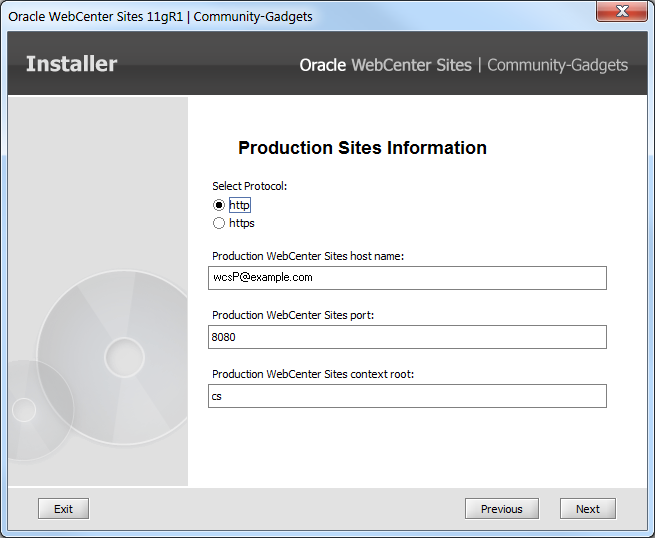
Description of ''Figure 15-12 Production Sites Information''
-
-
On the Production Sites Admin User screen (Figure 15-13):
-
Enter your general administrator user name, which you use to log in to the WebCenter Sites production system.
The user name is case-sensitive and allows from 8 to 64 alphanumeric characters. The default user:
fwadmin -
Enter your administrator password.
The password is case-sensitive and allows from 8 to 64 alphanumeric characters.
-
For verification, re-enter your password.
Figure 15-13 Production Sites Admin User

Description of ''Figure 15-13 Production Sites Admin User''
-
-
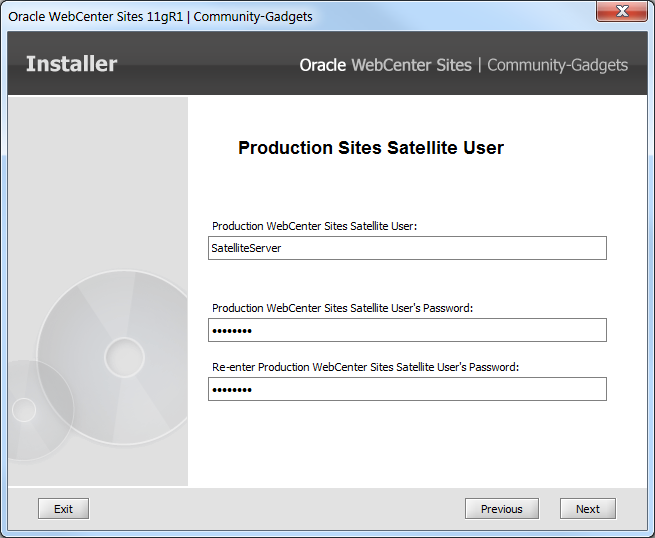
On the Production Sites Satellite User screen (Figure 15-14):
-
Enter the user name for the Satellite Server that is configured for the production WebCenter Sites application.
The user name is case-sensitive and allows from 8 to 64 alphanumeric characters. The default user is:
SatelliteServer -
Enter the Satellite Server user's password.
The password is case-sensitive and allows from 8 to 64 alphanumeric characters.
-
For verification, re-enter the password.
Satellite Server is a caching engine that enables WebCenter Sites to serve pre-rendered, static versions of pages that remain unchanged since a visitor's last request (otherwise, WebCenter Sites would generate the pages dynamically upon each request). Satellite Server caching improves the performance of your WebCenter Sites system.
Figure 15-14 Production Sites Satellite User
Description of ''Figure 15-14 Production Sites Satellite User''
-
-
On the Production Sites CAS Information screen (Figure 15-15):
Note:
If WebCenter Sites on the production system is integrated with Oracle Access Manager, accept the default values, click Next, and continue to step 21.-
Select the http or https (HTTP over SSL) protocol.
-
Enter the host name or IP address of the production Sites CAS application server.
-
Enter the port number of the production Sites CAS application server.
-
Enter the production Sites CAS application context root.
Figure 15-15 Production Sites CAS Information

Description of ''Figure 15-15 Production Sites CAS Information''
-
-
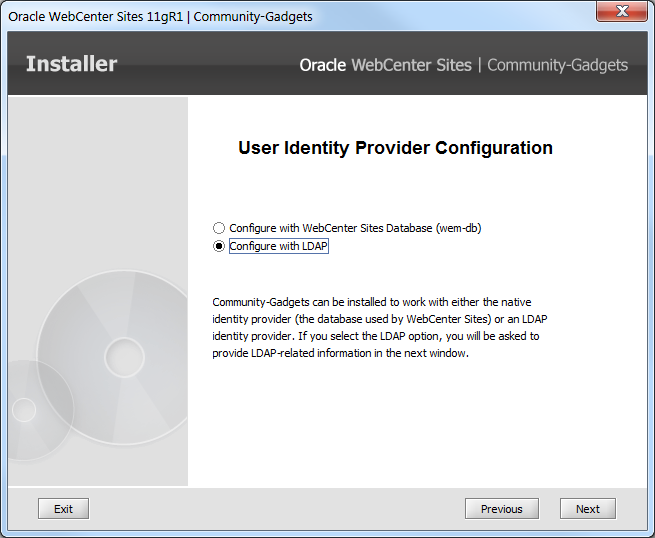
On the User Identity Provider Configuration screen, select one of these options (Figure 15-16):
-
Configure with WebCenter Sites Database (wem-db)
-
Configure with LDAP. If you select this option, the LDAP Server Information screen is displayed when you click Next.
Figure 15-16 User Identity Provider Configuration
Description of ''Figure 15-16 User Identity Provider Configuration''
-
-
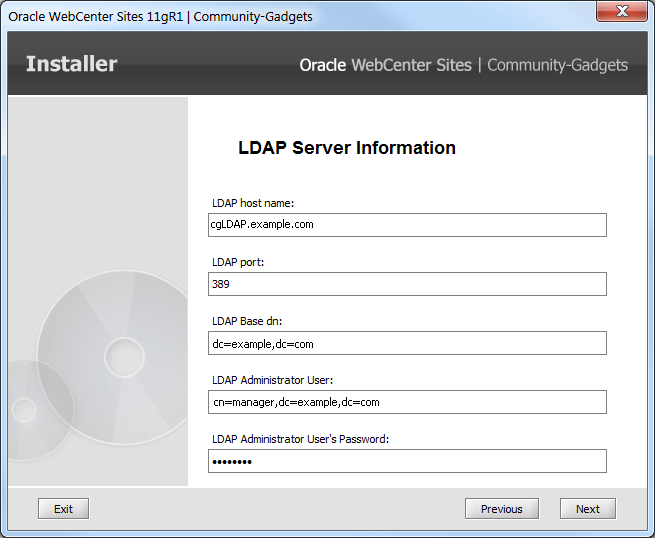
If you selected Configure with LDAP in the previous step, provide the following values on the "LDAP Server Information" screen shown in Figure 15-17 (for examples, see Section 13.1.3, "Prerequisites for LDAP Configuration").
-
LDAP server host name or IP address.
-
LDAP server port.
-
LDAP server Base DN.
-
LDAP administrator user.
-
LDAP administrator's password.
-
-
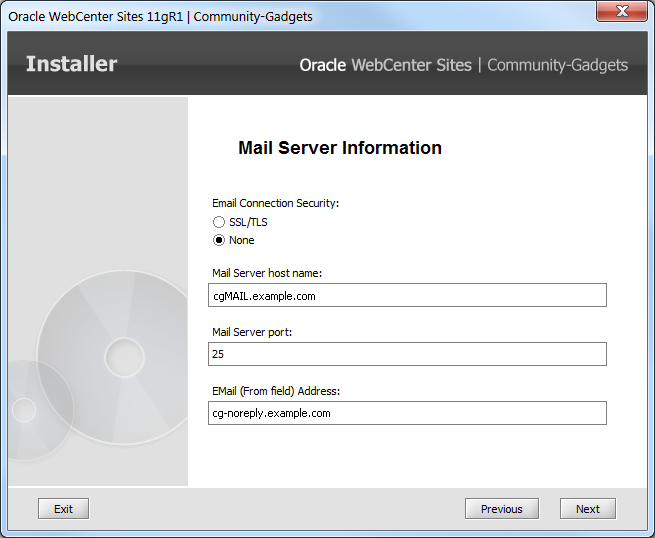
On the Mail Server Information screen (Figure 15-18):
-
Select SSL/TLS or None for email connection security.
-
Enter the mail server host name or IP address.
-
Enter the mail server port.
-
Enter the email address to be used in the From field.
Note:
Mail server information is used by the Community-Gadgets application to communicate with visitors.
-
-
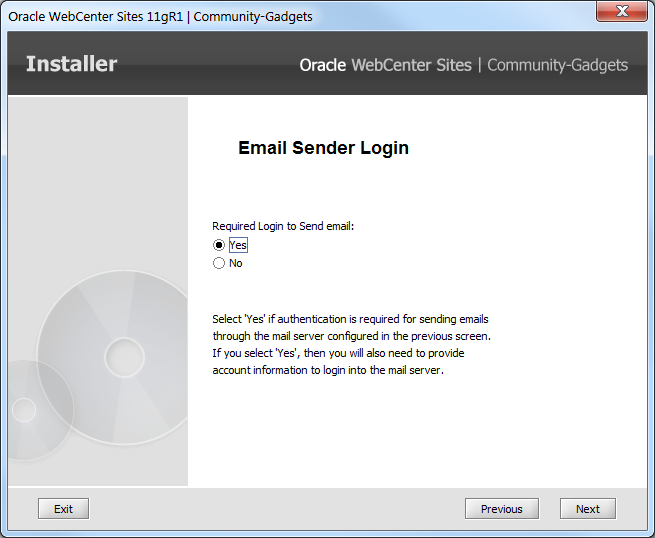
On the Email Sender Login screen, select one of these options (Figure 15-19):
-
Yes: Login is required to send mail. If you select this option, the Email Sender Information screen is displayed when you click Next.
-
No: Login is not required to send mail.
-
-
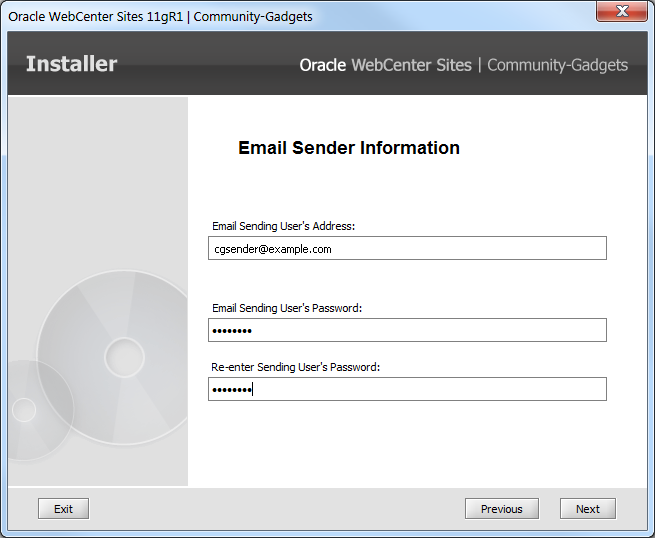
If you selected Yes in the previous step, provide these values on the Email Sender Information screen (Figure 15-20):
-
Email address of the sending user.
-
Password of the sending user.
-
For verification, re-enter the password of the sending user.
-
-
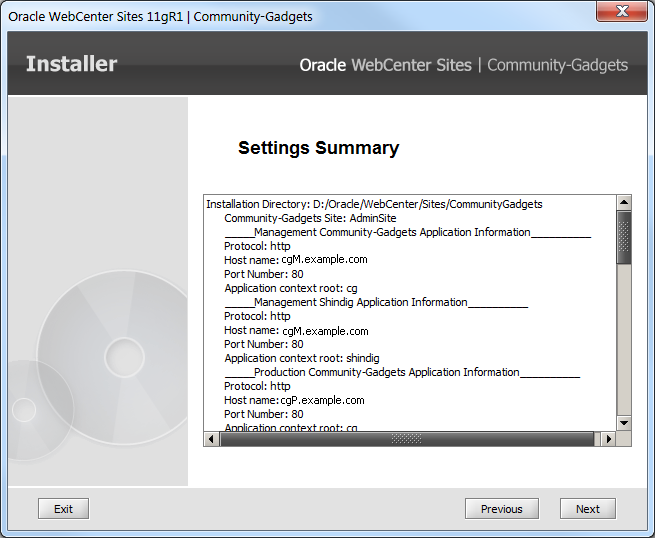
The Settings Summary screen (Figure 15-21) summarizes the configuration choices you have made for this installation.
-
Review the settings summary to make sure all options are configured correctly.
-
If you find an option that needs to be modified, click Previous to return to the installer screen containing that option.
-
-
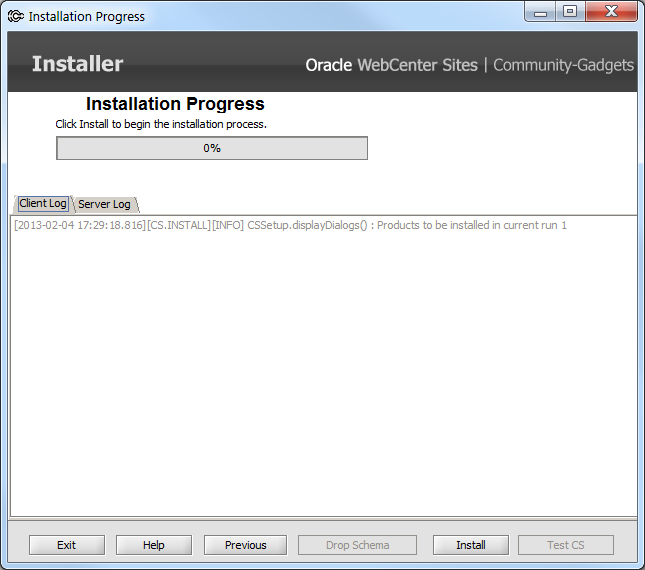
On the Installation Progress screen (Figure 15-22), click Install to start the process of generating the deployment files. You can monitor the process from the Client Log tab.
-
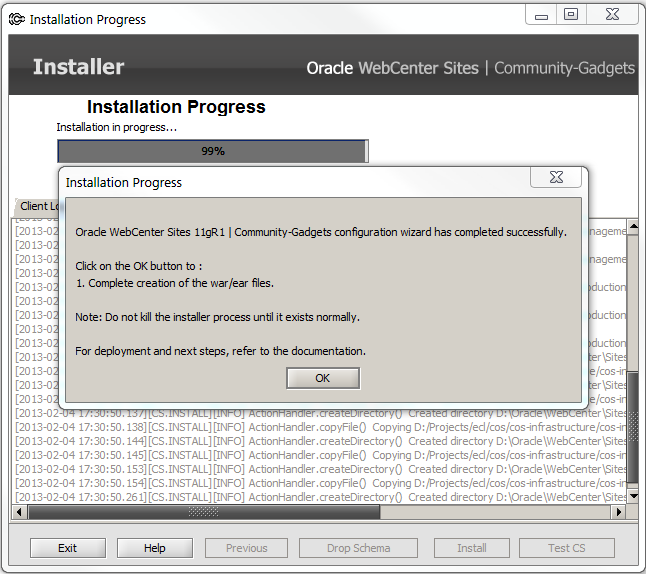
When the installer tasks are completed successfully, a confirmation note is displayed (Figure 15-23). Click OK to create the
war/earfiles for the Community-Gadgets web applications. Do not end the installer process. Allow it to exit normally. -
Continue to Section 15.3, "Verifying the Community-Gadgets Installation Directory Structure."
15.2 Generating the Community-Gadgets Deployment Files Silently
Follow these steps to generate the Community-Gadgets deployment files silently:
-
Extract the Community-Gadgets installer on the server where you will install the Community-Gadgets application.
-
The installer folder contains the sample
omii_sample.inifile, which you can use for your silent installation.-
Edit the file by verifying the default values and entering additional values as required. Refer to the comments in the file for guidance.
-
Save the file and copy it to a folder outside
<cg_install_dir>.
-
-
Edit the
install.inifile (in the extracted Community-Gadgets installer) as follows: -
Create an installation directory in which the Community-Gadgets installer will create the necessary folders and files.
For example:
/u01/software/Apps/CG
-
Set
JAVA_HOMEto the path of JDK 1.6 or a later version.For example:
export JAVA_HOME=/opt/jdk1.6.0_43
-
Run the Community-Gadgets silent installer:
-
Run the
cgInstall.shorcgInstall.batscript with the-silentparameter. -
Wait until the "
CG web-application files have been generated successfully" message appears and the process is complete.
-
-
Continue to Section 15.3, "Verifying the Community-Gadgets Installation Directory Structure."
15.3 Verifying the Community-Gadgets Installation Directory Structure
When the installer completes its process, it creates the Community-Gadgets installation directory containing the generated deployment files.
-
Verify your Community-Gadgets installation directory and the locations of the generated deployment files. Refer to the directory structure shown in this step. The main subdirectories are:
-
cg_licenses: This subdirectory contains the necessary license files. -
deploy: This subdirectory contains thewarandearfiles generated for the management and production sides of the Community-Gadgets application. This directory also contains standalone configuration files that should be added to the application server classpath. You are required to deploy thewar/earfiles manually. -
logs: This subdirectory stores logs that will be created by the Community-Gadgets application during use. -
ominstallinfo: This subdirectory contains information about the Community-Gadgets installation. The installation log and installation settings file are stored in this subdirectory.<cg_install_dir> |--cg_licenses | |--cas_thirdparty_licenses | |--shindig_thirdparty_licenses |--deploy | |--management | | |--CommunityGadgets.ear | | |--cg.war | | |--Shindig.ear | | |--shindig.war | | |--management_node1 | | | |--cas-cache.xml | | | |--cos-cache.xml | | | |--log4j-cos.properties | | | |--log4j-shindig.properties | | | |--setup_auth.properties | | | |--setup_cos.properties | | | |--setup_cs.properties | | | |--setup_proxy.properties | | | |--setup_shindig.properties | | | |--wsdk_facilities.properties | | | |--ESAPI.properties | | | |--validation.properties | | | |--wem_sso_config.xml | | | |--oam_wem_sso_config_sample.xml | | | |--gas_features.txt | |--production | | |--cas.ear | | |--cas.war | | |--CommunityGadgets.ear | | |--cg.war | | |--Shindig.ear | | |--shindig.war | |--production_node1 | | | |--cas.properties | | | |--customBeans.xml | | | |--host.properties | | | |--jbossTicketCacheReplicationConfig.xml | | | |--cas-cache.xml | | | |--cos-cache.xml | | | |--log4j-cos.properties | | | |--log4j.properties | | | |--log4j-shindig.properties | | | |--setup_auth.properties | | | |--setup_cos.properties | | | |--setup_cs.properties | | | |--setup_proxy.properties | | | |--setup_shindig.properties | | | |--wsdk_facilities.properties | | | |--ESAPI.properties | | | |--validation.properties | | | |--wem_sso_config.xml | | | |--oam_wem_sso_config_sample.xml | | | |--gas_features.txt |--logs |--ominstallinfo | |--install_log.log | |--management_cgwar.log | |--management_shindigwar.log | |--omii.ini | |--omproduct.ini | |--production_caswar.log | |--production_cgwar.log | |--production_shindigwar.log
-
-
Continue to Chapter 16, "Completing Community-Gadgets Pre-Deployment Steps."