18 Setting Up OpenLDAP 2.3.x
This chapter explains how to set up OpenLDAP for use with WebCenter Sites.
Note:
You must set OpenLDAP before you run the WebCenter Sites-LDAP integrator.It contains the following sections:
18.1 OpenLDAP Commands
This section contains the most commonly used OpenLDAP commands. Use it as a reference when configuring OpenLDAP for use with WebCenter Sites.
18.1.1 Starting OpenLDAP
Note:
This section assumes that theslapd daemon is located in /usr/local/libexec. Depending on your installation, the daemon might be located elsewhere. In such cases, substitute the correct path in the commands listed in this section.-
To start OpenLDAP normally, use the following command:
/usr/local/libexec/slapd -
To start OpenLDAP with full debugging (useful when diagnosing configuration issues and installing WebCenter Sites), use the following command:
/usr/local/libexec/slapd -h 'ldap:///' -d 0x5001
18.1.2 Searching an OpenLDAP Server
To search an OpenLDAP Server, do the following:
-
Execute the following command:
ldapsearch -x -D "cn=Manager,dc=<domain>,dc=<extension>" -W
-b '' -s base '(objectClass=*)' namingContexts
where
<domain>and<extension>are the values you specified in step a. -
When prompted for a password, enter the Root DN user password you specified in step d.
A typical response from the
ldapsearchcommand looks as follows:Enter LDAP Password: # extended LDIF # # LDAPv3 # base <> with scope baseObject # filter: (objectClass=*) # requesting: namingContexts # # dn: namingContexts: dc=example,dc=com # search result search: 2 result: 0 Success # numResponses: 2 # numEntries: 1
18.2 Installing OpenLDAP
This section explains how to install OpenLDAP.
Note:
OpenLDAP is bundled with most Linux distributions. If OpenLDAP is already installed on your system, skip this section.To install Open LDAP
-
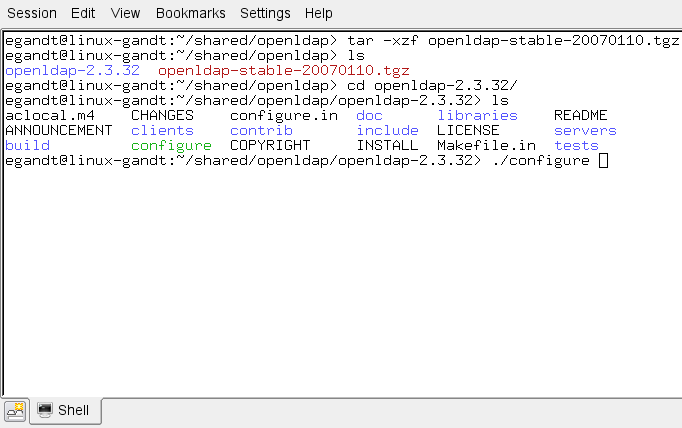
Download the OpenLDAP
tgzarchive from the OpenLDAP web site:http://www.openldap.org/For example:
openldap-stable-20070110.tgz -
Decompress the archive (Figure 18-1):
-
If you are using GNU, use the following command:
tar-xvzf openldap-stable-20070110.tgz -
If you are not using GNU, use the following command:
gzip -d openldap-stable-20070110.tgz ; tar -xvf openldap-stable-20070110.tar
-
-
Change to the directory containing the OpenLDAP source (Figure 18-2). For example:
cd openldap-2.3.32 -
Configure the OpenLDAP source (Figure 18-3) as follows:
./configure --enable-crypt --with-tlsFigure 18-3 OpenLDAP Source Configuration
Description of ''Figure 18-3 OpenLDAP Source Configuration''
The suggested options are:
-
--enable-crypt —enables password encryption -
--with-tls —enables TLS/SSL supportNote:
If you want to customize OpenLDAP for your system, run./configure --helpfor a complete list of configuration options.
-
-
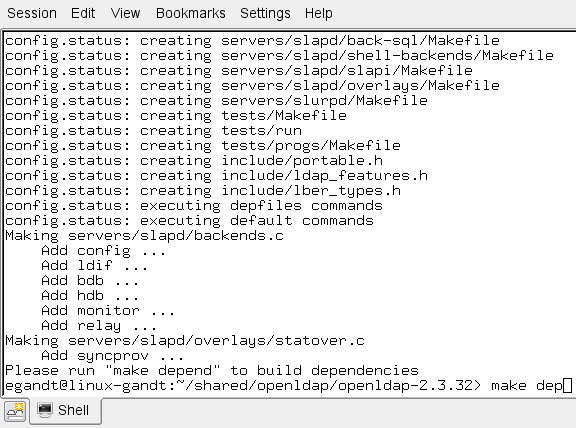
Compile OpenLDAP dependencies:
make depend -
Compile OpenLDAP:
make -
Install OpenLDAP:
make installNote:
By default, OpenLDAP is installed in/usr/local.
18.3 Configuring OpenLDAP
This section shows you how to configure your OpenLDAP installation.
-
Edit the
ldap.conffile as follows:Note:
If you installed OpenLDAP manually by following the steps in the previous section,ldap.confis located in/usr/local/etc.-
Specify your Base DN. Locate the following line (or create it if it does not exist):
BASE dc=<domain>,dc=<extension>where
<domain>and<extension>are, respectively, the domain and TLD of your LDAP server.The Base DN for OpenLDAP should always be two dc's in length. For example, if your full domain is
vm.example.com, your Base DN would beexample.com, and yourBASEline would look as follows:BASE dc=example,dc=com -
Specify your URI(s). Locate the following line (or create it if it does not exist):
URI ldap://<hostanme_or_IP> ldap://<hostanme_or_IP>Enter the host names and/or IP addresses on which on which OpenLDAP is to listen for connections. Separate the entries with spaces. For example:
URI ldap://127.0.0.1 ldap://localhost ldap://172.19.1.2
-
-
Edit the
sldapd.conffile as follows:Note:
If you installed OpenLDAP manually by following the steps in the previous section,sldapd.confis located in/usr/local/etc.-
Locate the following section:
access to *
   by self write
   by users read
and replace it with:
access to *
   by dn="cn=Manager,dc=<domain>,dc=<extension>" write
by self write
by users read
by anonymous auth
where
<domain>and<extension>are the values you specified in step 1a. -
Specify your suffix. Locate the following line (or create it if it does not exist):
suffix dc=<domain>,dc=<extension>where
<domain>and<extension>are the values you specified in step 1a. -
Specify your Root DN user. (The Root DN user is used to access the LDAP Server.) Locate the following line (or create it if it does not exist):
rootdn cn=<user_name>,dc=<domain>,dc=<domain>Enter
Manageras the user name and replace<domain>and<extension>with the values you specified in step 1a. -
Specify a password for the Root DN user. Locate the following line (or create it if it does not exist):
rootpw<password>Note:
The password can be either encrypted or unencrypted. (Encrypted passwords start with{SSHA}). If you wish to use an encrypted password, do the following:-
Generate an encrypted password (hash) using the
slappasswdcommand. The command generates a valid encrypted password (hash) and prints it to the terminal. -
Perform step e below.
-
-
(Optional) If you chose to use an encrypted password in the previous step, set the password type to SHA. Locate the following line (or create it if it does not exist):
password-hash {SSHA}This sets the password type to SHA (the default). You can set other password types; see the OpenLDAP documentation for more information.
-
-
Edit the
core.schemafile as follows:Note:
If you installed OpenLDAP manually by following the steps in the previous section,core.schemais located in/usr/local/etc/schema.-
Locate the following section:
objectclass ( 2.5.6.17 NAME 'groupOfUniqueNames' DESC 'RFC2256: a group of unique names (DN and Unique Identifier)'SUP top STRUCTURAL MAY ( businessCategory $ seeAlso $ owner $ ou $ o $ description $ uniqueMember) MUST ( uniqueMember $ cn ))
-
Comment the section out by placing a
#character at the beginning of each line. Then insert the following modified section after it:objectclass ( 2.5.6.17 NAME 'groupOfUniqueNames' DESC 'RFC2256: a group of unique names (DN and Unique Identifier)'SUP top STRUCTURALMAY ( businessCategory $ seeAlso $ owner $ ou $ o $ description $ uniqueMember) MUST ( cn ))
The difference between the original and modified sections is the last line:
MUST ( uniqueMember $ cn )becomesMUST ( cn )
OpenLDAP is now configured.
-
18.4 Adding WebCenter Sites Schema to OpenLDAP
This section shows you how to add WebCenter Sites schema to your OpenLDAP server.
Note:
If you are copying the contents of the sample LDIF file below, make sure to insert an empty line betweendn sections and at the end of the file.To configure OpenLDAP for WebCenter Sites
-
Create an LDIF file named
pre_cs_openldap.ldifwith the following contents:dn: dc=<domain>,dc=<extension>objectClass: dcObjectobjectClass: organizationdc: exampledescription: OpenLDAP pre_cs_setupo: Example Software# LDAP Manager Roledn: cn=Manager,dc=<domain>,dc=<extension>objectclass: organizationalRolecn: Manager# add the organizational Unit Peopledn: ou=People,dc=<domain>,dc=<extension>objectClass: organizationalUnitobjectClass: topou: People# add the organizational Unit Groupdn: ou=Groups,dc=<domain>,dc=<extension>objectClass: organizationalUnitobjectClass: topou: Groups
where
<domain>and<extension>are the values you specified in step a.The file will create a new organization (
example) containing two sub-organizations(GroupsandPeople)and theManageruser. TheManageruser will be used to access the LDAP server. -
Add the
pre_cs_openldap.ldiffile to your OpenLDAP server. Execute the following command:ldapadd -D 'cn=Manager,dc=<domain>,dc=<extension>'-w <root_dn_password> -f pre_cs_openldap.ldifwhere:
-
Test your OpenLDAP server. Execute the following command:
ldapsearch -x -b 'ou=Groups,dc=<domain>,dc=<extension>' '(objectclass=*)'where
<domain>and<extension>are the values you specified in step a.An example response from the
ldapsearchcommand looks as follows:# extended LDIF## LDAPv3# base <ou=Groups,dc=example,dc=com> with scope subtree# filter: (objectclass=*)# requesting: ALL## search resultsearch: 2result: 0 Success# numResponses: 1
If the
pre_cs_openldap.ldiffile was successfully inserted into the LDAP server, theresult:line indicatessuccess, at which point you are ready to run the WebCenter Sites LDAP integrator. For instructions, see Part IV, "Integrating Oracle WebCenter Sites with LDAP."
18.5 Modifying User Passwords
When you ran the WebCenter Sites LDAP integrator, all WebCenter Sites users (except fwadmin, ContentServer, and DefaultReader) were assigned the password which you entered in the "WebCenter Sites Configuration" screen. For security reasons, you might want to manually assign unique passwords to those users.
Note:
If you chose to use encrypted passwords when you configured OpenLDAP, you must change the passwords for all users on your WebCenter Sites system, or your WebCenter Sites installation will not function properly. This is because the WebCenter Sites-LDAP integrator writes user passwords into OpenLDAP as plaintext, but OpenLDAP expects password hashes.The following table shows the passwords you must assign to your WebCenter Sites users:
| User | Password |
|---|---|
DefaultReader |
SomeReader |
ContentServer |
The password you supplied during WebCenter Sites installation |
fwadmin |
The password you supplied during WebCenter Sites installation |
| All other users on your WebCenter Sites system | The password you supplied during WebCenter Sites- LDAP integration |
This section covers the following methods for changing passwords in OpenLDAP:
-
Section 18.5.1, "Modifying User Passwords Using an LDAP Browser"
-
Section 18.5.2, "Modifying User Passwords Using the ldapmodify Command"
18.5.1 Modifying User Passwords Using an LDAP Browser
This section shows you how to modify user passwords using the free LDAP Browser/Editor program available at http://www-unix.mcs.anl.gov/~gawor/ldap/.
To modify user passwords in OpenLDAP using an LDAP browser
-
Download and install the LDAP browser.
-
Start the LDAP browser:
./lbe.sh -
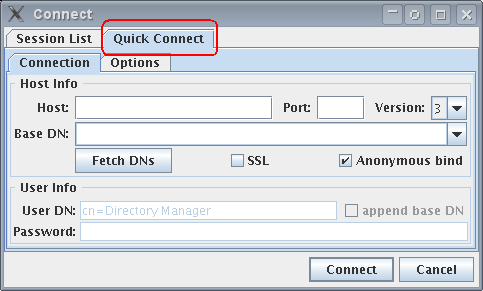
Click the Quick Connect tab (Figure 18-4).
-
Fill out the fields as follows:
-
Click Connect.
-
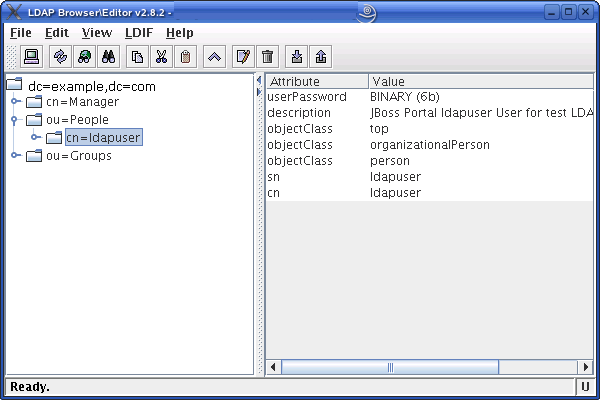
In the left-hand tree, expand the ou=People node (Figure 18-5).
-
Double-click the user whose password you want to change and press Ctrl-E.
-
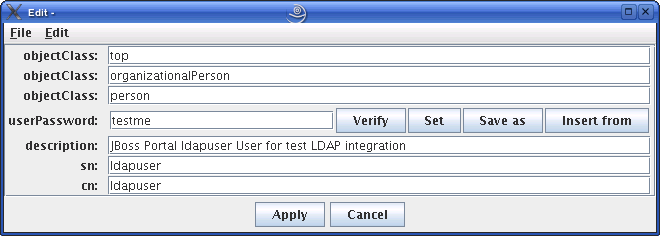
The plaintext password written by the WebCenter Sites-LDAP integrator appears in the userPassword field (Figure 18-6). Click Set.
-
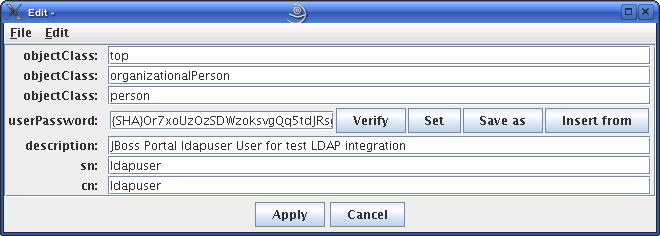
In the pop-up window, enter the user's password (Figure 18-7) and click Set.
Figure 18-7 Generate Password Dialog Box
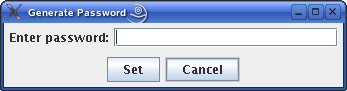
Description of ''Figure 18-7 Generate Password Dialog Box''
The password appears in its encrypted form.
-
Click Apply to save the new password (Figure 18-8).
-
Repeat steps 7–10 for each user whose password you want to change. When you are finished, test your integration by logging in to WebCenter Sites.
18.5.2 Modifying User Passwords Using the ldapmodify Command
The ldapmodify command provides you with an interface in which you can enter valid LDIF statements to make changes to the configuration of your OpenLDAP server. This section shows you how to use the ldapmodify and sldappasswd commands to change the passwords of LDAP users.
To modify user passwords in OpenLDAP using the ldapmodify command
-
Generate an encrypted password for each user. Run the
sldappasswdcommand and enter the plaintext password which you want to encrypt. The command outputs the encrypted password (hash) to the terminal. For example:{SSHA}ydUT5RCpBAU80P0PW8gaHnsmYmLlmUL8Note:
If you are generating hashes for a large number of users, it is a good idea to store the hashes in a file, so that you can easily retrieve them in step 3. When you finish this procedure, make sure that you destroy the file in which the hashes are stored. -
Execute the
ldapmodifycommand as follows:ldapmodify -D 'cn=Manager,dc=<domain>,dc=<extension>' -w <root_dn_password>
where:
-
<domain>and<extension>are the values you specified in step a . -
<root_dn_password>is the Root DN user password you specified in step d.
When the command returns a blank line, you are ready to input LDIF statements.
-
-
Change the user's password. Issue the following commands:
-
dn:cn=<user_name>,ou=People,dc=<domain>,dc=<extension>where
user_nameis the user name of the user whose password you want to change, and<domain>and<extension>are the values you specified in step a. -
changetype:modify -
replace:userPassword -
userpassword:<password_hash>where
<password_hash>is the hash generated by thesldappasswdcommand in step 1 of this procedure. -
Press Ctrl+D.
-
Repeat steps a–e for each user whose password you want to change. When you are finished, press Ctrl+C to terminate the
ldapmodifycommand.
-