F Software Deinstallation Screens
This appendix describes the screens of the Oracle Fusion Middleware 11g Deinstallation Wizard that enables you to remove the Oracle Identity Management software from your machine. This appendix contains the following topics:
F.1 Welcome
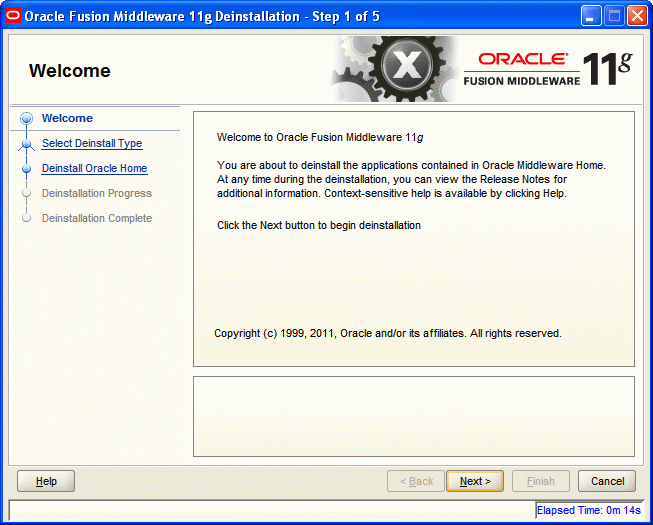
The Welcome screen is the first screen that appears when you start the Oracle Fusion Middleware 11g Deinstallation Wizard.
Click Next to continue.
F.2 Select Deinstallation Type
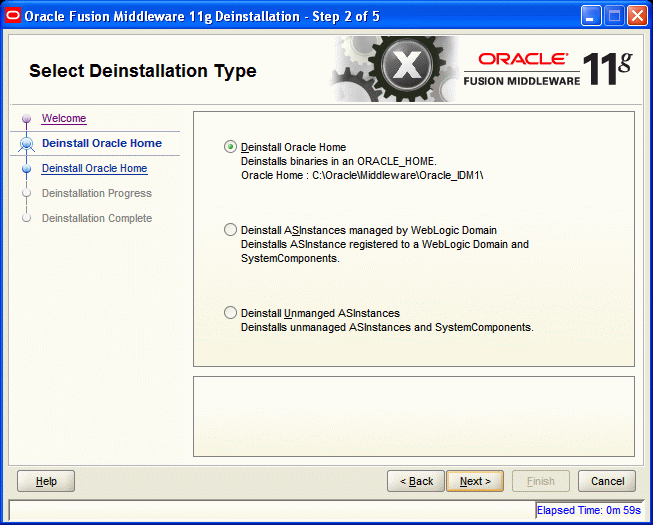
Select the type of deinstallation you want to perform.
Figure F-2 Select Deinstallation Type Screen
Description of "Figure F-2 Select Deinstallation Type Screen"
Table F-1 Deinstallation Types
| Type | Description |
|---|---|
|
Deinstall Oracle Home |
Select this option to deinstall the binaries contained in the listed Oracle Identity Management Oracle Home. If you select this option, the Deinstall Oracle Home screen appears next, where you can save a response file that contains the deinstallation settings before deinstalling. |
|
Deinstall ASInstances managed by WebLogic Domain - Applicable to Oracle Internet Directory and Oracle Virtual Directory only. |
Select this option to deinstall the Oracle Identity Management system component instances, such as Oracle Internet Directory and Oracle Virtual Directory, that are registered in a WebLogic domain. If you select this option, the Specify WebLogic Domain Detail screen appears next where you identify the administration domain containing the system components you want to deinstall. The Select Managed Instance screen appears next, where you identify the instances you want to deinstall. |
|
Deinstall Unmanaged ASInstances - Applicable to Oracle Internet Directory and Oracle Virtual Directory only. |
Select this option to deinstall the Oracle Identity Management system component instances, such as Oracle Internet Directory and Oracle Virtual Directory, that are not registered in a WebLogic domain. If you select this option, the Specify Instance Location screen appears next where you identify the instances you want to deinstall. |
Click Next to continue.
F.2.1 Option 1: Deinstall Oracle Home
If you selected Deinstall Oracle Home on the Select Deinstallation Type screen, the following screen appears:
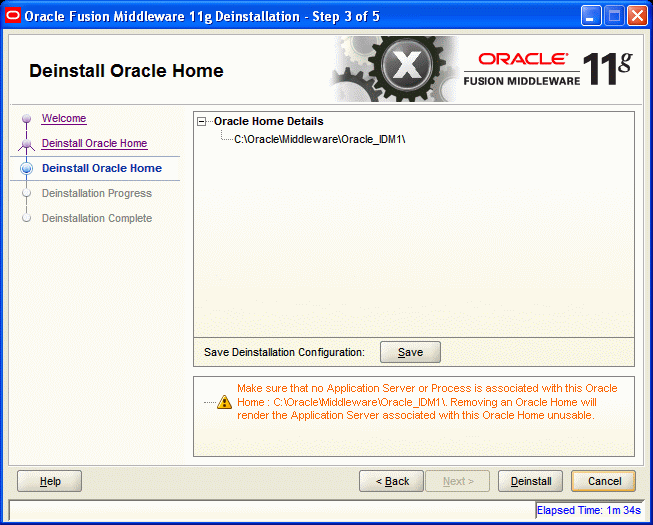
F.2.1.1 Deinstall Oracle Home
This screen shows the Oracle Home directory that is about to be deinstalled. It is the Oracle Home directory in which the deinstaller was started.
Verify that this is the correct directory, and also verify that there are no processes associated with this Oracle Home.
Click Deinstall to start the deinstallation process.
F.2.2 Option 2: Deinstall ASInstances managed by WebLogic Domain
If you selected Deinstall ASInstances managed by WebLogic Domain on the Select Deinstallation Type screen, the following screens appears:
F.2.2.1 Specify WebLogic Domain Detail
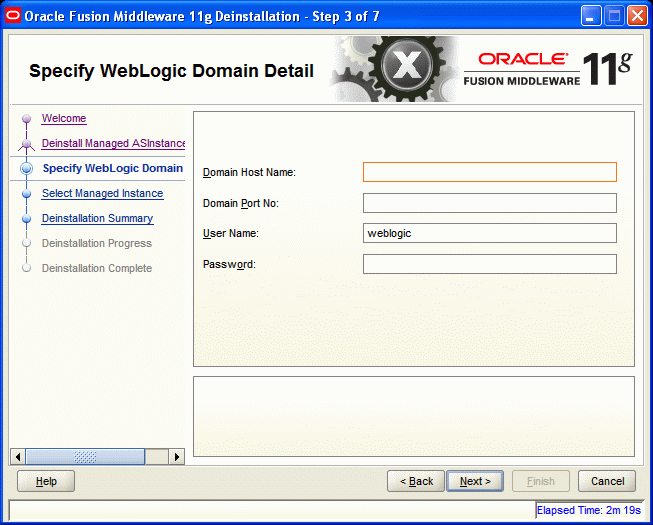
Specify the WebLogic Domain credentials:
-
Domain Host Name
The name of the system on which the WebLogic Domain is running.
-
Domain Port No
Listen port number of the domain. The default port number is
7001. -
User Name
The WebLogic Domain user name.
-
Password
The password of the WebLogic Domain user.
Figure F-4 Specify WebLogic Domain Detail Screen
Description of "Figure F-4 Specify WebLogic Domain Detail Screen"
Click Next to continue.
F.2.2.2 Select Managed Instance
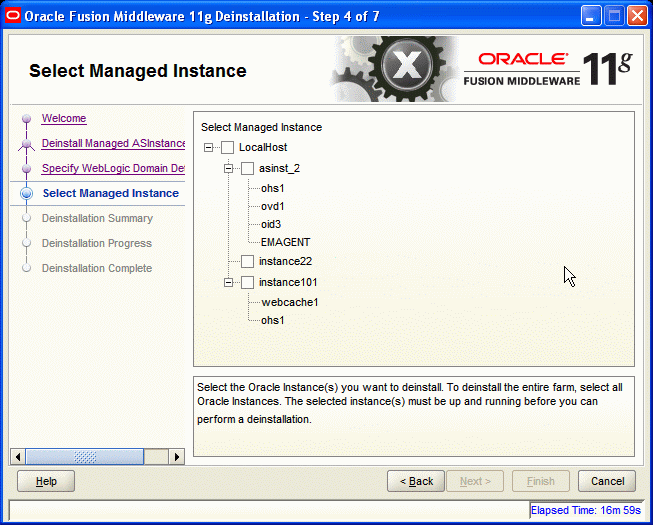
Select the managed instance you want to deinstall.
Figure F-5 Select Managed Instance Screen
Description of "Figure F-5 Select Managed Instance Screen"
Click Next to continue.
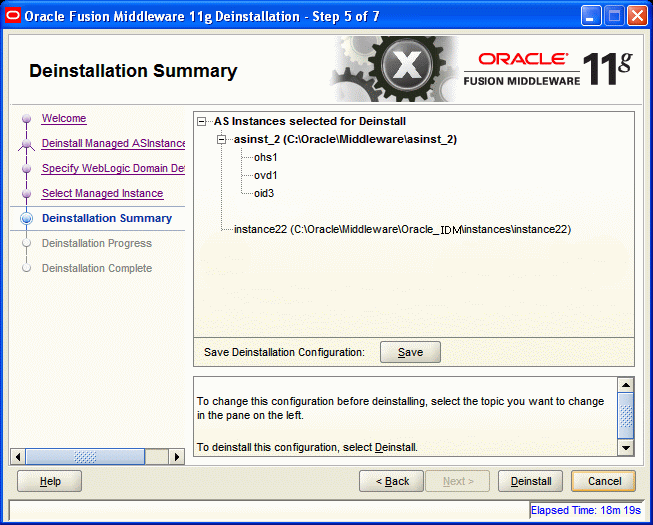
F.2.2.3 Deinstallation Summary (Managed Instance)
Verify that the specified instance is the one you want to deinstall.
Click Deinstall to start the deinstallation process.
F.2.3 Option 3: Deinstall Unmanaged ASInstances
If you selected Deinstall Unmanaged ASInstances on the Select Deinstallation Type screen, the following screen appears:
F.2.3.1 Specify Instance Location
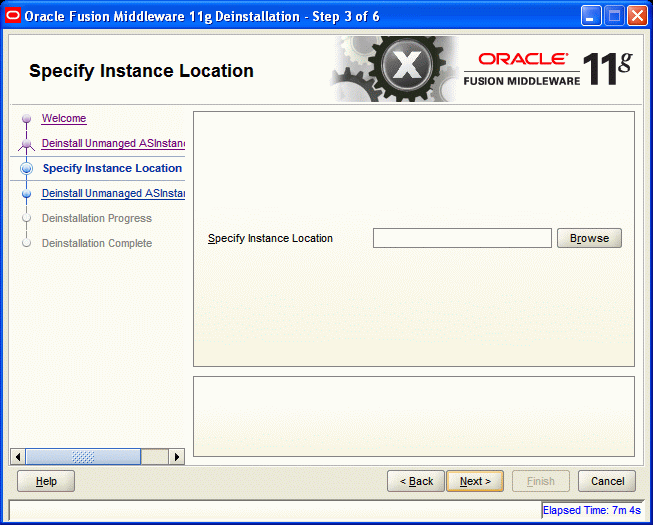
Specify the full path to your Oracle Instance directory. If you are unsure, click Browse to find this directory on your system.
Figure F-7 Specify Instance Location Screen
Description of "Figure F-7 Specify Instance Location Screen"
Click Next to continue.
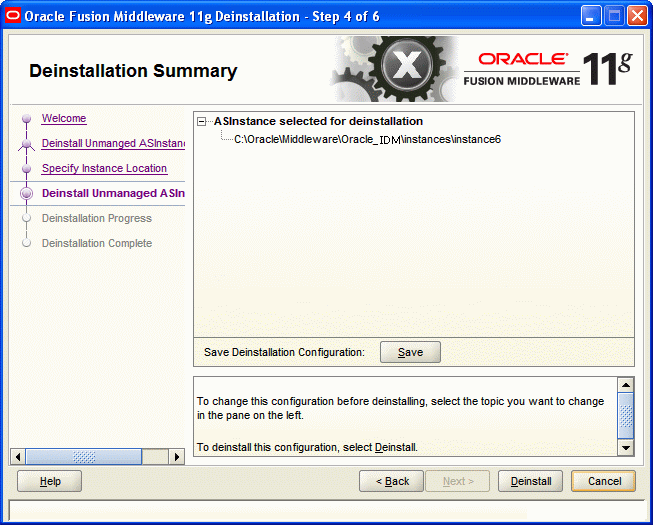
F.2.3.2 Deinstallation Summary (Unmanaged ASInstance)
Verify that the specified instance is the one you want to deinstall.
Click Deinstall to start the deinstallation process.
F.3 Deinstallation Progress
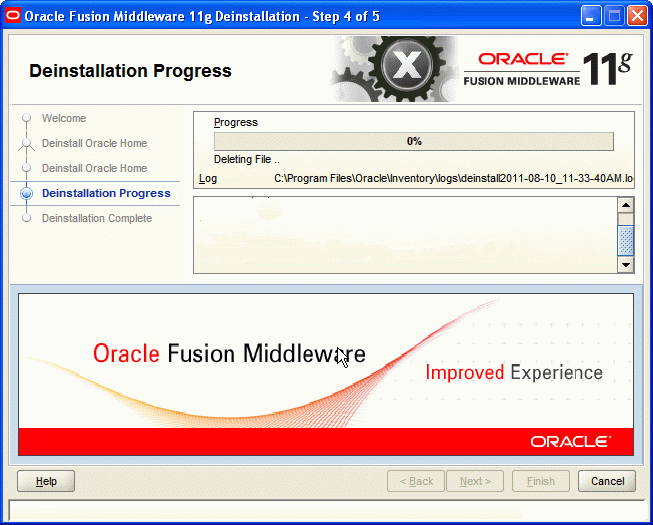
This screen shows you the progress of the deinstallation.
Figure F-9 Deinstallation Progress Screen
Description of "Figure F-9 Deinstallation Progress Screen"
If you want to quit before the deinstallation is completed, click Cancel.
F.4 Deinstallation Complete
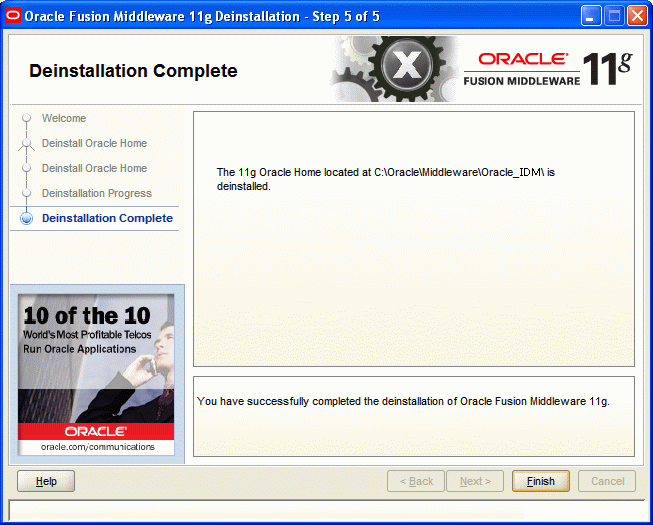
This screen summarizes the deinstallation that was just completed.
Figure F-10 Deinstallation Complete Screen
Description of "Figure F-10 Deinstallation Complete Screen"
Click Finish to dismiss the deinstaller.
