11g Release 6 (11.1.6)
Part Number E20379-06
Home
Contents
Book
List
Contact
Us
|
Oracle® Fusion
Applications Workforce Deployment Implementation Guide 11g Release 6 (11.1.6) Part Number E20379-06 |
Home |
Contents |
Book List |
Contact Us |
|
Previous |
Next |
This chapter contains the following:
Payroll Relationships: Explained
Define Payroll Business Definitions
Define Earning and Deduction Definitions
Manage Payroll Process Configuration
A payroll relationship exists between a person and a payroll statutory unit, which is the legal entity responsible for employee payment. Payroll relationships group person records based on payroll regulatory and statutory calculation and reporting requirements. This grouping enables the aggregation of balances across multiple employment terms and assignment records.
Important aspects of payroll relationships include:
Creation of payroll relationship records
Multilevel aggregation for payroll calculation
Payroll employment model
When an HR administrator processes a new hire, the application automatically creates a payroll relationship record for that person. As an administrator adds employment terms or assignments for that person, the application uses several factors, such as system person type, payroll statutory unit, and country-specific relationship mapping rules, to determine whether to create a new payroll relationship record. Predefined mapping rules for payroll relationships also define the payroll relationship types that indicate whether payroll processing can occur. These predefined rules can vary by localization. For example, in the US, the Employee person type maps to the payroll relationship type that is defined to be processed in payroll runs, whereas the Contingent Worker person type maps to a payroll relationship type that is not be processed in payroll runs.
Note
There is no direct association between payroll relationships and work relationships.
Payroll relationships represent the association between a person and the payroll statutory unit, which provides the highest level of aggregation for payroll calculation purposes. Payroll processing occurs at the payroll relationship level. This means that to access the results of any payroll process, such as calculation or payment distribution, you start by selecting a payroll relationship record.
Note
Although a person may have multiple payroll relationships, payroll balances for that person cannot span payroll relationships.
The payroll relationship structure provides the capability to have employment terms and assignments that can be linked together for calculations based on the payroll statutory unit. Therefore, information must be stored at the various levels of the payroll relationship model. This information is used by the various payroll processes.
Your enterprise might be defined to use two-tier and three-tier employment models. The three payroll employment levels are:
Payroll relationship
The payroll relationship is the highest level for which to accumulate balances. Elements assigned at the payroll relationship level are processed in every payroll run. Payroll relationship elements are typically deduction elements, such as tax, pension, social insurance, or court orders.
Payroll relationships are also used outside of Oracle Fusion Global Payroll to facilitate the extraction of data from HCM that is sent to a third-party payroll provider for payroll processing. For example, payroll coordinators use Oracle Fusion Global Payroll Interface to extract benefits data from HCM and send that data through payroll relationships, along with payroll-related data.
Employment terms (three-tier model only)
Employment terms are commonly used as a middle layer in the payroll employment model to help manage multiple assignments and to satisfy tax and reporting requirements at a lower level than the payroll statutory unit. Elements assigned at the employment terms level are typically salary, pension, or social insurance elements that vary based upon the employment terms.
Note
Employees with multiple terms or assignments that are paid on payrolls using different frequencies, such as Monthly and Semimonthly, must have different employment terms or assignments for each payroll. In a two-tier configuration, payrolls can be assigned to the assignment record; in a three-tier configuration, payrolls can be assigned to the terms record.
Assignment
Because the assignment is the lowest level of the payroll employment model, elements assigned at this usually level vary from one assignment to another or are specifically for a single assignment. Assignment elements are typically used for monetary terms and conditions, such as overtime rules, rates, or bonuses.
The following figure illustrates the comparison between the HR employment model and the payroll employment model in a US example with two legal employers belonging to one payroll statutory unit. In this example, David Ellis has two different employment terms and assignments, and therefore has two work relationships in the HR employment model and one payroll relationship in the payroll employment model.
You can use profile options to specify the values you want to display for each level of the payroll employment hierarchy. The hierarchy appears in View Person Process Results pages. It can display information for up to three levels, depending on the employment model used in your enterprise:
Payroll relationship
Employment terms
Assignments
You can specify up to three values at each level to help identify the record. For example, you might select legal employer name and job name to identify employment terms records, and assignment name and number to identify assignment records.
The following table lists the profile option codes, available profile values, and default values at the site level for each level of the payroll employment hierarchy.
|
Level |
Profile Option Codes |
Profile Values |
|---|---|---|
|
Payroll relationship |
PAY_EMP_HIERARCHY_REL_DESC_1 PAY_EMP_HIERARCHY_REL_DESC_2 PAY_EMP_HIERARCHY_REL_DESC_3 |
Payroll Relationship Number Payroll Statutory Unit Name Payroll Relationship Type |
|
Employment terms |
PAY_EMP_HIERARCHY_TERM_DESC_1 PAY_EMP_HIERARCHY_TERM_DESC_2 PAY_EMP_HIERARCHY_TERM_DESC_3 |
Employment Category Legal Employer Name Grade Name Job Name Position Name Payroll Name Location Name |
|
Assignment |
PAY_EMP_HIERARCHY_ASG_DESC_1 PAY_EMP_HIERARCHY_ASG_DESC_2 PAY_EMP_HIERARCHY_ASG_DESC_3 |
Assignment Name Assignment Number Employment Category Grade Name Job Name Legal Employer Name Location Name Position Name |
You can override site-level values at the user level. For example, you might use position as the default value and override it with job for the payroll administrator who manages records for a group of workers who are not assigned to positions.
Pay frequency components together provide the flexibility to implement complex time-related objects used in payroll definitions, payroll processes, and payroll tasks that use start and end dates.
It is important to understand how the following pay frequency components work together to provide payroll functionality for your organization. Each may require its own setup and implementation.
Consolidation Groups
Payroll Definitions
Time Definitions
Run Types
Use consolidation groups to process the results from more than one payroll run in a single action or process the results for one payroll in separate actions. With consolidation groups, you produce one set of results per payment method for several payrolls, one set of reports, and one set of costing results. For example, you may submit a regular payroll run and a supplementary payroll run for the same payroll period. If both the regular and supplementary run belong to the same consolidation group, then you use a single consolidation group to process all the results for the post-run processing. Optionally, you can enter a different consolidation group for the supplementary payroll and use it to process the results of the post-run processing for the supplementary payroll separately from the regular payroll.
Payroll definitions are essential to your payroll implementation because they indicate the payment frequency and processing schedule, and through the payroll relationship, they link the employees with the payroll run.
Time definitions can be static periods of unusual length based on a given static date, or they can create dates based on dynamic variables that you specify for either a time span, a retrieval date, or a more complex definition type to use with a user-defined date. They are used in many areas, including payroll periods, payroll employment management, balance dimensions, retroactive and proration events, element start and end dates, and overtime periods.
Run types control the elements and payment types to process in a payroll run. Two predefined run types, Regular and Supplemental, group the other run types and determine the sequence in which they are processed. The Regular run type includes Regular Normal, Process Separately, and Separate Payment. The Supplemental run type includes Process Separately, Separate Payment, and Supplemental Normal.
For each of the component run types, you can specify payment methods that override the default payment methods for the payroll definition. You can also select the element classifications to be processed by runs of this type, and exclude specific elements from these classifications.
You create consolidation groups by selecting the Manage Consolidation Groups task from the Payroll Calculation work area. The following scenarios provide examples of how you can use consolidation groups.
Consolidation groups facilitate separating payroll run results for supplemental processing. For most payroll post-run processing, you can use the consolidation group as an input parameter. You may want the results of a supplemental payroll run to be kept separately from those of the regular payroll process that was already performed. To use a consolidation group to keep supplemental run results separate from the regular payroll run, you would perform these steps:
Create a new consolidation group used to label the supplemental payroll run.
Initiate the supplemental payroll run, specifying the new consolidation group as an input parameter.
Using multiple consolidation groups you can control processing. For example, you want to process and pay a particular set of employees separately within a single payroll to keep separate records of payment and costing. To process employees separately, you would perform these steps:
Create a new consolidation group to specify when running the Calculate Payroll process.
Create a payroll relationship groups to separate the employees.
You can use rules to identify them dynamically or you can specify the employees by their payroll relationship numbers.
Run the Calculate Payroll process for each payroll relationship group separately, once specifying the original consolidation and once for the new consolidation group.
You may want a supplemental payroll run for a special circumstance. For example, you have a main payroll run and three QuickPay runs. Because one of the QuickPay runs is for a termination, it needs to be processed prior to the others. To process the QuickPay for this special circumstance, you would perform these steps:
Create a new consolidation group to specify when you process the QuickPay for the termination.
Submit a QuickPay process, specifying the new consolidation group.
Process the other three payroll runs using their default consolidation groups.
Payroll definitions contain calendar and offset information, which determines when payments are calculated and costed. Using payroll definitions, you can specify payment frequency, processing schedule, and other parameters for a particular payroll. Payroll period types, such as weekly or monthly, determine the interval at which you pay employees.
Each payroll definition can use only one payroll period type, and you must set up at least one payroll definition for each payroll period type that you use to pay employees. For example, to pay employees semimonthly, create a payroll definition using the semimonthly payroll period type, ensuring that tax calculations and other calculations will produce correct results for those employees.
When you create a payroll definition, the complete payroll schedule is automatically generated, based on the payroll period type, any offsets or calendar adjustments, and the number of years that you specify. Once you have saved a payroll definition, you can assign employees to it on the Manage Payroll Relationships page.
A common scenario for modifying an existing payroll definition is to increase the number of years and generate more payroll time periods to extend the payroll calendar. A common scenario for creating a payroll definition is to replace one that is expired or end-dated.
Each payroll must belong to a consolidation group, which is required by the application for processing purposes. Before you can create a payroll definition, the legislative data group and the consolidation group to use for it must already be defined.
When you create or modify payroll definitions, the application automatically generates a calendar of payroll periods based on your selections. The choices you make for the following values determine exactly how the schedule of payroll periods is generated:
Effective start date
First period end date
Number of years
Offsets
Changes to specific dates
The effective start date is the first date that the payroll definition can be used for employee data. The start date must be on or before the earliest date of any historical data you want to load. For example if you want a payroll to be in use starting on 1/1/2013, and you have 5 years of historical payroll data to load, then the start date of the payroll definition must be on or before 1/1/2008.
The effective start date does not affect the generated calendar of payroll periods. The start date for the first payroll period is based on the first period end date.
The first period end date is the end date of the first payroll period that the application generates for a payroll definition. It is typically based on the date of implementation, tax year, benefits enrollments, or a particular payment cycle. For example, if your weekly payroll work week is Saturday through Friday, and your first payment date is planned to be on 1/6/12, you could use 12/30/11 as your first period end date.
The number of years you enter represents how many years of time periods to generate starting from the beginning of the first payroll period. For example, a payroll definition with an effective start date of 1/1/1985, a payroll period type of semimonthly, a first period end date of 6/15/2012, and the number of years as 5 would generate a calendar of payroll time periods from 6/1/2012 through 5/31/2017. Once you save a payroll definition, you can later only increase but not reduce its number of years because a calendar of time periods for the payroll has already been generated.
Depending on the payroll period type, you can elect for your payroll cycle events to occur on specific dates or be based on offsets from period start or end dates.
This table describes the predefined payroll cycle events that you can offset.
|
Date |
Meaning |
|---|---|
|
Cutoff Date |
Final date that payroll information can be entered for the payroll period. |
|
Payslip Availability Date |
Date on which the payslip is available for viewing. |
|
Payroll Run Date |
Date scheduled for the regular run of this payroll. |
|
Date Earned |
Date on which element entries are added to the payroll run. |
|
Date Paid |
Date the employee is marked as paid. For check payments, this is the date that the check can be cashed or deposited. For electronic funds transfer (EFT) payments, it is the transfer date. |
When creating a payroll definition, you can use dynamic offsets for payroll cycle events. All of the predefined payroll time periods you can use support dynamically generated dates for offsets. Using dynamic offsets, you have the option to offset each payroll cycle event by a specified number of calendar or work days before or after the start date or the end date of the payroll period. For example, you might want to set the payroll run date three work days before the payroll end date, which accommodates differences in the number of days in the payroll period and also accounts for weekends and holidays.
The predefined Monthly (Calendar) payroll time period supports using both dynamic offsets and fixed-date offsets. Using fixed dates, you can adjust the exact date of each of the payroll cycle events for the first payroll period and any adjustments that you make will be reflected in the payroll calendar for subsequent payroll time periods. For example, you might set the cutoff date as the 25th of the month and the payroll run date as the 26th of the month, then all payroll periods in the calendar will have those offsets.
Once you have generated the payroll time periods, you can further adjust any specific calendar dates, as desired. For example, if you know of a particular bank holiday that falls on a payroll run date or a payment date, you might want to adjust the dates manually on the payroll calendar's time period. You can make these adjustments when creating a payroll definition or any time after then, as long as the time period is in the future.
This example demonstrates how to create two payroll definitions for different payment frequencies that are associated with one consolidation group and one legislative data group.
The following table summarizes the key decisions for this scenario.
|
Decisions to Consider |
In This Example |
|---|---|
|
Which consolidation group should be used? |
User-defined consolidation group: InFusion US Emp Group |
|
What is the legislative data group for the consolidation group? |
User-defined legislative group: InFusion US LDG |
|
What are the payroll periods to use? |
Predefined payroll period types: Semimonthly Monthly (Calendar) |
|
What are the names of the new payroll definitions? |
InFusion US Emp Semimonthly InFusion US Emp Monthly |
|
What is the name of the organization payment method to use for all employees? |
User-defined payment methods: InFusion US Emp Check Infusion US Emp EFT |
In this example, the InFusion US company is creating payrolls for its employees. There are two sets of employees, permanent employees who are paid a set amount on a semimonthly basis, and temporary employees that are paid using time card data on a monthly basis.
The business requires that a single monthly costing process be run against results from different payroll runs by using the consolidation group name as an input parameter in the costing run. This example creates two payroll definitions with different payment periods, but the same consolidation group. Both definitions are effective starting on 1/1/11 and will generate payroll time periods covering 5 years.
Create two payroll definitions:
One for permanent employees that are paid a flat amount by electronic funds transfer (EFT) on a semimonthly basis. This payroll definition includes dynamically generated offset dates.
One for temporary employees that are paid by check using time card data on a monthly calendar basis.
Perform the following steps twice, first using the semimonthly values and then using the monthly values.
In this example, all employees that will use this payroll definition are hired after 1/1/11, so there is no issue with loading historical employee data.
|
Field |
Semimonthly Value |
Monthly Value |
|---|---|---|
|
Name |
InFusion US Emp Semimonthly |
InFusion US Emp Monthly |
|
Consolidation Group |
InFusion US Emp Group |
InFusion US Emp Group |
|
Period Type |
Semimonthly |
Monthly (Calendar) |
|
First Period End Date |
6/15/12 |
6/30/12 |
|
Default Payment Method |
InFusion US Emp EFT |
InFusion US Emp Check |
|
Field |
Falls Value |
Day Type Value |
Offset Value |
Base Date Value |
|---|---|---|---|---|
|
Cutoff Date |
5 |
Work Days |
Before |
Period End Date |
|
Payroll Run Date |
3 |
Work Days |
Before |
Period End Date |
|
Field |
Value |
|---|---|
|
Fixed Date |
Yes |
|
Cutoff Date |
6/25/12 |
|
Date Earned |
6/30/12 |
|
Payroll Run Date |
6/27/12 |
|
Date Paid |
6/30/12 |
|
Column |
Semimonthly Value |
Monthly Value |
|---|---|---|
|
Payroll Run Date |
Old Value: 11/28/13 New Value: 11/27/13 |
Old Value: 5/27/13 New Value: 5/28/13 |
Closing a payroll period can interfere with changes to recurring entries. Payroll periods are not like General Ledger periods. You do not need to close payroll periods.
There are two reasons why you might not be able to view and select the payment method you are looking for. Either the start date of the payroll definition is before the start date of the organization payment method or the organization payment method has no associated payment source.
This example illustrates how to create a user-defined table to store values for workers schedules.
Your organization works on a 10 hour a day, four day a week rotating schedule. The employees work for four consecutive days, 10 hours a day.
The main components of the user-defined table are the definition, columns, rows, and values.
In this example, you will construct a user-defined table containing the schedules available in your organization.
This figure illustrates the user-defined table containing the various schedules that your organization offers.
This user-defined table definition consists of the following:
The name of the table is Scheduled_Hours.
The table is used to match to a specific day of the week.
The row title is Days of the Week.
The unit of measure is text since the row values are days of the week.
The user-defined columns are named the days of the week that the employee works. The data type for each column is number. The date type reflects the data type of the values that will be entered in each column.
There are seven user-defined rows containing the exact value of a day of the week.
The values are the scheduled hours for each day of the week. Since the employees only work four consecutive days of ten hours each, there can only be four different schedules. Each column contains the scheduled hours for each day of the week represented in the row.
This example illustrates how to create a user-defined table to store values for stock option allocations.
Each year, your organization offers stock options to its employees. The amount of options depends on years of service and job category of the employee receiving them.
The main components of the user-defined table are the definition, columns, rows, and values.
In this example, you will construct a user-defined table containing stock option allocations by job category and years of service.
This figure illustrates the user-defined table containing the stock option allocation that your organization offers.

This user-defined table definition consists of the following:
The name of the table is Stock_Options.
The table rows consist of a range of numbers that represent years of service.
The row title is Years of Service.
The unit of measure must be number when you are looking at a range of values.
The user-defined columns are named for each job category. The data type for each column is number. The date type reflects the data type of the values in each column.
There are seven user-defined rows containing the range of years of service allotting the same amount of stock options.
The values are the number of stock options. There are only four job categories, in this example. Each column contains the stock option allocation for each job category based on the range of service years.
Fast formulas are generic expressions of calculations or comparisons that you want to repeat with different input variables.
You can use fast formulas to:
Calculate payrolls
Define the rules for paid time off accrual plans
Define custom calculations for benefits administration
Validate element inputs or user-defined tables
Edit the rules for object group population for elements or people
Calculate absence duration
Define custom configuration for compensation
Write payroll calculations and skip rules for elements that you define to represent earnings and deductions. Associate more than one formula with each element to perform different processing for employee assignments with different statuses. You can define elements and formulas for earnings and deductions with highly complex calculations requiring a number of different calls to the database.
Edit the delivered accrual type formulas or write your own. Each accrual plan needs two formulas: one to calculate the gross accrual and the other to return information to the PTO carry-over process.
Configure your plan design to the requirements of your enterprise. Formulas provide a flexible alternative to the delivered business rules for such purposes as:
Date calculations, such as enrollment start and end dates, rate or coverage start and end dates, waiting periods and enrollment periods, or action item due dates
Calculations of rate and coverage amount, minimum and maximum, or upper and lower limits
Certification requirements
Partial month and proration calculations
Eligibility and participation evaluation
For example, you can write a formula to calculate benefits eligibility for those cases where the provided eligibility criteria does not accommodate your particular requirements.
For more information, see Benefits Fast Formula Reference Guide (1456985.1) on My Oracle Support at https://support.oracle.com.
Validate user entries into element input values using lookups or maximum and minimum values. However, for more complex validations write a formula to check the entry. Also, use a formula to validate entries in user tables.
Define criteria to dynamically populate a payroll relationship group or work relationship group. When you create a formula of type Payroll Relationship Group or Work Relationship Group, the Create Fast Formula page provides an expression editor to help you build the selection criteria.
Calculate the duration of an absence from the start and end dates.
Extend the existing flexibility of compensation plan configuration by writing formulas to customize:
Start and end dates for compensation allocations under individual compensation plans
Person selection, hierarchy determination, column default values, and currency selection for workforce compensation plans
The source of items displayed in total compensation statements
This example demonstrates, using the text editor, how to create a fast formula that returns the range of scheduled hours for managers and a different range for other workers.
The following table summarizes key decisions for this scenario:
|
Decisions to Consider |
In This Example |
|---|---|
|
Is the formula for a specific legislative data group? |
No, this is a global formula that can be used by any legislative data group. |
|
What is the formula type for this formula? |
Range of Scheduled Hours |
|
Are there any contexts used in this formula? |
No |
|
Are there any database item defaults? |
Yes, ASG_JOB |
|
Are there any input value defaults? |
No |
|
What are the return values? |
MIN_HOURS, MAX_HOURS, FREQUENCY |
|
Field |
Value |
|---|---|
|
Formula Name |
Manager Range of Scheduled Hours |
|
Formula Type |
Range of Scheduled Hours |
|
Description |
Manager's Range of Hours |
|
Effective Start Date |
1-Jan-2010 |
/* DATABASE ITEM DEFAULTS BEGIN */
DEFAULT FOR asg_job IS ' '
/* DATABASE ITEM DEFAULTS END */
JOB_1 = ASG_JOB
IF JOB_1 = 'Manager' then
(MIN_HOURS = 25
MAX_HOURS = 40
FREQUENCY = 'H')
else
(MIN_HOURS = 20
MAX_HOURS = 35
FREQUENCY = 'H')
return MIN_HOURS, MAX_HOURS, FREQUENCY
This example demonstrates how to create a fast formula that groups executive workers for reporting and processing. All executive workers are in department EXECT_10000. Once the formula is created it will be added as object group parameters so that only those workers in department EXECT_10000 are used in processing.
The following table summarizes key decisions for this scenario:
|
Decisions to Consider |
In This Example |
|---|---|
|
Is the formula for a specific legislative data group? |
Yes, InVision |
|
What is the formula type for this formula? |
Payroll Relationship Group |
|
Field |
Value |
|---|---|
|
Formula Name |
Executive Payroll Relationship Group |
|
Type |
Payroll Relationship Group |
|
Description |
Executive Workers |
|
Legislative Data Group |
Vision LDG |
|
Effective As-of Date |
1-Jan-2010 |
|
Conjunction |
Database Item Name |
Data Type |
Operand |
Literal Value |
|---|---|---|---|---|
|
IF |
DEPARTMENT |
Character |
= |
'EXECT_10000' |
|
Then |
SELECT_EMP |
Character |
= |
'YES' |
|
ELSE |
SELECT_EMP |
Character |
= |
'NO' |
Compilation errors display in the Manage Fast Formulas page when you compile the formula. The formula compiler returns line numbers starting at 1 from the beginning of a formula, and character positions starting at 1 from the beginning of a line in its error messages. The compiler aborts compilation when an error is encountered.
This table lists the type and description of several common formula compilation errors.
|
Formula Error |
Description |
|---|---|
|
Syntax Error |
The formula text violates the grammatical rules for
the formula language. An example is using |
|
Incorrect Statement Order |
|
|
Misuse of |
Occurs when any of these conditions occurs:
|
|
Misuse of |
An |
|
Missing |
A database item with defaulting specified must have
a |
|
Misuse of |
A DEFAULT statement is specified for a variable other than an input or database item. |
|
Uninitialized Variable |
The compiler detects that a variable is uninitialized when used. The compiler cannot do this in all cases. This error often occurs when you want to use a database item, but a database item is not available in the formula. |
|
Missing Function Call |
A function call is not recognized. The combination of return type, function name, and parameter types does not match any available function. |
|
Incorrect Operator Usage |
An instance of a formula operator use does not match the permitted uses of that operator. For example, the + operator has two permitted uses.
The operands are both of data type |
|
Inconsistent Data Type Usage |
A formula variable is being used as if it is of more than one data type. Or a database item or context is being used with the wrong data type. For example, Variable A is assigned a |
|
|
A condition that eventually becomes false, or an |
|
Misuse of Context |
A variable is used as a context, or a context is used as a variable. For example, |
Fast formula execution errors occur when a problem arises while a formula is running. The usual cause is a data problem, either in the formula or in the application database. These errors contain the formula line number where the error occurs.
This table lists the type and description of each formula execution error.
|
Formula Error |
Description |
|---|---|
|
Uninitialized Variable |
Where the formula compiler cannot fully determine if a variable or context is initialized when it is used, it generates code to test if the variable is initialized. When the formula executes and the variable or context is not initialized an error is raised. |
|
Divide by Zero |
Raised when a numeric value is divided by zero. |
|
No Data Found |
Raised when a non-array type database item unexpectedly fails to return any data. If the database item can return no data then it should allow defaulting. This error is also raised from within a formula function. The cause is an error in the formula function code. |
|
Too Many Rows |
Raised when a non-array type database item unexpectedly returns more than a single row of data. The cause is an incorrect assumption made about the data being accessed. This error can also be raised from within a formula function. The cause is an error in the formula function code. |
|
|
Raised when a database item unexpectedly returns a |
|
Value Exceeded Allowable Range |
Raised for a variety of reasons, such as exceeding the maximum allowable length of a string. |
|
Invalid Number |
Raised when an attempt is made to convert a non numeric string to a number. |
|
User Defined Function Error |
Raised from within a formula function. The error message text is output as part of the formula error message. |
|
External Function Call Error |
A formula function returned an error, but did not provide any additional information to the formula code. The function might have output error information to the logging destination for the executing code. |
|
Function Returned |
A formula function returned a |
|
Too Many Iterations |
A single |
|
Array Data Value Not Set |
The formula attempted to access an array index that has no data value. This is an error in the formula code. |
|
Invalid Type Parameter for |
An invalid data type was specified in the |
|
Incorrect Data Type For Stored Item |
When retrieving an item using |
|
Called Formula Not Found |
The called formula could not be resolved when attempting to call a formula from a formula. This could be due to an error in the calling formula, or because of installation issues. |
|
Recursive Formula Call |
An attempt was made to call a formula from itself. The call could be directly or indirectly via another called formula. Recursive formula calling is not permitted. |
|
Input Has Different Types In Called and Calling Formulas |
When calling a formula from a formula, the actual formula input data type within the called formula does not match the data type specified from the calling formula. |
|
Output Has Different Types In Called and Calling Formulas |
When calling a formula from a formula, the actual formula output data type within the called formula does not match the data type specified from the calling formula. |
|
Too Many Formula Calls |
There are two many formula from formula calls. This is due to a problem with the formulas. |
If you need to compile many fast formulas at the same time, you can run the Compile Formula process on the Submit a Process or Report page. Also, if you make any changes to a function after you have compiled a formula that uses it, you need to recompile the formula for the changes to take effect.
Compilation errors occur in the Manage Fast Formulas page when you compile the formula. An error message explains the nature of the error. Common compilation errors are syntax errors resulting from typing mistakes.
Execution errors occur when a problem arises while a formula is running. The usual cause is a data problem, either in the formula or in the application database.
Payroll balances show the accumulation of values over a period of time. The values can be currency, hours, or any other numeric value. You manage balance definitions from the Payroll Calculation work area. Most of the balances you require are predefined and additional balances are created automatically when you create elements. You can edit the definition of these generated balances, or create additional balances for calculations or reporting.
When you create a balance definition, you select the balance category and a unit of measure. Each balance definition is grouped in a predefined balance category for quicker processing. Balance categories are legislation-specific and cannot be modified. The predefined units of measure available for selection are Day, Hour (with different combinations of minutes and seconds), Integer, Money, and Number.
Important aspects of balance definitions are:
Balance Dimensions
Balance Feeds
Generated Balances and Database Items
Base Balances
Remuneration
Each balance can have multiple dimensions, which define the specific value to be retrieved. Balance dimensions are predefined and typically combine these components:
Time span, such as run, period to date, or fiscal year to date
Employment relationship level, either assignment, terms, or payroll relationship
Context, required for some balances only, such as tax reporting unit, element, or payroll
For example, if you select the dimension Core Assignment Tax Unit Year to Date for the balance Gross Earnings, you create the defined balance GROSS_EARNINGS_ASG_TU_YTD, which accumulates gross earnings for an assignment in a specific tax reporting unit from the beginning of the calendar year to date.
You can define balance feeds by element input values or by balance classification run results.
Balance Feeds by Element
Balance feeds by element indicate one or more element input values to add or subtract from a balance. For each balance feed, all elements must be of the same data type. For example, you would not mix money and hours in the same balance feed.
If a balance is fed by a single element, it is called a primary balance.
Balance Feeds by Classification
Balance feeds defined by primary or secondary element classification are always payroll run result values.
If you add a primary classification as a balance feed, you cannot add the children of this classification from the secondary or subclassifications. For example, if you use the Supplemental Earnings primary classification as a balance feed, you cannot also use any secondary or subclassification that are children of Supplemental Earnings. Also, you cannot use both secondary classifications and subclassifications in the same balance feed.
For any balance that you need to initialize, regardless of whether it is fed by elements or classifications during normal processing, you can select elements to feed it for balance initialization purposes only. Select one element for each level of the employment hierarchy associated with a dimension that you want to initialize.
When you create elements, balances and balance feeds are created automatically as determined by the element template. A database item is generated automatically for each balance dimension. You can use the database items in your formulas to check the value of a balance.
You can specify a base balance when there is a relationship between balances that can be relied on when processing and reporting. For example, Loan Repayment could be the base balance for Loan Repayment Arrears.
One balance in a legislation is predefined as the remuneration balance, which is used to generate payments for employees. For example, the remuneration balance might be Net Pay, which is a calculated balance that is the sum of standard earnings and supplemental earnings minus all the deductions calculated for the run.
Important
Setting the Use for Remuneration option to Yes means the balance will be defined as the remuneration balance. Only one balance in a legislation can be the remuneration balance.
Setting initial balances values is an essential task when you migrate payroll data from another system. First you load balance values into batch views then submit the Load Initial Balances process from the Payroll Calculation work area. The process validates then processes the batch.
For each balance to be initialized, you must create elements in the Balance Initialization classification and add them to the balance as balance feeds. You can create up to three elements: one to initialize assignment level balances, one for employment terms level, and one for payroll relationship level.
Each balance initialization element must:
Be nonrecurring and for balance adjustments only.
Be processable in the payroll run.
Have an input value to feed the balance and an input value for each context required by the balance. If you need to set initial values for a large number of balances you can define multiple input values for a single element with each input value feeding a different balance.
Populate the batch views with the balance values for the initialization date. You can use the Batch Loader spreadsheet, or populate the batch directly using the API in the PAY_BALANCE_BATCH_LINES_PKG API package. You can download the Batch Loader spreadsheet in the Payroll Administration work area.
The views are:
PAY_BALANCE_BATCH_HEADER
PAY_BALANCE_BATCH_LINES
Important
The PAY_BALANCE_BATCH_LINES view has a complex definition and cannot be directly inserted into. You must use the Batch Loader spreadsheet or API.
When you create the batch header and lines, consider the following points:
Divide your employees into separate batches to limit the size of each batch.
Within a batch, ensure that you include batch lines for every balance to be initialized for a person. You cannot split lines for a person across multiple batches.
The date you specify on the batch header applies to all lines unless you enter an override date at the line level. The date at line level must be on or before the date on the header.
You cannot initialize balances once you have run any payroll processes.
The Load Initial Balances process validates then processes the initial balance values you load into batch views. It creates balance adjustments to set the required values.
The data you load into the batch views determines which defined balances are initialized and the values used. Typically, you group employees into batches to manage the initialization of their balances.
The Load Initial Balances process validates that the entities referenced in the batch data exist, including balances, balance dimensions, tax reporting units, payrolls, payroll relationships, employment terms, and assignments. It checks that values are available for the contexts used by each balance dimension. It does not check, for example, that an employee is assigned to a specified organization. It sets the status of valid batch lines to V.
The process creates balance adjustments. For all the batch lines it successfully processes, the process sets the status to T and updates the PAYROLL_REL_ACTION_ID to point to the balance adjustment.
The following table shows a simple three-line batch loaded on 18 June.
|
Defined Balance |
Value |
|---|---|
|
Total_Earnings_PTD |
100 |
|
Total_Earnings_QTD |
250 |
|
Total_Earnings_YTD |
500 |
For this batch, the process creates an adjustment on the first day of the time period relevant to each dimension, as shown in the following table:
|
Adjustment Date |
Adjustment Value |
Balances Adjusted |
|---|---|---|
|
1 June |
100 |
Total_Earnings_PTD Total_Earnings_QTD Total_Earnings_YTD |
|
1 April |
150 |
Total_Earnings_QTD Total_Earnings_YTD |
|
1 Jan |
250 |
Total_Earnings_YTD |
The PAY_BALANCE_BATCH_HEADER and PAY_BALANCE_BATCH_LINES views hold the data used by the Load Initial Balances process to initialize balance values.
You must load data into these views using the Batch Loader spreadsheet or API in the PAY_BALANCE_BATCH_LINES_PKG PL/SQL package. Create each batch line with a BATCH_LINE_STATUS of U (unprocessed) and leave the PAYROLL_REL_ACTION_ID column blank. The batch upload process updates these two columns.
Note
You can view the full column listing by querying the view in the Oracle Enterprise Repository at https://fusionappsoer.oracle.com/oer/.
In PAY_BALANCE_BATCH_LINES, the columns shown in the following table are required. Where there is both an ID column and a name column for the same entity, for example, PAYROLL_ASSIGNMENT_ID and ASSIGNMENT_NUMBER, you can populate either column, but you must populate at least one. If the ID column is left blank, the batch upload process uses the name column value to derive the ID value.
|
Column |
Comments |
|---|---|
|
PAYROLL_RELATIONSHIP_ID + PAYROLL_RELATIONSHIP_NUMBER |
Identify the payroll relationship for this balance value. |
|
BALANCE_TYPE_ID + BALANCE_NAME |
Identify the balance for this balance value. |
|
BALANCE_DIMENSION_ID + DIMENSION_NAME |
Identify the balance dimension for this balance value. DIMENSION_NAME should be populated with the localization's dimension usage dimension name rather than the core DIMENSION_NAME held on PAY_BALANCE_DIMENSIONS. |
|
VALUE |
Identify the numerical value of the balance on the upload date. |
|
UPLOAD_DATE |
Identify the date of the balance value. This date must be on or before the upload date for the batch header. |
|
PAYROLL_ID + PAYROLL_NAME |
Identify the context required for evaluating a balance value, even though it may not be a context for the dimension. |
The core contexts shown in the following table must be populated if the balance dimension expects a value for this context.
|
Column |
Comment |
|---|---|
|
PAYROLL_TERM_ID + TERM_NUMBER |
Identify the payroll term for this balance value, if required. Where there is both an ID column and a number column for the same entity, you can populate either column, but you must populate at least one. |
|
PAYROLL_ASSIGNMENT_ID + ASSIGNMENT_NUMBER |
Identify the payroll assignment for this balance value, if required. |
|
LEGAL_EMPLOYER_ID + LEGAL_EMPLOYER_NAME |
|
|
TAX_UNIT_ID + TAX_UNIT_NAME |
|
|
AREA1 + AREA2 + AREA3 + AREA4 |
Identify state and country code information. In Oracle E-Business Suite these items were STATE_CODE, COUNTY_CODE and so on. |
|
THIRD_PARTY_PAYEE_ID + THIRD_PARTY_PAYEE_NAME |
|
|
TIME_DEFINITION_ID + TIME_DEFINITION_NAME |
|
|
RUN_TYPE_NAME + RUN_TYPE_ID |
|
|
ELEMENT_ENTRY_ID |
|
|
BALANCE_DATE |
|
|
CALC_BREAKDOWN_ID |
Identify the ID associated with payroll term. |
There are six legislative or user-defined contexts, which must be populated if the balance dimension expects a value for these contexts. For each context, there is a context ID, name, and value. For example:
CONTEXT1_ID + CONTEXT1_NAME
CONTEXT1_VALUE if CONTEXT1 is used by the balance dimensions
Note
The values of the core contexts are the IDs themselves, while the values of the legislative contexts are separate from the ID of the context.
Populate CONTEXT[1-6]_NAME with the name of the context usage for that legislative or user-defined context, and CONTEXT[1-6]_VALUE with the actual value of that context.
Elements are grouped into primary classifications, such as Earnings and Voluntary Deductions. In a human resources department, you can use the primary classifications to identify groups of elements for information and analysis purposes. In a payroll department, the classifications control processing, including the sequence in which elements are processed and the balances they feed.
Oracle Fusion provides you with these primary classifications and some balances, mainly to reflect tax legislation. They are designed to meet the legislative requirements of your country, so you cannot change them. You can create additional balances to be fed by any of the primary classifications.
Secondary classifications are subsets of the primary classifications. Use them to manage wage basis rules for deductions and taxes. Many legislations have predefined secondary classifications, and a few allow you to create your own. As with primary classifications, you cannot remove or change any predefined secondary classifications.
Subclassifications provide a way to feed balances. Elements can have only one primary and secondary classification, but multiple subclassifications. You can create subclassifications or use predefined ones. Once a subclassification is associated with a classification it cannot be associated with another classification. A subclassification name can be reused under different primary classifications, but you will have to create separate balance feeds for each subclassification with the same name.
If the classification is set to allow costing, you can select any costing option for element eligibility records. You can create distribution groups with elements that have a primary classification that allows distribution. For example, you can create a distribution with all of the earnings elements and prorate tax expenses proportionately over the cost centers in which the wages were earned. The primary classification also determines whether a positive amount is costed as a debit or a credit.
Use frequency rules on an element that is not scheduled to process each period. For example, the rules for a weekly payroll could indicate that the element entries for that element would only be processed on the first and third payroll periods of each month. The default frequency rule is always each period.
Payroll runs process elements in a predefined sequence, which you can determine.
An element's primary classification defines a default processing priority for the element in payroll runs. Lower priority numbers process first
Most classifications also have a priority range. When you define an element in these classifications, you can overwrite its default processing priority with another number from the range. This is useful if you need to establish the order in which the element processes with respect to other elements in the classification
Sometimes you must prioritize the processing of certain element entries for an individual person. For example, you may need to determine the precise order in which deductions taken for wage attachments process for a person. You can enter a subpriority number for element entries.
Elements are building blocks that help determine the payment of base pay, benefits, absences, and other earnings and deductions. The components of elements are set up differently based on how the element is to be used.
To manage base pay, you attach a single earning element to each salary basis to hold base pay earnings, and assign a salary basis to each worker. When a manager or compensation specialist enters a base pay amount for a worker, the amount is written to the payroll element input value associated with the worker's salary basis and used in payroll processing to generate payment amounts.
You can manage employee absences and leave time. To facilitate reporting and analysis of employee absences, you can distinguish between absence categories, absence types, and absence reasons. You can associate an absence type with an element to maintain an absence balance for an employee. You can associate absence types and other elements with accrual plans to determine the net accrual of an employee.
Attach elements at various levels in the benefits object hierarchy to create deductions and earnings that can be processed in a payroll run to calculate net pay.
For Oracle Fusion Global Payroll, you define earning and deduction elements, such as bonus and overtime earnings and involuntary deductions. These elements incorporate all the components required for payroll processing, including formulas, balances, and formula result rules.
Elements are the building blocks of payroll and benefits. There is no limit to the number of elements you can define. You define the policies or business rules that govern the allocation of these elements to your workers.
Elements can represent:
Earnings, such as salary, wages, and bonuses
Compensation, such as employee stock purchase and insurance plans
Absences from work
Tangible items distributed to persons, such as tools, uniforms, mobile phones, or computers
Statutory deductions, such as taxes, voluntary deductions, such as contributions to charities or savings plans, and involuntary deductions, such as court orders, as well as pretax deductions
Employer taxes and other employer liabilities
Oracle Fusion supplies many predefined elements while additional elements are generated when you define certain types of compensation and payroll elements through templates.
The predefined elements are specific to your localization. They typically include deductions for tax and wage attachments. You cannot make any changes to these predefined elements.
You can create many earnings and deductions from element templates. The templates include the elements, balances, balance feeds, and formulas required for payroll processing. You can configure any of these definitions to match your specific business requirements.
The components of an element's definition are available for entry based on the primary and secondary classification you select, for example a standard earning. This diagram illustrates element definition components and what is defined in each component.

For example, you can define an element called Wage, for hourly paid workers. You classify the element in the predefined classification Earnings, which determines when it is processed in the payroll run and what payroll balances it feeds.
You must specify at least one input value, in this case Hours Worked, which must be entered in each payroll period. If required, you can define multiple input values with fixed values, defaults, or validation.
You associate a formula with the element, to calculate the wage for the payroll period. A simple formula might be hours worked, from the input value, multiplied by an hourly rate, from compensation information on the employment record. You define who is eligible for the element by assigning eligibility criteria to various components in the persons employment record, such as grade, payroll, salary basis, or organization. In this example, the wage element is available to all persons on the weekly payroll.
An element's input values defines the entry values available on each entry of this element. Each input value has a unit of measure defined, and can have validations and conditions defined to control the data entry of the element entry assigned to a person. For example, an earnings element may have an input value for hours worked, which is defined as required and has a unit of measure of number.
When you create an element, some input values are created automatically if you use Oracle Fusion Global Payroll or Oracle Fusion Global Payroll Interface. For Global Payroll Interface, this applies to earnings elements only. You can create additional input values for any element, as needed.
For each input value created you can modify these attributes:
|
Field |
Purpose |
|---|---|
|
Display Sequence |
Control the order in which the entry value is displayed on element entries. |
|
Special Purpose |
Identify how an input value is used, irrespective of the name given to it. For example, it identifies if the input value holds a percentage value, a rate, or third-party payee details. It basically assists with processing the input value based on what type of information it holds. |
|
Unit of Measure |
Select the value that describes the type of value the entry value can hold, such as number or character. |
|
Displayed |
Select to display the input value on the element entry. |
|
Allow User Entry |
Select to enter values on element entries. |
|
Required |
Select to make the input value a required entry value on the element entry. If you select Required, you must also select Displayed and Allow User Entry. |
|
Create a Database Item |
Select to have a database item created for the input value to make the values available for formulas or system extract. |
|
Default |
Enter a value that appears as the default value for this entry value in element entries, if needed. |
|
Apply default at runtime |
Select to have the default set on the element entry when the payroll process is run. Changes to the default value are reflected in the next processing after the effective date of the change. You can replace the default at runtime functionality by manually providing an entry value on the element entry. |
|
Minimum |
Enter a minimum value for the element, if needed. |
|
Maximum |
Enter a maximum value for the element, if needed. |
|
Validation Formula |
Enter a formula that validates the entry value entered on element entries, if needed. |
|
Validation Source |
Use with the other input value options to select the valid validation method, such as lookups or formulas. |
|
Lookup Type |
Specify a lookup type to provide a list of values for an element entry value. |
|
Warning or Error |
Use when you are validating the input value or entering a minimum or maximum value. It specifies whether a warning or an error displays if the entry fails the validation condition or does not meet the minimum or maximum value indicated. |
|
Reference |
Use to associate a balance context with the run result. For example, if you want to associate a context, such as jurisdiction, with an element; create an input value for jurisdiction and select the jurisdiction context in the reference field. Then the run result value of the input value will work as context value when updating the balance. If you select a reference then the lookup type and validation source values should be automatically set to the reference context. You need to provide the reference field first for the validation source value to be automatically populated. |
Note
Once an element is processed, you cannot update certain input value attributes, such as unit of measure. This ensures that changing certain attributes will not invalidate prior results.
After you have defined and used an element, updates to the element are limited to ensure the integrity of the element for retroactive processing and the balances of the input values. You cannot remove existing input values or add new ones if you have created entries for the element. You must add an input value to an element before you create any element entries, or set the element entries effective date to the element's start date.
You can make the following changes to an element that has been previously processed:
Change a required input value to be optional.
Alter the sequence in which input values appear in the Element Entries flow.
Change the input value validation rules for minimum, maximum, lookup, or formula.
Change your specification of which input values create database items.
You can select rules for the element's entry value to define how you can update the element entries. The options are:
Automatic entry
Allow multiple entries in same period
Additional entry
Entry values can be automatically added in element entries in three ways.
Elements can be defined to default an input value at creation. The user defining the element can specify the entry value to be defaulted when an element entry is created. Users can override or change the default at any time. Changes to this type of a default value on the element do not affect existing element entries.
Elements can be defined to default an input value at run time. When this is selected, the element will automatically default the element entry value. `This value can be updated if needed. A change to the default value for an input value set to default at run time will automatically change the value to be applied at run time for everybody with an entry for that element.
Some entry values are automatically created by a service or process used with compensation, benefits, or formula results.
Important
An element with automatic entry allowed cannot allow multiple entries in the same period.
This option allows you to give a person more than one entry of the element in the same pay period. For example, if you enter overtime hours on a weekly basis for monthly-paid persons, you might need to give a person five entries of an overtime element in each period.
If you are creating a net-to-gross element, you must select Allow multiple entries in same period.
This option allows you to add an occasional one time entry for recurring elements. This additional entry can override or add to the normal entry amount.
At minimum, an element needs one standard processing rule. This identifies the formula the payroll run uses to process the element for persons with an active employment record. It is also the default formula for other assignment statuses. However, you can define additional processing rules if you need to use different formulas for assignments at other statuses. For example, you could have two rules for a Wages element: Standard Wages and Paid Training Leave.
You can add one or more of the following optional results rules to an element:
Direct result
Indirect result
Message
Order indirect
Stop
Target indirect
For all formula result types except Direct Result or Message, select the target element name to which you want to pass the formula result. This element must have a processing priority causing it to process after the element sending the result.
For the formula result types Direct Result, Indirect Result, and Target Indirect, select the target input value to update.
This is the element's run result, or a direct result updating one of the element's input values.
This result passes as an element entry to another nonrecurring element not yet processed.
The formula issues messages under certain conditions. For example, a formula can check a loan repayment balance and, if the balance is zero, issue the message "Loan is repaid."
There are three severity levels for a message rule:
Error
This causes the run to roll back all processing for the employment record.
Warning
This does not affect payroll processing but warns you of a possible problem.
Information
This does not affect payroll processing.
This result updates the subpriority of the element you select in the Target Element Name field.
This formula result uses the Date Earned of the payroll run to put an end date on a recurring entry of this or another element (which must be defined with Allow Multiple Entries not selected).
This result updates recurring entries of this or another element on the effective date of the payroll run. The receiving element must be defined with Allow Multiple Entries not selected unless you are passing a recurring element's entries to itself, that is updating another entry of the same element. With this result rule, any future-dated changes to the entry will be overwritten by the results of the current payroll run.
An element's latest entry date determines how element entries process after a person is terminated or transferred to another payroll. The options are:
Final close
Last standard earning date
Last standard process date
Note
These are the predefined options, you can create others that fit your business needs.
This option allows the element to stay open for entries beyond a persons last day worked. For example, you want the element to stay open to pay a severance package to a terminated person.
This option stops all element entries on the date the person leaves. It is recommended to use this option for recurring entries such as salary.
Note
When you select the Last Standard Earning Date, also select proration for the element. This ensures the element is processed for proration purposes, even if it is not active at the end of a payroll period.
The last standard process date defaults to the last day of the pay period in which the person is terminated, but you can set it to a later period when you terminate a person. It enables all element entries to stop on the last standard process date or on the date the assignment ends, if this is earlier.
Note
This option is only available for Oracle Fusion Global Payroll users.
Element eligibility determines which people are eligible for an element. To determine eligibility, you assign element eligibility criteria to the components that persons must have to receive entries of the element. While some elements may represent compensation, deductions, and equipment available to all persons, many elements are available only to certain groups of persons. For example, your enterprise might provide company cars only to persons in the Sales Department. Eligibility criteria rule out the possibility of persons getting element entries by mistake. For example, you might want to give a production bonus only to those persons who work full time in Production and are on the weekly payroll. To do this you would define eligibility criteria for the element Production Bonus and the combination of the Production organization, the Full-Time assignment category, and the Weekly payroll.
Element eligibility can be assigned by many different criteria.
All payrolls or for specific payrolls
Payroll statutory unit
Legal employer
Payroll relationship type
Department in which the person works
Location of person's office
Job, for example, Associate Professor or Secretary
Grade
Groups to which the person belongs. You set up all the groups that are appropriate for your enterprise. For example, you could decide to group persons by company within a multi-company enterprise, and by union membership.
Position, which is a class of job performed in a particular organization, for example, Associate Professor of Chemistry, or Finance Department Secretary.
Note
In order to enter an element for a worker, you must define element eligibility for every element. This must be done for predefined elements and those you define. If you want the element to be available to all workers, you can save the element eligibility record with no criteria selected. This is the usual practice for compensation and benefit elements where you determine eligibility using eligibility profiles.
You can define more than one eligibility criteria for each element but there must be no overlap between them. For example, you could create one criteria for the combination of grade A and the job Accountant. However, you could not create one criteria for grade A and a second for the job Accountant. This would imply that an accountant on grade A is eligible for the same element twice. If you have more than one criteria for an element, you can enter different default values, qualifying conditions, and costing information for each eligibility group.
Element eligibility rules always control element entries.
After you have used an element you can make the following changes to the eligibility rules:
Change the input value default values and validation.
These changes affect all new entries. Changes to run time defaults affect existing entries. The system also uses the new validation rules to check any updates you make to existing entries.
Date-effectively end all of the rules that apply to an element and define a new set of rules, which are effective from a later date. For example, suppose you have defined eligibility for a company car based on grade. Following a change of policy you must now define eligibility based on job.
You will not be allowed to end the element eligibility if any nonrecurring entries exist at the date you want to end the rule. You must delete existing entries before you end the element's eligibility.
You can end the element eligibility if recurring entries exist. Any existing entries will be ended automatically when you end the element's eligibility.
Change the qualifying conditions of age and length of service that persons must meet to be eligible for the element.
Proration is the calculation of proportionate element amounts whenever payroll-relevant data is changed during a payroll period. For example, a person joining or leaving the company or a change of pay grade, mid-payroll period, could trigger proration. You add a proration formula to the element and add the element to a proration event group.
The proration formula determines how to prorate the element. For example, you can prorate based on hours in a pay period or days in a pay period. You can either use a payroll formula that handles proration, or create a separate proration formula that runs after the main payroll formula only in payroll periods in which a proration event occurs.
You must assign an event group to an element to prorate it. When you define the event group, you select the events that activate proration calculation, such as hiring a person or terminating employment.
Gross-up functionality enables you to calculate the gross earnings required to generate a specified net pay for a given earning, if you need to pay a person a guaranteed take home pay (net) per payroll period, or to pay a specified bonus of a set amount (net amount). You define which taxes and other deductions the employer is willing to pay by selecting the balances that can be used in the net-to-gross processing.
Follow these steps to set up elements for gross-up processing.
On the Standard Rules section of the earning element, define the element with the following criteria:
Nonrecurring entry
Allow multiple entries in same period
Enter a skip rule to process once per pay period
On the Duration Rules section define
the Latest Entry Date to be Final Close.
On the Advanced Rules section, define the element with the following criteria:
Gross-up during calculation
Pay separately from other elements
Select Yes to enable iterative calculation
Enter an iterative order.
Note
Iterative order must be in the reverse sequence of the processing priority numbers. The element with the lowest iterative priority number is reduced first.
Enter an iterative formula.
Chose the following input values for the element:
|
Input Value Name |
Purpose of Entry |
|---|---|
|
Pay Value |
The gross pay is returned to this input value when it has completed the gross-up calculations. |
|
Amount |
The amount gives the iterative formula the desired net pay. |
|
Low Gross |
The low gross is used by the iterative formula to hold the lower gross pay guess, to feed into the next iteration of the formula. |
|
High Gross |
Used by the iterative formula to hold the higher gross pay guess, to feed into the next iteration of the formula. |
|
Remainder |
The amount by which the additional pay to be paid by the employer (gross minus desired net) differs from the total of the balances that are eligible for gross-up processing. Returned by the iterative formula. |
|
To Within |
The amount by which actual net can differ from desired net after normal processing. Must not be zero but can be a nominal amount such as 0.01. |
|
Method |
The method of iterative calculation: binary or interpolation. This determines which function the iterative formula calls. Use the lookup type ITERATIVE_METHOD and select the default interpolation, since this is usually the more efficient method. |
|
Additional Amount |
The amount to add to desired net to calculate gross pay. Returned by the iterative formula. |
Define element eligibility rules.
On the Processing Rule section, enter the following formulas:
Add a gross-up formula in the standard processing formula name
Create a formula result rule to feed the payment amount result as a direct result to the element's pay value.
On the Balance Feeds section, confirm which balances feed your gross-up element.
On the Gross Balance Exclusions section, select the deductions to be paid by the employer.
The formulas for Net-to-Gross processing do the following:
The iterative formula takes as input the desired net amount (Amount input value), the amount by which net can differ from the desired amount (To Within input value), and the method of calculation (Method input value).
In the first run the formula sets the lower gross limit to the desired net amount, and the higher gross limit to twice the desired amount. Then it runs a function to provide the first guess of the gross. The formula returns three values to the element's input values: low gross, high gross, and additional amount.
The element's payroll formula runs. It adds the additional amount to the desired amount to create the gross amount and returns this value to the element's pay value for the payroll run to process.
In the next iteration, the iterative formula compares the additional amount to the total value of the balances that are available for gross-up for this element entry. The additional amount must not differ from this balance total by more than the amount you specified in To Within field.
If the additional amount equals the balance total, then the iterative processing ends.
If the additional amount is above or below the balance total by an acceptable margin, then the processing ends and the formula returns the remainder (additional amount - balance) to the element's Remainder input value.
Otherwise, the formula runs the function to generate a better estimate for gross, using the remainder to determine by how much to change the guess. The formula checks the results in another iteration.
When you create an absence element for an absence type, your choice of element classification determines how absence entries display on the statement of earnings. You must use one of the following classifications:
Information classification or Absence classification
Standard Earnings classification
Use either of these classifications if you want to:
Process absences in a single calculation.
Prevent absence entries from appearing on the statement of earnings that the payroll run generates.
Note
Although both the Information classification and Absence classification work in the same way, you can select either classification depending on your reporting requirement.
Since payroll runs do not process elements in the Information or Absence classifications, you can use an Earnings element to manage the calculation and payment of absences. For example, you can define a skip rule for an Earnings element that triggers processing when it finds an entry for the absence element. The payroll formula associated with the Earnings element uses the database item of the absence element to retrieve the total number of absences. Then the formula uses another database item to retrieve the salary or hourly rate to calculate the total absence pay for the period and, if necessary, reduce the regular earnings.
The following figure depicts the relation between the Absence element, Earnings element, skip rules, and the payroll formula associated with the Earnings element:
Use this classification if you want to:
Process absences individually in each payroll period.
Treat absence entries as earnings.
This approach creates a one-line entry on the statement of earnings for each absence type. For example, you can use this classification if your employees submit timecards, and you want absences taken by these employees to show on the statement of earnings.
When you set up an absence type, you can determine how absences are processed in payroll runs. Choose the type of element to associate with the absence type:
Use a nonrecurring absence element.
Use a recurring absence element (only if you use Oracle Fusion Global Payroll and enable proration).
Nonrecurring absence elements are valid for the payroll period in which the absence starts. The application creates the entry only when you enter the absence end date. The element entry records the full value of the absence duration even if the end date falls beyond the payroll period.
For example, if you enter an absence that starts on May 24 and ends on June 5 for someone on a monthly payroll, the element entry is dated May 1 to May 31 and records the full value of the absence duration (13 days).
Use a recurring absence element if you want the payroll run to process absences that have not ended. To process the absence element and calculate the absence duration in each payroll period, you use a payroll formula that handles proration.
Recurring absence element entries start on the absence start date and end on the absence end date (if there is an end date). If the absence starts or ends in the middle of a payroll period, the payroll run detects and processes the absence using the proration functionality.
The example shows how payroll managers create a regular earnings element using an element template.
First you create an earning element then update it to allow for multiple entries.
|
Field |
Value |
|---|---|
|
Legislative Data Group |
Your Legislative Data Group |
|
Primary Classification |
Standard Earnings |
|
Secondary Classification |
Regular |
|
Question |
Answer |
|---|---|
|
Name |
REGULAR SALARY |
|
Reporting Name |
Regular Salary. |
|
Effective Date |
1/1/2010 |
|
Input Currency |
US Dollar |
|
Should every person eligible for the element automatically receive it? |
No. |
|
What is the earliest entry date for this element? |
First Standard Earnings Date |
|
What is the latest entry date for this element? |
Last Standard Earning Date |
|
At which employment level should this element be attached? |
Assignment Level |
|
Does the element recur each payroll period, or does it require explicit entry? |
Recurring |
|
Process the element only once in each payroll period? |
Yes |
|
Can a person have more than one entry of the element in a payroll period? |
No |
|
Process and pay element separately or with other earnings elements? |
Process and pay with other earnings |
|
Question |
Answer |
|---|---|
|
What is the calculation rule? |
Flat Amount |
|
How do you want to derive the amount? |
Entered value |
|
What is the time-basis for this element? |
Periodically |
|
Is this element subject to proration? |
No |
|
Is this element subject to retroactive changes? |
No |
|
Use this element to calculate a gross amount from a specified net amount? |
No |
|
Should this element reduce regular earnings? |
No |
On the Element Summary page, review the newly created element details for accuracy.
On the Element Summary page, update the newly created element details.
A recurring element has an entry that applies in every pay period until the entry is ended.
A nonrecurring element has an entry that applies in one pay period only. It is only processed once per pay period. The dates of the pay period are determined by the payroll to which the person is assigned.
Note
A base pay element associated with a salary basis must be recurring.
A net-to-gross element must be nonrecurring.
A skip rule is a formula that determines the circumstances in which an element should be processed. If the conditions of the formula are met, then the element is processed. Otherwise the element is skipped from processing.
When an element is subject to retroactive changes, all components for the retroactive element are created automatically. This includes adding the element to the predefined retroactive event group and proration group. You can create your own retroactive event group and proration event group and change the default values for the element in the Manage Element flow.
An element processes entries only in the first payroll run of each period for this element.
If this option is not available for your localization, you can select a skip rule to process this element once each period.
It prevents all new element entries for the element. Selecting this option will not affect any existing element entries.
Use caution with this feature. When hiring, terminating, or updating assignments, this option will prevent element entry creation for the element, even if the element is used for automatic entries.
If you override it, then any subsequent changes to the default value on the element or element eligibility definition will not affect the element entry. However, you can clear your entry if you want to restore the default value.
Deduction rates and amounts may vary depending on the range in which the earnings balance falls. A deduction range is a table that holds the range of values and associated rates, amounts, or rules to use when calculating a deduction or exemption. For example, a deduction range for a graduated tax might contain two range value rows: one that defines the tax rate for earnings under 50,000 USD and another for earnings above 50,000 USD..
Each localization provides a set of predefined deduction ranges used to calculate statutory and involuntary deductions. You cannot edit predefined deduction ranges. You can add new deduction ranges using the Manage Deduction Ranges task in the Payroll Calculation area. When you create a deduction range, you specify the legislative data group (LDG) to which the range applies. The new range can then be used when processing deductions for the LDG.
Each deduction range belongs to a deduction range group used to categorize related deduction ranges. Examples of deduction range groups include city tax information and social insurance information. A set of standard deduction range groups is delivered with the application and available to all legislations. When you create a deduction range, you can select an existing range group or create a new one.
Deduction ranges are building blocks used in the calculation of deductions and exemptions. You associate a deduction range with a calculation factor, which defines the rule for calculating the deduction element for balances in the range table. The deduction range provides the values, but the calculation factor specifies when and how to apply them.
For example, a calculation factor might direct the payroll process to do the following: Calculate the deduction using this deduction range only if the person lives in Region B, and then annualize the calculated result to produce the final deduction amount.
Use the Manage Deduction Group Rules task in the Payroll Calculation work area to view and manage calculation factors.
The examples that follow illustrate how to use both static and dynamic deduction range values, and how to override the default calculation type for individual range value rows.
The deduction range for a regional income tax uses a default calculation type of Flat Rate. However, for the lowest and highest incomes, a flat amount applies. For these two ranges, the Flat Amount calculation type overrides the default type, and uses a monetary value rather than a percentage. No database item is specified in the Basis of Range of Values for the deduction range, so the range values are static.
|
From Value |
To Value |
Calculation Type Override |
Rate or Amount |
|---|---|---|---|
|
0 |
199 |
Flat Amount |
0 |
|
200 |
999 |
|
4 (percent) |
|
1000 |
1999 |
|
6 (percent) |
|
2000 |
999,999,999 |
Flat Amount |
300 |
The deduction range for a tax exemption uses a default calculation type of Incremental Rate. The first and last range value rows specify the Flat Amount calculation type, which overrides the default type. The Gross Earnings YTD database item is specified in the Basis of Range Values field, which means that the range values represent a percentage of year-to-date gross earnings. The following sample values define a set of dynamic range values for this deduction range:
|
From Value |
To Value |
Calculation Type Override |
Rate or Amount |
|---|---|---|---|
|
0 |
.1 |
Flat Amount |
300 |
|
.1 |
.2 |
|
10 (percent) |
|
.2 |
.9 |
|
30 (percent) |
|
.9 |
1 |
Flat Amount |
0 |
The first range value row defines a flat amount of 300 USD that applies to the first 10 percent of gross earnings. The second row defines a 10 percent rate that applies to the next 10 percent of gross earnings. The third row defines a 30 percent rate that applies to between 20 and 90 percent of gross earnings. The final row defines a flat amount of zero between 90 and 100 percent.
A deduction override refers to a value entered on a deduction card that replaces a value defined in a deduction range. For example, an organization might set a default tax rate at the legislative level, and allow the rate to be overridden by a flat amount entered on a personal deduction card at the payroll relationship level.
When the payroll process runs, it checks for deduction card overrides in the following order:
Payroll relationship
Tax reporting unit
Payroll statutory unit
When the process finds an override record, it stops checking and uses the values defined at that level.
Note
Some localizations do not support deduction cards for tax reporting units or payroll statutory units.
Overrides for statutory and involuntary deductions are predefined. You cannot allow new overrides for predefined deduction ranges.
If you create a custom deduction range, you can allow users to override a range value on a deduction card by adding the item to the Overrides Allowed on Deduction Card table on the Create or Edit Deduction Ranges page. You must provide the name to appear on the deduction card for the item. The list of items available for override varies depending on the calculation type for the deduction range. For example, you can allow users to override the percentage value for a flat rate calculation or the monetary value for a flat amount calculation. The following three override items are available for all calculation types except text:
Deduction Range: Uses the deduction range entered on the deduction card to calculate the deduction amount.
Total Amount: Uses the amount entered on the deduction card as the total deduction amount.
Additional Amount: Adds the amount entered on the deduction card to the calculated deduction amount.
If you allow multiple overrides for the same deduction range, the deduction calculation process applies them in the following priority:
Total amount
Deduction range
Range value component, such as rate or flat amount
Use the Manage Personal Deductions task in the Payroll Calculations or Payroll Administration work area to create deduction card overrides at the payroll relationship level. If overrides are allowed, the Overrides Allowed on Deduction Cards tab appears in the Component Details section of the Manage Deduction Cards page when you select a deduction component. Click Create to define an override. The override value you enter varies based on the type of override item defined in the deduction range, as described in the previous section. For example, you may enter a rate to be used in the deduction calculation or an amount to be added to the calculated amount.
If your localization supports deduction cards at multiple levels, use the Manage Legal Entity Deduction Records task in the Setup and Maintenance work area to create deduction card overrides at the payroll statutory unit level. Use the Manage Legal Reporting Unit Deduction Records task in the Setup and Maintenance work area to create deduction card overrides at the tax reporting unit level.
The Calculation Type field on the Create or Edit Deduction Ranges page specifies the default type of calculation to use for all deduction range value rows. You can override the default calculation type for individual rows in the Range Values section by selecting a different calculation type in the Calculation Type Override field. The calculation type determines which values you must provide in the Range Values section. For example, if you select Flat Amount as the calculation type, then you must provide a flat amount value.
You can choose from several predefined calculation types, as described in the following table:
|
Calculation Type |
Description |
|---|---|
|
Flat Amount |
Uses the specified flat amount as the total deduction amount. |
|
Flat Amount Times Multiplier |
Multiplies a flat amount by a multiplier value. If you select this option, you must specify a database item that provides the value of the multiplier. |
|
Conditional Flat Amount |
Uses the specified flat amount if the condition defined in the Calculation section is met. For example, a person might qualify for an exemption if their filing status is married or head of household. If you select this option, you must specify a database item that provides the value of the condition. |
|
Flat Rate |
Applies the specified rate to the balance. For example, to apply a rate of 10 percent, enter 10. |
|
Incremental Rate |
Applies a different rate to portions of the balance. For example, assuming that the balance is 80,000 USD, you could apply a 1 percent rate for the first 20,000 of the balance; a 3 percent rate for the next 30,000, and a 5 percent rate to the next 30,000. This is also referred to as a blended rate. |
|
Standard Formula 1 |
Calculates the total amount based on the following formula: y = Ax - Bz Where:
|
|
Standard Formula 2 |
Calculates the value based on the following formula: y = (x - A) x B + Cz Where:
|
|
Text |
Uses the specified character string as the calculated value. |
You can specify the view objects that define the valid values available to the selected calculation type. A view object is a query result set used to display a list of values. The view objects you can specify vary depending on the calculation type. For example, if the calculation type is Conditional Flat Amount, then you can specify view objects for the condition and flat amount values.
Include the fully qualified path name when you specify a view object, such as: oracle.apps.hcm.locUS.payrollSetup.details.publicView.UsStatePVO
Payroll deductions comprise multiple components that are defined and managed at different levels. When a payroll run processes a payroll deduction element, it retrieves information stored at all applicable levels.
The following figure shows how deduction information at the legislative and personal levels feeds into the deduction calculation process.
The deduction element's status processing rule drives the calculation, accessing rates and rules defined for the related payroll deduction and values captured on a personal deduction card.
Use the Manage Elements task in the Payroll Calculation work area to view the deduction elements. If an element is associated with a payroll deduction, the deduction name is displayed in the Deductions section on the Manage Element Summary page.
A payroll deduction comprises the rates and rules used to calculate the deduction amount.
Wage basis rules define which classifications of earnings to consider when calculating the basis for the deduction element, based on criteria such as a worker's place of residence. The rule is defined at the legislative level, but the context value for the rule is captured on the deduction card.
Calculation factors associated with the deduction element indicate which deduction range to use when calculating the deduction amount. For example, a calculation factor might identify which set of tax rates to use based on the employee's tax code, as specified on the deduction card. The calculated deductible amount would determine the specific rate to use from that range. A deduction range can also define a processing rule, such as a proration rule for calculating bankruptcy payments.
Use the Manage Deduction Group Rules task in the Payroll Calculation work area to view all wage basis rules, related elements, and calculation factors defined for a particular deduction group. Use the Manage Deduction Ranges task to view deduction ranges and range values.
A personal deduction card contains person-specific information used to calculate the deduction amount.
A deduction component on a deduction card typically relates to a deduction element defined at the legislative level. Adding a deduction component to a deduction card creates an entry for the related element.
Component details, such as tax filing status or social insurance contribution category, are used as input values in the element calculation.
Rates and rules defined on a personal deduction card override values defined in deduction ranges at the legislative level. For example, a default tax rate may be defined at the legislative level, but an employee qualifies for a special reduced rate, which you enter as an override on their personal deduction card.
Note
For some localizations, you can create deduction cards for a specific tax reporting unit (TRU) or payroll statutory unit (PSU) to capture information such as an employer's contribution rate.
Associations indicate which tax reporting unit is responsible for reporting the deductions. They define how deductions are aggregated and reported.
Use the Manage Personal Deductions task in the Payroll Administration or Payroll Calculation work area to create and edit personal deduction cards.
Note
Each legislation supports a predefined set of deduction card types, which typically includes a statutory deduction card and an involuntary deduction card. Additional cards may be supported to capture information for reporting purposes.
Deduction information defined at the legislative data group level comprises several different components, including wage basis rules, one or more payroll elements, and rules for calculating the deduction amount. The following figure shows the relationship between these components.
Each deduction belongs to a deduction group used to categorize related deductions. Predefined deduction groups include social insurance, taxes, retirement plans, involuntary deductions, benefits, and more. The deduction groups available and their names vary by legislation.
A payroll deduction is a set of rates and rules used in the calculation or reporting of one or more payroll deduction elements. A set of statutory deductions is predefined for each legislative data group and cannot be changed. Involuntary deductions are created automatically when you create an element for an involuntary deduction classification. Use the Manage Payroll Deductions task to view deductions.
Wage basis rules determine the earnings that contribute to a deductible amount or, for exemptions, the elements that reduce the amount subject to deduction. For example, wage basis rules might define which classifications of standard and supplemental earnings are subject to a particular tax. If wage basis rules vary based on a factor such as a person's location of residence, then location of residence is defined as a wage basis rule reference. Use the Manage Deduction Group Rules task to create new wage basis rules.
A deduction is typically associated with one or more elements. The element definition specifies how and when the element should be processed and identifies the input values for the element. A deduction element's processing rule drives the calculation of the element, accessing calculation factors and wage basis rules to derive the deduction amount.
Related elements for statutory deductions are predefined. Related elements for involuntary deductions are created when you create the involuntary deduction element. Element entries for deduction elements are created automatically when the deduction component for the element is added to a personal deduction card.
A calculation factor is a data-driven rule for calculating an element. For example, a calculation factor for an income tax element would identify the deduction range that holds the tax rates to use in the calculation. If tax rates vary based on a factor such as a person's filing status, then filing status is defined as a calculation factor reference. Thus, an element may have multiple calculation factors, one for each unique set of rules and references values. If element calculation involves multiple steps, each step is defined in a separate calculation factor. Calculation factors are predefined for statutory and involuntary deductions, and should not need to be changed. Technical users can create new calculations factors using the Manage Payroll Deductions task, and then modify an element's processing rule to use the new calculation factors.
A deduction range stores calculation rates and rules, which may vary based on the amount subject to deduction. For example, deduction range values for a graduated tax might define a 10 percent tax rate for earnings under 50,000 USD and a 20 percent rate for earnings above 50,000 USD. Predefined deduction ranges are provided for statutory and involuntary deductions. Use the Manage Deduction Ranges task to view and manage deduction ranges.
At the legislative level, a deduction can be associated with one or more tax reporting units for reporting purposes. These associations do not impact the deduction calculation or aggregation during a payroll run. You associate tax reporting units with specific deduction components on a personal deduction card.
Use these examples of an individual income tax deduction and a social insurance deduction to understand how deduction components work together. Each example provides sample values for the following deduction components:
Deduction group
References for wage basis rules
References for calculation factors
Wage basis rules
Related elements
Calculation factors for elements
Associations for tax reporting
A particular legislation has a statutory deduction for an individual income tax. The exemption amount for the tax varies based on a person's residential status. The earnings classifications included in the wage basis for the tax vary by geographical region. Thus, references are defined for both the wage basis rules and the calculation factors. The calculation is a two-step process: calculate the exemption and then calculate the tax amount based on the reduced deductible amount.
Deduction group: Taxes
Deduction name: Individual Income Tax Deduction
References for wage basis rules:
|
Reference Name |
Reference Value |
|---|---|
|
Geographical Region |
Mainland |
|
Geographical Region |
Territory |
References for calculation factors:
|
Reference Name |
Reference Value |
|---|---|
|
Residential Status |
Resident |
|
Residential Status |
Nonresident |
Wage basis rules:
|
Geographical Region Reference Value |
Primary Classification |
Secondary Classification |
Use in Wage Basis? |
|---|---|---|---|
|
Mainland |
Standard Earnings |
All secondary classifications selected |
Y |
|
Territory |
Standard Earnings |
All secondary classifications selected |
Y |
|
Mainland |
Supplemental Earnings |
Commission |
Y |
|
Territory |
Supplemental Earnings |
Commission |
N |
|
Mainland |
Supplemental Earnings |
Personal Use of Company Car |
Y |
|
Territory |
Supplemental Earnings |
Personal Use of Company Car |
N |
Related element: Individual Income Tax Processor
The processing rule (a fast formula) associated with this element drives the income tax deduction calculation. It accesses the appropriate calculation factor, based on the resident status reference value and the current step in the calculation process.
Calculation factors for Individual Income Tax Processor element:
|
Resident Status Reference Value |
Calculation Step |
Calculation Method |
Deduction Range |
Range Values |
|---|---|---|---|---|
|
Nonresident |
Calculate exemption amount |
None |
Tax Exemption Amount for Nonresident |
4800 |
|
Resident |
Calculate exemption amount |
None |
Tax Exemption for Resident |
2000 |
|
(None) |
Calculate individual income tax |
None |
Individual Income Tax Rate |
0-50000:3% 50000-100000:4% Over 10000: 5% |
Tax reporting units: All tax reporting units defined for this legislation can report this deduction. (You associate deductions with a specific tax reporting unit on the personal deduction card.)
The same legislation has a statutory deduction for a social insurance tax. Both the employer and the employee contribute to the social insurance tax, but their contribution rates are different. Calculation of the deduction has several steps:
Calculate the base amount for the employee's contribution.
Calculate the base amount for the employer's contribution.
Calculate the employee's contribution amount.
Calculate the employer's contribution amount.
The following component values define this deduction at the legislative level:
Deduction group: Social Insurance
Deduction name: Medical Insurance Deduction
References for wage basis rules: None
References for calculation factors:
|
Reference Name |
Reference Value |
|---|---|
|
Contribution Level |
Employee |
|
Contribution Level |
Employer |
Wage basis rules:
|
Primary Classification |
Secondary Classification |
Use in Wage Basis? |
|---|---|---|
|
Standard Earnings |
All secondary classifications selected |
Y |
|
Supplemental Earnings |
All secondary classifications selected |
Y |
Related elements: Medical Insurance Calculation element
The processing rule (fast formula) associated with this element drives the social insurance deduction calculation. It accesses the appropriate calculation factor, based on the contribution level reference value and the current step in the calculation process.
Calculation factors for Medical Insurance Calculation element:
|
Contribution Level Reference Value |
Calculation Step |
Calculation Method |
Deduction Range |
Range Values |
|---|---|---|---|---|
|
Employee |
Calculate Employee Base Amount |
None |
Employee Contribution Upper Limit |
8000 |
|
Employee |
Calculate Employer Base Amount |
None |
Employer Contribution Upper Limit |
5000 |
|
Employer |
Calculate Employee Contribution Amount |
None |
Employee Contribution Amount |
4% |
|
Employer |
Calculate Employer Contribution Amount |
None |
Employer Contribution Amount |
3% |
Tax reporting units: All tax reporting units defined for this legislation can report this deduction. (You associate deductions with a specific tax reporting unit on the personal deduction card.)
Wage basis rules determine the earnings that contribute to a deductible amount or, for exemptions, the elements that reduce the amount subject to deduction.
Each wage basis rule is associated with a primary or secondary element classification. For deduction elements, the classifications identify which types of earnings are subject to the deduction. For exemption elements, the classifications identify which type of earnings reduce the amount subject to deduction.
A wage basis rule may be associated with up to six references that define the context for the rule. Each reference has a sequence number that determines the order in which it is evaluated for processing relative to other references. For example, if a wage basis rule for a regional tax deduction has references for both county and city, then the county reference should have a higher sequence number than the city so that it will be evaluated first.
The wage basis rules and related references for statutory and involuntary deductions are predefined for each legislation. You cannot edit predefined rules or references.
You can create new wage basis rules for existing deductions using the Manage Deduction Group Rules task in the Payroll Calculation work area. The process is summarized below:
On the Manage Deduction Group Rules page, select the deduction group to which the new rule applies.
In the Deduction Group Overview section, click the deduction group name and then click Wage Basis Rules. If wage basis rule references have been defined, click the reference.
In the Wage Basis Rules section, click Create.
Select the deduction to which the rule applies.
Select the primary and secondary classifications to be used in the wage basis for the deduction.
Provide the reference value for the rule, if applicable.
The following example illustrates how to define a set of wage basis rules for a tax deduction when the earnings included in the wage basis vary depending upon where a person lives.
Brittany is a waitress who receives a salary of 5,000 USD each month plus tips. Brittany is subject to an income tax that is calculated at the rate of 10 percent of the deductible amount, which may vary based on where an employee lives. In Dover County, tips are included in the deductible amount, but in Smith County, tips are not included. This table shows the tax calculations that apply for each region.
|
Region |
Earnings in Salary |
Earnings in Tips |
Deductible Amount |
Deduction Amount |
|---|---|---|---|---|
|
Dover County |
5000 |
50 |
5050 |
505 |
|
Smith County |
5000 |
(50 - Exempt) |
5000 |
500 |
The wage basis rules for this tax deduction are as follows:
|
Region (Reference Value) |
Primary Classification |
Secondary Classification |
Use in Wage Basis? |
|---|---|---|---|
|
Dover County |
Earnings |
Salary |
Y |
|
Dover County |
Earnings |
Tips |
Y |
|
Smith County |
Earnings |
Salary |
Y |
|
Smith County |
Earnings |
Tips |
N |
A calculation factor defines a data-driven rule for calculating a deduction or exemption element. For example, a calculation factor for a tax deduction element might define a context reference (such as a city or state), the deduction range value (such as a 4 percent tax rate on balances under 50,000), and optionally a calculation method and calculation step. Some elements may have a large number of calculation factors, one for each unique set of rules, ranges, and references values. The element calculation process determines which calculation factor to use based on the reference values and calculation rules of the element being processed. Calculation factors are predefined for statutory and involuntary deductions, and should not need to be changed.
Aspects of a calculation factor are shown in the following figure:

A calculation factor may be associated with up to six references that define its context. For example, calculation of a social insurance deduction might vary based on a person's age and employment status. Each reference has a sequence number that determines the order in which it is evaluated for processing relative to other references.
To view the references associated with a calculation factor, click the deduction in the Deduction Overview pane on the Manage Payroll Deductions page.
Note
The calculation factors and related references for statutory deductions are predefined for each legislative data group. You cannot add or edit references for predefined deductions.
Each calculation factor is associated with a deduction range that defines the calculation type, such as flat amount or flat rate, and a set of calculation rates and rules, which may vary based on the amount subject to deduction. For example, a deduction range for a graduated tax might define a 10 percent tax rate for earnings under 50,000 USD and a 20 percent rate for earnings above 50,000 USD. Predefined deduction ranges are provided for statutory and involuntary deductions. Use the Manage Deduction Ranges task to view and manage deduction ranges.
A calculation step is a label you assign to a calculation factor to identify its role in a complex calculation. For example, when calculating an income tax deduction, the process might first calculate the allowance, then any exemption amount, and then apply the tax rate to the reduced deductible amount. For such deductions, you can define multiple elements to be processed separately or define a single element with multiple calculation steps, each defined in a separate calculation factor. You can assign the same calculation step to more than one calculation factor. Calculation steps are optional.
A calculation method references a single fast formula. It is an optional component of a calculation factor. Calculation methods operate at a higher level than the calculation types defined in the deduction range. They provide a wrapper around the calculation of a deduction by retrieving values from a deduction range, applying a fast formula, and returning the final deduction amount for the current run. For example, if the calculation method is set to Cumulative, which references the Core Cumulative fast formula, then the calculation process returns the total deduction amount as a cumulative year-to-date amount.
The following examples illustrate how calculation factors are used to calculate different types of deductions.
Employers in many countries deduct social insurance payments from employees and also make contributions. Employee and employer rates are typically different. Such deductions often have wage limits.
To process this type of deduction, you might create a social insurance deduction processor element with the following calculation factors:
|
Employer or Employee Code (Reference Value) |
Calculation Method |
Calculation Step |
Deduction Range |
Range Values |
|---|---|---|---|---|
|
Employee |
None |
Calculate Social Insurance Employee Rate |
Social Insurance Employee Rate |
4 percent flat rate |
|
Employer |
None |
Calculate Social Insurance Employer Rate |
Social Insurance Employer Rate |
2 percent flat rate |
|
Employee |
None |
Calculate Social Insurance Employee Wage Limit |
Social Insurance Employee Wage Limit |
100,000 flat amount |
|
Employer |
None |
Calculate Social Insurance Employer Wage Limit |
Social Insurance Employer Wage Limit |
100,000 flat amount |
A national income tax deduction involves the multiple steps. First, it calculates the allowance, then any exemption amount, and then it applies the tax rate. The following table shows a subset of calculation factors that might be associated with a tax processor element.
|
Filing Status (Reference Value) |
Calculation Method |
Calculation Steps |
Deduction Range |
|
|---|---|---|---|---|
|
Single |
None |
Calculate Region A Allowance - Single |
Region A Allowance - Single |
10,000 flat amount |
|
Single |
None |
Calculate Region A Exemption Amount - Single |
Region A Exemption - Single |
0 flat amount |
|
Single |
None |
Calculate Region A Regular Rate - Single |
Region A Rate - Single |
7 percent flat rate |
|
Married |
None |
Calculate Region A Allowance - Married |
Region A Allowance - Married |
10,000 flat amount |
|
Married |
None |
Calculate Region A Exemption Amount - Married |
Region A Exemption - Married |
1,000 flat amount |
|
Married |
None |
Calculate Region A Regular Rate - Married |
Region A Rate - Married |
6 percent flat rate |
Oracle Fusion Global Payroll supports a set of involuntary deduction types, such as bankruptcy orders, garnishments, child support payments, tax levies, and educational loans. Global Payroll provides element templates for each involuntary deduction type supported by your localization. You can create involuntary deduction elements as needed using these predefined templates. You can then add the corresponding involuntary deduction component to a personal deduction card so the deduction will be processed during a payroll run.
This figure shows the steps involved in creating an involuntary deduction.

Use the Manage Third-Party Payment Methods task in the Payment Distribution work area to create payment methods for all external payees. For example, you might set up direct deposit for the payee of a child support deduction. A payee can be either a person or an organization.
If you create a third-party person payee, you must select the payroll relationship for the employee whose pay is subject to the deduction. This makes the person payment method available for selection as a payee on the employee's involuntary deduction card.
For example, you might set up electronic file transfer (EFT) for Mary Smith, payee of a child support deduction for John Smith. When you create the person payment method, you select the payroll relationship for John Smith. When you add the child support order to John Smith's involuntary deduction card, you can select Mary Smith in the Order Amount Payee field.
If you create a third-party organization payee, you must select External Payee in the Party Usage Code field on the Create Third-Party Organization Payee page. This makes the organization payment method available for selection as a payee on the employee's deduction card.
For example, you might set up an EFT payment method for a County Sheriff that receives a processing fee on garnishment payments. When you create the organization payment method, you designate the County Sheriff as an External Payee. When you add the garnishment order to the employee's involuntary deduction card, you can select the County Sheriff in the Processing Fee Payee field.
You can create a third-party organization payee for a court or other issuing authority, even if the organization is not being paid. This allows you to record address and contact information that you can later associate with the deduction on the involuntary deduction card.
For both types of third-party payment methods, you must select a previously defined organization payment method to use. (Use the Manage Organization Payment Methods task in the Payment Distribution work area to define the payment source for third-party payments, if not already defined.)
An involuntary deduction element must be defined for each involuntary deduction type you need to process. Involuntary deduction elements can be created during initial setup and as the need arises later. You can create multiple elements for the same involuntary deduction type if processing information or other details vary. For example, court orders from different jurisdictions might have different processing rules. The involuntary deduction element creation process is summarized here. You can skip this task if an element has already been defined for the type of involuntary deduction you want to add to a person's deduction card and the element's processing rules meet your needs.
Using the Manage Elements task in the Payroll Calculation work area, create a new element with a primary classification of Involuntary Deduction and a secondary classification that reflects the deduction type, such as tax levy or child support. (Secondary element classification names vary by localization.)
Answer the questions on each page of the Create Element flow. For example, you must indicate whether or not to create arrears if the full deduction amount cannot be taken. A predefined set of rules, plus the answers you provide, determine which earnings contribute to the deductible amount and how the deduction will be processed.
Define eligibility for the element. To define open eligibility, enter a name for the element eligibility record but do not specify any criteria.
Define costing for the element as appropriate.
Note
To define costing for related elements, you must open and edit each element individually.
When you save the element, the application automatically creates all associated balances, feeds, input values, formulas, and related elements required for payroll processing. It also creates a deduction component that you can add to an employee's involuntary deduction card. Fee rules and proration rules are predefined in deduction ranges, based on statutory rules that vary by localization. Rules for core payroll are as follows:
Fee rule: Deduct the fee first, before calculating and paying the deduction amount.
Proration rule: First come, first serve. If a person has multiple orders and there is insufficient money to pay them all, deductions are paid in order by the date they were received, as recorded on the deduction card. (Oldest is paid first.)
No fee amounts or protected pay amounts are predefined for core payroll. You can enter these amounts as overrides on the involuntary deduction card.
Using the Manage Personal Deductions task in the Payroll Administration or Payroll Calculation work area, search for and select a payroll relationship. Create a new deduction card of the type Involuntary Deductions.
On the Manage Deduction Cards page:
Create a deduction component with the same name as the previously defined involuntary deduction element.
Adding the involuntary deduction component to the card automatically creates an element entry for the related deduction element.
If the deduction card will include more than one involuntary deduction component, you can specify the order in which the deductions should be processed in the Subprocessing Order field. For example, if you set the Subprocessing Order to 103 for a child support deduction and set it to 104 for a court order, the payroll run processes the child support deduction before the court order. By default, involuntary deduction elements are processed in order by date received; the oldest is processed first.
Enter a reference code to uniquely identify this deduction, such as a court order number, case number, or other identifier provided by the issuing authority.
Complete the fields on the Deduction Component Details tab.
In the Involuntary Deduction Payment Details section, select all payees for the deduction. The payee fields display all third-party person payees associated with this payroll relationship and all external payees defined for your legislative data group.
In the Involuntary Deduction Rules section, specify the date the involuntary deduction order was received, the issuing authority (such as a court), the frequency of the deduction, and any other pertinent information.
Note
Use the Frequency field to specify how often the deduction should be taken, such as monthly or weekly, regardless of the payroll frequency. If you leave the Frequency field blank, the application uses the payroll frequency.
You can add multiple involuntary deduction components for the same or different types. For example, you could add two child support and one garnishment components to the same deduction card. Assign each component a unique reference number and, optionally, specify the subprocessing order.
You define the order amount by creating an override on the deduction card. You can also create overrides for fees and other amounts used in the calculation. These overrides replace default values defined in deduction ranges at the legislative level. The default order amount for an involuntary deduction is typically zero.
The process of creating overrides is summarized here:
On the Overrides Allowed on Deduction Card tab, create an override for Order Amount (Rate) or Order Amount (Amount).
For example, if you specified a frequency of monthly in the component details, enter the amount to deduct each month, regardless of the payroll period; the application automatically calculates the correct amount to deduct in each payroll run. If you did not specify a frequency, this amount will be deducted at the payroll frequency defined for the payroll relationship.
Create additional overrides, as needed, for fees, protected pay amount, minimum and maximum withholding amounts, and other values applicable to this deduction.
Make sure that you have selected a payee on the component details for each fee override you create.
During a payroll run, the status processing rule for the deduction element calculates the correct deduction amount based on rules predefined for the deduction type plus information defined on the deduction card.
You define the order amount for an involuntary deduction by creating an override on the person's involuntary deduction card. You can also create overrides for fees and other amounts used in the calculation. These overrides replace default values defined in deduction ranges at the legislative level.
The overrides allowed on a deduction card may vary by legislation, but typically include the items described in this table.
Note
For most overrides, you can create either an amount or a rate override. Create a rate override if you want the application to calculate the deduction amount as a percentage of available pay. For example, to define a rate of 20 percent for the order amount, add an Order Amount (Rate) override and enter 20 in the Rate field.
|
Override Name |
Description |
|---|---|
|
Order Amount |
Rate or amount paid to the Order Amount Payee based on the frequency you specified. For example, if you specified a frequency of monthly in the component details, enter the amount to deduct each month, regardless of the payroll period; the application automatically calculates the correct amount to deduct in each payroll period. If you left the Frequency field blank, this amount will be deducted at the payroll frequency defined at the terms or assignment level. |
|
Organization Fee |
Rate or amount paid to the Organization Fee Payee each time the deduction is processed. |
|
Person Fee |
Rate or amount paid to the Person Fee Payee each time the deduction is processed. |
|
Processing Fee |
Rate or amount paid to the Processing Fee Payee each time the deduction is processed. |
|
Initial Fee |
Rate or amount paid to Processing Fee Payee the first time this deduction is processed. |
|
Maximum Withholding Amount and Minimum Withholding Amount |
Maximum and minimum rates or amounts that can be withheld in one payroll processing period for this deduction. |
|
Maximum Withholding Duration |
The number of days after the Date Received that the order is valid. For example, a court order might only be valid for 90 days after the date issued. |
|
Protected Pay Amount |
Amount of the employee's pay that is exempt from this deduction. Only pay exceeding this amount will be included in the deductible amount (available for the deduction). |
|
Exemption Percentage |
Percentage of the employee's pay that is exempt from this deduction. |
Use these examples to understand how involuntary deductions are processed in different scenarios for core payroll. Processing rules may vary by legislation or legal authority issuing the order for the deduction.
Scenario: A US employee is issued a court order for a monthly garnishment for 500 USD. The order is subject to a 10 USD one-time initial fee and a 10 USD monthly processing fee, which are both paid to the agency responsible for administering the account and forwarding payment to the recipient.
Involuntary Deduction Card Setup: Add a deduction component for a garnishment and then:
Select the Order Amount Payee and the Processing Fee Payee. (The processing fee payee is also the initial fee payee.)
Set the Frequency to monthly.
Create an Order Amount override, and set the amount to 500.
Create a Processing Fee Amount override, and set the amount to 10.
Create an Initial Fee Amount override, and set the amount to 10.
Payroll Run Results:
The amount of the employee's pay subject to deduction is 1000 USD.
During the first monthly payroll after the court order is received, both the initial fee amount and the processing fee are deducted, for a total deduction amount of 520 USD.
In subsequent payroll runs, only the processing fee is deducted, so the total deduction amount is 510 USD.
Scenario: A UK employee is issued a court order in the amount of 100 GBP per month. However, protected pay rules defined for the deduction require that the employee take home at least 700 GBP, after all deductions.
Involuntary Deduction Card Setup: Add a deduction component for a court order and then:
Select the Order Amount Payee.
Set the Frequency to monthly.
Create an Order Amount override, and set the amount to 100,
Create a Protected Pay Amount override, and set the amount to 700.
Payroll Run Results:
The amount of the employee's pay subject to the deduction is 750 GBP.
A 100 GBP deduction amount would leave only 650 GBP for the final pay amount. Therefore, only 50 GBP is deducted for the month.
The remaining balance of 50 GBP is not placed in arrears, based on processing rules defined for this deduction.
Scenario: An employee has 2 assignments, both for the same payroll relationship, and is assigned to 2 different payrolls. One of the assignments is on a weekly payroll, and the other assignment is on a monthly payroll. The employer receives a court order to deduct 200 USD per month from the employee's wages. The court order amount must be deducted from all available money, regardless of the payroll. If the total order amount cannot be deducted from the first payroll run, then the remaining balance must be deducted from one or more subsequent runs during the month, until the full amount is paid.
Involuntary Deduction Card Setup: Add a deduction component for a court order and then:
Select the Order Amount Payee.
Set the Frequency to monthly.
Create an Order Amount override for 200 USD.
Payroll Run Results:
During the first weekly payroll run, only 50 USD can be deducted, leaving an amount owed of 150 USD for the month.
When the next weekly payroll is run, no deduction can be taken due to insufficient pay. The balance for the month remains 150 USD.
The monthly payroll runs before the next weekly payroll is run. The remaining 150 USD owed for the deduction is taken during the monthly payroll run.
No money is deducted during the subsequent weekly payroll runs for this month.
Note
If a person has two assignments for different payroll relationships, they would typically be issued two different court orders, one for each employment. In this case, you would add each court order to a different deduction card.
Scenario: A UK employee has 3 court orders, and each has a different protected pay amount.
Deduction Card Setup: Add 3 deduction components to the employee's deduction card. Set the frequency of each one to monthly. Define protected pay and order amount overrides for each as shown in this table.
|
Involuntary Deduction |
Protected Pay Amount |
Order Amount |
Date Received |
|---|---|---|---|
|
Child Support 1 |
500 |
1000 |
23 January 2012 |
|
Child Support 2 |
600 |
1100 |
2 February 2012 |
|
Child Support 3 |
1000 |
1200 |
2 February 2012 |
Payroll Run Results:
The net amount available for involuntary deductions in the payroll run is 2000 GBP. Based on the processing priority defined for child support payments, the payroll run processes the involuntary deductions in order by date received.
Child Support 1 is paid in full, leaving 1000 GBP available for other deductions.
Child Support 2 is paid an amount of 400 GBP (1000 less protected pay of 600).
Child Support 3 is not paid. The total amount is placed in arrears, based on processing rules defined for the deduction.
Select the Manage Payroll Deductions task and open the deduction. In the Deduction Overview section, expand the Related Elements node and then expand the Calculation Factors node to display a list of all calculation factors associated with the element. You can create new calculation factors and edit existing ones that have an update status of Unlocked. You cannot edit predefined calculation factors. Note that if you create a new calculation factor, you must edit the element's processing rule (a fast formula) to use the new factor.
Oracle Payroll provides a set of predefined statutory deductions. You can view predefined deductions from the Manage Payroll Deductions page, but you cannot create new deductions. You can create new involuntary deduction elements using the Manage Elements task. The predefined involuntary deduction element templates automatically create a payroll deduction object and associated deduction component when you save the involuntary deduction element. You can add deduction components to a personal deduction card using the Manage Personal Deductions task. Adding a deduction component to a deduction card creates an element entry for the related deduction element.
Element eligibility determines which people are eligible for an element. To determine eligibility, you assign element eligibility criteria to the components that persons must have to receive entries of the element. While some elements may represent compensation, deductions, and equipment available to all persons, many elements are available only to certain groups of persons. For example, your enterprise might provide company cars only to persons in the Sales Department. Eligibility criteria rule out the possibility of persons getting element entries by mistake. For example, you might want to give a production bonus only to those persons who work full time in Production and are on the weekly payroll. To do this you would define eligibility criteria for the element Production Bonus and the combination of the Production organization, the Full-Time assignment category, and the Weekly payroll.
Element eligibility can be assigned by many different criteria.
All payrolls or for specific payrolls
Payroll statutory unit
Legal employer
Payroll relationship type
Department in which the person works
Location of person's office
Job, for example, Associate Professor or Secretary
Grade
Groups to which the person belongs. You set up all the groups that are appropriate for your enterprise. For example, you could decide to group persons by company within a multi-company enterprise, and by union membership.
Position, which is a class of job performed in a particular organization, for example, Associate Professor of Chemistry, or Finance Department Secretary.
Note
In order to enter an element for a worker, you must define element eligibility for every element. This must be done for predefined elements and those you define. If you want the element to be available to all workers, you can save the element eligibility record with no criteria selected. This is the usual practice for compensation and benefit elements where you determine eligibility using eligibility profiles.
You can define more than one eligibility criteria for each element but there must be no overlap between them. For example, you could create one criteria for the combination of grade A and the job Accountant. However, you could not create one criteria for grade A and a second for the job Accountant. This would imply that an accountant on grade A is eligible for the same element twice. If you have more than one criteria for an element, you can enter different default values, qualifying conditions, and costing information for each eligibility group.
Element eligibility rules always control element entries.
After you have used an element you can make the following changes to the eligibility rules:
Change the input value default values and validation.
These changes affect all new entries. Changes to run time defaults affect existing entries. The system also uses the new validation rules to check any updates you make to existing entries.
Date-effectively end all of the rules that apply to an element and define a new set of rules, which are effective from a later date. For example, suppose you have defined eligibility for a company car based on grade. Following a change of policy you must now define eligibility based on job.
You will not be allowed to end the element eligibility if any nonrecurring entries exist at the date you want to end the rule. You must delete existing entries before you end the element's eligibility.
You can end the element eligibility if recurring entries exist. Any existing entries will be ended automatically when you end the element's eligibility.
Change the qualifying conditions of age and length of service that persons must meet to be eligible for the element.
A payroll event group is a group of types of data changes that trigger retroactive event notifications or prorated calculation of a person's earnings.
There are two types of payroll event groups:
Proration
Retroactive
Using proration, you can calculate proportionate earning and deduction amounts whenever payroll-relevant data is changed during a payroll period, for example, if a person joins or leaves an organization or if a person's pay grade changes during a payroll period.
If you want to prorate an earnings element, such as basic salary, assign a proration event group to it containing the proration points that affect a person's salary. When you define the event group, you select the events that activates proration calculation, such as changes to:
Pay grades or grade rates
Pay scales and progression points
Hourly or annual pay rates
Working hours
Allowances or deductions
Retroactive processing ensures that your payroll run for the current period reflects any backdated payments and deductions from previous payroll periods. A retroactive event group defines the types of changes that trigger a retroactive event notification.
Within a retroactive event group, select the events that produce notifications if a backdated change occurs. Specify the entity, update type, and attribute, such as the examples provided in the following table.
|
Entity |
Update Type |
Attribute |
|---|---|---|
|
Element Entry Value |
Correction |
SCREEN_ENTRY_VALUE |
|
Element Entry |
Update |
EFFECTIVE_START_DATE |
|
Element Entry |
Update |
EFFECTIVE_END_DATE |
|
Element Entry |
Logical Date Change |
|
|
Element Entry |
Insert |
|
|
Element Entry |
Delete Changes |
|
Banks, branches, and accounts fit together on the premise of the Bank Account model. The Bank Account model enables you to define and keep track of all bank accounts in one place and explicitly grant account access to multiple business units, functions, and users. This eliminates the redundant duplicate bank account setup under different business units when these business units share the same bank account.
Creating a bank is the first step in the bank account creation. The user can search for existing banks, view and update them, or create new banks. You can create a new bank from an existing party. The option to create from an existing party is implicitly implemented by the matching option. The option is available only after the existing party has been found with the same bank. If you choose the matching option, the page repopulates the information from the matched party.
Once you have created your bank, the next step is create a branch or branches associated to the bank. The matching option is also available when creating branches. To create a new branch without using the matching option, manually enter in the information required. You can define other branch-related attributes in the page. If you do not use the matching option when an existing party is found, a branch with the same party name is created.
Once the bank and branch are created, you can proceed to the bank account setup. Select the bank branch you want to associate to your bank account. Assign the owner of the bank account. There are four areas associated to defining the account: general information, control of the account, security access to the account, and business unit assignment. If this is a Payable or Receivable account, the accounts are identified by business unit, and if a Payroll account, by legal entity.
Banks, branches and accounts fit together on the premise of the Bank Account model. The Bank Account model allows you to define and keep track of all bank accounts in one place and explicitly grant account access to multiple business units, functions, and users. Consider the following when you set up bank accounts:
Assigning a unique general ledger cash account to each account and use it to record all cash transactions for the account. This will facilitate book to bank reconciliation
Granting bank account security; bank account security consists of bank account use security, bank account access security, and user and role security.
Account use refers to accounts created for Oracle Fusion Payables, Oracle Fusion Receivables and Oracle Fusion Payroll. When creating an account to be used in one or more of these applications you must select the appropriate use or uses.
Payables and Receivables account access is secured by business unit. In addition to selecting the appropriate application use or uses, one or more business units must be granted access before the bank account can be used by Payables and Receivables. Only business units who use the same ledger as the bank accounts owning legal entity can be assigned access
You have the option to further secure the bank account so that it can only be used by certain users and roles. The default value for secure bank account by users and roles is No. In Payables and Receivables even if the secure bank account by users and roles is no, you must have the proper Multi-Organization Access Control (also known as MOAC) to access a bank account. If the secure bank account by users and roles is set to Yes, you must be named or you must carry a role that is named expressly on the bank account in order to use it.
Note
The security role Bank and Branch Management Duty is used to set up banks and branches.
The security role Bank Account Management Duty is used to set up accounts.
Bank, branch, and bank account information is shared across multiple applications. For example, if you add an employee's bank details for expense payment, the same bank details are available for managing electronic funds transfer (EFT) payment details for that employee. Who enters bank information depends on how security is configured at your site.
The configuration choices are:
Enter bank information centrally
Enter bank information on the Manage Personal Payment Methods page
By default, only cash managers can enter banks and branches. They use the Set Up Bank, Branches, and Accounts task list in the Setup and Maintenance work area.
A web service is also available to migrate personal payment method information, including employee bank account details, from external sources.
By default, on the Manage Personal Payment Methods page, employees can enter their own bank account details for existing banks and branches, but they cannot create new banks and branches. Similarly payroll managers, payroll administrators, and payroll coordinators can enter account details for the employees they handle, but they cannot create new banks and branches. If you want to enable the create option for any of these roles, you must add the Bank and Branch Management duty role to the relevant role.
It is not possible to edit bank and branch details on the Manage Personal Payment Methods page. You must use the Set Up Bank, Branches, and Accounts task list to edit existing banks and branches.
Important
If you enable employees or other roles to create banks and branches, provide guidance to use unique names and follow appropriate naming conventions.
Organization payment methods identify the payment type and the currency to use for payroll payments to workers and for disbursing employee deductions to third parties.
You must define at least one organization payment method for each type of payment and currency that you use to disburse wages and other compensation to your employees. You can also define rules for validating or processing the distribution of payments when you offer more than one option.
A typical configuration is to have one organization payment method for each combination of legislative data group, payment type, and currency.
Any payment method that you define must belong to one of the payment types that your enterprise supports.
Each payroll must have at least one valid organization payment method for each payment type available to employees on that payroll. There may be more than one payment method with the same payment type.
The most common payment types are:
Electronic funds transfer (EFT)
Check
Cash
Your enterprise may support a different range of types that are appropriate for your localization. For example, some localizations do not allow cash, some do not support checks, and very few support postal money orders.
The names of payment types can vary by localization. For example, in the US, the payment type for EFT is NACHA; in the UK it is BACS, and in Australia it is BECS.
Note
When you select the EFT payment type, you can enter EFT information at the organization payment method level, the payment source level, or both. Entries at payment source level take priority over entries at organization payment level.
Payment sources associate bank accounts and other sources of funds with organization payment methods. If you are using Oracle Fusion Global Payroll for payroll processing, each organization payment method that is in use must have at least one valid payment source.
For check and EFT payment methods processed by Global Payroll, the payment source must be associated with an active bank account defined in Oracle Fusion Cash Management. If an organization payment method is associated with multiple payment sources, then the payment method rules determine which payment source is to be used for each disbursement.
You can use the same bank account as a payment source in more than one organization payment method. For example, one checking account may be used to pay both check and EFT payments. The application will not prevent specifying the same name for different payment sources, but it is best practice to use different naming for each occurrence.
When you have one organization payment method for each combination of legislative data group and payment type, you can use payment rules to determine the appropriate payment source based on tax reporting unit. However, there are several reasons why a company might need multiple organization payment methods and multiple payment sources, such as these examples:
Company X has only one tax reporting unit, but prefers to pay its executive staff from a separate bank account for security and confidentiality.
Company Y must comply with state laws and union agreements requiring that checks are drawn on an in-state bank. It uses different organization payment methods for each bank used to pay people based upon their locale.
Company Z may use different currencies to pay foreign nationals and expatriates working in a different country than their home.
Note
You can use the same organization payment method for both employee payments and third-party payments, but you must define different payment sources for each of them and name them differently.
The first payment source defined is the default payment source. If you add more payment sources, you can add subsidiary information as payment rules. For example, if you have multiple tax reporting units, you can specify which payment source to use for each tax reporting unit.
Having a default payment source ensures that employees are paid if there is a change in tax reporting unit. For example, Company A has multiple independent franchises, each with its own tax reporting unit. If a franchise sells, it will have a new tax reporting unit number, and the payment rule will fail. Instead of issuing errors, payment is made using the default payment source.
You might rather not specify a default payment source when payments cannot be made from the specified payment source in the payment rule. For example, Company B has 30 bank accounts and is very careful not to comingle funds. They leave the default unspecified to instead receive notifications that they can resolve manually.
You can define as many payment methods as required for your enterprise. When you create a payroll, you can select which of these methods are valid for employees assigned to that payroll. You select one method as the default method for the payroll. The default payment method is used to determine how to disburse a payment when an employee does not have any personal payment methods specified.
Note
The application does not support EFT payment methods as default payment methods because each payee must have a personal payment method with account information to know where the money will be deposited.
You select organization payment methods when defining other objects, such as payroll definitions and other payment methods. Organization payment methods are only available for selection if they are effective as of the date the object is being defined or updated.
For example, if you create a payroll definition effective as of 4/1/2012 and want to associate a particular organization payment method as the default, the organization payment method must have an effective start date on or before 4/1/2012. Similarly, when updating or correcting objects to change the organization payment method, the organization must have an effective start date on or before the effective date of the change.
The functional relationship of organization payment methods with other objects is described in this table.
|
Object |
Functional Relationship |
|---|---|
|
Personal Payment Method |
Associates a person to a particular organization method. If the payment type is EFT, the person's bank information is included in the personal payment method. Employees manage personal payment methods from their portrait. Payroll managers, coordinators, and administrators use the Manage Personal Payment Methods task on the Payment Distribution work area. |
|
Third-Party Payment Method |
Enables separate payment information for payments to third parties who are not on the payroll. Payments to third parties, such as garnishments or other involuntary deductions, are typically check payments processed separately from the payroll. To manage third-party payment methods, payroll managers and administrators use the Manage Third-Party Payment Methods task on the Payment Distribution work area. |
|
Payroll Definition |
Establishes the default payment method for payments to employees who have no personal payment method defined. To manage payroll definitions, payroll managers and administrators use the Manage Payroll Definitions task on the Payroll Calculation work area. |
|
Run-Type Payment Method |
Overrides a payroll's default payment method for payments to employees with no personal payment method defined. For example, your regular payroll is by EFT but you issue check bonuses once a year. Using the Separate Payment run type, the payment method will overwrite the one of the payroll. However, if a personal payment method of type EFT has been defined for any employee on the payroll, the application will use the personal payment method instead. To manage run type payment methods, payroll managers and administrators use the Manage Run Types task on the Payroll Calculation work area. |
This example demonstrates how to set up payment sources when defining organization payment methods to be used in Oracle Fusion Global Payroll for payroll processing.
The following table summarizes the key decisions for this scenario.
|
Decisions to Consider |
In This Example |
|---|---|
|
How many organization payment methods are needed? |
Two methods to pay employees by check and electronic funds transfer (EFT), and one method to pay external third-party consultants by check. |
|
How many payment sources are needed? |
One payment source for each of organization payment method to pay employees, and two payment sources for the organization payment method to pay external third-party consultants. |
|
How many bank accounts will be used? |
One for each payment source. |
|
What payment method rules will be used? |
Rules for in-state bank accounts used to pay third-party consultants. |
|
Is notification required to alert the source financial institution before processing EFT payments? |
Yes. Ten days before EFT payments to executive employees |
In this example, the InFusion US company pays its employees by check and EFT payments. Two bank accounts have been set up for funds used to pay the executive staff and the regular employees separately. The company occasionally distributes payments to external third-party consultants, but must comply with state regulations and pays them from two different banks based on their tax reporting unit.
Note
The available payment types for organization payment methods may be limited by the legislation.
This worked example assumes that the following prerequisites of organization payment methods have already been set up:
Perform the following steps three times, once for each of the three organization payment methods.
|
Field |
Non-Executive Value |
Executive Value |
Consultant Value |
|---|---|---|---|
|
Name |
Employee Payroll Check |
Executive Payroll Direct Deposit |
In-State Consultant Check |
|
Payment Type |
Check |
NACHA |
Check |
|
Currency |
US Dollar |
US Dollar |
US Dollar |
On the Create Payment Source page, complete the fields as shown in this table, and then click Continue.
|
Field |
Non-Executive Value |
Executive Value |
|---|---|---|
|
Name |
Employee Check Source |
Executive Direct Deposit Source |
|
Bank Account Name |
InFusion US Your Bank |
InFusion US Bank of America |
Note
Keep your payment source names as specific as possible for each scenario. This will help when managing more complicated combinations of organization payment methods and payment rules.
Perform this step twice, once for each payment source.
On the Create Payment Source page, complete the fields as shown in this table, and then click Continue.
|
Field |
First Source Value |
Second Source Value |
|---|---|---|
|
Name |
Texas Check Source |
California Check Source |
|
Bank Account Name |
Comerica Bank |
Bank of the West |
Note
If a single organization payment method has payment sources defined for both employees and third parties, the names of the payment sources must not be the same.
In this example, the organization payment method you set up for the external third-party payments with two different payment sources requires payment rules to determine how payments are distributed.
Perform these steps for the In-State Consultant Check organization payment method created in the previous task.
|
Field |
Texas Check Source |
California Check Source |
|---|---|---|
|
Default |
No |
No |
|
Tax Reporting Unit |
Texas TRU |
California TRU |
|
Payment Source |
Texas Check Source |
California Check Source |
In this example, the bank information for the EFT payments to executive employees must be added.
When you select the EFT payment type, you can enter EFT information at the organization payment method level, the payment source level, or both. Entries at payment source level take priority over entries at organization payment level. In this example, the EFT information is set at the organization payment method level because the US company requires notification of any electronic transfers of funds 10 days prior to the planned transfer date.
|
Field |
Value |
|---|---|
|
Prenotification Required |
Yes |
|
Prenote Days |
10 |
Use the Manage Third-Party Payment Methods task to create payment methods for all external payees who are not on the payroll. A third party can be either a person or an organization. Payments to third parties are normally involuntary deductions, such as court-ordered garnishments.
For all third-party payment methods, the organization method that determines the payment source to use must already be defined. Use the Manage Organization Payment Methods task in the Payment Distribution work area to define the payment source for third-party payments.
When you create a third-party payment method for a person, you select the payroll relationship for the employee whose pay is subject to the deduction. This makes the third-party person payment method available for selection as a payee on the employee's involuntary deduction card.
For example, you might set up an electronic funds transfer (EFT) payment to Mary Smith for a child-support deduction for employee John Smith. When you create the third-party payment method, you select the payroll relationship for John Smith. When you add the child support order to John Smith's involuntary deduction card, you can select Mary Smith in the Order Amount Payee field.
When you create a third-party payment method for an organization, you select External Payee in the Party Usage Code field to make the organization available for selection as a payee on the employee's deduction card.
For example, you might set up an EFT payment method for a County Sheriff that receives a processing fee on garnishment payments. When you create the payment method, you designate the County Sheriff as an External Payee. When you add the garnishment order to the employee's involuntary deduction card, you can select the County Sheriff in the Processing Fee Payee field.
The cost allocation key flexfield creates a structure that captures the account codes you use to create accounting entries, and to report and track your labor costs. When planning how to create a key flexfield structure, consider the following choices:
Structure of the cost allocation key flexfield
Decide how many segments you require and in what sequence, and whether you need additional segments not required by the chart of accounts flexfield.
Segment Value Sets
Confirm that you have created value sets or can reuse existing value sets that supply the values for each segment you create in your flexfield structure.
Cost hierarchy levels required for each cost account segment
For the cost account, for each column heading, you select the segment labels that correspond to the levels of the cost hierarchy where the user can enter account information: payroll, element, department, job, position, and person levels.
Identify which segments should be available for entry for the offset account
For the offset account, for each column heading, you select offset as the segment label, if you want to enable entry of the segment for the offset account.
Decide if the account number you enter for a segment of the cost account is the same account number you enter for the offset account. You only need to specify that a segment is applicable for the offset account, if you expect the segment to record different account number than the cost account. For example, for a segment where the account number seldom changes, such as the number that identifies the company, you would not specify that the company number is applicable for the offset. When the application builds the offset account for the company segment , it would use the account number for the company segment that you entered for the cost account.
Number of different instances of the cost allocation key flexfield structure
Determine if a legislative data group requires different value sets for the flexfield segments. You can create separate instances for these legislative data groups.
Use the predefined cost allocation key flexfield code to create a cost allocation key flexfield structure. The structure specifies the segments to include, their order, and the value sets to validate the data entered in the segments. The segments correspond to each part of the account number, such as the company identifier, cost center code, and the activity or expenditure type.
As a best practice, you create the cost allocation key flexfield structure based on the key flexfield structure used by the accounting flexfield for that chart of accounts that receives the costing entries from payroll. By using a similar sequence of segments and naming conventions, you can facilitate setup, avoid discrepancies, and minimize effort. For example, when you define the accounting rules in Oracle Fusion Subledger Accounting, you can more easily map the segment names of the cost flexfield to the heading names in the accounting flexfield.
When you create your cost allocation key flexfield, also consider whether you want to add segments for:
Future use
You can include segments in your flexfield and not display them until you start using them, such as segments that accommodate new lines of business as the enterprise expands.
Context sensitive information used by legislation
For example, if you maintain separate liability accounts for each state and state tax, you might create additional segments to record this context sensitive information.
Project and task information used by other applications
For example, you might choose to break down costs of a project for reporting purposes.
You associate each segment in your structure to a value set, which validates the data entered for that segment.
When planning which value sets to create for your segments, consider which segments require a:
Value set that is shared, such as value sets created for the chart of accounts flexfield
Value set specific to payroll
You might create a separate value set if you require a small subset of the value set created by Financials. In this example, a separate value set could reduce input errors.
Single value when segments share the same value for all accounts
For example, if you add a segment for future use to your flexfield structure, you might create a value set with a single value of zeros to serve as a placeholder for a future account number.
The following figure shows how the cost allocation key flexfield segments are associated to value sets. The flexfield structure includes an additional segment to break down costs for projects, which does not have a corresponding segment in the chart of account.
When you create the cost allocation key flexfield structure, you determine at which levels of the cost hierarchy each cost account segment is available for entry. This structure controls which cost account segments the application displays on the costing setup pages.
Each column heading of the cost key flexfield structure corresponds to a segment of your account structure. Each segment label of the flexfield structure corresponds to a cost hierarchy level, which qualifies where you can enter account information. For example, you might select the column heading for the segment that records the natural account and select element as the segment label. The Manage Costing of Elements page would then include the natural account segment for the cost account, and you could enter that account for the appropriate element eligibility records.
The following figure illustrates how the flexfield structure determines which segments you can specify for the cost account on the costing setup pages.
Note
You can specify different levels of the cost hierarchy for the cost segments, but the offset segments that balance the costs are available for entry only at the element level of the cost hierarchy.
You do not have to enter a costing segment at each level of the cost hierarchy where it is available for entry. The cost hierarchy determines how a segment inherits an account number. If you enter an account number at a higher level, such as the company account at the payroll level, each lower level of the cost hierarchy inherits that number. If you do not want all the levels to inherit the same number, you can specify the levels at which to override the account number. Overrides identify costs at a more granular level.
The level at which you enter costs is a key determinant in how the application builds the account number. The application starts with the lowest level (element entry) and ends with the highest level (payroll), checking for a value at each level until a value is found. For example, if you specify that a cost center segment is available for entry at the department and job levels, if the application finds a cost center number at the job level, it uses that number and not values at any higher levels.
The following figure shows the different levels of the cost hierarchy.
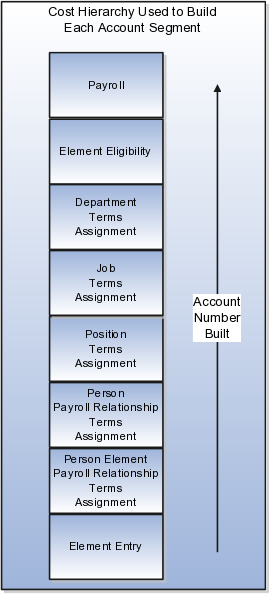
When setting up the segment labels for the cost allocation key flexfield, consider which level of the cost hierarchy to enable the segment for entry. The following table includes example of the segment labels you might specify for costing.
|
Cost Hierarchy Level |
Example |
|---|---|
|
Payroll |
Select payroll segment label for segments that seldom change for the people assigned to the payroll, such as company, line of business, and future use segments. |
|
Job or Position |
Select job segment label to compare and roll-up costs based upon job category. Select position segment label if you are using position management at your enterprise, to better track the cost of turnover to the enterprise. Costing at these levels requires higher maintenance to set up and manage the costing in diverse and complex organizations. |
|
Person |
Select segment label for Person to enable costing at the payroll relationship, term, and assignment level, and for elements at each of these levels. You might select Person to enable allocation of wages when costs are shared by several cost centers, or to override the activity or natural account segment that is usually enabled at the element level. |
You create structure instances of your cost allocation key flexfield that you then associate to legislative data groups. Structure instances share the same set, arrangement, and properties of the cost allocation key flexfield structure.
Before creating structure instances, determine how many instances you require. You associate a single instance to a legislative data group on the Manage Legislative Data Groups page, but you can associate the same instance to several legislative data groups, as long as they all use the same value sets.
To fully implement the cost allocation key flexfield, you specify rules in Oracle Subledger Accounting that identify the flexfield instance to use as the source for entries in the chart of accounts. You map each segment of your cost flexfield instance to the corresponding segment of the accounting flexfield for your chart of accounts using the Manage Account Rules task. If you selected the option when you created your accounting flexfield instances in Oracle Fusion General Ledger to allow dynamic account combination, when you save the account rule, Subledger Accounting automatically creates the corresponding account combinations for General Ledger. (Otherwise, you must create General Ledgers accounts that correspond to each of the account combinations you plan to use in payroll using the Manage Account Combinations task.)
Account numbers generated by payroll costing are validated against the cost-code combinations created in General Ledger when the Create Final Accounting process is submitted
Payroll costing integrates components required to accurately report labor costs and generate journal entries for your payroll run results and payments. To set up and manage payroll costing, you must have the appropriate duty roles to create components used by payroll costing, such as ledgers that you associate to legal entities, accounting methods and rules, and banking information.
Payroll costing involves creating the following components:
Financial ledgers, calendars, accounting periods, and legal entities
Cost allocation key flexfield
Subledger accounting methods and rules
Cash Management bank account and reconciliation information
Payroll cost accounts
The following figure illustrates how Oracle Fusion Global Payroll works with the following applications: Oracle Fusion Financials to maintain chart of accounts, ledgers, accounting periods, and calendars for legal entities; Oracle Fusion Cash Management to reconcile payments with bank statements; and Oracle Fusion Subledger to create journal entries for transfer to General Ledger.
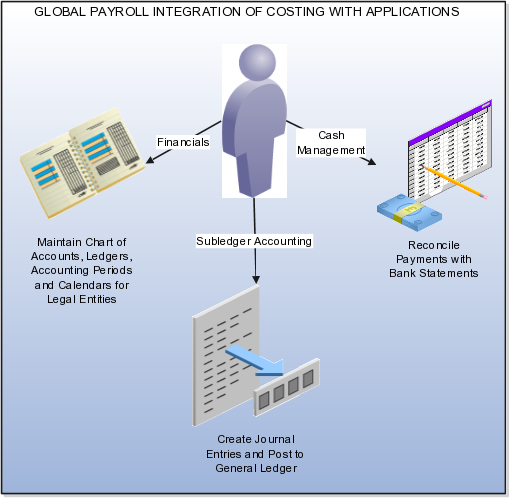
The following figure shows the different components you set up for payroll costing grouped by application.

You create components in Financials that support payroll costing, such as general ledgers, accounting calendars, and accounting periods. For example, you create ledgers in Financials that you later associate to your payrolls.
You create an accounting key flexfield structure for the chart of accounts and create General Ledger accounts that receive costing entries, such as cost, offset, payroll liability, cash clearing, and cash accounts. Most enterprises use the structure of this key flexfield and the value sets as a basis for the structure of the cost allocation key flexfield.
When you create the equivalent accounts in payroll, you should ensure that the same natural account is used in payroll that you use in your General Ledger accounts. By using a similar structure, you avoid discrepancies, minimize maintenance, and improve communication between departments when resolving questions about account entries. For example, you would want to ensure that the Cash account uses the same natural account in Payroll as in General Ledger so that you can easily reconcile the cash account balance with the bank balance for transactions for the same bank account. The Application Implementation Consultant with the appropriate Financial duty roles can perform these tasks.
You create an account key flexfield structure based on the cost allocation key flexfield code, and then create a structure instance that you associate to appropriate value sets. You map the structure instance to a legislative data group. You specify rules in Subledger Accounting on the Manage Account Rules page to use the cost allocation key flexfield instance as the source for segments in the accounting key flexfield for the chart of accounts. If you selected the option when you created your accounting flexfield instances in Oracle Fusion General Ledger to allow dynamic account combination, when you save the account rules, Subledger Accounting automatically creates the corresponding account combinations for General Ledger. (Otherwise, you must create General Ledgers accounts that correspond to each of the account combinations you plan to use in payroll using the Manage Account Combinations task.)
The cost flexfield structure determines at which levels of the payroll cost hierarchy you can enter account information when you create your payroll accounts. Specifying different levels at which to enter account information for a segment enables you to override account information. For example, you might specify that the department and job level can hold account information for a cost center segment, which would then enable you to specify a different cost center for a job than the department.
Subledger Accounting generates subledger journals, creates subledger balances, and generates general ledger journals. Payroll supplies predefined data for Subledger Accounting, such as event classes for event entities. You create accounting methods, and journal line and entry rules that Subledger Accounting uses to create accounting entries and post them to general ledger. You must have the Subledger Accounting duty roles required to perform these tasks.
Payroll requires bank account information for Check and EFT payment types, and optionally for Cash and Money Order payment types. If you plan to cost the payments that you issue, complete the bank, branch, and bank account information for the payment source and specify the General Ledger cash account. To reconcile your payments, you create reconciliation rules, map transaction types to payment types, create bank statement transaction codes, and specify the General Ledger accounts for cash clearing and reconciliation differences. You must have the Cash Management duty roles required to perform these tasks
After creating the components that support payroll costing in the other applications, you create the costing setup information for the different payroll accounts you intend to use, such as the cost, offset, suspense, default, payroll liability, cash clearing, and cash accounts. You enter the account information and any overrides for the different levels of the cost hierarchy. You must ensure when you set up the cash and cash clearing accounts that the natural account segment you specify for these accounts is the same as the natural account specified in the equivalent general ledger accounts.
Payroll accounts capture the account information required to generate journal entries for the ledgers used by your legal entities, and to produce the data required to accurately report and track labor costs based on regulatory and corporate requirements. The framework for payroll accounts accommodates cash and accrual accounting, distribution of costs over earnings elements, allocation of costs to multiple accounts, and the reconciliation of payments.
The payroll accounts you create store cost, payment, and offset costing results. The application places cost results with errors in a suspense account and unallocated costs in a default account for review and corrective action. Review the following choices about the payroll accounts and the options for managing the costing results:
Offset accounts
Payment accounts
Suspense and default accounts
Cost account overrides
Cost allocation and distribution
Transfer to General Ledger
Retroactive costing
Identify which accounts your enterprise uses to create balancing entries required for double-entry bookkeeping. Create offset accounts on the Manage Costing of Elements page for each element eligibility record that you cost.
For elements that affect net pay, the offset for cash accounting is usually an asset account, such as Cash in Bank, and for accrual accounting a payroll liability account, such as Wages Payable. Employer taxes and benefit expenses generally use offset accounts specific to the types of liability.
The cost allocation key flexfield determines the segments available for entry for the offset account. You do not have to complete all the segments. If you leave a segment blank, the application builds the account information based on the corresponding segment entered for the cost account.
The number of payment accounts you create depends on whether your company uses cash or accrual accounting, and whether you reconcile your payments.
For both cash and accrual accounting, create a cash account for each separate bank account, entering the appropriate natural account for each record. If you use accrual accounting, create payroll liability accounts for your payment sources. If you reconcile your payments, create a cash clearing account to generate costing entries when the payments clear. When you create these accounts, ensure that you select the same account numbers for the segments as the General Ledger accounts you select when specifying the bank account information in Cash Management. By using the same account information, you avoid discrepancies and minimize maintenance.
You can create payroll suspense and default accounts at the payroll or department level of the cost hierarchy. Suspense and default entries for a department override those at the payroll level.
Review your enterprise requirements to decide at which level you resolve invalid or unallocated cost results. For example, you may decide to create the default account at the department level, to aggregate unallocated cost results so that they are more easily identified and processed.
You can override the costing information to meet specific conditions, such as costing for a job or person or for a specific payroll period. You can also override the standard process of building the cost account by creating a Priority account to cost element results.
You can control the level of granularity for costing by entering costing information for:
An object at a lower levels of the cost hierarchy
You enter account information on separate pages that correspond to the levels of the cost hierarchy: Manage Costing of Payrolls, Manage Costing of Elements, Manage Costing of Departments, Manage Costing of Jobs, and Manage Costing of Positions. You can override account information entered at a higher level of the cost hierarchy by entering information at a lower level. For example, if you enter an account number for the cost center segment for a department on the Manage Costing of Departments page, you could override the account number for a job within that department, by entering its cost center account number on the Manage Costing of Jobs page.
A person
After you conclude your implementation and create your person records, you can override costing account information on the Manage Costing of Persons page by specifying costing at the payroll relationship, terms, or assignment level.
A payroll period
You can enter cost information on the element entry records for people in your enterprise to apply to a specific payroll period.
You can override the standard process for calculating the cost account by creating a Priority cost account. You might create a Priority account to ensure that the application costs the entire cost or a portion of the cost to a single account number. If you specify a percentage of the cost to a Priority account, the application creates a costing entry for the percentage allocated to the Priority account, and a costing entry for the remaining percentage, by using the standard costing process to derive the cost account number.
You have a choice to divide a cost among accounts, for example to divide labor costs over more than one cost center. You can also distribute your overhead expenses across earnings elements, such as employer liability and tax charges.
You can allocate costs when creating:
Cost accounts for departments, jobs, and positions
Priority accounts
Person accounts
You create cost accounts for people after you complete your implementation and create person records.
Note
With the exception of the Priority account, the total percentage you allocate to each account must equal 100 percent.
You set up distributed costing by creating the cost account information for the distributed element on the Manage Costing of Elements page and the distribution element groups that include earnings elements on the Manage Object Groups page. You can control whether to include all or a portion of each earning element, and whether to include the earnings element in more than one distribution group.
If you plan to transfer payroll and payment costs to Oracle Fusion General Ledger, you select options on the costing setup pages. Specify on the Manage Costing of Elements page and the Manage Costing of Payment Sources the elements and payment sources that you intend to post to general ledger.
Default configuration parameters specify the basis for accounting dates, which you can review and update as required on the Manage Payroll Process Configuration.
|
Parameter Name |
Parameter Description |
Default Value |
|---|---|---|
|
Transfer to GL Process on Date Earned |
Date earned or date paid, used to transfer and post journal entries for costing results to Oracle Fusion General Ledger |
P |
|
Reversal and Balance Adjustment Accounting Date |
Accounting date based on the process date of the reversal or balance adjustment or the process end date of the Transfer to Subledger Accounting process. |
T |
There are two retroactive costing processes, one which recalculates costs after you change the costing setup, and one which calculates costs for retroactive pay.
Before you can run:
Calculate Retroactive Costing, correct the information you set up at the different levels of the cost hierarchy
The process recalculates cost results after you edit the costing setups. The application compares the recalculated and original entries, and where different, offsets the original entries and creates new ones.
Recalculate Payroll for Retroactive Changes, cost the eligibility records of each retroactive element whose run results the application should cost when calculating retroactive pay
The process calculates costing for retroactive pay changes, and records the difference found between the original entry and the retroactive result.
Oracle Fusion Global Payroll integrates with Oracle Fusion Financials. You create components as part of your implementation such as chart of accounts, ledgers, and accounting calendars, which you use when creating payroll definitions and when distributing accounting for payroll costs.
Complete the following setup tasks in the Setup and Maintenance area for the chart of accounts and ledgers. If you integrate Global Payroll and Financials in a single system, assign an application implementation consultant role or appropriate duty role to a Financials or payroll manager.
Complete the following tasks to set up your chart of accounts information. Later, you associate the chart of accounts to a ledger.
|
Task |
Action |
|---|---|
|
Manage Chart of Accounts Value Sets |
Create new or review existing value sets for association with a key flexfield segment. |
|
Manage Chart of Accounts Structures |
Create account structures that specify the segments to include, their order, and the value sets to validate the data entered in the segments. The key flexfield, Accounting Flexfield, is predefined for you in Oracle Fusion General Ledger. |
|
Manage Chart of Accounts Structure Instances |
Create account structure instances used to record transactions and maintain account balances. |
|
Manage Chart of Accounts Value Set Values |
Create groups of values assigned to a key flexfield segment. |
|
Manage Account Hierarchies |
Search, create, and edit hierarchical groupings of accounts. |
|
Manage Accounting Calendars |
Set up accounting calendar period details. Determine the total number, frequency, and duration of the accounting periods. |
|
Manage Account Combinations |
If you do not select the option for your chart of accounts structure instance to allow account combinations to be dynamically created, you create account combinations. You create accounts for each account combination used in payroll, for example, for your payroll liability, cash, cash clearing, default, and suspense accounts. As a best practice, use the same account numbers in payroll and General Ledger. If you reconcile payments in Oracle Fusion Cash Management, create an account combination for reconciliation differences. |
You perform the following tasks as part of the accounting configuration setup for payroll.
|
Task |
Action |
|---|---|
|
Manage Primary Ledgers |
Create a ledger with a chart of accounts, accounting calendar, currency and subledger accounting method. If you are creating bank information, you must create a primary ledger. |
|
Assign Legal Entities |
Add the legal entities that use the ledger. When you create a payroll definition, you select a legislative data group. The list of available ledgers includes only ledgers assigned to legal entities associated with the legislative data group. (The Manage Legal Entity HCM Information task associates the payroll statutory units for legal entities to the legislative data group.) |
|
Specify Ledger Options |
Complete the fields for the General Information, Accounting Calendar, and Subledger Accounting sections. In the Period Close section, select the Retained Earnings Account you will use for payroll. In the Journal Processing Intercompany subsection, select the option to launch AutoReverse after the open period. |
|
Assign Balancing Segment Values to Legal Entities |
Assign specific balancing segment values to each legal entity before assigning values to the ledgers. By specifying this information, you can more easily identify legal entities during transaction processing and reporting |
|
Assign Balancing Segment Values to Ledger |
Optionally, assign specific primary balancing segment values to the primary and secondary ledgers to represent transactions for nonlegal entities, such as adjustments. |
|
Manage Reporting Currencies |
Review and update reporting currencies. Reporting currencies maintain and record subledger and general ledger journal entries in additional currencies. |
|
Review and Submit Accounting Configuration |
Submit your configuration. |
|
Open First Period |
Open the first period when you are ready to process transactions for the ledger. the Open First Period Task is used initially to open the first period. Afterwards, you use the Manage Accounting Periods in General Ledger to open and close periods, and to specify the target period that concludes the series of calendar periods. |
Oracle Fusion Global Payroll integrates with Oracle Fusion Subledger Accounting to streamline accounting tasks. Payroll transactions generate accounting events such as the costing of the payroll run, payments, and partial period accruals. Subledger Accounting applies rules to the transaction data and creates subledger journal entries and subledger balances for each payroll cost, and posts this information to Oracle Fusion General Ledger. This integration simplifies the management of corporate and statutory audit and reporting requirements by recording detailed and summary information, and facilitates the reconciliation of payments with Oracle Cash Management.
Global Payroll provides predefined data for Subledger Accounting. Subledger Accounting uses this data when creating accounting entries for payroll transactions and posting the resulting journal entries to General Ledger. You create additional components in Subledger Accounting to support costing, such as accounting methods and rules.
When you create your implementation project, you can configure the Financials offering by selecting the Define Subledger Application and Sources task list from the Select Features Choices page. You can include this task list to view the Subledger Accounting information that supports payroll costing. The information includes the definition of attribute values, process categories, event classes and event class options, sources, source assignments and accounting attribute assignments, journal line types, account derivation rules, journal lines definitions, and application accounting definitions.
The Define Subledger Accounting Methods task list includes tasks you must complete to integrate Subledger Accounting with Payroll.
You perform the following tasks as part of the setup required for defining payroll costing.
|
Page |
Action |
|---|---|
|
Manage Account Rules |
Specify the segment rules for each segment of the chart of accounts flexfield structure that has a corresponding source segment in the cost allocation key flexfield. Enter conditions to use for the rules. If you selected the Oracle Fusion General Ledger accounting key flexfield option to allow dynamic account combination, when you save the account rule, Subledger Accounting automatically creates the corresponding account combinations for General Ledger. (Otherwise, you must create General Ledgers accounts using the Manage Account Combinations task.) |
|
Manage Subledger Journal Entry Rules Sets |
Create journal entry rule sets for each type of event class: Costs, Payment Costs, Run Costs, and Partial Period Accrual for event types All and Reversal. Confirm the status is active. |
|
Manage Journal Line Rules |
Create journal line rules for the journal rule sets that have the same event class, and assign conditions. |
|
Manage Accounting Methods |
On the Payroll tab, add the journal rule set for each event class. From the Actions menu, change the status to active. |
|
Manage Subledger Accounting Options |
Specify accounting options to define how journal entries are generated from subledger transactions. Determine whether to summarize by general ledger date or by general ledger period. |
Complete the following optional tasks.
|
Page |
Action |
|---|---|
|
Import Supporting Reference Initial Balances |
Import source values for the balances maintained by the segments that store supporting reference balances. |
|
Manage Description Rules |
Define the rules for the descriptions that appear on the subledger journal entry at the header and the line level. |
|
Manage Supporting References |
Decide what additional source information to store about a subledger journal at the header or line level. |
The Manage Costing of Elements page records your choices about how to cost the element eligibility records for an element. You can decide which input values for the element to cost and which offset account to use to balance the cost account. You also have the choice of creating an override cost account, a Priority account, to ensure that you cost the run results to only one account number.
After you complete the initial implementation and create your person records, you can further define the costing of elements for specific people in your enterprise to cover situations where, for example, you need to cost the person's element run results to a different natural account or activity, such as specifying a separate account for commission bonuses for a group of sales people.
When you create costing for elements, review the following points:
Element eligibility records
Costing type
Offset account
Priority account
If you plan to cost the run results for an element processed in a payroll run, you must specify at least one element eligibility record when you create the element. You do not need to specify element eligibility criteria, but you must create a name for the element eligibility record. Cost the element eligibility records for the element that includes the primary output value, either the base element or the results element.
When you cost the base or the related results element, cost all its element eligibility records, even if the costing is the same for all the eligibility records. If you do not cost all the eligibility records, the application costs only those entries that have eligibility records with costing information.
The element classification determines whether the costing results for the cost and offset accounts for the element eligibility record create credits or debits, and whether the application can include the element as a member of a distribution group.
The costing type determines whether the application should cost the payroll run results and distribute the cost over earnings elements. The costing type is also one factor in determining which levels of the cost hierarchy the application checks when building the account number for each segment.
Costed: The application costs the run result value and checks for costing details at levels of the cost hierarchy based on the type of account. This account type is used most frequently for earnings elements.
Distributed: The application costs and distributes the results over the elements included in a distribution group.
You might select this option to spread employer charges, taxes, and liabilities over employee earnings.
Fixed Costed: The application costs the payroll run result value but restricts the check for costing details to three levels of the cost hierarchy: element entry, element, and payroll levels.
You might use fixed costing for deductions, which are commonly assigned at the payroll relationship level, and do not require cost overrides at other levels of the cost hierarchy. For example, if you have multiple companies for a ledger that use the same account structure, you might use fixed costing and record the company segment at the payroll level and the remaining segments for the cost account at the element level.
Not Costed: Optionally, select this option to record your decision not to cost the run result value for this element. The application only costs elements with a costing type of Costed, Distributed, or Fixed Costing. You might specify this option for elements that do not affect net pay, such as absence accruals, information elements, and some taxable benefits where the amount the employee is taxed is not the employer's cost of providing the benefit.
The cost allocation key flexfield determines the segments available for entry for the offset account. You do not have to complete all the segments. If you leave a segment blank, the application builds the account information based on the corresponding segment entered for the cost account.
Distributed costing allocates costs for the payroll run result values of distributed elements over earnings elements. For example, the costs for employer taxes, charges, and liabilities are generally distributed over earnings elements such as wages, overtime, and shift pay.
Identify which elements have costs that you plan to distribute, and which earnings elements to include as members of the distribution group. You create distribution groups on the Manage Object Groups page. Create an object group of element group type, and distribution usage type, and select the elements to include in the group.
When payroll calculates the costs for the distributed element, the application allocates the costs based on the ratio that each element in the distribution group contributes to the total cost. The application creates the distributed cost entries for each earnings element in the distribution group, replacing the account numbers for the segments of the earnings elements with the account numbers for the corresponding segments defined for the distributed element.
Decide whether to use a Priority account as a separate cost account to ensure that all cost results for the element are allocated to one account and that no overrides occur at other levels of the cost hierarchy. You might choose this option if you fund a specific labor cost entirely or partially by one account.
For example, if a percentage of wages are funded by a matching grant, you might enter a cost account and a priority account. You would specify the percentage of the element that receives this funding and enter the priority account information, and then enter the appropriate segments for the cost account. The application would apply the specified percentage of the costs for the element's run results to the priority account and use the standard costing process to derive the cost account for the remaining percentage.
Payroll processes generate costing results and create journal entries used to record your labor costs.
Several settings affect how the application costs a payroll run result for a payroll relationship:
Element classification costing options
Costing options specified on the Manage Element Classifications page determine whether the application costs elements with a specified classification and whether the application creates the costing entries as credits or debits. The costing options on this page also determine if the application can include the elements with that classification in a distribution group.
Cost allocations
When setting up costing information, you can specify whether a cost is allocated to a single account or allocated across several accounts, in which case a costing entry is created for each account based on the percentage of the cost it should receive. For example, if you split the cost of a payroll run result value for an earnings element between two different cost centers, the costing process produces two cost entries and two offset entries.
When the application calculates the costing results, if the total allocation does not equal 100 percent, the remaining allocation is placed in a default account. After you correct the costing setup, you can process a corrective action to cost the run result value to the appropriate account.
Element's costing type
The costing options on Manage Costing of Elements page specify the costing type and which element input values to cost. The costing types determines how the application costs the payroll run result value.
Not Costed: The application does not cost the run result value for this element.
Enterprises use this option for absence accruals, information elements, and some taxable (imputed) benefits.
Costed: The application costs the run result value and checks for costing details at levels of the cost hierarchy based on the type of account.
Distributed: The application costs and distributes the results over the elements included a distribution group.
Enterprises use distributed costing to spread employer charges, taxes, and liabilities over employee earnings.
Fixed Costed: The application costs the payroll run result value but restricts the check for costing details to three levels of the cost hierarchy: element entry, element, and payroll levels.
Enterprises use fixed costing for deductions when they capture costing details only on the payroll and element levels of the cost hierarchy. For example, if the enterprise has multiple companies for a set of books and uses the same account structure for each corporation, the enterprise might use fixed costing and record the company segment at the payroll level and the remaining segments for the account that records the deduction at the element level.
Type of account
The type of account determines which levels the costing process checks when building the account number. The implementation determines which levels of the costing hierarchy can include costing details. When managing the costing setup information, you can review the combined information in tables accessible from the Context area of the Accounting Distribution work area list.
Cost accounts: The application checks all levels of the costing hierarchy for costing details. Segments entered at each level depend on which levels the implementation restricts for entry.
Suspense and default accounts: The application checks the department and payroll levels of the costing hierarchy. You enter the entire number at either the department or payroll level depending on the implementation.
Priority accounts: The application checks the element eligibility level. If some of the segments are entered, the application completes the account number using the standard costing process. If the entire account number is entered, the application bypasses the standard costing process and uses only the priority account to cost the payroll run result value.
Offset number: The application checks the element eligibility level when generating the offsetting entry that balances the payroll run result values. The application completes any blank segments using the value for the same segment from the cost account.
Enterprises might leave a segment blank when they have multiple legal entities or other levels within the organization that maintain separate balance sheets. Completing the account number by inserting the remaining values for the segments from the cost account ensures, that the appropriate segment for the company or ledger is entered in the offset account and avoids additional setup time.
The different costing processes generate costing entries for payroll run results or payments generated at the payroll relationship level, and offset entries to balance those entries. For example, when calculating the payroll, the application costs a salary run result value as a debit to an expense account and offsets the same amount as a credit to a payroll liability account. When costing a cleared payment, the application costs a payment as a debit to a clearing account and offsets the same amount as a credit to a cash account.
The application calculates the costing result for a payroll run result value and a payment value in different ways. When building the cost account for:
Payroll run results: The application checks the costing hierarchy levels.
The type of account, costing type, costing allocation, and implementation determine which levels of the costing hierarchy the application checks. The application builds the account number segment by segment, starting with the lowest and most detailed level (element entry) and checking each subsequent level to the highest and most general level (payroll) until it locates a number for a segment of the account number. The application repeats this process for each segment until the entire number is built.
For example, to build the number for a cost center segment, the application starts with the element entry level. If it does not find a number for the cost center segment at that level, it continues up the hierarchy. If it finds a cost center number at the job level, it uses that number and does not use the one at the next higher level, the department level. When building the account number, the costing process uses the account information effective for the date earned of the payroll run.
Payment results: The application uses the account number for the payment source as specified on the Manage Payment Source page.
The application places invalid entries for costed payroll run result values and payments in a suspense account and incomplete entries in a default account. After editing the costing setup, you can process a corrective action to cost the entry to the appropriate account. The application offsets the original costing when the corrected account number is generated, which clears the suspense or default account.
This table lists the standard costing hierarchy levels checked when the application builds the account number for payroll run result values and where to manage these settings.
|
Level of Costing Hierarchy Checked for Costing Details |
Sequence of Costing Hierarchy Levels Checked When Costing Payroll Run Result Values |
Accounts Checked for Costing Details |
Costing Types Checked for Costing Details |
Page Where Costing Details Are Managed |
|---|---|---|---|---|
|
Element Entry |
First level checked when building each account segment. If costing details are not found for that segment, the application proceeds to the next level, the Person Element - Assignment level. |
Cost |
Fixed Costed, Costed, Distributed |
Manage Element Entries |
|
Person Element - Assignment |
Next level checked. |
Cost |
Costed, Distributed |
Manage Costing for Persons |
|
Person Element - Terms |
Next level checked. |
Cost |
Costed, Distributed |
Manage Costing for Persons |
|
Person Element - Payroll Relationship |
Next level checked. |
Cost |
Costed, Distributed |
Manage Costing for Persons |
|
Person - Assignment |
Next level checked. |
Cost |
Costed, Distributed |
Manage Costing for Persons |
|
Person - Terms |
Next level checked. |
Cost |
Costed, Distributed |
Manage Costing for Persons |
|
Person - Payroll Relationship |
Next level checked |
Cost |
Costed, Distributed |
Manage Costing for Persons |
|
Position |
Next level checked. |
Cost |
Costed, Distributed |
Manage Costing of Positions |
|
Job |
Next level checked. |
Cost |
Costed, Distributed |
Manage Costing of Jobs |
|
Department |
Next level checked. |
Cost, Default, Suspense |
Costed, Distributed |
Manage Costing of Departments |
|
Element Eligibility |
Next level checked. |
Cost, Offset, Priority |
Fixed Costed, Costed, Distributed |
Manage Costing of Elements |
|
Payroll |
Last level checked for costing information. If costing setup information is not found for that segment and the resulting costing account number is incomplete, the entry is costed to a Default account or, if invalid, to the Suspense account |
Cost, Default, Suspense |
Fixed Costed, Costed, Distributed |
Manage Costing of Payrolls |
When building the account number for the payroll run result values for a retroactive pay element, the Recalculate Payroll for Retroactive Changes process checks for costing details as of the current payroll period and the original payroll period. This table lists the costing hierarchy levels checked when the application builds the account number for retroactive payroll run result values and where to manage these settings.
|
Level of Costing Hierarchy Checked for Costing Details for Retroactive Pay |
Sequence of Costing Hierarchy Levels Checked for Costing Details |
Current or Original Payroll Period Checked for Costing Details |
Accounts Checked for Costing Details |
Costing Types Checked for Costing Details |
Page Where Costing Details Are Managed |
|---|---|---|---|---|---|
|
Retroactive Pay Element Entry |
First level checked for costing details when building each account segment for retroactive pay elements only. If costing details are not found for that segment, the application proceeds to the next level, the Retroactive Pay Element Eligibility level. |
Current |
Cost |
Fixed Costed, Costed, Distributed |
Manage Element Entries |
|
Retroactive Pay Element Eligibility |
Next level checked for retroactive pay elements only. If costing details are not found for that segment, the application proceeds to the Element Entry level of the original payroll period. |
Current |
Cost |
Fixed Costed, Costed, Distributed |
Manage Costing of Elements |
|
Element Entry |
Next level checked. |
Original |
Cost |
Fixed Costed, Costed, Distributed |
Manage Element Entries |
|
Person Element - Assignment |
Next level checked. |
Original |
Cost |
Costed, Distributed |
Manage Costing for Persons |
|
Person Element - Terms |
Next level checked. |
Original |
Cost |
Costed, Distributed |
Manage Costing for Persons |
|
Person Element - Payroll Relationship |
Next level checked. |
Original |
Cost |
Costed, Distributed |
Manage Costing for Persons |
|
Person - Assignment |
Next level checked. |
Original |
Cost |
Costed, Distributed |
Manage Costing for Persons |
|
Person - Terms |
Next level checked. |
Original |
Cost |
Costed, Distributed |
Manage Costing for Persons |
|
Person - Payroll Relationship |
Next level checked |
Original |
Cost |
Costed, Distributed |
Manage Costing for Persons |
|
Position |
Next level checked. |
Original |
Cost |
Costed, Distributed |
Manage Costing of Positions |
|
Job |
Next level checked. |
Original |
Cost |
Costed, Distributed |
Manage Costing of Jobs |
|
Department |
Next level checked. |
Original |
Cost, Default, Suspense |
Costed, Distributed |
Manage Costing of Departments |
|
Element Eligibility |
Next level checked. |
Original |
Cost, Offset, Priority |
Fixed Costed, Costed, Distributed |
Manage Costing of Elements |
|
Payroll |
Last level checked for costing information. If costing setup information is not found for that segment and the resulting costing account number is incomplete, the entry is costed to a Default account or, if invalid, to the Suspense account |
Original |
Cost, Default, Suspense |
Fixed Costed, Costed, Distributed |
Manage Costing of Payrolls |
This table lists the payroll processes that generate costing entries and describes the calculations.
|
Process That Generates Costing and Accounting Results |
Description |
|---|---|
|
Recalculate Payroll for Retroactive Changes |
Calculates costing for retroactive changes that were not included in the original payroll run, and records the difference found between the original entry and the retroactive result. |
|
Calculate Payroll |
Calculates the costing for the payroll run results for payroll relationships after the run results are calculated. |
|
Calculate QuickPay |
Calculates the costing for the payroll run results for a payroll relationship processed by the Calculate QuickPay process for a single employee. |
|
Reverse Payroll Calculation |
Negates the costing results generated by the Calculate Payroll process by creating costing entries that offset the original entries. The process uses the effective date of the reversal process as the accounting date to avoid creating entries for a closed accounting period. The reversal creates an audit trail, unlike the rollback action which eliminates the audit trail by deleting the original entry. |
|
Adjust Cost for a Person |
Reallocates costing results to different accounts using a manual adjustment process. An offset entry is created for the original entry based upon the amount of the new entries created. A user can reallocate the entire costing result or part of it to one or more different accounts. |
|
Costing of Balance Adjustment |
Calculates the costing for the payroll run results of the Adjust Individual Balances process. |
|
Calculate Retroactive Costing |
Recalculates costing based upon retroactive changes to costing setups. The process compares the recalculated and original entries, and where different, offsets the original entries and creates new ones. The effective date of the process is used as the accounting date when transferring the results to general ledger. |
|
Calculate Partial Period Accruals |
Calculates accrual entries for a partial payroll period, prorating the costing results based on the previous results of a full period, and using as the accounting date, the date of the Partial Period Accruals process. The process also creates reversal entries with an accounting date of the payroll period end date. The process is often used when a payroll period overlaps two accounting periods. |
|
Calculate Costing of Payments |
Calculates costing for prepayments, QuickPay prepayments, and external payments. It also offsets the costing for voided payments by negating the original costing. If you reconcile payments, after payments have cleared the bank, the process creates entries that debit the clearing accounts and credit the cash accounts. |
|
Transfer to Subledger Accounting |
Creates subledger accounting events for each payroll relationship to identify the payroll costing entries that are transferred to Oracle Fusion Subledger Accounting when the Create Draft Accounting and Create Final Accounting processes are run. |
|
Create Draft Accounting |
Creates draft journal entries in Subledger Accounting. You can preview the journal entries before you run the Create Final Accounting process that transfers the entries to Oracle Fusion General Ledger. |
|
Create Final Accounting |
Creates final journal entries in Subledger Accounting. Creates journal entries, transfers the entries to Subledger Accounting, and transfers and posts them to Oracle Fusion General Ledger. |
Many enterprises distribute the costs for employer taxes, charges, and liabilities over earnings elements, such as wages, overtime, and shift pay. When you set up costing, you specify the costing for the distributed element eligibility records, and identify which elements belong to the distribution group over which the costing results are allocated.
Several settings control how the costs for an earnings element are calculated:
Element classification of the distributed element
The element classification determines whether you can include an element in a distribution group and whether its cost result generates a debit or credit entry. For example, deductions reduce the net pay which generates a credit entry.
The distribution group for the distributed element specified on the Manage Costing of Element page
The application allocates the costing result of a distributed element over the costed run result values for the elements included in the distribution group. The distribution is based on the ratio each element contributes to the total for the distribution group.
The primary output value specified on the Manage Costing of Element page
The application uses the primary output value as the input value when calculating the cost for the distributed element.
The application allocates the cost for the distributed element's run result value over the costed run result values for the elements in the distribution group. The application allocates the cost proportionately based on the amount each element contributes to the total for the distribution group. Only elements in the distribution group that produce actual run result values have costs distributed over them.
This distribution maintains the ratio that each element's costed run result value contributes to the total for the distribution group. For example, if a salary element contributes 70 percent of the total costed run results for the distribution group, the overtime contributes 20 percent, and the commission 10 percent, the application allocates 70 percent of the employer liability to the salary, 20 percent to the overtime, and 10 percent to the commission. If the distribution group does not include a run result value for the commission, then the application distributes the liability cost over the two remaining elements proportionate to the amount each contributes to the total.
If none of the earnings elements produce actual results, the application enters the costing result for the distributed element in a suspense account.
The application creates cost and offset entries for distributed elements. The distribution depends on how you set up costing for the distributed element on the Manage Costing of Element page. If you:
Set up element eligibility costing for the distributed element, the application adds the costing result proportionately to the elements in the distribution group using the standard costing hierarchy, except when it reaches the element eligibility level, the application replaces the cost flexfield segments of the elements in the distribution group with the segments specified for the distributed element.
For example, if the costing result for the overtime wage is costed to account 50.053.5130, and the account number for the distributed element is 5220, then the amount of the distributed element allocated to the overtime wage is costed to account 50.053.5220.
Did not setup element eligibility costing for the distributed element, the application adds the costing result proportionately to the elements in the distribution group using the standard costing hierarchy.
For example, if the costing result for the overtime wage is costed to account 50.053.5130, then the amount of the distributed element allocated to the overtime wage is also costed to account 50.053.5130.
In the following example, the distributed element is the employer pension tax and the distribution group consists of the costed run result values for the regular and overtime wages for Departments 120 and 053.
This table lists the liability and expense accounts used in the example.
|
Account Classification |
Account Name |
Account Number |
|---|---|---|
|
Liabilities |
Wages Payable |
2110 |
|
Liabilities |
Pension Payable |
2150 |
|
Liabilities |
Employee Pension Payable |
2151 |
|
Liabilities |
Employer Pension Payable |
2152 |
|
Expense |
Regular Wages |
5110 |
|
Expense |
Overtime |
5130 |
|
Expense |
Employer Pension Tax |
5220 |
This table shows the primary output values calculated for the employee's regular and overtime pay while working for two different departments.
|
Elements included in the Distribution Group |
Division |
Department |
Hours |
Rate (USD) |
Primary Output Value |
Percent Costed Run Result Contributes to the Total for the Distribution Group |
|---|---|---|---|---|---|---|
|
Regular Wages |
10 |
120 |
30 |
10 |
300 |
61.2 |
|
Regular Wages |
50 |
053 |
10 |
10 |
100 |
20.4 |
|
Overtime Wages |
50 |
053 |
6 |
15 |
90 |
18.4 |
The employer and employee each contribute a rate of 6.2 percent of the employee's gross pay to the pension fund. In this example, the elements in the distribution group constitute the gross pay. The total for the elements in the distribution group is 490 USD. The employee and employer each pay 6.2 percent of the gross pay, or 30.38 USD. The employer's share is distributed over the elements in the distribution group.
This table shows the percentage of the distributed element allocated to each department based on the amount each element contributes to the total for the distribution group.
|
Distributed Element |
Element in the Distribution Group |
Division |
Department |
Percent Allocated Based on the Amount the Element Contributes to the Total of the Distribution Group |
Distributed Amount (USD) |
|---|---|---|---|---|---|
|
Employer Pension Tax |
Regular Wages |
10 |
120 |
61.2 |
18.60 |
|
Employer Pension Tax |
Regular Wages |
50 |
053 |
20.4 |
11.78 |
|
Employer Pension Tax |
Overtime Wages |
50 |
053 |
18.4 |
5.59 |
This table shows the costing entries calculated for the distributed element.
|
Costing Entries |
Distributed element |
Input Value |
Distributed Input Value |
Account Name |
Division Department Account |
Debit (USD) |
Credit (USD) |
|---|---|---|---|---|---|---|---|
|
Regular Wages |
Pay Value |
Regular Wages |
10.120.5110 |
300 |
|||
|
Offset |
Wages Payable |
00.000.2100 |
300 |
||||
|
Regular Wages |
Pay Value |
Regular Wages |
50.053.5110 |
100 |
|||
|
Offset |
Wages Payable |
00.000.2100 |
100 |
||||
|
Overtime Wages |
Pay Value |
Overtime |
50.053.5130 |
90 |
|||
|
Offset |
Wages Payable |
00.000.2100 |
90 |
||||
|
Employer Pension Tax |
Employer Pension Tax |
Liability Amount |
Employer Pension Tax |
10.120.5220 |
18.60 |
||
|
Offset |
Employer Pension Payable |
00.000.2152 |
18.60 |
||||
|
Employer Pension Tax |
Employer Pension Tax |
Liability Amount |
Employer Pension Tax |
50.053.5220 |
11.78 |
||
|
Offset |
Employer Pension Payable |
00.000.2152 |
|
11.78 |
|||
|
Employee Pension Tax |
Liability Amount |
Employee Pension Payable |
00.0000.2000 |
|
30.38 |
||
|
Offset |
Wages Payable |
00.000.2100 |
30.38 |
|
Use object groups to define subsets of objects used for processing or reporting.
There are four types of object groups:
Element
Payroll Relationship
Work Relationship
Deduction Card
Element groups limit the elements processed for payroll, reporting, or cost distribution purposes.
There are two usages for an element group:
Run group
Specifies the elements to use in a process.
Distribution group
Defines the grouping of elements to distribute element costing results.
All element groups are static. You select the element classifications to add and then include or exclude additional elements from the group. Or you can select specific elements to include without using element classifications.
Payroll relationship groups limit the persons processed for payroll, data entry, and reporting. When defining the group specify the payroll definition which retrieves the payroll relationships assigned to it. Every group is limited to the payroll relationships assigned to a single payroll that you select. You can further define the group statically or dynamically.
If you define the group statically, select the payroll relationships, terms, and assignments to include or exclude in the group.
If you define the group dynamically, use a fast formula of type Payroll Relationship Group to determine the criteria that determines the payroll relationships, terms, and assignments to include in the group. Then you can individually select additional payroll relationships, terms, and assignments to include in or exclude from the group.
Work relationship groups limit the persons processed for human resources and reporting. For example, you can use work relationship groups in custom extracts. If you define the group statically, select the work relationships, terms, and assignments to include or exclude in the group. If you define the group dynamically, use a fast formula of type Work Relationship Group to determine the criteria that determines the work relationships, terms, and assignments to include in the group. Then you can individually select additional work relationships, terms, and assignments to include in or exclude from the group.
Deduction card groups are read-only. They are automatically created when deductions cards are created. For example, in the UK, they are used for year-end processing.
A payroll flow pattern consists of a sequence of tasks, which represent the tasks you complete in each phase of the payroll cycle. You can use the predefined flow patterns or create new ones for tasks you normally perform during a payroll period.
When you create a flow pattern, you can:
Include predefined tasks
Rename tasks and reorder the task sequence
Specify flow parameters that a person enters when submitting a flow
Specify optional information, such as duration dates, notifications, task and flow ownership
The task pane of the payroll work areas include a task to submit a flow pattern. Submitting a flow pattern generates a payroll flow, which you can monitor from the Payroll Dashboard, and with a payroll checklist that lists the tasks on a single page, so that you can easily monitor, perform, and reassign the tasks to someone else.
Predefined tasks are the building blocks of flow patterns. Predefined tasks are associated to an activity, which corresponds to a phase of the payroll cycle, and optionally to a task group within the activity.
All payroll flow patterns begin with a start task and conclude with an end task. Flow patterns can include:
A single task
The predefined tasks that form the building blocks of composite flows consist of single tasks that you can submit as standalone flows. You submit report and process single task flows using the Submit Report or Process Flow task in the navigation tree from the Payroll Checklist work area or the work area that corresponds to the task's activity.
Multiple tasks ordered in a sequence that corresponds to a phase of a typical payroll activity, such as the tasks involved in hiring someone or the tasks involved in paying people after running the payroll.
You submit flow patterns consisting of multiple tasks using the Submit Payroll Flow task in the navigation tree from the Payroll Checklist work area or the work area that corresponds to the activities for tasks included in the flow.
This figure shows a payroll flow pattern for a single task.

This figure shows a payroll flow pattern of several tasks.

Each payroll task has subordinate task actions. Task actions are based on the work the task performs and how it does this work within the application. They describe how the task is executed, such as submit, roll back, mark for retry, retry, and view. Each task action includes task parameters that control how the application processes a task and how the task relates to other tasks in the flow pattern. When you create a flow pattern, you can review the predefined task-action parameters and edit them, for example, to specify a different lookup value set.
This figure shows the relationship of a task to its subordinate task actions and their parameters.

You can rename tasks on the Tasks Sequence page and add descriptions to tasks to more clearly identify their use. For example, if you have a payments flow pattern that includes two payment processes, you might add a manual task after each payment task, rename these tasks and add descriptions to reflect the type of payment and validation to perform.
The sequence in which you initially select the tasks for your flow pattern on the Basic Information page determines the order in which you view the tasks on the Task Sequence page. You can rearrange the order on the Task Sequence page, as well as remove and add tasks. For example, you might remove a report task from the Calculations activity and add it to the Statutory activity.
When you create a flow pattern, you specify flow parameters, the subset of input task parameters that a person submitting the flow enters and that the application uses to derive values needed to successfully complete the tasks included in the flow pattern.
You can specify optional information for a flow pattern, including when a task starts or is due, and which types of notifications to send the task owner, such as overdue reminders, and error and warning messages.
You can restrict who can perform the tasks in it by designating owners for specific tasks. After you create a flow pattern, you can control access to it by creating a security profile and associating it to the appropriate data roles.
The payroll flow pattern parameters capture the information necessary to complete the tasks in the flow pattern. Tasks parameters determine how the application processes a task, and how the task relates to other tasks in the flow pattern. Flow parameters consist of a subset of the input task parameters that the person submitting the flow enters and that the application uses to derive values when processing the tasks in the flow pattern.
You can review and update the task and flow parameters for the flow patterns you create.
The following figure shows how the flow parameters are a subset of task-action parameters required to generate the entire payroll flow and complete the tasks successfully.
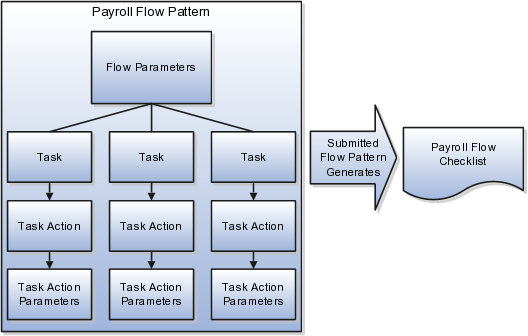
When you create a flow pattern, you review and update the parameters for the submission and initialization task actions. After you submit the flow pattern, you can edit the other task-action parameters, such as those for Mark for Retry, Retry, and Roll Back. The parameter details you can update include:
Display and Display Format
Lookups and Value Sets
Usage
Sequence
Parameter Basis and Basis Value
Display parameters determine whether someone can view and enter parameters and the format for displaying them.
The Display option controls whether the person submitting a standalone task flow can enter the parameter, add it as a search criteria to a work area Overview page, or view it in the Parameters region of the payroll flow.
The Display Format option identifies the type of data displayed, such as a date or text, or choice list. The Display Format works in conjunction with other parameters such as the Parameter Basis and Basis Value, and the Lookup and Value Set details. For example, the Request parameter is not displayed because the application obtains it from the context.
Use lookups and value sets to control and validate the data used in the payroll flow pattern. Specify lookups for parameters and value sets for descriptive flexfields.
The following table describes the type of methods used for lookups.
|
Method |
Parameter Basis |
|---|---|
|
Person submitting the flow enters the lookup value from a smart list or choice list |
Bind to Flow Parameter |
|
Application derives the value from existing tables, such as the value for the payroll statutory unit |
Bind to Flow Task Parameter or Bind to Context |
|
Application obtains the value based on a Post SQL process, such as a consolidation group |
Post SQL |
If you create value sets for descriptive flexfields to validate the values someone can enter for the parameter, you can specify that value set.
A parameter can receive information (input) or generate information (output) that subsequent tasks can use as input. For example, the Calculate Payroll Submit task action includes a Payroll Process parameter that generates an output value for the payroll action ID which is used as an input for the Calculate Payroll Retry task action.
Parameters that use the output of other tasks are not usually displayed in the UI. If the parameter is an output parameter, then the type of binding is Bind to Flow or null. If the binding is:
Bind to Flow, the default value is picked up from the flow parameter and the output value is updated in the flow parameters table which is consumed as the flow's output. The parameter is not shown in the flow submission.
Null, the value is the result of a task's output
You can control the order in which the application processes and displays the parameters by specifying the sequence. Sequence numbers provide the application with the default logic to derive the parameter order in which to process the parameters. For example, if you have two lookups and the values of the second lookup depends on the value selected for the first lookup, the first lookup would have a lower sequence number than the second lookup. For example, in the Calculate Payroll task, the lookup for the Payroll parameter would have a lower sequence number than the lookup for the Payroll Period parameter, so that the values for the Payroll Period list the payroll periods defined for the selected payroll.
The Parameter Basis tells the application how to derive the value for the parameter and the Basis Value further specifies the value the application should use for the parameter.
The following table lists the Parameter Basis options and gives examples of when you might select them.
|
Parameter Basis |
Description |
Basis Value |
Example |
|---|---|---|---|
|
Use Specified Value |
Assigns a specific value to the parameter. |
Value is entered or selected by user. |
Use a constant if the value is the same for all tasks. For example, if you have only one payroll statutory unit, select Use Specified Value as the basis for the payroll statutory unit parameter and enter the text for the payroll statutory unit as the Basis Value. |
|
Bind to Context |
Derives the value from the context of the current flow instance or the task instance of the flow pattern. Context information available on the Overview page of the work area depends on whether the Bind to Context is based on the payroll task or payroll flow. The Add fields are derived based on the parameters for the tasks relevant to the work area. |
Value is based on the payroll flow, payroll task, or the Request. The application automatically generates the value. |
Bind the Request parameter to the payroll flow context so that other tasks in the flow can reference the task, based on the Request ID which the application generates when the task is submitted. Bind the legislative data group parameter to a task parameter that supplies the legislative data group. For example, the legislative data group for prepayments uses the payroll as context, because the payroll definition includes the legislative data group. |
|
Bind to Flow Parameter |
Derives the value from one of the flow parameter values. |
Value is selected from the flow parameters. |
Bind parameters to the flow that several tasks share to avoid multiple occurrences of the same parameter. |
|
Bind to Flow Task Parameter |
Binds the value to the output of the previous task. |
Value is selected from the previous task's parameters. |
Bind a parameter to a task, such as Retry corrective action, so that when the flow owner resubmits the task to retry it, the application uses the output of the Submit task parameter. |
|
Bind to Task Parameter |
Resolves the value for the task parameter. |
Value is selected from the current task's parameters. |
If several tasks share a parameter, such as a start date, but one task requires a different date, bind the parameter to the task. |
|
Null |
Stops the application from generating a parameter value when the task executes. |
Parameter generated by the application is blank. |
|
|
Post SQL Bind |
Calculates the parameter but does not display it on the user interface. |
SQL statement |
Use Post SQL bind to generate data. For example, if the process date is not displayed as a flow parameter, the person submitting the flow does not enter it. Use a post SQL process to generate the process date from the payroll period and payroll parameters. Predefined tasks such as Costing of Payments and Gross-to-Net reports determine the Basis Value for the Consolidation Group using Post SQL bind. |
|
SQL Bind |
Before the parameter is rendered the value is calculated and displayed on the user interface. |
SQL statement |
Use SQL bind, for example, to have the application calculate the payment type parameter for the Generate Check Payment task by obtaining the payment type ID that corresponds to the record queried for that check payment. Another example of the SQL bind is to prompt the task owner to enter a reason for a corrective action, such as a QuickPay. |
You can specify the start and due date for any task in the flow pattern by selecting a duration date and further adjust the start or due date by entering an offset. The application then uses the resulting dates as a basis for sending notifications, such as overdue reminders. The list of values for the duration dates consists of the dates specified as flow level parameters, such as process date or date earned.
By specifying duration dates and notifications, you can ensure that task owners have adequate time to prepare material before the task starts or to address issues that arise before the task is due. Notifications with details about the task are sent by e-mail or to the worklist and are also displayed in the Payroll Dashboard.
When a person submits a payroll flow, the payroll flow task begins after the completion of the previous task unless you schedule the task by entering a start date. The due date sets the date by which the task owner should complete the task.
You can control the start or due date by specifying:
The flow parameter date to use as the basis for the duration date
If you schedule a start date when the previous task concludes successfully, if the next task is an automatic task, the application waits to begin the task until the start date is reached. If the next task is a manual task, the task owner can wait or begin the task ahead of its scheduled start date.
An offset to indicate the number of days from the flow parameter date that the duration date should occur
You can specify a plus or minus value depending on whether you want the date to fall before or after the duration date.
Select notifications to have the application send error and warning messages to the task owner, as well as notifications that a task has started or ended or is overdue.
The receipt of notifications about the start date or due date depends on the dates and their offsets. For example, if the process date is the date paid, you might specify an offset of 3 days in advance of the process date for the verification of the prepayment results to give the task owner adequate time to review the results and make any necessary corrections before generating the payments.
You can specify the amount of time before payroll flow notifications generated by the payroll flow expire. A Notification Expiration Offset parameter on the Manage Payroll Process Configuration page controls the number of days before a payroll flow notification is automatically deleted.
Most predefined process and report tasks support corrective task actions such as retrying or rolling back a task. Corrective payroll and payment tasks are usually submitted as separate flows. For example, the Cancel Payment flow pattern includes tasks to view the person process results, void the payment, process an external payment to prevent reissue of the original payment, and reverse the original payroll run calculations to negate the run results.
Before adding a corrective task to your flow pattern, consider whether people working with a flow based on your pattern will correct errors by:
Selecting task actions from the Actions menu at the task level or individual record level
Submitting a flow pattern that combines corrective tasks
You do not need to incorporate task actions for payroll and payment corrective tasks in your flow pattern, such as marking for retry, retrying, reversing, or rolling back processes and report results. Most tasks support these task actions at the task level or individual record level. The type of task and the status of the task and resulting records determine which actions you can select from the Actions menu on the View Person Process Results page or from the Payroll Checklist or Processes and Reports tab of the payroll flow.
The following figure shows the task actions such as Mark for Retry, Retry, and Roll Back that you can choose as task actions from the Actions menu when working on the Payroll Flow Checklist or the Processes and Reports tab of the payroll flow.
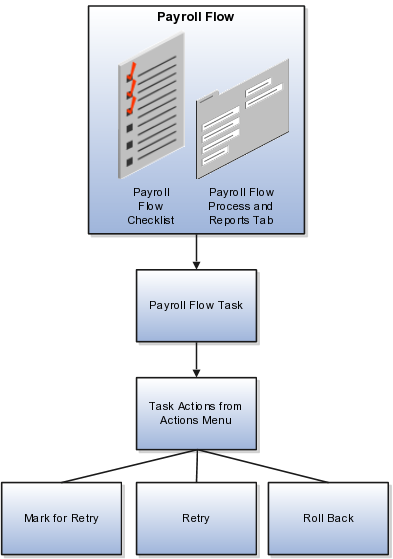
If you have sequential tasks you perform to correct a problem, you can create a flow pattern that consists of those tasks. For example, a flow pattern to reissue a lost check might include tasks to void the payment, issue an external payment, and view the person process results.
The payroll flow pattern determines the sequence of payroll flow tasks executed in a payroll flow. Submitting a payroll flow generates a payroll flow checklist.
You can manage a payroll flow by working in:
The Payroll Checklist work area
Other payroll work areas for the specific activity phase
The payroll flow checklist contains the payroll flow tasks required to complete each activity phase of the payroll: preparation, calculation, payment distribution, accounting, and regulatory reporting.
A payroll flow task by default is associated to an activity, but it can recur in the same activity. For example, a payment distribution flow pattern might include a verification task after each type of payment, such as EFT payment and check payment.
The payroll flow checklist shows you the progression of the individual tasks that comprise the payroll flow. You can use the checklist to monitor the status of the payroll flow tasks and to manage the tasks. The checklist owner or flow task owner manages the flow tasks, for example, by reassigning tasks, revising due dates, marking tasks as complete, and performing actions the task supports, such as roll back and retry.
From the payroll checklist, you can navigate directly to the payroll flow task details. For example, you can navigate from the payroll calculation task directly to the Person Process Results page to view a list of workers processed in the payroll run.
While working with payroll flows, you can remain in the Payroll Checklist work area or navigate to the other payroll work areas to work on payroll flow tasks and access related payroll tasks.
The activities in the payroll flow checklist correspond to the individual payroll work areas. Each payroll work area includes additional tasks to manage the information processed for that phase of the payroll. For example, the Accounting Distribution work area includes tasks to view journal entries and revise cost allocations, and the Payroll Calculation work area includes tasks to manage payroll relationship information.
This example demonstrates how to create a payroll flow pattern to issue a replacement check that an employee lost or did not receive.
The following table summarizes the key decisions for this scenario.
|
Decision to Consider |
In This Example |
|---|---|
|
What activities do you want to include in the flow pattern? |
Calculation and Payment activities |
|
What tasks do you want to include in the flow pattern and in what sequence? |
Verify a Payment, Void Payment, Generate Check Payment |
|
Do you want to assign an owner to the flow? |
InFusion Payroll Manager |
|
Do you want the flow owner to receive notifications? |
Error and Warning notifications |
|
Do you want to override the task or flow parameters? |
Process Configuration Group parameter for the Void Payment task |
|
Region |
Field |
Value |
|---|---|---|
|
Basic Information |
Flow Pattern |
InFusion Reissue Check |
|
Activities |
Activities to Include |
Payment |
|
Tasks |
Available Tasks |
Void Payment, Generate Check Payments, Verify a Payment |
You can select multiple parameters from the Select and Add window.
|
Field |
Value |
|---|---|
|
Void Payment |
Start Check Number, End Check Number, Process Configuration Group, Process Date, Payroll Process, Reason Note With the exception of the Reason parameter, these task parameters are used by the Generate Check Payment task. Add them only once as flow parameters to cover both tasks. |
|
Generate Check Payment |
Payroll, Start Date, Consolidation Group, Organization Payment Method, Overriding Payment Date, Payment Source, Payment Type |
|
Field |
Action |
|---|---|
|
Display |
No |
|
Display Format |
Text |
|
Lookups |
blank |
|
Parameter Basis |
Use Specified Value |
|
Basis Value |
InFusion Process Configuration Group |
You do not need to edit the Process Configuration task parameter. The application uses the details specified for the flow parameter, not the details specified for the task parameter.
The activities of a payroll cycle include predefined tasks that you can include or exclude to correspond to the way in which your enterprise typically processes payroll. When you create a payroll flow pattern or edit it later, you can revise the initial list of tasks. You can add and delete tasks, move them to a different activity, rename them, and edit their descriptions.
You can edit flow patterns you create, but not predefined flow patterns. While editing flow patterns, it is helpful to keep in mind the following points when you add, delete, or move a task.
Add a task
Adding a new task automatically places it at the end of the sequence of tasks for that task group or activity. Update the task sequence so that this task occurs in the order in which you want it processed.
Repeat a task used previously
When you repeat a task, the task name is the same. Rename it to more easily understand its purpose in the payroll checklist. For example, if different managers review report results, you might repeat a verification task and rename them to identify the type of report results the manager will review.
Delete a task
Deleting a task may impact tasks that depend on the results of the deleted task. Review the subsequent tasks to ensure, for example, that a task parameter is not Bind to Task with the deleted task specified as its Value.
Move a task to a different activity
The activity determines the availability of the flow from a work area. For example, if you move a reporting task from the Payments activity to the Statutory activity, the person working with the payroll flow can view the report results from the Checklist or Regulatory and Tax Reporting work area, but not the Payments work area.
Use these scenarios to understand the types of updates you might make to a flow pattern.
The payrolls you run use a single Process Configuration Group. On the Parameter tab for the Calculate Payroll task, you can update the flow parameters to specify the name of that configuration group so that the person submitting the payroll flow does not have to complete that information but relies on the application to supply the value.
The following table lists the values to enter for the task parameter details for the Calculate Payroll task to enter a constant for the Process Configuration Group.
|
Parameter Detail |
Value |
|---|---|
|
Display |
No |
|
Display Format |
Text |
|
Lookup |
blank |
|
Usage |
Input Parameter |
|
Parameter Basis |
Use Specified Value |
|
Basis Value |
Name of the Process Configuration Group |
You have decided to add the Reason parameter to one of your tasks to better track why managers submit standalone tasks during a payroll cycle.
The following table lists the values to enter for the task parameter details for the Calculate QuickPay task to enter a reason for processing the task.
|
Parameter Detail |
Value |
|---|---|
|
Display |
Yes |
|
Display Format |
Text |
|
Lookup |
blank |
|
Usage |
Input Parameter |
|
Parameter Basis |
Bind to Flow Parameter |
|
Basis Value |
Reason |
After completing the task parameter information, you would add the Reason parameter as a flow parameter, so that the user completes the Reason when submitting the flow.
Your flow pattern includes payroll calculation reports. You decide that you need to run specific reports such as Gross-to-Net report before other reports such as the Element Register report and to validate the results of each report before the application runs the next report. You can rearrange the sequence of reporting tasks, add a manual verification task after each report, and rename the manual tasks to more clearly identify them, such as Verify Gross-to-Net Report and Verify Element Register Report.
This example demonstrates how to edit a QuickPay flow pattern that you have created so that a person whose role carries a specific level of authority reviews the prepayment results before the flow owner generates the payment.
The following table summarizes the key decisions for this scenario.
|
Decisions to Consider |
In this Example |
|---|---|
|
Which role should own the Verify Prepayments Result task? |
Payroll Manager Operations |
|
When does the task become overdue? |
One day before the process date |
|
Field |
Value |
|---|---|
|
Due Date |
Process Date |
|
Offset |
-1 |
|
Field |
Value |
|---|---|
|
Flow Task Start Notification |
Yes |
|
Overdue Notification |
Yes |
You cannot edit predefined single or composite flow patterns, but you can edit payroll flow patterns that you create. For example, if all your payrolls reference the same legislative data group, you could edit the legislative data group flow parameter for your payroll cycle flow, and select the Parameter Basis as Use Specified Value, the Display Format as text, and then enter the name of the legislative data group for the Basis Value.
No, you must specify the flow parameters required to successfully complete the task. You can also include optional parameters that the person submitting the flow enters, or that the application can derive from the information entered for the required parameters.
Edit the task sequence by selecting a different task in the Following Task column. Every payroll flow pattern begins with a Start Flow task, which does not belong to an Activity or Task Group. The payroll flow concludes with the End Flow task, which is listed for the last task in the Following Tasks column.
The sequence in which you select the tasks for a flow pattern on the Create Flow Pattern: Basic Information page determines the order of the tasks displayed on the Task Sequence page. Edit this task list on the Task Sequence page by selecting a different following task for the task you want to reposition. Confirm the order of the tasks on the Review page before submitting the flow pattern.
The person who submits the payroll flow becomes the payroll flow owner and the task owner. The person's security privileges determine whether the person can submit the payroll flow.
Enter a destination URL for a task when the task type is the application interface, such as the batch loader, or user interface, such as a page in the user interface where the task owner views process and report results.
The payroll flow pattern duration dates for the start and due dates are based on the flow parameter dates. Enter the flow parameters and then navigate back to the Tasks page to enter the duration dates and the offsets for those dates.
If your flow pattern does not specify dates as flow parameters, the duration list of values is blank.
Payroll process configuration groups provide sets of payroll action parameters, primarily related to logging and performance, for your processes and reports. When you run a process, you can select a process configuration group. If you do not select a process configuration group, the application uses the parameters in the default group.
You must specify the default group in the Process Configuration Group ACTION_PARAMETER_GROUPS profile option. You can set the profile option in the Setup and Maintenance work area using the Manage Default Process Configuration Group Profile Option Values task or the Manage Administrator Profile Values task.
Note
Entering a value for this profile option is a required step. The value of the Payroll License parameter in the process configuration group selected in the profile option determines the element templates used in the Manage Elements task and whether deduction cards are created automatically for new employees when you hire them.
A default process configuration group is predefined. You can edit the predefined group on the Default Group tab of the Manage Payroll Process Configuration page. You can select this group or another one as the default for your sites using the Process Configuration Group ACTION_PARAMETER_GROUPS profile option.
You can also create as many additional groups as you require on the Group Overrides tab on the Manage Process Configuration Group page. For example, you might want to create a group with the logging parameters turned on to troubleshoot processes. You can also specify different performance parameter values (such as chunk size and buffer size) for running different processes.
Payroll action parameters are system-level parameters that control aspects of the payroll batch processes. The effects of setting values for specific parameters may be system wide. Payroll batch processes read values from the PAY_ACTION_PARAMETERS table on startup, or provide appropriate values by default, if specific parameter values are not specified.
For some parameters you should understand the concept of array processing and how this affects performance. Values for each parameter are predefined with the system, but you can override these values as part of your initial implementation and for performance tuning. Use the Manage Payroll Process Configuration task in the Setup and Maintenance work area.
The following table describes action parameters and lists values and predefined default values:
|
Parameter |
Description |
Values |
Default Value |
|---|---|---|---|
|
Balance Buffer Size |
Used for array inserts and updates of latest balances, based on one row per balance. |
Maximum: 1000. Minimum: 1. Note If your trace files show differences between execute and fetch timings, look at the buffer sizes you are using. Try setting each of these to 100. |
500 |
|
Shuffle Chunk Processing |
Random processing of order chunks for assignment actions. |
Yes, No |
No |
|
Chunk Size |
Number of payroll relationship actions processed together. |
Maximum: 16000. Minimum: 1. |
20 |
|
Cost Buffer Size |
Used for array insert and select statements when calculating the costing of the payroll run results. |
Maximum: 1000. Minimum: 1. |
500 |
|
Element Entry Buffer Size |
Buffer size used in the initial array selects of element entries, element entry values, run results, and run result values per assignment. |
Maximum: 1000. Minimum: 1. |
500 |
|
Formula Execution Logging |
Code area where logging is performed. |
The action parameter mechanism is only available for formula logging in the Payroll run. It is possible to perform logging with a combinations of characters. For example, the 'di' string corresponds to the logging of database item cache access and formula input and output values. Note The dump logging options should only be used in rare circumstances, especially the T trace option, which generates very large amounts of data that would significantly slow down processing. d = database item cache access D = database item cache dump f = formula cache access F = formula cache dump i = formula input/output values w = working storage area access W = working storage area dump n = nested calls c = change contexts s = SQL execution (database item and PLSQL formula function calls) m = miscellaneous T = trace (very large level that provides the inputs and outputs of every call made when executing a formula) 1 = level 1 (combination of i, m, f, and C) 2 = level 2 (combination of 1, d, w, c, and n) 3 = level 3 (combination of 2, D, W, and s) 4 = level 4 (combination of 3 and F) 5 = level 5 (combination of 4 and T) |
No logging. |
|
Logging Area |
Area where code logging can be performed. |
The values correspond to c-code entries in the form PY_ENTRY (env, pyipppr); where pyipppr is the functional area that will have logging enabled. |
Note If this isn't set, logging is not limited to a particular code area if logging is enabled by the Logging Category pay action parameter. |
|
Assignment ID to End Logging |
Assignment ID that ends logging. |
|
All assignments |
|
Assignment ID to Start Logging |
Assignment ID that starts logging. |
|
All assignments |
|
Logging Category |
Helps investigates problems with large volumes of detailed data. |
GMPE or blank for no logging. You can specify multiple values. |
No logging. |
|
Maximum Number of Payroll Relationship Actions to Roll Back |
Number of payroll relationship actions that can be rolled back, when rolling back a process. |
Minimum: 1 |
50 |
|
Maximum Errors Allowed |
Number of payroll relationship actions that can be rolled back, when rolling back a process. |
Minimum: 0 |
CHUNK_SIZE or 20 |
|
Maximum Iterations Allowed per Run Action |
Maximum number of iterations allowed per run action within Net to Gross calculations within the Payroll Run. |
Minimum: 0 |
15 |
|
Notifications Expiration Offset |
Number of days before a payroll flow notification is automatically deleted. |
|
|
|
Payroll License |
Provides features, such as element templates, appropriate to selected product license. |
PAYROLL, HR_ONLY , and PAYROLL_INTERFACE. |
HR_ONLY |
|
Process Timeout |
Number of minutes before the Run Balance Generation process times out. |
Minimum: 0 |
If not specified, no timeout limit is enforced. |
|
Remove Report Assignment Actions |
Removes report processing actions after reports are generated. |
Yes, No |
Yes |
|
Run Result Buffer Size |
Used for array inserts and updates, based on 1 row for each payroll run result. |
Maximum: 1000. Minimum: 1. |
500 |
|
Override Location for Tax Libraries |
Directory location for Quantum tax libraries. |
There are no set values. Values for this parameter would be directory structures on the client site. |
$VERTEX_TOP/lib |
|
Accounting Date for Transfer to General Ledger |
Date earned or date paid, used to transfer and post journal entries for costing results to Oracle Fusion General Ledger. |
E = date earned P = date paid |
P |
|
Reversal and Balance Adjustment Accounting Date |
Accounting date based on the process date of reversal or balance adjustment or the process end date of the Transfer to Subledger Accounting task, which is used to transfer journal entries for costing results to Oracle Fusion General Ledger. |
T = transfer using end date of the Transfer to Subledger Accounting task as the accounting date P = use process date of the reversal or balance adjustment as the accounting date |
P |
|
Threads |
Total number of subprocesses that can run from the Oracle Enterprise Scheduler Service. |
Minimum: 1. |
1 |
|
Wage Basis Rules Buffer Size |
Used in array selects from the PAY_ TAXABILITY_RULES table within the Payroll Calculation process. |
Minimum: 100 |
500 |
|
Trace |
Enables the database trace facility for application processes written in C only. |
Yes, No |
No |
|
Trace Level |
Sets the trace level of the trace event. To generate the finest level of detail, enter the highest value. |
1, 4, 8, 12 |
None |
|
User Messaging |
Enables detailed logging of user-readable information to the PAY_MESSAGE_LINES table. |
Yes, No |
No |
Parallel Processing Parameters
THREADS
Oracle Fusion Global Payroll is designed to take advantage of multiprocessor machines. This means that you can improve performance of your batch processes by splitting the processing into a number of threads, or subprocesses, which run in parallel.
Note
Using threads and subprocesses may also improve performance if you are using PAYROLL_INTERFACE.
When you submit a batch process, the THREADS parameter determines the total number of subprocesses that run concurrently. The process submits THREADS minus 1 subprocesses.
Set this parameter to the value that provides optimal performance on your server. The default value of 1 is set for a single-processor machine. Benchmark tests on multiprocessor machines show that the optimal value is approximately 2 processes per processor. So, for example, if the server has 6 processors, you should set the initial value to 12 and test the impact on performance of variations on this value.
CHUNK_SIZE
Size of each commit unit for the batch process. This parameter determines the number of assignment actions that are inserted during the initial phase of processing and the number of assignment actions that are processed at one time during the main processing phase. Parameter values range from 1 to 16,000. The default value is 20.
Note
This does not apply to all processes, such as Generate Check Payments and Retroactive Pay.
During the initial phase of processing, this parameter defines the array size for insert. Large chunk size values are not desirable and the default value has been set as a result of benchmark tests. Each thread processes one chunk at a time.
Logging Parameters
During implementation and testing, you may need to turn on logging to provide a large volume of detailed information that is useful for investigating problems.
Use this parameter only when you need to investigate problems that are not easily identified in other ways. The logging activities can impact the overall performance of the process you are logging. Usually, this feature is needed during your initial implementation and testing before you go live. In a normal operation you should disable detailed logging.
Note
If you need to contact Oracle Support for assistance in identifying or resolving problems in running your payroll processes, you should prepare your log file first. Define the logging category, area, and range of assignments before resubmitting the problem.
LOGGING
Logging categories define the type of information included in the log. You can set any number of these categories by specifying multiple values so you can focus attention on specific areas that you think may be causing a problem. Parameter values are one or more logging categories, as described below. The default value is No logging.
The following table explains each logging category:
|
Parameter Value |
Logging Category |
Description |
|---|---|---|
|
B |
Balance Information. |
Provides output information that shows the creation and maintenance of balances used during payroll processing. |
|
C |
C cache structures information. |
Provides output information that shows details of the payroll cache structures and changes to the entries within the structure. While working on a service request, Oracle may ask you to use this parameter to gather additional information. |
|
E |
Element entry information. |
Provides output information that shows the state of the element entries in the process memory after the entries have been retrieved from the database. The information is provided whenever data for an entry is changed during processing. |
|
F |
Formula information. |
Provides output information that shows details of formula execution, including formula contexts, inputs, and outputs. |
|
G |
General logging information. |
Provides general information, rather than a specific information type. This parameter does not provide sorted output. In general, it is recommended that you choose parameters that provide specific types of information. |
|
I |
Balance output information. |
Provides output information that shows details of values written to the database from the balance buffers. |
|
L |
Balance fetching information. |
Provides output information that shows the balances retrieved from the database and whether or not the process will use those balances. (If balances such as Year To Date totals have expired because the year has changed, the process resets them and uses the new balance.) |
|
M |
Entry or exit routing information. |
Provides output information to show when any function is entered and exited. The system may display messages such as In: pyippee and Out: pyippee. This information is indented to show the call level, and can be used to trace the path taken through the code at the function call level. Often, this information is useful when attempting to track down a problem such as a core dump. |
|
P |
Performance information |
Provides output information to show the number of times certain operations take place at the assignment and run levels and why the operation took place. This parameter is often used to balance the buffer array write operation. |
|
Q |
C cache query information. |
Provides output information that shows the queries being performed on the payroll cache structures. While working on a service request, Oracle may ask you to use this parameter to gather additional information. |
|
R |
Run results information. |
Provides output information that shows details of run results and run result values just as they are about to be written to the database from the Run Results buffer or the Values buffer. This enables verification that the buffer contents were correct. |
|
S |
C cache ending status information. |
Provides output information that shows the state of the payroll cache before the process exits, whether that process ends with success or an error. While working on a service request, Oracle may ask you to use this parameter to gather additional information. |
|
T and Z |
PL/SQL detail and PL/SQL output. |
To obtain detailed information about the PL/SQL calls made by the Payroll application, use the combination of the T parameter and the Z parameter. This combination is typically useful for obtaining information about payroll processes that use a large amount of PL/SQL code, such as prepayments and archive. The output from using these parameters is buffered while the process is running and is placed at the end of the log file after processing is complete. Each payroll process instance has its own log file, located under the log subdirectory for the particular process ID. |
|
V (USA and Canada only) |
Vertex tax calculation information. |
Provides output information that shows the values being passed in and out of a third-party Vertex tax engine. This parameter also provides a separate file in the Out directory that shows the internal settings of the Vertex engine. This logging option is available to customers in the USA and Canada only. |
The Payroll License parameter on the Manage Payroll Process Configuration page has three allowable values that determine how payroll-related features function within Oracle Fusion Applications. You must ensure that the value for the Payroll License parameter in your default configuration group is appropriate for your licensing agreement.
The three allowable values for the Payroll License parameter for the following product licenses are:
Oracle Fusion Global Payroll: PAYROLL
Oracle Fusion Global Payroll Interface: PAYROLL_INTERFACE
Other HCM Products: HR_ONLY
Global Payroll customers must set the Payroll License parameter to PAYROLL to ensure the complete set of payroll-related element templates is available when creating elements. These element templates assist in element creation and automatically create and generate fast formulas for new elements. Elements created without this set of element templates will not be suitable for costing or payment processing in Global Payroll.
The PAYROLL license setting also prevents any organization payment methods without a payment source from being associated when creating payroll definitions, which reduces potential problems during payment processing. For some localizations, the PAYROLL license setting enables deduction cards to be automatically generated as part of the new-hire process.
Global Payroll Interface customers must set the Payroll License parameter to PAYROLL_INTERFACE to ensure the correct set of element templates is available. Earnings elements created without this license setting will not automatically generate the associated features, such as the formulas and balances required when calculating gross earnings for employees.
Customers of other HCM products must set the Payroll License parameter to HR_ONLY to ensure the correct set of element templates is available. These element templates are simplified to facilitate creating elements to capture just the required information. Elements created without this license setting will include formulas and balances, which are required for payroll purposes but are unnecessary for HR purposes.
Add parameters to a payroll process configuration group to optimize performance and troubleshoot your payroll processes. To process large volumes of records, use the Threads and Chunk Size parameters. To troubleshoot processes, add the Logging Category or Formula Execution Logging parameters to a configuration group and rerun the process using that configuration group. Using these parameters enables you to investigate formula code problems.