This topic describes how to configure the Add/Update Records connector for data ingest.
This procedure assumes that you have created a graph and added the Add/Update Records connector.
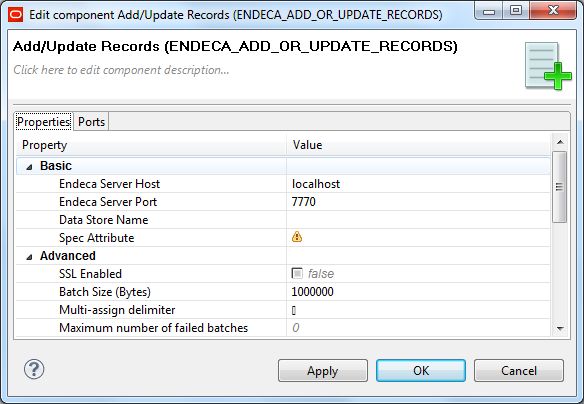
The Edit Component dialog is where you configure the Add/Update Records connector:
To configure the Add/Update Records connector:
- In the Graph window, double-click the Add/Update Records component. The Integrator Edit Component dialog is displayed.
-
In the Edit Component dialog, enter these mandatory settings in
the Basic section:
- Endeca Server Host: Enter the host name of the machine on which the Endeca Server is running.
- Endeca Server Port: Enter the port on which the Endeca Server is listening.
- Data Store Name: Enter the name of the Endeca data store into which the records will be added.
- Spec Attribute: Enter the name of the property that is the primary key (record spec) for the records.
-
Still in the Writer Edit Component dialog, you can make these
optional settings in the Advanced section:
- SSL Enabled: Toggle this field to true if the Endeca Server is SSL-enabled.
- Batch Size (Bytes): To change the default batch size (which is in bytes), enter a positive integer. Specifying 0 or a negative number will disable batching.
- Multi-assign delimiter: Specify the character that separates multi-assign values in an input property. Keep in mind that this delimiter is different from the delimiter that separates properties.
- Maximum number of failed batches: Enter a positive integer that sets the maximum number of batches that can fail before the ingest operation is ended. Entering 0 allows no failed batches.
- When you have input all your changes, click OK.
- Save the graph.
