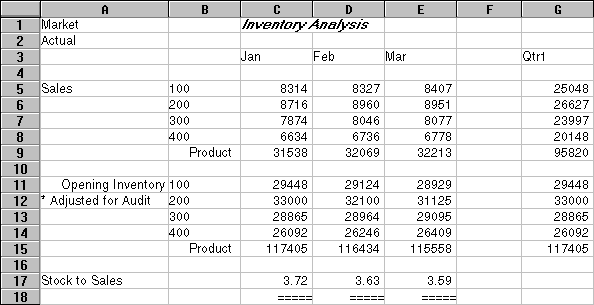
As part of the default Essbase installation, the Inv.xls sample file is provided which illustrates how to pivot data in a formatted worksheet. The sample file was saved with the Retain on Retrieval option disabled so that you can pivot on its worksheets.
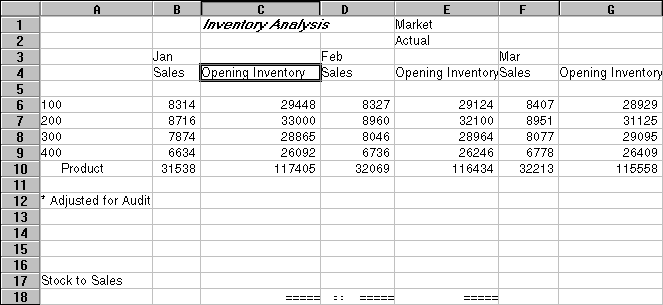
 To pivot data in the Inv.xls worksheet:
From EPM_ORACLE_HOME/products/Essbase/EssbaseClient/client/sample, open Inv.xls.
In Global, under Display Messages , clear Display Unknown Members to avoid seeing the Essbase messages when working with formatted worksheets, and then click OK.
Using the right-mouse button, drag Sales (in cell A5) to the cell nested below Jan (C4).
Essbase pivots the Sales member group so that it is nested below the monthly members. During the pivot, however, Essbase retains only database elements. For example, all data for Stock to Sales and Adjusted for Audit is deleted during the pivot.