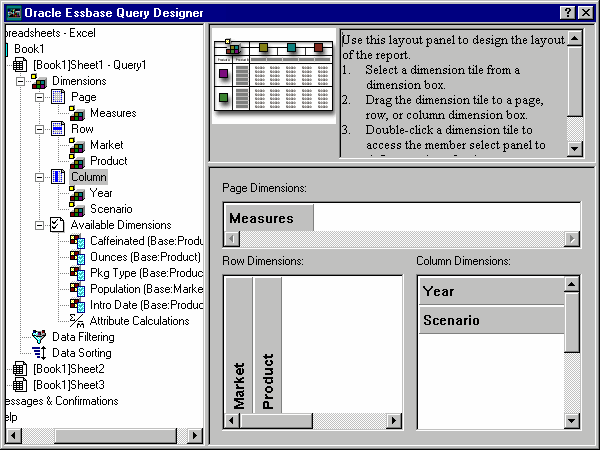
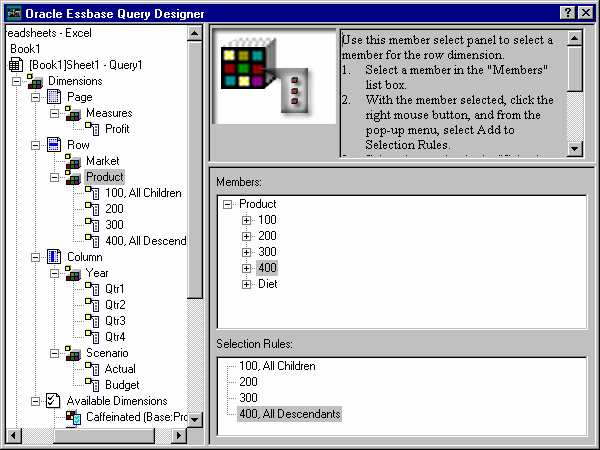
 To create a query using Query Designer:
In the navigation panel, select [Book1]Sheet1, right-click, and select New, and then Query.
Define the worksheet layout by dragging the dimension tiles in the properties panel as follows:
In the navigation panel, select the Measures dimension by selecting the Measures icon.
Alternatively, double-click the Measures tile in the layout panel.
The member select properties panel, where you can select a member from the Measures dimension, is displayed.
In Members, select Profit, right-click, and select Add to Selection Rules.
Select members of the Year dimension as follows:
In the navigation panel, click the Year icon.
The member select properties panel for the Year dimension is displayed.
In Members, select Qtr1, right-click, and select Add to Selection Rules.
Add Qtr2, Qtr3, and Qtr4 to the selection rules in the same manner.
Because Year is in a Column location, you can select one or more members.
Select members of the Product dimension as follows:
In the navigation panel, select Product. Alternatively, double-click the Product tile in the layout panel.
The members of the Product dimension are displayed in the member select properties panel.
Select product code 100, right-click, and select Add to Selection Rules.
In Selection Rules, select product code 100, right-click, and then, from the shortcut menu, choose Select, and then Children.
This action selects all children of 100. All Children is displayed next to 100 in the Selection Rules list box.
In Selection Rules, select product code 400, right-click, and choose Select, and then Descendants.
All Descendants is displayed next to 400 in the Selection Rules list box.
To view the list of all product codes to be retrieved into the worksheet, select an entry in Selection Rules (for example, 200), right-click, and select Preview.
The Member Selection Preview dialog box is displayed with the selected product dimensions listed.
Select members of the Market dimension:
In the navigation panel, select Market.
Alternatively, double-click the Market tile in the layout panel.
The members of the Market dimension are displayed in the member select properties panel.
In Members, select East, right-click, and select View by, and then Generation.
To pick the second generation of the Market dimension, in Member, select Region, right-click, and select Add to Selection Rules.
Alternatively, double-click Region to add it to the selection rules.
To view the list of members to be retrieved into the worksheet, in Selection Rules, select Region, right-click, and select Preview.
East, West, South, and Central, which are members of generation two in Market, are displayed in the Member Selection Preview dialog box.
You defined a basic query. The outline of the query is displayed in the navigation panel.


