Member selection is an important method of creating a spreadsheet report for the data to retrieve. The Essbase Member Selection dialog box enables you to find and select members and to define the layout of members in the worksheet. Boolean operators and other search parameters enable you to specify criteria and conditions that members must meet for member selection.
Make sure you are connected to the Sample Basic database. If you are not connected, follow the steps in Lesson: Connecting to a Database.
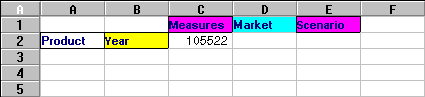
 To view members from the Product dimension:
To display Product as a row dimension, rather than as a column dimension, select Product, then Essbase, and then Pivot .
Select Product, then Essbase, and then Member Selection.
In the Essbase Member Selection dialog box, Product is displayed in the Dimension list, and its children are displayed in the Members list box.
Select Colas, and then click Member Information.
The Member Information dialog box provides information about the selected member, such as dimension, generation, level, storage setting, formula, UDAs, and member comments.
In Essbase Member Selection, click Add to add Colas to Rules.
Alternatively, you can double-click an item in the Members list box to add the item.
Select Product, and then click Find.
The Find Member dialog box is displayed.
In the Find Member dialog box, you can do pattern-match searches for members in the selected dimension. You can use wildcard patterns—trailing asterisk *, and single-character match, ?. Essbase locates the members that match the text string and groups them in outline order, so that they can be selected as a group.
Essbase selects the first descendent in the dimension whose name begins with the letter D.
The next member in the Product dimension whose name begins with the letter D is selected.
Continue to click Find Next until all members and descents of the Product dimension whose names begin with the letter D are selected.
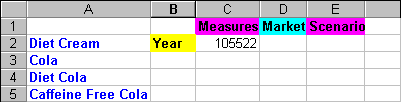
Click Diet Cream once to clear all other selected members and descendants, and then click Add.
In Essbase Member Selection, select Colas in Rules, right-click, and from the shortcut menu, select All Children and Member.
All Children and Member are displayed next to Colas in the Selection Rules list box.
In Selection Rules, select Colas, All Children and Member, and right-click.
From the shortcut menu, select Subset.
The Subset Dialog box, where you can further define conditions for the selected member, is displayed.
In Subset Dialog, from the list on the left, select Caffeinated. From the list in the middle, select Is. From the list on the right, select Caffeinated_True.
Caffeinated = Caffeinated_True is displayed in the Conditions list box.
When you use Add as AND Condition, the subsetting condition in the Conditions list box is evaluated using AND logic (the selection must meet the current condition and the condition that follows it).
From the list on the left, select Ounces. From the list in the middle, select the logical operator “=”. From the list on the right, select Ounces_12.
From the list on the left, select Ounces. From the list in the middle, select the logical operator “<=”. From the list on the right, select Ounces_32.
Ounces <= Ounces_32 is displayed in the Conditions box.
When you use Add as OR Condition, the subsetting condition in the Conditions list box is evaluated using OR logic (the selection must meet the current condition or the condition that follows it).
From the list on the left, select Pkg Type. From the list in the middle, select Is. From the list on the right, select Bottle.
In Conditions, select Ounces <= Ounces_32, and then click Add (.
Select Pkg Type = Bottle, and then click Add ).
The Add ( and Add ) buttons add a left parenthesis and right parenthesis, respectively, to selected items. Use parentheses for grouping multiple subsetting conditions to determine the order of priority for analyzing the conditions.
Each item in the Conditions list box can contain the left or right parenthesis, but not both. In this example, Essbase first evaluates members that are less than or equal to 32 ounces and are packaged in a bottle. Essbase evaluates the results from this condition against members that are 12 ounces.
Use the Remove ( ) button to remove an individual group of parentheses from a selected item in the Conditions list box. Use the Remove All ( ) button to remove all parenthetical groupings from the Conditions list box.
In the Member Preview dialog box, you can view the resulting member selection from the conditions that you defined.
Click OK to close Subset and return to Essbase Member Selection.
The conditions that you set in the Subset dialog box are displayed in the Rules list box.
Select Diet Cream, and then click Move Item Up to change the order in which Diet Cream is displayed in the worksheet.
Each time you click the Move Item Up or Move Item Down button, the selected item and its associated subset conditions move up or down one position in the Rules list box. You can move only the top-level item (the item you added from the Members list box), not the individual subset conditions.
Click OK to close Essbase Member Selection and insert the members into the worksheet.
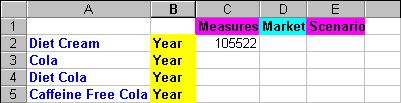
Starting with Diet Cream, enter Year next to each product.
You must perform this step so that every product is associated with a matching Year dimension in the report.
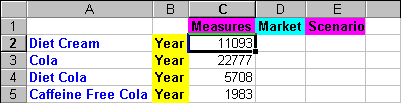
Select Essbase, and then Retrieve.
Essbase retrieves data for the members that you selected and applies the styles that you previously set.
 .
.