Adding Role Names for the Presentation Catalog

Adding the role name for a user is the first step in hiding unused content in the Transactional Business Intelligence Presentation Catalog.

  To add role names:

  1. Verify that you have access to Application Performance Management.

    Note:

    Not all SaaS customers have access to Application Performance Management. Check with your product manager or system administrator to determine if you were provided with a link to APM when your Fusion Applications environment was provisioned.

  2. Log in to Oracle Identity Manager.

  3. Click the Administration link in the upper-right corner.

    The Delegated Administration screen displays.

  4. In Basic Role Information, enter a role Name.

  5. Click Save.

  6. Log into Application Performance Management as a “Super User.

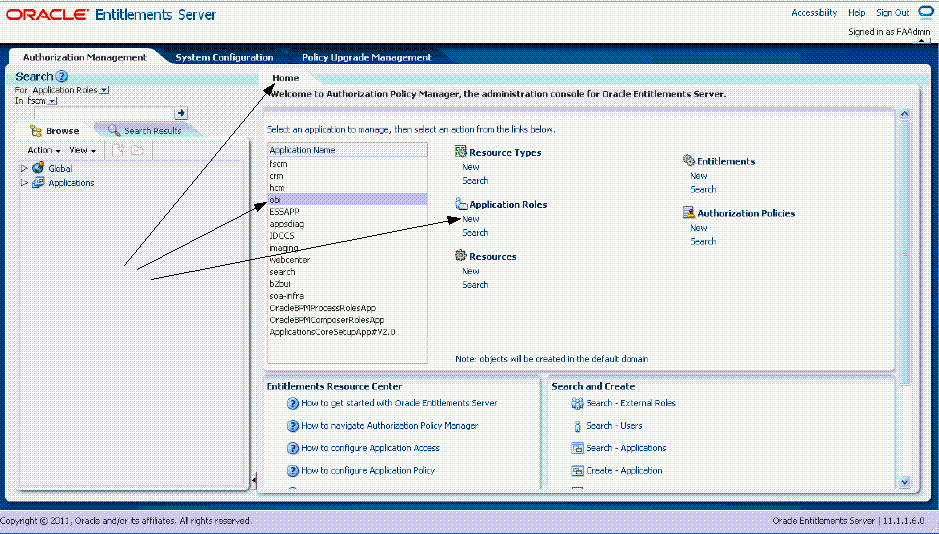
    The Entitlements Server screen displays.

    Figure 98. Entitlements Server

    This screen shot shows the Entitlements Server screen and how to select obi as the Application Name and how to select New under Application Roles.
  7. In the Application Name list, select obi.

  8. Under Application Roles, Click New.

  9. Enter a Role Name.

  10. Click Save.

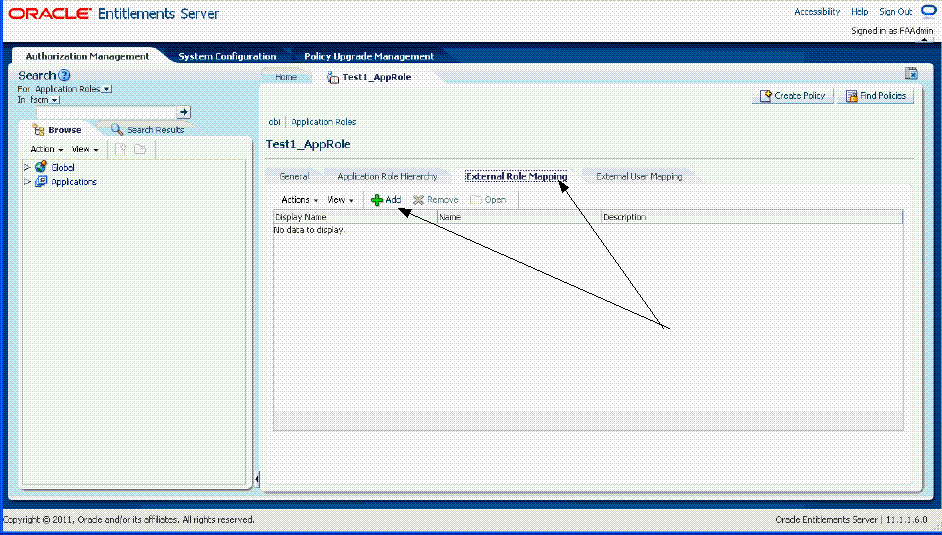
  11. Select the External Role Mapping tab.

    Figure 99. External Role Mapping

    This screen shot shows the External Role Mapping tab.
  12. Click the Add button Plus sign button.

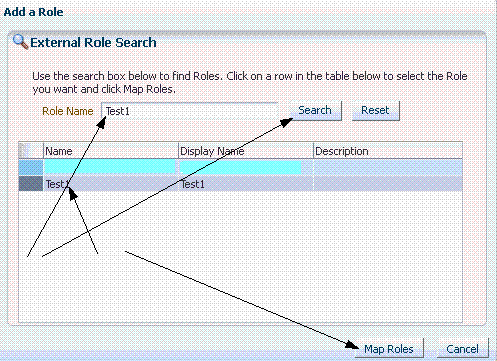
    The External Role Search screen displays:

    Figure 100. External Role Search Screen

    This screen shot shows the External Role Search function.
  13. Enter a Role Name and click Search to find the role created in Oracle Identity Manager.

  14. Click Map Roles.

  15. Log in to Oracle Identity Manager again.

  16. Create a new user.

    Note:

    If the new Application Role is not yet visible, it is pending a run of the job Retrieve Latest LDAP Changes.
  17. Add the Application Roles applicable for the user.