You must create a WebLogic domain for the Endeca Server application to run in.
The prerequisites to this task are that WebLogic Server, Application Development Framework Runtime, and Endeca Server must be installed. Note that WebLogic Server does not have to be running for this procedure.
For single-machine development environments, you can deploy the Endeca Server instance in the single Admin Server in the WebLogic domain. You can later use this WebLogic domain when you expand your deployment to an Endeca Server cluster.
To create a WebLogic domain for the Endeca Server application:
-
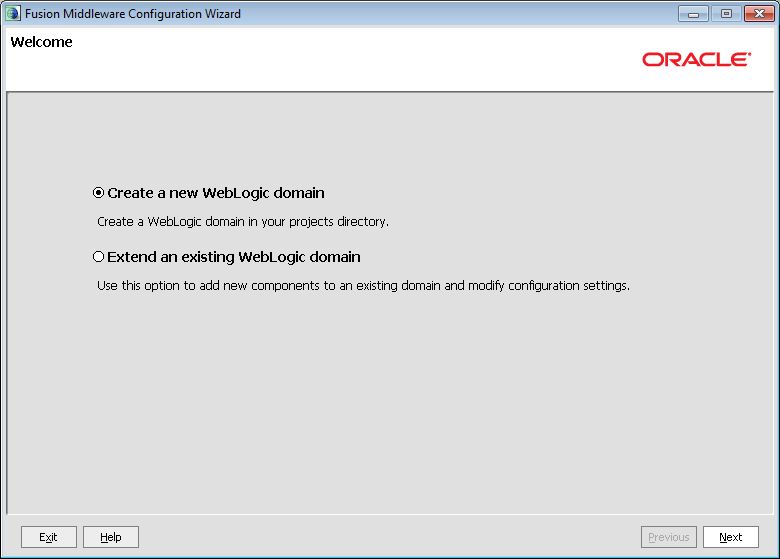
At the Configuration Wizard's
Welcome screen, select
Create a new WebLogic domain and click
Next.
-
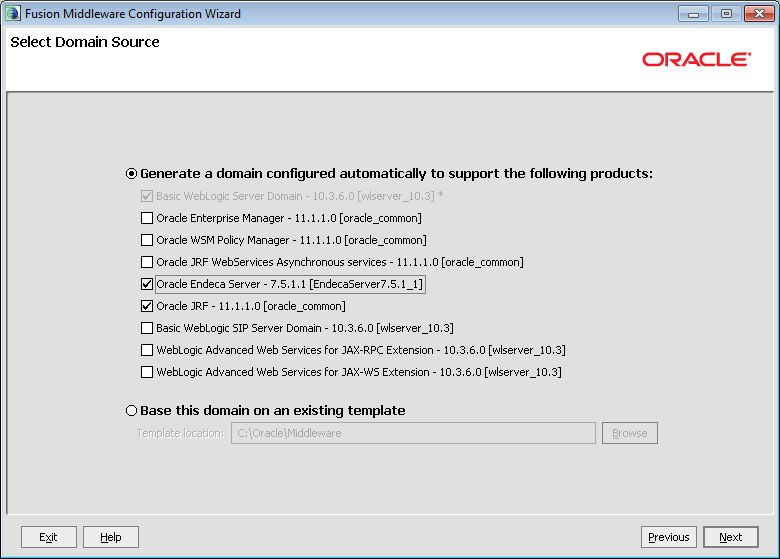
At the
Select Domain Source screen, select
Oracle Endeca Server (note that this also
automatically selects
Oracle JRF). Then click
Next.
-
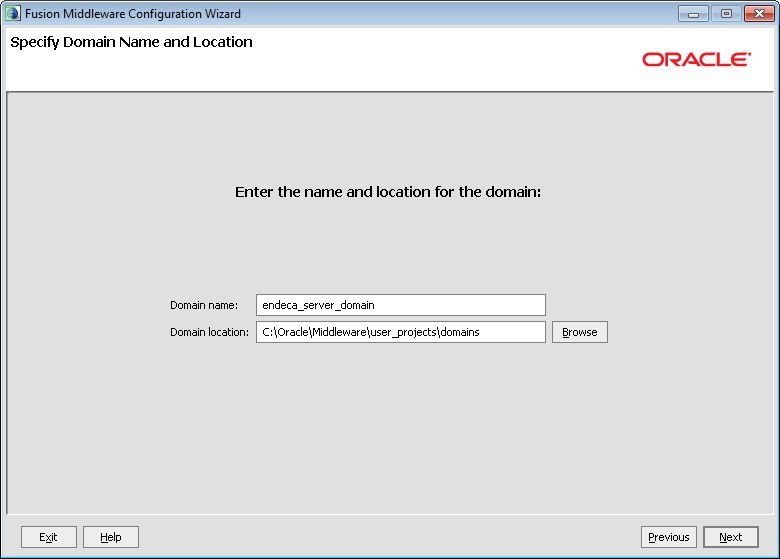
At the
Specify Domain Name and Location screen,
specify the domain name (such as
endeca_server_domain) and keep the default
domain location. Then click
Next.
-
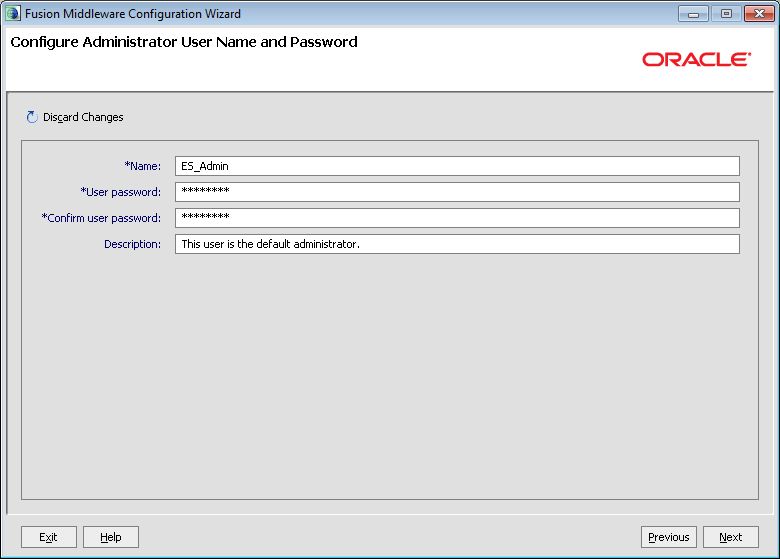
At the
Configure Administrator User Name and Password
screen, enter the name and password you want to use for the administrator.
Optionally, you can enter a description. Then click
Next.
You will be using this name and password to start the WebLogic Server. Note that the password has a minimum length of eight characters.
-
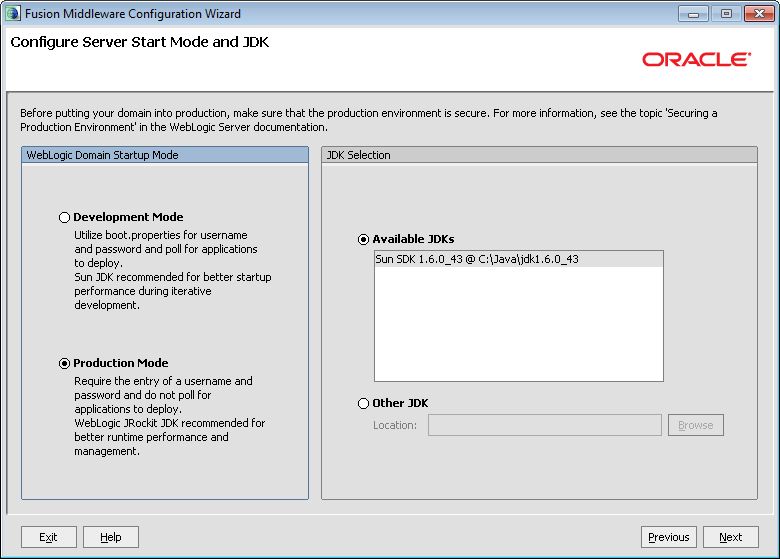
At the
Configure Server Start Mode and JDK screen, do
the following:
- In the WebLogic Domain Startup Mode pane, select Production Mode.
- In the JDK Selection pane, click Available JDKs and select the Sun SDK. (Note that if the Sun JDK is not displayed in this pane, click the Other JDK button and browse for the Sun JDK home.)
- Click Next.
-
At the
Select Optional Configuration screen, do not
select any optional configurations and click
Next.

-
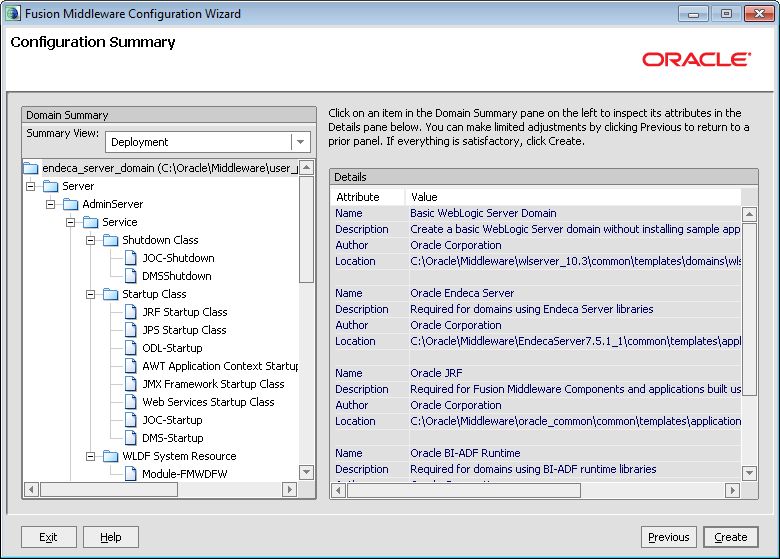
At the
Configuration Summary screen, click
Create to create the domain.
-
At the
Creating Domain screen, the message
"Domain Created Successfully!" signifies
the end of the create process (as shown in the example below). Click
Done to exit the Configuration Wizard.

- For secure mode, start
WebLogic Server and run the
generate_ssl_keys utility, as described in the
next topic. After that, you can verify the Endeca Server deployment.
Note: If you are deploying a cluster, make sure to generate SSL keys after you have installed the Endeca Server on the Admin Server, but before you clone the Admin Server to create additional Managed Servers. Additionally, in the Endeca Server cluster, the Endeca Server instance that was running on the Admin Server should be stopped, and the Endeca Server should be started on the Managed Servers in the WebLogic domain that you create. For detailed instructions, see Installing and Deploying an Endeca Server Cluster.
- For non-secure mode, start WebLogic Server and verify the Endeca Server deployment.
