Selecting the file to upload

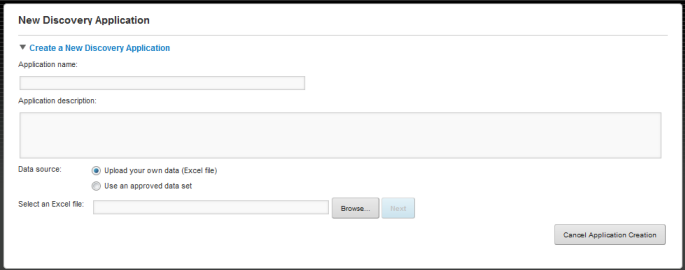
When creating a new application using a file upload, the first step is to provide the application name and description, then select the file and worksheet to use.

To start the file upload process:

  1. On the Discovery Applications page, click New Application.

    The application creation page is displayed.

    Initial view of the Application Creation page
  2. In the Application name field, enter the name of the new application.
  3. In the Application description field, enter a description of the application. The description displays as part of the application information on the Discovery Applications page.
  4. The Upload your own data (Excel file) radio button is selected by default. To search for and select the file, click Browse.
    Application creation page with file selected

    The selected file must be an Excel spreadsheet created using Excel 2000 or later.

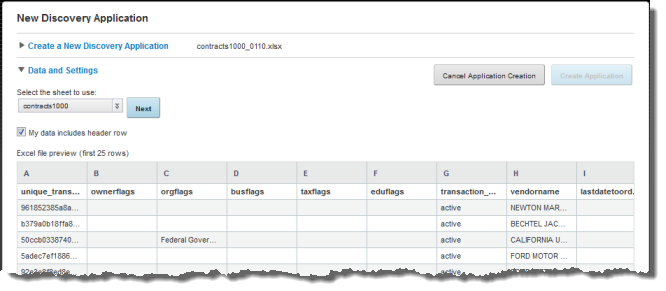
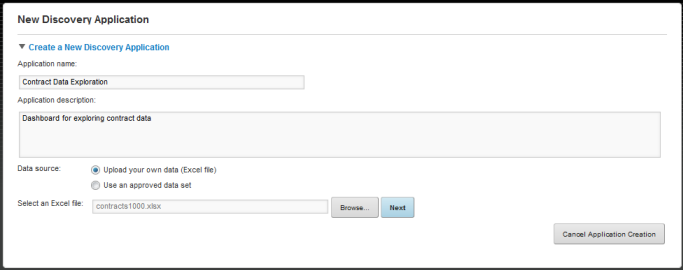
  5. After selecting the file, click Next.

    Studio processes the file, and displays a subset of the data from the first worksheet.


    Application creation page after file uploaded
  6. If there are multiple worksheets, then from the drop-down list, select the worksheet to use for the upload.
  7. If the selected worksheet has a header row, check the My data includes header rows checkbox.
  8. Click Next.

    Studio parses the data, then updates the Data and Settings section to display an initial list of attributes and their associated metadata.

    You can review and revise the attribute list before the application is created.