2 Initial Installation Requirements
This chapter lists specific instructions for installation of the Oracle software components that are required to run the OHI Product Definition application.
See the Certification information that is published on My Oracle Support for specific versions of operating systems and Oracle software that the OHI Product Definition application is certified to work with.
Note:
All OHI Product Definition releases contain the complete application. The only difference between installing OHI Product Definition for the first time and upgrading it to a new release, is thus the pre-installation activities (which only need to be executed when installing OHI Product Definition for the first time)When the initial installation requirements are met, continue with the chapter Release Installation.
2.1 Required and optional software
2.1.1 Required Software
The following table lists the Oracle software that is required in order to execute OHI Product Definition:
| Oracle Product | Version |
|---|---|
| Oracle Database Enterprise Edition | 11g Release 2 (11.2.0.3) |
| Oracle Weblogic Server Enterprise Edition | 11g Release 1 (10.3.4) |
| Oracle TopLink, Application Development Framework and TopLink Grid | 11g Release 1 (11.1.1.4.0) |
| Oracle Coherence Enterprise Edition | 3.7.1 |
Note:
For the Oracle Database and Oracle WebLogic server make sure to always apply the latest Critical Patch Updates.The Oracle Database, Oracle ADF Runtime libraries and Oracle WebLogic server need to be installed. Oracle TopLink, TopLink Grid and Coherence are bundled with each release of OHI Product Definition and do not require a separate installation
2.1.2 Optional Software
This section covers the optional software that can be installed to be used with OHI Product Definition.
2.1.2.1 Oracle Database Options
The following table lists Oracle database options that can optionally be used with OHI Product Definition:
| Oracle Product | Option | Version | Motivation |
|---|---|---|---|
| Oracle Database 11gR2 Enterprise Edition | Real Application Clusters | 11g Release 2 (11.2.0.3) | Supports the deployment of a single database across a cluster of servers to support a high availability setup. |
| Oracle Database 11gR2 Enterprise Edition | Total Recall (Flashback Data Archive) | 11g Release 2 (11.2.0.3) | For tracking changes to data over time. Although optional, this is the recommended way to track historical changes to the OHI configuration tables which is not handled in the system in any other way. |
2.1.2.2 Oracle WebLogic Options
The following table lists Oracle WebLogic server additional software that can optionally be used with OHI Product Definition:
| Oracle Product | Option | Version | Motivation |
|---|---|---|---|
| Oracle WebLogic Server Enterprise Edition | Oracle Repository Creation Utility (RCU) | 11.1.1.4 | The RCU is required for the configuration of WS-Security policies for OHI Product Definition web services (whether using Oracle WebLogic WS-Security policies or Oracle Web Services Manager WS-Security policies). If the OHI web services are not secured through WS-Security policies the RCU is not required. See the Security Guide for additional information.
The RCU must be downloaded as patch set 11060956 from My Oracle Support. |
| Oracle WebLogic Server Enterprise Edition | Oracle Web Services Manager | 11.1.1.4 | Optional, provides more extensive WS-Security support and manageability features. |
2.1.2.3 Software for Managing an OHI Product Definition Environment
Oracle recommends to manage and monitor OHI Product Definition environments using Oracle Enterprise Manager (OEM) Cloud Control. The following table lists recommended OEM options
| Oracle Product | Option | Version | Motivation |
|---|---|---|---|
| Oracle Enterprise Manager (OEM) Cloud Control | 12c Release 1 (12.1.0.1) | ||
| Oracle Enterprise Manager (OEM) Cloud Control | WebLogic Server Management Pack EE | 12c Release 1 (12.1.0.1) | To manage multiple WebLogic domains and monitor middleware availability and performance. |
| Oracle Enterprise Manager (OEM) Cloud Control | Oracle Diagnostic Pack for Database | 12c Release 1 (12.1.0.1) | Provides real time and automatic performance diagnostics and simplifies the task of managing large sets of databases. |
| Oracle Enterprise Manager (OEM) Cloud Control | Oracle Tuning Pack for Database | 12c Release 1 (12.1.0.1) | Provides real-time SQL monitoring and tuning advice. |
2.2 Install and configure an OHI Database
2.2.1 Install Oracle Database software
First install Oracle Database software required for Oracle Insurance Product Definition for Health (OHI Product Definition); for specific certification details see OHI Product Definition Certification Guide.
2.2.1.2 Create OHI Product Definition database
Now create the OHI Product Definition database. For this activity the following requirements and restrictions apply.
2.2.1.2.3 Tablespaces
There is no specific requirement as to which tablespace exist. During the application installation and/or upgrade we use information specified in ohi_install.cfg. In there you can configure table tablespace (and optionally) an index tablespace.
All tablespaces must be created 11gR2 default style (locally managed, system/uniform managed extent allocation, Automatic Segment Space Management).
A default temporary tablespace TEMP (this name is mandatory) should be created.
Automatic undo must be used.
2.2.1.2.4 Parameters
-
NLS_LENGTH_SEMANTICS = CHAR
-
STATISTICS_LEVEL=TYPICAL
-
_like_with_bind_as_equality=TRUE
Unless specified otherwise, keep all optimizer parameters (gv$sys_optimizer_env) default.
2.2.1.2.5 Required privileges
OHI Product Definition uses queues in the Oracle database. The owner of the queue objects, the Product Definition owner schema, requires execute privileges on the SYS.DBMS_AQIN package.
For installing OHI Product Definition database artifacts the SYSTEM account is used. In this process also database grants are given by the system database user. To be able to do that, SYSTEM user needs GRANT ANY OBJECT PRIVILEGE (without grant option).
2.2.1.2.6 Creating additional schemas in the database
Oracle recommends that the Oracle database instance that is used by OHI Product Definition is used solely for the purpose of running the OHI Product Definition system.
In the case that additional database schemas are created in the Oracle database instance, make sure that these are not prefixed with OHI.
2.2.1.2.7 Setup Total Recall (optional)
The Total Recall Option of Oracle Server (also known as Flashback Archiving) is used to log changes to setup tables. Configuring which table to archive and how is considered a responsibility of the database administrator
In order to use Flashback Archiving the following settings need to be made:
-
The user that will be used to switch archiving on tables on and off should be granted the "FLASHBACK ARCHIVE ADMINISTER" privilege (grant FLASHBACK ARCHIVE ADMINISTER to <user>).
-
This user should be granted "ALTER TABLE" rights on the tables that need to be archived (or stopped being archived).
-
Create a separate tablespace for the Flashback Archive. Define this tablespace using "extent management local uniform size 40K". This 40K size (for 11gR2) has proven to be the optimal size for this tablespace.
-
Create a Flashback Archive, for example:
CREATE FLASHBACK ARCHIVE [DEFAULT] fda1 TABLESPACE tbs1 QUOTA 10G RETENTION 5 YEAR;
2.3 Install and configure Oracle Fusion Middleware
OHI Product Definition runs on an Oracle Fusion Middleware Application Server. This may also be referred to as Oracle WebLogic Server. When running on more than one node, the application servers should be configured as a cluster.
This guide assumes experience with setting up Oracle WebLogic Server. For details regarding the installation process please consult the product documentation.
The Certification Guide specifies the required version of the Oracle WebLogic Server software that must be installed. It also describes how the software can be obtained and how the documentation can be accessed.
This chapter outlines the installation of the Oracle WebLogic Server software. Subsequently, the setup of a domain is explained for the following situations:
-
A simple, non-clustered environment that is suitable for development and testing purposes. The description of this configuration also demonstrates how Oracle ADF runtime libraries are added to a WebLogic Server domain.
-
An advanced, clustered setup that is typically used in production deployments and that is executed on multiple nodes.
2.3.1 Installing Oracle Weblogic Server
The following steps describe how to install Oracle WebLogic Server. The Certification Guide lists the software that needs to be used as well as the download locations.
Step 1: Navigate to that folder and run the installer by entering the following command in command line: java -jar wls1034_generic.jar
JAVA_HOME should be set before running the installer
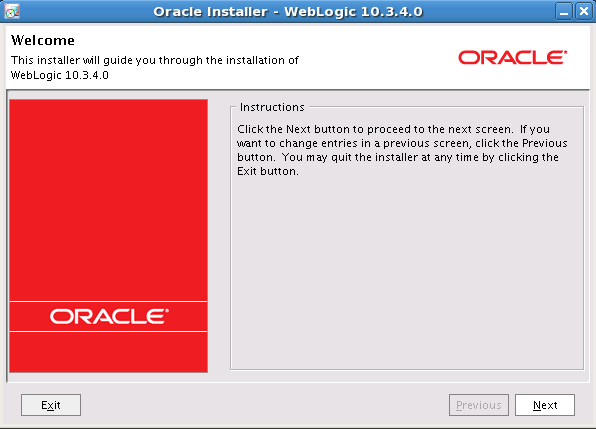
Step 2: In the Welcome screen click on Next button
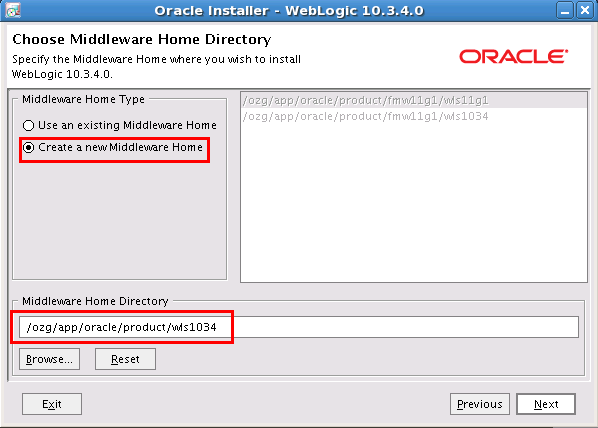
Step 3: In the Choose Middleware Home Directory page, select the option Create a new Middleware Home and enter the path in Middleware Home Directory. Click on Next button
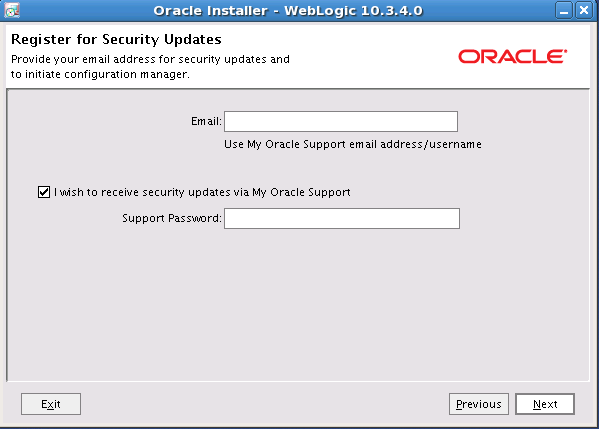
Step 4: In the Register for Security Updates page, enter your My Oracle Support Email address and Support Password (optionally, this can be skipped). Click on Next button
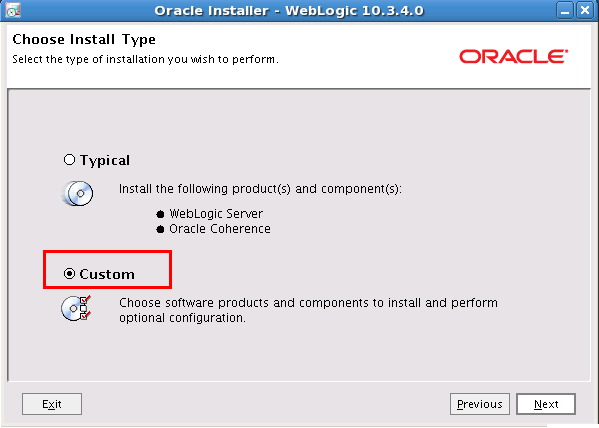
Step 5: In the Choose Install Type page, select the option Custom. Click on Next button
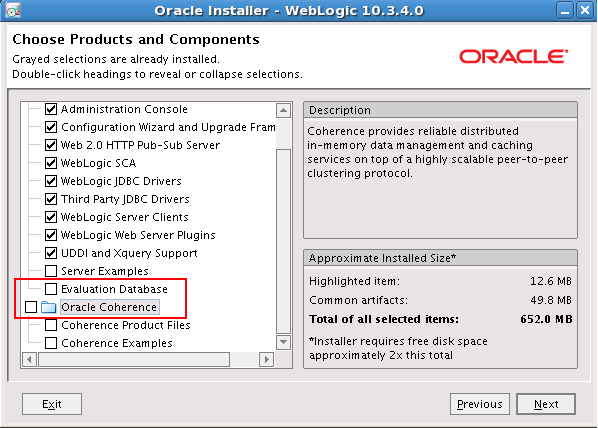
Step 6: In the Choose Products and Components page, deselect the options Evaluation Database and Oracle Coherence. Click on Next button
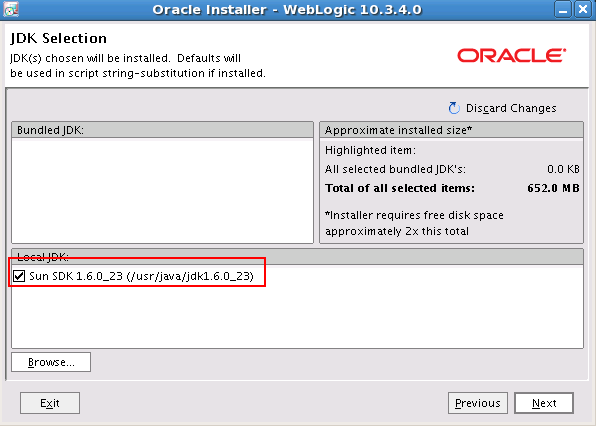
Step 7: The installer for 64-bit machines does not have bundled JDK. So, In JDK Selection page, click on Browse button to navigate to your JDK installation directory. Click on Next button
Step 8: In the Choose Product Installation Directories page accept the default setting and click on Next button

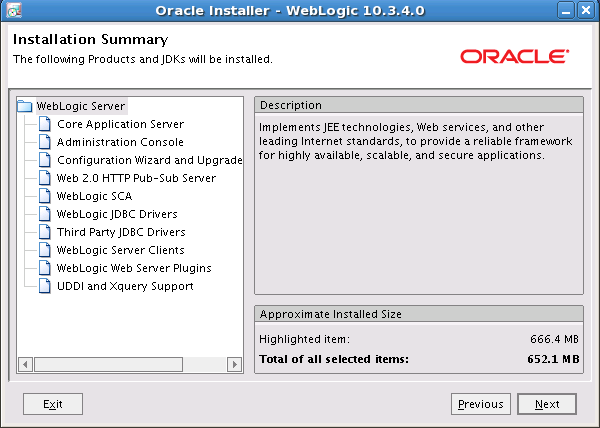
Step 9: In Installation Summary page, click on Next button
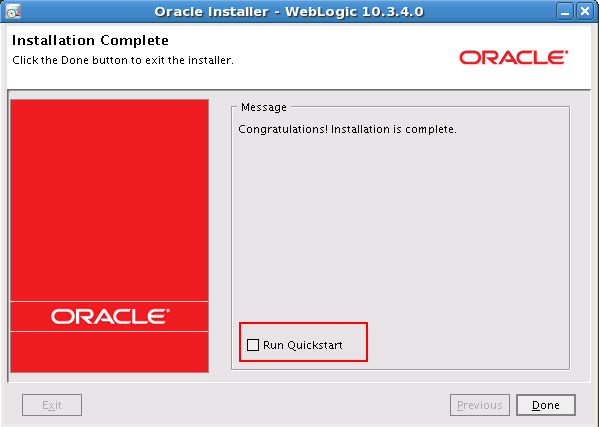
Step 10: When the installation is complete, un-check the check box Run Quickstart and click on Done button. Oracle WebLogic Server 10.3.4 is now installed.
2.3.2 Installing Oracle Applications Development Runtime
The following steps describe how to install Oracle Application Development Runtime. The Certification Guide lists the software that needs to be used as well as the download locations.
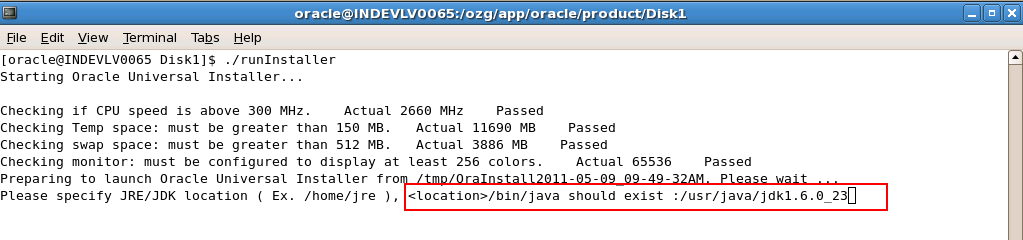
Step 1: Unzip the downloaded archive and navigate to the Disk1 folder; run the installer by entering the following command in command line: ./runInstaller
The installer will ask you to enter JDK installation directory
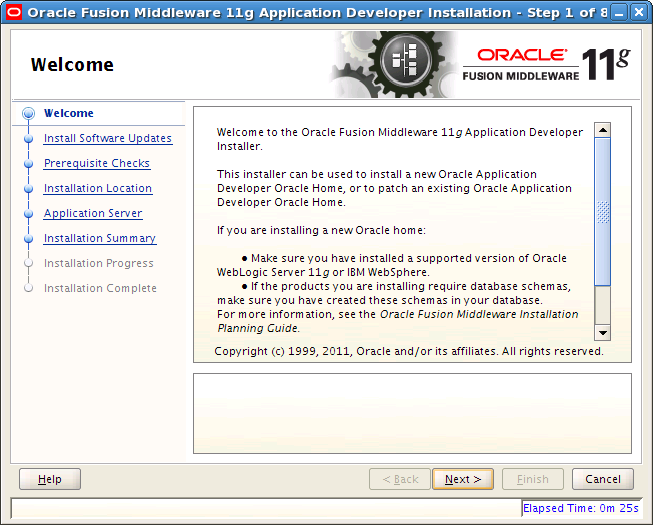
Step 2: In Welcome page, click on Next button
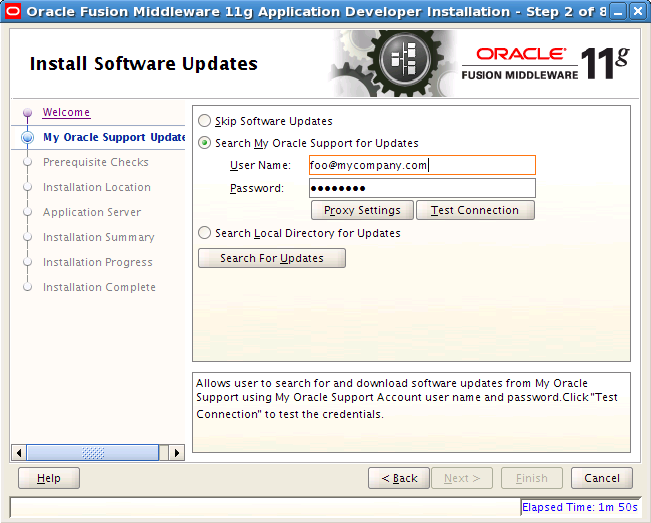
Step 3: In Install Software Updates page, enter your My Oracle Support User Name and Password (optionally, this can be skipped). Click on Next button
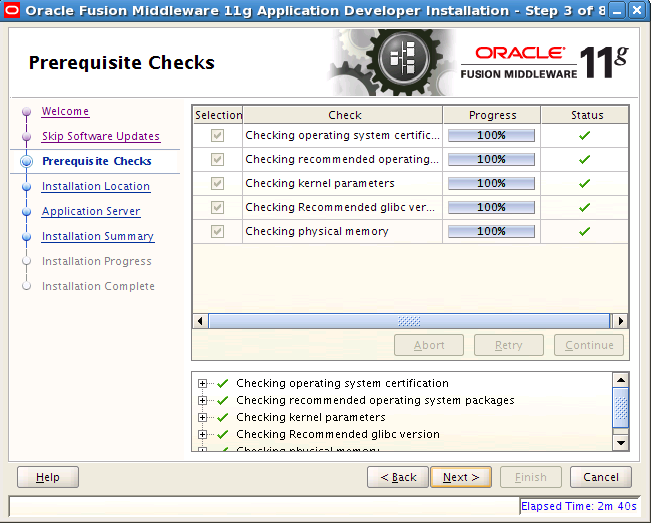
Step 4: Once Prerequisite Checks is completed, click on Next button
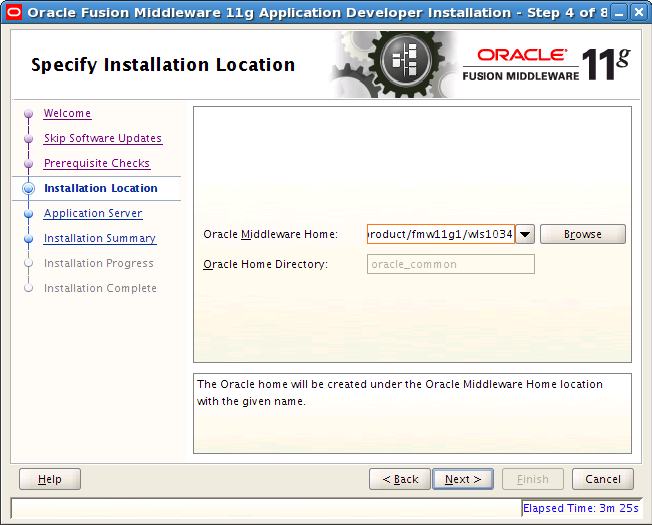
Step 5: In Specify Installation Location page, change the value of Oracle Middleware Home to suit your WLS installation directory and click on Next button
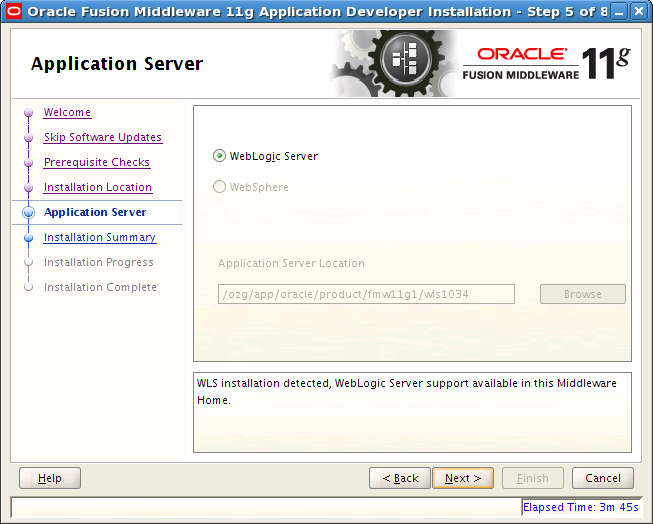
Step 6: In Application Server page, accept the default values and click on Next button
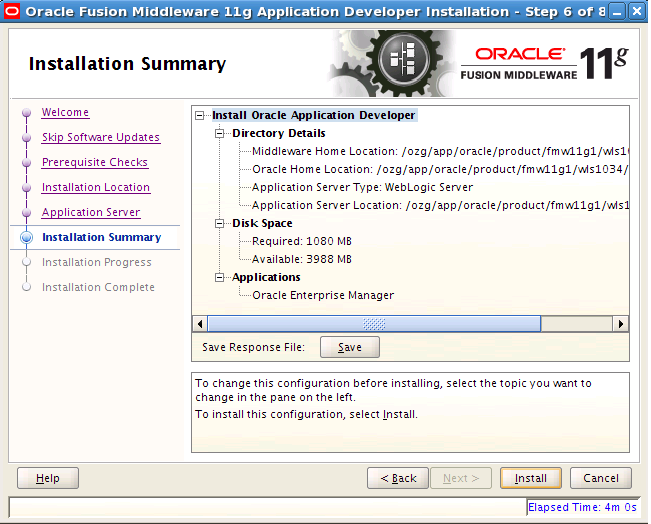
Step 7: In Installation Summary page, click on Install button
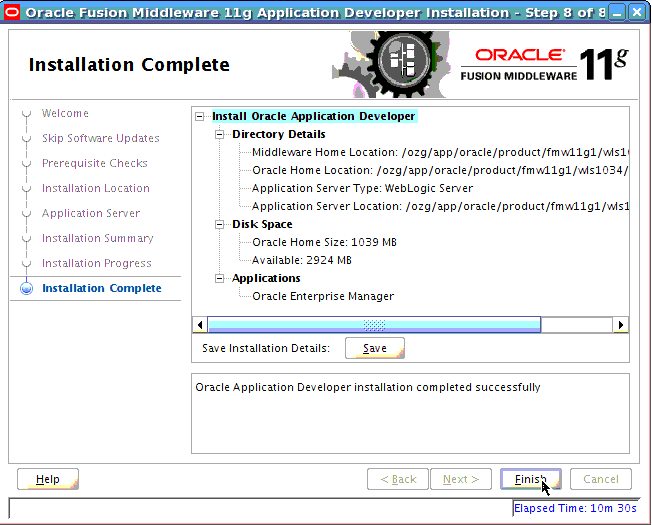
Step 8: Once the installation is complete, click on Finish button in Installation Complete page. Oracle Application Development Runtime 11.1.1.4.0 is now installed.
2.3.3 Configuring Oracle Fusion Middleware for running ADF Applications
After installing Oracle WebLogic Server and Oracle Application Development Runtime, perform the following steps:
-
Create a domain in which the OHI Product Definition application will be configured and installed.
-
Detailed instructions are available in the documentation library (
http://download.oracle.com/docs/cd/E12839_01/web.1111/b31974/deployment_topics.htm#ADFFD1831).
Alternatively, follow these steps to create a domain.
The following domain setup is suitable for development and testing purposes but should not be used in production situations.
Step 1: Go to <MIDDLEWARE_HOME_DIRECTORY>/wlserver_10.3/common/bin in command prompt . Here MIDDLEWARE_HOME_DIRECTORY is the path where you instaled WLS 10.3.4.
Step 2: Issue the following command: ./config.sh
Step 3: Fusion Middleware Configuration Wizard - Welcome screen appears.
Step 4: In Welcome page, leave the default selection Create a new WebLogic domain and click on Next button

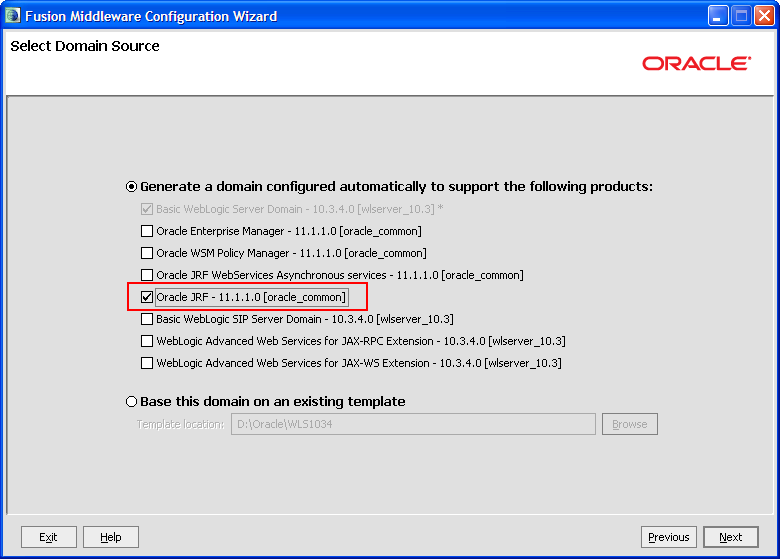
Step 5: In the Select Domain Source page, select the check box Oracle JRF - 11.1.1.0 [oracle_common] and click on Next button
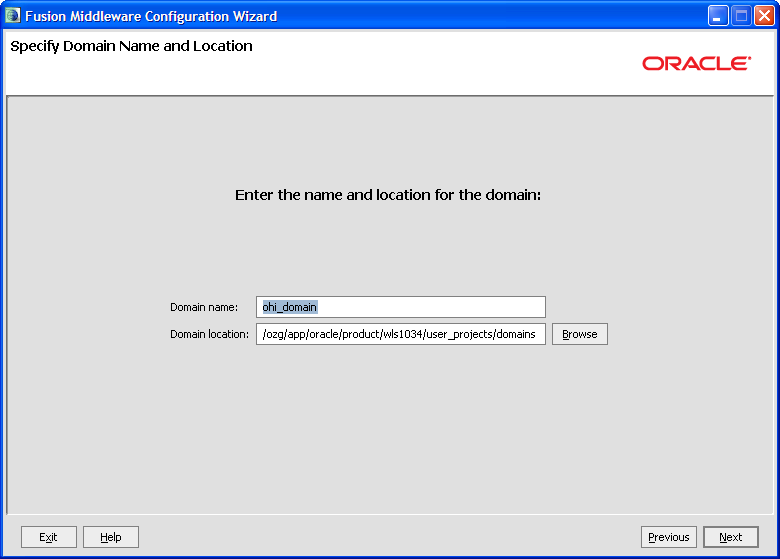
Step 6: In the Specify Domain Name and Location page, edit the values for Domain name and Domain location to suit your requirements or leave the default values and click on Next button.
For consistency, Oracle recommends the value "ohi_domain" as domain name.
Step 7: In the Configure Administrator User Name and Password page, enter the values for User password and Confirm user password and click on Next button.
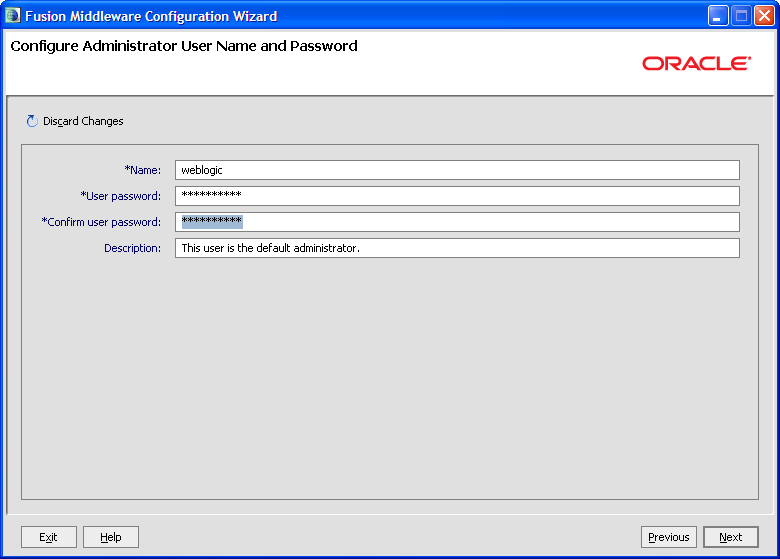
The password must be at least 8 alphanumeric characters with at least one number or special character.
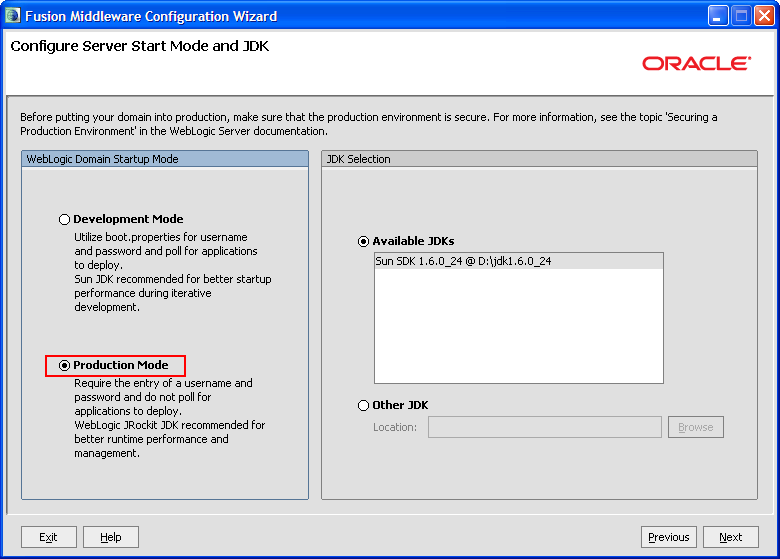
Step 8: In the Configure Server Start Mode and JDK page, change the value for WebLogic Domain Startup Mode to Production Mode and click on Next button.
Step 9: In the Select Optional Configuration page, select the options that you want to configure. Else, leave with the default settings and click on Next button.
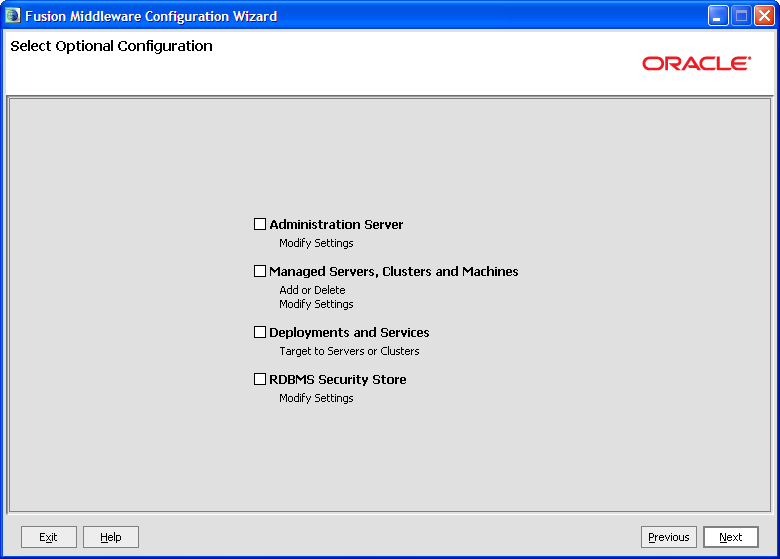
The default AdminServer listening port is 7001.
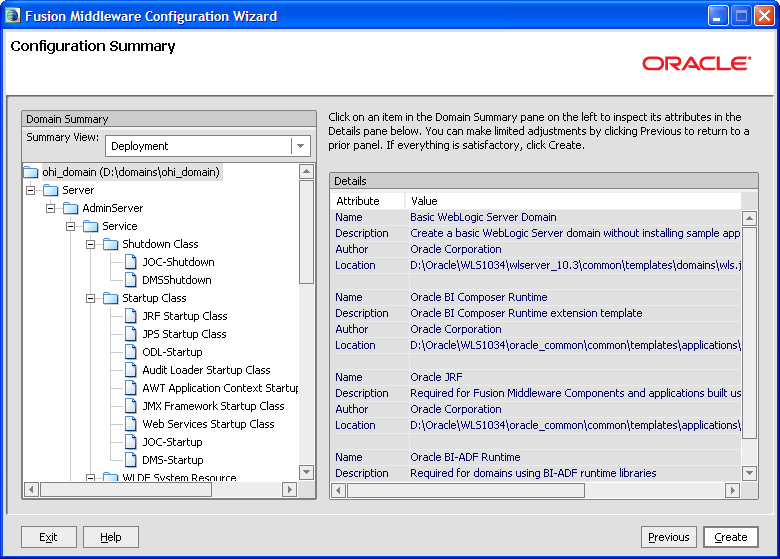
Step 10: In the Configuration Summary page, click on Create button.
Step 11: In the Creating Domain page, click on Done button once the domain is created.

2.3.4 Domain configuration for OHI Product Definition
This chapter contains directions for the following topics:
-
Redirecting console log output
-
Setting up OHI Product Definition properties files
-
Coherence settings
-
Setting OHI Product Definition Domain environment variables
2.3.4.1 Redirect JVM Output to a Log File
By default, the JVM output for a WebLogic server is written to the console. It is recommended to redirect the console output to file. Note that in development mode, the default size of a logfile before it is rotated is only 500Kb. Hence, it is also recommended to change the size of the log files before rollover to 10240 Kb and to specify the number of log files that will be retained. These configuration settings can be changed through the WebLogic Server Console.
2.3.4.2 Setting up OHI Product Definition Properties File
Create a directory that will hold OHI Product Definition properties and configuration files. This directory will be referenced as <PROPERTIES_ROOT> throughout this document.
Copy the following files that were delivered as part of the specific release from the <OHI_ROOT>/properties directory to the <PROPERTIES_ROOT>:
-
logback.xml
-
ohi-proddef.properties.template
Rename the copied ohi-proddef.properties.template to ohi-proddef.properties. A description of the properties files is available section 'Configure OHI Product Definition properties file' of this document.
Also copy file <OHI_ROOT>/util/security/ohi-security.config to the <PROPERTIES_ROOT>.
2.3.4.3 Coherence settings
OHI Product Definition uses Oracle Coherence. The IT infrastructure on which the system is installed determines the configuration for Oracle Coherence. This paragraph describes the following configuration options:
-
Restrict a Coherence cluster to one machine
-
Control multiple Coherence clusters that are spread across multiple machines
-
Control multiple Coherence clusters that are executed on one machine
-
Specific settings for running Coherence in a Production environment
Restrict a Coherence cluster to one machine
The <PROPERTIES_ROOT> directory contains a Coherence configuration file (single-server-tangosol-coherence-override.xml) that ensures that a Coherence cluster is restricted to a single machine.
These settings will constrain Coherence to run on a single machine. It will not prevent Coherence from clustering with other JVMs on the same machine that also run Coherence. Therefore, it is not suitable for setting up multiple Coherence clusters on a single machine.
Copy the following properties file that was delivered as part of the specific release from the <OHI_ROOT>\properties directory to the <PROPERTIES_ROOT>:
-
single-server-tangosol-coherence-override.xml
In order to control which JVMs can join in a particular Coherence cluster, the Coherence Well Known Addresses (WKA) feature may be used. This can be used to:
-
Control multiple Coherence clusters that are spread across multiple machines
-
Control multiple Coherence clusters that are executed on one machine
A preconfigured tangosol-coherence-override.xml file for these situations cannot be provided as required host names or IP addresses must be used. The following sample files show the basic structure.
Schema validation is used to ensure that configuration files adhere to their respective schema definition. Configuration files that include a schema reference are automatically validated against the schema when the configuration file is loaded. A validation error causes an immediate failure and an error message is emitted that indicates which element caused the error. Schema validation should always be used as a best practice. To enable schema validation, make sure to always start a coherence-override file with the following root element definition:
<coherence xmlns:xsi="http://www.w3.org/2001/XMLSchema-instance"
 xmlns="http://xmlns.oracle.com/coherence/coherence-operational-config"
 xsi:schemaLocation="http://xmlns.oracle.com/coherence/coherence-operational-config coherence-operational-config.xsd">

 ...

</coherence>
<coherence xmlns:xsi="http://www.w3.org/2001/XMLSchema-instance"
 xmlns="http://xmlns.oracle.com/coherence/coherence-operational-config"
 xsi:schemaLocation="http://xmlns.oracle.com/coherence/coherence-operational-config coherence-operational-config.xsd">

 <configurable-cache-factory-config>
 <class-name>com.oracle.healthinsurance.support.cache.factory.OhiDefaultConfigurableCacheFactory</class-name>
 <init-params>
 <init-param>
 <param-type>java.lang.String</param-type>
 <param-value system-property="tangosol.coherence.cacheconfig">/META-INF/coherence-cache-config.xml</param-value>
 </init-param>
 </init-params>
 </configurable-cache-factory-config>

 ...

</coherence>
The use of the configurable-cache-factory-config element is mandatory for any Coherence configuration (override file) used with OHI Product Definition.
The following sample override file controls a Coherence cluster that runs on JVMs on several machines (host1, host2, ..., hostN):
<coherence xmlns:xsi="http://www.w3.org/2001/XMLSchema-instance"
 xmlns="http://xmlns.oracle.com/coherence/coherence-operational-config"
 xsi:schemaLocation="http://xmlns.oracle.com/coherence/coherence-operational-config coherence-operational-config.xsd">

 <configurable-cache-factory-config>
 <class-name>com.oracle.healthinsurance.support.cache.factory.OhiDefaultConfigurableCacheFactory</class-name>
 <init-params>
 <init-param>
 <param-type>java.lang.String</param-type>
 <param-value system-property="tangosol.coherence.cacheconfig">/META-INF/coherence-cache-config.xml</param-value>
 </init-param>
 </init-params>
 </configurable-cache-factory-config>
 <cluster-config>
 <unicast-listener>
 <well-known-addresses>
 <socket-address id="1">
 <address system-property="tangosol.coherence.wka1">host1</address>
 <port system-property="tangosol.coherence.wka1.port">8088</port>
 </socket-address>
 <socket-address id="2">
 <address system-property="tangosol.coherence.wka2">host2</address>
 <port system-property="tangosol.coherence.wka2.port">8088</port>
 </socket-address>
 ...
 <socket-address id="N">
 <address system-property="tangosol.coherence.wkaN">hostN</address>
 <port system-property="tangosol.coherence.wkaN.port">8088</port>
 </socket-address>
 </well-known-addresses>
 </unicast-listener>
 </cluster-config>
</coherence>
Start the JVM on host1 with the following command-line parameters:
These options should be specified on one line, it was formatted differently in this guide for readability.
-Dtangosol.coherence.wka1=host1
-Dtangosol.coherence.wka1.port=8088
-Dtangosol.coherence.localport=8088
-Dtangosol.coherence.override=tangosol-coherence-override.xml
Start the JVM on host2 with the following command-line parameters:
-Dtangosol.coherence.wka2=host2
-Dtangosol.coherence.wka2.port=8088
-Dtangosol.coherence.localport=8088
-Dtangosol.coherence.override=tangosol-coherence-override.xml
The following sample override file controls a Coherence cluster that runs on multiple JVMs on the same machine (host1):
<coherence xmlns:xsi="http://www.w3.org/2001/XMLSchema-instance"
 xmlns="http://xmlns.oracle.com/coherence/coherence-operational-config"
 xsi:schemaLocation="http://xmlns.oracle.com/coherence/coherence-operational-config coherence-operational-config.xsd">

 <configurable-cache-factory-config>
 <class-name>com.oracle.healthinsurance.support.cache.factory.OhiDefaultConfigurableCacheFactory</class-name>
 <init-params>
 <init-param>
 <param-type>java.lang.String</param-type>
 <param-value system-property="tangosol.coherence.cacheconfig">/META-INF/coherence-cache-config.xml</param-value>
 </init-param>
 </init-params>
 </configurable-cache-factory-config>
 <cluster-config>
 <unicast-listener>
 <well-known-addresses>
 <socket-address id="1">
 <address system-property="tangosol.coherence.wka1">host1</address>
 <port system-property="tangosol.coherence.wka1.port">8088</port>
 </socket-address>
 <socket-address id="2">
 <address system-property="tangosol.coherence.wka2">host1</address>
 <port system-property="tangosol.coherence.wka2.port">8089</port>
 </socket-address>
 ...
 <socket-address id="N">
 <address system-property="tangosol.coherence.wkaN">host1</address>
 <port system-property="tangosol.coherence.wkaN.port">8090</port>
 </socket-address>
 </well-known-addresses>
 </unicast-listener>
 </cluster-config>
</coherence>
Start the first JVM on host1 with the following command-line parameters:
These options should be specified on one line, it was formatted differently in this guide for readability.
-Dtangosol.coherence.wka1=host1
-Dtangosol.coherence.wka1.port=8088
-Dtangosol.coherence.localport=8088
-Dtangosol.coherence.override=tangosol-coherence-override.xml
Start the second JVM on host1 with the following command-line parameters:
-Dtangosol.coherence.wka2=host1
-Dtangosol.coherence.wka2.port=8089
-Dtangosol.coherence.localport=8089
-Dtangosol.coherence.override=tangosol-coherence-override.xml
For more information please check the Coherence documentation on Well Known Addresses.
Specific settings for running Coherence in a Production environment
By default, Oracle Coherence runs in Development mode. The production checklist in the Coherence documentation states that it is recommended to use the development mode for all pre-production activities, such as development and testing. This is an important safety feature, because Coherence automatically prevents these nodes from joining a production cluster. The production mode must be explicitly specified when using Coherence in a production environment.
In the Production environment (and only in the Production environment), the system property tangosol.coherence.mode should be set to value prod in the script that is used to start Coherence nodes.
Next to that, Oracle advises to use system property tangosol.coherence.cluster to name the cluster. To join the cluster, all members must specify the same cluster name. Suggested naming convention:OHI-<systemproperty.ohi.environment.identifier>.
-Dtangosol.coherence.mode=prod
-Dtangosol.coherence.cluster=<cluster_name>
2.3.5 Set Environment Variables for OHI Product Definition
Environment variables for OHI Product Definition can be set in the startManagedWebLogic.sh script or the setDomainEnv.sh script. An alternative approach (offered as a best practice) is to create a separate shell script named setOhiEnv.sh in a directory (referred to hereafter as <SET_ENV_VAR_DIR>). Rationale:
-
The setDomainEnv.sh file is generated by WLS and large (clutters the view).
-
The setDomainEnv.sh file can be changed by WebLogic if the cluster configuration changes. A separate setOhiEnv.sh file shields from these changes.
-
The settings in setDomainEnv.sh are also applied when stopWebLogic.sh is used. In that case, the memory settings for Managed Servers that execute the OHI Product Definition application can cause errors.
This approach does not work in conjunction with a Node Manager. For the Node Manager, the settings have to be in setDomainEnv.sh or set in the Server Start up properties (in Admin console).
Make sure that <SET_ENV_VAR_DIR> is a shared directory for all the managed servers in the cluster. The following is a sample setOhiEnv.sh script:
# Memory Args
USER_MEM_ARGS="-Xms4096m -Xmx4096m -XX:PermSize=768m -XX:MaxPermSize=768m -XX:NewSize=1280m -XX:MaxNewSize=1280m"
USER_MEM_ARGS="$USER_MEM_ARGS -XX:ReservedCodeCacheSize=128m"
USER_MEM_ARGS="$USER_MEM_ARGS -XX:+UseConcMarkSweepGC"
USER_MEM_ARGS="$USER_MEM_ARGS -XX:+UseParNewGC"
USER_MEM_ARGS="$USER_MEM_ARGS -XX:+ExplicitGCInvokesConcurrent"
USER_MEM_ARGS="$USER_MEM_ARGS -XX:+CMSClassUnloadingEnabled"
USER_MEM_ARGS="$USER_MEM_ARGS -XX:+UseCMSCompactAtFullCollection"
export USER_MEM_ARGS

# Java Options
JAVA_OPTIONS="-Dohi.mds.country=US"
JAVA_OPTIONS="${JAVA_OPTIONS} -Dohi.properties.file=/properties/ohi-proddef.properties"
JAVA_OPTIONS="${JAVA_OPTIONS} -Dtangosol.coherence.override=/properties/tangosol-coherence-override.xml"
JAVA_OPTIONS="${JAVA_OPTIONS} -Djava.security.auth.login.config=/properties/ohi-security.config"
JAVA_OPTIONS="${JAVA_OPTIONS} -Dtangosol.coherence.cluster=<cluster_name>"
JAVA_OPTIONS="${JAVA_OPTIONS} -Dtangosol.coherence.mode=prod"
JAVA_OPTIONS="${JAVA_OPTIONS} -Dtangosol.coherence.localport=<coherence_port>"
JAVA_OPTIONS="${JAVA_OPTIONS} -Dcom.sun.org.apache.xml.internal.dtm.DTMManager=com.sun.org.apache.xml.internal.dtm.ref.DTMManagerDefault"
JAVA_OPTIONS="${JAVA_OPTIONS} -Djavax.xml.datatype.DatatypeFactory=com.sun.org.apache.xerces.internal.jaxp.datatype.DatatypeFactoryImpl"
export JAVA_OPTIONS

# Optional settings for JMX management
JAVA_OPTIONS="${JAVA_OPTIONS} -Dcom.sun.management.jmxremote.authenticate=false"
JAVA_OPTIONS="${JAVA_OPTIONS} -Dcom.sun.management.jmxremote.ssl=false"
JAVA_OPTIONS="${JAVA_OPTIONS} -Djavax.management.builder.initial=weblogic.management.jmx.mbeanserver.WLSMBeanServerBuilder"
export JAVA_OPTIONS

# Optional settings to enable monitoring Coherence through JMX
JAVA_OPTIONS="${JAVA_OPTIONS} -Dtangosol.coherence.management=all"
JAVA_OPTIONS="${JAVA_OPTIONS} -Dtangosol.coherence.management.remote=true"
export JAVA_OPTIONS

# Settings specific to Managed Servers -- repeated for each Managed Server 1 to N
if [ "$1" = "managed_server1" ] ; then
JAVA_OPTIONS="${JAVA_OPTIONS} -Dtangosol.coherence.member=<coherence_member_name>"
JAVA_OPTIONS="${JAVA_OPTIONS} -Dtangosol.coherence.wka1=<hostname or IP address of managed server 1>"
JAVA_OPTIONS="${JAVA_OPTIONS} -Dtangosol.coherence.wka1.port=<coherence_port>"
JAVA_OPTIONS="${JAVA_OPTIONS} -Dlogback.configurationFile=<properties directory>/logback_node_1.xml"
# Optional JMX Setting
JAVA_OPTIONS="${JAVA_OPTIONS} -Dcom.sun.management.jmxremote.port=<unique_port>"
export JAVA_OPTIONS
fi

if [ "$1" = "managed_server2" ] ; then
JAVA_OPTIONS="${JAVA_OPTIONS} -Dtangosol.coherence.member=<coherence_member_name>"
JAVA_OPTIONS="${JAVA_OPTIONS} -Dtangosol.coherence.wka2=<hostname or IP address of managed server 2>"
JAVA_OPTIONS="${JAVA_OPTIONS} -Dtangosol.coherence.wka2.port=<coherence_port>"
JAVA_OPTIONS="${JAVA_OPTIONS} -Dlogback.configurationFile=<properties directory>/logback_node_2.xml"
# Optional JMX Setting
JAVA_OPTIONS="${JAVA_OPTIONS} -Dcom.sun.management.jmxremote.port=<unique_port>"
export JAVA_OPTIONS
fi

if [ "$1" = "managed_serverN" ] ; then
JAVA_OPTIONS="${JAVA_OPTIONS} -Dtangosol.coherence.member=<coherence_member_name>"
JAVA_OPTIONS="${JAVA_OPTIONS} -Dtangosol.coherence.wkaN=<hostname or IP address of managed server N>"
JAVA_OPTIONS="${JAVA_OPTIONS} -Dtangosol.coherence.wkaN.port=<coherence_port>"
JAVA_OPTIONS="${JAVA_OPTIONS} -Dlogback.configurationFile=<properties directory>/logback_node_N.xml"
# Optional JMX Setting
JAVA_OPTIONS="${JAVA_OPTIONS} -Dcom.sun.management.jmxremote.port=<unique_port>"
export JAVA_OPTIONS
fi
Go to <MIDDLEWARE_HOME_DIRECTORY>/user_projects/domains/<DOMAIN_NAME>/bin where <DOMAIN_NAME> is the name of the domain that was given in Step 6 of the previous section. Edit the file startManagedWebLogic.sh in that directory and add the following line (highlighted below) at the beginning as shown in this sample:
#!/bin/sh

# WARNING: This file is created by the Configuration Wizard.
# Any changes to this script may be lost when adding extensions to this configuration.

# --- Start Functions ---

usage()
{
 echo "Need to set SERVER_NAME and ADMIN_URL environment variables or specify"
 echo "them in command line:"
 echo "Usage: $1 SERVER_NAME {ADMIN_URL}"
 echo "for example:"
 echo "$1 managedserver1 http://bal03028:7005"
}

# --- End Functions ---

# *************************************************************************
# This script is used to start a managed WebLogic Server for the domain in
# the current working directory. This script can either read in the SERVER_NAME and
# ADMIN_URL as positional parameters or will read them from environment variables that are
# set before calling this script. If SERVER_NAME is not sent as a parameter or exists with a value
# as an environment variable the script will EXIT. If the ADMIN_URL value cannot be determined
# by reading a parameter or from the environment a default value will be used.
#
# For additional information, refer to "Managing Server Startup and Shutdown for Oracle WebLogic Server"
# (http://download.oracle.com/docs/cd/E17904_01/web.1111/e13708/overview.htm)
# *************************************************************************
. <SET_ENV_VAR_DIR>/setOhiEnv.sh

DOMAIN_NAME="<domain_name>"

ADMIN_URL="http://<machine>:<port>"
USER_MEM_ARGS Explanation:
-
-Xms2048m -Xmx2048m -- this represents the heap size allocated for the JVM. Xms and Xmx should always be the same number.
-
-
Determining what these sizes should be in production environments requires a full JVM sizing exercise. More on JVM sizing for production is available at 'OHI-Product Definition JVM Sizing'.
-
-
-XX:PermSize=512m -XX:MaxPermSize=512m -- this sets the size for the permanent generation of the JVM's heap.
-
-XX:+UseConcMarkSweepGC -XX:+UseParNewGC -XX:+ExplicitGCInvokesConcurrent -XX:+CMSClassUnloadingEnabled -XX:+UseCMSCompactAtFullCollection -- these are the garbage collector settings recommended for use with the OHI-Product Definition application. More information on JVM options and garbage collector settings at Java HotSpot VM Options.
JAVA_OPTIONS Explanation:
-
tangosol.coherence.mode: use this property for production environments only.
-
tangosol.coherence.cluster: the same name needs to be specified by all members in order to join a specific cluster.
-
tangosol.coherence.member: the member-name element contains the name of the member itself. This name makes it possible to easily differentiate among members, such as when multiple members run on the same machine. If a name is not specified, the node will fail to start (IllegalArgumentException). Suggested naming convention: OHI-<systemproperty.ohi.environment.identifier>-<machinename_or_ip-address>-<unique-identifier>. Note that the value of this system property should not exceed 32 characters.
2.4 Setting up a Weblogic Cluster for running OHI Product Definition on multiple nodes
A WebLogic Server cluster consists of multiple WebLogic Server Managed server instances running simultaneously and working together to provide increased scalability and reliability. A cluster appears to clients to be a single WebLogic Server instance. The server instances that constitute a cluster can run on the same machine, or be located on different machines.
A cluster's capacity can be increased by adding additional Managed server instances to the cluster on an existing machine, or by adding machines to the cluster to host the incremental Managed server instances. Each server instance in a cluster must run the same version of WebLogic Server.
Typically, the administration for the WebLogic Server instance is done through an Administration Server or Admin Server. The Managed Servers do not require the Administration Server to be up and running.
Make sure that the following prerequisites are met before configuring a WebLogic cluster:
-
Experience in setting up a WebLogic Server cluster is required!
-
The WebLogic software needs to be installed on all the machines that will be part of the cluster (that will run WebLogic server instances). Make sure that the same version of the WebLogic software is installed on all nodes.
The OHI Product Definition release bundle contains scripts that may be used to automate the creation of a WebLogic Cluster.
Using these requires experience in setting up a WebLogic Server cluster. The scripts are located in <OHI_ROOT>\util\wlst. Note that the scripts are provided "as is".
Before using the scripts, stage these to the environment in which they will be applied and make sure that the scripts can be executed.
If the cluster setup is for a distributed environment, make sure to stage the files on a shared disk so that all machines can access these.
Before executing the steps to create a WebLogic Cluster, the following must be done in preparation:
-
Change the setEnv.sh script to match the settings of the environment in which the scripts will be applied, e.g. set the correct Middleware Home (MW_HOME) and reference a Java Home.
-
Populate the wlst\properties\createOHIDomain.properties file with the values for the desired setup.
The OHI Domain creation script supports the following Domain Topologies:
-
Admin Server only
-
Admin Server + single Managed Server (single host)
-
Admin Server + single Managed Server (distributed)
-
Admin Server + multiple Managed Servers (single host)
-
Admin Server + multiple Managed Servers (distributed)
-
Admin Server + multiple Clustered Managed Servers (single host)
-
Admin Server + multiple Clustered Managed Servers (distributed)
Sample configuration files are provided in <OHI_ROOT>\util\wlst\properties\samples for all Domain Topologies mentioned.
Steps for setting up a Weblogic Cluster
Perform the following steps for setting up a WebLogic Cluster:
-
Set up a Node Manager on all hosts in the cluster.
-
Create a WebLogic domain for OHI Product Definition.
-
Generate node manager boot & startup properties.
-
Register the Domain with the Node Manager.
-
Optional: Create WebLogic Domain Template for secondary hosts.
-
Set up a load balancer to distribute requests to different managed servers in the cluster.
Before putting the domain into production, make sure that the environment is secure. See the specific WebLogic documentation with respect to "Securing a Production Environment".
Starting and stopping WebLogic Server is covered in the Operations Guide.
Setup a Node Manager for all nodes in the cluster
This step must be performed on all hosts (primary and secondary) that will be part of the WebLogic Server domain.
Node Manager is a WebLogic Server utility that controls start, shut down, and restart of Administration Server and Managed Server instances from a remote location. A Node Manager process is not associated with a specific WebLogic domain but with a machine. The same Node Manager process can be used to control server instances in any WebLogic Server domain, as long as the server instances reside on the same machine as the Node Manager process. Node Manager must run on each computer that hosts WebLogic Server instances -whether Administration Server or Managed Server- that need to be controlled with Node Manager.
Before a domain is created set up a Node Manager.The Node Manager will run as "init.d" service. Use the <OHI_ROOT>\util\wlst\registerNodeManagerService.sh script (as root) to create the nodemgrservice file and to set the correct property values in the nodemanager.properties file:
-
StopScriptEnabled=true
-
CrashRecoveryEnabled=true
-
StartScriptEnabled=true
All scripts are driven from properties for which the values are specified in the <OHI_ROOT>\util\wlst\properties\createOHIDomain.properties file.
Create a Weblogic domain for OHI Product Definition in the cluster
This step must be performed on the primary host only.
Use the WebLogic Configuration Wizard to create a domain for OHI Product Definition. Alternatively, use the <OHI_ROOT>\util\wlst\ script (as oracle user).
Oracle suggested values for configuration of the WebLogic Cluster are listed in the following table:
| Parameter | Suggested Value |
|---|---|
| Domain Name | ohi_domain |
| Administration Server Name | ohi_admin_server |
| Managed Server Name(s) | ohi_managed_serverX (where X is an integer value that starts with 1) |
| Cluster Name | ohi_cluster |
Note that these values can be set in the <OHI_ROOT>\util\wlst\properties\createOHIDomain.properties file.
Required setting: make sure that the Server Start Mode for the domain is set to Production Mode.
Generate node manager boot & startup properties
Make sure that the server is up and running.
The easiest way to do is by using the <OHI_ROOT>\util\wlst script (as oracle user). Make sure that the <OHI_ROOT>\util\wlst\properties\createOHIDomain.properties file has all required values.
The generateNMPropsOHIDomain.sh script needs to be executed from the root directory of the WebLogic domain that was created.
Verify that the boot.properties and startup.properties files were created correctly for all server instances and in the proper location ($DOMAIN_HOME/servers/[SERVER_NAME]/data/nodemanager.
Regsiter the Domain with the Node Manager
Make sure that the server is up and running.
Enroll the domain (i.e. register the domain with the node manger service) by running <OHI_ROOT>\util\wlst\enrollOHIDomain.sh (as oracle user). Verify that the enroll operation was successful, by checking the script output for "Successfully enrolled…".
The enrollOHIDomain.sh script needs to be executed from the root directory of the WebLogic domain that was created.
Optional: Create WebLogic Domain Template for secondary hosts
This step is only required if Managed Servers are defined that run on other hosts than the Admin Server.
Execute the "pack" command to create a WebLogic Domain Template for all secondary host machines. Alternatively, use the <OHI_ROOT>\util\wlst script to do that. The script requires the fully qualified root directory of the WebLogic domain that was created as an input parameter. Transfer the generated WebLogic Domain Template to all secondary host machines. The template can now be removed from the primary host.
On any secondary host machine, use the "unpack" command to create the WLS Domain Directory. Alternatively, , use the <OHI_ROOT>\util\wlst script to do that. The script requires two arguments:
-
a reference to the generated WebLogic Domain Template
-
the fully qualified root directory of the WebLogic domain that was created as an input parameter
A load balancer is needed to distribute incoming requests to the participating nodes in the cluster. Details about configuration of load balancers can be found in Oracle Fusion Middleware Using Clusters for Oracle WebLogic Server .
OHI Product Definition requires that HTTP session "stick" to the same node; that needs to be supported by the load balancer. OHI Product Definition maintains the session by sending a cookie to the client. The name of the cookie is OHIPRODDEFSESSION.
OHI Product Definition does not support HTTP Session state replication.
The domain is almost ready to deploy the application. Perform these final steps before deployment:
-
Set the ohi-proddef.properties, logback.xml and ohi-security.config files.
-
Configure the Coherence cluster.
Before putting a domain into production, make sure that the environment is secure. See the specific WebLogic documentation with respect to "Securing a Production Environment".
2.5 Initial configuration for OHI Product Definition in Oracle Fusion Middleware
2.5.1 Logging configuration
OHI Product Definition makes use of Logback library for generating log output. That log output is controlled by logback.xml file that is referenced in the WebLogic Server configuration. Through the configuration file, the logging level can be controlled as well as the output channels (referred to as 'appenders') for log messages. An example of an output channel for logging is a file.
Predefined logging configurations
OHI Product Definition comes bundled with a number of predefined logback configurations:
-
logback.xml: a default logging config file.
-
production-logback.xml: for maximum performance, will reveal errors.
-
trace-logback.xml: provides trace-level output (most detailed).
By default, logback.xml is used. To use one of the others, use the -Dlogback.configurationFile Java option in the setDomainenv script:
-Dlogback.configurationFile=production-logback.xml
or
-Dlogback.configurationFile=trace-logback.xml
The OHI Product Definition Operations Guide describes log files and how to control log output.
2.5.1.1 Logging Configuration For Web Services
To enable logging web services request and response, enable debug logging on DefaultServerSOAPHandler class. Add the following entries in logback.xml:
<logger name="com.oracle.healthinsurance.support.ws.handlers.MessagePayloadLoggingHandler" level="debug" />
2.5.2 Setup required defaults
The application requires default settings for a number of objects. Before default settings can be applied, users must be provisioned in order to access the system. Make sure the following prerequisites are met:
-
Set up users in an LDAP Directory Server as outlined below.
-
Provision the users in OHI Product Definition. For this purpose, a Provisioning service is provided
2.5.2.1 Set up a directory for File Exchange
In a number of scenarios OHI Product Definition processes files, for example for the File Import integration points. It is recommended to set up a shared directory structure that can be accessed by any machine that executes the system.
For example:
-
For inbound files: /<MOUNT_POINT>/ohi-proddef/transfer/in
-
For outbound or response files: /<MOUNT_POINT>/ohi-proddef/transfer/out
2.5.2.2 Authentication and User Provisioning
Before users can access the OHI Product Definition application, the following prerequisites must be met:
-
Users need to authenticate themselves by entering a valid combination of username and password credentials. All pages (other than the login page) are only available to authenticated (and properly authorized) users.
-
A user must be provisioned to access the OHI Product Definition application. The main purpose of OHI Product Definition user accounts is authorization: the administration of (role-based) access rights for users is handled in the OHI Product Definition application.
The following paragraphs provide details on authentication and provisioning.
2.5.2.3 Authentication
Although user accounts are stored in the application, user passwords are not. As a result, the application relies on external services for authentication. It provides support for LDAP based authentication (LDAP version 3).
The application supports LDAP authentication by binding to the LDAP server using the user-supplied credentials. This way, no LDAP-specific account info needs to be stored in OHI Product Definition.
Users in the LDAP server are expected to be defined using the industry standard inetOrgPerson object class (which is derived from the organizationalPerson object class). Typically, in that class, the properties uid and userpassword are used to store the credentials used for logging in.
The following picture shows the flow of the authentication process:
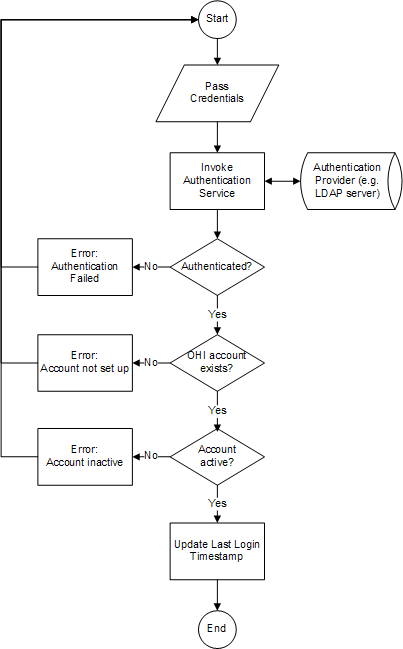
Credentials are passed by the user via the OHI Product Definition Login page.
In the authentication process, the user account data that is stored in OHI Product Definition is accessed, for example for logging the last time the user successfully logged in to the system. Before someone can authenticate and subsequently access OHI Product Definition, an account has to be set up. For that purpose, OHI Product Definition offers a user provisioning service which is documented in the Integration Guide.
2.5.2.4 Internal System User
During installation, an acount for the Internal System User is created in the OHI_USERS table with the following characteristics:
-
ID=10
-
IND_ACTIVE=Y
-
DISPLAY_NAME='Internal System User'
-
LOGIN_NAME=null
This user cannot be used to log in to the application via the UI pages, because the LOGIN_NAME is null. The Internal System User is used for the internal processing. For example, records created or updated by an Integration Point, will have CREATED_BY and/or LAST_UPDATED_BY = 10 (the id of the internal system user).
2.5.2.5 Seeded access roles
As said in the previous section, the seeded Internal System User cannot be used to log in to the application to use the UI pages. So after installation, new users should be created with appropriate roles.
There is a bootstrap issue here: new roles should be defined first in the OHI Product Definition application using the Setup access role page. To be able to access the setup access role page, a user should exists with a role that gives access to this page.
To solve the bootstrap issue, role SETUP_ACCESS_ROLE is seeded during installation as follows:
| Access Role Attribute | Value |
|---|---|
| Code | SETUP_ACCESS_ROLE |
| Name | Setup Access Role |
| Description | System role that gives access to setup access role page only. |
| Active | Y |
| Enabled | Y |
| Ohi specific? | Y |
Table 2-1 Table 2-1: Access Restriction Grants for SETUP_ACCESS_ROLE
| Access Restriction Grant Attribute | Value |
|---|---|
|
Access Restriction |
AccessRoles |
|
Create? |
Y |
|
Retrieve? |
Y |
|
Update? |
Y |
|
Delete? |
Y |
|
OHI specific? |
Y |
So the role SETUP_ACCESS_ROLE gives access to the setup access role page only.
After installation, the following steps needs to be taken to setup a new user with the SETUP_ACCESS_ROLE granted:
-
Create a new access role SETUP_ACCESS_ROLE in the external identity store.
-
Create a new user in the external identity store and grant the SETUP_ACCESS_ROLE to that user.
-
Provision the user with the SETUP_ACCESS_ROLE granted to the OHI Product Definition application.
For explanation of these steps, see 'Function Authorization'.
To facilitate testing, role ALL_FUNCTIONS_ACCESS_ROLE is seeded also. This role gives access to all pages of the application. This role is not intended to be used in production environments, so this role is disabled by default.
| Access Role Attribute | Value |
|---|---|
| Code | ALL_FUNCTIONS_ACCESS_ROLE |
| Name | All Functions Access Role |
| Description | System role that gives access to all pages (disabled by default) |
| Active | Y |
| Enabled | N |
| Ohi specific? | Y |
Table 2-2 Table 2-2: Access Restriction Grants for ALL_FUNCTIONS_ACCESS_ROLE
| Access Restriction Grant Attribute | Value |
|---|---|
|
Access Restriction |
All access restrictions of type 'Function' |
|
Create? |
Y |
|
Retrieve? |
Y |
|
Update? |
Y |
|
Delete? |
Y |
|
OHI specific? |
Y |
After installation, the following steps needs to be taken to setup a new user with the ALL_FUNCTIONS_ACCESS_ROLE granted:
-
Create a new access role ALL_FUNCTIONS_ACCESS_ROLE in the external identity store.
-
Create a new user in the external identity store and grant the ALL_FUNCTIONS_ACCESS_ROLE to that user.
-
Provision the user with the ALL_FUNCTIONS_ACCESS_ROLE granted to the OHI Product Definition application.
-
Enable to access role ALL_FUNCTIONS_ACCESS_ROLE.