4 Developing Custom Pages
Oracle Access Manager provides default login, logout, error and password pages and an extensible framework for creating a custom page tailored to the look and feel of your company's brand.
This chapter explains how to develop custom pages and how to deploy them in your environment. It provides the following sections.
4.1 Introducing the Custom Pages Framework
In its simplest form, Access Manager provides a framework that includes a set of static HTML pages displayed to the user. These default pages can be customized to reflect your company's look and feel, or replaced entirely with new pages. You can create custom interactive pages for authentication during login, logout, and error conditioning processing.
The custom pages framework is generally dynamic which requires that it be implemented as a script or an application that can perform the required logic. Thus, you can design, implement, and deploy a custom HTML page that, for example, displays a different version of the login form depending on whether the user is accessing via a mobile browser or a desktop browser.
Login, logout, error and password pages are packaged as part of the custom pages framework. An out-of-the-box Web application archive (WAR) file is provided that can be used as a starting point to develop customized pages. This WAR is named oamcustompages.war and located in the MW_HOME/oam/server/tools/custompages/ directory. After creating a custom HTML page, add it to the WAR. For more information, see Section 4.3.1, "Creating a Form-Based Login Page."
Note:
A custom page can be used in combination with existing Access Manager authentication modules or a custom authentication plug-in. For information about developing a plug-in, see Chapter 3, "Developing Custom Authentication Plug-ins."Any user facing custom pages must return the OAM_REQ token and the authentication endpoint. The following sections have more information.
4.1.1 Returning the OAM_REQ Token
OAM_REQ is a transient cookie that is set or cleared by Access Manager if the authentication request context cookie is enabled. This cookie is protected with keys known to Access Manager only. OAM_REQ must be retrieved from the query string and sent back as a hidden form variable.
Note:
For more information, see "Introduction to SSO Cookies" in Oracle Fusion Middleware Administrator's Guide for Oracle Access Management.When a resource is requested, the OAM Server redirects or forwards it to the credential collector page to collect credentials. The OAM Server also sends an OAM_REQ token to the login page. In the case of a customized login application, the login application should ensure that the OAM_REQ token is retrieved from the request and posted back to the OAM Server along with the credentials. OAM_REQ must be retrieved from the query string and sent back as a hidden form variable. For example:
String reqToken = request.getParameter(GenericConstants.AM_REQUEST_TOKEN_IDENTIFIER);

<%
if(reqToken != null && reqToken.length() > 0) { %>
<input type="hidden" name="<%=GenericConstants.AM_REQUEST_TOKEN_IDENTIFIER%>" value="<%=reqToken%>">
<%
}
%>
4.1.2 Returning the End Point
The end point, /oam/server/auth_cred_submit, must be returned to the OAM Server. For example:
<form action="/oam/server/auth_cred
_submit"> or "http://oamserverhost:port/oam/server/auth
_cred_submit".
4.2 Authenticating with Custom Pages
The authentication process involves determining what credentials a user must supply when requesting access to a resource, gathering the credentials over HTTP, and returning an HTTP response that reflects the results of credential validation. Figure 4-1 shows the end-to-end request flow for authenticating a user accessing an Access Manager protected resource that results in an error page.
Process Overview: Authentication Request Flow
In this process, the resource is protected by a specific authentication scheme that uses the authentication (AuthN) plug-in. The AuthN plug-in uses the Identity Store API to authenticate the credentials. The AuthN plug-in can also call a third-party API (not shown).
-
When a user requests a protected resource, the authentication flow is triggered and a login page is displayed. The user enters the required credentials which are then submitted to the authentication engine.
-
The Identity Store API establishes a connection to the backend store to complete authentication. AD and OVD are shown as example identity stores.
-
The Identity Store layer returns the results to the plug-in and the authentication engine layer. The authentication layer maps the error codes from the backend to the corresponding Access Manager error codes. For information about the standard error codes, see Table 4-2.
The results include any authentication error codes and native error codes acquired from the identity stores. Native error codes are returned to the login page as unmapped secondary error codes (
p_sec_error_msg). For information about secondary error codes, see Section 4.4.4, "Secondary Error Message Propagation".Error codes are returned as query parameters to the error or login page. Error codes are transmitted as HTTP Request parameters to the error page. The query parameter is named
p_error_code. -
The primary error code message is a localized string containing the detailed text for the error code. This can be obtained from the appropriate resource bundle file using the error code.
The following sections contain more information.
4.2.1 Using mod_osso Agent
Programmatic authentication using HTTP client APIs is supported for both OSSO 10g and 11g OAM Server.
4.2.1.1 OSSO 10g
An OSSO 10g programmatic client typically looks for URL redirects to identify the authentication flow. The default authentication schemes are configured to use embedded login pages. OAM Server will forward to the login page instead of using redirection. For OSSO 10g style programmatic clients to work, the credential collector must be configured in external mode.
In cases of upgrade from 10g release, configure the authentication scheme SSOCoexistMigrateScheme to use the new custom login page. In cases of new 11g release installation, edit the scheme used for authenticating a resource, namely LDAPScheme.
Set the challenge URL to point to a fully qualified custom URL. For example, http://host:port/sample-web/login.jsp. Also set the context type to external. For more information, see "Managing Authentication Schemes" in Oracle Fusion Middleware Administrator's Guide for Oracle Access Management.
4.2.1.2 11g OAM Server
In 11g release, the OAM Server uses Javascript to transmit the login form for credential input to the client. In the case where the client or device cannot understand a script-based redirect, the user-agent the client uses must be configured as a programmatic client. OAM Server is then recognized the client as a programmatic one and not as a browser based one. In this case, OAM Server will not use javascript based redirect.
The following is an example of the configuration setting in oam-config.xml. Multiple entries can be added under the userAgentType setting.
<Setting Name="userAgentType" Type="htf:map">
   <Setting Name="Mozilla/4.0 (compatible; Windows NT 5.1)
 OracleEMAgentURLTiming/3.0" Type="xsd:string">PROGRAMATIC</Setting>
 </Setting>
4.2.1.3 Process Overview: Developing Programmatic Clients
Use the following process when developing both OSSO 10g and Access Manager 11g programmatic clients.
-
The application invokes a protected resource via HTTP channel using the client API.
-
The
mod_ossopartner protecting the accessed resource generates thesite2pstoretokenand redirects to OAM Server for authentication. -
OAM Server redirects to the login page with the request parameters:
site2pstoretokenandp_submit_url.p_submit_urlcontains the programmatic authentication endpoint. For example:http(s)://host:port/sso/auth. The default browser action URL creates a session on the server side and is not present in the programmatic authentication endpoint. The programmatic authentication endpoint will not create a session for every authentication, rather it will use a global session for a user. This session will be the same for all authentication performed programmatically for a specific user. -
Programmatic clients are expected to submit credentials to the programmatic endpoint.
-
Clients must submit the following information to
p_submit_url:ssousername,password,s2pstoretoken(obtained in Step 3). -
OAM Server validates credentials, and if valid, redirects the request to the initial protected application.
-
In case of credential validation error,
p_error_codeis returned.
4.2.2 Using Unsolicited Post
In 11g release, use the following process for programmatic authentication using unsolicited POST.
-
Enable Direct Authentication.
In oam-config.xml, ensure that
ServiceStatusunderDirectAuthenticationServiceDescriptoris set totrue. (DirectAuthenticationServiceDescriptoris underOAMServicesDescriptor). -
Submit the following information to the endpoint
https://oam_host:oam_port/oam/server/authentication:-
username
-
password
-
successurl, for example,
http://machinename.example.com:7778/sample-web/headers.jsp.
-
-
Once the credentials are validated, OAM Server redirects to the success URL after setting
OAM_IDcookie as part of HTTP redirect (HTTP response code 302).
To allow direct authentication only for POST, or vice-versa:
-
Login to Oracle Access Management administration console and navigate to Policy Configuration, then Application Domains.
-
Select edit IAMSuite. Navigate to Resources, then search and edit resource /oamDirectAuthentication.
-
Under Operations, de-select all operations that are not to be supported, except POST. For example, GET, DELETE.
To change how username and password credentials are authenticated for different success URLs:
-
During the direct authentication request, along with
username,passwordandsuccessurl, pass another parametertypewith a value specifying the authentication mechanism. -
Go to IAMSuite application domain. Create a new resource with the resource URL
/oamDirectAuthentication, and query string with nametypeand value specified in Step 1. -
Associate this resource to the authentication scheme that supports the
typeselected. -
Create multiple resources with the URL
/oamDirectAuthenticationand different values for the query stringtype(for example,type=FORM,type=CREDS) and associate it to corresponding authentication schemes.
4.2.3 Setting Custom OSSO Cookies After Authentication
For mod_osso agents, 11g release supports setting custom cookies. For 10g and 11g Webgates, this is achieved through an authentication and authorization response type cookie.
To configure OSSO custom cookies:
-
Login to Oracle Access Management administration console.
-
Navigate to the application domain for the OSSO agent.
-
Select the protected resource policy for authentication.
-
Click Responses tab.
-
Add the cookie responses. The cookies for your deployment should be created with a Name and Value that follow Access Manager 11g authentication response format. For example:
-
Name: ORASSO_AUTH_HINT, Type: Cookie, Value: v1.0~${session.expiration}
-
Name: ORASSO_UCM_COOKIE1, Type: Cookie, Value: v2.0~${user.attr.displayname}~${user.attr.given}
-
Name: ORASSO_UCM_COOKIE2, Type: Cookie, Value: v3.0~${user.attr.uid}~${user.attr.mail}
-
-
Save the changes.
-
Access the
mod_ossoprotected application to verify that the cookies are being created after authentication.
The OSSO cookies are set by default on .example.com domain and the cookies are set to expire after one year. The settings can be changed using the WLST commands:
-
updateOSSOResponseCookieConfig -
deleteOSSOResponseCookieConfig
For example, using updateOSSOResponseCookieConfig:
help('updateOSSOResponseCookieConfig')

Description:

Updates OSSO Proxy response cookie settings in system configuration.
Syntax:


 updateOSSOResponseCookieConfig(cookieName = "<cookieName>",cookieMaxAge = "<cookie age in minutes>", isSecureCookie = "true | false",cookieDomain="<domain of the cookie>", domainHome = "<wls_domain_home_path>")
 cookieName = Name of the cookie for which settings are updated. This is optional parameter. If parameter is not specified global setting is updated.
 cookieMaxAge = Max age of cookie in minutes. A negative value will set a session cookie.
 isSecureCookie = Boolean flag specifies if cookie should be secure which wouldbe sent only in SSL channel.
 cookieDomain = The domain of the cookie.
 domainHome = location of domain home <mandatory for offline commands,not required for online>

Example:


 updateOSSOResponseCookieConfig(cookieName = "ORASSO_AUTH_HINT",cookieMaxAge = "525600", isSecureCookie = "false", cookieDomain=".example.com",domainHome = "<wls_domain_home_path>")
For example, using deleteOSSOResponseCookieConfig:
help('deleteOSSOResponseCookieConfig')

Description:

Deletes OSSO Proxy response cookie settings in system configuration.
Syntax:


 deleteOSSOResponseCookieConfig(cookieName = "<cookieName>",domainHome = "<wls_domain_home_path>")
 cookieName = Name of the cookie for which settings are updated. This is mandatoryparameter. The global cookie setting cannot be deleted.
 domainHome = location of domain home <mandatory for offline commands,not required for online>

Example:


 deleteOSSOResponseCookieConfig(cookieName = "ORASSO_AUTH_HINT",domainHome = "<wls_domain_home_path>")
In the update command, if cookie name is not specified, global settings for all the cookies are updated. If cookie name is specified, the parameters are overridden for the specific cookie. For example:
updateOSSOResponseCookieConfig(cookieMaxAge = "525600", isSecureCookie = "false", cookieDomain=".example.com")

updateOSSOResponseCookieConfig(cookieName="ORASSO_AUTH_HINT", cookieMaxAge = "-1", isSecureCookie = "false", cookieDomain=".example.com")

updateOSSOResponseCookieConfig(cookieName="ORASSO_UCM_COOKIE2", isSecureCookie = "true", cookieDomain=".us.example.com")

deleteOSSOResponseCookieConfig(cookieName = "ORASSO_UCM_COOKIE2")
4.3 Understanding Custom Login Pages
The custom login page can be created as a WAR file and packaged with the necessary resource bundle files. The WAR file can then be deployed on an application behind a DCC, or if DCC is not used, the page can be deployed on the same server where ECC is running. When using ECC, the following settings must be specified for the Authentication scheme using the custom WAR file.
-
Context Type = CustomWar
-
Challenge URL = Relative path for the URL of the login page inside the WAR file
-
Context Value = Custom WAR's root path. If a customized error page is included as part of the Custom WAR file, you must specify the absolute URL in the authentication policy-failure redirect URI. For example:
http://host:port/SampleLoginWar/pages/MFAError.jsp.
Note:
For more information about authentication schemes and managing them, see "About the Authentication Schemes Page" in Oracle Fusion Middleware Administrator's Guide for Oracle Access Management.More information is in the following sections.
4.3.1 Creating a Form-Based Login Page
Form-based authentication enables the development of customized Web forms that process login credentials using Access Manager's authentication mechanisms. These forms are HTML pages that enable you to present login information in different languages, to display user interface elements that comply with your company's presentation standards, and to add functions required for password management.
The form or login application can be written to process the redirect from the user and render the HTML using your preferred technology (JSP, ASP.net, Perl, PHP, and so on). This allows you to customize the look and feel of the page so it reflects company standards, and it enables pre-processing of the user's submission (POST) before their credentials are sent to the OAM Server, if desired.
Three modes of request cache are supported: basic, cookie, and form. When working in basic mode, the request_id is a mandatory parameter and should be sent back. In form mode, the OAM_REQ token is mandatory and should be sent back if available. In cookie mode, OAM_REQ is set as a cookie.
A custom login form page has the following requirements:
-
The page must be built to support the desired authentication module.
-
The page must support retrieval of the OAM_REQ token. See Section 4.1.1, "Returning the OAM_REQ Token".
-
The page must retrieve the end point. See Section 4.1.2, "Returning the End Point".
4.3.2 Page Redirection Process
When writing a custom login page for authentication by Access Manager, a common method is to redirect a user to a login page that is hosted outside of the OAM Server. The user is redirected to the custom page or application you have written.
When a form-based authentication scheme has been created with an external challenge type, the OAM agent redirects the user first to the obrareq.cgi URL, which in turn redirects the user to the login page specified as the Challenge URL for the authentication scheme. The Challenge Redirect URL declares the DCC or ECC endpoint. The Challenge URL is the URL associated with the Challenge method such as FORM.
On the redirect page, request_id and redirect_url are added to the query string. For example:
?request_id=5092769420627701289&redirect_url=http%3A%2F%2Fexample.com%3A7777%2Fscripta%2Fprintenv
When using the x509 authentication scheme there is no separate page for login credentials as authentication occurs transparently. However, page redirection also applies to non-form based authentication methods. For example, when using an x509 Authentication Scheme, you can direct users to a confidentiality disclaimer statement, or similar, before a protected resource is displayed. In this case, enter the path to the disclaimer page and have that page redirect to the /oam/CredCollectServlet/X509 page. Be sure to present the original query scheme.
4.4 Understanding Custom Error Pages
This section contains information specific to the development of custom error pages. It contains the following information.
For information on how error code query parameters p_error_code and p_sec_error_msg will map to the custom error codes in your environment, see Section 4.4.5, "Retrieving Error Codes".
See Also:
Section 3.5.3, "Error Codes in an Authentication Plug-In" and Section 4.5.5, "Retrieving Password Policy Error Codes"4.4.1 Enabling Error Page Customization
Once a custom Error page is packaged and deployed as an out-of-the-box Web application archive (WAR) file, use the updateCustomPages WLST command to enable and disable it. The custom Error page has a specific location that must be respected when deploying the custom web application. The location is:
http(s)://<host>:<port>/<context>/pages/Error.<pageExtension>
Information on how to use updateCustomPages and other WLST commands can be found in the Oracle Fusion Middleware WebLogic Scripting Tool Command Reference and in Specifying the Custom Error and Logout Page Deployment Paths in this chapter.
4.4.2 Standard Error Codes
Access Manager provides standard error codes that indicate the reasons for failure. Common reasons include an invalid username and password combination, a locked or disabled user account, or an internal processing error. The reason for the authentication error is received from the backed identity store and mapped to a specific error code maintained in the Access Manager Server. This error code is then propagated to the login or error page. (The custom error page also displays any internal server errors as well.)
Table 4-1 summarizes the standard error information available in login and error pages.
Table 4-1 Types of Error Information
| Message Type | Description |
|---|---|
|
Error code |
A string containing a specific number. The error codes are managed solely by Access Manager. Query string parameter is named |
|
Primary error message |
A localized string containing the detailed text for the error code. Is based on the client locale, namely, the user's browser language setting. |
|
Secondary error message |
A non localized string containing the real cause for the failure. Secondary error message can be provided by a custom authentication plug-in or be returned by an identity store. Query string parameter is named |
Table 4-2 lists all the error message codes sent by the OAM Server and the corresponding primary error message. If a primary error message has been customized for an application, the application must map this custom message to the corresponding standard error message maintained by OAM Server. There is no difference between OAM-1 and OAM-2 error codes.
Table 4-2 Standard Error Codes and Message
| Error Code | Primary Error Message |
|---|---|
|
OAM-1 |
An incorrect Username or Password was specified. |
|
OAM-2 |
An incorrect Username or Password was specified. |
|
OAM-3 |
Unexpected Error occurred while processing credentials. Please retry your action again! |
|
OAM-4 |
System error. Please contact the System Administrator. |
|
OAM-5 |
The user account is locked or disabled. Please contact the System Administrator. |
|
OAM-6 |
The user has already reached the maximum allowed number of sessions. Please close one of the existing sessions before trying to login again. |
|
OAM-7 |
System error. Please re-try your action. If you continue to get this error, please contact the Administrator. |
|
OAM-8 |
Authentication failed. |
|
OAM-9 |
System error. Please re-try your action. If you continue to get this error, please contact the Administrator. |
|
OAM-10 |
The password has expired. Please contact the System Administrator. |
4.4.3 Security Level Configuration
An error code's security level determines the error code that is returned by OAM Server. The security level is configured by an administrator using the Access Manager Configuration panel in the administration console. The following security level settings are available when configuring error codes for custom login pages:
-
SECURE: Most secure level. Provides a generic primary error message that gives little information about the internal reason for the error.
-
EXTERNAL: The recommended level and is the default.
-
INTERNAL: The least secure level. Enables propagation of error code to login or error page.
Table 4-3 lists the standard error codes (see Table 4-2) that are propagated to the login or error page according to security level.
Table 4-3 Error Condition Mapping by Security Level
| Error Condition | Internal Mode | External Mode | Secure Mode |
|---|---|---|---|
|
Invalid login attempt. |
OAM-1 |
OAM-2 |
OAM-8 |
|
Processing submitted credentials failed for a reason. For example, in WNA mode the |
OAM-3 |
OAM-3 |
OAM-8 |
|
An authentication exception is raised for a reason. |
OAM-4 |
OAM-4 |
OAM-9 |
|
User account is locked due to certain conditions. For example, the invalid attempt limit is exceeded. |
OAM-5 |
OAM-5 |
OAM-8, or OAM-9 if OIM is integrated |
|
User account is disabled. |
OAM-5 |
OAM-5 |
OAM-9 |
|
User exceeded the maximum number of allowed sessions. This is a configurable attribute. |
OAM-6 |
OAM-6 |
OAM-9 |
|
Can be due to multiple reasons. The exact reason is not propagated to the user level for security reasons. Is the default error message displayed when no specific error messages are propagated up. |
OAM-7 |
OAM-7 |
OAM-9 |
When an error condition occurs, the OAM Server will forward to the default error page, unless the default page has been overridden as a failure-redirect-url in the authentication policy. When using a custom error page, the absolute error page URL must be set as the failure_redirect_url in the authentication policy so that the server will redirect to the custom page. The custom login page typically has the logic to serve as the error page.
In the case of error conditions OAM-1 and OAM-8, which enable the credentials to be collected again, the user is returned to the login page.
4.4.4 Secondary Error Message Propagation
The authentication engine layer maps exceptions from the backend identity store to error codes specific to OAM Server. These codes are then propagated. Plug-ins can retrieve the secondary error code and then propagate so that appropriate action can be taken.
Note:
The primary error codes are propagated to the error or login page in all modes. The secondary error message is propagated only when the security level is configured to be INTERNAL. For more information, see Section 4.4.3, "Security Level Configuration".Secondary error messages are sent as HTTP Request parameters to the error page. The query parameter is named p_sec_error_msg. This message is a concatenated string of code and message text from the backend and is not translated.
For example, in the case where OVD is the backend and invalid credentials are entered, authentication fails and the cause is returned from the backend as LDAP:error code 49-Invalid Credentials and the OAM Server error code is returned as OAM-1. In this case the following data will appear in the log in page:
| Entity | Description |
|---|---|
| Error Code | OAM-1 |
| Primary Message (retrieved from the code) | An incorrect Username or Password was specified |
| Secondary Error Code | LDAP:error code 49- Invalid Credentials |
4.4.5 Retrieving Error Codes
An error code is sent as HTTP Request parameters to the error page. The query parameter is named p_error_code. This parameter value will contain error code values, such as OAM-1, that is returned by the OAM Server. See Table 4-2 for standard Access Manager error codes and corresponding message. These error codes do not have supplementary information.
A custom login page can be associated with a custom resource bundle to transform the error codes to be meaningful messages that are displayed to the end user. However, if the custom login page does not require meaningful error messages or translations, then the custom resource bundle is not required.
4.4.5.1 Code Samples
A local resource bundle file must be created with and the error condition mapped to Access Manager error codes as summarized in Table 4-3. The file can be consumed in the login or error page.
Example 4-1 provides a resource bundle code sample and Example 4-2 provides an error code page sample.
Example 4-1 Resource Bundle Code
package mytest.error;
     Import java.util.ListResourceBundle;
  public class ExampleErrorMsg extends ListResourceBundle {
        /* (non-Javadoc)
         * @see java.util.ListResourceBundle#getContents()
         */
        public Object[][] getContents()
    {
        return m_contents;
    }
    /** The Constant m_contents. */
    private static final Object[][] m_contents =
     {
        {"OAM-1", " An incorrect Username or Password was
 specified "},
        {"OAM-2", " An incorrect Username or Password was
 specified "},
        {"OAM-3", "Unexpected Error occurred while processing
 credentials. Please retry your action again!"},
        {"", ……};
             }
     }
<%@page import="mytest.error.ExampleErrorMsg"%>
  //initializing the messageBundle first
  String defaultResourceBundle = "mytest.error.ExampleErrorMsg";
  java.util.Locale myLocale = request.getLocale();
  ResourceBundle msgBundle=
 ResourceBundle.getBundle(defaultResourceBundle,myLocale);
String errCode = request.getParameter("p_error_code");
String secondaryErrMessage = request.getParameter("p_sec_error_msg");
  <%
        if(errCode != null && errCode.length() > 0) {
          try {
             simpleMessage = msgBundle.getString(errCode);
          } catch(Exception e) {
             //get the default authn failed message
             simpleMessage = msgBundle.getString("OAM-8");
          }
  %>
  <div class="message-row">
      <p class="loginFailed"> <%=simpleMessage%> </p>
  </div>
4.4.6 Error Data Sources Summary
Table 4-4 summarizes the error data sources available to an authentication plug-in.
Table 4-4 Authentication Plug-In Error Data Sources
| Source | Parameter |
|---|---|
|
Error code |
HTTP Request parameter: |
|
Primary error message |
Is obtained from the resource bundle, using the error code |
|
Secondary Error Message (sent only in INTERNAL error mode) |
HTTP Request parameter: |
|
Concatenated list of server error codes |
HTTP Request parameter: |
|
Password Plugin error message |
HTTP Request parameter: |
|
Plugin client responses |
HTTP Request parameter: PLUGIN_CLIENT_RESPONSE |
|
Plugin error responses |
HTTP Request parameter: PLUGIN_ERROR_RESPONSE |
4.5 Understanding Custom Password Pages
Access Manager processes user-entered passwords and password changes with form-based Java Server Pages (JSP). These pages can be customized in several languages or to display a company logo. When writing a custom password page for authenticating users, a common method to follow is to redirect the user to a password page hosted outside Access Manager; custom pages are written to process a redirect from the user and to render the HTML. They can be kept as a JSP, or written using ASP.net, Perl, PHP, and other similar technologies. The pages enable pre-processing of the user's submission (POST) before their credentials are sent to Access Manager, if desired. The following sections contain more details.
4.5.1 Customizing the Password Page WAR
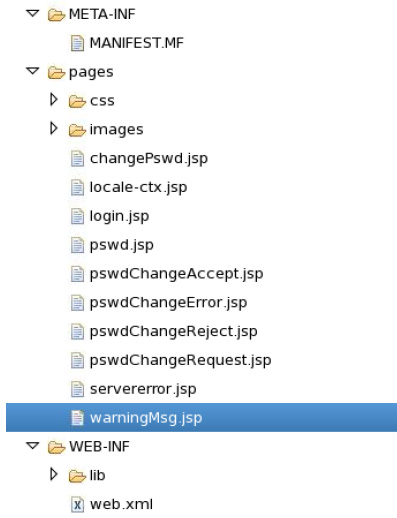
A basic Web archive (WAR) file that includes the required translation bundles for login and password pages is provided when Access Manager is installed. This WAR is called oamcustompages.war and is the starting point for customizing password pages. A custom password service form page has the following requirements:
-
The page must support retrieval of the OAM_REQ token as documented in Returning the OAM_REQ Token.
-
The page must retrieve the end point as documented in Returning the End Point.
The WAR is located in the $IDM_HOME//oam/server/tools/custompages/ directory. The advantage of using the WAR is that the basic structure is already in place. Figure 4-2 displays the structure of the WAR; the CSS and images can be customized as per your requirements.
4.5.2 Using the Request Cache
Three modes of request cache are supported: basic, form and cookie.
-
Basic mode defines the request_id as a mandatory parameter that must be sent back.
-
Form mode defines the OAM_REQ token as mandatory and should be sent back, if available.
-
Cookie mode sets OAM_REQ as a cookie.
4.5.3 Specifying Custom Pages In a Policy
The starting point for password pages is pswd.jsp. The location of this page is configured under Password Policy using the Administration Console. For details, see the Oracle Fusion Middleware Administrator's Guide for Oracle Access Management.
-
Log in to the Access Manager Administration Console as administrator.
-
Click the Password Policy link under Access Manager.
-
Define or modify the value of the Password Service URL attribute.
-
Click Apply.
4.5.4 Retrieving Warning Messages
A user-facing page has access to the number of days before which the password will expire. The following code snippet illustrates how to obtain the number of days or hours before the password expires.
String message = "";
if(errCode != null && errCode.equals("1")) {
message = msgBundle.getString("USER_PSWD_WARNING") + errCode +
msgBundle.getString("USER_PSWD_DAY");
} else if (errCode != null && errCode.equals("0")) { message =
msgBundle.getString("USER_PSWD_WARNING_HOURS"); } else {
message = msgBundle.getString("USER_PSWD_WARNING")+ " " + errCode + " " +
msgBundle.getString("USER_PSWD_DAYS");
}
4.5.5 Retrieving Password Policy Error Codes
A user-facing page has access to the password policy result context and has the ability to obtain applicable messages. Each message may include supplementary information, depending on the message. The following code snippet shows how a page can obtain the message and supplementary information from the password policy result context:
String simpleMessage = "";
  String result = request.getParameter("rejectedRuleDesc");
  if(result.indexOf('~') != -1) {
   String[] results = result.split("~");
   for(String eachResult : results) {
      if(eachResult.indexOf(":") != -1) {
        String messageKey = eachResult.substring(0, eachResult.indexOf(":"));
        String resourceBundleKey = UrlSubstitutionMessages.ERRORCODEMAP.get(messageKey);
        String placeHolderValue = eachResult.substring(eachResult.indexOf(":") + 1, eachResult.length());
        String displayValue = Localizer.localize(resourceBundleKey, placeHolderValue, myLocale);
        simpleMessage += displayValue + "<br>";
      }
      else {
        String resourceBundleKey = UrlSubstitutionMessages.ERRORCODEMAP.get(eachResult);
        String displayValue = Localizer.localize(resourceBundleKey, null, myLocale);
        simpleMessage += displayValue + "<br>";

      }
   }
  }
For example, if the password doesn't have enough characters, the following will be the result in context:
-
PasswordRuleDescription.getResourceBundleKey()returns"passwordPolicy.error.minLength" -
PasswordRuleDescription.getPlaceHolderValue()returns minimum number of characters -
PassswordRuleDescription.eachDesc.getDisplayValue()returns fully translated message
The password plug-in redirects to the password pages and the corresponding message is received from the password policy. These error codes are sent to the password policy pages as HTTP Request parameter named ruleDes. Table 4-5 lists the available error codes, message key, and the corresponding message that can be returned during password validation.
Table 4-5 Password Validation Error Codes
| Message Key in URL | Message Key for Resource Bundle | Message Text |
|---|---|---|
|
PSWD-1 |
passwordPolicy.message.minLength |
Password must be at least {0} characters long |
|
PSWD-2 |
passwordPolicy.message.maxLength |
Password must not be longer than {0} characters |
|
PSWD-3 |
passwordPolicy.message.minAlpha |
Password must contain at least {0} alphabetic characters |
|
PSWD-4 |
passwordPolicy.message.minNumber |
Password must contain at least {0} numeric characters |
|
PSWD-5 |
passwordPolicy.message.minAlphaNumeric |
Password must contain at least {0} alphanumeric characters |
|
PSWD-6 |
passwordPolicy.message.minSpecialChars |
Password must contain at least {0} special characters |
|
PSWD-7 |
passwordPolicy.message.maxSpecialChars |
Password must not contain more than {0} special characters |
|
PSWD-8 |
passwordPolicy.message.maxRepeated |
Any particular character in the password must not be repeated more than {0} times |
|
PSWD-9 |
passwordPolicy.message.minUnique |
Password must contain at least {0} unique characters |
|
PSWD-10 |
passwordPolicy.message.minUpperCase |
Password must contain at least {0} uppercase letters |
|
PSWD-11 |
passwordPolicy.message.minLowerCase |
Password must contain at least {0} lowercase letters |
|
PSWD-12 |
passwordPolicy.message.maxAge |
Password will expire {0} days after the last password change |
|
PSWD-13 |
passwordPolicy.message.warnAfter |
Password change reminder will be sent {0} days after the last password change |
|
PSWD-14 |
passwordPolicy.message.reqdChars |
Password must contain the following characters: {0} |
|
PSWD-15 |
passwordPolicy.message.invalidChars |
Password must not contain the following characters: {0} |
|
PSWD-16 |
passwordPolicy.message.validChars |
Password can contain the following characters: {0} |
|
PSWD-17 |
passwordPolicy.message.invalidStrings |
Password must not contain the following strings: {0} |
|
PSWD-18 |
passwordPolicy.message.startsWithChar |
Password must start with an alphabetic character |
|
PSWD-19 |
passwordPolicy.message.disAllowUserId |
Password must not match or contain user ID |
|
PSWD-20 |
passwordPolicy.message.disAllowFirstName |
Password must not match or contain first name |
|
PSWD-21 |
passwordPolicy.message.disAllowLastName |
Password must not match or contain last name |
|
PSWD-22 |
passwordPolicy.message.dictMessage |
Password must not be a dictionary word |
|
PSWD-23 |
passwordPolicy.message.enforceHistory |
Password must not be one of {0} previous passwords |
|
PSWD-24 |
passwordPolicy.message.minAge |
Password cannot be changed for {0} days after the last password change |
|
PSWD-25 |
passwordPolicy.message.minUnicode |
Password must contain at least {0} Unicode characters |
|
PSWD-26 |
passwordPolicy.message.maxUnicode |
Password must not contain more than {0} Unicode characters |
4.5.6 Obtaining Password Policy Rules
A user-facing page has access to the password policy rules applicable for the user. Each message may include supplementary information, depending on the message. The following code snippet shows how a page can obtain the rules and supplementary information from the password policy result context:
String simpleMessage = "";
String result = request.getParameter("ruleDesc");
if(result.indexOf('~') != -1) {
String[] results = result.split("~");
for(String eachResult : results) {
if(eachResult.indexOf(":") != -1) {
String messageKey = eachResult.substring(0, eachResult.indexOf(":"));
String resourceBundleKey = UrlSubstitutionMessages.ERRORCODEMAP.get(messageKey);
String placeHolderValue = eachResult.substring(eachResult.indexOf(":") + 1, eachResult.length());
String displayValue = Localizer.localize(resourceBundleKey, placeHolderValue, myLocale);
simpleMessage += displayValue + "<br>";
}
else {
String resourceBundleKey = UrlSubstitutionMessages.ERRORCODEMAP.get(eachResult);
String displayValue = Localizer.localize(resourceBundleKey, null, myLocale);
simpleMessage += displayValue + "<br>";

}
}
}
For example, if the password does not have enough characters, the following will be the result in context:
-
PasswordRuleDescription.getResourceBundleKey()returns"passwordPolicy.error.minLength" -
PasswordRuleDescription.getPlaceHolderValue()returns minimum number of characters -
PassswordRuleDescription.eachDesc.getDisplayValue()returns fully translated message
4.6 Using the Credential Collectors with Custom Pages
Either one of two Access Manager credential collection components can be enabled to serve as the communication endpoint for custom pages, and to facilitate interaction with the customized user interface. The Access Manager credential collection components are:
-
The Embedded Credential Collector (ECC) which can be used out-of-the-box with no additional installation and setup. In cases where the ECC is used, the default pages are accessed from the following locations:
-
Login page: http(s)://host:port/oam/pages/login.jsp
-
Error page: http(s)://host:port/oam/pages/servererror.jsp
-
-
The Detached Credential Collector (DCC) which is recommended for greater scalability and security isolation in production deployments. In cases where the DCC is used, the default pages are accessed from the following locations:
-
Login page: /oamsso-bin/login.pl
-
Login action URL: /oam/server/auth_cred_submit. This is the default action URL if no
actionis configured in the authentication scheme parameters. No corresponding physical page is located with the default URL. A physical page is needed at the URL location only when anactionhas been configured in the authentication scheme and a runtimeaction typeresults in a pass through on the action URL. -
Error page: /oberr.cgi. This is a URL pattern recognized by DCC and is not a physical location.
-
Regardless of which credential collection component is enabled for communicating with users, the design and implementation of custom pages in your environment is almost identical.
Note:
For more information about the Access Manager Server credential collectors, see "Configuring 11g Webgate for Dynamic Credential Collection" in Oracle Fusion Middleware Administrator's Guide for Oracle Access Management.This section contains details regarding the DCC.
4.6.1 Using the Detached Credential Collector
The primary differences when using the DCC to collect credentials from a custom page include the following:
-
The DCC is installed with default pages implemented as Perl scripts using HTML templates located in the following Webgate Oracle Home (WebgateOH) directories:
-
WebgateOH/webgate/ohs/oamsso
-
WebgateOH/webgate/ohs/oamsso-bin
-
-
In addition to customizing login pages for supported authentication mechanisms, the default error and logout pages can be customized.
-
The default error page is triggered when an error condition occurs outside of the authentication flow, or if the failure redirect URL is not specified in the authentication scheme. The default error page template and associated error messages are located in a language and locale specific subdirectory within the Webgate Oracle Home. For example, the exact location for
en-usis: WebgateOH/webgate/ohs/lang/en-us/WebGate.xml. -
The default logout page is located in WebgateOH/webgate/ohs/oamsso-bin/logout.pl.
-
-
Custom pages can be deployed on the Oracle HTTP Server hosting the DCC or, in the case of JSP or Servlets, on a web container fronted by it.
-
Use a configurable URL to allow HTML forms to post collected data to the DCC. The
actionchallenge parameter in the authentication scheme specifies the URL where the credentials are expected. -
requestidquery parameter handling is not required.
4.6.2 Creating a Form-Based Login Page Using DCC
-
Create an HTML form from which the user's credentials (user name and password) can be submitted.
For more information, see Section 4.3.1, "Creating a Form-Based Login Page".
-
Place the form in an unprotected directory, or in a directory protected by an Anonymous authentication scheme, on your Web server with DCC.
-
Create a form-based authentication scheme and specify the path to the login form as the Challenge URL.
For more information, see Oracle Fusion Middleware Administrator's Guide for Oracle Access Management.
-
Call the form action using HTTP GET or POST.
-
Protect the target URL in the action of the login form with a policy.
-
Configure the challenge parameters in the authentication scheme.
-
Specify the authentication module to use to process the credentials.
4.7 Specifying the Custom Error and Logout Page Deployment Paths
Custom Error and logout pages have specific paths that must be respected when deploying the custom application. The error page path is:
http(s)://<host>:<port>/<context>/pages/Error.<pageExtension>
The logout page path is:
http(s)://<host>:<port>/<context>/pages/Logout.<pageExtension>
context and pageExtension are variables that can be configured using the updateCustomPages WLST command. pageExtension has a default value of jsp but can be left blank while running the command. updateCustomPages will add a context path and page extension to the configuration.
<Setting Name="ssoengine" Type="htf:map">
  <Setting Name="ErrorConfig" Type="htf:map">
  <Setting Name="ErrorMode" Type="xsd:string">EXTERNAL</Setting>
  <Setting Name="CustomPageExtension" Type="xsd:string">html</Setting>
  <Setting Name="CustomPageContext" Type="xsd:string">SampleApp</Setting>
</Setting>
</Setting>
Note:
See the Oracle Fusion Middleware WebLogic Scripting Tool Command Reference for details.