6 Managing Oracle Access Manager Identity Assertion on IBM WebSphere
Oracle Access Manager Identity Assertion Provider for IBM WebSphere Application Server (IBM WebSphere) can be used to provide authentication and single sign-on with Oracle Access Manager 10g (10.1.4.3) or 11g.
This chapter includes the following topics:
-
Installing Components for the Oracle Access Manager IAP for IBM WebSphere
-
Introduction to the Oracle Access Manager 10g (10.1.4.3) Configuration Tool
-
Provisioning WebGate and Configuring OAM 10g (10.1.4.3) and the IAP for IBM WebSphere
-
Provisioning and Configuring OAM 11g for the IAP and IBM WebSphere
Note:
For more information, see "Supported IBM WebSphere Application Server." Information on using OAM with IBM WebSphere Portal is in Chapter 7, "Integrating Oracle Access Manager Identity Assertion with IBM WebSphere Portal."6.1 Introduction to OAM Identity Assertion on IBM WebSphere
Oracle Access Manager Identity Assertion Provider is part of Oracle Fusion Middleware. Oracle provides an Identity Assertion Provider for IBM WebSphere that can be used to intercept and validate OAM sessions and generate IBM WebSphere-specific sessions.
IBM WebSphere allows Single Sign On (SSO) with external authenticators by using the Trust Association Interceptor (TAI). TAI interfaces provide mechanisms for external authenticators to perform user authentication and then assert the identity to IBM WebSphere. Oracle Access Manager Identity Assertion Provider for IBM WebSphere uses the TAI interface to assert the user identity from the OAM session to IBM WebSphere. Upon receiving user identity information from the Identity Assertion Provider, IBM WebSphere queries the existence of the user in the user registry.
Oracle Access Manager Identity Assertion Provider for IBM WebSphere needs a valid OAM session for asserting the user identity to IBM WebSphere. Typically this is achieved by using an IBM HTTP Server (IHS) reverse proxy to front-end IBM WebSphere. OAM WebGate is installed on the IHS proxy and used to authenticate users against Oracle Access Manager. WebGate generates an OAM session token upon successfully authenticating a user. The IHS proxy then forwards this session token to IBM WebSphere. The Identity Assertion Provider intercepts the request and asserts the user identity from the session token for IBM WebSphere.
The Identity Assertion Provider provides identity assertion using either the HTTP Cookie or HTTP Request Headers. Accordingly, the IAP can be configured for Cookie based assertion or header based assertion.
-
Cookie-based Assertion: Is based on OAM Session Token (ObSSOCookie). In this configuration, the Identity Assertion Provider checks availability of ObSSOCookie and validates it. On successful validation, user identity in the session cookie is asserted to IBM WebSphere.
-
Header-based Assertion: Is based on HTTP Request Header. In this configuration, the Identity Assertion Provider checks availability of a particular (configurable) request header in the request. If available, the user identity within the header is asserted to IBM WebSphere.
For more information, see the following:
-
Scenario 1: Oracle Access Manager 10g (10.1.4.3) with the IAP on IBM WebSphere
-
Scenario 2: OAM 11g with the IAP and IBM WebSphere (10g WebGate Installed)
-
Scenario 3: OAM 11g with the IAP and IBM WebSphere (11g WebGate Installed)
6.1.1 Scenario 1: Oracle Access Manager 10g (10.1.4.3) with the IAP on IBM WebSphere
This scenario describes a Java EE application that relies on Oracle Access Manager 10g (10.1.4.3) for authentication and authorization of its users. This application has been deployed on IBM WebSphere and can use the Identity Assertion Provider to provide SSO with Oracle Access Manager 10g (10.1.4.3).
Figure 6-1 Components and Process Flow with OAM 10g (10.1.4.3) and the IAP
Description of "Figure 6-1 Components and Process Flow with OAM 10g (10.1.4.3) and the IAP"
Process overview: Identity Assertion on IBM WebSphere
-
Browser to IHS Proxy Web Server: User accesses the IBM WebSphere resource using the proxy IHS host and port, which triggers the 10g (10.1.4.3) WebGate installed on IHS Web server to authenticate and authorize the user.
-
WebGate to Access Server: WebGate communicates with OAM 10g (10.1.4.3) Access Server using Oracle Access Protocol (OAP). Access Server checks the Policy Store to locate any policies protecting the requested resource. WebGate through Access Server collects credential information from the user based on the Authentication Scheme specified and then validates whether the user can be authenticated. On successful authentication, WebGate through Access Server authorizes the user to access the requested resource on the IHS Web server. Additionally, WebGate sets authorization headers in the request as specified in the OAM Policy.
-
Web Server to IBM WebSphere: IHS Web Server acts as a proxy for IBM WebSphere and forwards the request to IBM WebSphere after successful authorization by OAM 10g (10.1.4.3) WebGate. IHS Web Server will also forward the HTTP Cookies and Request Headers set in the request to the IBM WebSphere.
Requests are intercepted at IBM WebSphere by OAM IAP. The TAI of OAM then validates the Cookie and HTTP Header. OAM IAP communicates with 10g (10.1.4.3) Access Server for Cookie-based assertions, to validate the session token and retrieve user information for the session. The TAI asserts this user identity to IBM WebSphere.
IBM WebSphere checks for the existence of user in the user registry (configured LDAP instance) supplied by the OAM IAP. If the user is found, the assertion is successful. IBM WebSphere does not check for or request user's password in this scenario.
-
SSO Logout: See "Configuring SSO Logout for OAM IAP for IBM WebSphere."
6.1.2 Scenario 2: OAM 11g with the IAP and IBM WebSphere (10g WebGate Installed)
This scenario describes a Java EE application that relies on Oracle Access Manager 11g for authentication and authorization of its users. The Java EE application is deployed on IBM WebSphere to use the OAM IAP for IBM WebSphere for integrating the SSO with Oracle Access Manager 11g.
Figure 6-2 Components and Process Flow with OAM 11g and the IAP
Description of "Figure 6-2 Components and Process Flow with OAM 11g and the IAP"
Process overview: Identity Assertion with Oracle Access Manager 11g
-
Browser to IHS Proxy Web Server: The user accesses the resource (Sample Application on IBM WebSphere) using the proxy IHS host and port, which triggers the OAM 10g (10.1.4.3) WebGate installed to authenticate and authorize the user.
-
OAM 10g (10.1.4.3) IHS WebGate communicates with OAM 11g Server across the Oracle Access Protocol (OAP).
OAM 11g Server checks its policy store to locate policies protecting the resource.
WebGate and OAM 11g Server collect credentials from the user based on the authentication scheme specified in the policy, and the OAM 11g Server validates if the user can be authenticated.
On successful authentication, WebGate and OAM Server authorize the user before access to the requested resource on the IHS Web server is granted. WebGate sets authorization headers in the request as specified in the OAM policy.
-
Web Server to IBM WebSphere: IHS Web Server acts as a proxy for IBM WebSphere and forwards the request to IBM WebSphere after successful authorization by OAM 10g (10.1.4.3) WebGate. IHS Web Server also forwards to IBM WebSphere the HTTP Cookies and Request Headers set in the request.
Requests are intercepted at IBM WebSphere by OAM IAP. The TAI for OAM then validates the Cookie or HTTP Header. OAM IAP communicates with OAM 11g Server for Cookie-based assertions, to validate the session token, and retrieve user information for the session. TAI is responsible for asserting this user identity to IBM WebSphere.
IBM WebSphere checks the existence of the user (supplied by the OAM IAP) in its user registry (configured LDAP instance). If user is found in the user registry, the assertion is successful. IBM WebSphere does not request nor check the user's password in this scenario.
-
SSO Logout: See "Configuring SSO Logout for OAM IAP for IBM WebSphere."
6.1.3 Scenario 3: OAM 11g with the IAP and IBM WebSphere (11g WebGate Installed)
This scenario describes a Java EE application that relies on Oracle Access Manager 11g for authentication and authorization of its users. The Java EE application is deployed on IBM WebSphere to use the OAM IAP for IBM WebSphere for integrating the SSO with Oracle Access Manager 11g.
Figure 6-3 Components and Process Flow with OAM 11g and the IAP

Description of "Figure 6-3 Components and Process Flow with OAM 11g and the IAP"
Process overview: Identity Assertion with Oracle Access Manager 11g
-
Browser to IHS Proxy Web Server: The user accesses the resource (Sample Application on IBM WebSphere) using the proxy IHS host and port, which triggers the OAM 11g WebGate installed to authenticate and authorize the user.
-
OAM 11g IHS WebGate communicates with OAM 11g Server across the Oracle Access Protocol (OAP).
OAM 11g Server checks its policy store to locate policies protecting the resource.
WebGate and OAM 11g Server collect credentials from the user based on the authentication scheme specified in the policy, and the OAM 11g Server validates if the user can be authenticated.
On successful authentication, WebGate and OAM Server authorize the user before access to the requested resource on the IHS Web server is granted. WebGate sets authorization headers in the request as specified in the OAM policy.
-
Web Server to IBM WebSphere: IHS Web Server acts as a proxy for IBM WebSphere and forwards the request to IBM WebSphere after successful authorization by OAM 11g WebGate. IHS Web Server also forwards to IBM WebSphere the HTTP Cookies and Request Headers set in the request.
Requests are intercepted at IBM WebSphere by OAM IAP. The TAI for OAM then validates. TAI is responsible for asserting this user identity to IBM WebSphere.
IBM WebSphere checks the existence of the user (supplied by the OAM IAP) in its user registry (configured LDAP instance). If user is found in the user registry, the assertion is successful. IBM WebSphere does not request nor check the user's password in this scenario.
-
SSO Logout: See "Configuring SSO Logout for OAM IAP for IBM WebSphere."
6.2 Installing Components for the Oracle Access Manager IAP for IBM WebSphere
This section outlines the tasks you must perform to enable OAM Identity Assertion with IBM WebSphere.
The Oracle Access Manager IAP for IBM WebSphere is available as part of Oracle Fusion Middleware suite for IBM WebSphere. The IAP for IBM WebSphere jar is located at:
MW_HOME/oracle_common/modules/oracle.oamprovider_11.1.1/
    OAMTrustAssociationInterceptor.jar
Oracle Access Manager IAP for IBM WebSphere configuration file is located at:
MW_HOME/oracle_common/modules/oracle.oamprovider_11.1.1/
    domain_config/was/oamtai.xml
Note:
Oracle Access Manager 10g (10.1.4.3) components and installation differs from Oracle Access Manager 11g components and installation. However, all other component installation tasks are the same.Task overview: Installing components for IBM WebSphere, OAM, and the IAP
-
Install and set up IBM WebSphere as described in Chapter 2, "Installing and Configuring Oracle Identity and Access Management on IBM WebSphere."
-
IBM HTTP Server 7.x can be used as a reverse proxy in front of IBM WebSphere.
Note:
For IBM HTTP Server 7.x, use IHS22 WebGate package. -
Oracle Access Manager: Install either:
-
OAM 10g (10.1.4.3): As described in the and includes: Oracle Access Manager Installation Guide 10g
10g (10.1.4.3) Identity Server
10g (10.1.4.3) Access Server
10g (10.1.4.3) Policy Manager
10g (10.1.4.3) Web Components for OHS 11g Web Server: Web Pass, Policy
Manager and Web Gate) -
OAM 11g: As described in Oracle Fusion Middleware Installation Guide for Oracle Identity Management, which includes:
Oracle Access Manager 11g (11.1.1.3.0)
Oracle Identity Manager 11g (11.1.1.3.0
Oracle WebLogic Server
-
-
WebGate: Required whether you use OAM 10g (10.1.4.3) or OAM 11g, and can be installed after provisioning as described later in this chapter.
6.3 Introduction to the Oracle Access Manager 10g (10.1.4.3) Configuration Tool
This section introduces OAMCfgTool (oamcfgtool.jar) is a platform-agnostic configuration tool for use with Oracle Access Manager 10g (10.1.4.3). Skip this topic if you have OAM 11g deployed.
See Also:
"Introduction to OAMCfgTool" in Oracle Fusion Middleware Application Security Guide for more information on OAMCfgTool.OAMCfgTool is a command-line utility provided to automatically run a series of scripts and set up policies. OAMCfgTool requires a set of parameters as inputs to create the required form-based authentication scheme, policy domain, access policies, and a WebGate profile for the Identity Asserter for single sign-on for IBM WebSphere.
Note:
OAMCfgTool requires JRE 1.5 or 1.6. Internationalized login forms for Fusion Middleware applications are supported with the policies protecting those applications.With OAM 10g (10.1.4.3) deployed, if you do not use the OAM Config Tool you must manually create the host-identifier, authentication schemes, and OAM policy manually using the Access System Console, as described in the Oracle Access Manager Access Administration Guide:
Example 6-1 a sample template for the configuration file for creating the required artifacts for the OAM IAP for IBM WebSphere. Additional information follows the example.
Example 6-1 Sample URIs_config File for OAMCfgTool and the IAP for IBM WebSphere
-- Template-starts --
###################################
#
# OAM-WAS Integration using OAM IAP
#
###################################
protected_uris

###################################
#Resources protected with default authentication scheme
/webcenter/adfAuthentication

###################################
public_uris
###################################
#Public Policy required for Cookie Based Assertion
Cookie Based Assertion
/Authen/SSOToken
-- Template-ends --
Example 6-2 illustrates a sample of the command-line syntax for OAMCfgTool when configuring artifacts for OAM 10g (10.1.4.3) and the IAP for IBM WebSphere.
Example 6-2 OAMCfgTool Syntax Configures Artifacts for OAM 10g (10.1.4.3) IAP
(echo ldappwd java -jar oamcfgtool.jar
mode=CREATE app_domain=OAMPolicy_for_WAS-IAP
uris_file=/path-to-template-config-file
web_domain=host-id-name
ldap_host=wxyz
ldap_port=6633
ldap_userdn=orcladmin
ldap_base=ldap-base-dn
oam_aaa_host=abcd
oam_aaa_port=7789
oam_aaa_mode=open
log_file=OAMCfg_date.log
log_level=INFO
output_ldif_file=<LDIF_filename>
-noprompt
The above sample command produces the following artifacts:
-
OAMPolicy_for_WAS-IAP, OAM Policy for protecting IBM WebSphere resources specified under protected_uris and public_uris
-
OraDefaultAnonAuthNScheme, Anonymous Authentication Scheme used by OAMPolicy_for_WAS-IAP
-
OraDefaultFormAuthNScheme, Form Authentication Scheme used by OAMPolicy_for_WAS-IAP
-
Other OAM authentication scheme configuration
For a known resource, the public URI policy needs a Return Attribute in the Authorization Actions for Cookie-based assertion, as shown in Table 6-1. In this case, the return name OAM_REMOTE_USER is not configurable in oamtai.xml.
Table 6-1 Authorization Actions for "Cookie-based Assertion" in Public URI Policy
| Type | Name | Return Attribute |
|---|---|---|
|
HeaderVar |
OAM_REMOTE_USER |
uid |
To enable Header-based assertion, you must set the Return Attribute in Authorization Actions of the Resource (protected_uris) protection policy. With Header-based Assertion, the return name OAM_REMOTE_USER is configurable in the oamtai.xml file and you must ensure that the Header-based Assertion section is uncommented.
6.4 Provisioning WebGate and Configuring OAM 10g (10.1.4.3) and the IAP for IBM WebSphere
This section provides the steps to obtain the OAMCfgTool, provision the required WebGate, create a form authentication scheme, and create a policy domain and OAM 10g (10.1.4.3) policies for the IAP and IBM WebSphere.
To acquire OAMCfgTool and configure OAM 10g (10.1.4.3) for the IAP for IBM WebSphere:
-
Obtain the OAMCfgTool as follows:
-
Log in to Oracle Technology Network at:
http://www.oracle.com/technology/software/products/middleware/htdocs/111110_fmw.html
-
Locate the
OAMCfgToolZIP file with Access Manager Core Components (10.1.4.3.0):oamcfgtool<version>.zip -
Extract and copy
oamcfgtool.jarto the computer hosting the IBM WebSphere application to protect. -
Confirm that JDK 1.6 (or the latest version) is installed and configured on the host computer.
-
Change to the file system directory containing OAMCfgTool.
-
-
Provision WebGate, Create the Authentication Scheme, and Policy Domain: Run the following command using values for your environment. For example:
(echo ldappwd java -jar oamcfgtool.jar
mode=CREATE app_domain=OAMPolicy_for_WAS-IAP
uris_file=/path-to-template-config-file
web_domain=host-id-name
ldap_host=wxyz
ldap_port=6633
ldap_userdn=orcladmin
ldap_base=ldap-base-dn
oam_aaa_host=abcd
oam_aaa_port=7789
oam_aaa_mode=open
log_file=OAMCfg_date.log
log_level=INFO
output_ldif_file=<LDIF_filename>
-noprompt
-
Review the information provided by the tool. For example, the parameter and values in Step 3 provide the following information:
Processed input parameters Initialized Global Configuration Successfully completed the Create operation. Operation Summary: Policy Domain : OAMPolicy_for_WAS-IAP Host Identifier: OAMPolicy_for_WAS-IAP Access Gate ID : OAMPolicy_for_WAS-IAP_AG -
Update host identifiers to include possible host-variations.
-
Add following authorization actions to the "Header Based Assertion" Policy.
Type Name Return Attribute
HeaderVar OAM_REMOTE_USER uid
-
Proceed to "Installing the Required WebGate for the IHS Web Server".
6.5 Provisioning and Configuring OAM 11g for the IAP and IBM WebSphere
This section provides the following topics:
6.5.1 About Provisioning WebGates and AccessGates with OAM 11g
This topic introduces OAM 11g access clients, known as policy-enforcement agents, and the process that is required to set up the trust mechanism between the agent and Oracle Access Manager 11g SSO. The process is known as provisioning (also known as registering an agent).
Only registered policy enforcement agents can communicate with an OAM Server, and process information when a user attempts to access a protected resource. Users with valid OAM Administrator credentials can register an OAM Agent using the Administration Console.
You can register a WebGate agent before you install it. Required WebGate or AccessGate configuration files are created during registration and stored in the following path:
DOAMIN_NAME/output/$Agent_NAME
During registration, you can also create an application domain and default policies. For this reason, registering an agent is also known as "registering a partner application".
During registration, the Agent is presumed to be on the same Web server as the application it is protecting. However, the Agent can be on a proxy Web server and the application can be on a different host.
During Agent registration:
-
One key is generated per agent, accessible to the WebGate through a local wallet file on the client host, and to OAM Server through the Java Key Store on the server side.
The Agent specific key must be accessible to WebGates through a secure local storage on the client machine.
-
A key is generated for the partner (application) during registration. (except for 10g (10.1.4.3) WebGate agents).
-
An OAM application domain is created, named after the Agent, and populated with default authentication and authorization policies. The new application domain uses the same host identifier that was specified for the Agent during registration.
After registration, agent details appear in the OAM Administration Console and are propagated to all Managed Servers in the cluster. If you choose to automatically create policies during agent registration, you can also view and manage the application domain and policies that were registered with the partner application.
Table 6-3 describes each of named text fields where you enter requested information on the Create OAM Agent page.
Table 6-3 Create OAM Agent Pages for OAM 10g (10.1.4.3) and 11g Agents
| OAM Agent Element | Description |
|---|---|
|
Agent Name |
The identifying name for this WebGate Agent. This is often the name of the computer that is hosting the Web server used by WebGate. Note: If the Agent Name exists, an error occurs and registration fails. If the host identifier exists, the unique Agent Base URL is added to the existing host identifier and registration proceeds. |
|
Agent Base URL Optional |
The host and port of the computer on which the Web server for the agent is installed. For example, Note: A particular Agent Base URL can be registered once only. There is a one-to-one mapping from the Agent's Base URL to the Web server domain on which the WebGate is installed (as specified with the <hostidentifier> element). However, one domain can have multiple Agent's Base URLs. |
|
Access Client Password |
An optional, unique password for this WebGate, which was assigned during WebGate registration. When a registered WebGate connects to an OAM 11g Server, the password is used for authentication to prevent unauthorized WebGates from connecting to OAM 11g Servers and obtaining policy information. |
|
Security |
Level of communication transport security between the Agent and the OAM Server (this must match the level specified for the OAM Server):
|
|
Host Identifier |
This identifier represents the Web server host. |
|
Auto Create Policies |
During agent registration, you can have authentication and authorization policies created automatically. This option is checked (enabled) by default. Default: Enabled Note: If you already have a domain and policies registered, you can simply add new resources to it. If you clear this option (no check), no application domain or policies are generated automatically. |
|
Protected Resource (URI) List |
URIs for the protected application: The following resource is protected by default: /** The default matches any sequence of characters within zero or more intermediate levels spanning multiple directories. Add all IBM WebSphere resources to be protected to this list. |
|
Public Resource (URI) List |
Each public application should be specified in a new row of the table for the Public Resource List. Add a field and enter URI values for the public applications and resources. Each URI should be specified in a new row of the table for the Public Resource List. Add all IBM WebSphere resources that should not be protected to this list. Note: |
6.5.2 Provisioning Agents and Creating OAM 11g Policies for IBM WebSphere
This topic describes how to provision agents and create policies for OAM 11g.
At least one OAM Server instance must be running in the same mode as the agent. Otherwise, agent registration fails. After provisioning, you can change the communication mode of the OAM Server if needed. Communication between the agent and server continues to work as long as the WebGate mode is at least at the same level as the OAM Server mode (or higher).
To register an agent and create policies for the OAM 11g IAP for IBM WebSphere:
-
Log in to the OAM 11g Administration Console as usual. For example:
http://host:port/oamconsole. -
On the Welcome page, click Add OAM 10g (10.1.4.3) Agent in the Agent Configuration panel to open a fresh page:
Alternatively: From the System Configuration tab, expand the Agents node, the OAM Agents node, and the 10g (10.1.4.3) Webgates node, then click the Create command button in the tool bar.
-
On the Create: OAM Agent page, enter required details (those with an *) to register this OAM Agent, as shown in Table 6-3.
-
Protected Resource List: In this table, enter individual resource URLs to be protected by this OAM Agent, as shown in Table 6-3.
-
Public Resource List: In this table, enter individual resource URLs to be public (not protected), as shown in Table 6-3, including
/Authen/SSOTokenused by the Oracle Access Manager Identity Assertion Provide. -
Confirm that the Auto Create Policies box is checked (or clear the box to disable this function).
-
Click Apply to submit the registration (or close the page without applying changes).
-
Check the Confirmation window for the location of generated artifacts and then close the window.
-
Repeat steps in this procedure to register an additional AccessGate and policies for use by WebGate and:
-
Enter a name for this registration.
-
Select the appropriate Security mode.
-
Do not specify a Base URL.
-
Check Auto Create Policies
-
Click Apply
-
-
Proceed to "Installing the Required WebGate for the IHS Web Server."
6.6 Installing the Required WebGate for the IHS Web Server
After provisioning, you can install the OAM 10g (10.1.4.3) WebGate for IHS to operate within either an OAM 10g (10.1.4.3) or OAM 11g deployment as described here. Ignore any steps that do not apply to your environment.
To download and install the 10g (10.1.4.3) WebGate for IHS:
-
Locate and download the WebGate installer as follows:
-
Go to Oracle Fusion Middleware 11gR1 Software Downloads at:
http://www.oracle.com/technology/software/products/middleware/htdocs/fmw_11_download.html
-
Click Accept License Agreement, at the top of the page.
-
From the Access Manager WebGates (10.1.4.3.0) row, click the download link for the desired platform and follow on-screen instructions.
-
Store the WebGate installer in the same directory with any 10g (10.1.4.3) Access System Language Packs you want to install.
-
-
Launch the WebGate installer for your platform, installation mode, and Web server, and then:
-
Dismiss the Welcome screen by clicking Next.
-
Respond with administrator privileges when asked.
-
Specify the installation directory for the WebGate. For example:
/OracleAccessManager/WebComponent/ -
Linux or Solaris: Specify the location of the GCC runtime libraries on this computer.
-
Language Pack—Choose a Default Locale and any other Locales to install, then click Next.
-
Record the installation directory name in the preparation worksheet if you haven't already, then click Next to continue.
The WebGate installation begins, which may take a few seconds.
-
-
OAM 10g (10.1.4.3) Deployment: Continue installation, as described in the 10g (10.1.4.3) Oracle COREid Access and Identity Installation Guide, and:
-
Specify the same values when you install the WebGate that were specified when provisioning the WebGate using OAMCfgTool, earlier.
-
Specify any additional requested values to properly finish the installation
-
Copy the files to the WebGate host:
WebGate_install_dir/access/oblix/config. -
Restart the WebGate Web server.
-
Proceed to "Preparing the IHS Web Server."
-
-
OAM 11g Deployment: Cancel the WebGate installer (without finishing) and gather WebGate 10g (10.1.4.3) provisioning artifacts (and certificate files, if needed). For example:
-
On the OAM AdminServer host, locate and copy the updated OAM Agent
ObAccessClient.xmlconfiguration file (and any certificate artifacts). For example:DOMAIN_HOME/output/$Agent_Name/
ObAccessClient.xml
password.xml (if needed)
aaa_key.pem (your private key generated by openSSL)
aaa_cert.pem (signed certificates in PEM format) -
On the OAM Agent host, add the artifacts to the WebGate directory path. For example:
WebGate_install_dir/access/oblix/lib/ObAccessClient.xml
WebGate_install_dir/access/oblix/config -
Restart the WebGate Web server.
-
Run the EditHTTPConf tool to update IHS Server configuration for WebGate.
-
Restart the OAM Server that is hosting the Agent.
-
Proceed to "Preparing the IHS Web Server."
-
Note:
If you are installing on 64-bit Linux platform, then you need 32-bit JDK/JRE and run the installer using the following command:linux32 bash ./runInstaller
6.7 Preparing the IHS Web Server
When you have 10g (10.1.4.3) IHS2 WebGate (or later), the IHS httpd.conf file includes entries for adding the /oamsso directory to the Web Server root. However, if you have an earlier Oracle Access Manager IHS2 WebGate, you must add the following entries under the WebGate block of the httpd.conf file.
To prepare the IHS Web server:
-
On the computer hosting the WebGate, locate IHS httpd.conf file and confirm the following entries exist (if they do not add them):
Alias /oamsso "<webage-install-dir>/access/oamsso"
<LocationMatch "/oamsso/*">
Satisfy All
</LocationMatch>
-
Proceed with "Preparing the Login Form for WebGate."
6.8 Preparing the Login Form for WebGate
This section describes how to acquire the proper Oracle Access Manager forms for use with the provisioned and installed 10g (10.1.4.3) IHS WebGate. No login forms are used from WebGate
If you have OAM 11g, the OAM 11g Server instance provides the Login form and you can skip this procedure.
Note:
The forms provided with 10g (10.1.4.3) WebGates cannot be used with OAM 11g Servers.In an OAM 10g (10.1.4.3) deployment, if you have:
-
10g (10.1.4.3) IHS2 WebGate (or later), find
login.htmlinWebGate_install_dir/access/oamsso/login.html. -
Earlier 10g (10.1.4.3) IHS2 WebGate, you must create the directory and place a sample
login.htmlfile manually, as described in the following procedure.
To preview the login.html file for 10g (10.1.4.3) IHS WebGate:
-
OAM 10g (10.1.4.3) with 10g (10.1.4.3) IHS2 WebGate (or later), preview
login.htmlinWebGate_install_dir/access/oamsso/login.html. -
OAM 10g (10.1.4.3) with 10g (10.1.4.2.0) or earlier WebGate for IHS2:
-
Create an
/oamssosubdirectory in the following path:WebGate_install_dir/oamsso. -
Create and add to the new
/oamssodirectory alogin.htmlfile with the following elements:<!--Sample login Page Code --> <form name="loginForm" method="post" action="/access/sso"> <b> Username: </b> <input name="userid" type="text" maxLength="80" size="20" value=""> <b> Password: </b> <input type="password" maxLength="255" size="20" name="password" autocomplete="off"> <input type="submit" value="Login" name="submit"> </form>
-
-
Proceed to "Configuring IBM WebSphere for OAM SSO and the IAP."
6.9 Configuring IBM WebSphere for OAM SSO and the IAP
This section provides the following topics:
6.9.1 Configuring a Stand Alone LDAP Registry for OAM in IBM WebSphere
This section describes how to configure a stand-alone LDAP registry for OAM within IBM WebSphere.
To configure a stand alone LDAP registry for OAM in IBM WebSphere:
-
Login to your IBM WebSphere console. For example:
http://host:port/ibm/console -
Go to Security, Global Security.
-
Under User account repository in Available realm definitions, select Standalone Ldap Registry and click Configure.
-
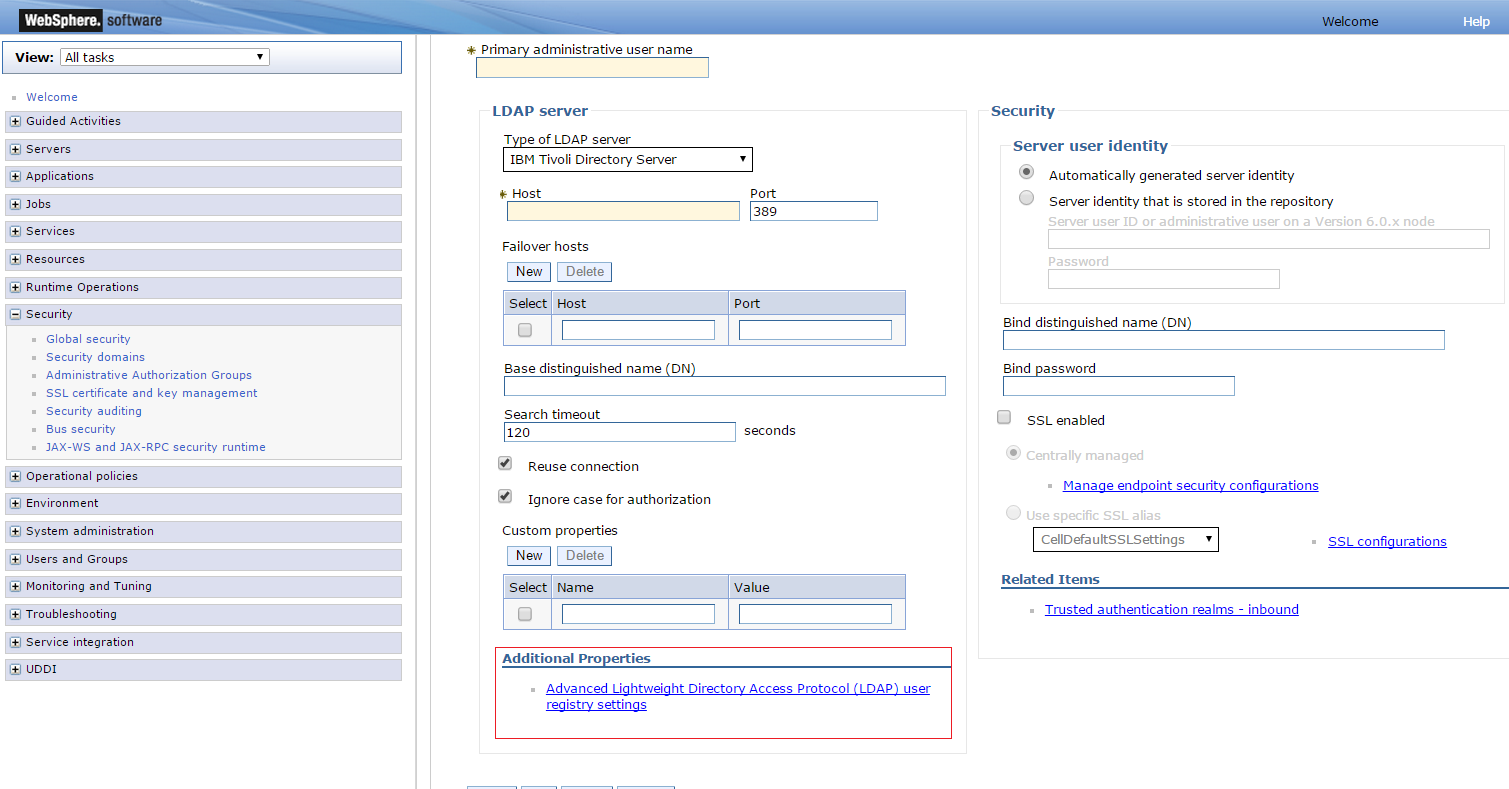
Under General Properties, fill in fields to configure the LDAP directory that is used by OAM:
Primary administrative user name: <OAM admin username>
Server user identity: <full dn only, such as cn=Administrator,dc=domain,dc=com>
Type of LDAP server: <LDAP Directory Type for OAM>
Host: < host name where LDAP directory resides>
Port: <LDAP directory bind port>
Base distinguished name (DN): <LDAP base DN>
Bind distinguished name (DN): <LDAP bind DN>
Bind password: <LDAP password>
Search timeout: keep the default value (120 seconds)
Keep default Reuse connection and Ignore case for authorization (checked)
The following figure shows the fields to configure the LDAP directory used by OAM.
-
Click Apply and OK and save this configuration.
-
On the same page, under Additional Properties, click Advanced Lightweight Directory Access Protocol (LDAP) user registry settings and fill in fields under the General Properties:
User filter: (&(uid=%v)(objectclass=inetOrgPerson))
Group filter: (&(cn=%v)(objectclass=ldapsubentry))
User ID Map: uid
Group ID Map: cn
Group Member ID Map: nsRole:nsRole -
Click Apply and OK and save this configuration.
-
On the same page, under Related Items, click Trusted authentication realms - inbound and confirm that the LDAP entry (host:port) is trusted.
-
Click Test connection to verify the connection configuration.
-
Restart IBM WebSphere.
If Standalone LDAP Registry is not selected as "Current realm" then under "User account repository" in "Available realm" definitions, select "Standalone Ldap Registry" and click "Set As Current".
-
Provide the Primary administrative ID with Base DN, such as cn=orcladmin, on restarting IBM WebSphere.
-
From now onward, log in to the IBM WebSphere console using OAM LDAP directory login credentials (as registered with IBM WebSphere).
6.9.2 Adding and Configuring a Virtual Host in IBM WebSphere
You must bind your Web applications to virtual hosts (logical name for configuring Web applications to a particular host name). When you request a resource, IBM WebSphere maps the request to an alias of a defined virtual host.
To add and configure a virtual host in IBM WebSphere for the enterprise application:
-
Login to your IBM WebSphere console. For example:
http://host:port/ibm/console -
Go to Environment, Virtual Hosts, and click New
-
Enter the General Properties for your environment, as follows:
-
Add name:
IHS host nameand click on Ok and then save the changes. -
Click the recently created entry
IHS host name:
-
-
Under Additional Properties, click Host Aliases, and then click New.
-
Fill in details for General Properties for your environment, as follows:
-
Host:
Host name where IHS server resides -
Port:
IHS port
-
-
Click OK to save the changes and continue with the next steps to configure the virtual host in your deployed enterprise application.
-
Go to Applications, WebSphere enterprise applications, and:
-
Click <Enterprise Application (default application) or another application you may want instead>.
-
Under Web Module Properties, choose Virtual hosts.
-
Select all the Web modules and apply the virtual host that you added.
-
Click OK, then Save.
-
-
Restart IBM WebSphere where the enterprise application is deployed.
-
Proceed to "Configuring IHS Reverse Proxy in the IBM WebSphere Console."
6.9.3 Configuring IHS Reverse Proxy in the IBM WebSphere Console
This section describes how to configures the IHS server in reverse proxy mode within the IBM WebSphere console.
To configure IHS in reverse proxy mode within IBM WebSphere:
-
Login to your IBM WebSphere console. For example:
http://host:port/ibm/console -
Go to Server Types, Web Servers.
-
Click New, and provide IHS Web server details.
-
Save changes to see a server entry for IHS.
-
Select the
ServerNameand click Generate Plug-in. -
Select the
ServerNameand click Propagate Plug-in: -
Configure the IHS Web server to act as a reverse proxy for IBM WebSphere, as follows:
-
Locate
plugin-cfg.xmlinIHS_install_dir/Plugins/config/ServerName -
If the following entry exists, remove it:
<Uri AffinityCookie="JSESSIONID" AffinityURLIdentifier="jsessionid"
Name="/*"/>
-
-
Restart the IHS Web server.
-
If steps to generate and propagate the application did not work, perform the steps manually.
-
Run the following command:
./ConfigureIHSPlugin.sh -plugin.home /scratch/example_user/IBM/WebSphere/Plugins/ -plugin.config.xml /scratch/example_user/IBM/WebSphere/AppServer/profiles/AppSrv01/config/cells/abc00ywgNode01Cell/nodes/8080-node/servers/abc00ywg.example.com/plugin-cfg.xml -ihs.conf.file /scratch/example_user/IBM/HTTPServer/conf/httpd.conf -ihs.admin.usergroup dba -operating.system AIX
-
Restart the IHS server.
-
Check that the
httpd.conffile was updated:LoadModule was_ap22_module /scratch/example_user/IBM/WebSphere/Plugins//bin/64bits/mod_was_ap22_http.so WebSpherePluginConfig /scratch/example_user/IBM/WebSphere/Plugins/config/templates/plugin-cfg.xml
-
-
Proceed to "Creating the Interceptor Entry in the IBM WebSphere Console."
6.9.4 Creating the Interceptor Entry in the IBM WebSphere Console
Tasks are the same whether you are using Oracle Access Manager 10g (10.1.4.3) or Oracle Access Manager 11g.
At runtime, the IBM WebSphere extension class loader loads classes. The class path used by the extensions class loader is retrieved from the ws.ext.dirs system property. When you specify the parent directory of the IAP for IBM WebSphere OAMTrustAssociationInterceptor.jar file in the ws.ext.dirs property, the directory is added to the WebSphere extensions class loaders class path and the OAMTrustAssociationInterceptor.jar file, which is in the directory, is added to the class path.
The IAP for IBM WebSphere OAMTrustAssociationInterceptor.jar file is available from the following path:
MW_HOME/oracle_common/modules/oracle.oamprovider_11.1.1
To add the OAMTrustAssociationInterceptor.jar and jrf-api.jar to the IBM WebSphere class path:
-
In IBM WebSphere console go to Servers, Server Types, WebSphere Application, Servers, and select the appropriate server.
-
Under the Server Infrastructure section, click Java And Process Management, and then Process Definition.
-
In Additional properties, select Java Virtual Machine, Custom Properties.
-
Add a new
ws.ext.dirproperty that points to the parent directory where the IAP for the IBM WebSphereOAMTrustAssociationInterceptor.jarfile is located:MW_HOME/oracle_common/modules/oracle.oamprovider_11.1.1The
OAMTrustAssociationInterceptor.jarfile must be loaded from the OAM Middleware Home of the OAM you are configuring. -
Add the
oracle.domain.config.dirproperty that points to the parent directory where thejrf-api.jarfile is located:MW_HOME/oracle_common/modules/oracle.jrf_11.1.1The
jrf-api.jarfile must be loaded from the OAM Middleware Home of the OAM you are configuring. -
Create the Interceptor entry for the OAM IAP, as follows:
-
In the IBM WebSphere console, go to Security, Global Security, and ensure that "Enable Application Security" is checked.
-
Under the "Authentication" section, click "Web and SIP Security" tab, and then click the Trust association link.
-
Under General Properties, check the "Enable Trust Association".
-
Under Additional Properties, click Interceptors link.
-
-
Under General Properties, click Under New, and provide the Interceptor class name as follows:
oracle.security.was.providers.tai.OAMTrustAssociationInterceptorImpl
-
-
Proceed to "Configuring the OAM TAI Configuration File" to configure
oamtai.xmlas a custom property of Interceptor class path.
6.9.5 Configuring the OAM TAI Configuration File
The oamtai.xml configuration file is used by the OAM Trust Association Interceptor. You must configure the file and modify it for your environment. For details, see:
6.9.5.1 About Configuring the OAM TAI Configuration File
The oamtai.xml configuration file is available in the following path:
MW_HOME/oracle_common/modules/oracle.oamprovider_11.1.1/domain_config/was
/oamtai.xml
This file stores the details that are used by the TAI at run time to establish a connection with 10g (10.1.4.3) OAM Access Server (or 11g OAM Server).
There are two ways to configure the oamtai.xml file:
-
Either copy
oamtai.xmltowas_profile_dir/config/cells/cell_name/fmwconfig/oamtai.xml. -
Or perform Step 1 in the following procedure to configure
oamtai.xmlas a custom property of the Interceptor entry added earlier.
You must modify the oamtai.xml file to establish a connection to the Access Server, using parameters in Table 6-4 and values for your deployment. To enable Header based assertion, ensure that the Header Based Assertion section in oamtai.xml is not commented and use the same customHeadername in both oamtai.xml and the OAM policy.
Note:
If the 11g WebGate is used as the proxy, then OAM TAI configuration requires onlyAssertionType and CustomerHeaderName to be configured. With the 11g WebGate, CookieBasedAssertion is not supported.Table 6-4 oamtai.xml Configuration File Parameters
| Parameter | Required or Not | Description |
|---|---|---|
|
hostPort |
Required |
Hostname and port of the IHS Web server where the resource is hosted. Note: The host:port should be one of the host name variations present in OAM. In the Open and Cert mode configuration of oamtai.xml example: |
|
resource |
Required |
The URL to the protected resource. Default = In the Open and Cert mode configuration of oamtai.xml example: |
|
ip |
Optional |
IP address of the client computer that needs to access the resource. In the Open and Cert mode configuration of oamtai.xml example: |
|
operation |
Required |
Operation requested to access the |
|
accessGateName |
Required |
A unique name, without spaces, that identifies the AccessGate to be used while interacting with OAM. With OAMCfgTool the name is derived from the app_domain value, appended with _AG. In the Open and Cert mode configuration of oamtai.xml example: |
|
AccessGatePassword |
Required |
A unique password to verify and identify the AccessGate when interacting with OAM. This prevents unauthorized AccessGates from connecting and obtaining policy information. With OAMCfgTool, this is specified with the app_agent_password parameter. This should differ for each WebGate/AccessGate instance. |
|
accessServerHost |
Required |
OAM Access Server (or OAM 11g Server) host name. In the Open and Cert mode configuration of oamtai.xml example: |
|
accessServerPort |
Required |
OAM Access Server (or OAM 11g Server) port number. In the Open and Cert mode configuration of oamtai.xml example: |
|
accessServerName |
Optional |
Name of the OAM Access Server, as identified in the profile (or OAM 11g Server registration). In the Open and Cert mode configuration of oamtai.xml example: |
|
transportSecurity |
Required |
The level of transport security between the 10g (10.1.4.3) Access Server and associated WebGates must match. The default value is When Access Manager and WebGate are in Open mode, the value is When OAM is in Cert mode, the value is The following parameters trustStore, keyStore, and keyStorePass values are required when transport security mode is 'Cert'
Important Notes
For more information certificate mode configuration in For more information on setting up SSL certificate and key files, see "Creating the Keystore and Truststore.". |
|
debug |
Required |
This parameter is ignored in WebSphere environments. Instead, enable WebSphere trace for the following module to turn on debug level logging: oracle.security.was.providers.tai.OAMTrustAssociationInterceptorImpl=finest |
|
minConn |
Required |
The minimum number of connections that this AccessGate can establish with Access Servers. This number must be the same as or less than the number of Access Servers that are actually associated with the WebGate. In the Open and Cert mode configuration of oamtai.xml example: |
|
maxConn |
Required |
The maximum number of connections that this AccessGate can establish with Access Servers. This number must be the same as or greater than the number of Access Servers that are actually associated with the WebGate. In the Open and Cert mode configuration of oamtai.xml example: |
|
timeOutForConnPool |
Required |
Connection pool time out period. Specify any value in milliseconds. Default: 30000 (milliseconds) In the Open and Cert mode configuration of oamtai.xml example: |
|
Anonymous |
Required |
Configures the anonymous user value. Note: Following two parameters assertionType and customHeaderName are required for Header Based Assertion. Uncomment it if and only if in case of Header based assertion.
|
|
assertionType |
Required |
The value should be 'HeaderBasedAssertion', don't change it |
|
customHeaderName |
Required |
Default value used is " OAM_REMOTE_USER", or according to the OAM Policy if you have updated it. Note: You can provide any value as long as the same value is used in the OAM policy while configuring the Header. Otherwise you must use the default value "OAM_REMOTE_USER" while configuring the policy. In both cases, ensure that the "assertionType" parameter entry in the |
For configuration examples for Open and Cert mode configuration of oamtai.xml, see "Certification Mode Configuration."
Note:
WebGate timeout should be greater than LTPA timeout. Otherwise, the IAP is not triggered which could cause the WebGate session to time out. If this occurs, a user who logs in with a different userID could get access to the resource because the previously generated LTPA token still exists. LTPA timeout default value is 120 minutes; therefore, the WebGate profile requires a WebGate timeout value greater than 120 minutes.6.9.5.2 Configuring the OAM TAI Configuration File
The following procedure describes how to configure oamtai.xml for your environment.
Skip Step 1 if oamtai was copied to the following path: was_profile_dir/config/cells/cell_name/fmwconfig/oamtai.xml.
To configure oamtai.xml as a custom property of the Interceptor:
-
Custom Interceptor Property:
-
In the IBM WebSphere console, go to Security, Global Security.
-
Under the "Authentication" section, click "Web and SIP Security tab"; click the Trust association link.
-
Click the Trust association link.
-
Under Additional Properties, click Interceptors link.
-
Select the Interceptor class name
oracle.security.was.providers.tai.OAMTrustAssociationInterceptorImpl -
Under Custom Properties, add a property with the absolute path of
oamtai.xmldetails for theoamtai.xmlfile:Name:
OAMTaiPropertyValue:
was_profile_dir/config/cells/cell_name/fmwconfig/oamtai.xmlNote:
oracle.domain.config.diris used to pick up the location of theoamtai.xmlfile by default. If it doesn't find the file there, then it will use theOAMTAIPropertycustom value.
-
-
Modify oamtai.xml: Use parameters in Table 6-4 with values for your deployment to a establish a connection with the Access Server.
-
Header Based Assertion: In the
oamtai.xmlfile, perform the following steps.-
Uncomment the "assertionType" entry and retain the value "HeaderBasedAssertion".
-
Uncomment the "customHeaderName" entry and set the value as desired (Table 6-4).
-
-
Save the file.
-
OAM Policy: Use the same "customHeaderName" value when configuring the OAM policy.
-
Restart IBM WebSphere for changes to take affect.
6.9.5.3 Certification Mode Configuration
The following are examples of Open and Cert mode configuration of oamtai.xml.
When Access Manager and WebGate are in Open Mode
<param name = "hostPort" value ="beq3291473.example.com:19090"/>
<param name = "IP" value ="host IP"/>
<param name = "resource" value ="/Authen/SSOToken"/>
<param name = "operation" value ="GET"/>
<param name = "AccessGateName" value ="webgatea1"/>
<param name = "AccessGatePassword" value =""/>
<param name = "AccessServerHost" value ="cfr3251397.example.com"/>
<param name = "AccessServerPort" value ="5575"/>
<param name = "AccessServerName" value ="oam_server1"/>
<param name = "TransportSecurity" value ="open"/>
<param name = "trustStore" value =""/>
<param name = "keyStore" value =""/>
<param name = "keyStorePass" value =""/>
<param name = "debug" value =""/>
<param name = "minConn" value ="1"/>
<param name = "maxConn" value ="1"/>
<param name = "timeOutForConnPool" value ="5000"/>
<param name = "hostPort" value ="beq3291473.example.com:19090"/>
<param name = "IP" value ="host IP"/>
<param name = "resource" value ="/Authen/SSOToken"/>
<param name = "operation" value ="GET"/>
<param name = "AccessGateName" value ="webgatea1"/>
<param name = "AccessGatePassword" value =""/>
<param name = "AccessServerHost" value ="cfr3251397.example.com"/>
<param name = "AccessServerPort" value ="5575"/>
<param name = "AccessServerName" value ="oam_server1"/>
<param name = "TransportSecurity" value ="cert"/>
<param name = "trustStore" value ="/scratch/example_user/view_storage/store/oamclient-trust
store.jks"/>
<param name = "keyStore" value ="/scratch/example_user/view_storage/store/ssoKeystore.jks"/>
<param name = "keyStorePass" value ="welcome1"/>
<param name = "debug" value =""/>
<param name = "minConn" value ="1"/>
<param name = "maxConn" value ="1"/>
<param name = "timeOutForConnPool" value ="5000"/>
Important Note:
When OAM is in Cert mode, the IBM JDK may throw an error and may not be able to read the certificate.
There is an issue with the IBM JDK with SHA512 cert. The Sun JDK may not have this issue.
The cause of this problem is that the key size on the server size for the SHA512 certificate is 4096 bits. This is too large for the IBM JDK unless you are using the unrestricted policy file.
When the MD5 cert is used, it appears to be of 1024 bits, however when using the SHA512 the cert is 4096 bits.
In accordance with the United States of America export restrictions, Java that is bundled with the server has limited encryption key sizes that can be used in the server operation. In order to successfully convert signed client certificates for use in the server, you have to replace the bundled encryption policy files with the unrestricted files published by IBM. This is called "Unrestricted JCE Policy files for SDK".
To obtain this file:
-
Go to the following website:
http://www.ibm.com/developerworks/java/jdk/security/index.html -
Click J2SE 6.0.
-
Click IBM SDK Policy files. The Unrestricted JCE Policy files for the SDK website is displayed.
-
Click Sign in and provide your IBM ID and password or register with IBM to download the files.
-
Select Unrestricted JCE Policy files for SDK for all newer versions (version 1.4.2 and higher) and click Continue.
-
View the license agreement and then click I Agree.
-
Click Download Now.
-
Install the files:
-
Extract the file:
unrestricted.zipinto a directory of your choice in Windows. -
Copy/FTP the two .jar files from the extraction directory to following directories:
If you are using a specific JDK version, then copy in
$JAVA_HOME/jre/lib/securityIf you are using Weblogic AS, then
WAS_HOME/java/jre/lib/security
-
-
For the case of WebLogic AS, restart the WebLogic server for this change to take effect.
6.9.6 Creating the Keystore and Truststore
This section contains the following subsections:
6.9.6.1 Configuration Requirements
An Access SDK configuration consists of the following files:
-
Configuration File (ObAccessClient.xml)
The configuration file holds various details such as Oracle Access Manager server host, port, and other configuration items that decide behavior of the Access Client. For example, idle session time. Name of this file is ObAccessClient.xml.
-
SSL Certification and Key File
This file is required only if the transport security mode is Simple or Cert. Both the Oracle Access Manager 10g Server and Oracle Access Manager 11g Server supports transport security modes Open, Simple and Cert to communicate with agents. An Access Client developed using Access SDK is called an agent. Depending on the mode in which Oracle Access Manager server is configured, Access Client will have to be configured to communicate in the same mode.
For Simple or Cert transport security mode, the following is required:
-
Certificate for the Access Client
-
Private key for the Access Client
-
CA certificate to trust OAM Server's certificate
-
-
password.xml File
This file is required only if the transport security mode is Simple or Cert. This file contains a password in encrypted form. This password is the one using which SSL key file is protected.
-
Log Configuration
Is required in order to generate a log file.
6.9.6.2 SSL Certificate and Key Files
Oracle Access Manager 11g Access SDK uses SSL certificates and key files from a database commonly known as trust stores or key stores. It requires these stores to be in JKS (Java Key Standard) format.
6.9.6.2.1 Simple Transport Security Mode
The CA certificate must be imported to the trust store. Oracle Access Manager 10g JNI ASDK provides a self-signed CA certificate that can be used in Simple mode, and is used for issuing certificates to the Access Client. OAM 11g Server also provides a self-signed CA certificate.
In Oracle Access Manager 10g JNI ASDK, the CA certificate is found in the following directory and is named cacert.pem: ASDK_INSTALL_DIR/oblix/tools/openssl/simpleCA.
In OAM 11g Server, the CA certificate is found in the following directory and is named cacert.der: $MIDDLEWARE_HOME/user_projects/domains/base_domain/config/fmwconfig.
Execute the following command to import the PEM or DER format CA certificate into trust store:
-
Edit
ca_cert.pemorcacert.derusing a text editor to remove all data except what is contained within theCERTIFICATEblocks, and save the file. For example:-----BEGIN CERTIFICATE----- Content to retain -----END CERTIFICATE----- -
Execute the following command, modifying as needed for your environment:
keytool -importcert -file <<ca cert file cacert.pem or cacert.der>> -trustcacerts -keystore oamclient-truststore.jks -storetype JKS -
Enter keystore password when prompted. This must be same as the global pass phrase used in the OAM Server.
The Access Client's SSL certificate and private key file must be added to the keystore. The SSL certificate and private key file must be generated in Simple mode so the Access Client can communicate with OAM Server.
Oracle Access Manager 10g JNI ASDK provides for generating a certificate and key file for the Access Client. These certificates are in PEM format.
OAM 11g Server provides a tool called Remote Registration and Administration Console for generating a certificate and key file for the Access Client. These certificates are also in PEM format. The names of these files are aaa_cert.pem and aaa_key.pem.
Execute the following commands in order to import the certificate and key file into keystore oamclient-keystore.jks.
-
Edit
aaa_cert.pemusing any text editor to remove all data except that which is contained within theCERTIFICATEblocks, and save the file. For example:-----BEGIN CERTIFICATE----- Content to retain -----END CERTIFICATE----- -
Execute the following command, modifying as needed for your environment:
openssl pkcs8 -topk8 -nocrypt -inaaa_key.pem-inform PEM -outaaa_key.der-outform DERThis command will prompt for a password. The password must be the global pass phrase.
-
Execute the following command, modifying as needed for your environment:
openssl x509 -inaaa_cert.pem-inform PEM -outaaa_cert.der-outform DER -
Execute the following command, modifying as needed for your environment:
java -cp importcert.jar oracle.security.am.common.tools.importcerts.CertificateImport -keystore oamclient-keystore.jks -privatekeyfileaaa_key.der-signedcertfileaaa_cert.der-storetype jks -genkeystore yesIn this command,
aaa_key.derandaaa_cert.der are the private key and certificate pair in DER format. -
Enter the keystore password when prompted. This must be same as global pass phrase.
6.9.6.2.2 Cert Transport Security Mode
In Cert transport security mode, the certificates for the server and agent should be requested from a certifying authority. Optionally, the Simple mode self-signed certificates can also be used as a certifying authority, for purposes of issuing Cert mode certificates.
Follow these steps to prepare for Cert mode:
-
Import a CA certificate of the certifying authority using the certificate and key pair issued for Access Client and OAM Server. Follow the steps in "Importing the CA Certificate." Instead of
cacert.pemorcacert.der, substitute the CA certificate file of the issuing authority. -
If Oracle Access Manager 10g JNI ASDK install is available, it provides a way to generate certificate and key file for the Access Client. These certificates will be in PEM format.
For more information about how to generate a certificate using an imported CA certificate, see Oracle Fusion Middleware Administrator's Guide for Oracle Access Manager with Oracle Security Token Service.
To import this certificate, key pair in the
oamclient-keystore.jksin PEM format, follow instructions in "Setting Up The Keystore."
6.10 Configuring SSO Logout for OAM IAP for IBM WebSphere
This section describes logout with the OAM IAP for IBM WebSphere.
6.10.1 Configuring Logout for Generic (or Non-ADF) Applications
In non-ADF applications, logout is initiated when an application causes the invocation of the logout.html that is configured as the target in the application's logout link.
The logout.html file can be placed at the Web server's doc root, or it can be part of the IBM WebSphere application.
If you are using your own logout.html, you can embed Example 6-3 JavaScript to invoke "delOblixCookie" upon loading the page body. The LTPAToken is deleted by JavaScript; ObSSOCookie is deleted by WebGate.
<body onload="delOblixCookie();">
Note:
If cookie "httponly" property is set to "true" by users for security considerations, javascript cannot delete LTPAToken cookies and SSO logout will not work.Example 6-3 JavaScript to invoke delOblixCookie
function delCookie(name,path,domain) {
   var today = new Date();
   var deleteDate = new Date(today.getTime() - 48 * 60 * 60 * 1000); // minus 2
   days
   var cookie = name + "="
            + ((path == null) ? "" : "; path=" + path)
            + ((domain == null) ? "" : "; domain=" + domain)
            + "; expires=" + deleteDate;
   document.cookie = cookie;
}
function delOblixCookie() {
         // set focus to ok button
      var isNetscape = (document.layers);
  if (isNetscape == false || navigator.appVersion.charAt(0) >= 5) {
    for (var i=0; i<document.links.length; i++) {
      if (document.links[i].href == "javascript:top.close()") {
          document.links[i].focus();
          break;
      }
    }
   }
  delCookie('ObTEMC', '/');
  delCookie('ObSSOCookie', '/');
  delCookie('LtpaToken', '/');
  delCookie('LtpaToken2', '/');
  // in case cookieDomain is configured
  // delete same cookie to all of subdomain
  var subdomain;
  var domain = new String(document.domain);
  var index = domain.indexOf(".");
  while (index > 0) {
     subdomain = domain.substring(index, domain.length);
     if (subdomain.indexOf(".", 1) > 0) {
         delCookie('ObTEMC', '/', subdomain);
         delCookie('ObSSOCookie', '/', subdomain);
         delCookie('LtpaToken', '/', subdomain);
         delCookie('LtpaToken2', '/', subdomain);
     }
     domain = subdomain;
     index = domain.indexOf(".", 1);
   }
}
To configure logout for generic (non-ADF) applications:
-
Locate the desired
logout.htmlfile. -
Add the JavaScript in Example 6-3 to
logout.htmlto invoke "delOblixCookie" upon loading the page body. -
In the Oracle Access Manager policy, protect
logout.htmlusing the Anonymous Authentication Scheme, as described in the Oracle Fusion Middleware Administrator's Guide for Oracle Access Manager with Oracle Security Token Service.
6.10.2 Configuring Logout for ADF-Coded Applications
In ADF coded Fusion Middleware applications such as Oracle WebCenter Portal application, single sign off is achieved through OPSS. For details, see the following topics:
6.10.2.1 Configuring WebGate for Logout
This topic provides an example (Example 6-4) and procedure that you can use and customize to logout an application protected by OAM 10g with a 10g WebGate
Note:
Example 6-4 applies only for an end URI of a single word. For a long URI, you must update the parsing logic accordingly.To configure WebGate for logout:
-
Create and edit
logout.htmlfor the WebGate based on Example 6-4: add and call the functionhandleLogout()for redirecting the logout request to the end URL specified in the logout URLExample 6-4 Sample logout.html Script
<html> <head> <script language="javascript" type="text/javascript"> function handleLogout() { //get protocol used at the server (http/https) var webServerProtocol = window.location.protocol; //get server host:port var webServerHostPort = window.location.host; //get query string present in this URL var origQueryString = window.location.search.substring(1); //vars to parse the querystring var params = new Array(); var par = new Array(); var val; if (origQueryString != null && origQueryString != "") { params = origQueryString.split("&"); //search for end_url and redirect the user to this for (var i=0; i<params.length; i++) { par = params[i].split("="); if ("end_url" == par[0]) { endUrlVal = par[1]; //check if val (value of end_url) begins with "/" or "%2F" (is it an URI?) if (endUrlVal.substring(0,1) == "/" || endUrlVal.substring(0,1) == "%") { if (endUrlVal.substring(0,1) == "%") endUrlVal = "/" + endUrlVal.substring(3); //modify the end_url value now endUrlVal = webServerProtocol + "//" + webServerHostPort + endUrlVal; } //redirect the user to this URL window.location.href = endUrlVal; } } } } </script> </head> <body onLoad="handleLogout();"> <h3>You have been logged out<h3> </body> </html> -
Store your
logout.htmlscript toWebGate_install_dir/oamsso/logout.html -
In the
httpd.conffile, ensure following entries exist under the WebGate block:Alias /oamsso "<webage-install-dir>/access/oamsso <LocationMatch "/oamsso/*"> Satisfy All </LocationMatch> -
Proceed to "Configuring OPSS for SSO Logout with Oracle Access Manager."
6.10.2.2 Configuring OPSS for SSO Logout with Oracle Access Manager
Application configuration for logout depends on whether you have an ADF-coded application integrated with OPSS versus not integrated with OPSS. This topic focuses on ADF-coded applications that are integrated with OPSS.
The following procedure is similar to configuring logout for 10g WebGates, with a specific step for ADF-coded applications, which must send the end_url value to identify where to redirect the user after logout processing. However, with ADF-coded applications, logout occurs when the application causes the following URI to be invoked:
/<app context root>/adfAuthentication?logout=true&end_url=<any uri>
To configure OPSS for SSO Logout with OAM:
-
Locate and open the
jps-config.xmlfile in the following path:was_profile_dir/config/cells/cell_name/fmwconfig/jps-config.xml
-
Within
jps-config.xml, add the following <propertySet name="props.auth.uri.0"> element and values:<?xml version="1.0" encoding="UTF-8" standalone="yes"?> <jpsConfig xmlns="http://xmlns.oracle.com/oracleas/schema/11/jps-config-11_ 1.xsd" xmlns:xsi="http://www.w3.org/2001/XMLSchema-instance" xsi:schemaLocation="http://xmlns.oracle.com/oracleas/schema/11/jps-config-11_ 1.xsd"> <property value="off" name="oracle.security.jps.jaas.mode"/> <propertySets> . <propertySet name="props.auth.uri.0"> <property value="/oamsso/logout.html" name="logout.url"/> <property value="${app.context}/adfAuthentication" name="login.url.BASIC"/> <property value="${app.context}/adfAuthentication" name="login.url.ANONYMOUS"/> <property value="${app.context}/adfAuthentication" name="login.url.FORM"/> </propertySet> <propertySet name="props.auth.level.0"> <property value="0" name="type-level:ANONYMOUS"/> <property value="1" name="type-level:BASIC"/> <property value="2" name="type-level:FORM"/> . </propertySets> -
Within
jps-config.xml, add the following <serviceProviders> element and values:... </propertySets> <serviceProviders> <serviceProvider class="oracle.security.jps.internal.sso.SsoService Provider" name="sso.provider.0" type="SSO"/> </serviceProviders> -
Within
jps-config.xml, add the following <serviceInstances> element and values:<?xml version="1.0" encoding="UTF-8" standalone="yes"?> ... </serviceProviders> <serviceInstances> . . <serviceInstance provider="sso.provider.0" name="sso.inst.0"> <property value="oracle.security.jps.wls.internal.sso.WlsToken Provider" name="token.provider.class"/> <property value="2" name="default.auth.level"/> <property value="oracle.security.wls.oam.providers.sso.OAMSSO ServiceProviderImpl" name="sso.provider.class"/> <property value="OAMSSOToken" name="token.type"/> <propertySetRef ref="props.auth.uri.0"/> <propertySetRef ref="props.auth.level.0"/> </serviceInstance> . . </serviceInstances>
-
Within jpsContexts, add the highlighted <serviceInstanceRef ref="sso.inst.0"/> element and value:
<?xml version="1.0" encoding="UTF-8" standalone="yes"?> ... </serviceInstances> <jpsContexts default="default"> <jpsContext name="default"> <serviceInstanceRef ref="credstore"/> <serviceInstanceRef ref="keystore"/> <serviceInstanceRef ref="policystore.xml"/> <serviceInstanceRef ref="audit"/> <serviceInstanceRef ref="idstore.ldap"/> <serviceInstanceRef ref="sso.inst.0"/> </jpsContext> </jpsContexts> </jpsConfig> -
In the Oracle Access Manager policy, protect
/oamsso/logout.htmlwith the Anonymous Authentication scheme, as described in the Oracle Fusion Middleware Administrator's Guide for Oracle Access Manager with Oracle Security Token Service. -
Proceed to "Configuring oamAuthenProvider.jar in the IBM WebSphere Class Path."
6.10.2.3 Configuring oamAuthenProvider.jar in the IBM WebSphere Class Path
To perform logout through OPSS, you must configure oamAuthnProvider.jar in the IBM WebSphere class path. This is similar to adding the interceptor jar in the IBM WebSphere class path in "Creating the Interceptor Entry in the IBM WebSphere Console."
The oamAuthnProvider.jar file is available from the following path:
MW_HOME/oracle_common/modules/oracle.oamprovider_11.1.1/
    oamAuthnProvider.jar
To add oamAuthnProvider.jar to the IBM WebSphere class path:
-
In the IBM WebSphere console go to Servers, Server Types, WebSphere Application, Servers, and select the appropriate server.
-
Under the Server Infrastructure section, click Java And Process Management, and then click Process Definition.
-
In Additional properties, select Java Virtual Machine, Custom Properties.
-
In the
ws.ext.dirsproperty, add the value foroamAuthnProvider.jarafter the entry forOAMTrustAssociationInterceptor.jarand confirm that the two values are separated by a colon. For example:ws.ext.dir MW_HOME/oracle_common/modules/oracle.oamprovider_11.1.1/ OAMTrustAssociationInterceptor.jar:MW_HOME/oracle_common/modules/ oracle.oamprovider_11.1.1/oamAuthnProvider.jar
-
Restart IBM WebSphere.
-
Proceed to "Verifying SSO Logout."
6.10.2.4 Verifying SSO Logout
-
From a browser, enter the URL of the protected resource. For example:
http://host:port/<app context root>/adfAuthentication
-
Confirm that the login page appears and sign in using proper credentials
-
Confirm that the protected resource is served
-
Open a new browser tab or window and access the same resource to confirm that the second attempt does not require another login
-
Logout from one tab using a URL like the following sample:
http://host:port/<app context root>/adfAuthentication?logout=true&end_url=<any
uri>
-
Access the resource again to confirm that a login page appears.
6.11 Known Issues
Oracle Access Manager Identity Assertion Provider for IBM WebSphere does not support the Simple security mode.
Oracle Access Manager Identity Assertion Provider for IBM WebSphere does not generate an LTPA token after successful authentication and valid ObSSOCookie generation.
Error
403: AuthenticationFailed
And the following error in the trace log:
com.ibm.websphere.security.WebTrustAssociationFailedException: Can not assert
user identity as LoggedIn user value is null
Refresh the browser 2 or 3 times. A valid LTPA token is generated.
For the server to communicate with a client in Simple transport security mode, a Master Secret Key is required. Sun JDK has an API that generates the Master Secret Key. However, IBM WebSphere contains the IBM JDK which does not have the API to generate the Master Secret Key.
The following exception will occur as mentioned in the bug# 21657775:
[8/6/15 17:34:02:264 EST] 0000000a OAMTrustAssoc E
@ oracle.security.was.providers.tai.OAMTrustAssociationInterceptorImpl
@ initialize NAP Channel connection cannot be established with the OAM Access
@ Server
@
@ oracle.security.am.common.exceptions.NAPException: Error in receiving server
@ challenge. ObAAAStatus: Major code: 98(Unknown) Minor code: 2(NoCode)
@ at
@ oracle.security.am.common.nap.ObMessageChannelWrapper.initNAP(ObMessageChannel
@ Wrapper.java:241)
@ ...
The exception doesn't impact the functionality of Header based integration.