Configuring the default display format for an attribute

By default, the display format for attribute values is based on the attribute's data type plus the user's current locale. You can change the default display format used for each attribute. Within specific components, you can then make some updates to the display format.

Note that you only configure the display format for the default locale version of the attribute. You do not configure formatting for the locale-specific attributes. Because the formatting configuration already takes the current locale into account, you do not need to configure the formatting for the locale-specific attributes separately.

From the attributes list on the Views page, to change the default display format for an attribute:

  1. Click the edit icon in the Standard Format column.

    The Format Option dialog is displayed.

    At the top of the dialog is a sample value that displays the current formatting selection based on your current locale.

  2. For numeric attributes:
    Basic number formatting fields for a view attribute
    1. Click the radio button to indicate the type of number.

      A numeric attribute may be displayed as a regular number, a currency value, or a percentage.

      Note that if you set a numeric attribute to be a currency or percentage, that selection cannot be overridden at the component level.

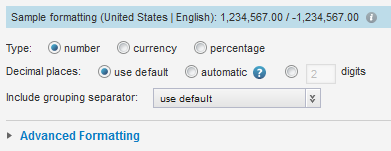
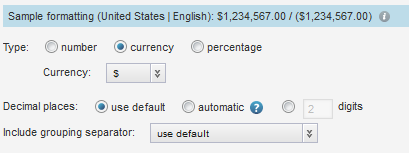
    2. If the number is a currency value, then from the Currency drop-down list, select the type of currency. This selection determines the symbol to display next to each value.
      Value format fields for a currency attribute value
    3. If the number is a percentage, then from the Include percentage sign drop-down list, select whether to display the percentage (%) sign with the value.

      Value formatting fields for a percentage attribute value

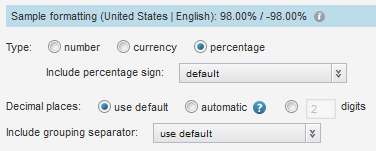
      Note that if you use percentage as the format, Studio automatically multiplies the value by 100. So if the actual value is 0.05, Studio displays the value as 5%.

    4. Under Decimal places, to display all numbers using the same default number of decimal places, leave the use default radio button selected.

      To display all of the decimal places from the original value, up to 6 places, click the automatic radio button. Studio truncates any decimal places after 6, and removes any trailing zeroes.

      To specify the number of decimal places to use for all numbers, click the custom radio button, then in the field, type the number of decimal places to display.

    5. From the Include grouping separator drop-down list, select whether to display the grouping separator (used to separate thousands).
    6. The Advanced Formatting section provides additional format options. To display those options, click the section heading.
      Advanced Formatting fields for a numeric attribute value

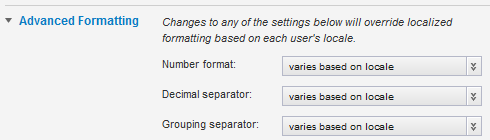
      For each of the advanced items, you can choose to have the display determined automatically based on the user's locale, or select a specific option.

    7. Under Advanced Formatting, from the Number format drop-down list, select how to display positive and negative numbers.
    8. From the Decimal separator drop-down list, select the character to use for the decimal point.
    9. From the Grouping separator drop-down list, select the character to use for the grouping (thousands) separator.
  3. For a Boolean attribute, you can determine the values to display for each Boolean value.

    By default, 1 is displayed as the localized version of "True", and 0 is displayed as the localized version of "False". To set specific (but non-localized) values to display:


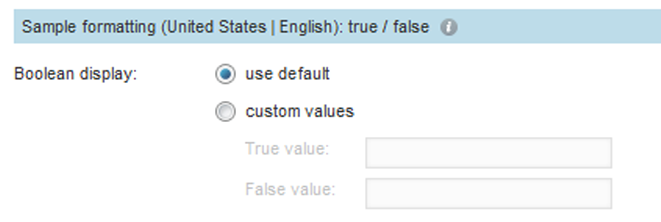
    1. Click the custom values radio button.
    2. In the True value (1) field, type the value to display if the attribute value is 1 (True).
    3. In the False value (0) field, type the value to display if the attribute value is 0 (False).
  4. For a geocode, to set a specific number of decimal places to display for the latitude and longitude values:
    Value formatting fields for a geocode attribute
    1. Click the custom radio button.
    2. In the field, type the number of decimal places.
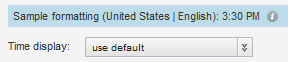
  5. For a date/time attribute:
    Value formatting fields for a date-time attribute
    1. From the Date display drop-down list, select the format to use for the date.

      The selected format is adjusted for locale. For example, for some locales the month displays first, and for others the day displays first.

    2. From the Time display drop-down list, select the format to use for the time.
  6. For a time attribute, from the Time display drop-down list, select the format to use for the time.
    Value formatting fields for a time attribute
  7. For a duration attribute:
    Value formatting fields for a duration attribute
    1. From the Duration precision drop-down list, select the unit to use when displaying the duration.

      For example, for a duration of 1 day, 15 hours, and 20 minutes, if you choose days as the precision, the value displays as 1.63 days. If you choose hours, the value displays as 39.33 hours.

    2. From the Include precision unit drop-down list, select whether to display the precision unit next to the value.
    3. Under Decimal places, to specify the number of decimal places to display for the duration value, check the custom radio button, then enter the number in the field.
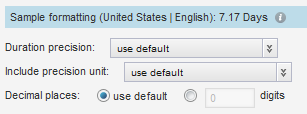
  8. For all value types, the Multi-Value Formatting section indicates how to display multiple values.
    Multi-Value Formatting configuration for a view attribute

    The setting is applied whenever multiple values are displayed for an attribute, including when an attribute is by definition multi-value, and when the set aggregation is applied to an attribute.

    From the Multi-value separator drop-down list, select the character to use to separate the values.

  9. To confirm the format configuration, click Apply.
  10. To save the changes to the view settings, click Save View.