To install Studio, you use the WebLogic Server Administration Console to deploy endeca-portal-weblogic-3.1.x.ear into the WebLogic domain.
Note that when you deploy the .ear file to a WebLogic Administration Server, and you use the default WebLogic staging mode for an Administration Server, which is "nostage", then WebLogic does not copy the file from the download directory to the server.
If the file is deleted from its current location, then Studio cannot be loaded. So with this mode, once you deploy Studio, the .ear file must remain in the same location for as long as Studio is deployed.
If you use the "stage" mode, then WebLogic does copy the file.
For more information on the WebLogic staging modes, see the WebLogic documentation.
When you deploy using these instructions, the following default locations are used:
| Location | Default Value |
|---|---|
| Studio home directory | By default, the Studio home directory is
<MiddlewareHomeDirectory>/user_projects/domains/<StudioDomain>/eid/studio.
If this directory already exists, then before installing,
make sure that it does not already contain the following subdirectories:
If these directories exist, then it means there is an instance of Studio installed. For the installation to work correctly, these existing directories must be removed. Before moving these directories, also make sure that the other instance has been removed. You can, if needed, change the location of the Studio home directory. To use a different directory for Studio home, then before you deploy Studio, you need to follow the instructions in Changing the Studio home directory on WebLogic Server. |
| Context path | Studio is deployed to the
/eid/ context in the domain.
When you created the domain, you should already have verified that there are no conflicts in that context. After you deploy Studio, you can change the context root. See Changing the context path for Studio on WebLogic Server. |
To deploy endeca-portal-weblogic-3.1.x.ear into a production environment:
-
Use the WebLogic Server
Administration Console to deploy
endeca-portal-weblogic-3.1.x.ear
into the domain.
-
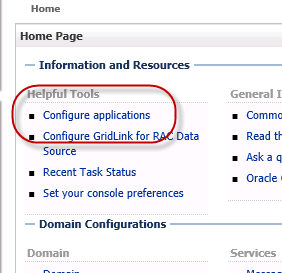
Under
Helpful Tools, click
Configure applications.
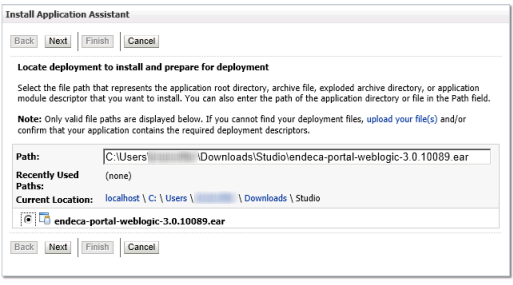
-
Click the
Install button.
-
Use the file browser to find the
endeca-portal-weblogic-3.1.x.ear
file, then click the radio button to the left of it.
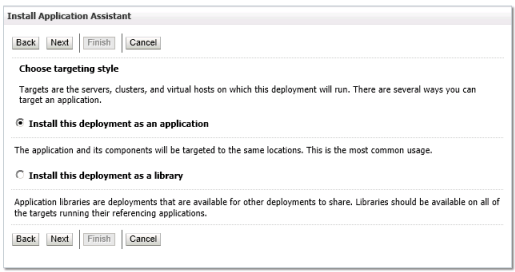
-
On the next page, under
Choose targeting style, make sure the
Install this deployment as an application
radio button is selected, then click
Next.
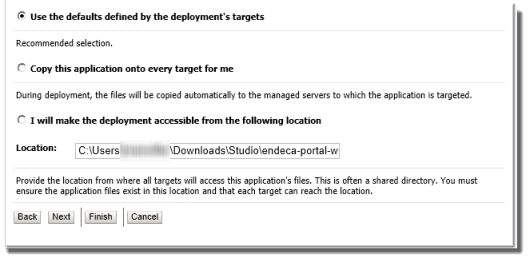
-
On the next page, accept the default selections, then click
Finish.
-
If necessary, click
Activate Changes.
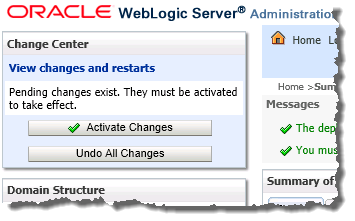
The deployment may take several minutes. Make sure you do not try to log in to Studio before the deployment is complete.
-
Under
Helpful Tools, click
Configure applications.
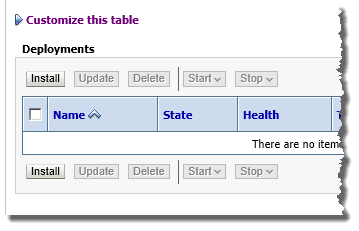
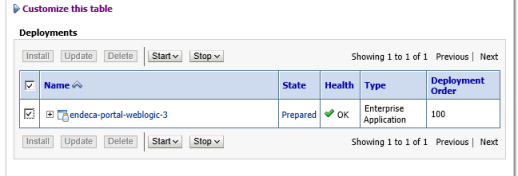
-
When the deployment process is completed, the deployment status is
Prepared. To start the deployment:
-
In the
Deployments list, check the checkbox for
the Studio deployment.
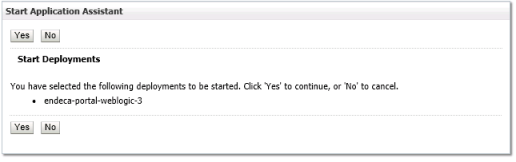
-
Under
Start Deployments, click
Yes.
-
In the
Deployments list, check the checkbox for
the Studio deployment.
