Next, you create an interface.
To create an interface:
- In ODI Studio, select the Designer tab.
- Expand Projects and go to your project folder.
- Expand <project name> Folder.
-
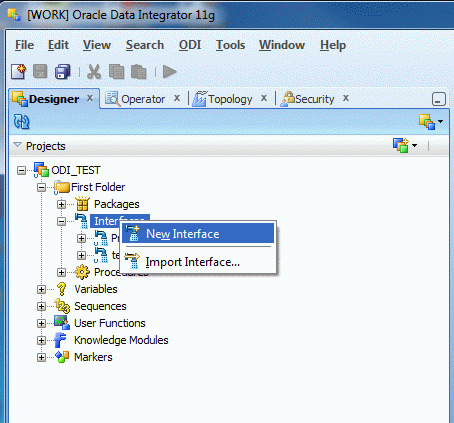
Right click
Interfaces and select
New Interface.
For example:

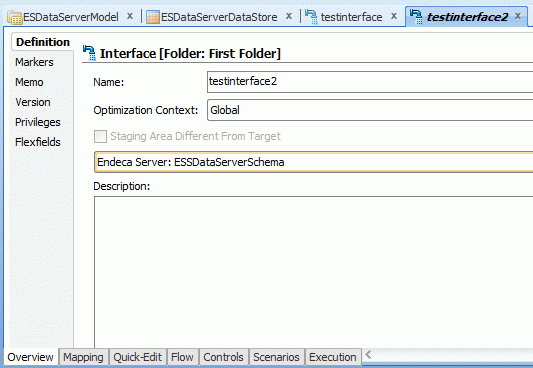
- Select the Definition pane and specify a unique value for Name.
-
From the drop-down list, select
Endeca Server: <name of logical schema>
that you created earlier.
For example:

- Select the Quick Edit tab.
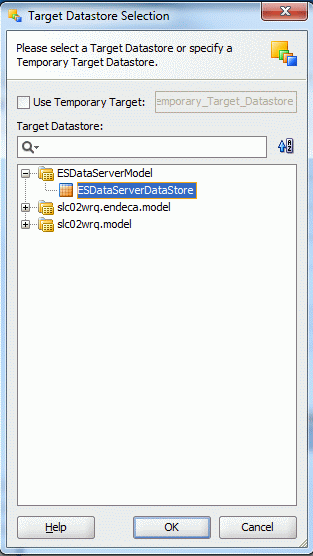
- Click the Target Datastore Selection icon.
- Uncheck Use Temporary Target.
-
Expand the Endeca Server model and select a datastore.
For example:

- Click OK.
- Select the Mapping tab and drag the data store of the source data into the Mapping tab.
- Map the source columns to the target datastore columns.
- Select the Overview > Definition, then check Staging Area Different From Target.
-
From the drop-down list, select a staging database.
The staging database must support SQL.
- Select the Flow tab.
-
Click the
Target component.
The Target Area - Property Inspector dialog displays.
- From the IKM Selector drop-down list, select IKM SQL to Endeca Server.
-
Under
Options, modify target options as necessary.
You must specify an Endeca data domain name for DATADOMAIN. Other options are optional. For details about the options, see Configuration reference for the IKM SQL to Endeca Server.
- Click Save.
You can now run the ODI Interface according to your scheduling requirements.
