A custom target application enables you to load data from a supported source, and then extract the data into a flat file instead of loading it to Essbase, Planning, and Financial Management. You can define the custom target application with required dimensionality. Instead of exporting the data to a target application, FDMEE generates a data file that can be loaded to an external system using a custom process.
When creating a custom target application, note the following:
Data is written to the file in the following predefined order: Account, Entity, UD1, UD2,..UD20, AMOUNT.
The sequence that is specified when you create the custom app definition is used to order the dimensions for mapping processing. Note the sequence in case you have scripts that have an order of processing dependency.
Metadata Rule—Metadata load is not applicable from custom target applications. The Location associated with a custom application is filtered in the metadata load POV.
Data Rule—The POV category is not validated. Plan types are unavailable.
Data Load Mapping—Target values are not validated for custom applications.
Data Load Execution—When the option to export the data file is enabled, FDMEE creates an output data file using the AIF_HS_BALANCES view. The name of the data file is <Target App Name>_<Process ID>.dat, and it is written to the <APPL ROOT FOLDER>/outbox directory. In addition the OUTPUT_FILE column in the AIF_PROCESSES table is updated. The data file can be accessed from the Process Details page from the OUTPUT file column.
Check Rules can be created from a custom target applications. Check rules cannot be based on target values.
Write-back is not applicable from custom target applications.
 To define a custom target application:
On the Setup tab, under Register, select Target Application.
In Target Application, in the Target Application summary grid, click Add.
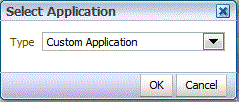
From Select Application, select Custom Application, and then click OK.

Select the Target Dimension Class or click
 to select the Target Dimension Class for each dimension that is not defined in the application.
The dimension class is a property that is defined by the dimension type. For example, if you have a Period dimension, the dimension class is also “Period.” For Essbase applications, you must specify the appropriate dimension class for Account, Scenario, and Period. For Public Sector Planning and Budgeting applications, you must specify the dimension class for Employee, Position, Job Code, Budget Item, and Element.
In Data Table Column Name, specify the table column name of the column in the staging table (TDATASEG) where the dimension value is stored.
Click
 to search and select a data table column name.
In Sequence, specify the order in which the maps are processed.
For example when Account is set to 1, Product is set to 2, and Entity is set to 3, then FDMEE first processes the mapping for Account dimension, followed by Product, and then by Entity.

In Enable export to file, select Yes to have FDMEE create an output data file for the custom target application.
A file I created in the outbox folder on the server with the following name format: <LOCATION>_<SEQEUENCE>.dat. For example when the location is named “Texas” and the next sequence is 16, then the file name is Texas_15.dat. The file is created during the export step of the workflow process.”
When the Enable export to file option is set to No, then the Export to Target option is unavailable in the execution window.
In File Character Set, select the file character set.
The file character set determines the method for mapping bit combinations to characters for creating, storing, and displaying text. Each encoding has a name; for example, UTF-8. Within an encoding, each character maps to a specific bit combination; for example, in UTF-8, uppercase A maps to HEX41.
In Column Delimiter, select the character to use for delimiting columns in the output file.
Available column delimiters are:
,
|
!
;
: