1 Introduction
Oracle Enterprise Manager Ops Center is Oracle's comprehensive solution for managing the physical and virtual assets in your data center: operating systems, firmware, BIOS configurations, bare metal server and virtual guest provisioning, hardware monitoring, automatic My Oracle Support service request generation, and performance and energy management.
1.1 Oracle Enterprise Manager Ops Center in Your Datacenter
Various sites and various users within each site value different aspects of the Oracle Enterprise Manager Ops Center software:
-
As a monitoring tool, the software discovers and identifies all assets in its environment, and displays the status of assets and details of a specific asset. When an incident occurs, you can track the progress of the investigation or service request.
-
As a provisioning tool, the software deploys new assets in a manner consistent with existing assets because you use profiles to set the attributes and you use plans to deploy the profiles to one target or many targets. In a similar way, when assets must be upgraded, you use the update profiles and plans to perform the operations.
-
As a virtualization manager, the software creates and manages virtual operating systems, virtual servers such as Oracle VM Server for SPARC and Oracle Solaris Zone, and virtual data centers in the cloud. To support these virtual assets, Oracle Enterprise Manager Ops Center manages and provides resources for storage and networks.
Not every product feature is relevant to your site's activities or for your role. What you see in the user interface is affected by several factors:
-
The role attached to your user account: The actions for your role are available in the Actions pane. The required roles for using a feature are listed in each chapter of this document. When you must accomplish a task and the necessary action is not available to you, your administrator can add the role to your user account. When you log in again, the action is available.
-
The current connection mode: In Connected mode, actions that rely on OS and firmware images and packages use the latest images and packages downloaded from Oracle and vendor sites. If your site uses the product software in Disconnected mode, the images and packages in your local knowledge base do not change until your site acquires them. Also in Connection mode, you can create service request from incidents with full asset information and warranty status. In Disconnected mode, you must contact My Oracle Support and provide this information.
Changing the connection mode can be done easily and temporarily. See the Oracle Enterprise Manager Ops Center Administration Guide for the procedure for changing the connection mode.
-
The scope of Oracle Enterprise Manager Ops Center: The product software is designed to manage assets of a data center, from small to large. However, the product software is also installed in an Oracle Engineered System, which is a complete set of integrated hardware and software designed to reach a specific level of capability, capacity, and scale. In this case, the product software is managing the components of the engineered system and the virtual assets that the system supports. Some actions are not relevant to an engineered system and so are not visible in the user interface.
1.2 About This Document
After the assets have been discovered and brought under the management of the software, as described in Chapter 2, "Asset Management", learn about the assets by selecting each one or each type and viewing the information in the center pane and its tabs.
When you are ready to perform a task such as discovering a type of hardware or upgrading a server's operating system, go to the How To tab of the documentation library to find the example procedure, which demonstrates one set of options. If you do not find an example of the procedure you want to perform, look in this document for the procedure. Use this document to learn about all the options for the product's operations so that you can determine how you will perform the procedure.
This document is divided into parts and, within each part, the chapters describes the capabilities of the product software's features. Where it is practical, all information about a feature is discussed in the same chapter but there are also links to other documents in the library.
1.3 About the Document Library
All documentation for the Oracle Enterprise Manager Ops Center 12c Release 2 software is located at the site: http://docs.oracle.com/cd/E40871_01/index.htm.
You can use this library from any browser or you can connect to one of the documents or a specific chapter from within the product's user interface. Click the Help option in the title bar to display the Help menu, containing the list of documents, as shown in Figure 1-1.
Figure 1-1 Accessing the Document Library
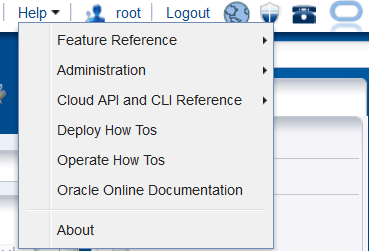
Description of "Figure 1-1 Accessing the Document Library "
The documentation library contains the documents in Table 1-1. The Deploy How To tab at http://docs.oracle.com/cd/E40871_01/nav/deployhowto.htm and the Operate How To tab at http://docs.oracle.com/cd/E40871_01/nav/operatehowto.htm have links to end-to-end examples and to workflows that combine the examples into deployment and operation scenarios.
Use the site's Search feature to search throughout the library of product documents or to search a specific document. The site can also convert the documents to PDF, EPUB, and Mobipocket file formats.
Table 1-1 Documents for Oracle Enterprise Manager Ops Center
| Document | Content |
|---|---|
|
An overview of the product software's architecture, its architecture, and its features. This document also explains the product's user interface. |
|
|
Links to the installation and upgrade information and a description of known issues in the current release. |
|
|
Information about the current version, procedures for installation, and known issues. |
|
|
Information about planning for a new installation of the product software and the procedure for installing the software on an Oracle Solaris server. |
|
|
Information about planning for a new installation of the product software and the procedure for installing the software on a Linux server. |
|
|
Lists the ports used by the product software, the protocol for each port, and its purpose. It also includes the websites that the product software uses. |
|
|
Information about updating an existing installation of the product software to the current version. |
|
|
Procedures for configuring each component of the product software, for configuring the software for high availability, for managing users and roles, and for maintaining the product database. This guide also has procedures for obtaining operating system updates, enabling Auto Service Requests (ASR), using the OCDoctor script, and upgrading the software. |
|
|
Descriptions of the product features in detail and with procedures. |
|
|
Reference information such as parameters and variables for customizing the product software. |
|
|
Instructions for using the product's command-line interface and man pages for each command. |
|
|
Descriptions and procedures for a secure Oracle Enterprise Manager Ops Center deployments. |
|
|
Supported hardware, operating systems, virtualization technologies, databases, and browsers. |
|
|
API and CLI commands to manage programmatically the allocated virtual resources for a virtual datacenter account and to create and manage vServers. |
|
|
System Monitoring Plug-in for Oracle Enterprise Manager Ops Center |
Procedure for installing and configuring the plug-in that enables Oracle Enterprise Manager Ops Center to connect to Enterprise Manager Cloud Control. |
1.4 User Preferences and Role Preferences
The Oracle Enterprise Manager Ops Center Concepts Guide describes the features of the user interface. Some of the actions and the abilities can be changed, either by an individual user or by an administrator for all users with a specific role.
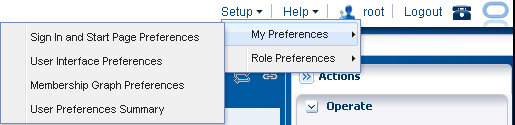
To see the current specifications or to change the specifications, click Setup in the title bar as shown in Figure 1-2 and then click My Preferences to view information about how the your account has been specified.
1.4.1 About the Current User Interface Preferences
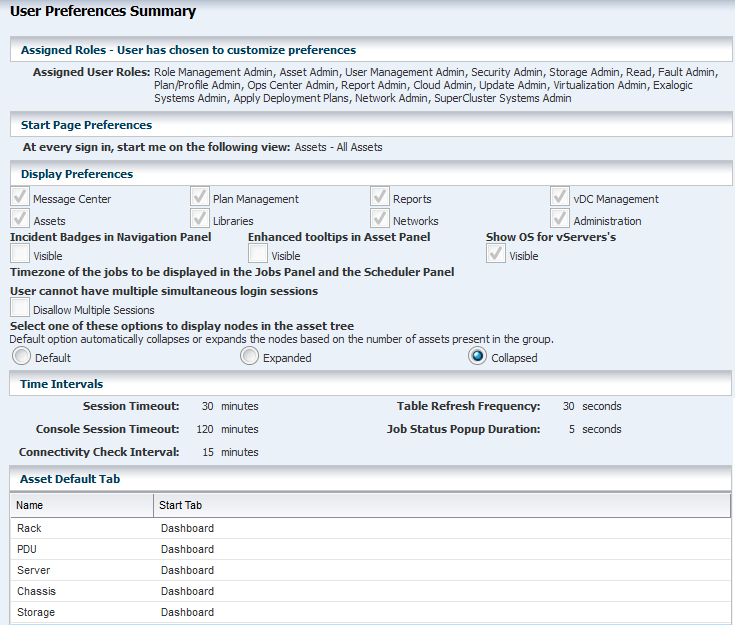
Figure 1-3 shows the User Preferences Summary window, which displays the current specifications for your start page, time intervals, and each asset type's default tab in the center pane. The current specification for the display of the Membership Graph and the Sign In and Start Page have separate windows.
To change the specifications in the User Preferences Summary window, click User Interface Preferences. Make changes, then log out and log in again.
When you change any of the preferences, this window includes a note to indicate that the preferences are not the default specifications.
In the Assigned Roles section, the roles assigned to this user account are listed.
The Start Page Preferences specifies the default view after you log in.
The Display Preferences section provides the following preferences:
-
Include or exclude each of the drawers in the Asset pane.
-
Show or hide the items in the Asset pane: incident badges, tooltips, and the operating system of a vServer.
-
Specify the time zones for the jobs in the Jobs pane.
-
Disable simultaneous sessions. The default behavior is to allow a user to log in multiple times. This convenience can be a security risk.
-
Change the way assets are expanded or collapsed in the Assets pane. The Default option relies on the number of assets to determine whether the node is expanded or collapsed. You can chose the Expanded option to always show all assets or the Collapsed option to always show only the Asset Type.
The Time Interval section shows the duration of the Session Timeout, the Table Refresh Frequency, the Console Session Timeout, the Job Status Popup Duration, and the Connectivity Check Interval.
The Asset Default Tab section lists each type of asset. For each asset type, you can specify the tab that is the default view displayed in the center pane when an asset of that type is selected.
1.4.2 Preferences By Role
As an administrator, you can set preferences for each role. All user accounts that are assigned the role share the same preferences.
Click Setup in the title bar and then click Role Preferences. The menu items are the same as for My Preferences with the addition of a drop-down list of roles. You select the role and then you select the specifications for all user accounts that have that role.
For example, the default behavior for logging in to the software is to allow the same user to log in multiple times. This is a convenience when monitoring the progress of an operation. However, it can be a security risk so an individual can disable this behavior by checking the Disable Multiple Sessions option in the User Interface Preferences window. As an administrator, you can disable this behavior for all users with a certain role by selecting the role and then disabling the option.
1.4.3 Sign In and Start Page Preferences
You can select a section of the Navigation pane as your default view. For example, you can specify that you see Plan Management when you log in. The Assets and Administration sections cannot be hidden. When you select Assets for display, you can choose a default tab to display. Your preferences override the default view for your role and any previous preferences that you.
1.4.4 Membership Graph Preferences
You can change the default orientation of the Membership Graph to left, right, top, or bottom. You can choose the icon size as small or large and the level of depth for the assets to be displayed. Figure 1-4 shows Membership Graph Preferences window.
Figure 1-4 Membership Graph Preferences Window
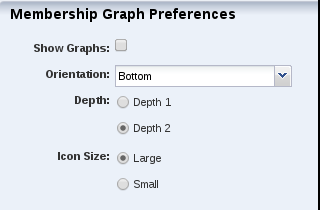
Description of "Figure 1-4 Membership Graph Preferences Window"
Each time you perform an operation in the Assets pane, the membership graph in the center pane is refreshed. In a datacenter with many assets, you might experience a noticeable delay during the refresh operation. If you are not making changes to the assets or to their relationships, you can hide the membership graph, which eliminates the refresh operation. Clear the Show Graph option, as shown in Figure 1-4. You see the effect of the change after you select an asset.
1.4.5 Time Interval Preferences
Select the User Interface Preferences action to set various time intervals to control when the software takes an action or performs an operation.
-
Session timeout: Sets the interval to wait for activity before ending your user interface session. The default value is 30 minutes. You can set the time to wait from 5 to 120 minutes.
-
Console timeout: Sets the interval to wait for activity from the serial console of managed assets before ending the session. The default value is 120 minutes. You can set the time to wait from 5 to 120 minutes.
-
Connectivity check interval: Sets the time to wait before the software checks its access to the Internet, Knowledge Base, and My Oracle Support Services. The default value is 15 minutes and the minimum value is 1 minute.
-
Table refresh frequency: Sets the time to wait before refreshing the tables in the user interface. The default value is 30 seconds and the minimum value is 10 seconds.
-
Job status popup duration: Sets the time to wait after a job completes to display a status message window. The default value is 5 seconds.