| Oracle® Fusion Middleware Enterprise Single Sign-On Suite Installation Guide 11g Release 2 (11.1.2.2) Part Number E37691-05 |
|
|
PDF · Mobi · ePub |
| Oracle® Fusion Middleware Enterprise Single Sign-On Suite Installation Guide 11g Release 2 (11.1.2.2) Part Number E37691-05 |
|
|
PDF · Mobi · ePub |
This section describes the registry settings you can use to customize the behavior of the Oracle Enterprise Single Sign-On Suite applications.
This section describes additional procedures for configuring Password Reset that you may find useful during deployment.
Password Reset sends reporting events to the SQL Reporting database through the SSO Reporting Service, which runs locally on the Web server. The local SSO Reporting Service sends those events to the SQL Reporting database at regular intervals.
The default interval for transmitting events to the SQL Reporting database is 30 minutes. You can change this setting from the Reporting page of the Password Reset Management Console.
You can configure the Web server in one of two ways to enable reporting:
(Recommended) Modify the DCOM permissions of the SSO Reporting Service to allow the Password Reset Reset account to launch and activate the SSO Reporting Service.
Make the Password Reset Reset domain account a member of the local Administrators group.
To modify the DCOM permissions:
Click Start > Run. At the command prompt, type dcomcnfg and press Enter to launch the Component Services management tool.

Navigate to the DCOM Config node: Console Root > Component Services > Computers > My Computer > DCOM Config.

Right-click the SSOReportingService Class node and select Properties.
Select the Security tab.

In the "Launch and Activation Permissions" section, click Customize, then click Edit.
In the "Group or user names:" section, click Add.

Enter the name of the Password Reset reset domain account and click OK.

Verify that the Password Reset reset account has "Local Launch" and "Local Activation" permissions.

9. Click OK twice to finish.
Run the AD LDS (ADAM) installer. Select A unique instance and click Next.
Provide your Instance name and click Next.
Specify port numbers of 10000 and 10001 (ten thousand range, for easy recall) and click Next.
Specify the root DN and click Next.
Specify an easy-to-find base location (for example, %RootDrive%\ADAM\Instance) and click Next.
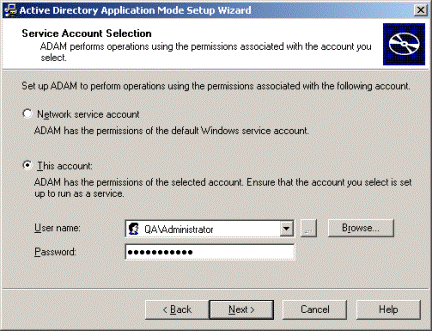
Specify the run privileges as appropriate for your environment and click Next.

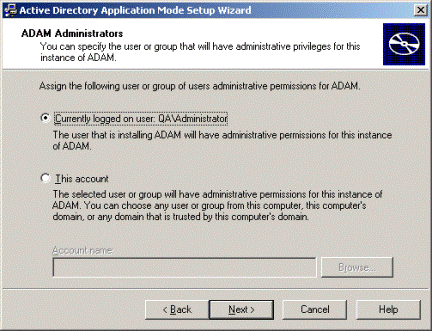
Specify the Administrative Permissions as appropriate for your environment and click Next.

Select Do not import LDIF files for this instance of ADAM and click Next.
In the "Ready to Install" screen, click Next.
In the "Complete" screen, click Finish.