Adding a Fact or Dimension Table to the Multidimensional Warehouse Data Model
You can extend the analytic capabilities of the prepackaged Multidimensional Warehouse (MDW) data model by adding new fact and dimension tables. New fact tables can become necessary when you introduce new sources of data to the data warehouse and/or new business processes are desired for analytic analysis.
Steps Required to Add a New Fact Table
The following steps are required to add a new fact table to the MDW data model:
Select the business process to be modeled.
Decide the grain for the new fact table.
Choose the dimensionality of the new fact table.
Identify the facts to be represented on the new fact table.
Identify the source of the new content and its corresponding error table.
Design the table structure required and apply it to the database.
Create new fact ETL job.
Declare the category or mart to which the fact applies.
Modify the applicable master sequence to include the new ETL fact job.
Note: This step is discussed in more detail below.
Use the following path in the left navigation panel of IBM WebSphere DataStage Director to locate the fact master sequence referenced in step nine above: E, [business process], [data mart], Master_Sequence.
Steps Required to Add a New Dimension Table
The following steps are required to add a new dimension table to the MDW data model:
Choose the new dimensionality desired and determine whether there are any corresponding related or outrigger language requirements.
Identify the source of the new content and its corresponding error table.
Design the table structure required and apply to the database.
Create new dimension ETL jobs (including any corresponding related or outrigger language jobs).
Declare the category or mart to which the dimension applies.
Modify the master sequence for this mart to include the new ETL dimension job as described in this section.
Modify the applicable master sequence to include the new ETL dimension job.
If required, the Language dimension sequence must be modified, as well.
Note: This step is discussed in more detail below.
The are three types of dimension master sequences that must be modified, as referenced in step seven above:
Global Dimension Master Sequence.
Local Dimension Master Sequence
Data Mart Business Process Dimension Master Sequence
Use the following path in the left navigation panel of IBM WebSphere DataStage Director to locate the applicable dimension master sequence: E, [business process], [data mart], Master_Sequence.
Adding a New Fact or Dimension Job to a Master Sequence
Perform the following steps to add a new fact or dimension job to a master sequence:
In IBM WebSphere DataStage Designer, locate the appropriate fact or dimension master sequence using the navigation provided in the preceding sections.
Open the master sequence for editing.
Add your new job (as a job activity) to the master sequence.
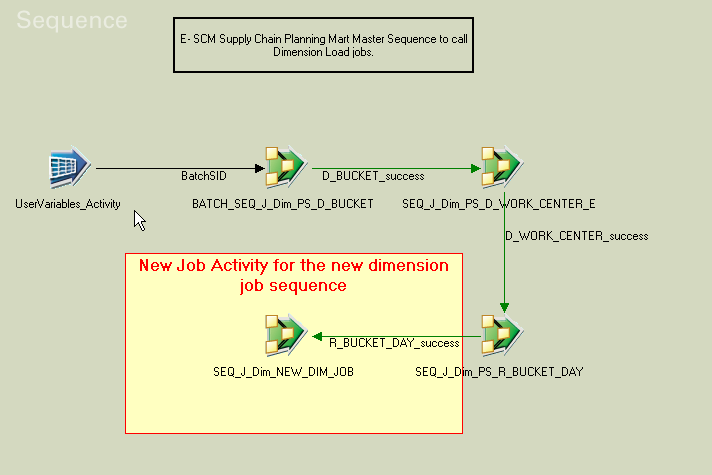
Drag the new job from the IBM WebSphere DataStage Designer Repository window and drop it in the Diagram window. The job appears as an activity in the Diagram window.
Image: Add new job to master sequence
This example illustrates Adding a new job to master sequence.
Connect the new job activity to the existing activity using a trigger.
In the Triggers tab of the properties box, edit the expression of the output trigger as appropriate.
Image: Job Activity box with Triggers tab selected
This example illustrates the Job Activity box with Triggers tab selected.
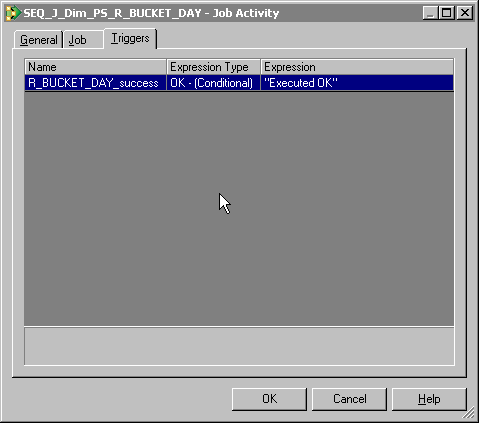
By default, the expression type on the triggers is set to OK – (Conditional). This condition can be modified if you have a different business requirement.
Open the new job activity for editing.
The job activity property box appears.
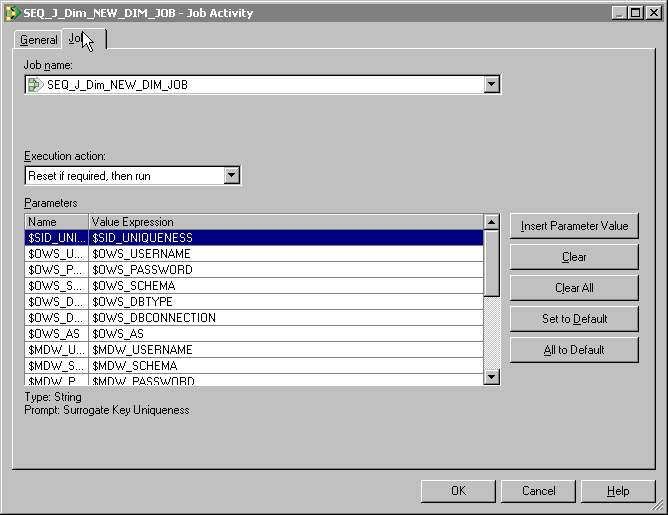
In the Jobs tab, change the job name to reflect the name of the new dimension sequence job and modify the value expression in the parameters as appropriate.
Image: Job Activity box with Job tab selected
This example illustrates the Job Activity box with Job tab selected.
Select File, Save from the menu to save the job.
Select File, Compile from the menu to compile the job.
If your mapping is correct, the Compilation Status window displays the Job successfully compiled with no errors message. If your mapping is incorrect, theCompilation Status window displays an error message.
If your job successfully compiles, select Close.
If you job does not compile successfully, you must return to the job and troubleshoot the errors.
You should perform technical unit testing and regression testing on the master sequence to ensure that each job activity is executed properly.