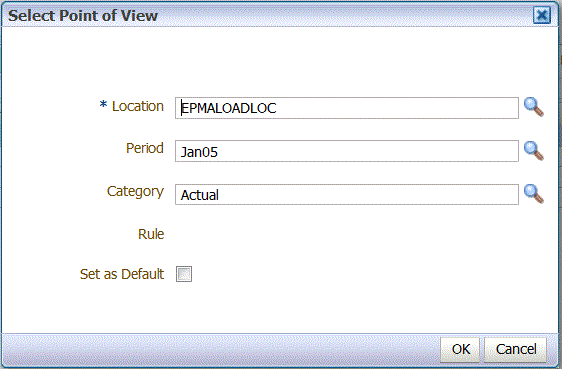
For the Write Back Load Workbench, the POV bar shows the current:
Location
Period
Category

By default only the data rule assigned to the Category POV is displayed.
For the Write-Back Workbench, the POV only shows the current “Location”.
The Source System and Target Application are displayed as context information.
When users log on, the location POV is set to the default location of the user. Users can view only locations that they have permission to access. Location permission is determined and granted by system administrators.
 To select another Location POV:
From the Workflow tab, and then under Data Load, select Write Back Workbench.

In Select Point of View, and then in Location, enter a full or partial string for the new location, and then, click OK.
Optional: To search on another location, from the Location drop-down, click More, navigate to the location on the Search and Select: Location screen, and then, click OK.
Optional: In Select Point of View, select Set as Default to use the new location as the default location.
 To select another Period POV:
From the Workflow tab, and then under Data Load, select Write Back Workbench.
In Select Point of View, and then in Period, enter a full or partial string for the new period, and then, click OK.
Optional: To search on another period, from the Period drop-down, click More, navigate to the period on the Search and Select: period screen, and then, click OK.
Optional: In Select Point of View, select Set as Default to use the new period as the default period.
Note: | By default only the data rule assigned to the Category POV is displayed. If the Category POV is locked, only the data rule assigned to the category is displayed. |
 To select another Period POV:
From the Workflow tab, and then under Data Load, select Write Back Workbench.
In Select Point of View, and then in Category, select the new category, and then, click OK.
Optional: In Rule, select the rule assigned to the Category POV.
Select Set as Default to use the new category as the default category.