| Oracle® Communications Design Studio Modeling Activation Release 7.2.4 |
|


|
Mobi · ePub |
The following is a coding example for an atomic action.
From the Java editor of the Package Explorer view:
Create an atomic action and an action processor.
See "Creating Model Elements" for more information.
Select an ADD action and LINE entity for each.
In the Atomic Action editor, map the action processor to the atomic action.
See "Understanding Model Element Relationships" for more information.
In the Parameters tab, right-click in the Parameters area and select Simple Data Element or Select Structured Data Element. See "Searching for Simple and Structured Elements" for more information.
In the Parameter Details area, define values to the ASAP run-time type parameters.
In the Mappings tab, click the mapped action processor to open the Action Processor editor.
Select Java Action Processor (with Code Generation).
Click New.
The Studio Activation Java Implementation Wizard appears.
Click Finish.
A new atomic action class appears in the Java editor with basic code, such as the entry point, get functions to get the parameters defined in the atomic action, and, in the end portion, sendRequests and how the response is handled.
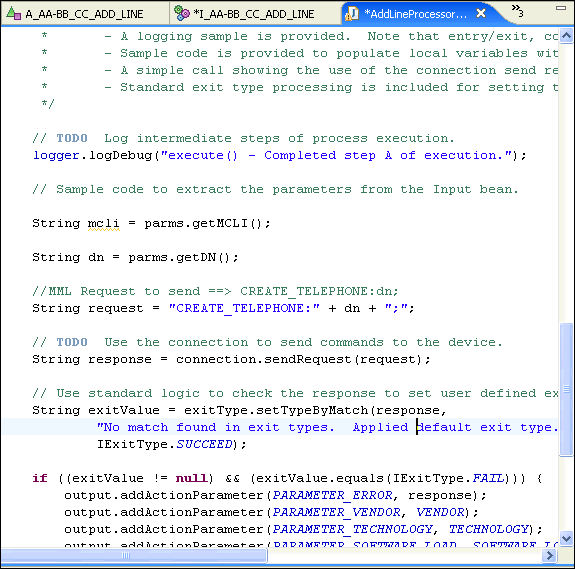
Build the MML (the message itself) using the Eclipse message format.
Use methods and classes. If no parameters are available in the atomic action, use a string to build the MML.
Send the message to the switch using the send request.
Set the user-defined exit type.
Understanding the Java Processor Class
Working with the Action Processor
Understanding Model Element Relationships
|
Copyright © 2006, 2014, Oracle and/or its affiliates. All rights reserved. Legal Notices |
|

