3. Transactions Input
You can perform below mentioned activities in the Oracle FLEXCUBE Payments.
3.1 Transaction Input
3.1.1 Capturing Transaction Details
You can book an outgoing / incoming SWIFT payment by providing input for the payment transaction in this screen. Input can be provided for a new transaction using the already saved template. Some Transaction fields are applicable only to the specific transfer type (Customer / Bank Bank transfer - Own Account).
You can invoke the ‘Transaction Input’ screen by typing ‘PXDTRONL’ in the field at the top right corner of the application toolbar and clicking the adjoining arrow button. Click new button on the Application toolbar.

Specify the following details.
Source Code
Specify the source of the transaction. Alternatively, you can select the source from the option list. The list displays all valid source codes with source type as Manual or Image.
Note
If you a select source code with source type as Image, then Image reference number field and Multiple Txn check box can be input.
Image Reference Number
Specify the system generated reference numbers for the MIFT images uploaded into the system. Alternatively, you can select the image reference number from the option list. The list displays all valid image reference numbers maintained in the system.
The MIFT image is considered as processed, when you save the first transaction for an Image Reference Number.The number of transactions entered against an Image reference number is tracked and displayed
Multiple Txn
Check this box to link multiple transactions to a single Image Reference Number. On selecting this option, the system copies the transaction details of the existing transaction for next transaction after generating a new transaction reference number. The transaction count for an Image reference number is then incremented and displayed.
Related Reference Number
After specifying Source code and clicking the Process (P) button, system generates and displays 10 digit reference numbers. The system generated value can be changed to any reference number desired by the user.
External Reference Number
This is defaulted to Related reference number. The system generated value can be changed to the reference number received from the external system which requested for the payment.
Booking Date
Select the booking date of transaction from the adjoining calendar.
Unique Reference Number
The system displays the auto-generated unique reference number.
Multi-Credit Transfer
Select this check box to indicate that this transaction is part of a a multi-credit transfer batch.
Multi Credit Reference Number
Specify the Multi Credit Reference Number of an open multi-credit transfer batch of customer/bank transfers in which this transaction should included.
Consol Reference Number
System generates and displays the credit Consol reference number for a multi-credit transfer batch.
Transaction Reference Number
System displays auto-generated Transaction reference number on clicking Process (P) button. This Reference number has a format mask of YYDDDSSSSSsssRRR.
The Reference number format is made up of following constituents
- YY : Year – 2 digits
- DDD : Julian Date – 3 digits
- SSSSS : Seconds elapsed since midnight – 5 digits
- sss : Milliseconds – 3 digits
- RRR : Random number – 3.
Transfer Type
Select the transfer type of the transaction. Options available are as follows:
- Customer Transfer
- Bank Transfer
- Bank Transfer Own A/c
Instruction Date
Select the customer advised Value Date of the transaction using the adjoining calender widget.
Transfer Currency
Specify the currency in which the payment needs to be made. Alternatively, you can select the currency from the option list. The list displays all valid currencies maintained in the system.
Instructed Currency
Specify the currency of the amount instructed by the customer. Alternatively, you can select the currency from the option list. The list displays all valid currencies maintained in the system.
Instructed Amount
Specify the payment amount as instructed by the customer.
Transaction Amount
Transaction Amount is calculated by the system based on the ‘Same As Transfer Currency’ flag and Currency conversion if applicable.
Same As Transfer Currency (check-box)
Select this check-box if you would like the Instructed Currency to same as Transfer Currency.
Debit Account
Specify the debit account of the transaction. Alternatively, you can select the debit account from the option list. The list displays all valid accounts maintained in the system.
Debit Account Currency
The system displays the debit account currency based on the debit account selected.
Sender Bank
System displays the BIC code of the sender bank for incoming payments.
If you are manually booking an incoming SWIFT payment then you can specify the Sender bank BIC present in the incoming message. Alternatively you can select the bank BIC code from the option list. The list displays all the valid BIC maintained in the system.
Prime Bank
System displays the Prime Bank code of the Sender bank if it is identified as a “Prime bank” (based on Prime Bank maintenance) in case of incoming payments. The prime bank will be validated as the base for doing the Prime bank checks as part of processing of incoming transactions.
If you are manually booking an incoming SWIFT payment then you can specify the Prime bank code. Alternatively, you can select the Prime bank code from the option list. The list displays all valid prime bank codes maintained in the system,
50:Ordering Customer
The system displays the name and address of the customer ordering the transaction, based on the debit account selected.
This is applicable only for ‘Customer Transfer’ type of transaction. The ordering customer details including name and address are defaulted based on the debit account selected. However you can modify these details.
Country
Specify or search and select the 2 character ISO country of the ordering customer.
52:Ordering Institution
Specify the details of the financial institution that has ordered for the payment to be initiated.
56: Intermediary Bank
Specify the details of intermediary bank which is the correspondent bank of Account with institution.
You can capture below mentioned details of the intermediary bank here.
- Specify the correspondent account number in the first line starting with “/”.
- Specify the bank identifier and bank code in the second and third lines. If the bank identifier is BIC then you can select the appropriate BIC code from the adjoining option list that displays all valid BICs maintained in the system.
- You can also specify the Name and Address of the Intermediary bank instead of the BIC Code, in lines 4 to 7.
57: Account with Institution
Specify the financial institution at which the beneficiary maintains their account. The beneficiary can be a retail/corporate in Customer Transfers or a Bank in case of Bank Transfers. Input is mandatory for ‘Customer Transfer’ type of transactions.
- Specify the correspondent account number in the first line starting with “/”.
- Specify the bank identifier and bank code in the second and third lines. If the bank identifier is BIC then you can select the appropriate BIC code from the adjoining option list that displays all valid BICs maintained in the system.
- You can also specify the Name and Address of the Intermediary bank instead of the BIC Code, in lines 4 to 7.
58: Beneficiary Institution
Specify the financial institution which is the ultimate recipient of the funds being transferred.
This is applicable only to Bank Transfers.
You can capture below mentioned details of the Beneficiary Institution here.
- Specify the account number in the first line starting with “/”
- Specify the BIC code in the second line. You can also select the appropriate BIC code from the adjoining option list that displays all valid BICs maintained in the system..
- You can also specify the Name and Address of the Beneficiary Institution instead of the BIC Code, in lines 3 to 5.
Country
Specify or search and select the 2 character ISO country code of the beneficiary institution.
59: Ultimate Beneficiary
Specify the details of the Ultimate Beneficiary of the payment. This field is available only for ‘Customer Transfer’ type of transactions.
You can capture below mentioned details of the Beneficiary here.
- In Line 1, specify the customer beneficiary account number to which the transaction amount should be credited. You can specify the IBAN of the account. Alternatively, you may search and select the account number using LOV if the beneficiary account is maintained with the bank, which is the case in Incoming payments. This field is available only for ‘Customer Transfer’ type of transactions.
- Specify the Name and Address of the Beneficiary in lines 2 to 5.
- Instead of the Name and Address, you can also specify the BIC code of the Beneficiary in line 2.
Country
Specify or search and select the 2 character the country code of the beneficiary customer.
Beneficiary A/C Prefix
Specify the beneficiary account prefix if applicable.
Receiver
System derives the Receiver (bank) of the outgoing payment message as part of Payment chain building activity and populates the BIC code of this bank in this field.
This field is also populated on clicking Enrich button.
You may choose to override the system derived Receiver with a different BIC code and input the same over here. On save, sytem validates if a SWIFT message can be sent to the user specified Receiver BIC code.
Receiver of Cover
System derives the Receiver of Cover (bank) of the outgoing payment message as part of Payment chain building activity if a Cover message is required to be sent in addition to the payment messages. The BIC code of this bank is populated in this field.
This field is also populated on clicking Enrich button.
You may choose to override the system derived Receiver of Cover with a different BIC code and input the same over here. On save, system validates if the user specified Receiver of Cover is a currency correspondent and a SWIFT message can be sent to this BIC code.
Internal Remarks
Specify any Operations remark or additional info pertaining to this transaction.
Preferences Section
Payment Details
Specify the remittance details of the individual transaction which are to be communicated to the beneficiary customer in up to 4 lines each containing upto 35 characters. Alternatively you can select a standard code from the option list and then input the remittance details. The list displays all values maintained in the ‘User Defined Generic Parameters’ screen. You may select a different standard code in each line. The standard codes available are INV, IPI, RFB, ROC and TSU.
Note
This is not applicable for bank transfers.
Sender To Receiver Info
Specify information for the receiver from the Sender. sending bank) in up to 6 lines each containing up to 35 characters. It is strongly recommended that a standard code is selected from the option list following which the information for the Receiver should be input. You may select a different standard code in each line. The standard codes available are ACC, INS, INT and REC. Narrative text relating to a standard code in the preceding line, which is continued on the next line(s), must start with a double slash '//', and, if used, must begin on a new line. Narrative text, in this case, should preferably be the last information in this field.
Ignore Cutoff
Check this box to ignore Processing cutoff for this transaction.
Waive Charge
Check this box to indicate whether the charges applicable to the transaction should be waived off or not.
Save as Template
Check this box to indicate whether the transaction details entered should be saved as a template or not. If checked, all the user-input fields including the charge details for manual pricing are saved with the template.
Note
This option is not applicable for Image Transactions.
Template Id
Specify a unique template ID if you want the transaction to be saved as a template. The transaction details are saved with the specified template ID.
Note
This is applicable only if Save as Template check box is selected.
Charge Whom
Specify the charge bearer for the transaction. The list displays the following values:
- OUR
- BEN
- SHA
Charge Currency
The system displays the charge currency of the Total Charges displayed in the next field. This field is not editable.
Total charge
The system computes the charges applicable on the transaction in Charge currency based on Pricing codes associated with the network and displays the total Charge amount here. his field is not editable.
Priority
Specify the priority level of the transaction. This value is used during the network resolution of the transaction. The system displays the value as ‘Normal’ by default. However, you can change it to ‘High’ if required.
Exchange Rate
The exchange rate is applicable for cross-currency transactions. The transaction is considered as cross-currency transaction if:
- For an incoming payment the credit account currency is different from the transfer currency
- For an outgoing/internal payment the debit account currency is different from the transfer currency
The exchange rate is defaulted using the standard mid rate if the transfer amount is less than the ‘Small FX Limits’ maintained in the Network Currency preferences maintenance. For an outgoing payment the transfer amount (credit amount) is compared with the small FXlimit.
If the transfer amount exceeds the ‘Small FX Limits’ then the exchange rate is not defaulted.
If ‘External Exchange Rate Applicable’ option is checked in the Network Preferences maintenance then a rate request is sent to the External Rate system for fetching the Exchange Rate. If the rate fetch is unsuccessful then the transaction is moved to the External Exchange Rate queue for manual intervention,
If ‘External Exchange Rate Applicable’ option is not checked in the Network Preferences maintenance screen, system moves the transaction to the ‘Exchange Rate’ queue, as part of the Exchange Processing activity. You have to manually input the exchange rate for the transaction in the Exchange Rate Queue.
Alternatively, if the exchange rate is input in this field in the Transaction screen then system considers this for Fx conversion.
Beneficiary Value Date
Specify a Value date with which the transaction should be processed at the beneficiary’s end. This field is optional. This date is used in outgoing local clearing messages.
Rate Refresh
This is a display field which shows the status of Fx Rates refreshment for the current day.
Spread Code
Select one of the available Spread codes in the drop down.
Rate Type
This is a display field which shows the applicable Rate type for the transaction.
3.1.2 Additional Details Button
You can capture additional information and view field values set by the system for the transaction.
You can invoke the ‘Additional Details’ sub-screen in Transaction Input by clicking the “Additional Details” link present at the bottom of the screen.
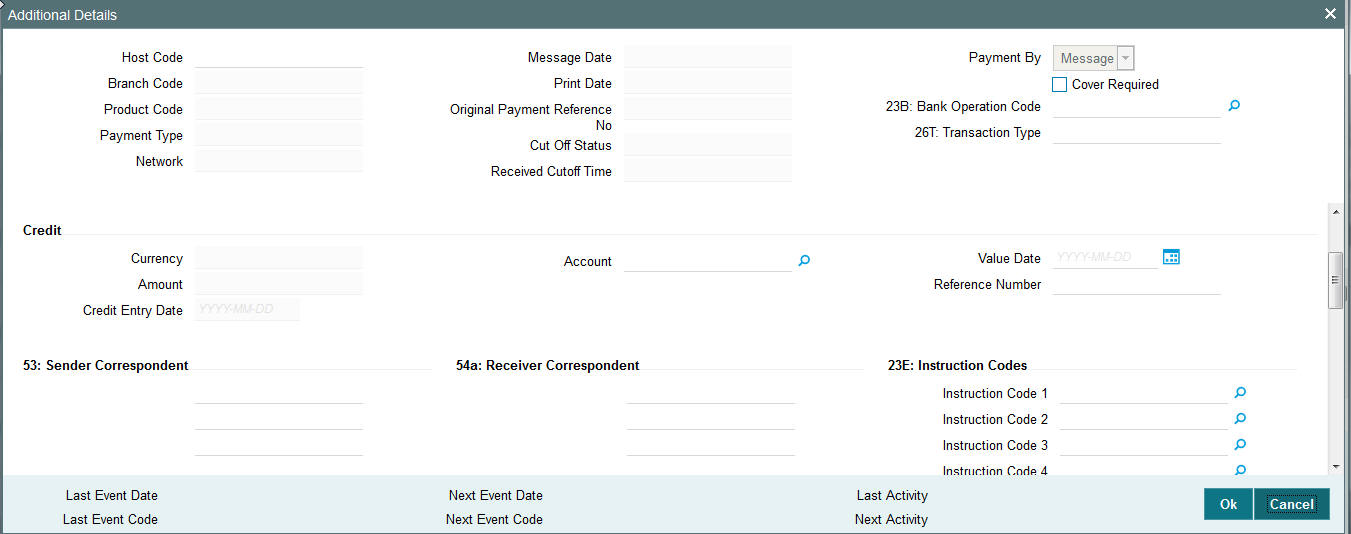
Specify the following details.
Host Code
The system displays the Host code of the selected branch.
Branch Code
The system displays the selected branch of the logged-in user.
Product Code
This field is no longer used and does not have any value.
Payment Type
The system displays the payment type of the transaction.The following are the valid values :–
- Outgoing
- Incoming
- Internal
Network
The system displays the Network code of the transaction. This Network code is set up in the Network maintenance for payments sent over SWIFT network.
Message Date
For outgoing transactions, the system computes the message date based on the credit value date and displays it here along with the cut-off time.
Print Date
The system displays the print date of the message.
Original Payment Reference No
The system displays the reference number of the original transaction, if a rejection message is received for an already processed outgoing transaction.
Note
This is applicable only for rejects received for an outgoing payment.
Cutoff status
The system displays the cutoff status by identifying whether the transaction was received from Channels or booked manually before or after the cut-off time. The Cut-off status is shown using one of the following options:
- R– Pre Cut-off
- O – Post Cut-off
Received Cutoff Time
The system displays the received cutoff time.
Payment By
The system defaults payment by as message only.
Cover Required
Check this box to indicate whether a cover message is is required to be generated for the transaction.
23B: Bank Operation Code
Select the bank operation code from the option list. Options available are as follows:
- CRED – Credit Transfer with No SWIFT Service Level
- CRTS – Credit Transfer for Test Purposes
- SPAY – Credit Transfer for SWIFT Pay Service Level
- SPRI – Credit Transfer for Priority Service Level
- SSTD – Credit Transfer for Standard Service Level
If no value is selected then system defaults this field value to “CRED”.
Note
This is applicable only for customer transfers.
26T: Transaction Type
Specify the nature or purpose of the payment in 3 characters.
Note
This is applicable only for customer transfers.
Debit
Currency
The system displays the debit currency.
Amount
The system displays the transaction amount in the debit currency.
Account
The system displays the debit account number.
Value Date
The system displays the Value date on which the debit account is debited for the transaction (debit) amount.
Reference Number
The system displays the Related Reference Number of the transaction from the Main tab.
Debit Entry Date
The system displays the Posting date on which the accounting hand-off is sent to the Accounting system for debiting the Debit account.
Credit
Currency
The system displays the credit currency.
Amount
The system displays the transaction amount in the credit currency.
Account
The system displays the Nostro/Vostro account number of the currency correspondent which would be credited. This value is populated after deriving the Payment chain as part of the processing.
Value Date
The system displays the Value date on which the credit account is credited for the transaction (credit) amount.
Reference Number
The system displays the Related Reference Number of the transaction from the Main tab.
Credit Entry Date
The system displays the Posting date on which the accounting hand-off is sent to the Accounting system for crediting the Credit account.
53: Sender Correspondent
The system displays the BIC code or details like Name and Address of the sender’s correspondent through which the payment transaction should be routed. This value is populated after deriving the Payment chain as part of the processing. This BIC would be present in the Currency Correspondent maintenance for the Transfer currency.
54a: Receiver Correspondent
The system displays the BIC code or details like Name and Address of the branch of the receiver or another financial institution in which the funds are made available to the receiver. This value is populated after deriving the Payment chain as part of the processing. This BIC would be present in the Global Correspondent maintenance for the Transfer currency.
23E: Instruction Codes
Instruction Code 1 through to Instruction Code 6
Specify a standard Instruction code in each field and then input additional information. Alternatively you can select the standard Instruction code type from the option list. The list displays all valid instruction codes maintained in the system.
Transaction Type Code
The system displays the applicable transaction type code for the transaction.
55: Third Reimbursement Institution
The system displays the BIC code or details like Name and Address of the receiver's branch, when the funds are made available to this branch through a financial institution other than that indicated in Field 53. This value is populated after deriving the Payment chain as part of the processing. This BIC would be present in the Global Correspondent maintenance for the Transfer currency.
71G: Receiver charges
If Charge Whom field in the Preferences section of the Main tab has a value of “OUR” then you can specify the Receiver’s charges in case of ‘Customer Transfer’ if they are required to be included in the Settlement amount.
Currency
Specify the charge currency.
Amount
Specify the charge amount due to the receiver.
Amount Collected
The system populates this field based on the Receiver charges specified.
77B: Regulatory Reporting Details
Specify the statutory and/or regulatory information required by the authorities in the country of receiver or sender. You should specify this information by specifying a regulatory code (placed between ‘/’) followed by 2 character country code and followed by regulatory details. This information should be specified in up to 3 lines each containing 35 characters.
13C: Time Indication Details
Specify the standard time indication related to the processing of the payment instruction. You should input the standard Time indication code (placed between ‘/’) followed by Time, a sign (+ or -) and the Offset from UTC. Alternatively, you can select the time indication code from the option list. The list displays all valid time indications maintained in the system, which are CLSTIME, RNCTIME and SNDTIME.
71F: Sender Charges
Sender Charge Ccy 1 through to Sender Charge Ccy 6
The system displays the charge currency of Sender’s charges that are deducted from the Transfer amount by this bank (Sender) or by any of the previous banks in the payment chain. These charges are applicable in case of Customer Transfers and the Charge Whom field value selected is SHA or BEN.
Sender charge Amount 1 through to Sender Charge Amount 6
The system displays the amount of Sender’s charges.
In case of an incoming Customer transfer message, each of the previous banks in the payment chain would have deducted charges from the Transfer amount and details of the same would be present in the message. The Charge currency and Charge amount of each of these charges would be populated in up to 6 sets of these fields in addition to the charges deducted by this bank
3.1.3 Charge Details Sub screen
You can view the charge amount computed by the system for each of the Pricing components of the Pricing code linked to the network code of the transaction. Click the “Charge Details” link to invoke the ‘Charge Details’ sub-screen.
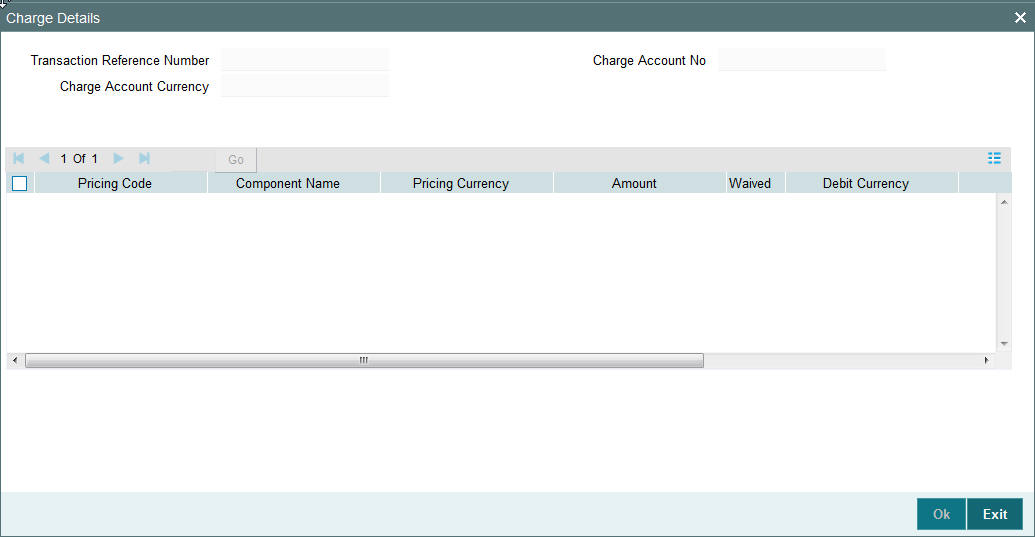
Specify the following details:
Transaction Reference Number
The system displays the Transaction reference number transaction.
Charge Account Currency
The system displays charge account currency based on the associated Pricing code.
Charge Account No
Specify the charge account number if it is required to be different from the Debit account. Alternatively, you can select the charge account number from the option list. The list displays all valid account numbers maintained in the system.
Pricing Code
The system displays the pricing code linked to the network code of the transaction.
Pricing Component
The system displays each Pricing component of the Pricing code from the Pricing Code maintenance.
Pricing Currency
The system displays the Pricing currency of each Pricing component of the Pricing code.
Amount
The system displays the calculated Charge amount for each Pricing component of the Pricing code.
Waived
The system displays if charges for any Pricing component are waived in the Pricing maintenance.
Debit Currency
The system displays the currency of the Charge account to be debited for the charges.
Debit Amount
The system displays the Charge amount for each Pricing component debited to the charge account in Debit currency. If the Pricing currency is different from the Debit currency the calculated charges are converted to the Debit currency and populated in this field.
Bourne By Bank
This field indicates if charges for the Pricing component are borne by the sending bank and hence not debited to the Charge account based on the parameter in Pricing Value maintenance.
Deferred
This field indicates if charges for the Pricing component are Deferred and not debited immediately. This is based on the parameters in Customer Preferences maintenance for the originating customer.
3.1.4 MIS section
You can maintain the MIS information for the Transaction. If the MIS details are not entered for the Transaction the same is defaulted from the product maintenance. Click the ‘MIS’ link to invoke the ‘MIS’ sub-screen
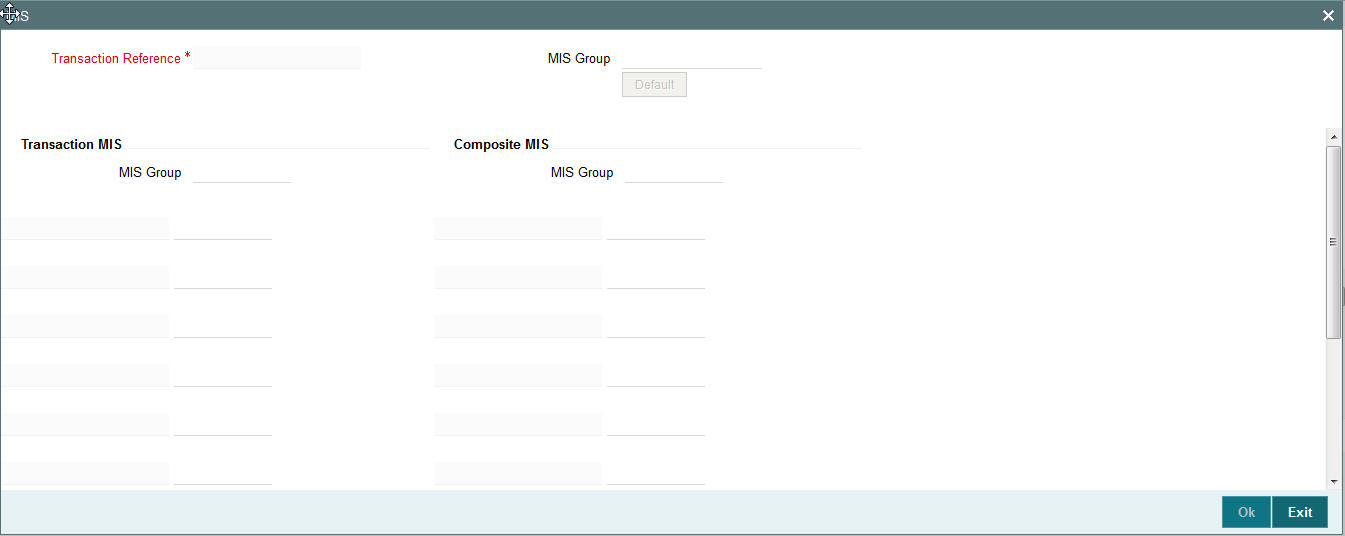
Specify the following details
Transaction Reference
The system displays the transaction reference number of the transaction.
MIS Group
Specify the MIS group code. Alternatively, you can select the MIS group code from the option list. The list MIS group displays all valid MIS groups maintained in the system for different sources in the Source maintenance. By default, the MIS group linked to the ‘Manual’ source is populated while booking a transaction from this screen.
Default button
Click this button after selecting a MIS group different from the default MIS Group (which was populated) so that any default MIS values can be populated from to link to the Transaction MIS and Composite MIS classes.
Transaction MIS
The default MIS values for Transaction MIS classes are populated for the MIS group. You can change one or more default MIS values or specify more MIS values. Alternatively, you can select MIS values from the option list.
Composite MIS
The default MIS values for Composite MIS classes are populated for the MIS group. You can change one or more default MIS values or specify more MIS values. Alternatively, you can select MIS values from the option list.
3.1.5 Fields Section
Click the ‘Fields’ Section in the Transaction Input screen to invoke the ‘Fields’ sub screen.
This sub-screen defaults values of UDF fields that are part of the UDF group specified for the ‘Manual’ source.
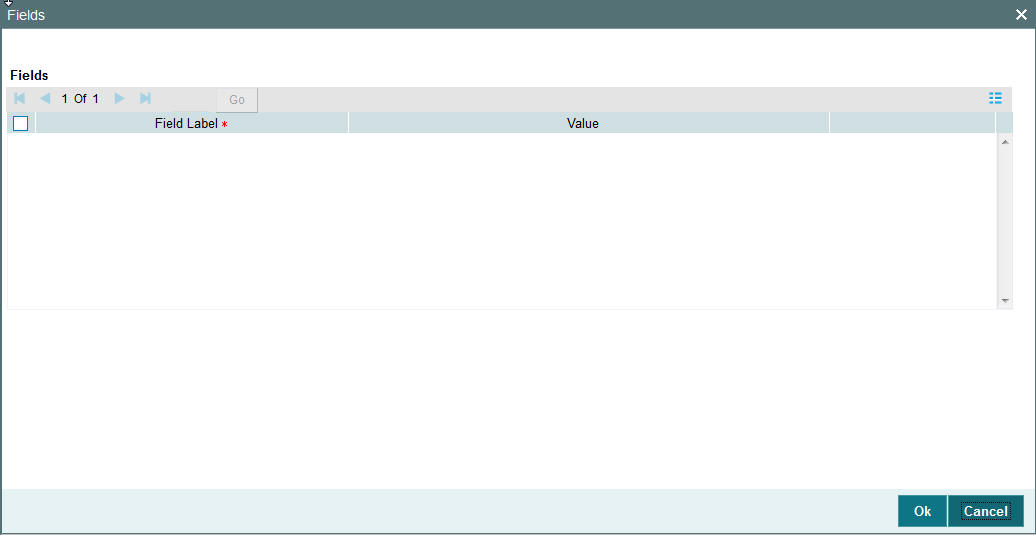
Specify the following details.
Fields
Field Label
The system displays all fields hat are part of the associated UDF group.
Value
The system displays the default value, where exists for the UDF fields. You can change the default value or specify value for other fields (where default value does not exist).
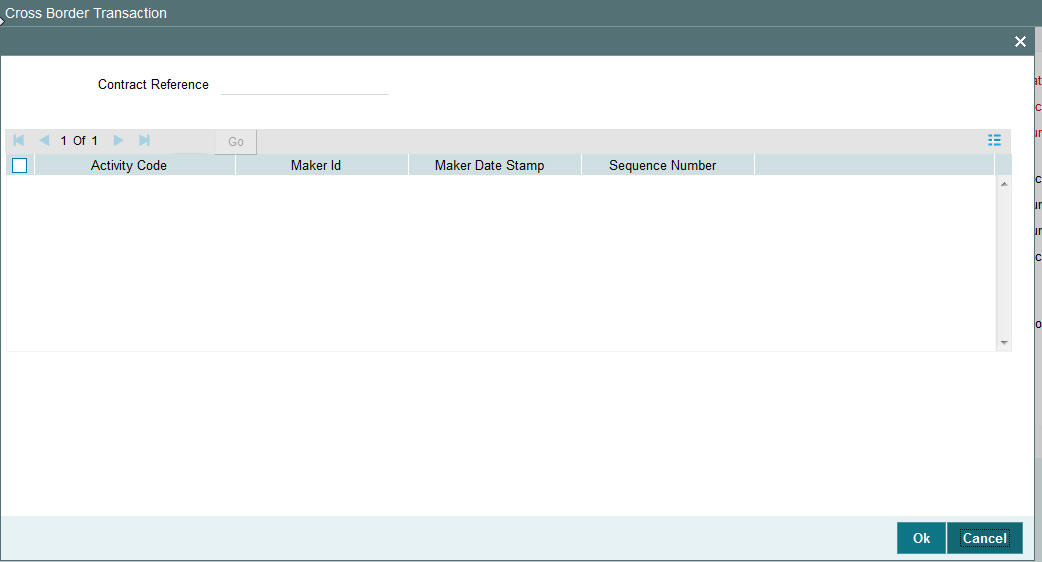
3.1.6 Activity Log
You can view the details of the Activities completed for the transaction by the system during the processing in this screen. Click the “Activity Log” link in the Transaction Input screen to invoke the ‘Activity Log’ sub -screen
Specify the following details.
Contract Reference
The system displays the Contract (Transaction) reference number.
Activity Code
The system displays the activity code for each completed activity by that point of time.
Maker ID
The system displays the marker id of each activity which would be SYSTEM in case of activities performed by the system.
Maker Date Stamp
The system displays the date and time stamp of the completion of the activity.
Sequence Number
The system displays the sequence number of the completion of the activity.
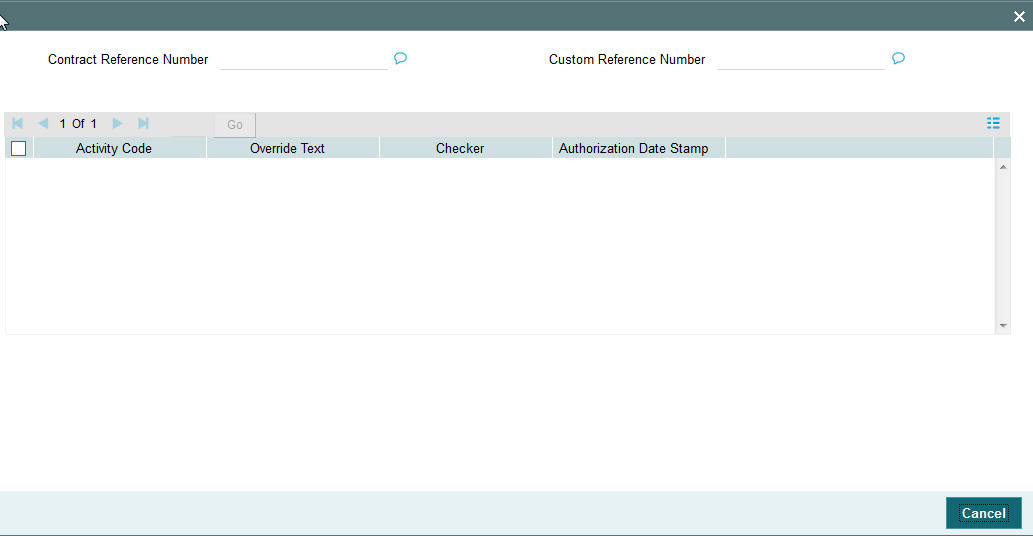
3.1.7 Exception
You can view the processing exception details for the transaction in this screen. Click the “Exception” link in the Transaction Input screen to invoke the ‘Exception’ sub-screen
Specify the following details.
Contract Reference Number
The system displays the Contract (Transaction) reference number.
Custom Reference Number
The system displays the Custom reference number of the transaction.
Activity Code
The system displays the activity code where an exception has occurred.
Override Text
The system displays the override text relevant to the exception.
Checker
The system displays the checker id after the user has authorized the override or resolved the exception.
Authorization Date Stamp
The system displays the authorization date stamp.
3.1.8 Payment Chain
You can view the Payment Chain details for the transaction in this screen. Click the “Payment Chain” link in the Transaction Input screen to invoke this sub-screen

Displays the following details.
Transaction Reference Number
Displays the transaction reference number.
Version Number
Displays the version number.
Chain Order
Specifies the order of banks/institutions in the payment chain
Bank Code
The system displays the BIC code of the bank/institution.
SWIFT Key Arrangement
The system displays if Sending bank has SWIFT Key Arrangement with the particular bank in the payment chain.
Account Number
The system displays the Nostro (mirror) /Vostro account number associated with the particular bank.
Field Number
The system displays the field numberused internally to identify the position of the party in the outgoing SWIFT message. E.g “53” corresponds to field 53 in SWIFT message whereas “02” is used to identify the Receiver of the message.
3.1.9 Notes
You can capture any additional details about the transaction in this sub-screen for internal use and future reference.
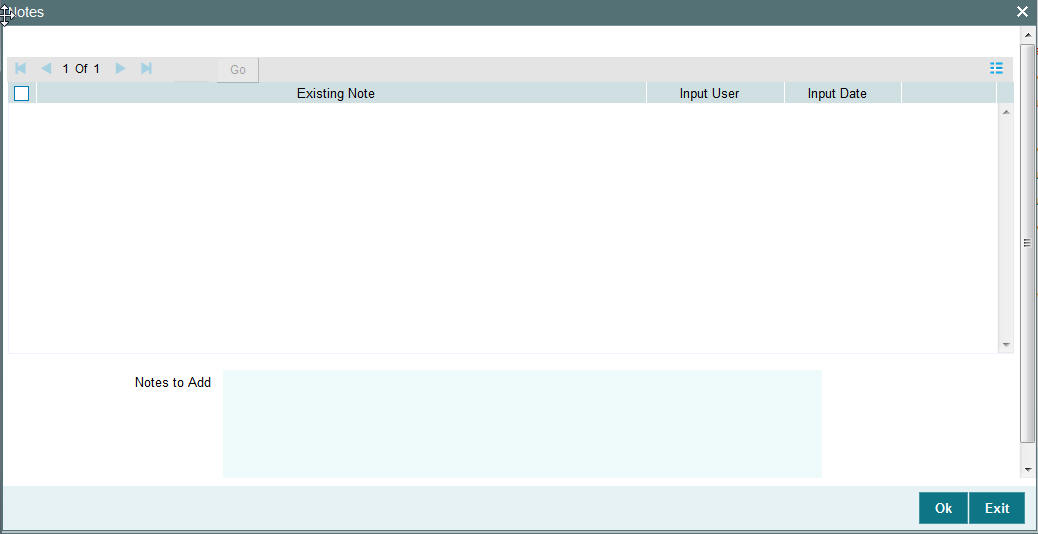
Notes to Add
Specify additional details in this text area box. On clicking the OK button in this sub-screen the Note gets added to the grid with the following details in the grid columns –
Existing Note
Displays all Notes added to the transaction till now.
Input User
Displays the user id of the user who added the Note.
Input Date
Displays the date when the Note was added.
3.1.10 Accounting Entries
Click the “Accounting Entries” link in the transaction input screen to invoke the screen
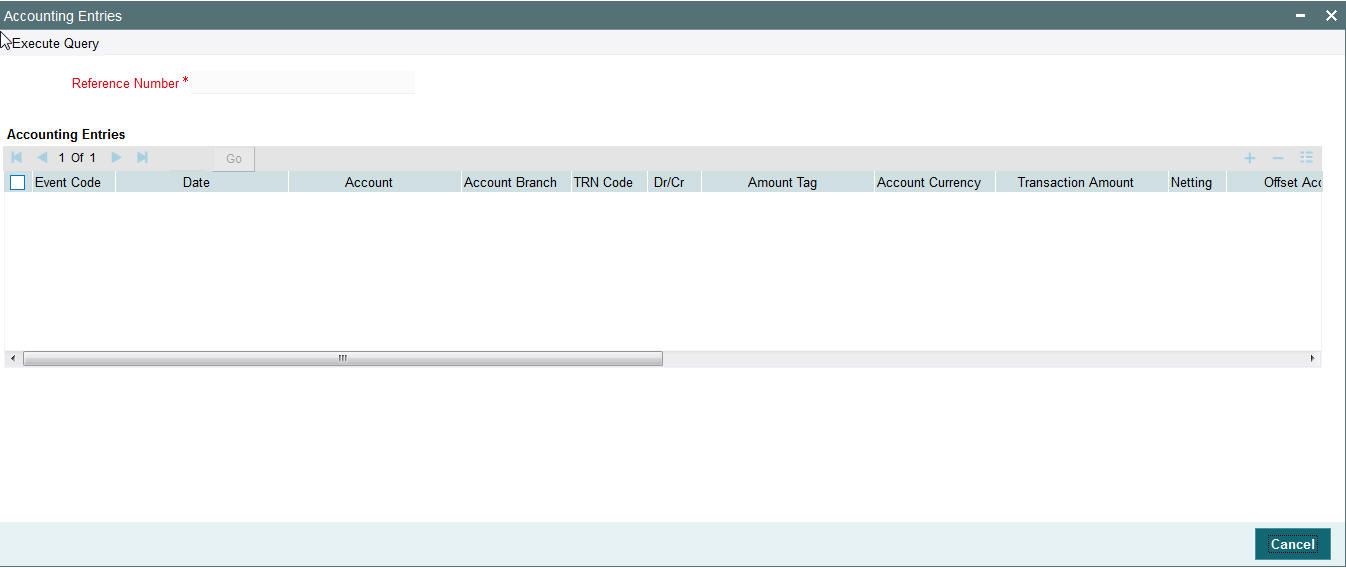
The system displays the following details in a grid form that contains multiple rows:
Reference Number
Displays the Transaction reference number.
Event Code
Displays the Accounting event code - DRLQ and CRLQ.
Account
The system displays the transaction account number that is debited or credited in the accounting entry.
Account Branch
The system displays the account branch.
TRN Code
The system populates the transaction code of the accounting entry from the Account Template maintenance.
Dr/Cr
The system displays whether the accounting entry is ‘debit’ or ‘credit’ leg.
Amount Tag
The system displays the amount tag of the Amount being debited/credited.
Account Currency
The system displays the transaction account currency.
Transaction Amount
The system displays the transaction amount being debited/credited.
Netting
The system displays if Netting of accounting entries is done.
Offset Account
The system displays the Offset Account of the accounting entry for posting the offset debit/credit. This is derived from the Account Template maintenance.
Offset Account Branch
The system displays the Offset Account Branch.
Offset TRN Code
The system displays the Offset Transaction Code from the Account Template maintenance.
Offset Amount Tag
The system displays the Offset Amount Tag of the Offset amount.
Offset Currency
The system displays the Offset Amount Currency.
Offset Amount
The system displays the Offset Amount being debited or credited.
Offset Netting
The system displays if the Offset Netting is done.
3.1.10.1 All Messages
Click the “All Messages” link in the transaction input screen to invoke this sub-screen.
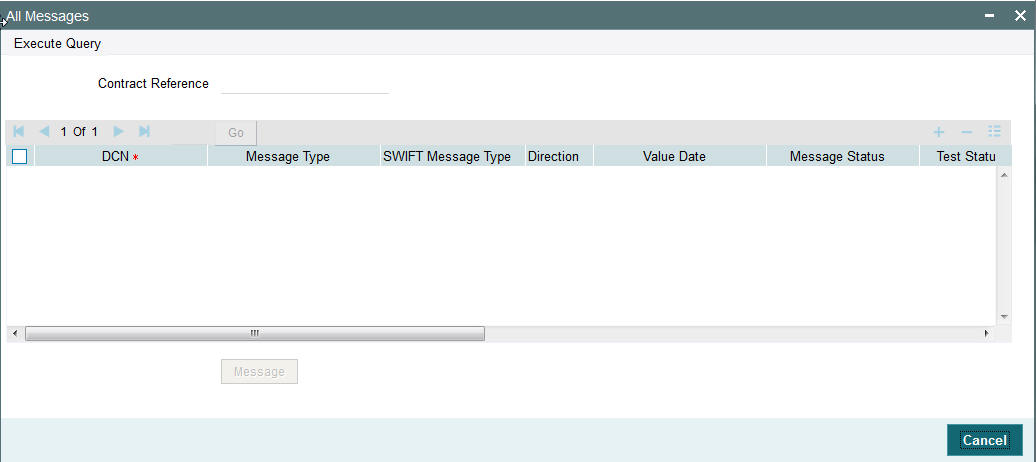
The system displays the following details in a grid form containing one or multiple rows
Contract Reference
Displays the contract (transaction) reference number.
DCN
Displays the unique DCN number assigned by the system to each generated message.
Message Type
Displays the system defined message type e.g. Cust_Transfer, Cover etc.
SWIFT Message Type
Specify the SWIFT message type of the generated message e.g. MT103, MT202COV etc.
Direction
Displays if the message is outgoing or incoming.
Media
Displays the message generation date.
Message Status
The system displays the message status. e.g. Hand-off, Repair etc.
Test Status
The system displays the Test status of the message, which would generally be “Not Applicable”.
Authorization Status
The system displays the authorization status. i.e. Authorized or Unauthorized. For incoming messages which fall into Repair or a user defined queue, this status may be “Unauthorized” if the message has been manually repaired and awaiting authorization.
Acknowledgment Status
The system displays whether Acknowledgement from SWIFT (ACK/NAK) is required or not for the outgoing SWIFT message. This value is displayed based on the message level configuration.
Media
The system displays the media of the message which is “SWIFT”.
Receiver/Sender
Displays the Customer ID of the Receiver of an outgoing SWIFT message or of the Sender of an incoming SWIFT message.
Receiver Name
Displays the name of the receiver or sender.
PDE Flag
Displays if PDE trailer is included in the incoming or outgoing message.
3.1.10.2 Message Details
You can select a particular message in the All Messages summary sub-screen (explained above) and view the message details in this screen.
Displays the following details for the selected message.
Reference Number
Specify the transaction reference number.
DCN
The system displays DCN of the message.
ESN/Version Number
The system displays the version number of the message.
Receiver/Sender
The system displays receiver/sender of the message.
Message Type
The system displays system defined message type.
SWIFT Message Type
The system displays SWIFT message type.
Message
The system displays details of the actual message including BIC and Name and Address details of the Sender and Receiver as well as the fields and values populated in the message body.
Remarks
Specify a comments or remarks for the message.
Reject Reason
The system displays the reject reason code.
Message Trailers
The system displays the message trailers.
3.1.10.3 Audit Trail and Status Details
You can view the audit trail and status of a transaction record at the bottom of each transaction screen.

You can view the following fields:
Authorization Status
The system displays the authorization status of the transaction, which could be ‘Authorized’ or ‘Unauthorized’.
Status
The system displays the status of the transaction record. Possible status values are ‘Active’, Liquidated, Reversed, Cancelled and so on.
Queue
The system displays the Operations (Exception) Queue to which the transaction is sent to for manual intervention.
Rate Status
The system displays the Rate Status,if applicable.
Maker ID
The system displays the identification of the maker who created the transaction.
Maker Date Stamp
The system displays the time and date on which the transaction record was created.
Checker Id
The system displays the identification of the checker who authorized the transaction.
Checker Date Stamp
The system displays the time and date on which the transaction record was authorized by another user.
SNCK Status
The system displays the Sanction Check status. Possible Status values are Pending, Approved and Rejected. If Sanction Check is switched-off at the Network Preferences level or for the Debit Customer then the status value shown is “Not Required/Switch off”.
ECA Status
The system displays the ECA status. Possible Status values are Pending, Approved and Rejected. If ECA Check is switched-off for the Customer’s Debit account then the status value shown is “Not Required/Switch off”.
Consolidation Status
The system displays the Consolidation status indicating if Consolidation was done or not.
3.1.11 Saving a Transaction
You can save the transaction after specifying at least all of the mandatory fields.
On Save, system performs Transaction Validations. If any of the validations fails then system shows an error message on the screen detailing the error. You can then correct the error and click on Save button again. If all the validations are successful then the transaction is saved and a confirmation message is shown. At the bottom of the transaction screen, the Authorization Status is shown as ‘Unauthorized’, Transaction Status as ‘Active’ and the Maker ID and Maker Date stamp is displayed. The transaction is now pending authorization by a different user after which the transaction processing will begin.
3.1.12 Performing operation
Below mentioned operations are allowed in the Transaction input screen:
| Operation | Description | ||||
|---|---|---|---|---|---|
| New | You can input a new Transaction using this option. | ||||
| Hold | You can keep incomplete transactions on hold using this option. | Once a Transaction is kept on hold, the system does not consider the Transaction for any further processing. You can amend Transactions on hold and save them subsequently. | |||
| Delete | You can delete unauthorized transactions from the system using this option. | The count of the transaction is decremented against the image reference number if the transaction to be deleted is an Image transaction. | Deletion of the transaction is not allowed if a transaction was authorized at least once. | ||
| Unlock | You can unlock an unauthorized transaction and change some of transaction details using this option. Amendment of an unauthorized transaction will not result in an increase of the version number. The latest version alone is modified. The party fields like 57, 56, 59 etc. can be modified.A new Transaction version is created if an authorized Transaction is amended. | ||||
| Enter Query | This is a Query option for querying an unauthorized or authorized transaction in any Transaction status and viewing its details. Transaction can be queried by entering the Transaction Reference number. | After the transaction details are loaded in the screen, any other applicable operation mentioned in this table can be performed. | |||
| Copy | You can create a Transaction using a template or copy details from a transaction using this option. | The transaction or the template to be copied can be selected in the transaction summary screen or loaded in the Transaction Input screen. The copy option in the Transaction online copies user input transaction details/template details. | |||
| Reverse | Using this option, you can reverse the Liquidated Transactions for which accounting entries are generated but Message is not yet generated. After the Transaction is reversed and authorized, it is not possible to do further operations on the Transaction. | If Reverse option is used for a Liquidated Transaction after message generation,a message is displayed advising the user to initiate MTn92 message from the Common Group Message screen. |
3.1.13 Viewing Transaction Summary
You can view all the outgoing and incoming SWIFT transactions created in the Host of the selected branch of the logged in user. You can also view transactions that are present in various Operations (Exception) queues. However, you cannot perform any operations.
You can invoke “Transaction summary” screen by typing ‘PXSTRONL’ in the field at the top right corner of the Application tool bar and clicking on the adjoining arrow button. Click new button on the Application toolbar.

You can search using one or more of the following parameters.
- Source Code
- Transaction Reference Number
- Custom Reference Number
- Image Reference Number
- External Reference Number
- Unique Reference Number
- Authorization Status
- Contract Status
- Transfer Type
- Queue
- Template Id
- Save as Template
Once you have specified the search parameters. Click ‘Search’ button. The system displays the records that match the search criteria containing the following details.
- Source Code
- Branch Code
- Transaction Reference Number
- Custom Reference Number
- Image Reference Number
- External Reference Number
- Unique Reference Number
- Authorization Status
- Contract Status
- Network
- Transfer Type
- Queue
- Instruction Date
- Transfer Currency
- Debit Account Number
- Credit Account Number
- Debit Account Currency
- Credit Account Currency
- Debit Value Date
- Credit Value Date
- Booking Date
- Last Event Code
- Last Activity
- File Reference Number
- Rate Status
- SNCK Status
- ECA Status
- Cutoff Status
- Exchange Rate
- Transaction Amount
- Maker ID
- Checker Id
- Template Id
- Save as Template
The transactions are sorted in the ascending order based on the following field:
- Message Date Time
- Instruction Date
- Amount
The following operations are available in the transaction summary screen
| Operation | Functions | ||
|---|---|---|---|
| Save | Helps you to save the search criteria for future use. | ||
| Refresh | Helps you to refresh the screen with the latest transaction details. | ||
| Reset | Clears the search results retaining the search criteria | ||
| Clear All | Clears the search results as well as the search criteria | ||
| Details | Selecting a particular transaction from the search results and clicking this menu displays the details of the transaction in the Transaction input screen. | ||
| Advanced Search | Helps to create advanced or complex search query using the search fields, logical operators and sort option of search results. |
3.1.14 Transaction Authorization/Verification
From the Transaction Input screen, you can also query for a particular transaction using Enter Query option and then authorize the transaction by clicking the Authorize button..
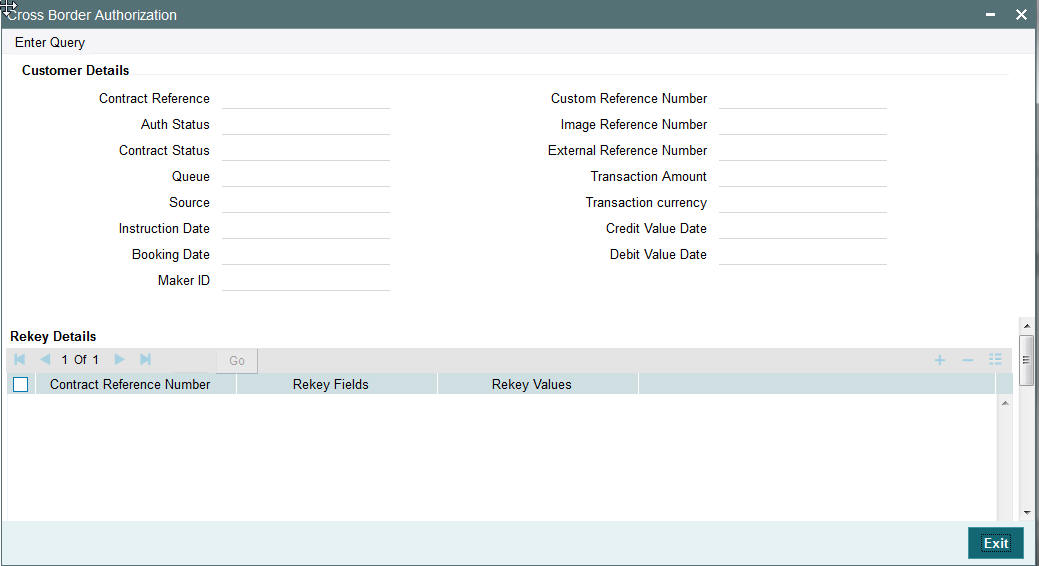
On clicking the Authorize button, the above screen is launched displaying some of the key transaction details (listed below) as seen in the above screen shot.
- Contract Reference
- Custom Reference Number
- Auth Status
- Image Reference Number
- Contract Status
- External Reference Number
- Queue
- Transaction Amount
- Source
- Transaction Currency
- Instruction Date
- Credit Value Date
- Booking Date
- Debit Value Date
- Maker ID
Rekey Details
Contract Reference Number
The system displays the contract reference number.
Rekey fields
The system displays the transaction fields that needs to be re-keyed. These fields are configured in the Source Network Preferences maintenance for the ‘Manual’ source and the Network code of the transaction.
Rekey Values
You need to input the value for each of the re-key fields. After keying in the fields, the system validates the details input. For multiple lines input, the data is defaulted if the first line is input correctly.
Overrides Details
Override Text
The system displays override text if applicable.
Authorized By
The system displays the authorizer id of the user who authorized the override message.
Authorize Date Stamp
The system displays the authorization date stamp.
Authorization actions
Authorize button
You can click this button is you would like to authorize the transaction.
Reject button
You can click this button is you would like to reject the transaction. On rejection, the transaction cannot be processed any further nor can it be amended,
On clicking any of the two buttons, system shows a confirmation message for the user action. On successful authorization, the Authorization status of the Transaction is updated as ‘Authorized’.
Transactions require authorization after the following actions:
- Manual input
- Transactions that are Repaired.
- Transactions that are Reversed
3.1.14.1 Outgoing– Transaction Processing
On Authorization, the next activity for the outgoing through a series of Activities in the order listed below
| SL. No | ACTIVITY_CODE | ACTIVITY_DESCRIPTION | |||
|---|---|---|---|---|---|
| 1 | TXNVAL | Transaction Validations | |||
| 2 | PMTTYPERES | Payment Type resolution | |||
| 3 | PMTCHAINBLDNG | Payment Chain Building | |||
| 4 | DRCRACCRES | DR - CR Account Resolution | |||
| 5 | DATESRES | Processing Dates Resolution | |||
| 6 | EXCHRATEPROC | Exchange Rate Processing | |||
| 7 | COMPUTECHGS | Charge Computation | |||
| 8 | AUTHLMTCHK | Authorization Limits (1 and 2) Check | |||
| 9 | PROCCUTOFF | Process Cut-off check | |||
| 10 | RPCCHK | RPC Processing Check | |||
| 11 | CSUCHK | CSU (Customer and Account Status) Check | |||
| 12 | CUTOFFTIMERES | Currency Cutoff Time Resolution Check | |||
| 13 | SNCKCHK | Sanctions check | |||
| 14 | ECACHK | External Credit Approval - Check | |||
| 15 | TXNACCENTRY | Transaction Accounting Entry Hand-off | |||
| 16 | MSGGEN | Message Generation |
3.1.14.2 Enriching Manual Transaction before Save
Before Saving a manually booked transaction, user has an option to manually trigger some of the processing steps mentioned in the table above, and thereby enrich the transaction. On saving the transaction followed by Authorization, the outgoing transaction is processed through the remaining processing Activities as mentioned above.
On clicking the Enrich button in the main tab of the Transaction input screen, the activities till Charge computation are performed. The Enrich option is especially useful when you would like to view the Payment chain determined by the system and change any of the parties including the Receiver and Currency Correspondent, if required, based on specific customer instructions for routing the payment.
3.1.14.3 Payment Instructions received through Channels
For outgoing payment instructions received through Channels through ReST/SOAP services, system automatically creates a transaction and a Transaction Reference number. The transaction is auto-authorized. It is then processed through the activities as mentioned in the above table.
3.2 Manual Liquidation of Consolidated Transaction Batch
A consolidated batch of transactions can be manually liquidated at any time before the Cut-off time by a user of the branch where the transaction was created. This would be enabled through a separate screen called Outgoing Consolidated Queue.
A new queue called “Multi Credit Consolidation Queue” would be available in the system that would maintain all consolidated pool of transactions. The same can be queried, viewed and auctioned from the above mentioned screen.
Note
This Consolidation Queue screen is applicable to MT102, MT201 and MT203 consolidated batches that are pending liquidation.
3.2.1 Multi Credit Transfer Summary
This Summary screen displays all the Multi Credit Transfer batches with different statuses like Closed, Open, Reversed etc. From this screen ,you can query for the desired Multi Credit batch and view a a summary of the batch including details of the individual (child) transactions in the consolidated batch. This detail screen is covered in the next section.
You can invoke “Multi Credit Transfer Summary” screen by typing ‘PXSTCONS’ in the field at the top right corner of the Application tool bar and clicking on the adjoining arrow button. Click new button on the Application toolbar.
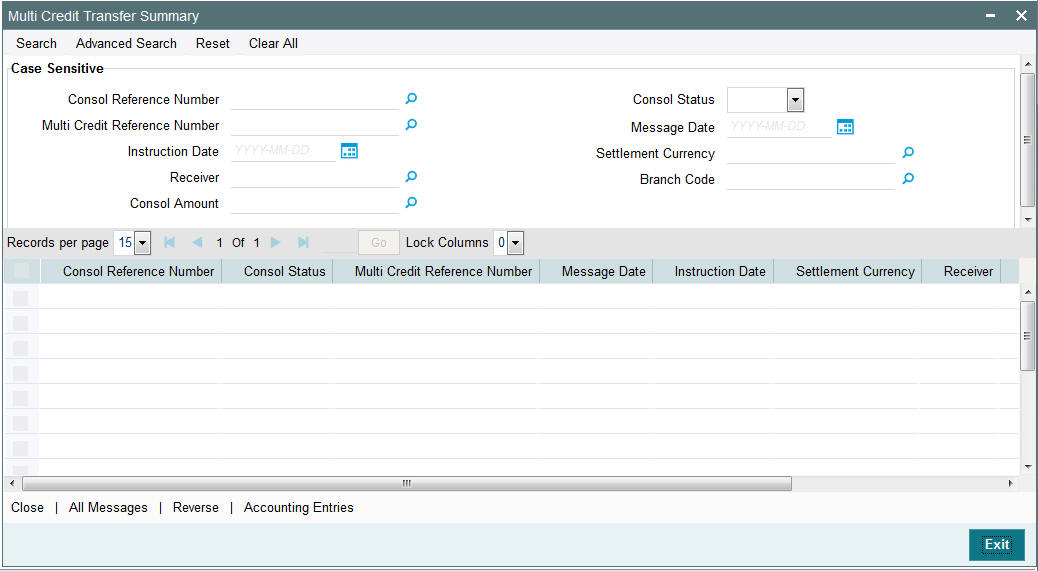
You can search using one or more of the following parameters.
- Consol Reference Number
- Consol Status
- Multi Credit Reference Number
- Message Date
- Instruction Date
- Settlement Currency
- Receiver
- Branch Code
- Consol Amount
Once you have specified the search parameters. Click ‘Search’ button. The system displays the records that match the search criteria containing the following details.
- Consol Reference Number
- Consol Status
- Multi Credit Reference Number
- Message Date
- Instruction Date
- Settlement Currency
- Receiver
- Branch Code
- Consol Amount
The following operations are available in the Multi Credit Transfer Summary screen
| Operation | Functions | ||
|---|---|---|---|
| Close | Helps you to close the consolidated batch and initiate Liquidation of the bath. Once Closed, no new child transactions can be added to the batch | ||
| All Messages | You can view all the generated messages for the selected batch, which would include the MT102/MT201/MT203 depending on the Transfer type. Refer Section 3.1.10.1 for the description of this sub-screen for a single transaction. | ||
| Reverse | You can select a batch and click this link to to reverse the consolidated batch provided the batch is not liquidated. | ||
| Accounting Entries | You can view the generated consol Accounting Entries for the selected consolidated batch whose Consol Status is Closed. Refer Section 3.1.10 for the description of this sub-screen for a single transaction. |
3.2.2 Invoking Multi Credit Transfer screen
You can invoke “Multi Credit Transfer Maintenance” screen by typing ‘PXDTCONS’ in the field at the top right corner of the Application tool bar and clicking on the adjoining arrow button. Click new button on the Application toolbar.

The system displays the following fields for the selected or queried Multi-Credit Transfer batch.
Consol Reference Number
Displays the Consolidated Reference Number of the Multi-Credit Transfer batch of Customer/Bank Transfers.
Multi Credit Reference Number
Displays the Multi-Credit Reference Number of the batch.
Consol Status
Displays the Consolidation Status of the batch. Possible values are Pending, Closed or Reversed
3.2.2.1 Main Tab
The system displays the following fields
Instruction Date
Displays the Instruction date of the Multi-Credit Transfer batch.
Branch Code
Displays the Branch code of the branch where the Multi-Credit Transfer batch is being processed.
Message Date
Displays the calculated Message date of the Multi-Credit Transfer message (MT102/MT201/MT203).
Consol Amount
Displays the consolidated amount of the Multi-Credit Transfer batch.
3.2.2.2 Settlement Details Tab
Click the Settlement Details tab of the Multi Credit Transfer Screen.
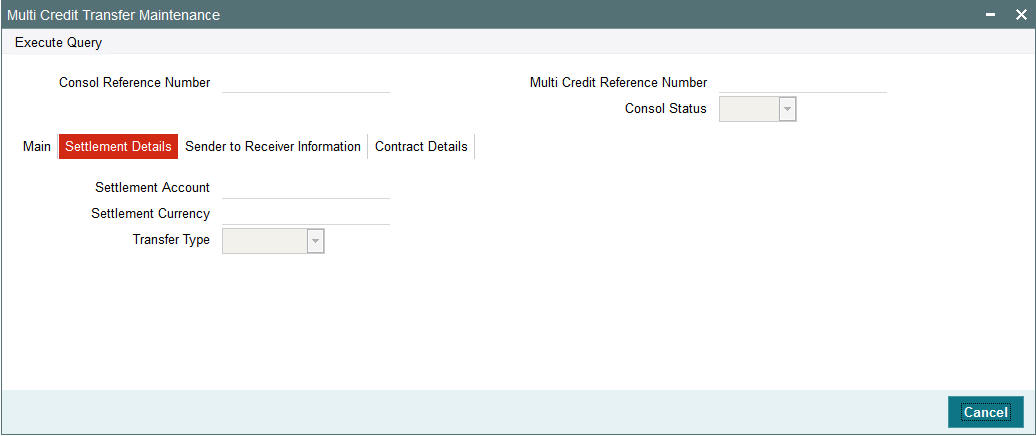
The system displays the following fields
Settlement Account
Displays the Nostro/Vostro account number associated with the Receiver of the Multi-Credit Transfer message.
Settlement Currency
Displays the Transfer Currency of the Multi-Credit Transfer message.
Transfer Type
Displays the type of payment transfer of the Multi-Credit Transfer message. Posssible Values are “Customer”, “Bank” or “Own Account”.
3.2.2.3 Sender to Receiver Information Tab
Click the Sender to Receiver Information tab of the Multi Credit Transfer Maintenance screen.
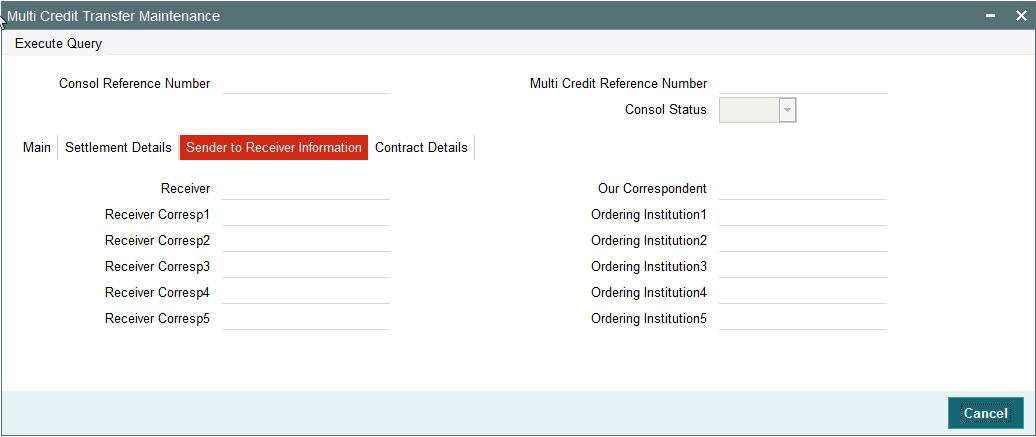
The system displays the following fields:
Receiver
Displays the Receiver of the Multi-Credit Transfer message.
Our Correspondent
Displays the BIC of Sender’s Correspondent Details.
Receiver Corresp1 through to Receiver Corresp5
Displays the details of the Receiver Correspondent details comprising BIC or Name and Address.
Ordering Institution1 through to Ordering Institution5
Displays the details of the Ordering Institution details comprising BIC or Name and Address.
3.2.2.4 Contract Details Tab
Click the Contract Details Tab of the Multi Credit Transfer screen to view key details of each of the individual (child) transactions in the Multi Credit Transfer batch.
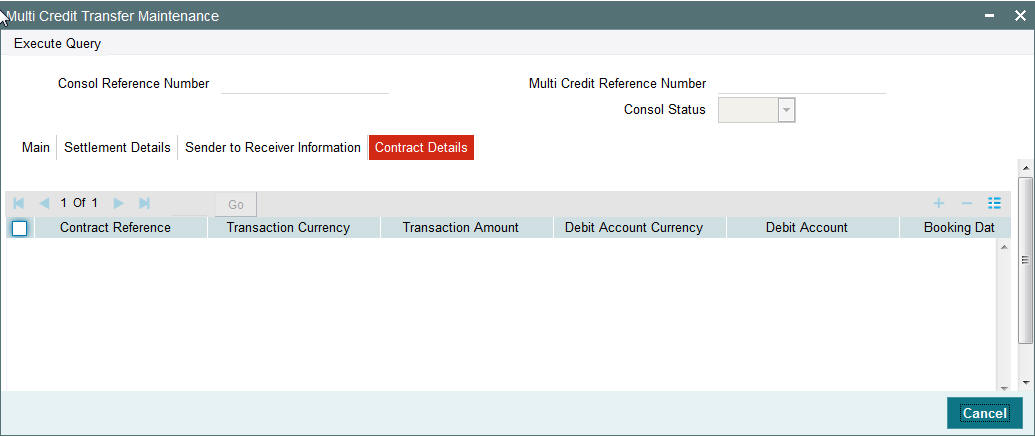
The system displays the following fields:
Contract Reference
The system displays the Contract Reference Number.
Transaction Currency
The system displays the Transaction Currency.
Transaction Amount
The system displays the Transaction Amount.
Debit Account Currency
The system displays the Debit Account Currency.
Debit Account
The system displays the Debit Account.
Booking Date
The system displays the Booking Date of the transaction.
Charge Whom
The system displays the Charge bearer of the transaction. Possible values are O (OUR), S (SHA), B (BEN).
Exchange Rate
The system displays the Exchange rate applied for currency conversion for the transaction.
3.2.3 Uploading Image
You can process and upload image files into the system from a pre-defined network location using this screen.
An interface definition is maintained to specify the path of the images and the file name conventions. A job processes the files and uploads the files once it receives the specified path.
The file contents are uploaded into the system after generating a unique reference number. The process status against each of the Image reference is marked as Unprocessed. The first transaction entered against the Image Reference Number from the Transaction Input screen updates the status to Processed.
The Image reference number is generated by the system using the process code ZIMG.
You can invoke the ‘Image Upload’ screen by typing ‘PXDIMGUP’ in the field at the top right corner of the application toolbar and clicking the adjoining arrow button. Click new button on the Application toolbar

Specify the following details.
Branch Code
The system displays the branch code.
File Name
Specify the file name.
Upload
Click the Upload button to initiate manual upload of the image file.
3.2.4 Viewing Image Upload Summary
You can invoke the ‘Image Upload’ screen by typing ‘PXSIMGUP’ in the field at the top right corner of the application toolbar and clicking the adjoining arrow button. Click new button on the Application toolbar.
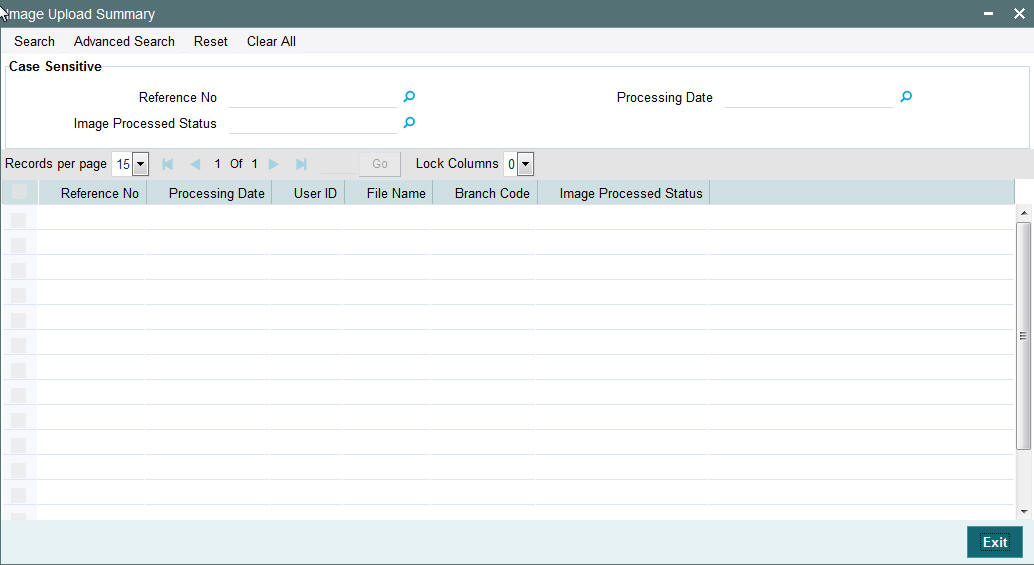
You can search using one or more of the following parameters.
- Reference No.
- Processing Date
- Image Processed Status
Once you have specified the search parameters, Click ‘Search’ button. The system displays the records that match the search criteria for the following.
- Reference No.
- Processing Date
- User ID
- File Name
- Branch Code
- Image Processed Status
You can view the list of Image files that are in following status:
- Files to be processed
- Files Processed
- Files with errors during processing
3.3 STP of Incoming Messages
This section contains the following topics:
- Section 3.3.1, "STP of Incoming Messages"
- Section 3.3.2, "Processing of MT200 message"
- Section 3.3.3, "Processing Of MT203 message"
- Section 3.3.4, "Processing of MT205 message"
- Section 3.3.5, "Cover Matching"
- Section 3.3.6, "Charge Claim Processing"
3.3.1 STP of Incoming Messages
Incoming SWIFT payment and non-payment messages are received by the EMS message sub-system of Oracle FLEXCUBE Payments and stored in the incoming directory The STP function then reads and processes the messages.
The system first resolves the source code of the transaction and routes it to a particular system (e.g. SWIF, COVR) or user defined queue based on the Cover Queue Rule maintenance. For messages routed to SWIF queue, the STP function then creates transactions of the following types for the payment messages:
- Incoming Customer Transfer
- Incoming Bank transfer
- Incoming Bank Transfer for Own Accounts
- Outgoing Customer Transfer (in case of Incoming pass-through payment)
- Outgoing Customer Transfer with cover (in case of Incoming pass-through payment)
- Outgoing Bank Transfer (in case of Incoming pass-through payment)
In case of any exceptions during the STP of an incoming message, the transaction’s Repair Type is marked as ‘Yes’.
The Transaction is auto-authorized.
Once the transaction is authorized, the transaction is processed through the following activities in the given order
| SL. No | Activity Code | Activity Description | |||
|---|---|---|---|---|---|
| 1 | MSGSEGPARSE | Message Segregation and Parsing | |||
| 2 | MSGENRICH | Message Enrichment | |||
| 3 | PMTTYPERES | Payment Type resolution | |||
| 4 | DRCRACCRES | DR - CR Account Resolution | |||
| 5 | PRIMEBANKCHK | Prime Bank Check | |||
| 6 | DATESRES | Processing Dates Resolution | |||
| 7 | EXCHRATEPROC | Exchange Rate Processing | |||
| 9 | COMPUTECHGS | Charge Computation | |||
| 10 | AUTHLMTCHK | Authorization Limits (1 and 2) Check | |||
| 11 | RPCCHK | RPC Processing Check | |||
| 12 | CSUCHK | CSU Check | |||
| 13 | CUTOFFTIMERES | Cutoff Time Resolution | |||
| 14 | SNCKCHK | Sanctions check | |||
| 15 | ECACHK | External Account Check | |||
| 16 | TXNACCENTRY | Transaction Accounting Entry Hand-off | |||
| 17 | MSGGEN | Message Generation (Applicable only to certain SWIFT Message types) |
3.3.2 Processing of MT200 message
On receipt of an incoming MT200 message, a Transaction is booked with Transfer type as ‘Bank Transfer’. An outgoing bank transfer message (i.e. MT202) is generated as part of the message generation activity of this Transaction.
3.3.3 Processing Of MT203 message
STP job splits incoming MT203 message into multiple MT202 messages. Then these MT202 messages are again picked up by another STP job for processing. MT202 messages are processed as normal bank transfer as per the existing functionality.
STP job performs the below mentioned validations before splitting an MT203 message:-
- The amount in field 19 must be equal to the sum of the amounts in all occurrences of field 32B.
- The currency code in the amount field 32B should be the same for all occurrences of this field in the message.
- The repetitive sequence must appear at least twice but not more than ten times.
- If field 56a is present in a transaction, then, field 57a should also be present.
3.3.4 Processing of MT205 message
STP process for Payments module supports upload of incoming MT205 message.
For an incoming MT205, a Transaction is booked in PX with Transfer type as ‘Bank Transfer’ and processed similar to an incoming MT202 message.
3.3.5 Cover Matching
Cover Matching is supported for MT103 with Cover messges of MT202COV, MT205COV or MT910. Similarly, Cover matching is supported for MT202 with another MT202 as Cover message.
Based on the rule condition mentioned in the Cover Queue Rule maintenance, an incoming payment message (MT103/MT202) is routed to a ‘COVR’ queue. All payment messages in this queue await Cover matching. Incoming Cover messages are also routed to this queue based on the Cover queue rule condition.
A job tries to match the payment messages with the cover messages based on the following criteria for cover matching is
- Field 20 of MT103 = Field 21 of MT202COV or MT910
- Amount and Currency
- Value date
After Cover matching is done the payment message gets picked up for STP
3.3.6 Charge Claim Processing
When an incoming MT103 payment is received having Charge Whom field value as “OUR” and no charges are included in the Settlement amount (i.e. 71G is not present), after the payment is processed (transaction is Liquidated), system automatically generates a MT191 Charge Claim message and sends it to the Sender of the MT103.
Similarly, when an outgoing MT103 with Charge Whom specified as “OUR” with no 71G is sent then a MT191 Charge Claim may be received later from the Receiver of MT103. The incoming MT191 is processed to send an outgoing MT202 Charge payment. This is achieved in one of the two ways mentioned below.
Auto-STP of incoming MT191 to generate and send MT202
Manual approval of Charge Claim leading to STP of Bank Transfer and generation of MT202
The sections 3.4.7 and 3.4.8 detail the processing of this incoming MT191 by the second method (manual approval) mentioned above.
3.3.7 Viewing Charge Claim Summary
You can invoke the ‘Charge Claim’ screen by typing ‘PXSCHGCM’ in the field at the top right corner of the application toolbar and clicking the adjoining arrow button. Click new button on the Application toolbar.
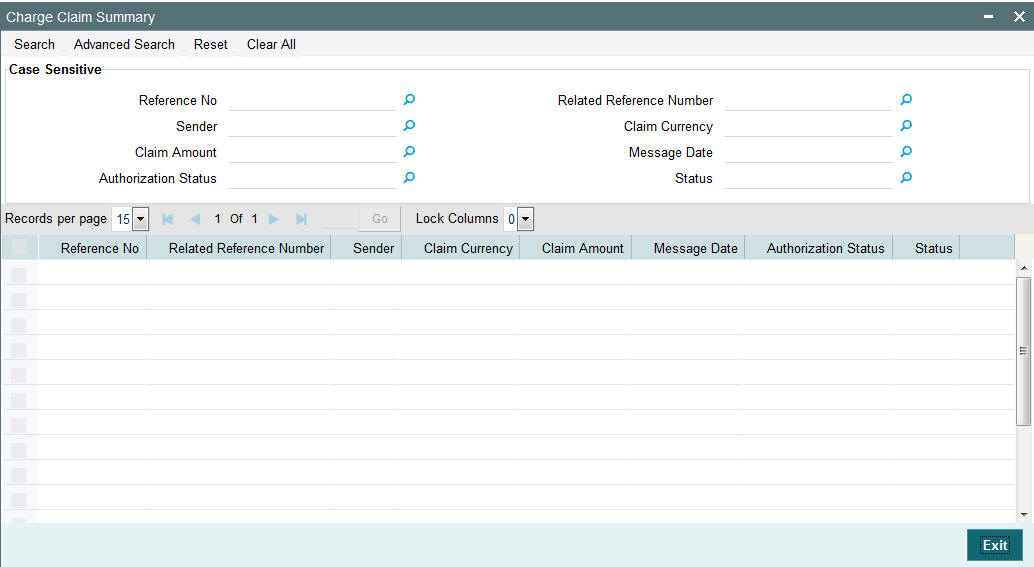
You can search using one or more of the following parameters:
- Reference No
- Related Reference Number
- Sender
- Claim Currency
- Claim Amount
- Message Date
- Authorization Status
- Status
Once you have specified the search parameters, click ‘Search’ button. The system displays the records that match the search criteria for the following
- Reference No
- Related Reference Number
- Sender
- Claim Currency
- Claim Amount
- Message Date
- Authorization Status
- Status
3.3.8 Invoking Charge Claim Details
You can invoke “Charge Claim Details” screen by typing ‘PXDCHGCM’ in the field at the top right corner of the Application tool bar and clicking on the adjoining arrow button. Click new button on the Application toolbar. Alternatively, you can select a Charge Claim record in the Charge Claim Summary screen explained above, to view its details in this screen.
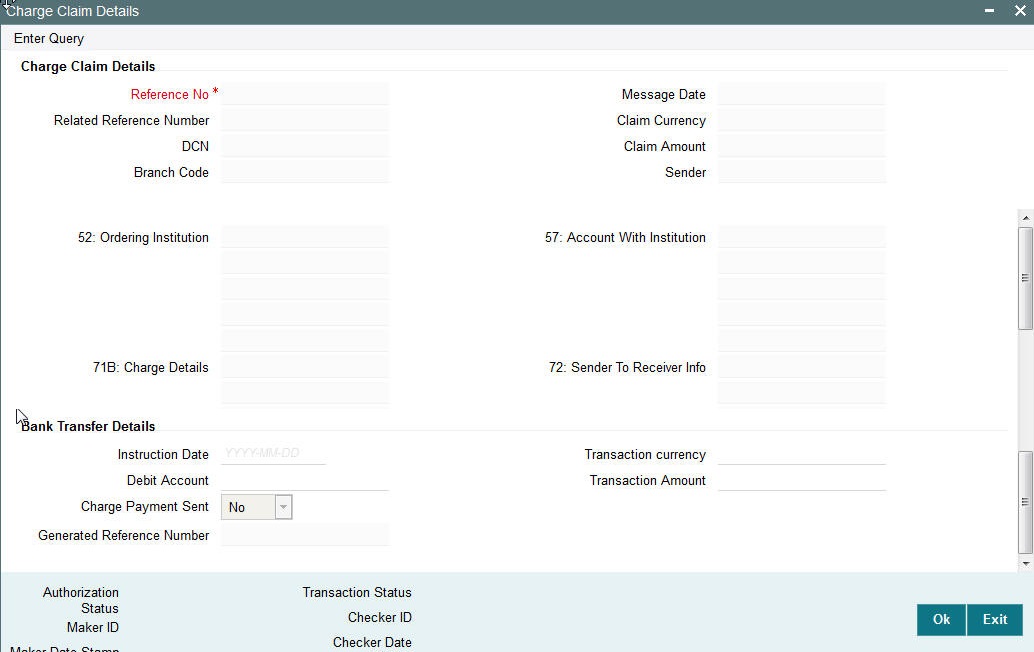
Charge Claim Details
The system displays the following fields based in the MT191 message.
Reference No
Displays the reference number (field 20) of the MT 191 message.
Message Date
Displays the date on which the MT 191 message was sent.
Related Reference Number
Displays the field 20 reference of the MT103 (Transaction Reference number) sent earlier.
Claim Currency
Indicates the currency of claim amount.
DCN
Displays the unique DCN number assigned by the system to the incoming MT191.
Claim Amount
Displays the amount claimed in the MT191.
Branch Code
Displays the branch code of the identified processing branch of the MT191.
Sender
Displays the BIC of Sender of MT191 message.
52: Ordering Institution
Displays the Ordering Institution details if mentioned in the MT191 message.
57: Account With Institution
Displays the Account with Institution details if mentioned in the message.
71B: Charge Details
Displays the Charge Details from the MT191 message.
72: Sender To Receiver Info
Indicates the sender to receiver details.
Bank Transfer Details
Instruction Date
Defaults the message date of the MT191 as the instruction date. This is editable and you can specify the current date or a future date.
Transaction currency
Defaults the currency of the Claimed amount in MT191. This is editable and you can specify any other currency if required.
Debit Account
Defaults the GL code (if maintained) from the Currency Correspondent maintenance for the Sender of MT191. This is editable and you can specify any GL code using the LOV.
Transaction Amount
Defaults the claimed amount in the MT191 message. This is editable and you can specify a different amount.
Charge Payment Sent
Indicates whether the Charge Payment was sent or not.
Generated Reference Number
Displays the generated reference number of the outgoing Charge payment transaction after it is auto created on approval of this Charge Claim record.
The following operations are available in this screen
| Operation | Functions | |||
|---|---|---|---|---|
| Unlock | Helps you to input or modify the values of editable fields of Charge Claim detail record and then save the record. | |||
| Authorize | You can authorize the modified or un-edited Charge Claim record so that system can auto-create the Bank Transfer transaction and process it. | Authorization should be done by a user different from the one who modified the Charge Claim record. | ||
| Enter Query | When you directly launch this details screen from the menu or using the Function Id then you can click this link to input a Charge Claim Reference number and view its details.’ |
3.4 Common Group Messages
Usage of this screen
The Common Group Messages screen is used to manually initiate outward Common Group Messages. The following Common Group Messages like can be manually initiated from this screen:
- MT190, MT290– Advice of charges
- MT191, MT291 – Request for charges
- MT192, MT292 – Request for cancellation
- MT195, MT295 – Queries
- MT196, MT296 – Answers
- MT198, MT298 – Proprietary Message
- MT199, MT299 – Free Format Message
This message types are exchanged between banks for investigations regarding payment messages and initiating non-value requests like cancellation.
3.4.1 Initiating Common Group Messages
You can invoke “Common Group Messages” screen by typing ‘PXDCOMPM’ in the field at the top right corner of the Application tool bar and clicking on the adjoining arrow button.
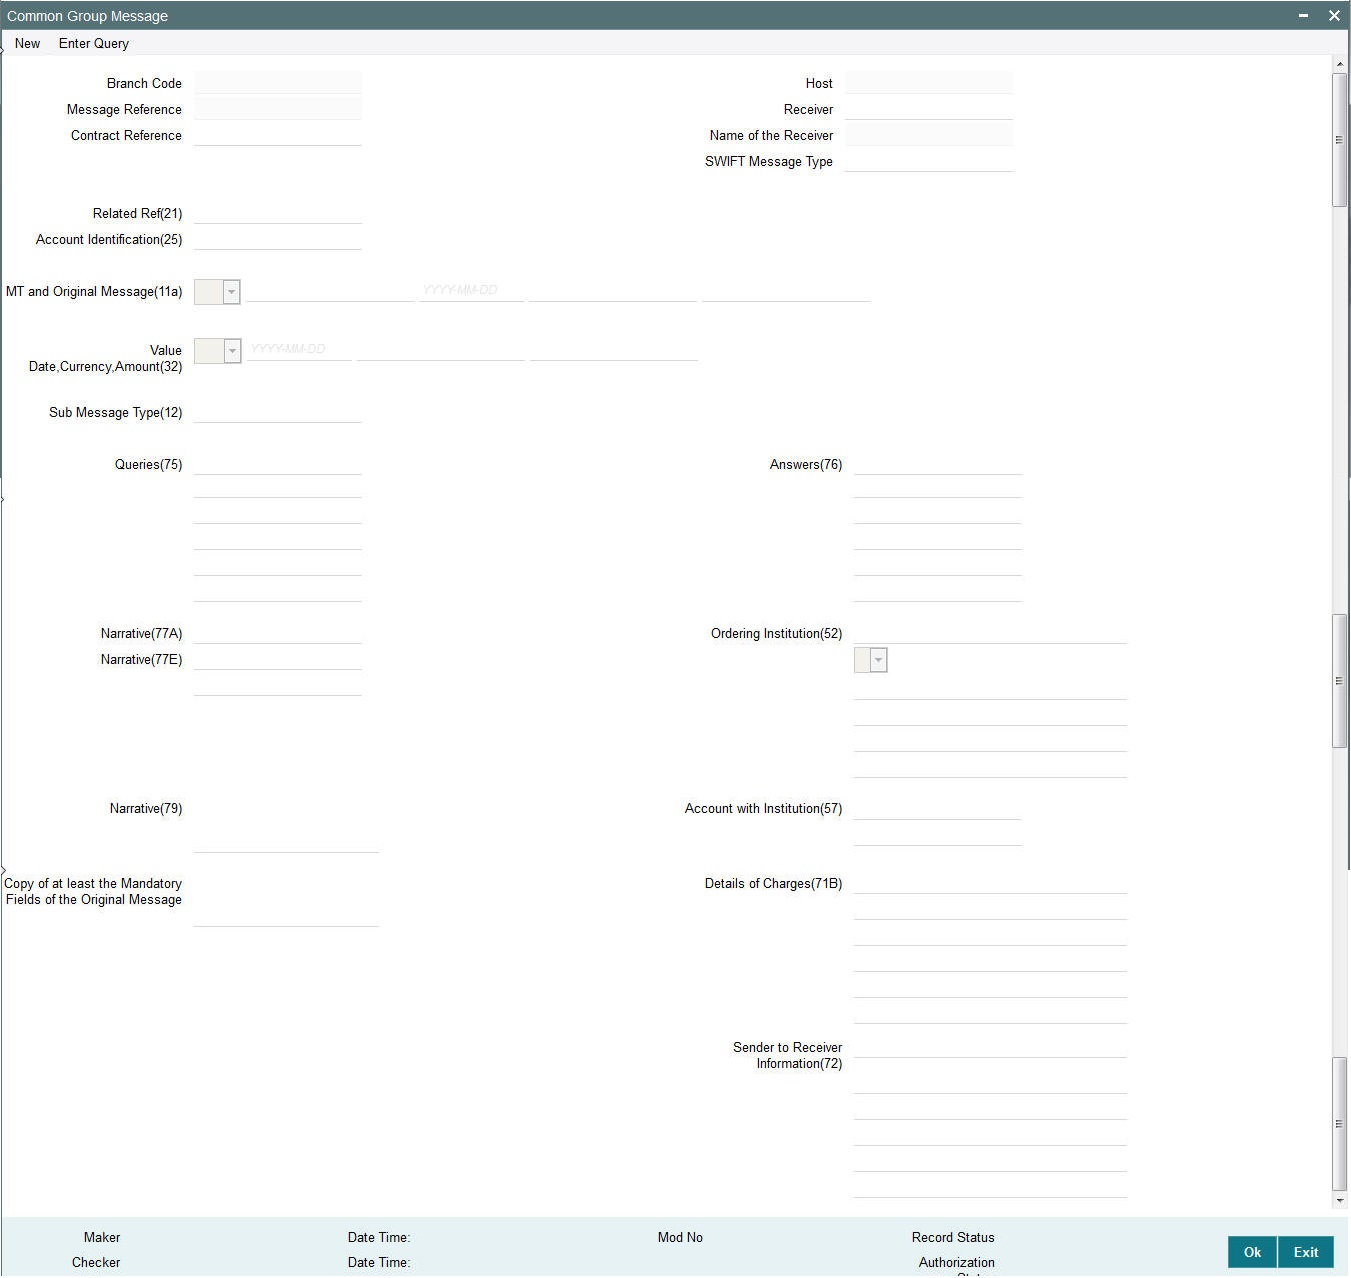
Specify the following details.
Branch Code
Displays the selected branch of the logged-in user.
Host
Displays the host code of the selected branch of the logged-in user.
Receiver
Specify or search and select the BIC code of the bank which is desired to be the Receiver of the generated Common Group message.
Name of the Receiver
Displays the name of the bank corresponding to the selected BIC.
Message Reference
Displays the reference number of the generated Common Group message when viewed in the Query mode.
Contract Reference
Specify or search and select the transaction (contract) reference number of the associated customer or bank transfer transaction.
Related Reference
Specify the transaction reference (e.g. F20 in MTn92, F20 in MTn95) contained in the associated inward or outward common group message, if applicable for the common group message.
SWIFT Message Type
Select the required Common Group message type. The available values for selection include the following:
- MT191
- MT190
- MT192
- MT195
- MT196
- MT199
- MT198
- MT291
- MT290
- MT292
- MT295
- MT296
- MT299
- MT298
Account Identification
Specify or search and select (using LOV) the Vostro Account that was debited or credited, if applicable for the common group message.
Note
This is applicable to MTn90 only.
Value Date, Currency, Amount
Specify the Currency and Amount, and additionally Value Date (if applicable), of the actual debit or credit to the specified account.
Note
This is applicable to MTn90 and MTn91 only.
Ordering Institution
Specify the details of the ordering institution of the associated inward payment or common group message. These details should be input in either A or D format.
Sender to Receiver Information
Specify any additional information for the Receiver. Enter information in text-boxes in up to 6 lines, each text box (line) accepting max. of 35 characters.
MT and Date of the Original Message
Specify the following details of the original (referenced) outward/inward message.
- Drop-down – Select either “11S” or “11R” depending on whether original message being referred was sent or received.
- 1st text-box – MT Number – Specify the MT number of the original message e.g. 103, 202, 102 etc.
- 2nd text-box – Date – Specify or select date (from calendar LOV) of original message
- 3rd text-box – Session Number – Specify Session number (1st 4 digits from the last 10 digits in Block1 of ACK received) of original message
- 4th text-box – ISIN (Input Sequence Number) – Specify ISIN (last 6 digits from the last 10 characters in Block1 of ACK received) of original message.
Sub Message Type
Specify the sub-message type of the proprietary message to be sent in the MTn98, as agreed with the Receiver.
Note
This is applicable to MTn98 only.
Queries
Specify or search and select (using LOV) a standard Query code. You can then input additional text or query following the selected Query code, You may specify upto 6 different queries in each of the 6 text boxes.
Answers
Specify or search and select (using LOV) a standard Answer code. You can then input additional text or response following the selected Answer code. You may specify upto 6 different responses in each of the 6 text boxes.
Narrative (77A)
Specify additional details about the Queries or Answers input in one of the above mentioned fields. The Narrative text can contain up to 700 characters.
Narrative (79)
Specify narrative text for describing the original message, or all transactions in the original multi-credit Customer/Bank transfer message that is being referenced by this Common Group message. Alternatively, this field can also be used for specifying free format text in case of MT199/MT299. This field can contain up to a 1750 characters.
Account With Institution
Specify details of the Account With Institution where the Sender of MT191/MT291 maintains an account and would like to have the charge amount credited.
Note
This is applicable to MTn91 only.
Details of Charges
Specify details of charges requested (in case of MT191/MT291) or charges advised (in case of MT190/MT290) in up to 6 lines (6 text boxes), each containing up to 35 characters.
Copy of at least the Mandatory Fields of the Original Message
Specify at least the mandatory fields of the original message that is being referenced by this Common Group message. This field can be input instead of ‘Narrative 79’ field but never both.
Narrative (77E)
Specify a Proprietary Message, including fields and values, in this text area box based on the format agreed with the Receiver, Total size of the proprietary message in this field should not exceed 9800 characters.
Note
This is applicable to MTn98 only.
3.4.2 Viewing Common Group Message Summary
You can invoke “Common Group Message Summary” screen by typing ‘PXSCOMPM’ in the field at the top right corner of the Application tool bar and clicking on the adjoining arrow button.
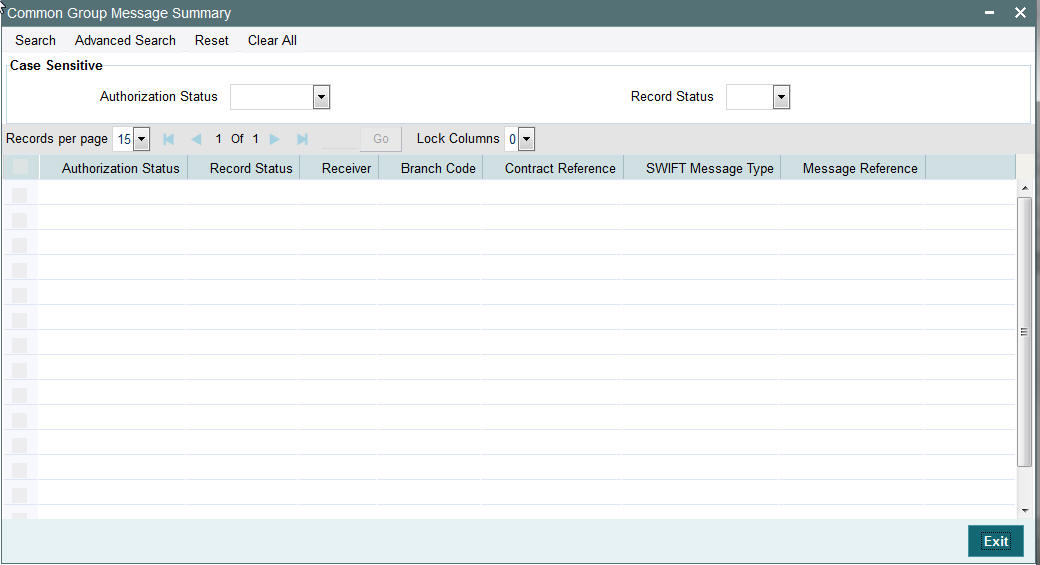
You can search using one or more of the following parameters:
- Authorization Status
- Record Status
Once you have specified the search parameters, click ‘Execute Query’ button. The system displays the records that match the search criteria for the following
- Authorization Status
- Record Status
- Receiver
- Branch Code
- Contract Reference
- SWIFT Message Type
- Message Reference