2. Messaging
This document details bulker, de-bulker, router and the SWIFTNet connectivity framework to be built in the FLEXCUBE to send the bulked files to the SWIFTNet network through SAG with the File Act protocol.
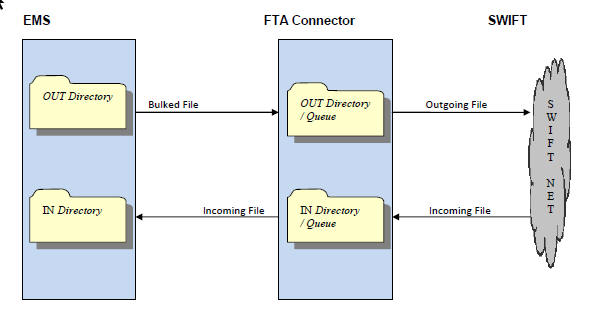
The files are bulked and stored on Application server. The file from Application server will be transmitted to SWIFT over FTA.’
The system technically bulk MT messages and routes them to configured destination.
The system transmits and receives bulked files from SWIFT Network using SAG interface, through the FTA (Folder) connector.
This chapter contains the following sections:
- Section 2.1, "Message Flow Diagrams"
- Section 2.2, "Key Features of Messaging"
- Section 2.3, "Basic Maintenance for File Exchange"
- Section 2.4, "Bulking and De-bulking of SWIFT MT Messages"
- Section 2.5, "File Transmission over SWIFTNet"
2.1 Message Flow Diagrams
The below flow diagram depicts the flow of outgoing message:

The below diagram depicts the flow of incoming message:
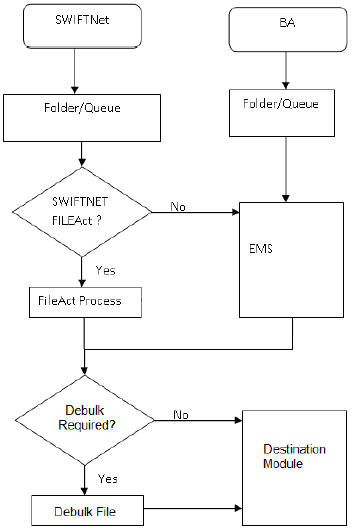
The below diagram depicts the flow diagram of data exchange with SWIFTNet.
2.2 Key Features of Messaging
Routing rules is defined for each module. Using these routing rules the messages are sent to the mapped destinations. To achieve this multiple maintenances are introduced.
- Rule definition – This screen is used to define the rule and respective destination.
- Rule Group – This maintenance is used to map the modules to different rule groups.
- Rule Priority – This maintenance is used to prioritise the rules.
The following functionalities is developed to support the routing of messages to different destinations.
2.2.1 Rule Parameter
Rule parameters is part of day zero set up. There is no user interface to maintain this.
The following set of standard rule parameters is used for all type of rule definition-
- Amount
- Currency
- Media
- Network Code
- Sender BIC
- Receiver BIC
- Message Type
- Module Name
2.2.2 Rule Definition
Rule configuration maintenance is provided to define the rule and to map it to a specific destination. Standard set of parameters are available while defining a rule. You can also provide values manually for evaluating the rules. On same screen option is provided to map rule to its destination. Each rule must belong to a rule group.
Messaging provides a router implementation which evaluates configured rules and identifies the destination for a message dynamically. The Routing capabilities in messaging include ability to define/modify rule configurations based on a set of pre-defined routing parameters. These parameters are stored in the Database and for each routing configuration; the values for these routing parameters is calculated at runtime, thus enabling dynamic routing configuration.
Destination for any message is mapped on the rule definition screen. This is done by specifying the rules which unambiguously lead to the selection of a single destination to be used for outward transmission of data from messaging.
Routing configuration supports routing based on the messaging standard parameters.
Routing rule can be mapped to following entities in the system.
- Connectivity Lines
- Bulker
- De-bulker
- Folder
- Queue
2.2.3 Rule Group
You can group one or more modules into different groups. Based on the rule groups a module is associated with, mapped rules are executed to identify the qualifying rule definition and thus destination for any message.
Each module can belong to only one rule group to avoid ambiguous results.
The modules for which routing rules should be used for identifying the destination is added to a default rule group as part of day zero script.
When a message is received from a modules that is not a part of any rule group, the existing EMS flow is considered to identify its destination.
2.2.4 Rule Priority
You can provide priority of rules belonging to a rule group. Based on this priority, rules are executed to identify the qualifying rule definition and thus destination for any message. First rule that matches the message properties is used to identify the destination for that message.
2.3 Basic Maintenance for File Exchange
A message is routed to the specific SWIFT connector, bulker, folder or queue if they meet certain user-defined criteria.
Routing Rules are defined for each module. Using these routing rules, the messages are sent to the mapped destinations. To achieve this, the following maintenances are introduced:
- Rule Definition - Used for defining rules and respective definitions.
- Rule Group - Used for mapping modules to different groups
- Rule Priority - Used for prioritizing rules
2.3.1 Invoking Distinguished Name Definition Screen
The Distinguished Name (DN) serves to uniquely identify any entity that sends or receives messages over SWIFTNet.
Distinguished name follow an X.500-compliant naming convention. Refer the SWIFTNet Naming and Address Guide from SWIFT for more details.
You can invoke ‘Distinguished Name Definition’ screen by typing MSDDSTNM‘’ in the field at the top right corner of the Application tool bar and clicking on the adjoining arrow button...
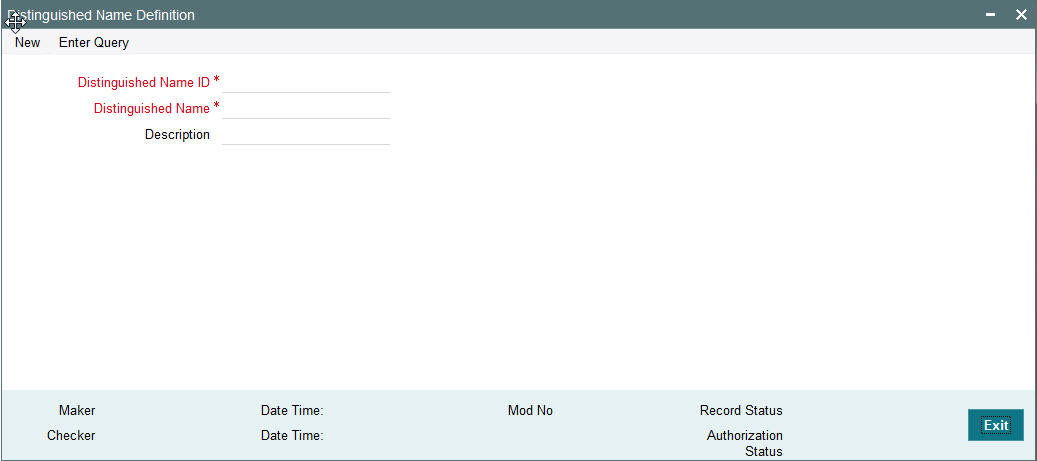
You can specify the following fields:
Distinguished Name ID
Specify the unique identification of the distinguished name.
Distinguished Name
Specify the distinguished name to identify the entity that sends or gets messages.
Description
Specify the description of the distinguished name.
2.3.2 Viewing Distinguished Name Summary
This summary screen is used to view the distinguished name serves. It includes the information about the various distinguished names and the description.
You can invoke “Distinguished Name Summary” screen by typing ‘MSSDSTNM’ in the field at the top right corner of the Application tool bar and clicking on the adjoining arrow button.
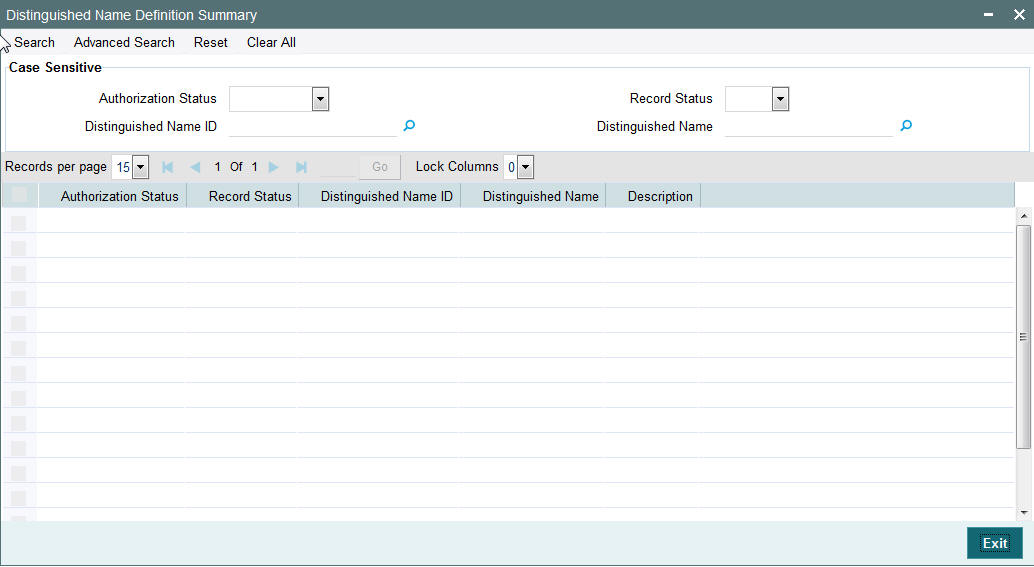
You can search using one or more of the following parameters:
- Distinguished Name Id
- Distinguished Name
- Authorization Status
- Record Status
Once you have specified the search parameters, click ‘Search’ button. The system displays the records that match the search criteria for the following:
- Distinguished Name Id
- Distinguished Name
- Description
- Authorization Status
- Record Status
2.3.3 Invoking SWIFTNet Service Definition Screen
This screen is used to capture SWIFTNet service details.
SWIFT Net service should be a valid SWIFT Net service to which the bank has registered to send the message.
When the message is sent through the File Act , the service name attribute is sent with the envelope.
This service name defined from this screen gets listed in the protocol parameters to choose the service name, which is used for constructing the envelope to send to SWIFT Net.
You can invoke ‘SWIFTNet Service Definition’ screen by typing ‘MSDSWTSR’ in the field at the top right corner of the Application tool bar and clicking on the adjoining arrow button...
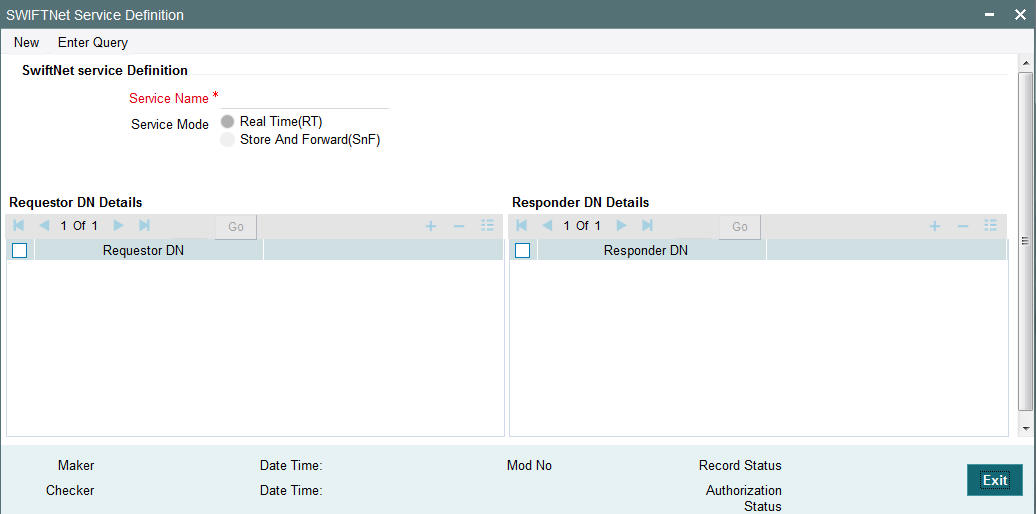
You can specify the following fields:
Service Name
Specify the SWIFTnet Service name.
Service Mode
Select any one of the service modes.
- Real Time- Choose this button to send and receive messages real-time.
- Store and Forward - Choose this button to send and receive messages by storing them in a location and then forwarding them accordingly.
Note
Real Time option is selected by default.
Requestor DN
Specify the DN that send request to the service.
Note
You must provide at least one DN.
Responder DN
Specify the DN that responds request to the service.
Note
You must provide at least one DN.
2.3.4 Viewing SWIFTNet Service Summary
This summary screen is used to display SWIFTNet service details.
You can invoke “SWIFTNet Service Summary” screen by typing ‘MSSSWTSR’ in the field at the top right corner of the Application tool bar and clicking on the adjoining arrow button.
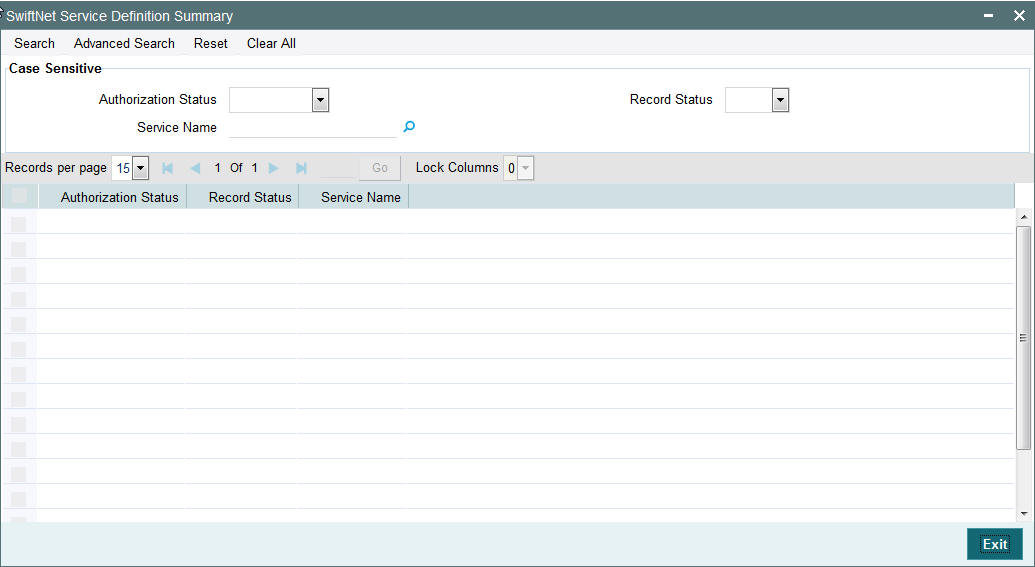
You can search using one or more of the following parameters:
- Service Name
- Authorization Status
- Record Status
Once you have specified the search parameters, click ‘Search’ button. The system displays the records that match the search criteria for the following
- Service Name
- Authorization Status
- Record Status
2.3.5 Invoking Protocol Parameter Definition Screen
This screen is used to capture protocol parameters for FTA protocol used to connect to SWIFT Net. These are additional SWIFTNet connectivity attributes, which are required for SWIFTNet file transfer and communication with SWIFT Network.
You can invoke ‘Protocol Parameter Definition’ screen by typing ‘MSDPTPRM’ in the field at the top right corner of the Application tool bar and clicking on the adjoining arrow button...

You can specify the following fields:
Protocol Parameter Name
Specify the name of the Protocol Parameter.
Description
Specify the description of the Protocol Parameter set.
Protocol Type Mode
The name of the protocol for which parameter list is defined.
Parameters
Specify the parameters for the protocol.
Value
Specify the value of the parameter.
2.3.6 Viewing Protocol Parameter Definition Summary
This summary screen is used to display protocol parameters captured for FTA.
You can invoke “Protocol Parameter Definition Summary” screen by typing ‘MSSPTPRM’ in the field at the top right corner of the Application tool bar and clicking on the adjoining arrow button.
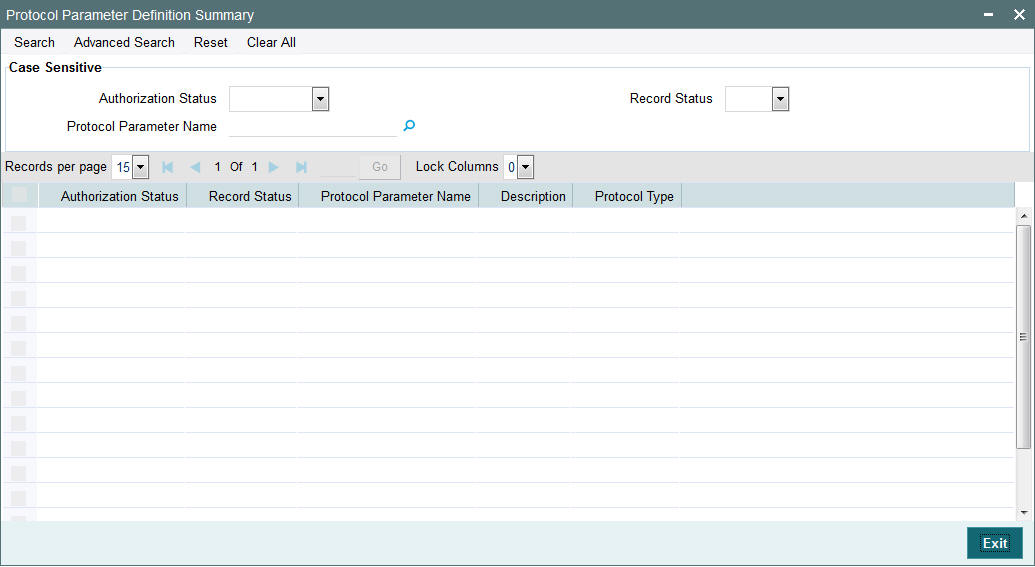
You can search using one or more of the following parameters:
- Protocol Parameter Name
- Authorization Status
- Record Status
Once you have specified the search parameters, click ‘Search’ button. The system displays the records that match the search criteria for the following
- Protocol Parameter Name
- Description
- Authorization Status
- Record Status
2.3.7 Invoking Rule Definition Screen
Rule Definition screen will be provided in EMS module to capture the Rule details.
You can invoke ‘Rule Definition’ screen by typing ‘MSDRLDFN’ in the field at the top right corner of the Application tool bar and clicking on the adjoining arrow button..
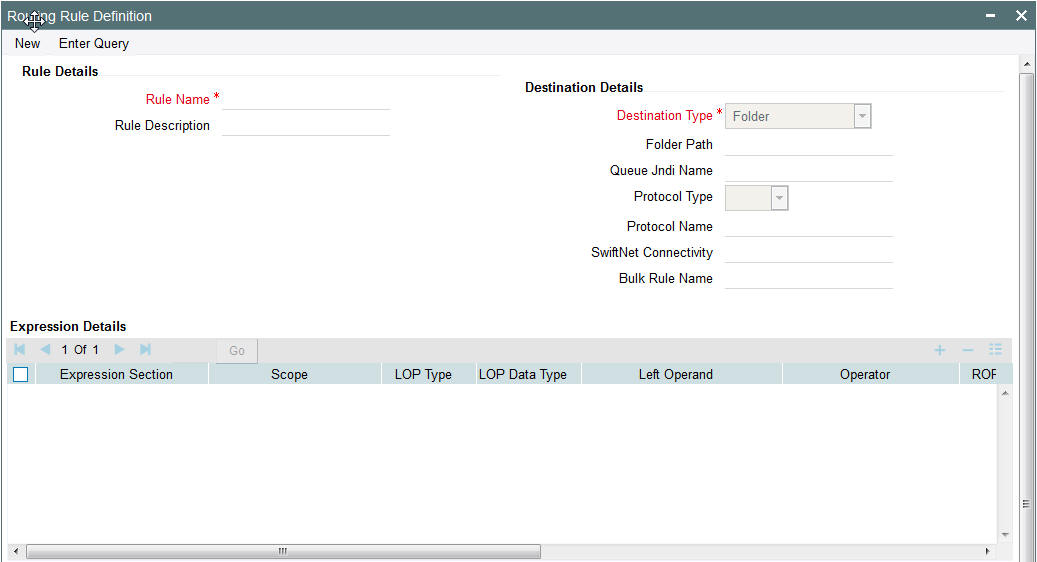
You can specify the following fields:
Rule Name
Specify the unique rule name.
Description
Enter a brief description of the rule name.
Destination Type
Specify the type of destination to which the messages matching the rule criteria is being sent. Select any of the options given below:
- SWIFT connector
- Bulker
- Folder
- Queue
Folder Path
Specify the folder path if the destination is folder.
Queue JNDI Name
Specify the name of JNDI Queue. This is mandatory if the destination type is Queue.
Protocol Type
Specify the type of Protocol.
Protocol Name
Specify the required protocol for the selected protocol.
SWIFTNet Connectivity
Specify the name of the connector if the destination type is SWIFTNet.
Bulk Rule Name
Select the required bulk rule name.
Expression Section
Specify the value of the parameter.
Scope
Specify the value of the parameter.
Left Operand Type
Specify the value of the parameter. The type can be constant, parameter or expression.
Left Operand Data Type
Specify the value of the parameter. The value can be string, date, boolean or number.
Left Operand
Specify the value of the parameter. If left operator is parameter values from the static table is populated, if its constant then any constant can be selected or expression is build if its a expression.
Operator
Specify the value of the parameter like equal to, less than and so on.
Right Operand Type
Specify the value of the parameter.
Right Operand Data Type
Specify the value of the parameter.
Right Operand
Specify the value of the parameter.
Scope
Specify the value of the parameter.
Logical Operators
Specify the value of the parameter.
Pre Defined Functions
Specify the value of the parameter.
Parameter Name
Specify the value of the parameter.
Parameter Value
Specify the value of the parameter.
Parameter Type
Specify the value of the parameter.
Expression For
Specify the value of the parameter.
Final Expression
Specifies the final expression built for the rule.
Build Expression
Specifies the final expression built for the rule.
2.3.8 Viewing Rule Definition Summary
You can invoke “Rule Definition Summary” screen by typing ‘MSSRLDFN’ in the field at the top right corner of the Application tool bar and clicking on the adjoining arrow button.

You can search using one or more of the following parameters:
- Authorization Status
- Record Status
- Rule Name
- Rule Description
- Rule Group Name
- Destination Name
Once you have specified the search parameters, click ‘Search’ button. The system displays the records that match the search criteria for the following
- Authorization Status
- Record Status
- Rule Name
- Rule Description
- Rule Group Name
- Destination Type
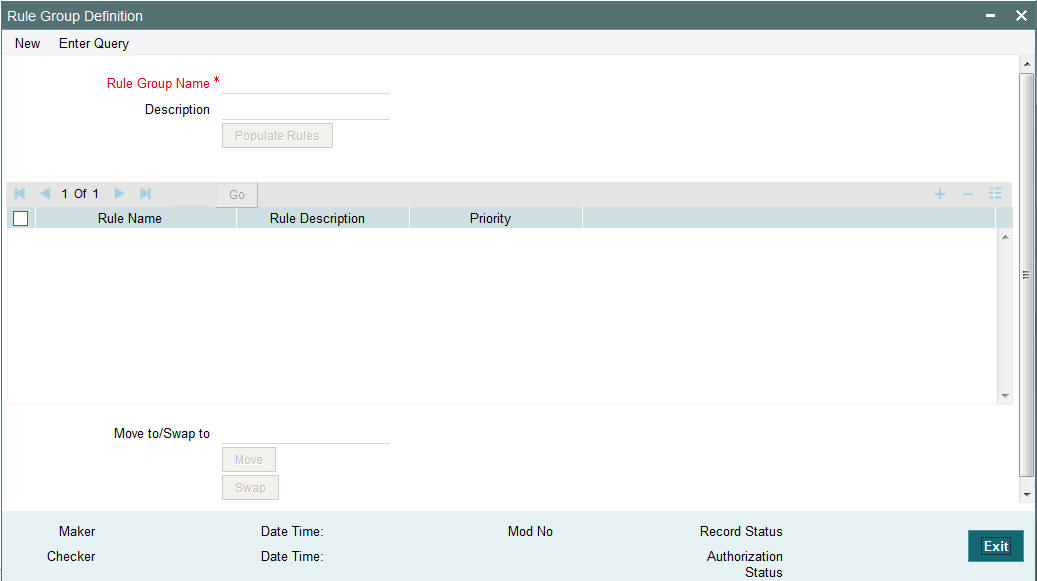
2.3.9 Invoking Rule Group Definition Screen
Rule Group Definition screen is provided to capture the Rule group details. A logical grouping of the routing rules can be done using this group name.
Populate Rules button populates all the routing rules defined which can be moved or swapped.
On click of ‘populate rules’ all the rules marked for the group are listed and priority of which can be changed.
From the populated list select a rule priority for swapping and enter another priority visible on search result in Move to/Swap to field to swap the selected rule priority with the priority entered.
From the populated list select a priority for moving and enter another priority visible on search result in Move to/Swap to field to move the selected rule priority with the priority entered.
You can invoke ‘Rule Group Definition’ screen by typing ‘MSDRLGRP’ in the field at the top right corner of the Application tool bar and clicking on the adjoining arrow button..
You can specify the following fields:
Rule Group Name
Specify the unique rule group name.
Description
Enter a brief description of the rule group.
Rule Name
Specify the rule name from the rule definition screen.
Rule Priority
Specify the priority of the rule name.
Move To/ Swap
Specify whether the priority must be swapped or moved.
Move
Click the Move button to move the priority record.
Swap
Click the Swap button to swap the priority record.
2.3.10 Viewing Rule Group Summary
You can invoke “Rule Group Summary” screen by typing ‘MSSRLGRP’ in the field at the top right corner of the Application tool bar and clicking on the adjoining arrow button.

You can search using one or more of the following parameters:
- Authorization Status
- Record Status
- Rule Group
Once you have specified the search parameters, click ‘Search’ button. The system displays the records that match the search criteria for the following
- Authorization Status
- Record Status
- Rule Group Name
- Description
2.3.11 Invoking Rule Group Mapping Screen
Modules can be mapped to the rule groups defined.
In case a rule group is mapped to the module then all the rules from rule group are executed and the destination is derived.
If there is no rule group mapping for the module then the normal EMS flow should get executed.
You can invoke ‘Rule Group Mapping’ screen by typing ‘MSDRLMAP’ in the field at the top right corner of the Application tool bar and clicking on the adjoining arrow button..
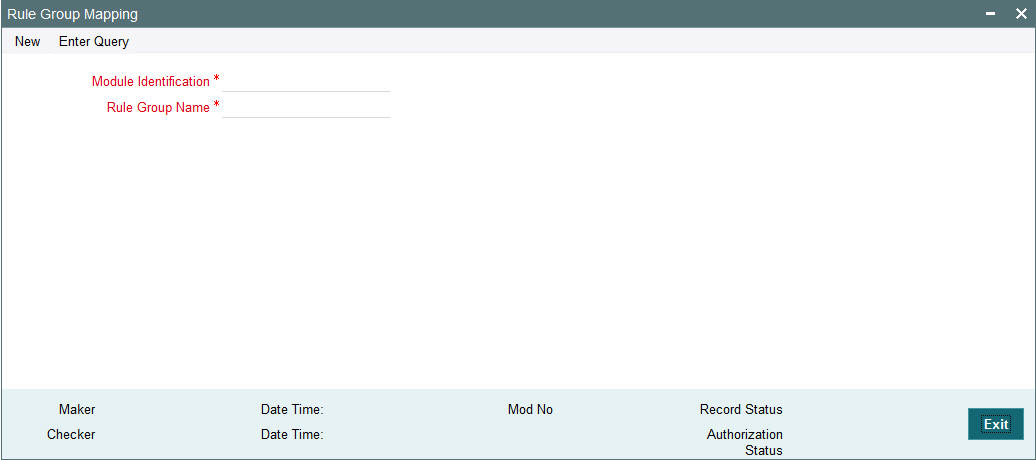
You can specify the following fields:
Rule Group Name
Specify the unique rule group name.
Module Id
Specify the module that needs to be mapped to the created rule group.
2.3.12 Viewing Rule Group Mapping Summary
You can invoke “Rule Group Mapping Summary” screen by typing ‘MSSRLMAP’ in the field at the top right corner of the Application tool bar and clicking on the adjoining arrow button.

You can search using one or more of the following parameters:
- Authorization Status
- Record Status
- Module Id
Once you have specified the search parameters, click ‘Search’ button. The system displays the records that match the search criteria for the following
- Authorization Status
- Record Status
- Rule Group Name
- Description
2.4 Bulking and De-bulking of SWIFT MT Messages
The following are the list of functionalities that are part of Bulker Framework:
- Ability to bulk the outgoing SWIFT MT messages with a configurable delimiter based on parameters like Message Type, Value Date, Currency, Receiver BIC and Sender BIC.
- Option to schedule automatic bulking with a start and end time with time frequency so that the bulking process runs between start and end time for configured frequency.
- Ability to configure size or volume based bulking.
- File name prefix should be configurable in the system.
- The system supports option to compress the bulk file before sending it to the SWIFTNet network.
2.4.1 Invoking Bulk Preference Definition Screen
Bulk Preference Definition screen is used to configure the preferences to be used during the bulking process.
It also defines the scheduling parameters to automate the bulking process, like start time, end time and frequency.
Compression required and compression type is applicable only for SWIFTNet connectivity not for other destination types.
You can invoke ‘Bulk Preference Definition’ screen by typing MSDBLKRL’ in the field at the top right corner of the Application tool bar and clicking on the adjoining arrow button...

You can specify the following fields:
Bulk Preference Name
Specify the name used for storing the Bulk Preference.
Volume Based Trigger
Check this box to configure volume based bulking.
Maximum number of messages
Specify the maximum number of messages that can be stored in a bulk file.
Minimum number of messages
Specify the maximum number of messages that can be stored in a bulk file.
Maximum size in KB
Specify the distinguished name to identify the entity that sends or gets messages.
Minimum size in KB
Specify the distinguished name to identify the entity that sends or gets messages.
Size based Trigger
Check this field to configure size based bulking.
Scheduler Type
Select the type of scheduler. Choose any one of the following:
- Time Based
- Frequency
Start Time
Specify the Start Time of the trigger. Enter the format in HH:MM format.
End Time
Specify the Start Time of the trigger. Enter the format in HH:MM format.
Time Interval in Min
Specify the interval of the repeat in MM format.
Scheduling No
Specify the scheduling sequence.
Start Hour
Specify the start hour of the scheduling sequence.
Start Min
Specify the start minute for frequency based scheduler.
Bulk File Name Prefix
Specify the prefix to indicate the name of the bulk file.
Maximum size of a file of KB
Specify the maximum size of a bulk file in KB.
Payload Delimiter
Specify the delimiter while bulking messages.
Maximum settlement amount for a file
Specify the maximum settlement for a file that must be considered while bulking messages.
File Format
Select the file that must be used while bulking messages.
File Type
Select the file type that must be used while bulking messages.
Compression Required
Check this box to indicate that file compression is required.
Compression Type
Specify the required type of compression.
Destination Type
Specify the type of destination.
- Folder
- Router
Folder Path
Specify the user defined destination folder path.
Queue JNDI Name
Specify the name of the Queue if the destination type is Queue.
Protocol Type
Select the type of Protocol.
Protocol Name
Specify the protocol name required for FTA protocols.
2.4.2 Viewing Bulking Preference Definition Summary
This summary screen is used to view the bulk rules defined. It includes the information about the scheduler, file, bulk and destination attributes.
You can invoke “Bulking Preference Definition Summary” screen by typing ‘MSSBLKRL’ in the field at the top right corner of the Application tool bar and clicking on the adjoining arrow button.

You can search using one or more of the following parameters:
- Bulking Preference Name
- Bulk Initiated
- Auth Initiated
- Record Status
Once you have specified the search parameters, click ‘Search’ button. The system displays the records that match the search criteria for the following:
- Bulking Preference Name
- Frequency
- Max Number of Messages
- Size (in KB)
- File Format
- Bulk Filename Prefix
- Maximum size of bulk file (in KB)
- Bulk Initiated
- Destination Type
- Auth Status
- Record Status
2.4.3 Invoking Debulk Rule Definition Screen
DeBulk Rule Definition is the criteria to define how a file from External Network would be segregated into messages and sent to business application.
You can invoke ‘Debulk Rule Definition’ screen by typing MSDDEBRL’ in the field at the top right corner of the Application tool bar and clicking on the adjoining arrow button...
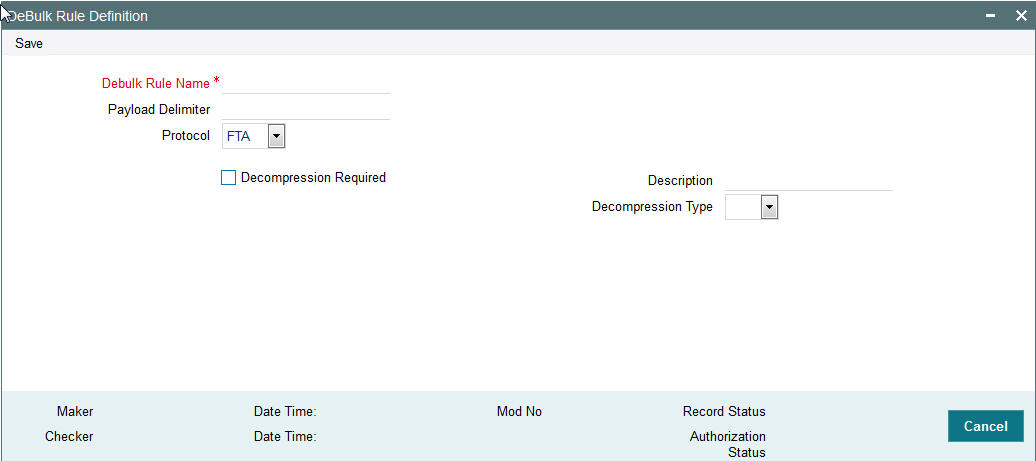
You can specify the following fields:
De bulk Rule Name
Specify the name of the debulk file.
Payload Delimiter
Specify the delimiter between payloads.
Protocol
Select the type of protocol.
Decompression Required
Check this box if debulk processing requires decompression.
Decompression Type
Select the type of decompression. Choose among the following:
- ZIP
- GZIP
2.4.4 Viewing Debulk Rule Summary
You can invoke “Debulk Rule Summary” screen by typing ‘MSSDEBRL’ in the field at the top right corner of the Application tool bar and clicking on the adjoining arrow button.
You can search using one or more of the following parameters:
- Authorization Status
- Record Status
- Debulk Rule Name
Once you have specified the search parameters, click ‘Search’ button. The system displays the records that match the search criteria for the following:
- Authorization Status
- Record Status
- Debulk Rule Name
- Payload Delimiter
- Debulk File Type
2.4.5 Invoking Bulker Monitor Screen
This is the screen to monitor the bulk scheduler execution.
You can view the bulk preference name and the execution start time , end time , execution status and no of files generated.
You can initiate the ad-hoc bulking for the selected bulk preference.
To initiate the adhoc manual bulking the detail screen has to be invoked and click on the adhoc bulking button to trigger the adhoc bulking for the chosen bulk preference.
To Reprocess the messages which are got failed in the previous bulking process user has to invoke bulk monitor details screen. Then click on the user regenerate button to reprocess the failed message to reprocess.
You can invoke ‘Bulker Monitor’ screen by typing MSSBLKMN’ in the field at the top right corner of the Application tool bar and clicking on the adjoining arrow button...
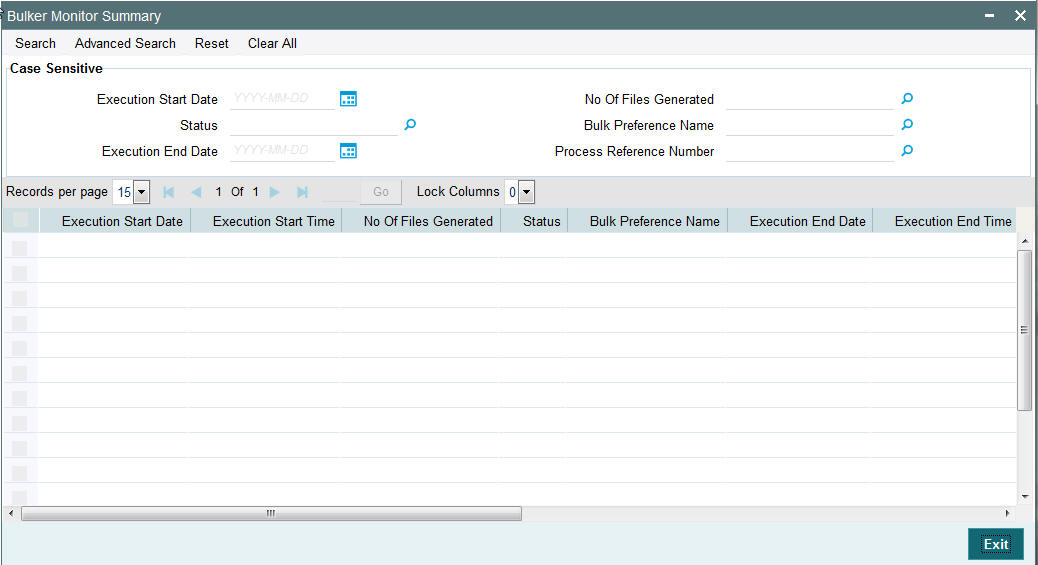
You can search using one or more of the following parameters:
- Bulk Preference Name
- Execution Start Time
- Execution End Time
- Status
Once you have specified the search parameters, click ‘Search’ button. The system displays the records that match the search criteria for the following:
- Bulk Preference Name
- Execution Start Time
- Execution End Time
- Status
- No of Files
2.4.6 Invoking Outgoing Message Browser Screen
Additional fields are introduced in the outgoing browser to track the status of the message and along with bulk criteria and bulk reference number.
The new fields are bulk status, bulk file reference number and bulk preference name.
If the message is not satisfied with any of the bulk rule defined in the system, then bulk status will be marked as NA (Bulking not applicable).
You can invoke ‘Outgoing Message Browser’ screen by typing PMDOUTBR’ in the field at the top right corner of the Application tool bar and clicking on the adjoining arrow button.
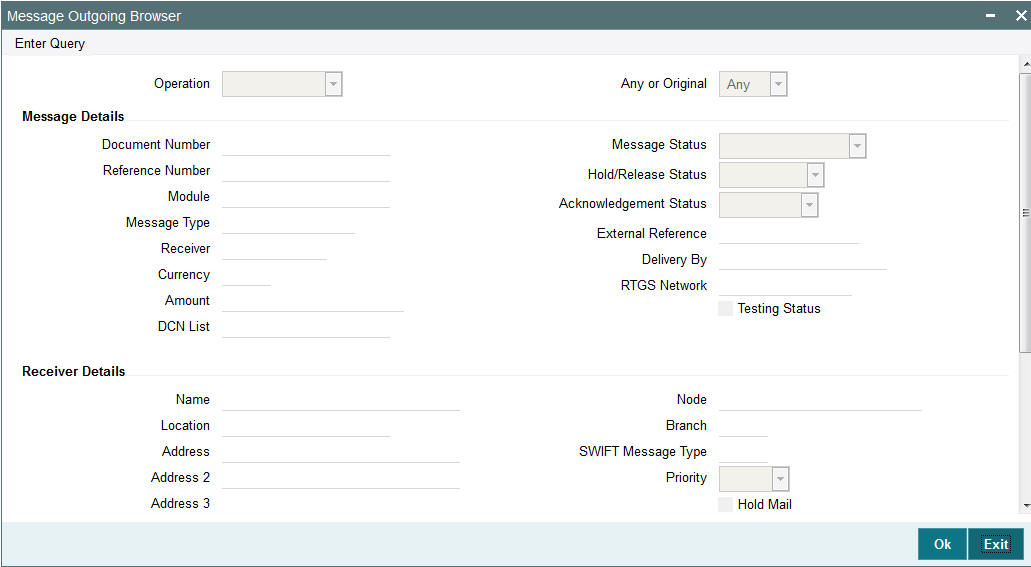
You can specify the following fields:
Operation
The system displays the type of operation.
Any or Original
The system displays if the message was ‘Any’ or ‘Original’.
Message Details
Document Number
Specify the Document Number.
Message Status
The system displays the status of the message.
Reference Number
Specify the reference number
Hold/Release Status
The system displays if the message is in Hold or Released status.
Module
Specify the module name.
Acknowledgement Status
The system displays the acknowledgement status of the message.
Message Type
Specify the type of message.
External Reference
Specify the external reference details.
Receiver
Specify the Receiver details.
Delivery By
Specify the Delivery details of the message.
Currency
Specify the currency that is specified in the message.
RTGS Network
Specify the RTGS Network.
Testing Status
The system checks this box, if the message requires testing..
DCN List
Specify the DCN List details.
Receiver Details
Name
Specify the name of the Receiver.
Node
Specify the Receiver Node.
Location
Specify the location of the Receiver.
Branch
Specify the branch of the Receiver.
Address
Specify the address details of the Receiver in the lines provided from 1 o 4.
SWIFT Message Type
Specify the SWIFT Message Type.
Priority
The system displays the priority of the message.
Hold Mail
The system check this box, if the mail must be held.
Exception
Specify the Exception details.
Media
Specify the media details.
Test Word Details
Testword
Specify the Test Word details.
Test Amount
Specify the Test Amount
Test Date
Specify the date of testing.
Test Currency
Specify the currency used for testing.
Test Word Narrative
Specify the Test Word details.
2.4.7 Viewing Outgoing Message Browser Summary
You can invoke “Outgoing Message Browser Summary” screen by typing ‘PMSOUTBR’ in the field at the top right corner of the Application tool bar and clicking on the adjoining arrow button.
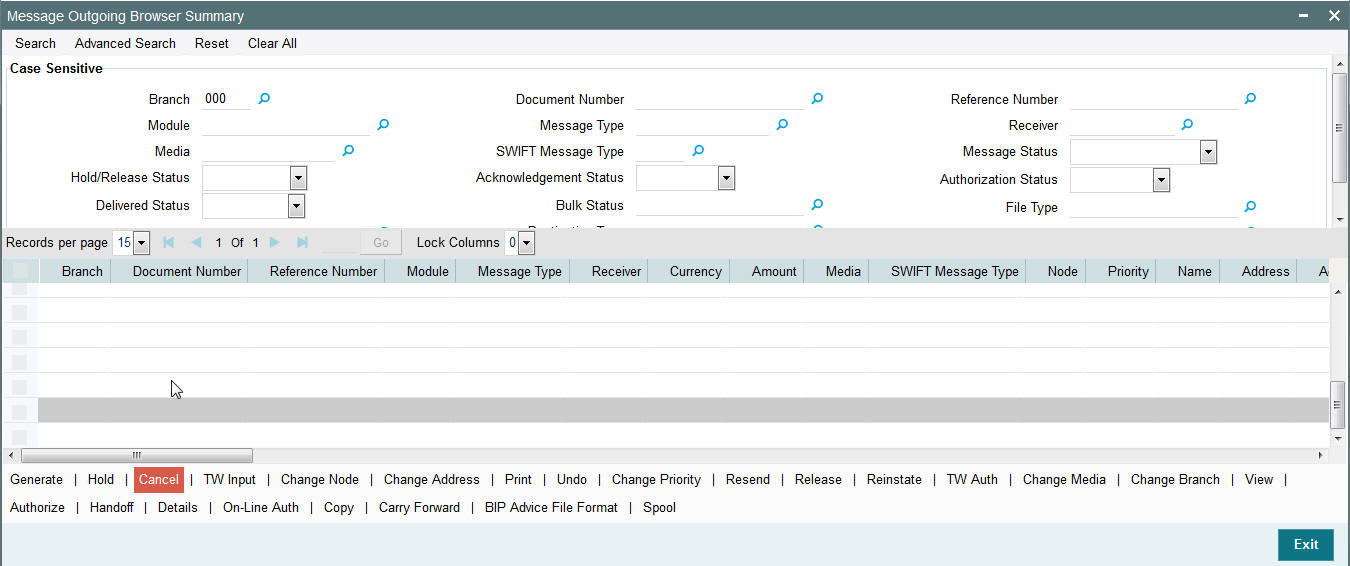
You can search using one or more of the following parameters:
- Branch
- Document Number
- Reference Number
- Module
- Message Type
- Receiver
- Media
- SWIFT Message Type
- Message Status
- Hold/Release Status
- Acknowledgement Status
- Authorization Status
- Delivered Status
- Bulk Status
- File Type
- Handoff Status
- Destination Type
- Bulk Preference Name
Once you have specified the search parameters, click ‘Search’ button. The system displays the records that match the search criteria.
2.4.8 Invoking Incoming Message Browser Screen
This screen is modified to view the incoming message details like source type and SWIFTNet connector name.
You can invoke ‘Incoming Message Browser’ screen by typing PMDINBRW’ in the field at the top right corner of the Application tool bar and clicking on the adjoining arrow button...
You can specify the following fields:
Document Number
Specify the Document Number.
Reference No
Specify the Reference Number of the document.
Sender
Specify the reference number.
Media
Specify the required media.
SWIFT Message Type
Specify the required SWIFT Message Type.
Queue
Specify the queue name.
Required Execution Date
Specify the required execution date.
Operation
Select the required operation.
Name
Specify the name.
Address 1
Specify the address.
Address 2
Specify the address.
Address 3
Specify the address.
Address 4
Specify the address.
Location
Specify the required location.
Status
Specify the required status.
Currency
Specify the required currency.
Amount
Specify the amount.
Value Date
Specify the value date.
External Reference
Specify the external reference number.
Multi Credit Reference
Specify the multi credit reference details.
Branch
Specify the required branch.
Media Control System
Specify the Media Control System.
Node
Specify the required node.
Testword
Specify the testword.
Repair Reason
Specify the Repair Reason.
Reason Description
Specify the description of the reason.
Suppress Details
Process Status
Specify the status of the process.
PDE Flag
Check the PDE flag if required.
Remarks
Specify the any remarks of the Suppress details.
Suppress Message
Specify the suppress message details.
Checker Date Stamp
The system specifies the Checker Date Stamp.
Checker Id
Specify the identification of the checker.
Modification Number
Specify the modification number.
Entry By
Specify the identification of the maker.
Release Time
Specify the Release Time.
Cover Match Status
Specify the status of the cover match.
Suppress Status
Specify the status of the suppress.
Funding Exception Status
Specify the status of the Funding Exception.
Authorization Status
Check the Authorization Status box, if required.
2.4.9 Viewing Incoming Message Browser Summary
You can invoke “Incoming Message Browser Summary” screen by typing ‘PMSINBRW’ in the field at the top right corner of the Application tool bar and clicking on the adjoining arrow button.
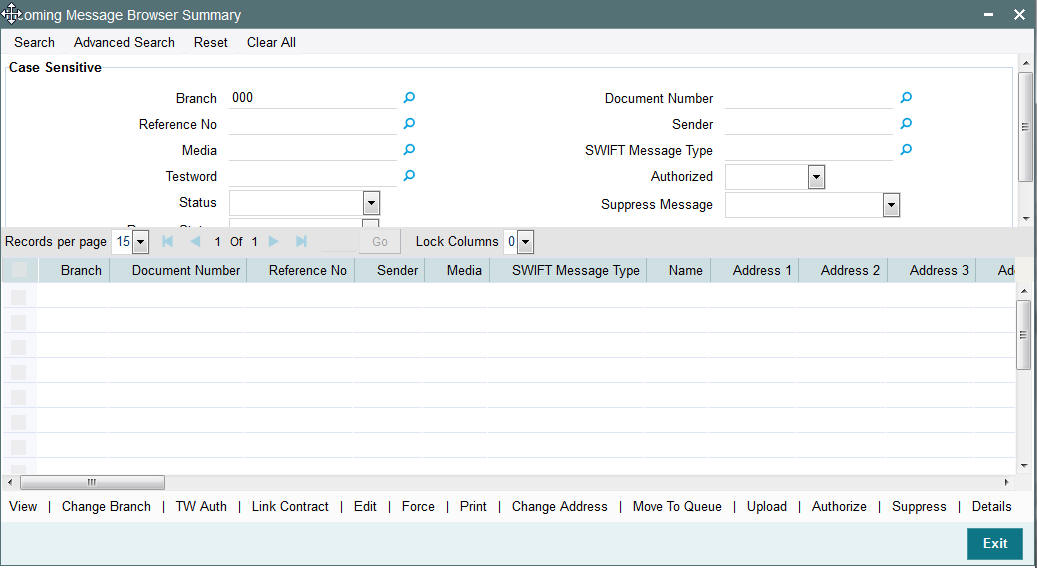
You can search using one or more of the following parameters:
- Branch
- Document Number
- Reference Number
- Sender
- Media
- SWIFT Message Type
- Testword
- Authorized
- Status
- Suppress Message
- Process Status
Once you have specified the search parameters, click ‘Search’ button. The system displays the records that match the search criteria.
2.5 File Transmission over SWIFTNet
The following are the list of functionalities that are part of File Transmission over SWIFTNet:
- A framework that provides the SWIFTNet connectivity for the bulked SWIFT FIN files that were generated by bulker.
- New Maintenance functions to capture configurations that are required to connect SWIFTNet via SAG File Act
- Monitoring and tracking function to track FileAct processing within the system.
2.5.1 Invoking File Transfer Adapter Connector Configuration Screen
This new screen is used to capture the parameters required for SWIFT Net FileAct connectivity using FTA.
They define the mode of transmission and the parameters required to actually perform the message transmission.
You can invoke ‘File Transfer Adapter Connector Configuration’ screen by typing ‘MSDFTACN’ in the field at the top right corner of the Application tool bar and clicking on the adjoining arrow button.
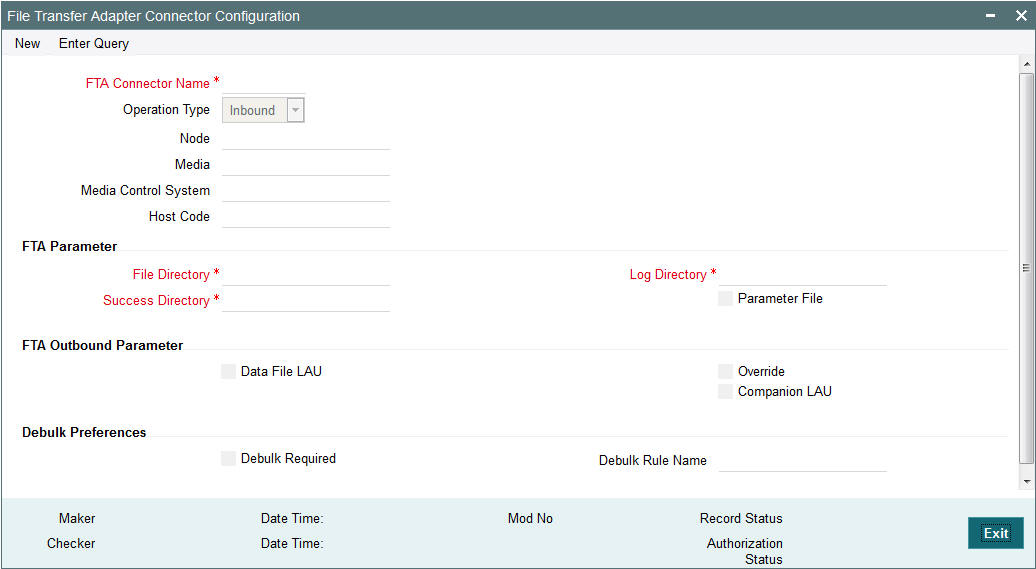
You can specify the following fields:
Operation Mode
Select the type of connectivity. Choose between Inbound and Outbound.
Parameter File Required
Check this box if FCM creates or receives a Parameter File corresponding to each and every data file in configured file directory along with data file.
Data file LAU
Check this box if FCM calculates the LAU of Data File and puts the calculated value in parameter file.
Parameter File LAU
Check this box if parameters defined at emission profile of SAG side are overridden by information in companion file.
Allow Overriding on SAG Profile
Check this box if parameters defined at the emission profile of SAG side will be overridden by information in Companion file.
File Directory
Specifies store details of emission directory for outbound connectivity and reception directory for inbound flow.
Log Directory
Specifies the responses from SAG.
Success Directory
For Outbound connectivity, Delivery notification response related to file transfer status from the SAG are placed in this directory. For inbound connectivity file transfer, success status files are placed in this folder.
Debulk Required
Check this box, if debulk is required for inbound messages.
Debulk Rule Name
Specifies the debulk rule name.
Node
Specifies the node details. This is mandatory for inbound.
Media
Specifies the media details. This is mandatory for inbound.
Media Control System
Specifies the media control system. This is mandatory for inbound.
Host Code
Specify the Host code of the logged in user.
2.5.2 Viewing File Transfer Adapter Connector Configuration Summary
You can invoke “File Transfer Connector Configuration Summary” screen by typing ‘MSSFTCON’ in the field at the top right corner of the Application tool bar and clicking on the adjoining arrow button.

You can search using one or more of the following parameters:
- FTA Connector Name
- Operation Mode
- Auth Status
- Record Status
Once you have specified the search parameters, click ‘Search’ button. The system displays the records that match the search criteria for the following:
- FTA Connector Name
- Operation Mode
- Auth Status
- Record Status
2.5.3 Invoking Connectivity Operation Manager Screen
This screen is used to start and stop the connectivity lines.
You can search for the connectivity lines and perform the operation start/stop on the line searched.
You can invoke ‘Connectivity Operation Manager’ screen by typing ‘MSDCNMGR’ in the field at the top right corner of the Application tool bar and clicking on the adjoining arrow button...

You can specify the following fields:
Connectivity
Specify the required connectivity line.
Operation Type
Select the type of operation.
Status
Specify the display line status.
Start
Click the Start button to start the connectivity line.
Stop
Click the Stop button to start the connectivity line.
2.5.4 Invoking Outbound File Browser Screen
This screen is used to view the bulk files generated for the bulk criteria maintained in the system.
You can search based on the Bulk criteria (rule) name, Generated date, File Name and Status.
File details like name of the bulker file, status, bulk rule name, file generated time, bulk reference number, Size of the file; number of transactions bulked is shown in the details.
File can be resent to the destination if the file status is not processed.
You can invoke ‘Outbound File Browser’ screen by typing ‘MSSFLBRW’ in the field at the top right corner of the Application tool bar and clicking on the adjoining arrow button...
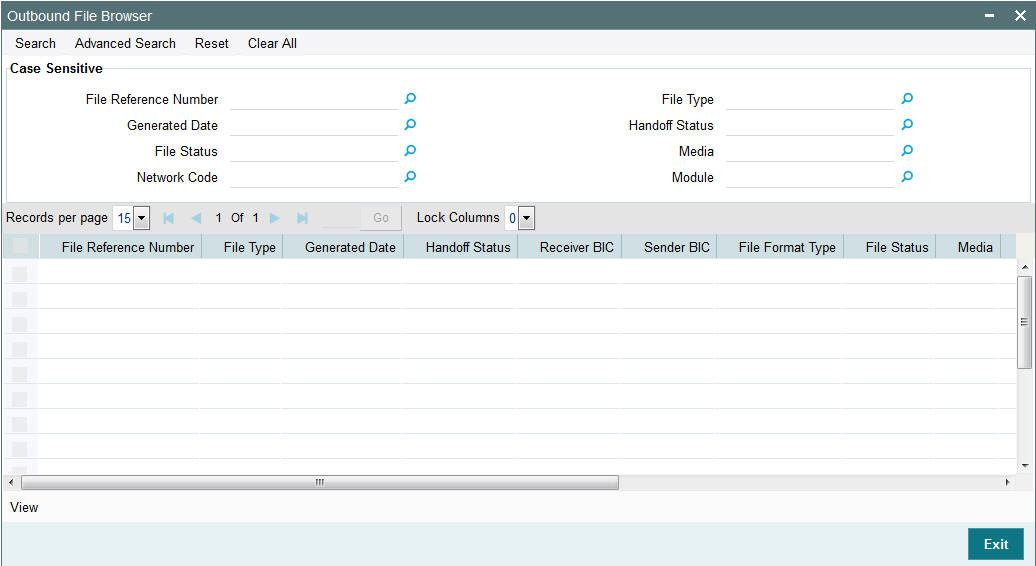
You can specify the following fields:
File Reference Number
Specify the File Reference Number of the generated file.
Generated Date
Specify the date of the generated file.
File Status
Specify the file status of the generated file.
Network Code
Specify the network code of the generated file.
File Type
Specify the type of the generated file.
Handoff Status
Specify the handoff status of the generated file.
Media
Specify the media of the generated file.
Module
Specify the module of the generated file.
2.5.5 Invoking Inbound File Browser Screen
This new screen can be used to view the bulk files received from SWIFT Net through the FileAct connectors.
You can search based on the File Name, Received date time and status of the file.
Files received through FileAct connectors is sent to the EMS after parsing the payload file.
De-bulking of the file happen in the EMS.
You can invoke ‘Inbound File Browser’ screen by typing ‘MSSIFBRW’ in the field at the top right corner of the Application tool bar and clicking on the adjoining arrow button...
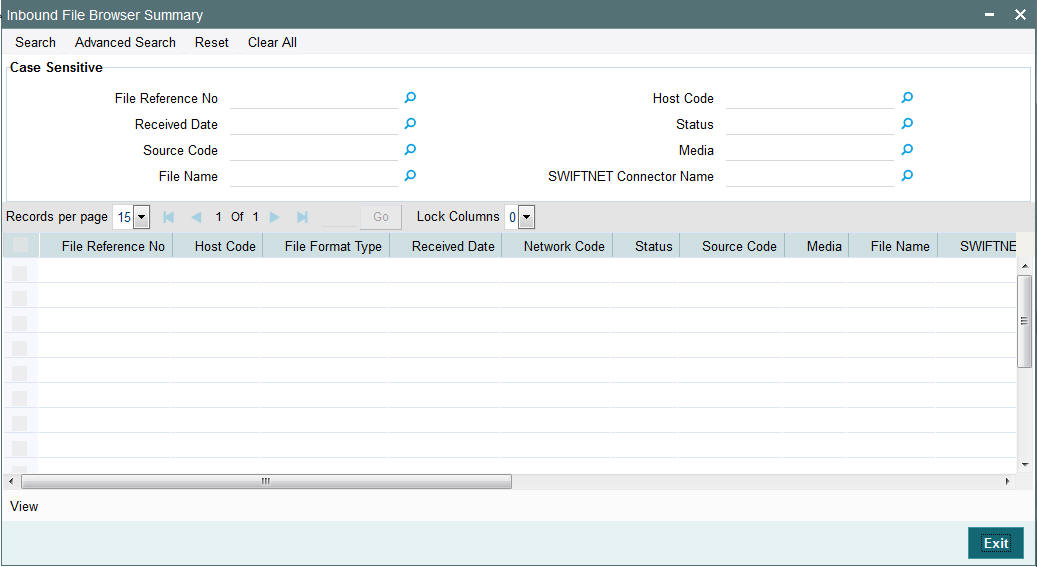
You can specify the following fields:
File Name
Specify the name of the received file.
File Reference Number
Specify the unique reference number of the generated file.
Received Date
Specify the date and time of the received file.
Status
Specify the status of the file.
FileAct Connector Name
Specify the connector through which the file is received.
Host Code
Specify the host code of the received file.
Source Code
Specify the source code of the received file.
Media
Specify the media of the generated file.