2. Payments Maintenance
Oracle FLEXCUBE Payments aims at providing a payment solution which cater to requirements of both Retail/Corporate segments.
This chapter enumerates the maintenance of reference information used by the Payments. It is possible to maintain preferences and parameters applicable for different payment types using the maintenances available. In addition to common maintenances, certain common processes which are applicable across payment types are explained as well.
2.1 Payment Maintenances
Generic maintenances helps in defining various parameters as required by the bank, for payment processing.
2.1.1 Source Maintenance
Source maintenance screen is used to identify an external system or source from which payments system receives a payment request.
You can invoke the ‘Source Maintenance’ screen by typing ‘PMDSORCE’ in the field at the top right corner of the application toolbar and clicking the adjoining arrow button.Click new button on the Application toolbar.
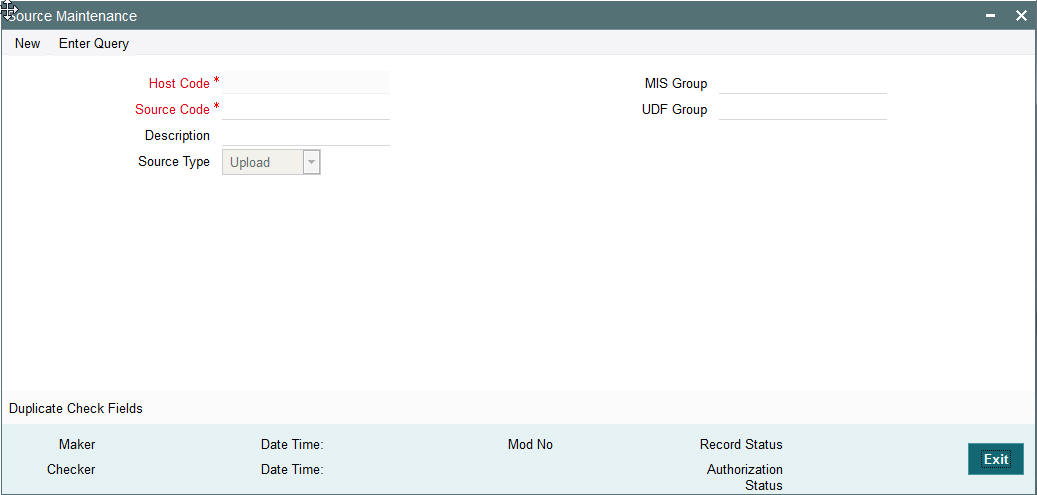
Source codes are defined Host specific. User’s logged in Host is defaulted while creating a new source code.
You can specify the following fields:
Source Code
Specify a unique source code.
Description
Specify a brief description on the source code.
Source Type
Select the source type from the drop-down list. The list displays the following values:
- Upload
- Manual Input
Duplicate Check Parameters
Preferences for duplicate check can be maintained for a Source.
Duplicate Check Required flag
Check this flag if duplicate check is applicable to the source.
Duplicate Check Period in days
Specify the duplicate check period in days. Transactions booked during duplicate check period is compared to find the duplicate transactions.
Duplicate Check Fields
Select the fields based on which duplicate check has to be performed for a payment transaction if ‘Duplicate Check Required’ flag is checked. The following are the fields listed:
- Transfer Currency
- Transfer Amount
- Debtor Account (if IBAN is required for a network Debtor IBAN field is considered)
- Creditor Account (if IBAN is required for a network Creditor IBAN field is considered)
- Creditor Bank
- Debtor Bank
- Customer Number
- End to End Id
- Transaction Id
- Network
2.1.2 Viewing Source Maintenance
You can view all payment sources maintained in the system using ‘Source Maintenance Summary’. You can invoke the ‘Source Maintenance Summary’ screen by typing ‘PMSSORCE’ in the field at the top right corner of the application toolbar and clicking the adjoining arrow button..
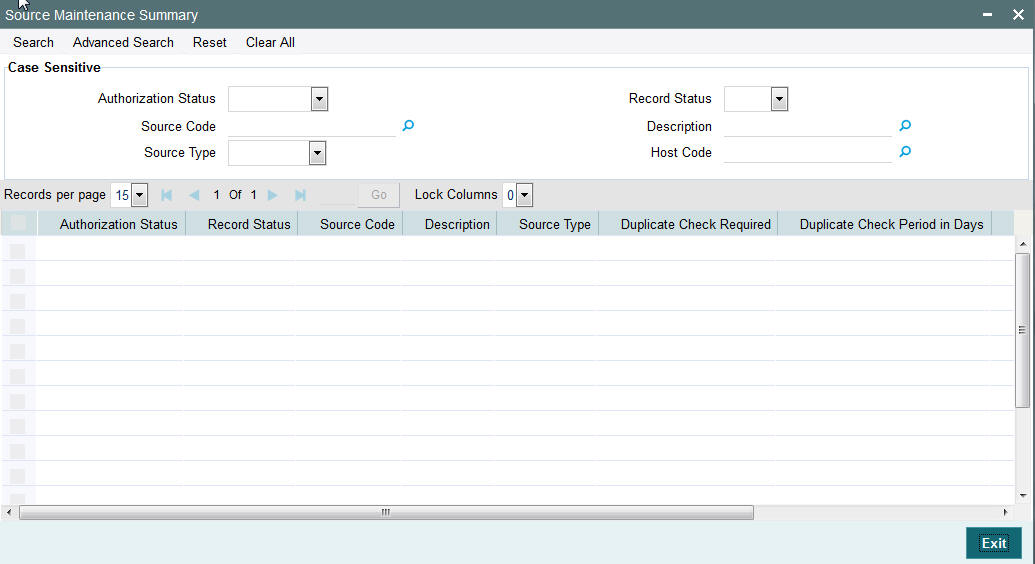
You can search using one or more of the following parameters:
- Authorization Status
- Record Status
- Source Code
- Description
- Source Type
- Host Code
Once you have specified the search parameters, click ‘Execute Query’ button. The system displays the records that match the search criteria.
Double click a record to view the detailed source maintenance screen. You can also export the details of selected records to a file using ‘Export’ button.
2.1.3 Network Maintenance
You can maintain clearing network that supports local payments using ‘Network Maintenance’ screen.
Every network code is linked to a payment type and host code. The same Network code is allowed to be maintained with multiple host combinations.
You can invoke the ‘Network Maintenance’ screen by typing ‘PMDNWMNT’ in the field at the top right corner of the application toolbar and clicking the adjoining arrow button.Click new button on the Application toolbar..
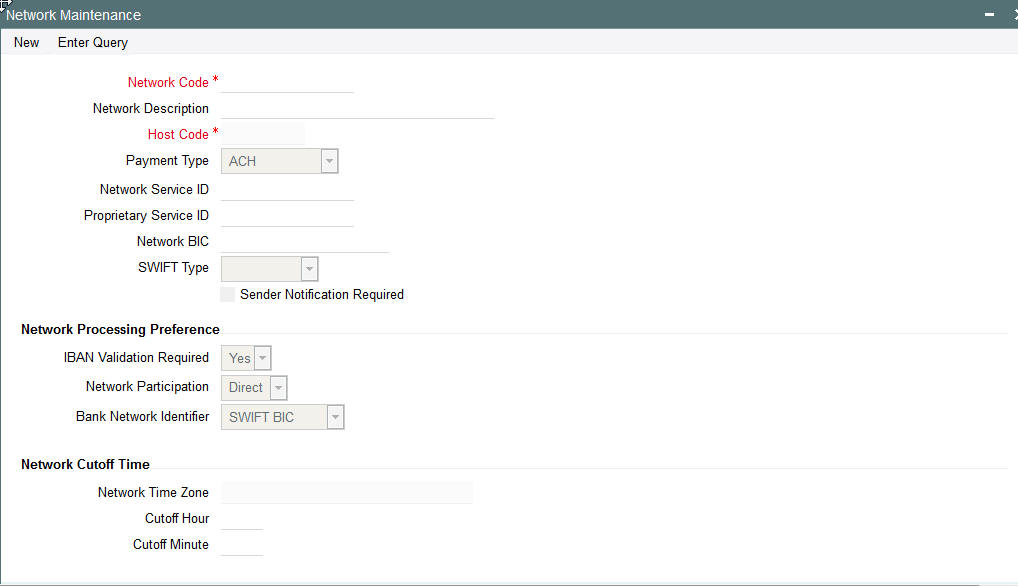
You can specify the following fields;
Network Code
Specify a unique code for the network.
Network Description
Specify a brief description on the network code.
Host Code
Host Code is defaulted as your logged in Host.
Payment Type
Select the payment type from the drop-down list. The list displays the following values:
- ACH
- Book Transfer
- RTGS
- Faster Payment
- Cross Border
- Direct Debits
Network Service ID
Specify the ISO clearing identification code. Alternatively, you can select the network service ID from the option list. The list displays all valid network service IDs maintained in the system.
Proprietary Service ID
Specify the proprietary service ID if the network service ID is proprietary in nature.
Network BIC
Specify the network BIC. Alternatively, you can select the network BIC from the option list. The list displays all valid network BIC maintained in the system. This is used in SEPA dispatch file generation.
SWIFT Type
Specify the type of SWIFT. Select any one of the following:
- FIN
- FIN Y-COPY
Sender Notification Required
Check this box to request MT012 for the outgoing RTGS message.
Network Processing Preferences
IBAN Validation Required
Select whether IBAN validation is required from the drop down list. Options are as follows:
- Yes
- No
This field is not applicable for the payment type ‘Book Transfer’.
Network Participation
Select the bank’s network participation type from the drop-down list. The list displays the following values:
- Direct
- Indirect
Bank Network Identifier
Select the bank network identifier from the drop-down list. The list displays the following values:
- SWIFT BIC - If SWIFT BIC is selected, then the SWIFT addresses maintained for the bank in local bank code directory will be used for bank identification.
- Local Bank Code - If Local Bank Code is selected, the bank codes maintained in Local Bank Directory will be applicable for bank identification.
Network Cutoff Time
Network Time zone
The system defaults the time zone applicable for the host.
Cutoff Hour
Specify the network cut-off hour.
Cutoff Minute
Specify the network cut-off minute.
2.1.4 Viewing Network Maintenance Summary
You can view a summary of network using ‘Network Maintenance Summary’ screen. To invoke this screen, type ‘PMSNWMNT’ in the field at the top right corner of the application toolbar and click the adjoining arrow button.
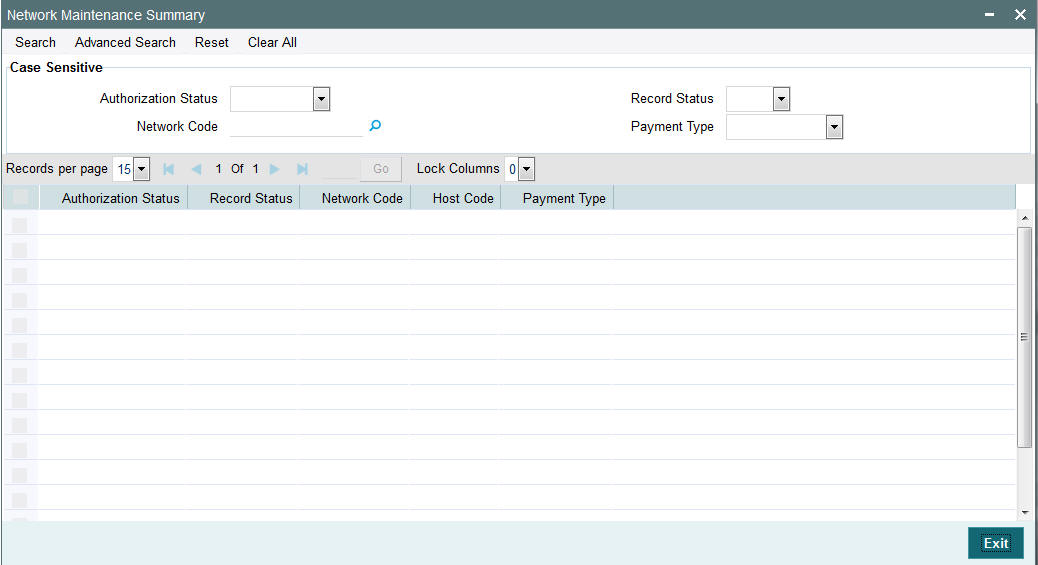
You can search for the networks using one or more of the following parameters:
- Authorization Status
- Record Status
- Network Code
- Payment Type
Once you have specified the search parameters, click ‘Execute Query’ button. The system displays the records that match the search criteria.
Double click a record to view the detailed network maintenance screen. You can also export the details of selected records to a file using ‘Export’ button
2.1.5 Network Preference
You can maintain network preferences for combination of Network and transaction type using ‘Network Preference’ screen.
In this screen, you can specify the following preferences:
- Exchange Rate Preferences
- Sanction System Preferences
- Charge Claim Preferences
- Exception Preferences for Domestic Low Value Payments
- Faster Payment Preferences
You can invoke the ‘Network Preference’ screen by typing ‘PMDNWPRF’ in the field at the top right corner of the application toolbar and clicking the adjoining arrow button.Click new button on the Application toolbar..
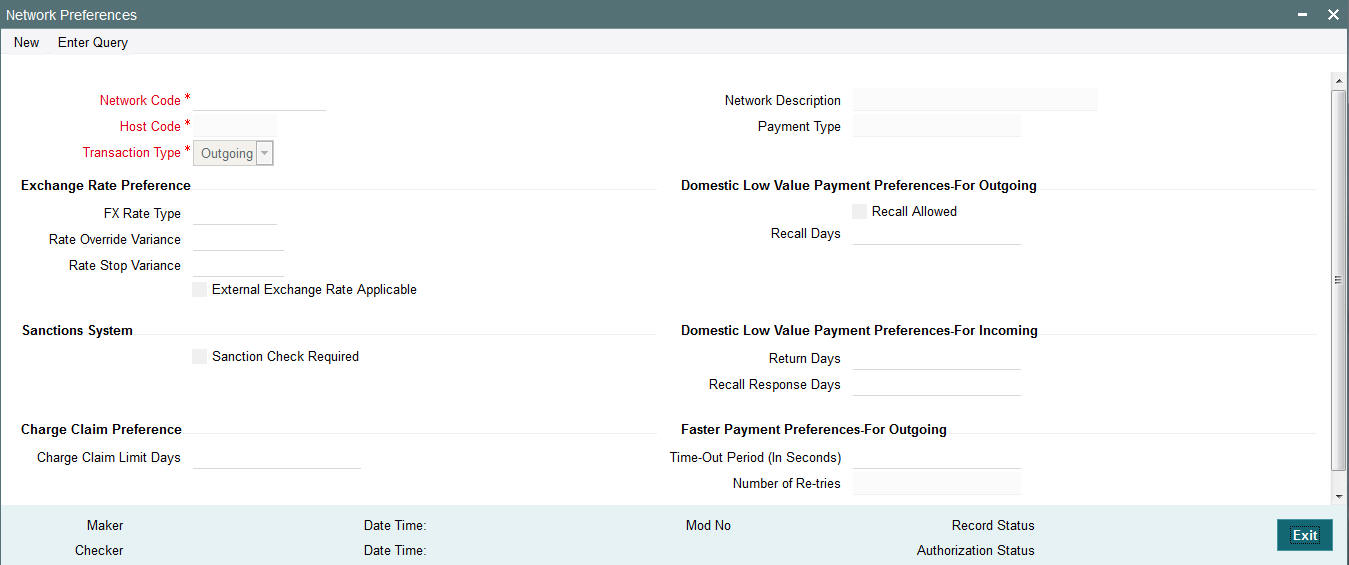
You can specify the following fields;
Network Code
Specify the network code. Alternatively, you can select the network code from the option list. The list displays all valid network codes applicable for the logged in Host, maintained in the system.
Network Description
The system displays the network code description.
Host Code
Host code is defaulted as the logged in Host.
Payment Type
The system displays the payment type based on the network code selected.
Transaction Type
Select the payment transaction type from the drop-down list. The list displays the following values:
- Incoming
- Outgoing
Exchange Rate preferences
FX Rate Type
Specify the FX rate type. Alternatively, you can select the FX rate type from the option list. The list displays all open and authorised exchange rate types maintained in the system.
Rate Override Variance
Specify the rate override variance.
If the variance between the exchange rate manually provided for a payment with internal rate exceeds the override limit specified, then the system displays a message and the transaction is saved.
Rate Stop Variance
Specify the rate stop variance. The system displays an error message if the exchange rate variance exceeds the stop limit.
External Exchange Rate System Applicable
Check this box to receive the exchange rate from the external system.
Note
External rate fetch is applicable only if the transfer amount is above the small FX limit maintained in Network Currency preferences (PMDNCPRF).
Other Preferences
Sanction Check System Required
Check this box if the transaction details has to be sent for sanction check.
Domestic Low Value Payment Preferences
Recall Allowed
Check this box if the network allows recall of an outgoing payment already sent.
Recall Days
Specify the number of days within which the payment originating bank has to recall an outgoing payment.
Return Days
Specify the number of days within which the beneficiary bank has to return an incoming payment which cannot be credited to creditor account. Return days are always be considered as working days based on Network holidays. For an incoming return processing, the system validates whether the return is being processed within the allowed number of days from incoming payment settlement date.
Recall Response Days
Specify the number of days within which the beneficiary bank has to respond to an incoming recall request.
Recall days will always be considered as working days based on Network holidays.
While doing recall response processing, it is validated whether the response is being processed within the allowed number of days from recall received date.
Faster Payment Preferences
Time-out period
You can specify time out period in seconds for receiving the response from the CI (Clearing Interface) for an outward Faster payment sent earlier.
Number of Re-tries
Number of times the Faster Payment outward message can be re-sent if a response is not received for the original outward message or the previous re-tried message. This is defaulted and fixed to “1” currently.
Charge Claim Preferences
Charge Claim Limit Days
You can capture the maximum number of days after the customer/bank payment value date that the MTn91 for charge claim can be received
2.1.6 Viewing Network Preference
You can view a summary of network preferences using ‘Network Preference Summary’ screen. To invoke this screen, type ‘PMSNWPRF’ in the field at the top right corner of the application toolbar and click the adjoining arrow button.

You can search using one or more of the following parameters:
- Authorization status
- Record status
- Transaction Type
- Network Code
- Payment Type
Once you have specified the search parameters, click ‘Execute Query’ button. The system displays the records that match the search criteria.
Double click a record to view the detailed Network Preference screen. You can also export the details of selected records to a file using ‘Export’ button
2.1.7 Network Currency Preferences
You can maintain all currency related parameters for a Network and transaction type combination using ‘Network currency preference’ screen.
You must maintain network currency preferences for all transfer currencies allowed for the network.
For book transfer payments, network currency preference for the allowed credit currencies is needed to be maintained.
You can invoke the ‘Network Currency Preference’ screen by typing ‘PMDNCPRF’ in the field at the top right corner of the application toolbar and clicking the adjoining arrow button.Click new button on the Application toolbar..
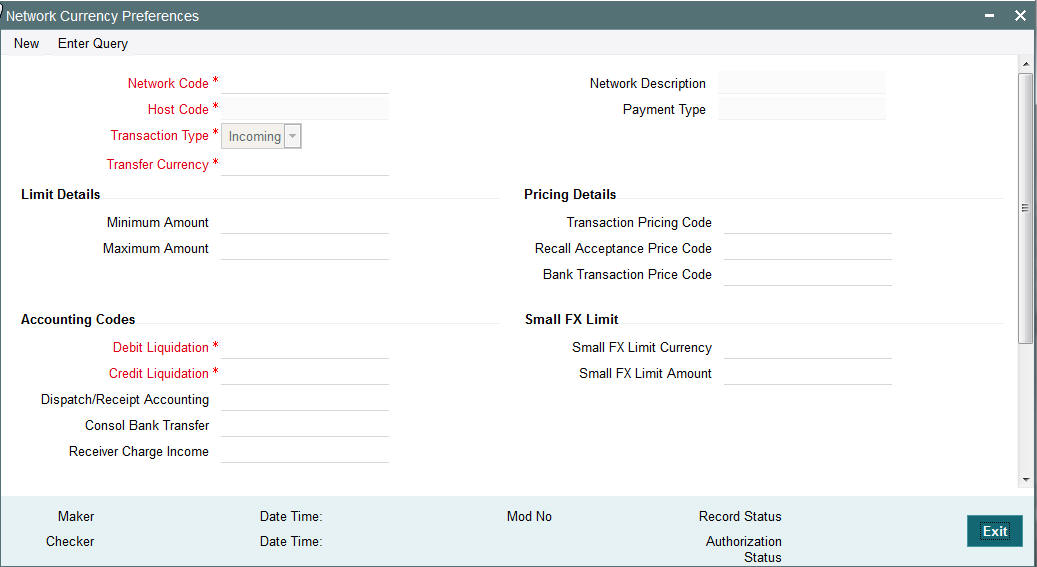
You can specify the following fields:
Network Code
Specify the network code. Alternatively, you can select the network code from the option list. The list displays all valid network codes applicable for the logged in Host.
Network Description
The system displays the network code description.
Host Code
The system displays the host code based on logged in Host.
Payment Type
The system displays the payment type based on the network code.
Transaction Type
Select the transaction type from the drop-down list. The list displays the following values:
- Incoming
- Outgoing
Transfer Currency
Specify the transfer currency. Alternatively, you can select the transfer currency from the option list. The list displays all valid currency codes maintained in the system.
Limits Details
Minimum Amount
Specify the minimum transaction amount.
Maximum Amount
Specify the maximum transaction amount.
Note
Payments booked should have transaction amount between the minimum and maximum amount specified in the transaction currency. If the transaction amount is not in the specified range, the system displays an error message.
Small FX Limit
Small FX Limit Currency
Specify the small FX limit currency code. Alternatively, you can select the currency code from the option list. The list displays all valid currency codes maintained in the system.
For payments with cross currency conversions, the transfer amount is converted to equivalent amount in the small FX limit currency and is compared with small FX limit amount. If the amount is less than the limit specified, then the internal rates maintained in the system is picked up for currency conversion.If it is more than the limit specified, and if external exchange rate is not applicable, then payments are moved to exchange rate queue. If external exchange rate is applicable, then request is sent to External Rate system.Payment is logged n External Exchange Rate Queue if the rate is not obtained from External system.
If no limit is maintained, then limit check is skipped and internal rates are applied for the payment.
Pricing Details
Pricing Code
Specify the pricing code applicable to the Network, transaction type and currency. You can also select the pricing code from the option list. The list displays all valid pricing codes maintained in the system.
Recall Acceptance Price Code
Specify the Recall Acceptance price code. This is applicable to domestic low value payments based on the Network support available for recall acceptance charges. Alternatively, you can select the pricing code from the option list. The list displays all valid Recall Acceptance Price codes maintained in the system.
Note
The option list has a list of all price codes with single component linkage.
Bank Transaction Pricing Code
Pricing code applicable for Bank transfers can be specified in this field.
Accounting Codes
Debit Liquidation
Specify the accounting code for debit liquidation. Alternatively, you can select the debit liquidation code from the option list. The list displays all accounting codes where main transaction is maintained with debit indicator.
Credit Liquidation
Specify the accounting code for credit liquidation. Alternatively, you can select the credit liquidation code from the option list. The list displays all accounting codes where main transaction is maintained with credit indicator.
Dispatch/Receipt Accounting
Specify the accounting code for dispatch accounting. Alternatively, you can select the dispatch accounting code from the option list. The list displays all valid codes maintained in the system.
Note
- Dispatch accounting is applicable to outgoing domestic low value payment files. Accounting code needs to be maintained for Transaction type 'Outgoing' if Dispatch accounting is required.
- Receipt accounting is for incoming files. Accounting code needs to be maintained for Transaction type 'Incoming' if Receipt accounting is required.
Consol Bank Transfer
Accounting code for cross-border consolidated bank transfer can be specified in this field.
Receiver Charge Income
Accounting code for receiver charge income posting for cross-border payments can be specified in this field.
Authorization Limits
Authorization Limit 1
Payment Transactions are moved to Authorization Limit 1 Queue if transaction amount exceeds the authorization limit 1 maintained.
Authorization Limit 2
The transactions are moved to Authorization Limit Level 2 Queue if transaction amount exceeds the authorization limit 2 maintained.
Note
Authorization Limits should be greater than or equal to Minimum Network Limit maintained and should be less than or equal to Maximum Network Limit. Authorization Limit 2 should be greater than Authorization Limit 1.
- Payment transactions is be moved to Authorization Limit Level 1 Queue if transaction amount exceeds the authorization limit 1 maintained for Payment transactions.This check is done after initial validations.
- The transactions will be moved to Authorization Limit Level 2 Queue if transaction amount exceeds the authorization limit 2 maintained.
- These checks will be applicable for both channel and user input transactions. These checks are not applicable for payments processed in bulk.
- Authorization limits check are applicable for
- Domestic Low Value Payments (ACH)
- Book Transfer
- Domestic High value Payments (RTGS)
- Cross border Payments
Return Accounting
Payment Return GL
Specify the Return GL code. Alternatively, you can select the GL code from the option list. The list displays all GL codes maintained in the system.
Note
Return GL is used in scenarios when the incoming payment processing could not be completed and return is initiated from queues.
2.1.8 Viewing Network Currency Preference
You can view summary of network currency preferences using ‘Network Currency Preference Summary’ screen. To invoke this screen, type ‘PMSNCPRF’ in the field at the top right corner of the application toolbar and click the adjoining arrow button.
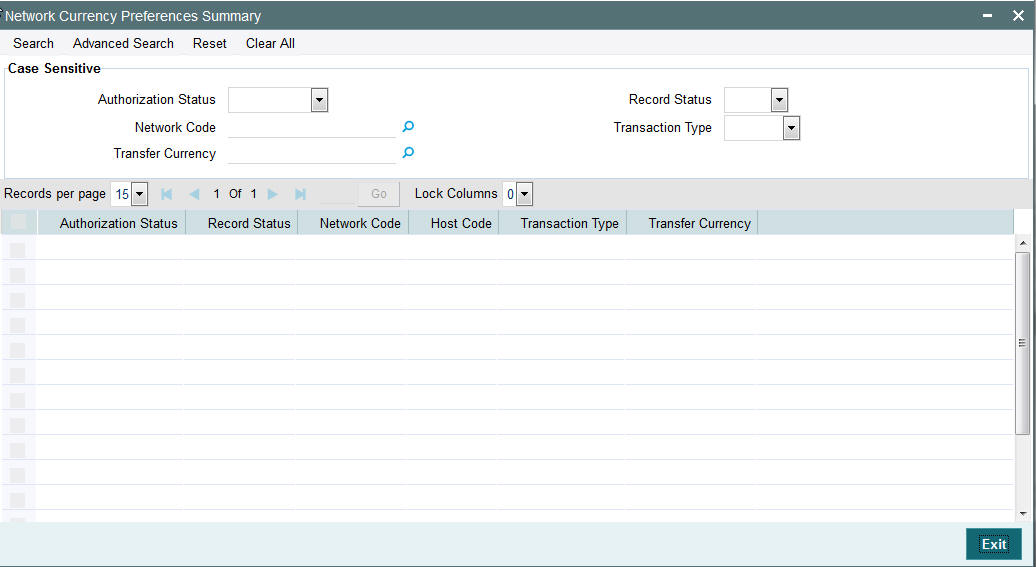
You can search using one or more of the following parameters:
- Authorization Status
- Network Code
- Transaction Type
- Record status
- Transfer Currency
Once you have specified the search parameters, click ‘Search’ button. The system displays the records that match the search criteria.
Double click a record to view the detailed Network Currency Preference screen. You can also export the details of selected records to a file using ‘Export’ button.
2.1.9 Source Network Preferences
You can maintain Source Network Preferences for capturing preferences at source and network level for each transaction type.
Usage of Source Network Preferences
- External system Communication Method preference can be maintained for a network & source.Options available are ‘Synchronous’ & ‘Asynchronous.
- If ‘Synchronous’ option is chosen, after sending requests to external systems, system waits for response as part of the same session. For an asynchronous call, session is broken before the response is received.
- If Asynchronous option is chosen and external system processing is involved for a transaction, on authorization of a payment transaction, you will receive the message ‘Transaction is submitted for processing’. End status of the transaction processing is not be available as part of information message displayed.
- For Cross-border networks, the system allows asynchronous communication method only with external systems.For Faster Payments, synchronous method is followed.
- Authorization re-key required flag is added in Source Network preferences.If re-key is required, it is possible to maintain the re-key fields applicable.
- The list of fields is populated based on the payment type linked to the Network selected.
- Static maintenance is provided for populating available field values for each payment type/transaction type.
- All applicable re-key fields is part of the Authorization screen.For any of the available fields, if re-key is not applicable, actual field values are populated by system and the fields are disabled in authorization screen. In authorization screen, fields for which re-key is applicable will be null and editable by user.
- On processing authorization, the system checks whether re-key values by the authorizer are matching with actual values available as part of transaction details
You can invoke ‘Source Network Preferences’ screen by typing ‘PMDSORNW’ in the field at the top right corner of the Application toolbar and clicking on the adjoining arrow button.
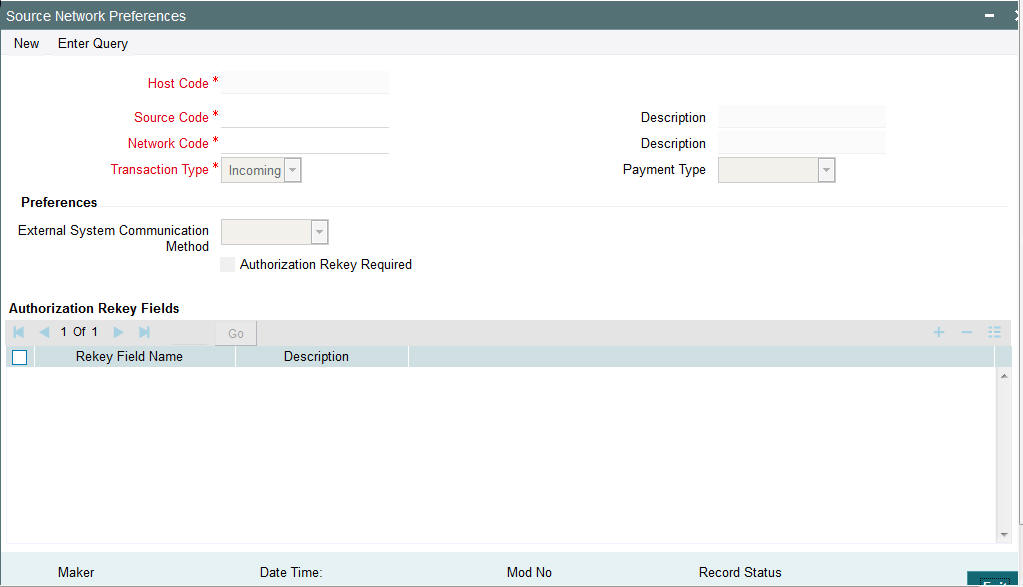
You can specify the following fields:
Host Code
Defaults the Host Code of the logged in branch.
Source Code
Specifies all valid source codes applicable.
Source Description
Displays the description of the source code.
Network Code
Specifies all valid network codes applicable to the host.
Network Description
Specifies the description of the network.
Payment Type
Specifies the type of payment linked to the network.
Transaction Type
Specifies the type of transaction. The options are Outgoing and Incoming.
External System Communication Method
Specifies the Communication Method for External System. Choose between Asynchronous and Synchronous.
Authorization Re-key Required
Check this box if Re-key is required for authorization.
Rekey Field Name
Select the required field that requires re-key authorization. All valid fields are listed
Field Description
This field is applicable based on the Rekey field chosen.
2.1.10 Viewing Source Network Preferences Summary
You can view summary of network network preferences using ‘Network network Preference Summary’ screen. To invoke this screen, type ‘PMSSORNW’ in the field at the top right corner of the application toolbar and click the adjoining arrow button.
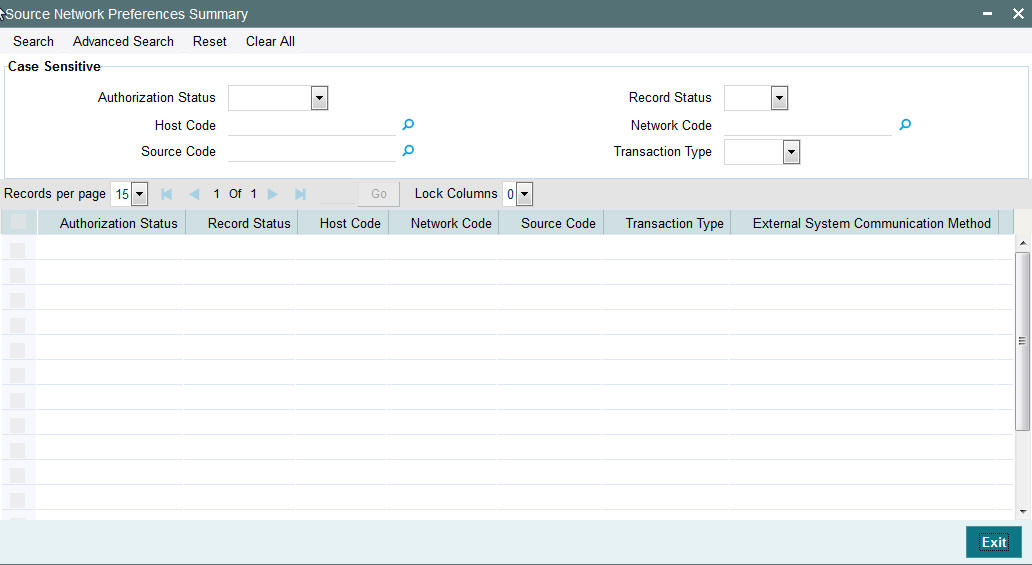
You can search using one or more of the following parameters:
- Authorization Status
- Record Status
- Host Code
- Network Code
- Source Code
- Transaction Type
Once you have specified the search parameters, click ‘Search’ button. The system displays the records that match the search criteria.
2.1.11 Network Rule Maintenance
You can maintain network rules using ‘Network Rule Maintenance’ screen.
Usage of this screen
- This will be maintenance at host level. Rule Expression field is disabled for this screen.
- Once expressions are built for a rule in Network Rule Definition screen (PMDNRDEF), it gets automatically reflected in the Rule maintenance screen.
You can invoke the ‘Network Rule Maintenance’ screen by typing ‘PMDNWRLE’ in the field at the top right corner of the application toolbar and clicking the adjoining arrow button.Click new button on the Application toolbar.
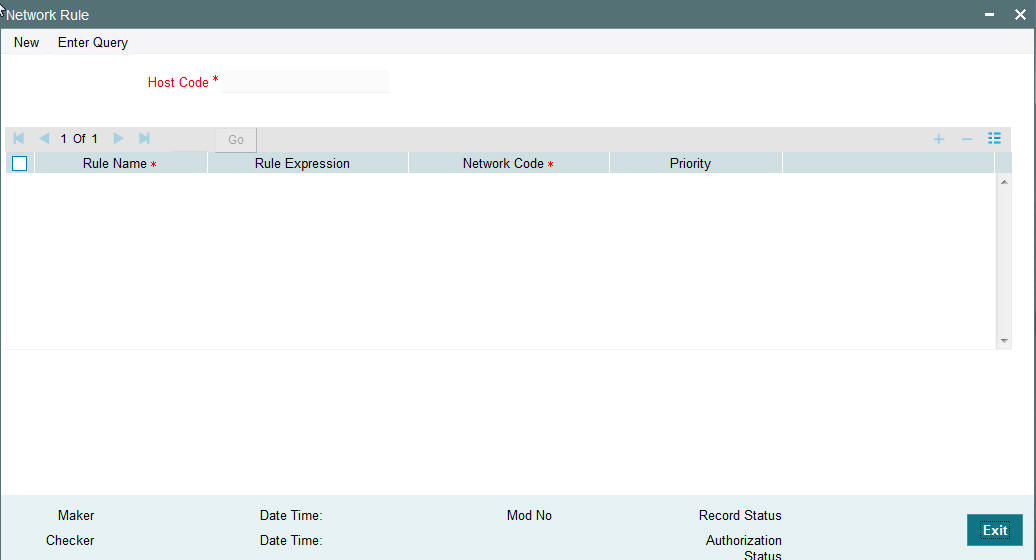
You can specify the following fields;
Host Code
Specify the host code. Alternatively, you can select the host code from the option list. The list displays all valid host codes maintained in the system.
Host Description
The system displays the host description.
Priority No
Specify the priority number for rule execution.
Rule
Specify the network resolution rule.
Network Code
Specify the network code. Alternatively, you can select the network code from the option list.
Note
Network is resolved based on the condition which gets satisfied first on priority order
2.1.12 Viewing Network Rule Summary
You can view a summary of network maintenances using ‘Network Rules Resolution Summary’ screen. To invoke this screen, type ‘PMSNWRLE’ in the field at the top right corner of the application toolbar and click the adjoining arrow button.
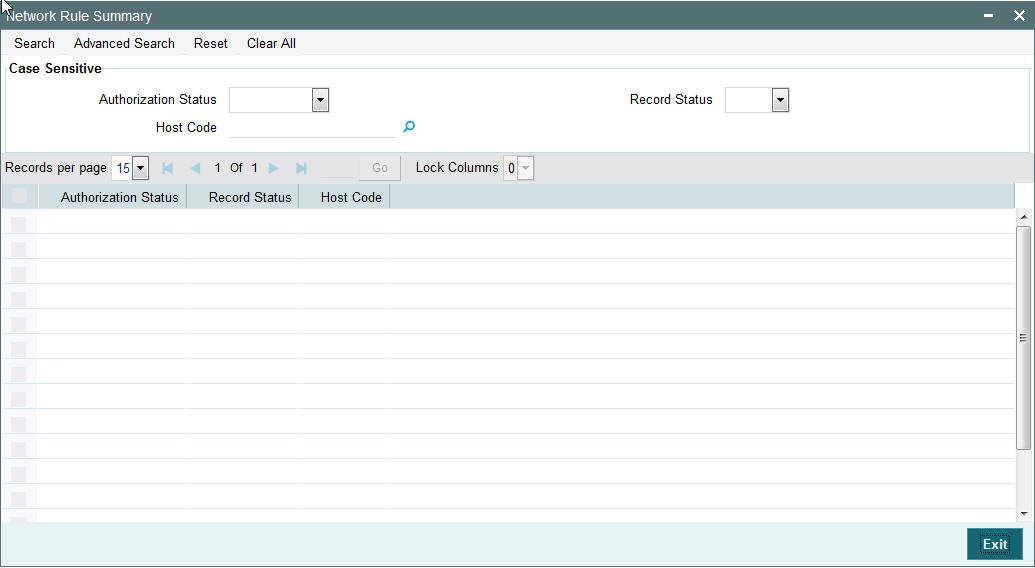
You can search using one or more of the following parameters:
- Authorization status
- Record status
- Host Code
Once you have specified the search parameters, click ‘Execute Query’ button. The system displays the records that match the search criteria.
Double click a record or click the ‘Details’ button after selecting a record to view the detailed screen.
2.1.13 Network Rule Definition
You can use this screen for building the expressions related to a Rule maintained.
Once expressions are built for a rule, it gets automatically reflected in the Rule maintenance screen.
You can invoke the ‘Network Rule Definition’ screen by typing ‘PMDNRDEF’ in the field at the top right corner of the application toolbar and clicking the adjoining arrow button.Click new button on the Application toolbar.
Below mentioned elements are used to create a rule:
- TRANSFER_CURRENCY
- TRANSFER_AMOUNT
- CREDITOR_AGENT_BIC
- SERVICE_LEVEL
- INSTRUCTION_PRIORITY
- BRANCH_CODE
- CATEGORY_PURPOSE
- CREDITOR_AGENT_BIC
- CREDITOR_AGENT_MEMBER_ID
- DEBTOR_AGENT_BIC
- DEBTOR_AGENT_MEMBER_ID
- INSTRUCTION_PRIORITY
- INTERMEDIARY_AGENT_BIC
- INTERMEDIARY_AGENT_MEMBER_ID
- IS_PMNT_LOCAL_CURRENCY
- RECEIVER_BANK_BIC
- SENDER_BANK_BIC
- SENDER_BANK_MEMBER_ID
- SERVICE_LEVEL
- SOURCE_CODE
- IS_CREDITOR_AGENT_LCLCLG_BANK
- IS_CREDITOR_AGENT_RTGSPARTICIPANT
- DERIVED_PAYMENT_TYPE
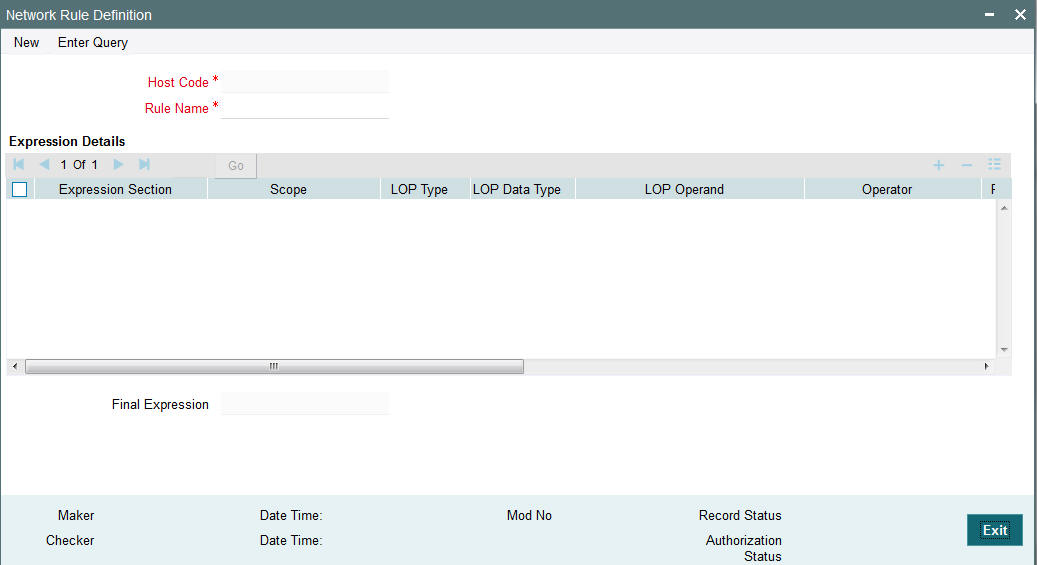
You can specify the following fields:
Left /Right Operand Type
Left /Right Operand Type can be Parameter or Constant. Select the required value.
Data Type
Data Type can be String, Number, Boolean or Date. Select the required value.
Operators
Operators can be Greater Than, Less Than, Not Equal To, Equal to, Greater Than Or Equal To and Less Than or Equal To. Select the required value.
Logical Operators
Logical operators can be AND /OR. Select the required value.
If multiple expression sections are maintained, they are maintained with logical operators.
Final Expression
Final Expression is defaulted on save of the Rule definition and is updated for the Rule on authorization of the record. Specify the required value.
2.1.14 Viewing Network Rule Definition Summary
You can view a summary of network rule definitions using ‘Network Rule Definition Summary’ screen. To invoke this screen, type ‘PMSNRDEF’ in the field at the top right corner of the application toolbar and click the adjoining arrow button.
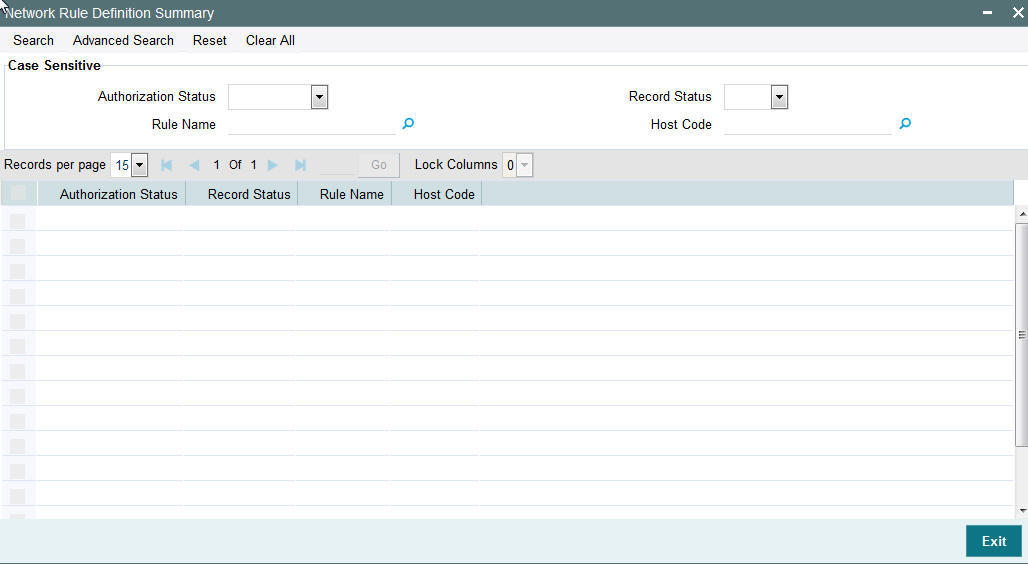
You can search using one or more of the following parameters:
- Authorization status
- Record status
- Rule Name
- Host Code
Once you have specified the search parameters, click ‘Execute Query’ button. The system displays the records that match the search criteria.
Double click a record or click the ‘Details’ button after selecting a record to view the detailed screen.
2.1.15 Payment Processing Cut off Time
You can define currency wise transaction cutoff time using ‘Payment processing cutoff time’ screen.
You can select applicable source, customer service model or customer, if required. The system displays an error, if processing cut off is maintained for Book transfer networks.
Note
- Cut-off time check is based on the application server time at the time of payment processing.
- Cut-off time maintenance is applicable for payments with ‘Outgoing’ transaction type.
You can invoke the ‘Payment Processing Cutoff Time’ screen by typing ‘PMDCTOFF’ in the field at the top right corner of the application toolbar and clicking the adjoining arrow button.Click new button on the Application toolbar..
You can specify the following fields:
Host Code
This field is displayed as user's logged in Host.
Network Code
Specify the network code. Alternatively, you can select the network code from the option list. The list displays all valid network codes maintained in the system.
Network Description
The system displays the network description.
Payment Type
The system displays the payment type based on the network selected.
Source Code
Specify the source code for which cutoff is maintained. Alternatively, you can select the source code from the option list. The list displays all valid source codes maintained in the system.
Note
You can also select the value ALL, if required.
Customer Service Model
Specify the customer service model for which cut off is maintained. Alternatively, you can select the Service model from the option list. The list displays all valid customer service models maintained in the system.
Note
You can also select the value ALL, if required.
Customer Number
Specify the customer number. Alternatively, you can select the customer number from the option list. The list displays all valid customer numbers maintained in the system.
Note
- If Service model is selected as ALL, then customer number should be selected as ALL only.
- If Service model is selected as specific, then specific CIF numbers of that Service model linkage alone will be listed.
Move forward to next working day
Check this box if the value date should be moved to next working day for post cutoff transactions.
Transfer Currency
Specify the payment currency. Alternatively, you can select the transfer currency from the option list. The list displays all valid currency codes maintained in the system.
Cutoff Hours
Specify the cutoff time in hours.
Cutoff Minutes
Specify the cutoff time in minutes.
Debit Float Days
You can specify Debit float days applicable for the payment.
Credit Float Days
You can specify Credit float days applicable for the payment. Credit Float Days should be greater than or equal to Debit Float Days.
Note
Float days are currently applicable to outgoing Domestic low value/Cross-border payments
2.1.16 Payment Processing Cutoff Time Summary
You can view a summary of payment processing cutoff using ‘Payment Processing Cutoff Time Summary’ screen. To invoke this screen, type ‘PMSCTOFF’ in the field at the top right corner of the application toolbar and click the adjoining arrow button.
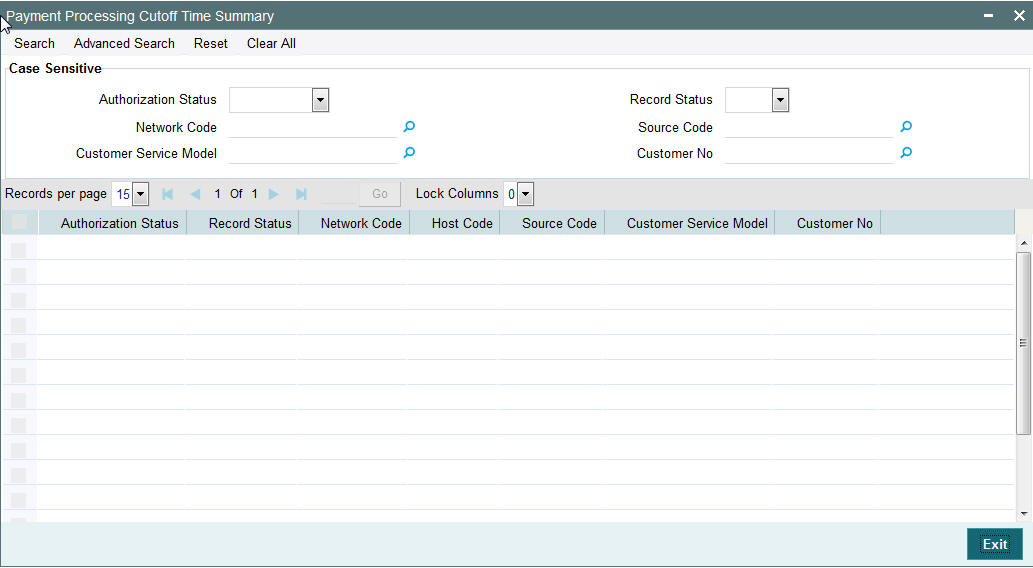
You can search using one or more of the following parameters:
- Authorization Status
- Record Status
- Network Code
- Customer no
- Source Code
- Customer Service Model
Once you have specified the search parameters, click ‘Execute Query’ button. The system displays the records that match the search criteria.
Double click a record or click the ‘Details’ button after selecting a record to view the detailed screen.
2.1.17 Host Parameters
You can maintain parameters for payments at the host level in the ‘Host Parameters’ screen. You can invoke the ‘Host Parameters’ screen by typing ‘PMDHSTPR’ in the field at the top right corner of the application toolbar and clicking the adjoining arrow button.Click new button on the Application toolbar.
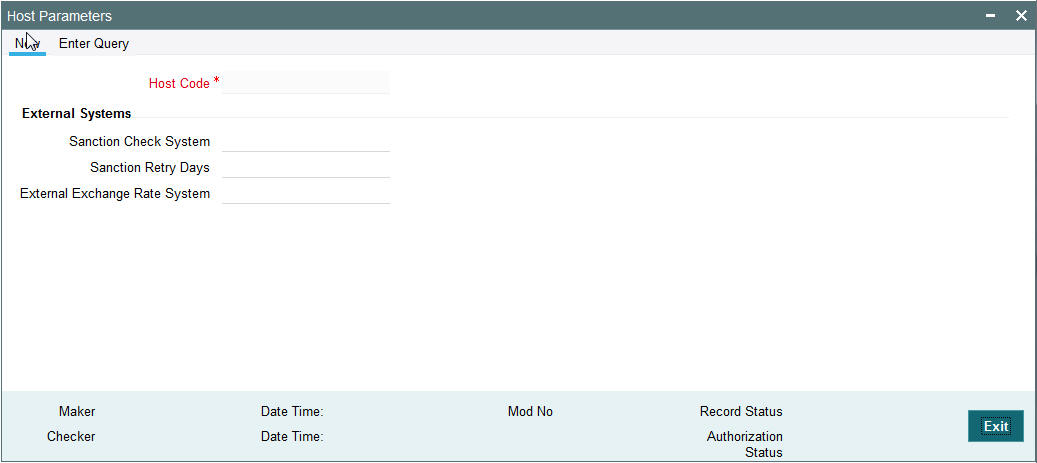
You can specify the following details:
Host Code
Host Code is defaulted as Host code linked to user's logged in Branch.
External Systems
Sanction Check System
Specify the external sanction check system. Alternatively, you can select the sanction check system from the option list. The list displays all valid sanction check external systems.
Sanction Retry Days
Specify the sanction check retry days. Based on the sanction retry days, the sanctions are performed for future dated payments or current dated payments carried forward to next date.
External Exchange Rate System
Specify the external exchange rate system. Alternatively, you can select the external exchange rate system from the option list. The list displays all valid external exchange rate systems.
2.1.18 Viewing Host Parameter Summary
You can view summary of exchange rate in the ‘Host Parameters Summary’ screen. You can invoke the ‘Host Parameters Summary’ screen by typing ‘PMSHSTPR’ in the field at the top right corner of the application toolbar and clicking the adjoining arrow field at the top right corner of the application toolbar and clicking the adjoining arrow button.Click new button on the Application toolbar.
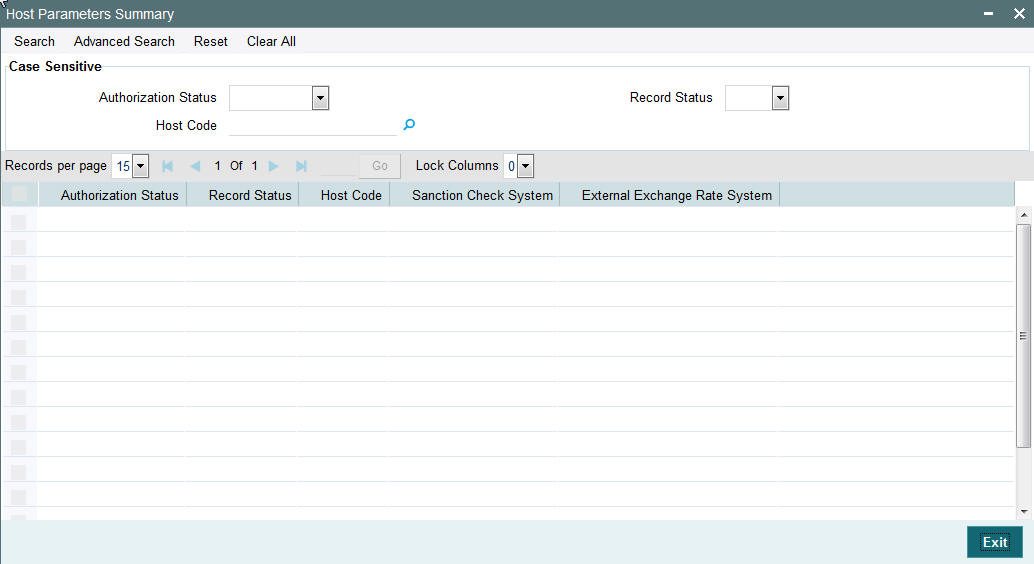
You can search using one or more of the following parameters:
- Authorization Status
- Record Status
- Host Code
Once you have specified the search parameters, click ‘Execute Query’ button. The system displays the records that match the search criteria.
Double click a record or click the ‘Details’ button after selecting a record to view the detailed screen.
2.1.19 Customer Beneficiary Registration
You can maintain beneficiary registration for outgoing payments. When a channel initiates an outgoing payment, first the channel will query the beneficiary details from the payment system and then send the beneficiary details as part of transaction.
Note
- If Beneficiary ID is maintained for internal transfer, it is mandatory to choose account number available in the list of values.
- Bank Identifier and Beneficiary Bank details are not applicable for internal transfer type Beneficiary ID.
You can maintain the beneficiary details linked to a customer for each account in ‘Customer Beneficiary Registration’ screen. You can invoke the ‘Customer Beneficiary Registration' screen by typing ‘PMDBENRG’ in the field at the top right corner of the Application toolbar and clicking on the adjoining arrow button.
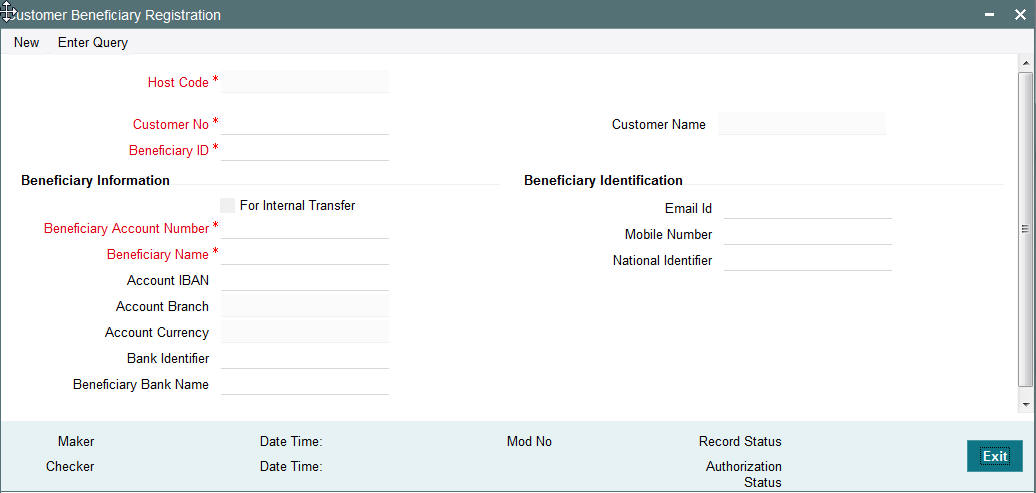
You can specify the following fields:
Host Code
The system displays the customer name.
Customer Number
Specify the customer number for whom beneficiary details are maintained. Alternatively, you can select from the option list. The list displays all valid customer numbers maintained in the system.
Customer Name
The system displays the customer name.
Beneficiary ID
Specify the beneficiary ID.
Beneficiary Information
Beneficiary Name
Specify the name of the beneficiary.
Account Number
Specify the account number of the beneficiary.
Account IBAN
Specify the International Banking Account Number of the beneficiary.
Account Branch
Specify the account number of the beneficiary.
Account currency
Specify the account currency of the beneficiary.
Beneficiary Bank
Specify the bank BIC of the beneficiary. Alternatively, you can select the beneficiary bank BIC from the option list. The list displays all valid bank BICs. This is mandatory if internal transfer flag is not checked.
Bank Name
The system displays the bank name of the beneficiary.
2.1.20 Viewing Customer Beneficiary Registration Summary
You can view the summary of customer beneficiary registration using ‘Customer Beneficiary Registration Summary’ screen. To invoke this screen, type ‘PMSBENRG' in the field at the top right corner of the Application toolbar and clicking on the adjoining arrow button.
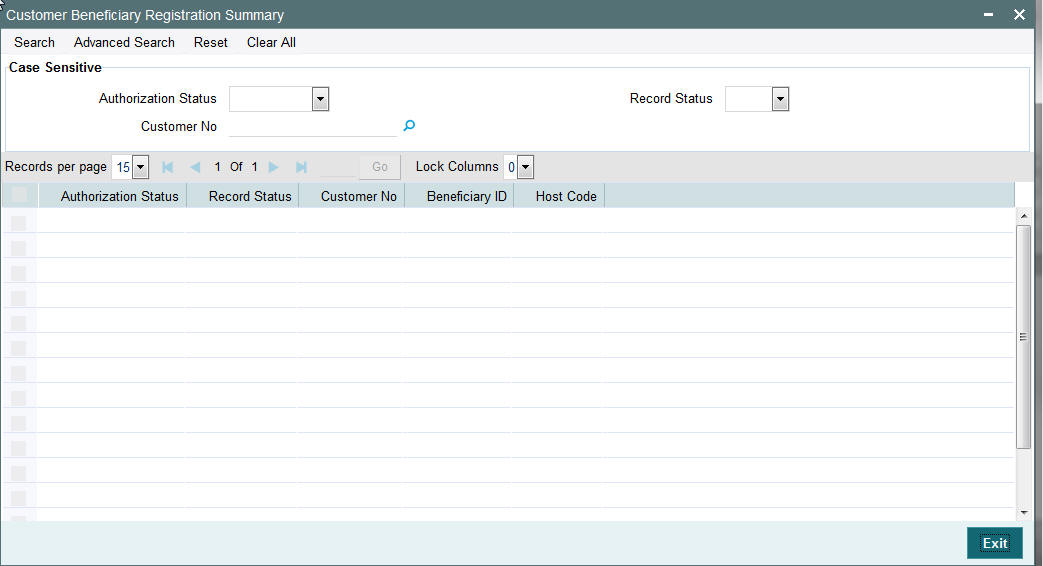
You can search for the records using one or more of the following parameters:
- Authorization status
- Record status
Once you have specified the search parameters, click ‘Execute Query’ button. The system displays the records that match the search criteria.
- Authorization status
- Record status
- Customer No
- Beneficiary ID
Double click a record or click the ‘Details’ button after selecting a record to view the detailed screen.
2.1.21 Maintaining Local Payments Bank Directory
The local clearing bank codes are maintained using the Local Clearing Bank Code Maintenance which is used for processing the local clearing payments.
Usage of this screen
- This is a Host level maintenance.
- This screen also provides the details of the clearing network participation (direct/indirect) for each clearing network
You can invoke the ‘Local Payments Bank Directory’ screen by typing ‘PMDBKMNT’ in the field at the top right corner of the Application tool bar and clicking on the adjoining arrow button.
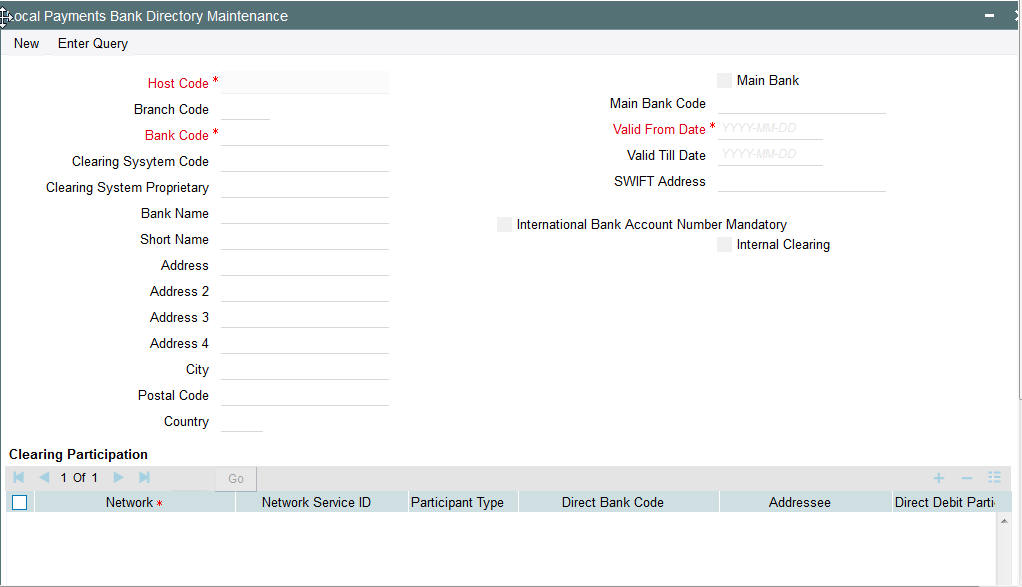
Specify the following details in this screen:
Host Code
Host Code is defaulted as the Host code linked to user's logged in branch.
Branch Code
Select the branch code from the adjoining option list. Alternatively, you can select branch code from the option list. The list displays all valid branch code maintained in the system.
You can use short name to specify the branch name also.
If you check ‘Main Bank’ check box, then this should be left blank.
The system will allow you to specify the value which is not available in the list.
Bank Code
Specify the bank code with which the processing bank can interact.
Clearing System Code
Specify the corresponding ISO code or clearing system Code in this field.
Clearing System Proprietary
Select the corresponding clearing system proprietary.
Bank Name
Specify the full name of the bank.
Short Name
Specify a short name to identify the bank.
Address 1 to 4
Specify the address of the bank.
City
Specify the city in which the bank is located.
Postal Code
Specify the postal code that forms a part of the address.
Country
Select the country code in which the bank is located, from the adjoining option list. All country codes maintained in the system is displayed in this list.
Main Bank
Check this box if the clearing bank code is for the main bank.
Main Bank Code
Select the clearing bank code of the bank which the branch belongs to. If you have specified a branch code, then it is mandatory to select the main bank code.
Valid From Date
Specify the date from which the clearing payments for the specified bank code is valid.
Valid Till Date
Specify the date till which the clearing payments for the specified bank code is valid.
Swift Address
Select the Swift address of the bank, from the adjoining option list. The list displays all valid swift codes maintained in the system.
International Bank Account Number Mandatory
Check this box, if the IBAN of the bank needs to be accompanied with the payment.
Internal Clearing
Check this box if the creditor bank is one of the internal banks maintained in the system.
Clearing Participation
Network Service ID
The system defaults the network service id.
Network
Select the clearing network from the adjoining option list. All valid clearing networks maintained by system are displayed in this field.
Participant Type
Select the participant type as direct or indirect from the drop down values. If indirect relationship is selected, then the direct participant bank codes along with the direct bank account number will be specified. If a message is received from the indirect participant bank code which is maintained in the local payment bank directory, the system derives the debit account for the payment from the direct bank account number specified for the bank code.
The networks from PMDNWMNT for which participant type is maintained are listed in the option list for Creditor bank BIC in PADOTONL.
Direct Bank Code
This field is enabled if participant type is indirect. Select the direct participant bank code from the adjoining option list.
Addressee
Specify the participant bank account number in this field.
Direct Debit Participation
Specifies if the agent code participates in Direct Debit for the corresponding network.
Note
The network will be used to process payment transactions, if you do not specify this field.
2.1.22 Viewing Bank Maintenance Summary
You can view a summary of network maintenances using ‘Bank Maintenance Summary’ screen. To invoke this screen, type ‘PMSBKMNT’ in the field at the top right corner of the application toolbar and click the adjoining arrow button.
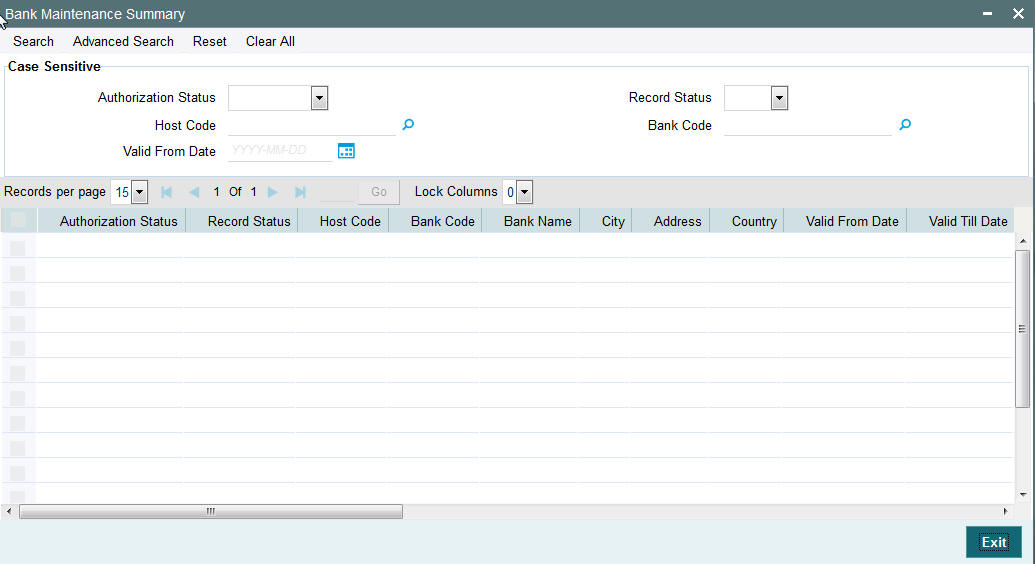
You can search for the networks using one or more of the following parameters:
- Authorization status
- Record status
- Country Code
- Bank code
- Valid From Date
Once you have specified the search parameters, click ‘Execute Query’ button. The system displays the records that match the search criteria.
Double click a record to view the detailed network maintenance screen. You can also export the details of selected records to a file using ‘Export’ button.
2.1.23 Maintaining Customer Service Model
Service Model classifies the customers into various level.
You can maintain service models for the customers using ‘Customers Service Model’ screen, invoked from the Application Browser. You can invoke this screen by typing ‘PMDSRMDL’ in the field at the top right corner of the Application tool bar and clicking the adjoining arrow button.
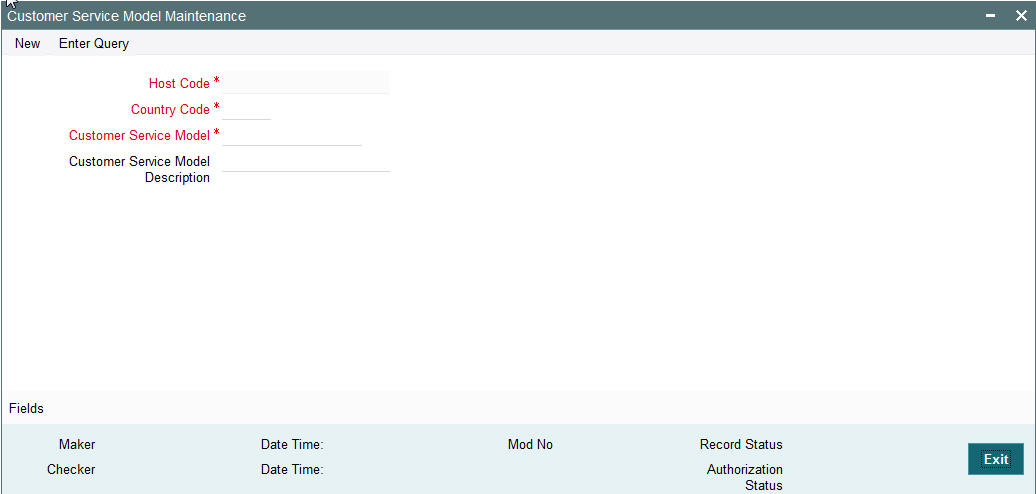
You can specify the following details:
Host Code
Host Code is defaulted as the Host code linked to user's logged in branch.
Country Code
Specify the country code. Alternatively, you can select the country code from the option list. The list displays all valid country codes maintained in the system.
Customer Service Model
Specify the unique service model code for a customer.
Customer Service Model Description
Specify the brief description about the customer service model entered.
2.1.24 Viewing Customer Service Model Summary
You can view a summary of network maintenances using ‘Customer Service Model Summary’ screen. To invoke this screen, type ‘PMSSRMDL’ in the field at the top right corner of the application toolbar and click the adjoining arrow button.
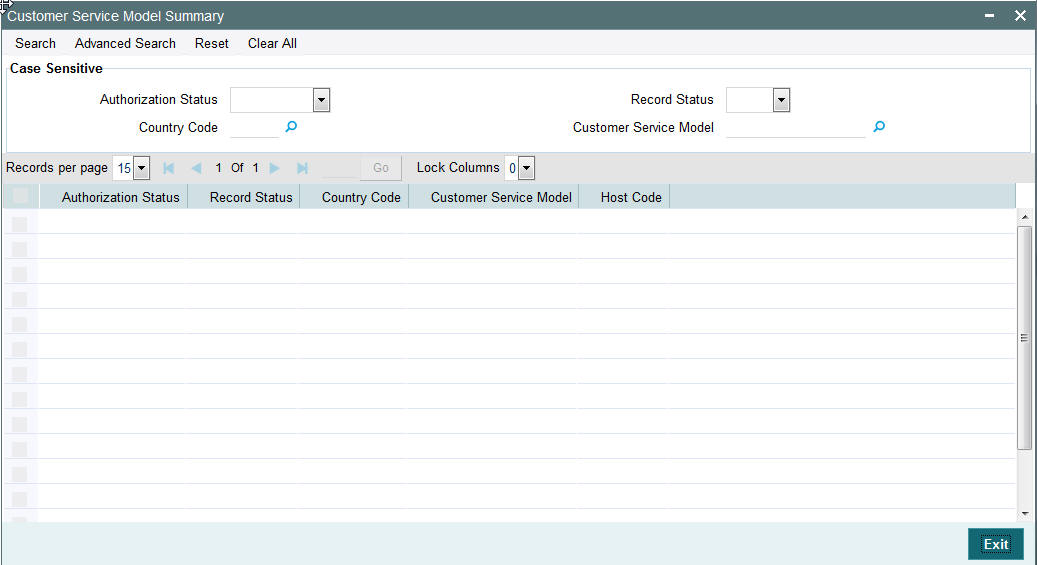
You can search for the networks using one or more of the following parameters:
- Authorization status
- Record status
- Country Code
- Customer Service Model
- Priority
Once you have specified the search parameters, click ‘Execute Query’ button. The system displays the records that match the search criteria.
Double click a record to view the detailed network maintenance screen. You can also export the details of selected records to a file using ‘Export’ button.
2.1.25 Maintaining Customer Service Model Linkage
You can link a customer to specific customer service model using ‘Customer Service Model Linkage’ screen. To invoke this screen, type ‘PMDCSMLK’ in the field at the top right corner of the application toolbar and click the adjoining arrow button.
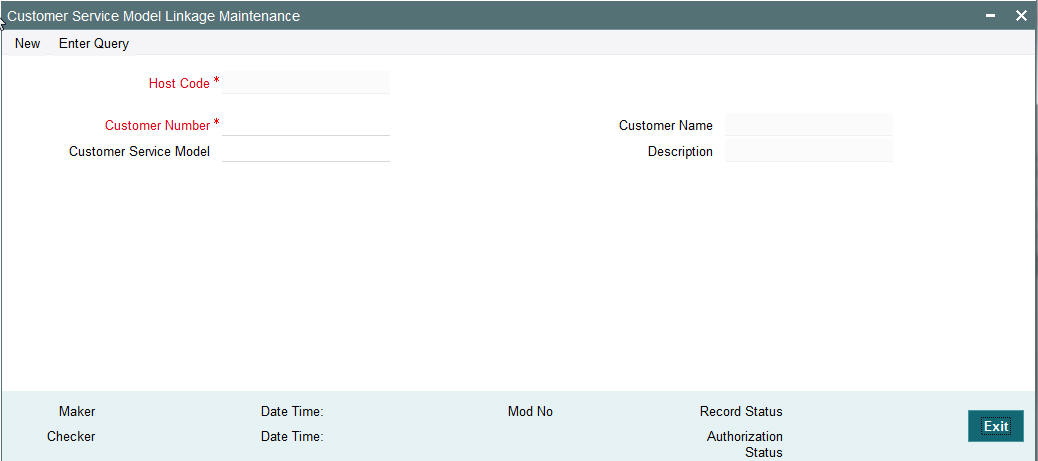
Specify the following details:
Host Code
Logged in Host is defaulted.
Customer Number
Select the customer number for linking the service model.
Customer Name
Once you select the customer number, the system displays the name of the customer.
Customer Service Model
Specify the customer service model to link the above customer.
Description
The system displays the description once you select the customer service model.
After capturing the above details, save the maintenance.
2.1.26 Viewing Customer Service Model Linkage Maintenance Summary
You can view a summary of network maintenances using ‘Customer Service Model Linkage Maintenance Summary’ screen. To invoke this screen, type ‘PMSCSMLK’ in the field at the top right corner of the application toolbar and click the adjoining arrow button.

You can search for the networks using one or more of the following parameters:
- Authorization status
- Record status
- Customer Number
Once you have specified the search parameters, click ‘Execute Query’ button. The system displays the records that match the search criteria.
Double click a record to view the detailed network maintenance screen. You can also export the details of selected records to a file using ‘Export’ button.
2.1.27 Maintaining Network Holidays
This maintenance allows you to specify working days and holidays for the year for the payment network. This function is accessible at a country code.
You can invoke the ‘Network Holidays Maintenance’ screen by typing ‘PMDNWHOL’ in the field at the top right corner of the Application tool bar and clicking on the adjoining arrow button. Click new button on the Application toolbar.
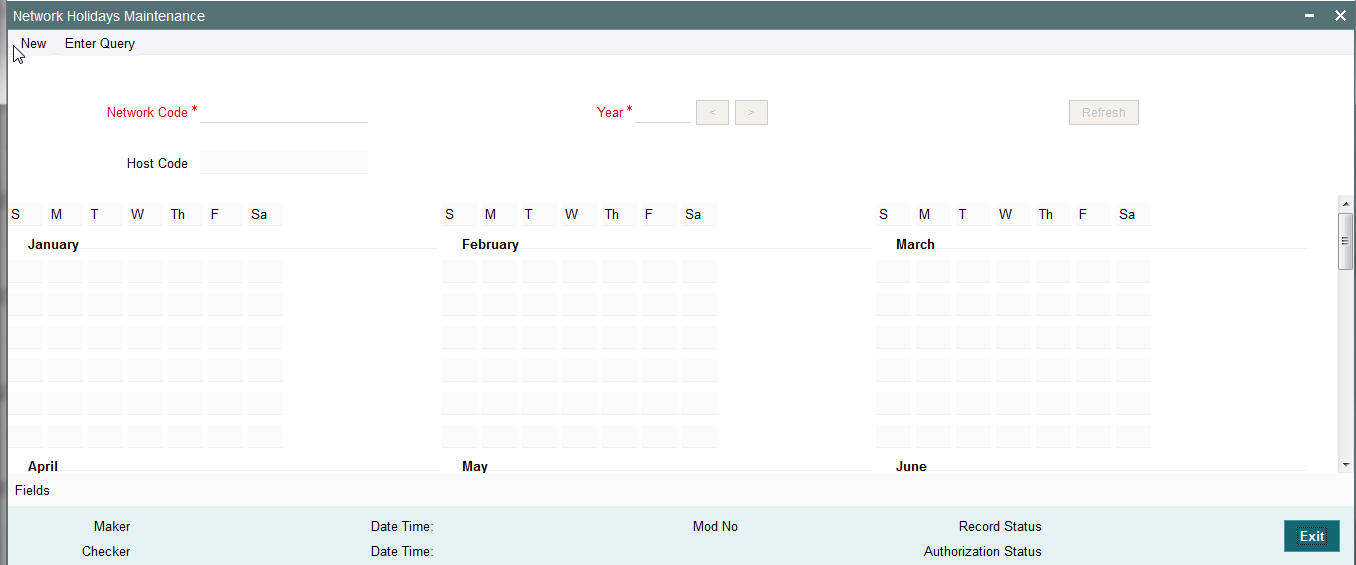
Network Code
Select the clearing network code from the adjoining option list. All valid clearing network codes are displayed in this list.
Host Code
Host code is defaulted based on the Network code selected.
Year
Select the calendar year details for which the network calendar is to be maintained.
Click the Refresh button after populating the above mentioned details. The calendar of the selected year is displayed. Now, you can click the specific dates on the calendar to define the holidays.
As you click a date in the calendar, the system will change the colour of the date text indicating whether it is a holiday or a working day. The colours applied to the text and their indications are as follows.
| Date Text Colour | Indication | ||
|---|---|---|---|
| Black | Working Day | ||
| Red | Holiday |
The system changes the colour of the text every time you click a date. Click the desired date until you need to set it to the colour as per requirement.
The details on each day of a month are displayed in the ‘Holiday Calendar Details’ section.
2.1.28 Viewing Network Holidays Maintenance Summary
You can view a summary of network holidays maintenances using ‘Network Holiday Maintenance Summary’ screen. To invoke this screen, type ‘PMSNWHOL’ in the field at the top right corner of the application toolbar and click the adjoining arrow button.
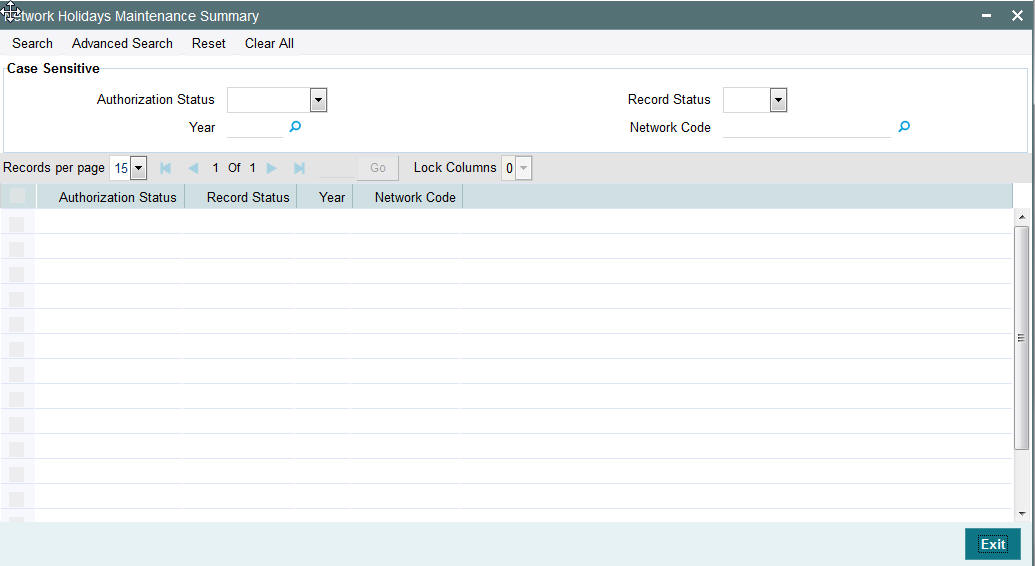
You can search for the networks using one or more of the following parameters:
- Authorization status
- Record status
- Network code
- Year
Once you have specified the search parameters, click ‘Execute Query’ button. The system displays the records that match the search criteria.
Double click a record to view the detailed network maintenance screen. You can also export the details of selected records to a file using ‘Export’ button.
2.1.29 System Parameters
You can invoke this screen by typing ‘PMDSYSPM’ in the field at the top right corner of the Application tool bar and click the adjoining arrow button.
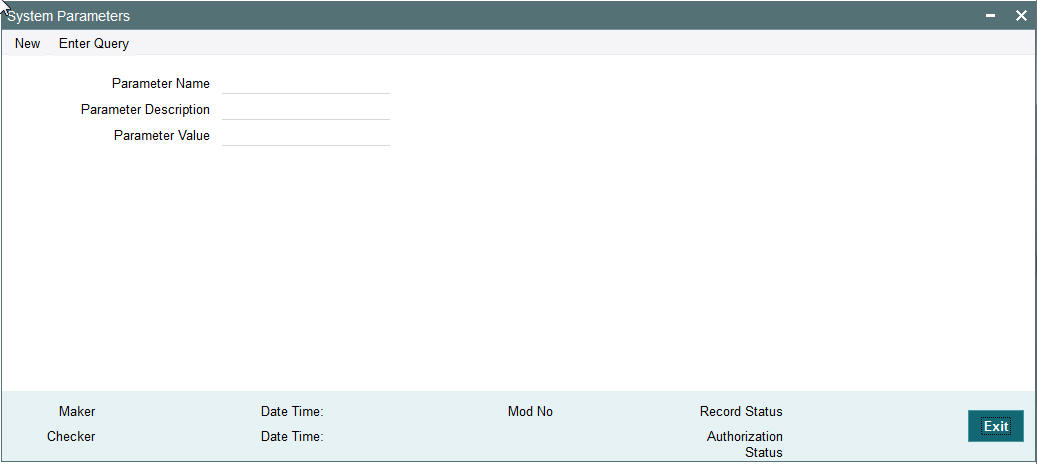
You can capture the following details
Parameter Name
Specify the parameter name. Alternatively, you can select the parameter name from the option list. The list displays all valid parameter names maintained in the system.
Parameter Description
Specify the parameter description.
Parameter Value
Specify the parameter value.
2.1.30 Viewing System Parameter Summary
You can view a summary of system parameters using ‘System Parameter Summary’ screen. To invoke this screen, type ‘PMSSYSPM’ in the field at the top right corner of the application toolbar and click the adjoining arrow button.

You can search for the networks using one or more of the following parameters:
- Authorization status
- Record status
- Parameter Name
- Parameter Value
- Parameter Description
Once you have specified the search parameters, click ‘Execute Query’ button. The system displays the records that match the search criteria.
Double click a record to view the detailed network maintenance screen. You can also export the details of selected records to a file using ‘Export’ button.
2.1.31 Reject Code
You can invoke the “Reject Code Maintenance” screen by typing ‘PMDRJMNT‘ in the field at the top right corner of the application tool bar and clicking on the adjoining arrow button.
You can capture the following details
Reject Code
Specify the Reject Code
Reject Reason
Specify the description of the Reject Code.
Reject Code Type
Specify the type of Reject Code. The type can be ISO or proprietary.
Applicable Networks and Exceptions
Network Code
Specify the network code. Alternatively, you can select the network code from the option list. The list displays all valid network codes maintained in the system.
Payment Type
Payment type will be defaulted based on the Network selected
Payment Pre-Settlement Reject
Check this flag if the new Reject Code maintained is applicable for payment rejects by CSM.
Payment Return
Specify the Payment Return. Choose among the following values:
- Null - This is the default value.
- Manual- If you select this option, the reject code will be applicable for processing of returns manually.
- Auto - If you select this option, the payment will be returned automatically, if the exception encountered by the incoming transaction is due to any of the error codes linked to this record in the Error Code Block.
Payment Recall
Check this flag if the Reject Code maintained is applicable for payment recalls by the Originating bank.
Recall Response
Check this flag if the Reject Code maintained is applicable for responses generated for payment recalls by the Beneficiary bank.
Collection Cancel
Check this flag if the new Reject Code maintained is applicable for recall of the outgoing Direct Debits.
Collection Return/Reject
Check this flag if the new Reject Code maintained is applicable forDirect debit returns/refunds/pre-settlement rejects.
Collection Reversal
Check this flag if the new Reject Code maintained is applicable for Direct Debit reversals by Originating Bank.
Exception Code Block
If return of an incoming payment is to be triggered automatically by system on certain exceptions, you can maintain the related Error codes in this Block.
For other exceptions encountered by the incoming transaction manual return is to be initiated by the user from Repair Queue.
Note
Exception codes are not allowed to be repeated for the same network and reject code com- combination.
2.1.32 Viewing Reject Code Maintenance Summary
You can view a summary of Reject Code using ‘Reject Code Maintenance Summary’ screen. To invoke this screen, type ‘PMSRJMNT’ in the field at the top right corner of the application toolbar and click the adjoining arrow button.
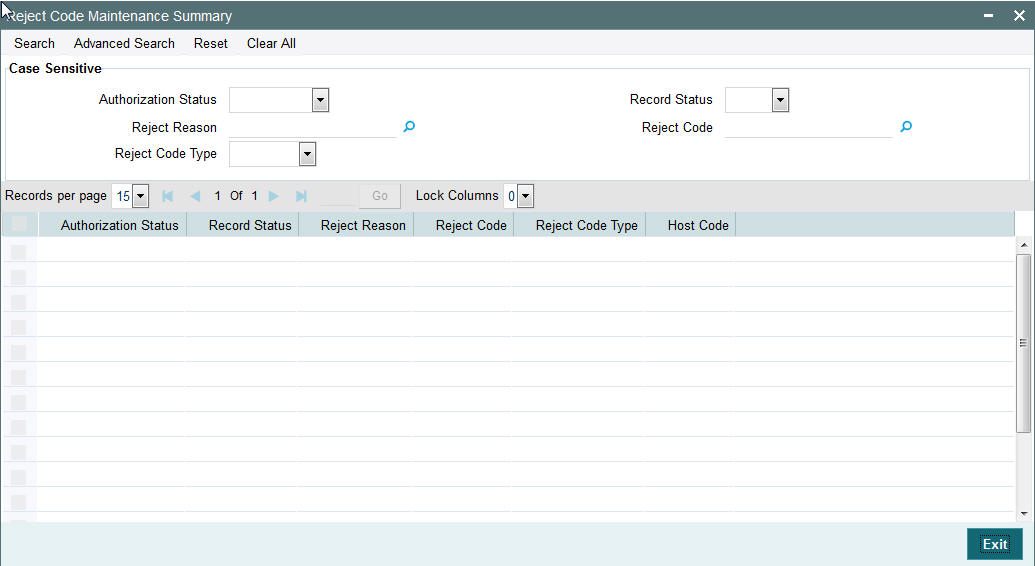
You can search for the networks using one or more of the following parameters:
- Authorization status
- Record status
- Reject Reason
- Reject Code
- Reject Code Type
Once you have specified the search parameters, click ‘Execute Query’ button. The system displays the records that match the search criteria.
Double click a record to view the detailed network maintenance screen.
2.1.33 Indirect Participant Account Details Maintenance
You can invoke “Indirect Participant Account Details Maintenance” screen by typing ‘PMDIPACC’ in the field at the top right corner of the Application tool bar and clicking on the adjoining arrow button. Click new button on the Application toolbar.
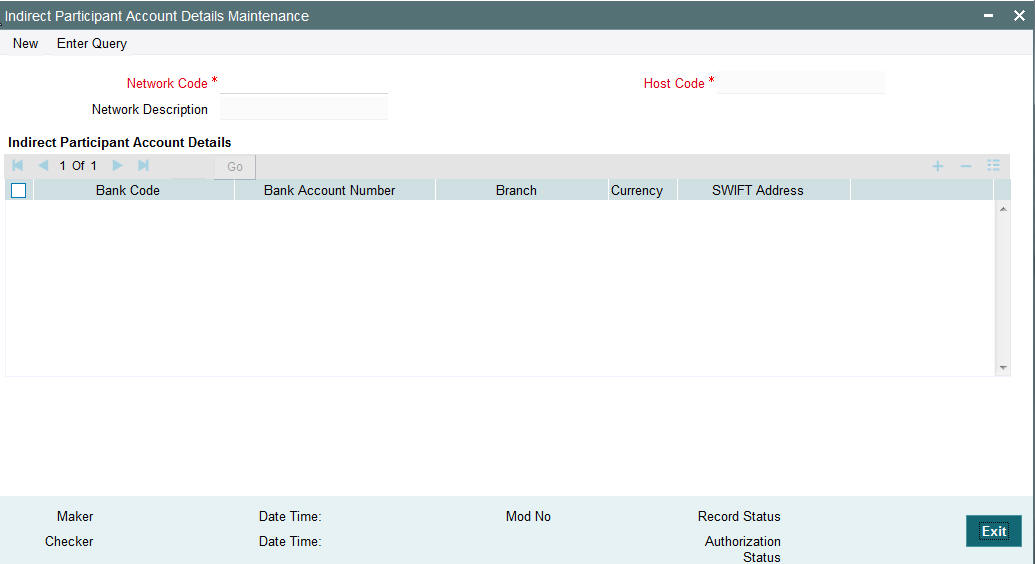
Specify the following details:
Network Code
Specify the network code for which indirect participant details are applicable. Alternatively, you can select the network code from the option list. The list displays all valid network codes maintained in the system
Network Description
The system displays the network description.
Host Code
The system defaults the host code linked to the network.
Bank Code
Specify the bank Code of the indirect participant. Alternatively, you can select the bank Code from the option list. The list displays all valid bank Codes maintained in the system
Bank Account Number
Specify the bank account number of the indirect participant. Alternatively, you can select the bank account number from the option list. The list displays all valid bank account numbers maintained in the system
Branch
The system displays the account branch.
Currency
The system displays the account currency.
Note
Only one record can be maintained for the same bank and currency in the multi-block for account details.
SWIFT Address
The system displays the BIC code of the indirect participant.
2.1.34 Indirect Participant Account Details
You can invoke “Indirect Participant Account Details Summary” screen by typing ‘PMSIPACC’ in the field at the top right corner of the Application tool bar and clicking on the adjoining arrow button. Click new button on the Application toolbar.

You can search for the networks using one or more of the following parameters:
- Authorization status
- Record status
- Network code
Once you have specified the search parameters, click ‘Execute Query’ button. The system displays the records that match the search criteria.
Double click a record to view the detailed network maintenance screen. You can also export the details of selected records to a file using ‘Export’ button.
2.1.35 Pending Maintenances Summary
You can view the pending maintenance in the ‘Pending Maintenances Summary’ screen.
You can invoke “Pending Maintenances Summary” screen by typing ‘PMSPENMT’ in the field at the top right corner of the Application tool bar and clicking on the adjoining arrow button. Click new button on the Application toolbar.
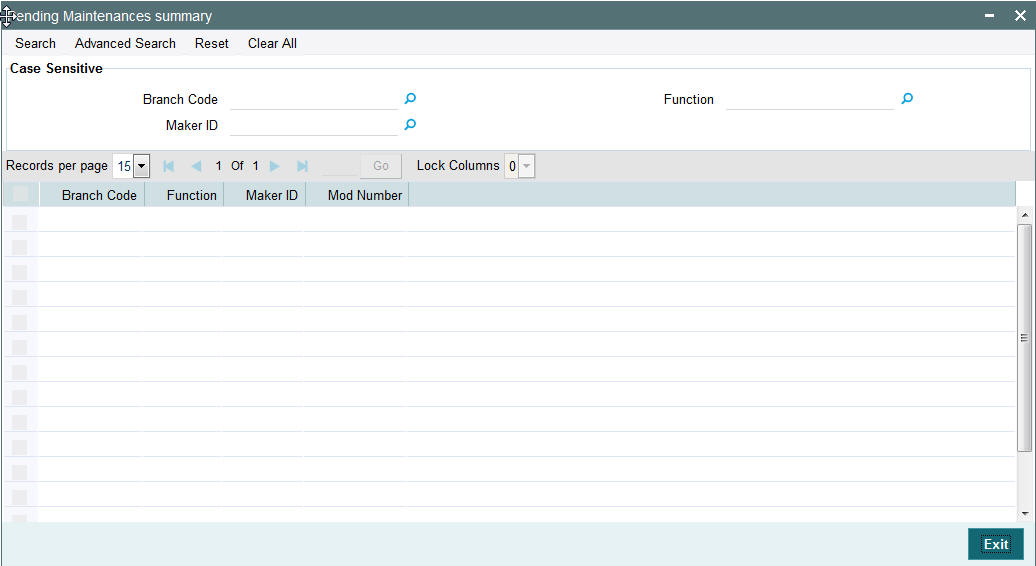
You can search using one or more of the following parameters:
- Branch Code
- Maker ID
- Function
Once you have specified the search parameters, click ‘Execute Query’ button. The system displays the records that match the search criteria for the following
- Branch Code
- Maker ID
- Function
- Mod Number
2.1.36 Bank Redirection
You can invoke the “Bank Redirection” screen by typing ‘PMDBKRED’ in the field at the top right corner of the Application tool bar and then clicking on the adjoining arrow button.
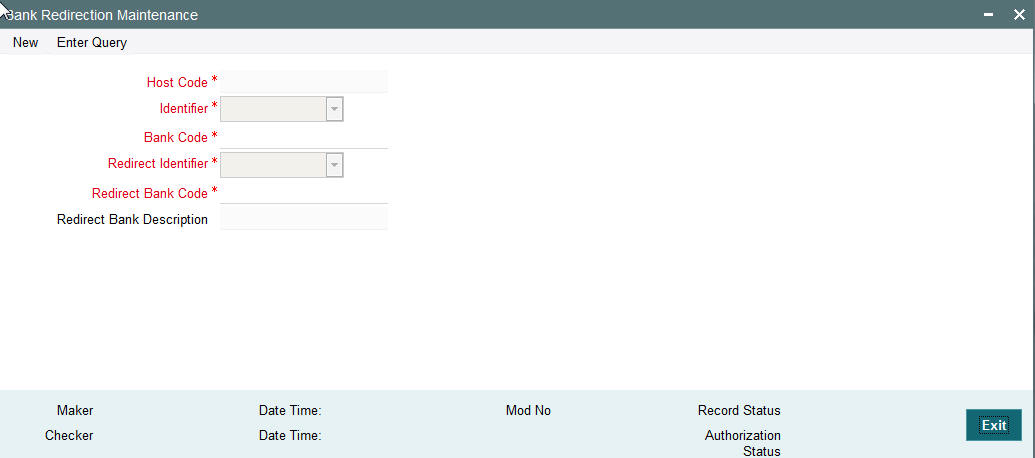
You can capture the following details:
Identifier
Select the required bank identifier
- BIC
- Local Bank Code
Bank Code
Specify the Bank Code for which redirection is required.
Redirect Identifier
Specify the Redirect Identifier
Redirect Bank Code
Specify the bank code to which payment needs to be redirected. The redirected bank codes can be a valid SWIFT BIC or Local Clearing Bank Code based on the Bank Code Identifier type chosen.
Redirect Bank Description
Redirect Bank Description is defaulted based on the Bank code chosen.
2.1.37 Account Redirection
You can use Account re-direction maintenance for replacing invalid/closed accounts Original Account in the payment transaction with the Redirected Account.
You can invoke the “Account Redirection” screen by typing ‘PMDACRED’ in the field at the top right corner of the Application tool bar and then clicking on the adjoining arrow button.
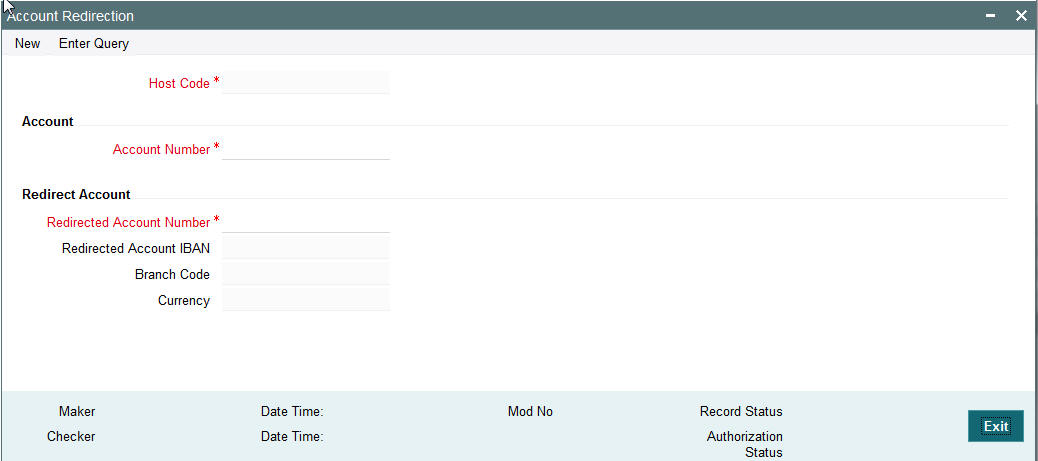
You can capture the following details:
Host Code
Specifies the Host Level function where the account redirection is maintained for the accounts of the host.
Account
Account Number
Specifies the original account number specified in the transaction.
Redirect Account
Redirect Account Number
Specify the redirected account number.
Redirect Account IBAN
The system displays the IBAN number along with redirect account if IBAN is maintained for the customer.
Branch Code
Account Branch Code is displayed.
Currency
Account Currency for the re-direct account is displayed.
2.1.38 UDF Group Maintenance
UDF maintenance is used for creating UDF codes.
You can invoke ‘UDF Group Maintenance’ screen by typing ‘PMDGRUDF’ in the field at the top right corner of the Application toolbar and clicking on the adjoining arrow button.
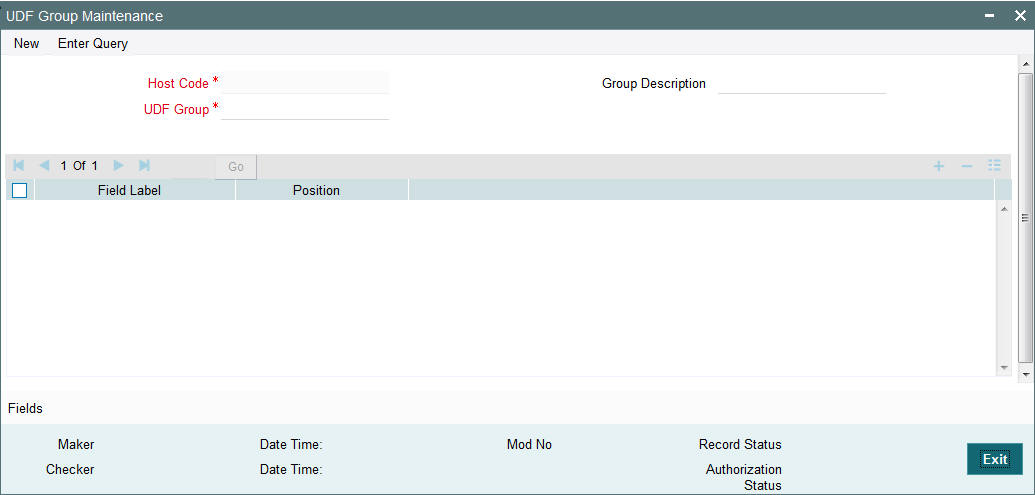
You can specify the following fields:
Host Code
Host Code is defaulted as the logged in Host.
Group Description
Specifies the description of the UDF Group.
UDF Group
Specifies the group of the user defined field.
Field Label
Specify the name of the field that needs to be defined by the user. You can maintain up to 10 UDF fields.
Position
Specify the position of the user defined field.
2.1.39 Maintaining Currency Correspondent
You can specify currency correspondent account details in this screen.Currency correspondent Maintenance function is host specific.
You can invoke the ‘Currency Correspondent Maintenance’ screen by typing ‘PMDCYCOR’ in the field at the top right corner of the application toolbar and clicking the adjoining arrow button.Click new button on the Application toolbar.
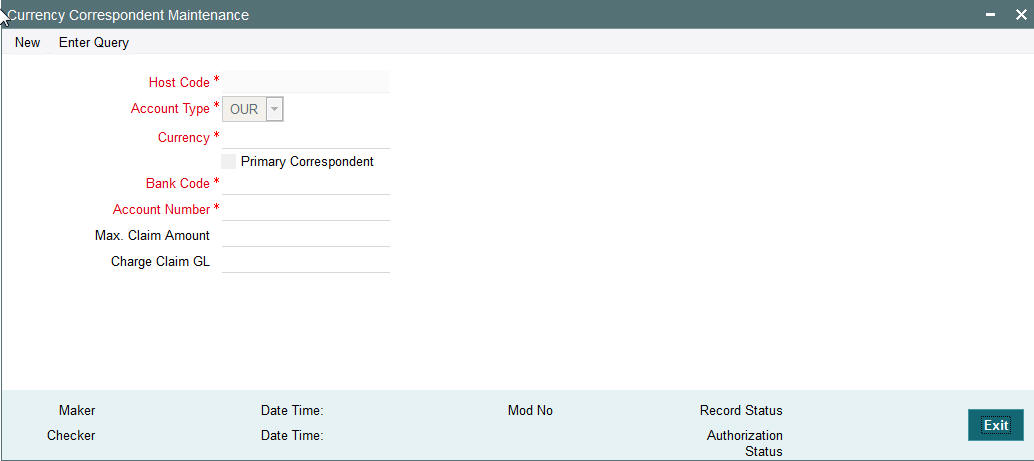
You can specify the following fields:
Host Code
The system displays the logged in Host Code.
Currency
Specify the currency. Alternatively, you can select the currency from the option list. The list displays all valid currencies maintained in the system.
Account Type
Select the account type. The list displays the following values:
- Our- Currency correspondent is Bank’s currency correspondent
- Their- Processing bank is the currency correspondent bank for the other bank
Account Number
Specify the account number of the specified bank. Alternatively, you can select the parent account number from the option list. The list displays all Nostro accounts for Account type OUR and valid normal accounts for account type THEIR. The account currency displayed in the list should be same as the currency specified.
Account Name
The system displays the account name
Primary Correspondent
Check this box if one of the standard currency correspondents is identified as primary currency correspondent. This option is applicable only for Account type ‘OUR’. There can be only one primary currency correspondent for the combination of Account type, Currency. This option will be defaulted as yes for the first currency correspondent maintained.
Max Claim Amount
Specifies the maximum amount that can be claimed by the correspondent so that processing of outward bank transfer is done automatically based on charge claim received.
Charge Claim GL
Specifies the GL code that is defaulted as the debit account in the outgoing Bank transfer contract for the charge claim.
2.1.40 Viewing Currency Correspondent Summary
You can invoke “Currency Correspondent Summary” screen by typing ‘PMSCYCOR’ in the field at the top right corner of the Application tool bar and clicking on the adjoining arrow button.
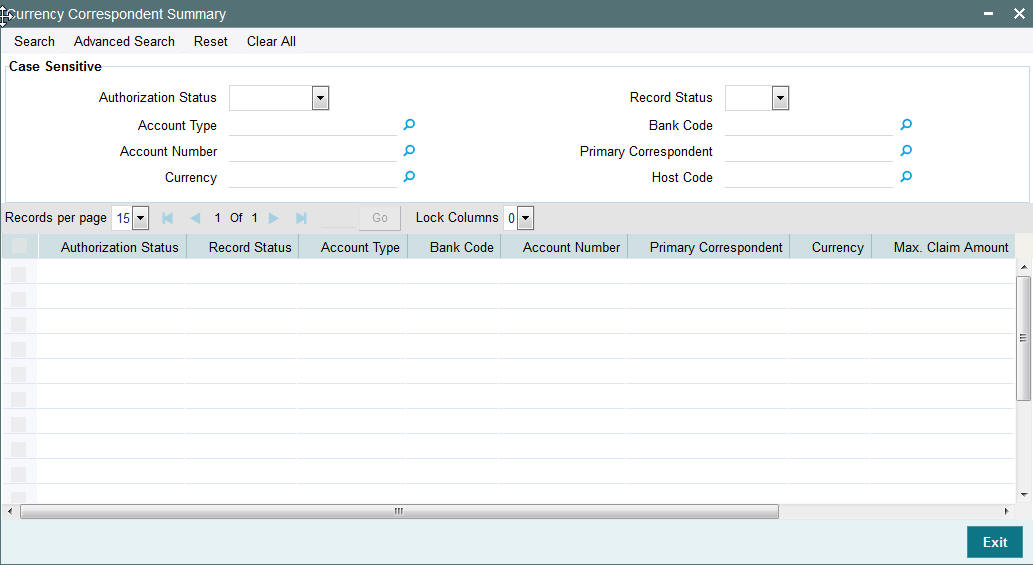
You can search using one or more of the following parameters:
- Authorization Status
- Record Status
Once you have specified the search parameters, click ‘Execute Query’ button. The system displays the records that match the search criteria for the following
- Authorization Status
- Record Status
- Branch
- Account Type
- Alpha Code
- Primary correspondent
- Branch
- Primary Account
- Currency
2.1.41 Maintaining Global Correspondent
You can maintain the currency correspondent of any bank in the Global correspondent screen
You can invoke the ‘Global correspondent Maintenance’ screen by typing ‘PMDGLCOR’ in the field at the top right corner of the application toolbar and clicking the adjoining arrow button.Click new button on the Application toolbar.
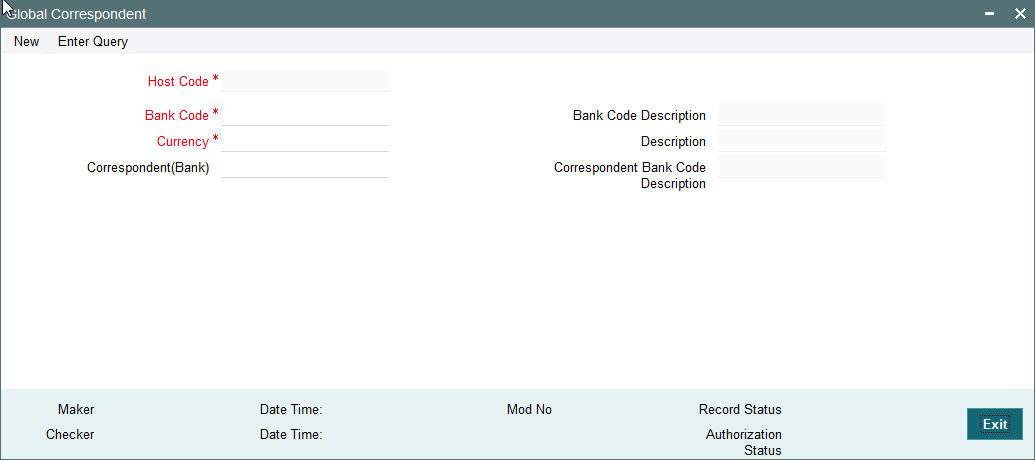
You can specify the following fields:
Bank Code
Specify the Bank code. Alternatively, you can select the Bank code from the option list. The list displays all valid Bank codes maintained in the system.
Bank Code Description
The system displays the Bank code description.
Currency
Specify the currency to be selected for which the correspondent alpha code will be selected. Alternatively, you can select the currency from the option list. The list displays all valid currencies maintained in the system.
Correspondent Bank Code
Specify the Alpha code of the correspondent bank for the specified currency.
Correspondent Bank Code Description
The system displays the correspondent Bank code description.
2.1.42 Viewing Global Correspondent Summary
You can invoke “Global Correspondent Summary” screen by typing ‘PMSGLCOR’ in the field at the top right corner of the Application tool bar and clicking on the adjoining arrow button.

You can search using one or more of the following parameters:
- Authorization Status
- Record Status
- Currency
- Alpha Code
Once you have specified the search parameters, click ‘Execute Query’ button. The system displays the records that match the search criteria.
- Authorization Status
- Record Status
- Currency
- Alpha Code
- Correspondent Alpha Code
2.1.43 Invoking D to A Converter
You can enable translation of information of the parties involved in the payment from ‘D’ option (names and addresses) to appropriate ‘A’ option (BIC codes).
This information is used during the STP of an incoming message to convert the names and address information to the appropriate BIC code.
You can invoke the ‘D to A Maintenance’ screen by typing ‘PMDDAMNT’ in the field at the top right corner of the application toolbar and clicking the adjoining arrow button.Click new button on the Application toolbar.
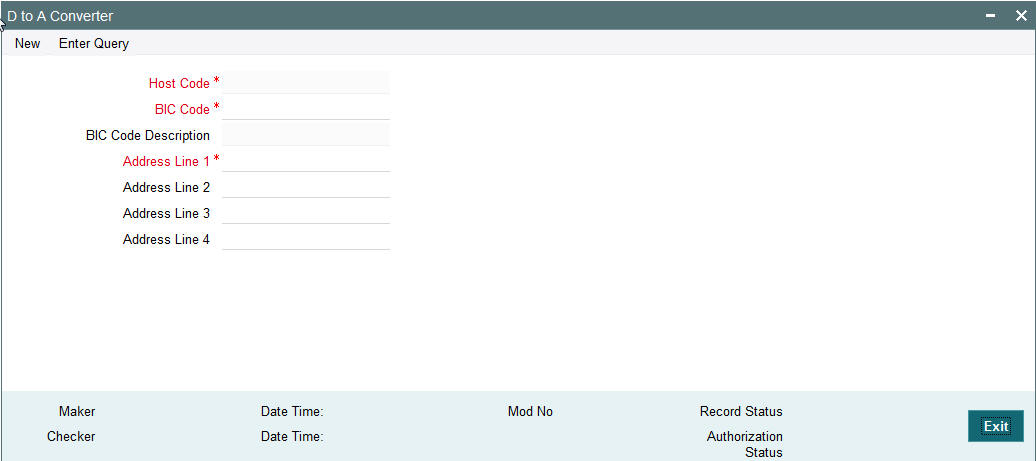
You can specify the following fields:
BIC Code
Specify the BIC codes. Alternatively, you can select the BIC code from the option list. The list displays all valid BIC codes maintained in the system.
BIC Code Description
The system displays the description of the BIC codes.
Address Line1
Specify the address line 1 maintained for the BIC code. This detail is compared with name and address received in the message to resolve the BIC Code. This line should match for successful conversion.
Address Line2
Specify the address line 2 maintained for the BIC code. This detail is compared with name and address received in the message to resolve the BIC Code. This line should match for successful conversion.
Address Line3
Specify the address line 3 maintained for the BIC code. This detail is compared with name and address received in the message to resolve the BIC Code. This line should match for successful conversion.
Address Line4
Specify the address line 4 maintained for the BIC code. This detail is compared with name and address received in the message to resolve the BIC Code. This line should match for successful conversion.
2.1.44 Viewing D to A Converter Summary
You can invoke “D to A Converter Summary” screen by typing ‘PXSDAMNT’ in the field at the top right corner of the Application tool bar and clicking on the adjoining arrow button.

You can search using one or more of the following parameters:
- Authorization Status
- Record Status
- BIC Code
- Address Line1
Once you have specified the search parameters, click ‘Execute Query’ button. The system displays the records that match the search criteria for the following
- Authorization Status
- Record Status
- BIC Code
- Address Line1
- Address Line2
- Address Line3
- Address Line4
2.1.45 Maintaining SWIFT Code
You can maintain applicable SWIFT codes in this maintenance for a Network and message type.
You can invoke “SWIFT Code Maintenance” screen by typing ‘PMDVALDN’ in the field at the top right corner of the Application tool bar and clicking on the adjoining arrow button.
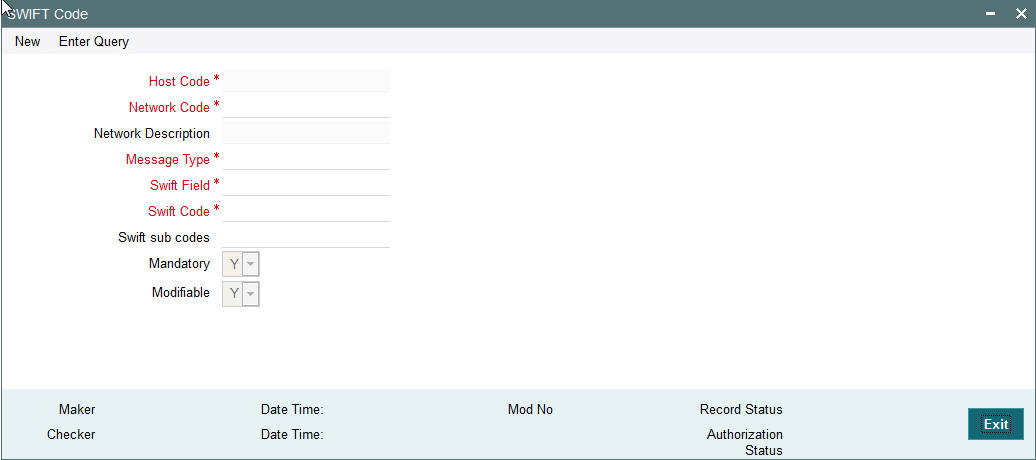
Specify the following details
Host Code
Specify the host code of the bank. Alternatively, you can select the host code from the option list. The list displays all valid host codes maintained in the system.
Branch Description
The system displays the branch description.
Network Code
Specify the network code. Alternatively, you can select the network code from the option list. The list displays all valid network codes maintained in the system.
Product Description
The system displays the product description.
Message Type
Specify the message type. Alternatively, you can select the message type from the option list. The list displays all valid message types maintained in the system.
Mandatory
Select an option to indicate whether the SWIFT tag is mandatory.
SWIFT Field
Specify the SWIFT field. Alternatively, you can select the SWIFT field from the option list. The list displays all valid SWIFT fields maintained in the system.
Modifiable
Select an option to indicate whether the SWIFT tag is modifiable.
SWIFT Code
Specify the SWIFT code.
SWIFT Sub Codes
Specify the sub SWIFT code.
2.1.46 Viewing SWIFT Code Summary
You can invoke “SWIFT Code Summary” screen by typing ‘PMSVALDN’ in the field at the top right corner of the Application tool bar and clicking on the adjoining arrow button.
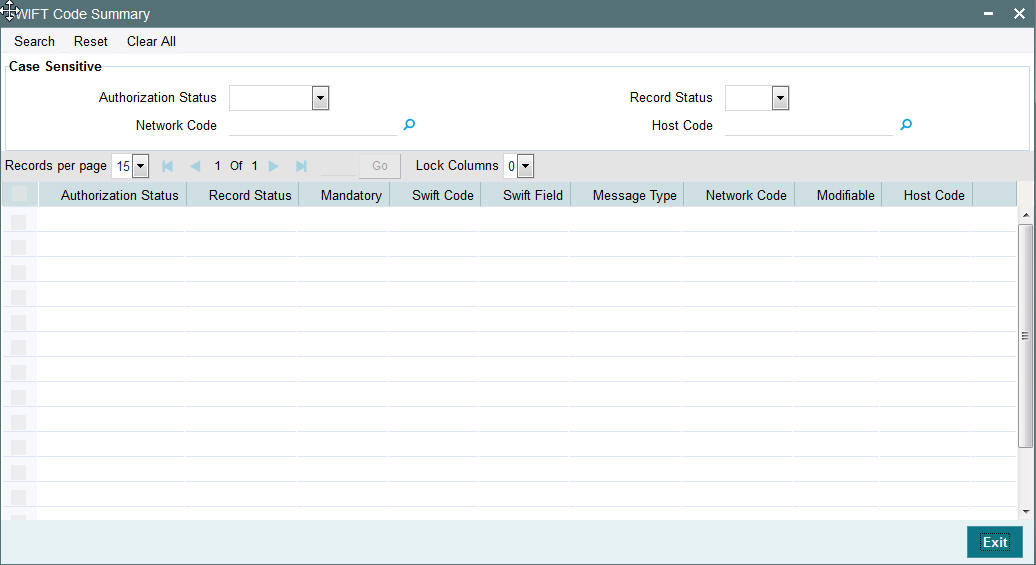
You can search using one or more of the following parameters:
- Authorization Status
- Record Status
- Network Code
- Host Code
Once you have specified the search parameters, click ‘Search’ button. The system displays the records that match the search criteria.
2.1.47 Maintaining File Parameters
You can specify parameters for handling files received from CSM/customers.
You can invoke the ‘File Parameters Maintenance’ screen by typing ‘PMDFLPRM’ in the field at the top right corner of the application toolbar and clicking the adjoining arrow button.Click new button on the Application toolbar.
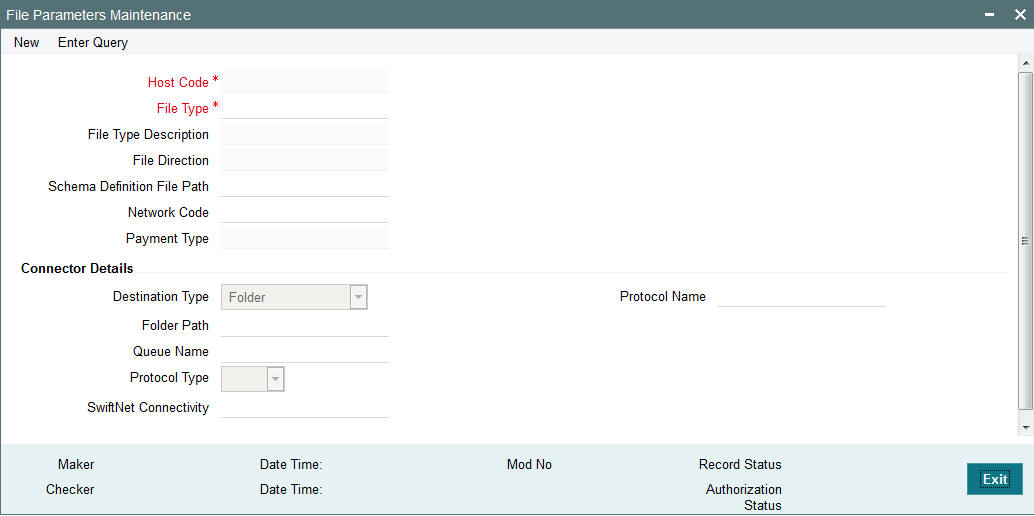
Specify the following details
Host Code
The system specifies the host code that the user is logged in.
File Type
The system populates this field based on static maintenance available in Messaging for the file types handled.
File Type Description
The system populates this field based on the file type chosen.
File Direction
The system populates this field based on the file type chosen.
Schema File Definition Path
Specify the File path from where xsd files for format validation are fetched
Network Code
Specify the network code from the list of values.
Payment Type
The system populates this field based on the network chosen.
Connector Details
Destination Type
Select the required destination path. Choose among the following:
- Folder.
- Queue
- SwiftNet Connectivity
Folder Path
Specify the folder path.
Queue Name
Specify the name of the queue.
Protocol Type
Select the type of protocol.
SwiftNet Connectivity
Specify the required SwiftNet Connectivity.
Protocol Name
Specify the required protocol.
2.1.48 Viewing File Parameters Summary
You can invoke “File Parameters Summary” screen by typing ‘PMSFLPRM’ in the field at the top right corner of the Application tool bar and clicking on the adjoining arrow button.
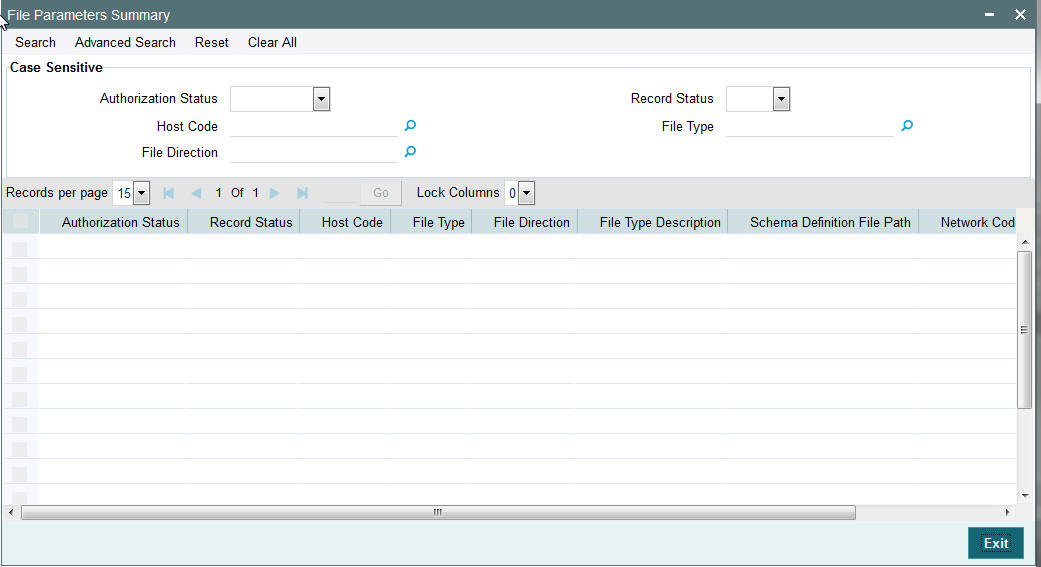
You can search using one or more of the following parameters:
- Authorization Status
- Record Status
- Host Code
- File Type
- File Direction
Once you have specified the search parameters, click the Search button. The system displays the records that match the search criteria.
2.1.49 Maintaining SWIFT Field Codes
You can maintain the SWIFT message details and validate the incoming and outgoing messages in this screen.
You can invoke “SWIFT Field Code maintenance” screen by typing ‘PMDSWFLD’ in the field at the top right corner of the Application tool bar and clicking on the adjoining arrow button.
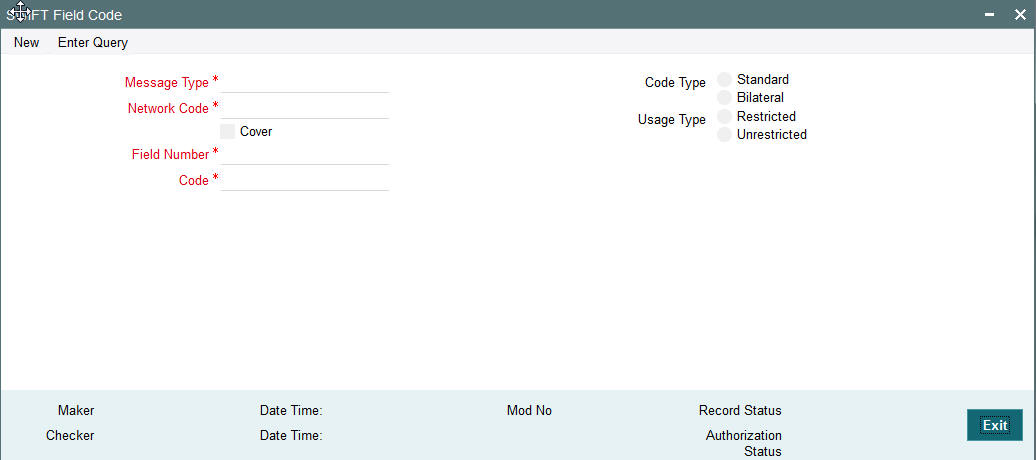
Specify the following details
Message Type
Specify the message type. alternatively, you can select the message type from the option list. The list displays all valid message types maintained in the system.
Cover
Check this box to indicate whether cover message is required or not.
Field Number
Specify the field number for the message type. alternatively, you can select the field number from the option list. The list displays all valid field numbers from the option list.
Code
Specify the code that is used to indicate incoming and outgoing messages for security purpose.
Code Type
Select the code type. The option are as follows:
- Standard
- Bilateral
Usage Type
Select the usage type. The option are as follows:
- Restricted
- Unrestricted
2.1.50 Viewing SWIFT Field Code Summary
You can invoke “SWIFT Field Code Summary” screen by typing ‘PMSSWFLD’ in the field at the top right corner of the Application tool bar and clicking on the adjoining arrow button.

You can search using one or more of the following parameters:
- Authorization Status
- Record Status
- Message Type
- Field Number
- Code
- Cover
Once you have specified the search parameters, click ‘Execute Query’ button. The system displays the records that match the search criteria.
2.1.51 Customer Preferences
You can maintain Deferred price and file preferences for corporate customers in the ‘Customer Preferences’ screen.
You can invoke the ‘Customer Preference’ screen by typing ‘PMDFLPRF’ in the field at the top right corner of the application toolbar and clicking the adjoining arrow button.Click new button on the Application toolbar..
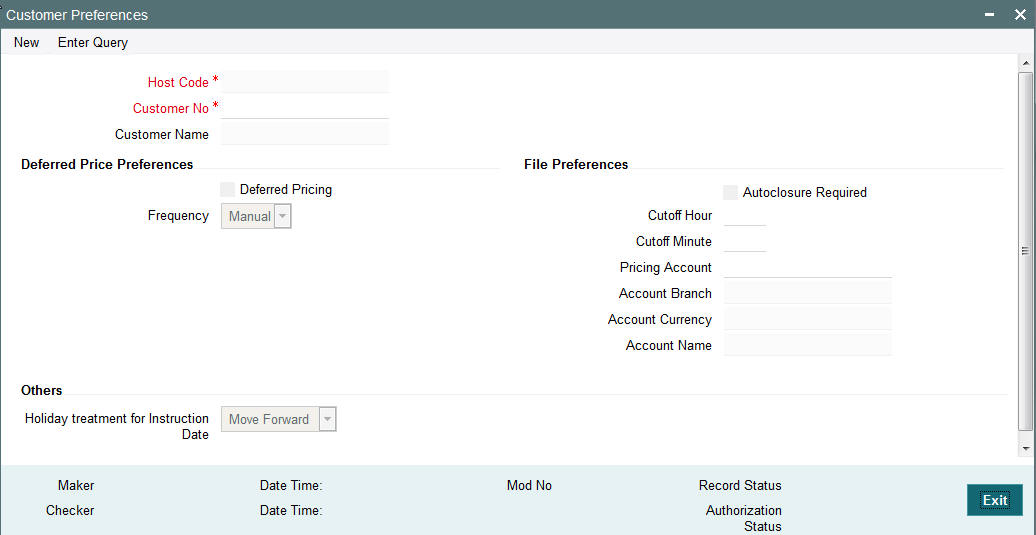
You can specify the following fields:
Deferred Price Preferences
Deferred Pricing
Check this box if deferred pricing is applicable for the customer.
Frequency
Select the required frequency. Frequency can be maintained as Daily, Monthly and Manual.
File Preferences
Autoclosure Required
Check this box if a consolidation batch needs to be considered for closure based on the cutoff time specified.
Note
This is applicable if processing of some of the transactions pertaining to the batch is not yet completed.
Cutoff Hour
Specifies the Cutoff time in hours for Batch auto closure
Cutoff Minute
Specifies the Cutoff time in minutes for Batch auto closure
Pricing Account
Choose the required Pricing Account from the list of values.
Account Branch
The system displays the account branch based on the selected Pricing Account.
Account Currency
The system displays the account currency based on the selected Pricing Account.
Account Name
The system displays the account name based on the selected Pricing Account.
2.1.52 Viewing Customer Preferences Summary
You can view the summary in “Customer Preferences Summary” screen. You can invoke the Customer Preferences Summary screen by typing ‘PMSFLPRF’ in the field at the top right corner of the Application toolbar and clicking on the adjoining arrow button.

You can search for the records using one or more of the following parameters:
- Authorization Status
- Record Status
- Customer No
Once you have specified the search parameters, click ‘Search’ button. The system displays the records that match the search criteria.
Double click a record or after selecting a record to view the detailed screen.
Note
- For a C2B transaction if the charge account is mentioned in the received pain.001 file, it takes precedence.If charge account is not available as part of the file, then pricing account maintained in file preferences is considered for debiting charge/tax amounts. If pricing account is not maintained, charge/ tax is recovered from debit account itself.
- Charge account and currency can be different from debit account and currency.
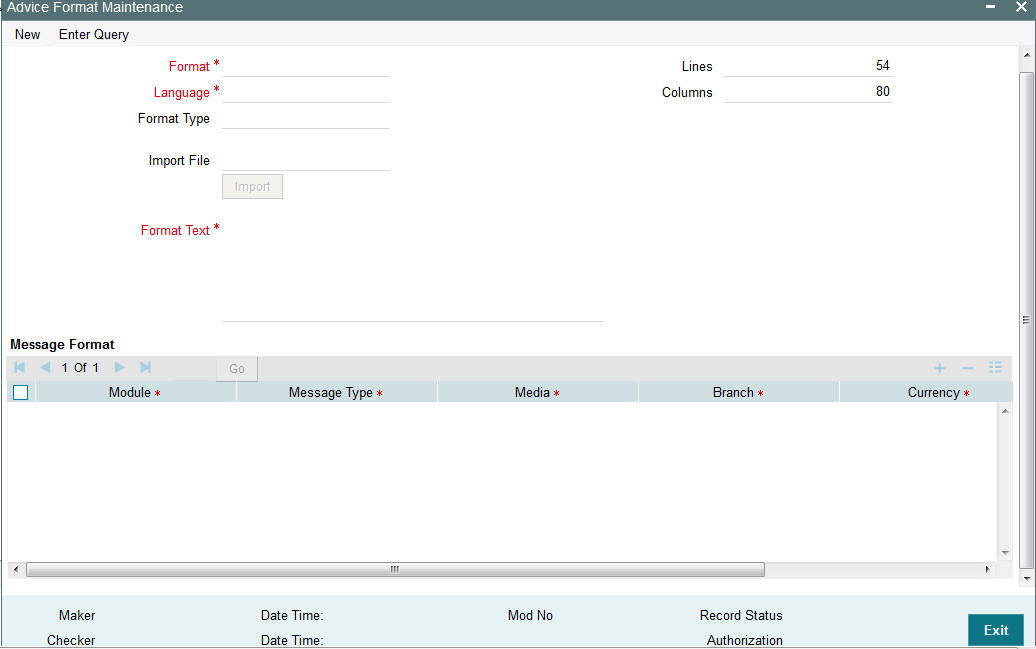
2.1.53 Advice Format Maintenance
In Advice Format Maintenance screen you can find a pre-shipped record for Format type ‘SWIFT’. You can invoke the ‘Advice Format Maintenance’ screen by typing ‘PMDSNCKM’ in the field at the top right corner of the application toolbar and clicking the adjoining arrow button.Click new button on the Application toolbar.
2.1.54 Viewing Advice Format Summary Summary
You can view the summary in “Advice Format Summary” screen. You can invoke the Advice Format Summary screen by typing ‘PMSADVFM’ in the field at the top right corner of the Application toolbar and clicking on the adjoining arrow button.
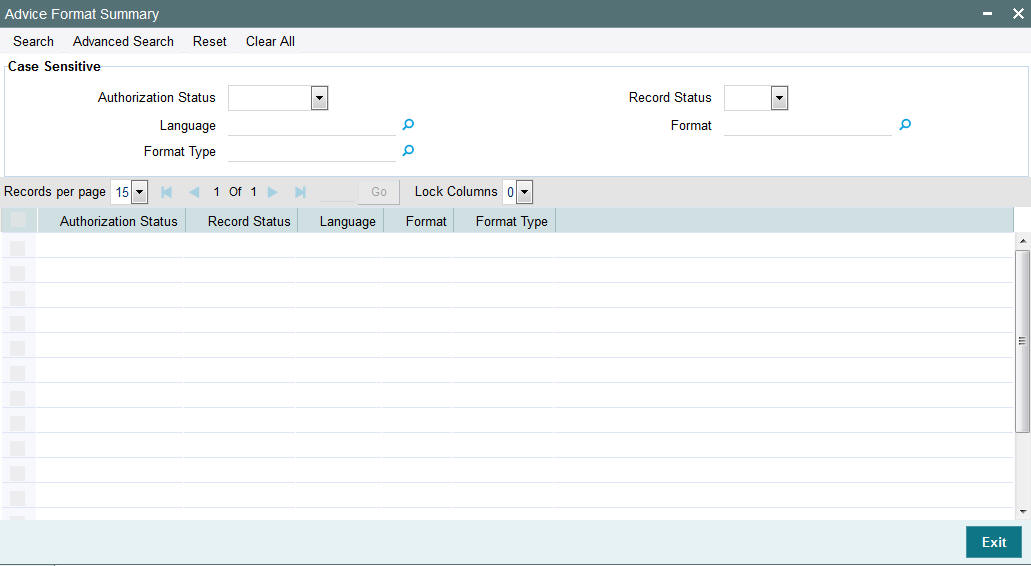
You can search for the records using one or more of the following parameters:
- Authorization Status
- Record Status
- Language
- Format
- Format Type
- Customer No
Once you have specified the search parameters, click ‘Search’ button. The system displays the records that match the search criteria.
Double click a record or after selecting a record to view the detailed screen.
2.1.55 Customer Address Maintenance
You can invoke the ‘Customer Address Maintenance’ screen by typing ‘PMDCUSAD’ in the field at the top right corner of the application toolbar and clicking the adjoining arrow button.Click new button on the Application toolbar.
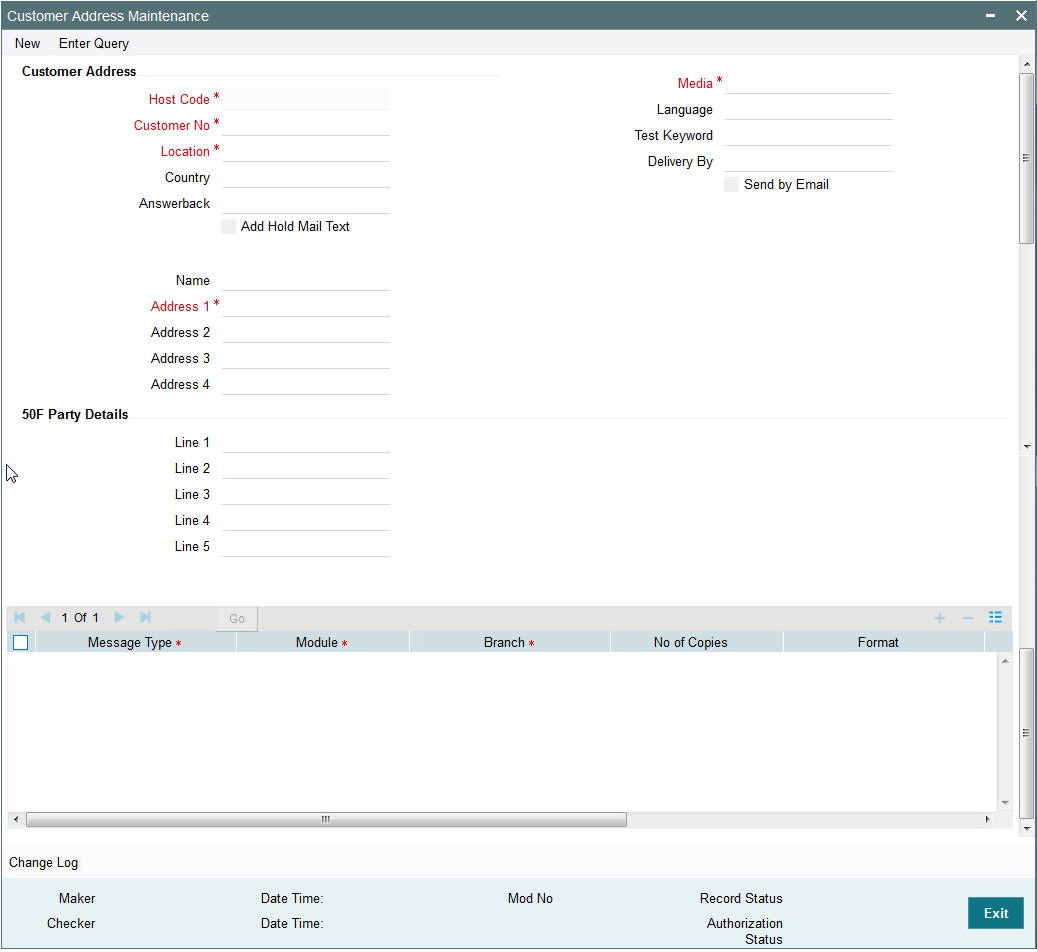
For correspondent Bank Customers, you can maintain the BIC in Address Line 1 for Media ‘SWIFT’.
2.1.56 Viewing Customer Address Summary
You can view the summary in “Customer Address Summary” screen. You can invoke the Customer Address Summary screen by typing ‘PMSADVFM’ in the field at the top right corner of the Application toolbar and clicking on the adjoining arrow button.

You can search for the records using one or more of the following parameters:
- Authorization Status
- Record Status
- Customer No
- Location
- Media
- Host Code
Once you have specified the search parameters, click ‘Search’ button. The system displays the records that match the search criteria.
Double click a record or after selecting a record to view the detailed screen.
2.1.57 Message Location Maintenance
You can maintain the message locations in this screen. You can invoke the ‘Message Location Maintenance’ screen by typing ‘PMDLOCMN’ in the field at the top right corner of the application toolbar and clicking the adjoining arrow button. Click new button on the Application toolbar.
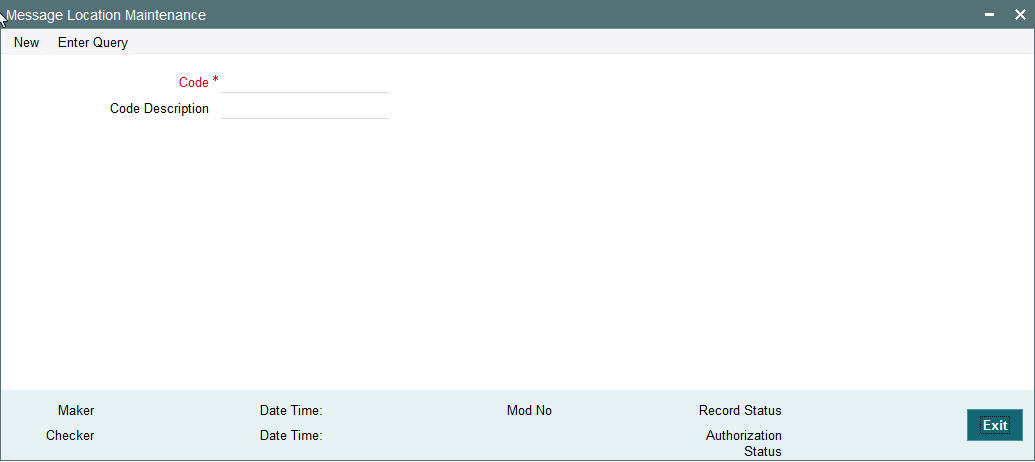
Specify the following fields:
Code
Specifies the code assigned to the Message Location.
Code Description
Specifies the description of the Message Location code.
2.1.58 Viewing Message Location Summary
You can view the summary in “Message Location Summary” screen. You can invoke the Message Location Summary screen by typing ‘PMSLOCMN’ in the field at the top right corner of the Application toolbar and clicking on the adjoining arrow button.
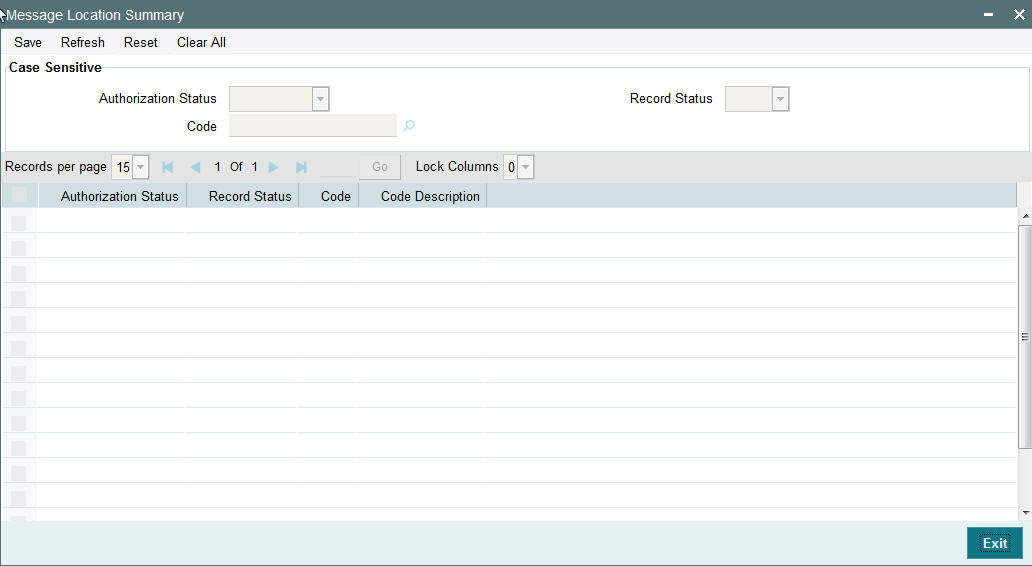
You can search for the records using one or more of the following parameters:
- Authorization Status
- Record Status
- Code
Once you have specified the search parameters, click ‘Search’ button. The system displays the records that match the search criteria.
Double click a record or after selecting a record to view the detailed screen.
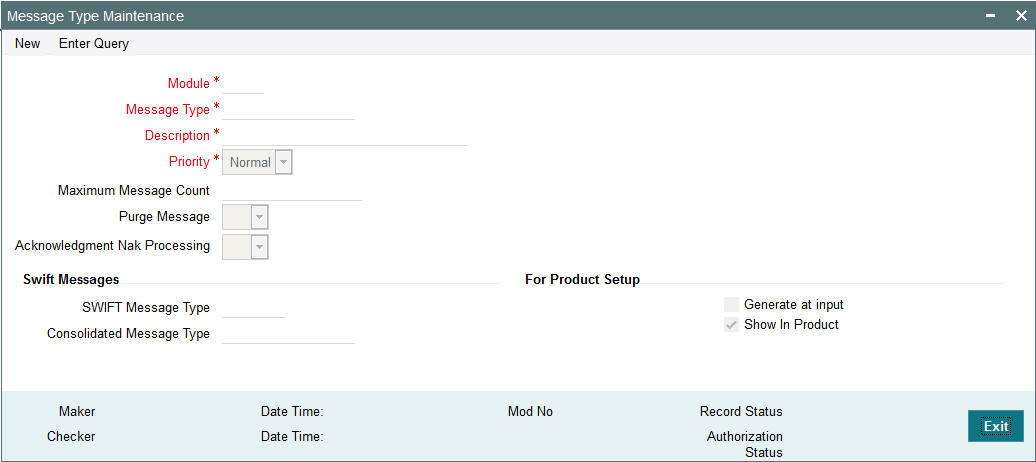
2.1.59 Message Type Maintenance
Message types are pre-shipped. You can view the message type detains in this screen. You can invoke the ‘Message Location Maintenance’ screen by typing ‘PMDMSTYM’ in the field at the top right corner of the application toolbar and clicking the adjoining arrow button. Click new button on the Application toolbar.
2.1.60 Viewing Message Type Summary
You can view the summary in “Message Type Summary” screen. You can invoke the Message Type Summary screen by typing ‘PMSMSTYM’ in the field at the top right corner of the Application toolbar and clicking on the adjoining arrow button.

You can search for the records using one or more of the following parameters:
- Authorization Status
- Record Status
- Module
- Message Type
Once you have specified the search parameters, click ‘Search’ button. The system displays the records that match the search criteria.
Double click a record or after selecting a record to view the detailed screen.
2.1.61 Messaging Branch Preferences Maintenance
Message Browser actions allowed for a branch can be configured in this screen. You can invoke the ‘Message Location Maintenance’ screen by typing ‘PMDPREF’ in the field at the top right corner of the application toolbar and clicking the adjoining arrow button. Click new button on the Application toolbar.
Indicating the activities that require authorization:
You can perform several activities on a message that is to be generated from your branch and on those that have come in for your branch. For example, from the outgoing or incoming browser, you can change the address to which a message should be sent.
In the branch preferences screen, you can indicate the activities which when performed on an incoming or outgoing message, would require subsequent manual authorization for the message. Several activities have been listed in this screen. A message, on which an activity which has been selected in this screen is performed, would require subsequent manual authorization for the activity to take effect. A message, on which an activity not selected in this screen is performed, would be automatically authorized with the activity taking effect.
The activities that you can choose from are:
- Cancel
- Hold
- Change Node
- Testword
- Auth Repair Incoming
- Carry Forward
- Change Media
- Regenerate
- Regenerate
- Change Address
- Reinstate
- Release
- Carried Forward
- Branch Move
- Change Media
- Change Priority
- Testword Check
- Auth Repair Incoming
A message on which you perform an activity that requires authorization will be available for further processing only after it is authorized.
2.1.62 Viewing Messaging Branch Preferences Summary
You can view the summary in “Messaging Branch Preferences Summary” screen. You can invoke the Messaging Branch Preferences Summary screen by typing ‘PMSPREF’ in the field at the top right corner of the Application toolbar and clicking on the adjoining arrow button.

You can search for the records using one or more of the following parameters:
- Authorization Status
- Record Status
- Branch
- PDE Functional Validation
- Message Archive Period
- PDE Archive Period
Once you have specified the search parameters, click ‘Search’ button. The system displays the records that match the search criteria.
Double click a record or after selecting a record to view the detailed screen.
2.2 External System Maintenance
2.2.1 Sanction Check System Maintenance
You can maintain the external system details to which the sanction request are to be sent with transaction party details in the ‘Sanction Check System’ screen. You can invoke the ‘Sanction Check System’ screen by typing ‘PMDSNCKM’ in the field at the top right corner of the application toolbar and clicking the adjoining arrow button.Click new button on the Application toolbar.
You can specify the following details:
Sanction Check System
Specify the external sanction check system.
Description
Give a brief description on the sanction check system.
Inqueue JNDI Name
Specify the name for Sanction response queue configured in Application serve.
Outqueue JNDI Name
Specify the name for Sanction request queue configured in Application serve.
Initial Context Factory Class
Specify the initial context factory class.
Context Provider URL
Specify the context provider URL.
Queue Factory JNDI
Specify the queue factory JNDI.
Timeout in seconds
Specify the time out in seconds. If there is no response within this time, then the request is marked as timed out.
Queue Authentication
Queue Authentication
Check this box to indicate that Queue Authentication is required for the Sanction Check System.
User Id
Specify the required User Name.
Password
Enter the password. The User Id and Password that you specify will be used for verification purposes. Password is encrypted and stored.
Status Mapping
External Response Code
Specifies the code assigned to a status by external sanctions check system.
Code Description
Specifies the description of the external response code.
System Status
Specifies the sanction check status derived in the system.
Automatic Cancellation
Select whether automatic cancellation of the payment is applicable. You can select Yes only if the response codes are mapped to Rejected status.
2.2.2 Viewing Sanction Check System Summary
You can view sanction check details in the “Sanction Check System Summary” screen. You can invoke the ‘Sanction Check System Summary’ screen by typing ‘PMSSNKSM’ in the field at the top right corner of the application toolbar and clicking the adjoining arrow button.Click new button on the Application toolbar.

You can search using one or more of the following parameters:
- Authorization Status
- Record Status
Once you have specified the search parameters, click ‘Execute Query’ button. The system displays the records that match the search criteria.
Double click a record or click the ‘Details’ button after selecting a record to view the detailed screen.
2.2.3 External Exchange Rate System Maintenance
You can maintain the external system details from which the exchange rate for a cross currency payment transaction has to be obtained in the ‘External Exchange Rate System’ screen. You can invoke the ‘External Exchange Rate System’ screen by typing ‘PMDERTMT’ in the field at the top right corner of the application toolbar and clicking the adjoining arrow button.Click new button on the Application toolbar.
You can specify the following details:
External Exchange Rate System
Specify the external exchange rate system.
Description
Give a brief description on the external exchange rate system.
Preferences
Communication Type
Select the type of communication from the drop-down list.
Inqueue JNDI Name
Specify the name for External exchange rate response queue configured in Application server.
Outqueue JNDI Name
Specify the name for External exchange rate request queue configured in Application server.
Initial Context Factory Class
Specify the initial context factory class.
Context Provider URL
Specify the context provider URL.
Queue Factory JNDI
Specify the queue factory JNDI.
Timeout in seconds
Specify the time out in seconds. If there is no response within this time, then the request is marked as timed out.
Queue Authentication
Queue Authentication
Check this box to indicate that Queue Authentication is required for the External Exchange Rate System.
User Id
Specify the required User Name.
Password
Enter the password. The User Id and Password that you specify will be used for verification purposes. Password is encrypted and stored.
2.2.4 Viewing Exchange Rate System Summary
You can view exchange rate details in the “Exchange Rate System Summary” screen. You can invoke the ‘Exchange Rate System’ screen by typing ‘PMSERTMT’ in the field at the top right corner of the application toolbar and clicking the adjoining arrow button.Click new button on the Application toolbar.
You can search using one or more of the following parameters:
- Authorization Status
- Record Status
Once you have specified the search parameters, click ‘Execute Query’ button. The system displays the records that match the search criteria.
Double click a record or click the ‘Details’ button after selecting a record to view the detailed screen.
2.2.5 External Credit Approval System Maintenance
You can maintain the external system details from which credit approval for debit entries has to be obtained in the ‘External Credit Approval System’ screen. You can invoke the ‘External Credit Approval System’ screen by typing ‘PMDECAMT’ in the field at the top right corner of the application toolbar and clicking the adjoining arrow button.Click new button on the Application toolbar.
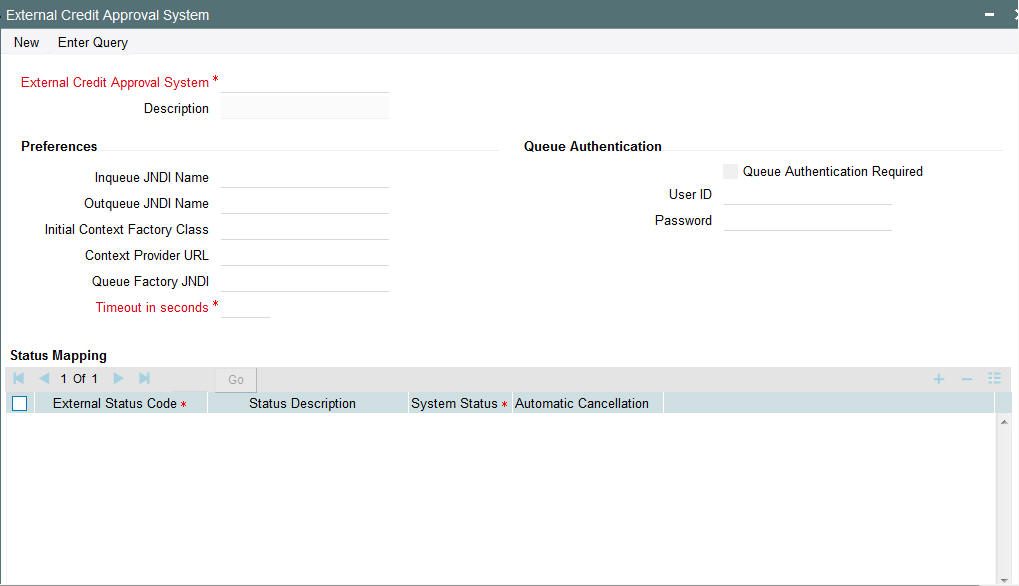
You can specify the following details:
External Credit Approval System
Specify the external credit approval system.
Description
Give a brief description in the external credit approval system.
Preferences
Inqueue JNDI Name
Specify the name for ECA response queue configured in Application server.
Outqueue JNDI Name
Specify the name for ECA request queue configured in Application server.
Initial Context Factory Class
Specify the initial context factory class.
Context Provider URL
Specify the context provider URL.
Queue Factory JNDI
Specify the queue factory JNDI.
Timeout in seconds
Specify the time out in seconds. If there is no response within this time, then the request is marked as timed out.
Queue Authentication
Queue Authentication
Check this box to indicate that Queue Authentication is required for the External Credit Approval System.
User Id
Specify the required User Name.
Password
Enter the password. The User Id and Password that you specify will be used for verification purposes. Password is encrypted and stored.
Status Mapping
External Response Code
Specifies the code assigned to a status by external ECA system.
Code Description
Specifies the description of the external response code.
System Status
Specifies the ECA status derived in the system. Choose among the following:
- Reject
- Override
- Approve
Automatic Cancellation
Select whether automatic cancellation of the payment is applicable or not. You can select Yes only if the response codes are mapped to Rejected status.
2.2.6 Viewing External Credit Approval System Summary
You can view exchange rate details in the ‘External Credit Approval System Summary’ screen. You can invoke the ‘External Credit Approval System Summary’ screen by typing ‘PMSECAMT’ in the field at the top right corner of the application toolbar and clicking the adjoining arrow field at the top right corner of the application toolbar and clicking the adjoining arrow button.Click new button on the Application toolbar.
You can search using one or more of the following parameters:
- Authorization Status
- Record Status
Once you have specified the search parameters, click ‘Execute Query’ button. The system displays the records that match the search criteria.
Double click a record or click the ‘Details’ button after selecting a record to view the detailed screen.
2.3 Dispatch
The below listed changes are applicable for dispatch processing of Domestic low value payments/ Direct Debits:
- Dispatch File Generation Screen
- File Dispatch Generation Summary
- Dispatch Parameters Maintenance
- File Dispatch Parameters Maintenance Summary
2.3.1 Dispatch File Generation Screen
Dispatch file generation screen is provided to manually initiate generation of dispatch files for CSM.
You can invoke ‘Dispatch File Generation’ screen by typing ‘PMDDFILE’ in the field at the top right corner of the Application tool bar and clicking on the adjoining arrow button...

You can specify the following fields:
Host Code
The system defaults the host code.
Request Reference Number
Reference Number is generated by the system.
Clearing Network
Select a valid clearing network for which the dispatch file will be generated.
Service Identifier
Indicates the service identifier. Identifier can be selected as SCT, SDD-CORE or SDD-B2B
User Reference Number
Specify the reference number for every dispatch run. This reference number can be used to track the number of files generated for every dispatch run.
2.3.2 File Dispatch Generation Summary
You can invoke the ‘Dispatch File Generation Summary’ screen by typing ‘PMSDFILE’ in the field at the top right corner of the Application tool bar and clicking on the adjoining arrow button:

You can search using the following parameter:
- Request Reference Number
- Clearing Network
- Network Description
- Clearing Network
- Service Identifier
- User Reference Number
- Authorization Status
Once you have specified the search parameters, click ‘Search’ button. The system displays the records that match the search criteria.
2.3.3 Dispatch Parameters Maintenance
Dispatch time for auto generation of Domestic Low Value Payments /Direct Debit dispatch files can be maintained in this screen.
You can invoke the ‘Dispatch Parameters Maintenance’ screen by typing ‘PADISPTM’ in the field at the top right corner of the application toolbar and clicking the adjoining arrow button.
You can specify the following fields:
Host Code
Select the required host code for the dispatch.
Network Code
Specify a brief description on the network code.
Service Identification
Specify the service identification code.
This field has options as SCT, SDD-CORE & SDD-B2B.
Sending BIC
All Branch BICs for the host are listed here. You can select the required Dispatch branch.
Schema Definition File Path
This field is used for maintaining the path of XSD file with which the dispatch file is validated.
2.3.4 File Dispatch Parameters Maintenance Summary
You can invoke the ‘Dispatch File Generation Summary’ screen by typing ‘PASISPTM’ in the field at the top right corner of the Application tool bar and clicking on the adjoining arrow button:

You can search using the following parameter:
- Record Status
- Host Code
- Network Code
- Service Identification
- Sending BIC
- Authorization Status
Once you have specified the search parameters, click ‘Search’ button. The system displays the records that match the search criteria.
2.3.5 Payment Details Handoff to External Systems
- If Payment Handoff is applicable, individual payment transaction data will be put into a destination JMS queue in XML format.
- This will be done after dispatch data enrichment is done for fields like Sender’s BIC, Service level &settlement method.
- Dispatch file generation will not be applicable if ’Payment Handoff’ flag is checked for the Network.
Note
This option is available for ACH payments.
2.4 Common Processes
2.4.1 Host & Time zone Related Processing
- Processing of payment transactions for multiple hosts with different time zones is supported.
- Cut-off time maintenances are to be done in host time.This has to be operationally controlled.
- Dispatch file generation timings and auto batch closure time for bulk file upload also follow host date & time.
2.4.2 Customer Status Check
- Customer status check is added in initial validations of payment processing.
- Based on customer status available as part of external customer maintenance (STDCIFCR), system performs the status check.
- If any of the following status for customer is maintained, payment
transaction gets moved to Business Override Queue:
- Deceased
- Whereabouts Not Known
- Frozen
- If record status is Closed, out going payment transactions is moved to Process Exception Queue. Incoming transactions will be moved to Repair Queue so that Return or Repair action can be performed based on the payment type.
2.4.3 Sanction Check
- If sanction check is made applicable at Network Preferences, system initiates sanction processing. Additional check is performed to verify whether sanction check is applicable for the customer at customer maintenance (STDCIFCR) level.Sanction processing is done only if it is applicable for both network and customer.
- On receiving External Sanction Check system response, sanction check status of the payment is updated.
- The following responses are possible:
- A – Approved. Sanction check is approved by the external system
- O- Override – Interim status or approval with override is received from external system
- R – Rejected. This indicates that the contract failed ECA check.
- T – Timed out. ECA check status is updated as T if no response is received from the external system within the stipulated time limit maintained for ECA system check system.
- If the sanction check response status for a payment transaction is ‘Approved’, then further processing continues.
- If the sanction check response status of the transaction is ’Override’ or ’Rejected’ or ‘Timed Out’, then transaction is logged in Sanction Check Exception Queue.
- If External system reject code is marked for auto cancellation in sanction system maintenance, transaction is automatically cancelled.
2.4.4 External Credit Approval
- Oracle FLEXCUBE Payments sends debit accounting entries pertaining to payment amount and charge/tax amounts to external DDA system for credit checks. ECA system for the credit check is derived based on External Customer Account (STDCRACC) maintenance.
- ECA requests are sent, if the flag ‘External Credit Approval Required’ in ‘External Customer Account maintenance (STDCRACC) is checked.
- Transaction ECA status are updated based on the response received from the external system.
- The following responses are possible:
- A – Approved. ECA is approved by the external system
- O- Override – Interim status or approval with override is received from external system
- R – Rejected. This indicates that the contract failed the External Credit Approval check.
- T – Timed out. ECA check status is updated as T if no response is received from the external system within the stipulated time limit maintained for external sanction check system.
- If the ECA response status for a payment transaction is ‘Approved’, then further processing continues.
- If ECA validation fails i.e. the status is ‘Override’, ’Rejected’, or ‘Timed out’, transaction is logged in ECA Exception Queue.
- If External system reject code is marked for auto cancellation in ECA system maintenance, transaction is automatically cancelled.
- Transaction Account and Charge Account cannot belong to different DDA systems. System validates the same.
- For a bulk file handling, ECA request for debit entries generates separate requests for debit account and charge account if both accounts are not the same.
- Reversal of ECA request is required in the following cases:
- Transaction is cancelled from Network Cut-off Queue
- Transaction is carried forward from Network Cut-off Queue
- On reversal of ECA, request message is sent to external system with original transaction details & amounts, indicating that it is a reversal request.
- External Account check (EAC) request is sent if customer account is in for credit leg of a transaction.This is applicable for incoming payments and book transfers.
- EAC requests are sent, if the flag ‘External Credit Approval Required’ in ‘External Customer Account maintenance (STDCRACC) is checked.
- For Book transfer transaction, request is generated for debit account and related charges. External Account check request is sent for credit account.
- If external account check request fails, transaction is moved to ECA queue. Exception queue for both ECA/EAC requests is the same.
2.4.5 Small FX Limit Check & Currency Conversion
- For a cross currency payment transaction where debit currency and transfer currency are different, exchange rate is picked up as maintained for the transaction branch.
- If Small FX limit is defined in Network Currency Preferences, then the auto rate pick up takes place only if the transfer amount is within the small FX limit.
- Exchange Rate Type is based on Network preferences maintained. Buy/Sell indicator is derived by the system.
- If the transfer amount is above the small FX limit specified, the rate is fetched from the internal exchange rates maintained in CORE.
- If the transfer amount is above the small FX limit specified, system checks whether External Exchange Rate is applicable in Network Preferences.
- If external system is available the transaction details, then system sends request to external system for receiving the exchange rate.
- Based on the response received, exchange rate is populated and further processing of transaction will continue.
- The following responses are possible from External Exchange Rate
system:
- A-Approved-Response with exchange rate
- R-Rejected-No exchange rate available in response or resulted in error
- T-Timed out –Request is timed out
- If Small FX limit is not maintained, auto rate pick up is done from internal rates maintained, for all cross currency payment transactions without any limit check.
- Payment contract is moved to Exchange Rate Exception queue in the
following cases with proper error code details:
- Exchange Rate derivation based on core system maintenance fails
- Small FX limit is breached and no external exchange rate system maintenance is available
- Payment contract is moved to external exchange rate queue if response from External Exchange Rate system is rejected or timed out.
- It is possible to provide exchange rate manually from Queue screen so that transaction proceeds with further processing.
2.4.6 IBAN Check
- If ‘IBAN validation required’ flag is checked for the network, then IBAN verification for Debtor IBAN, Creditor IBAN & creditor BIC is done against the IBAN format maintained for the respective country.
- IBAN is validated based on IBAN Information maintenance (ISDESBAN)
available for the country for the following parameters:
- IBAN length
- Check digit of the IBAN
- National ID of the IBAN
- Check digit of the beneficiary IBAN must be validated using the below
mentioned process:
- Extract country code from the IBAN
- Search the IBAN check digit length and IBAN check digit position for the country code from the IBAN structure data storage.
- Extract the check digit from IBAN using IBAN check digit length and IBAN check digit position.
- Compute the check digit from IBAN using the scheme defined in ISO/IEC 7064 Modulo 97-10.
- Compare the check digit value computed and the check digit value extracted from IBAN
- National ID of the beneficiary IBAN must be validated using the below
mentioned process
- Extract the IBAN National id from IBAN using bank identifier position and IBAN national ID length
- Extract the IBAN ISO country code from IBANPlus data storage for the IBAN national id
- Compare the IBAN ISO country code from IBANPlus with the country code extracted from IBAN.
- If the all of the above conditions are satisfied, then the IBAN is valid.
- Validate BIC from an IBAN by looking up IBANPlus, if available. For payment transaction the beneficiary Bank code is checked for Valid BIC based on the beneficiary IBAN. The BIC will be derived from IBAN using the below mentioned process:
- Extract country code from the IBAN
- Search the bank identifier position and IBAN national ID length for the country code from the IBAN structure data storage
- Extract the IBAN National id from IBAN using bank identifier position and IBAN national ID length
- Search the IBAN BIC for the IBAN National id and country code from the IBANPlus data storage.
- If the IBAN BIC and Account with Institution BIC code (Creditor Agent BICFI for outgoing ISO transaction) does not match, then it displays ans error that Account with Institution BIC is not valid