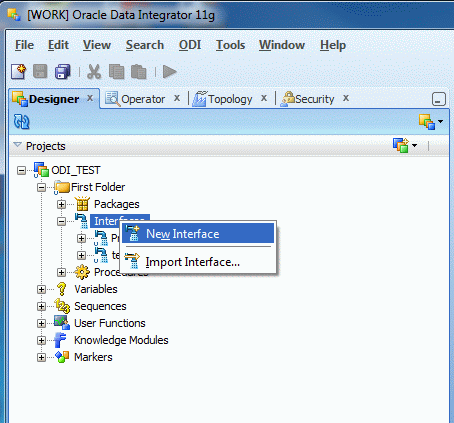
Next, you create an interface in ODI 11g, or if you are using ODI 12c, you create a mapping. (Interfaces and mappings are similar constructs.)
To create an interface:
-
If you are using ODI 11g, right click
Interfaces and select
New Interface, or in ODI 12c, right click
Mappings and select
New Mapping
For example, in ODI 11g:
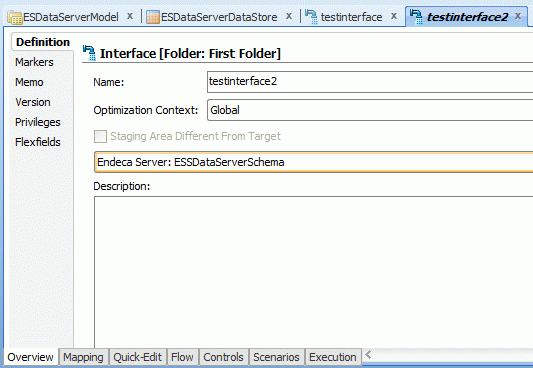
-
From the drop-down list, select
Endeca Server: <name of logical schema>
that you created earlier.
For example:
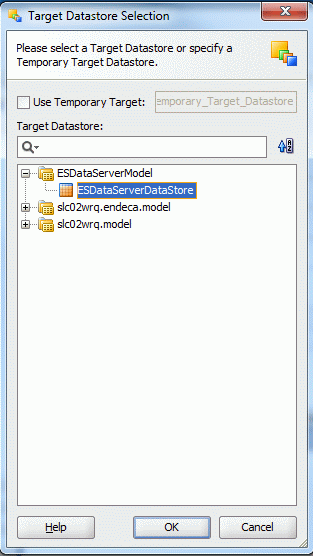
-
Expand the Endeca Server model and select a datastore.
For example:
You can now run the ODI Interface according to your scheduling requirements.
