This topic provides a brief description of how to install Oracle WebLogic Server, which is the Web server container in which the Endeca Server application is hosted.
This topic describes the installation of Oracle WebLogic Server 12.1.3, which is part of the WebLogic Server 12c product. This procedure applies to the Generic version of the installer (the installer file is named fmw_12.1.3.0.0_wls.jar).
- The Generic version of the WebLogic installer, which is downloaded as described in Oracle WebLogic Server requirement.
- The Oracle Java SE 7 or 8 JDK, as described in JDK requirement.
The installation instructions in this topic are a distillation of the complete instructions in the Oracle Fusion Middleware Installing and Configuring Oracle WebLogic Server and Coherence guide.
These distilled instructions concentrate on installing only those WebLogic Server components that are mandatory for an Endeca Server environment.
To install WebLogic Server:
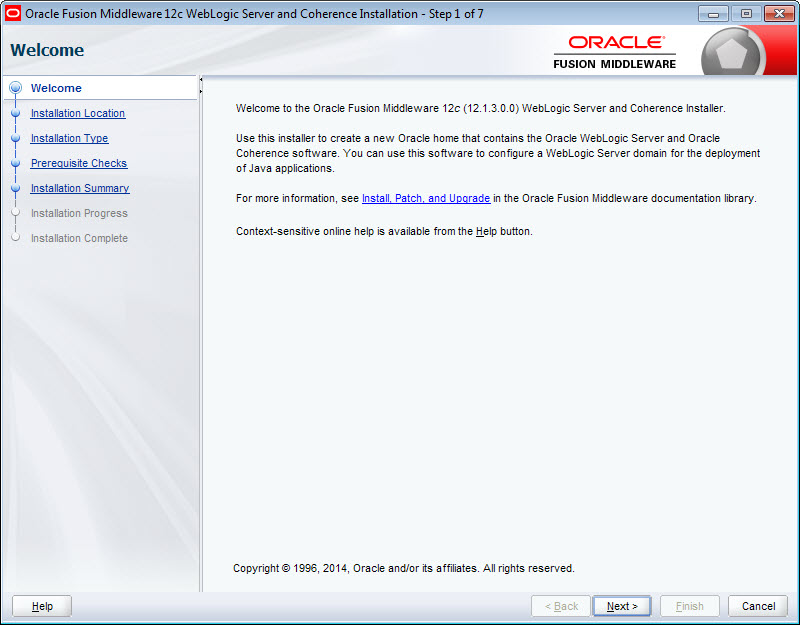
-
At the
Welcome screen, click
Next.
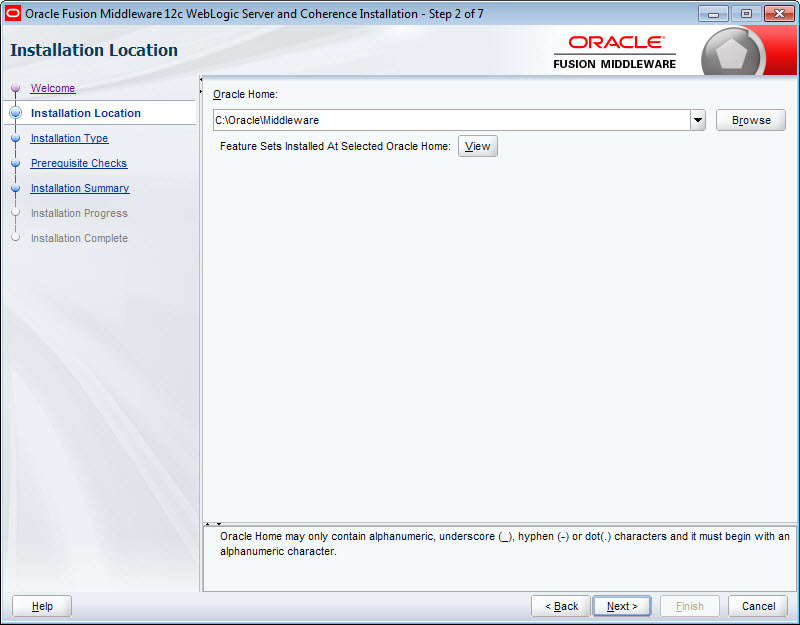
-
At the
Installation Location screen, enter the name
of the Middleware home directory in the
Oracle Home field.
This will be the $MW_HOME directory of your installation. You can either accept the default location or enter a new one. The directory name may only contain alphanumeric, hyphen (-) , dot (.), and underscore (_) characters, and must begin with an alphanumeric character.If the specified directory exists, it must be empty. If it doesn't exist, the installer will create it.Click Next when you're done.
-
At the
Installation Type screen, leave
WebLogic Server selected and click
Next.

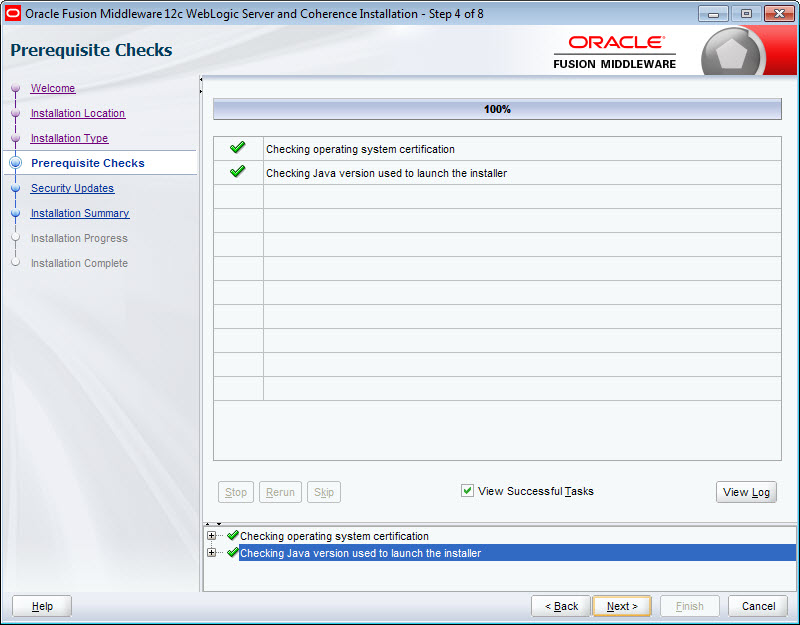
-
At the
Prerequisite Checks screen, wait for the
installer to verify your operating system and Java version, then click
Next.
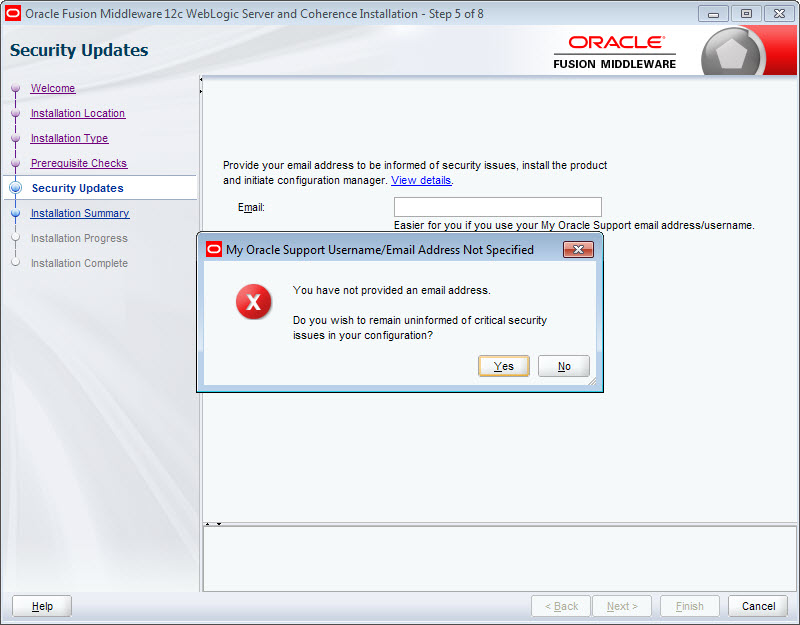
-
At the
Security Updates screen, if you want to
receive security updates, enter your support details and click
Next.
If you don't want to receive updates, uncheck I wish to receive security updates via My Oracle Support, click Next, then click Yes in the pop-up.
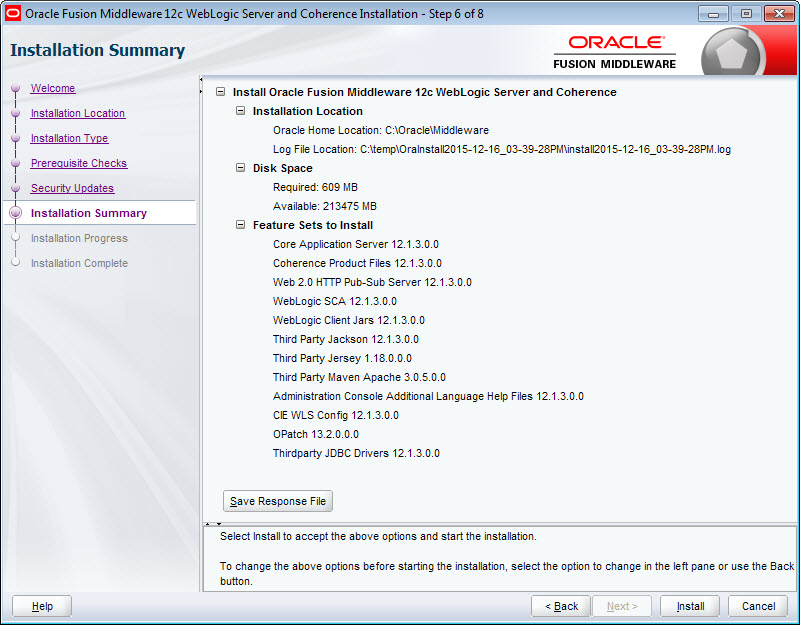
-
At the
Installation Summary screen, verify that
you're installing the correct products, then click
Install.
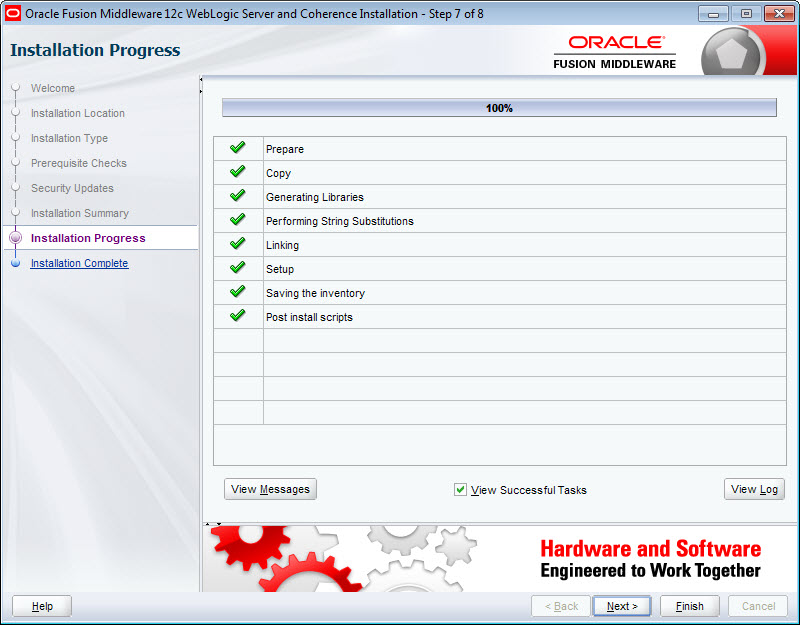
-
At the
Installation Progress screen, wait for the
installation to complete, then click
Next.
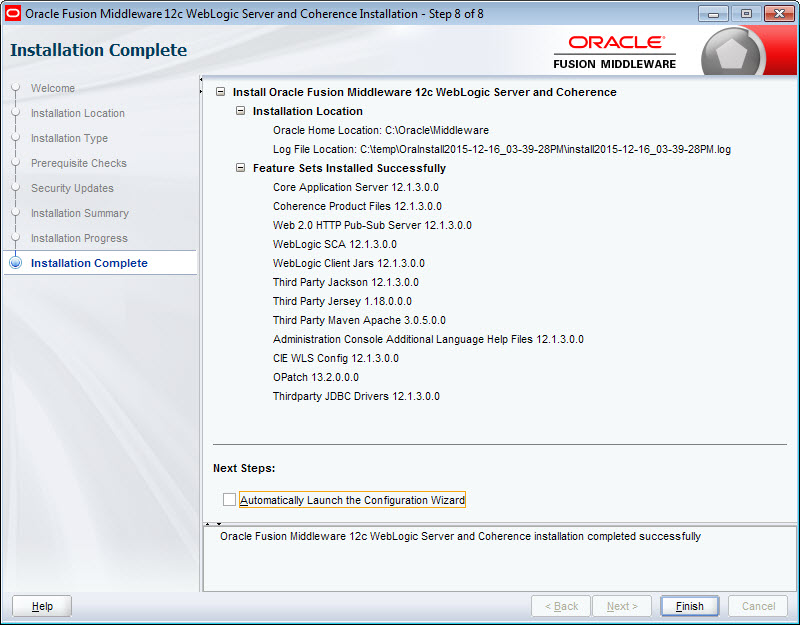
-
At the
Installation Complete screen, uncheck
Automatically Launch the Configuration Wizard,
then click
Finish to exit the installer.
You'll configure WebLogic Server later in the installation process.
The next step is to install Endeca Server.
