| Oracle® Argus Mart Installation Guide Release 1.0 E38590-01 |
|
|
PDF · Mobi · ePub |
| Oracle® Argus Mart Installation Guide Release 1.0 E38590-01 |
|
|
PDF · Mobi · ePub |
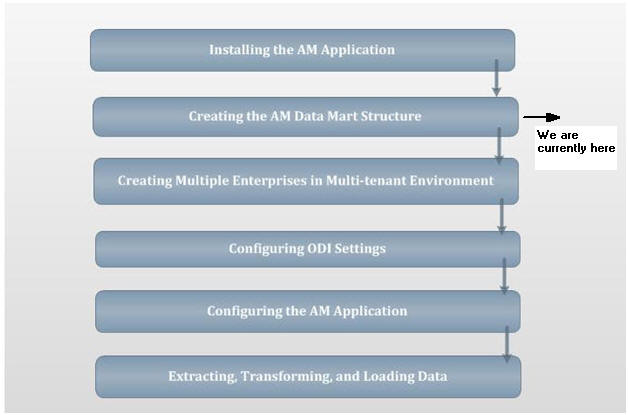
Once you have installed the AM application, you can now create its data mart structure.
The following figure depicts your progress in the complete installation process:
The AM Schema Creation tool enables you to create the AM data structure. It creates a link between the safety database and the new AM data mart. The Extract, Transform, and Load (ETL) process uses this link to transfer data from your source database to the AM data mart. Once transferred, this data can be used for querying and reporting purposes.
This chapter comprises the following sub-sections:
Before Running the AM Schema Creation Tool
AM Data Mart Tablespaces
Starting the AM Schema Creation Tool
Creating the Database Schema
Validating the Schema
The GLOBAL_NAME and NLS_LENGTH_SEMANTICS database parameters must be configured properly in order, for the AM Schema Creation Tool to run. If the parameters are not set properly, the Schema Creation Tool fails.
You must check the following settings before you run the AM Schema Creation Tool:
GLOBAL_NAME is set to FALSE. This enables the AM application to create the database links.
NLS_LENGTH_SEMANTICS is set to CHAR for the AM Schema Creation Tool to run.
The following table lists the tablespaces for the AM data mart. AM creates these tablespaces when you create a database schema:
This section gives you a brief introduction about all the options that are visible on the user interface, once you start the AM schema creation tool.
To start the AM Schema Creation tool, execute the following procedure:
Log in to the Argus Mart Server as a user with administrator privileges.
Click DBInstall.exe saved at the following location:
...\ArgusMart\Database\DBInstaller\DBInstall.exe
This displays the AM Schema Creation Tool, as shown in the following figure:
The following is a summary of all the options provided on the user interface:
Create Schema - Enables you to create a new database schema for AM. See Section 3.4.3, Creating a New Database Schema for AM, for more details.
Schema Validation - Enables you to validate a newly-created AM database schema. See Section 3.5, Validating the Schema for more details.
Factory Data - Loads data in to the newly created AM database schema. See Section 3.4.4, Loading Factory Data.
Argus User Creation - Enables you to create the users for the Argus Safety database. See Section 3.4.1, Creating User for the Argus Safety Database
Exit - Enables you to exit from the AM Schema Creation tool.
This section explains all the steps required to create a new AM database schema and load factory data into the database schema.
This section comprises the following sub-sections:
Creating User for the Argus Safety Database
Clearing the Cache
Creating a New Database Schema for AM
Loading Factory Data
Before creating a new AM database schema, you must create a user for the Argus Safety database.
This section explains the procedure to create a user for the Argus Safety database. To do so, execute the following procedure:
Start the AM Schema Creation tool. See Section 3.3, Starting the AM Schema Creation Tool. This displays the AM Schema Creation Tool, as shown in the following figure:
Click Argus User Creation. This displays the Oracle Database Connect dialog box, as shown in the following figure:
In the Oracle Database Connect dialog box:
Enter the password for the SYSTEM user in the Password field.
Enter the name of the Argus Safety database that you want to connect to, in the Argus Safety Database field.
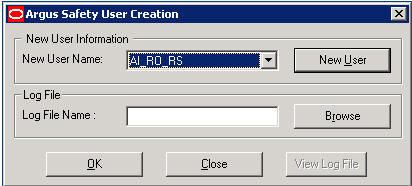
Click OK. This displays the Argus Safety User Creation dialog box as depicted in the following figure:
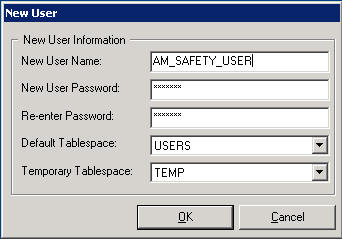
Click New User. This displays the New User dialog box, as displayed in the following figure:
In the New User dialog box:
Enter the name for the new user in the New User Name field.
Enter the password for the new user in the New User Password field.
Re-enter the password for the new user in the Re-enter Password field. Do not change the default values displayed in the Default Tablespace and Temporary Tablespace drop-down lists.
Select the default tablespace, where you want to store the database objects, from the Default Tablespace drop-down list.
Select the tablespace, where you want to store the database objects temporarily, from the Temporary Tablespace drop-down list.
Click OK.
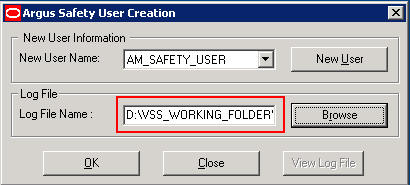
Select the name of the newly created user from the list of existing users in the New User Name drop-down list of the Argus Safety User Creation dialog box.
Click Browse to navigate to the location where you want to save the log file. This displays the Save Log File dialog box, as shown in the following figure:
Enter the name of the log file in the File name field. You can enter the name of the file as AM_SAFETY_USER, which is easier to remember, for reference later in the installation process.
Click Save. This displays the complete path of the log file in the Log File Name field of the Argus Safety User Creation dialog box, as shown in the following figure:
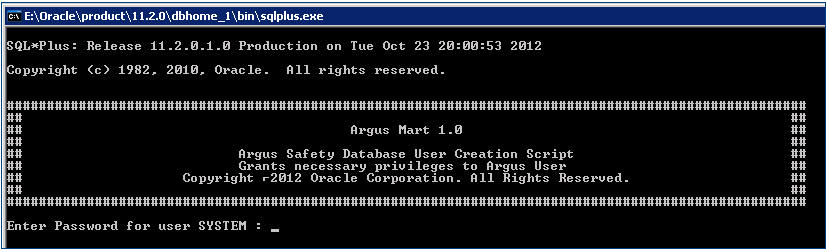
Click OK when you are ready to create the specified user. This displays a command prompt as shown in the following figure:
Enter the password for the SYSTEM user and press Enter to continue.
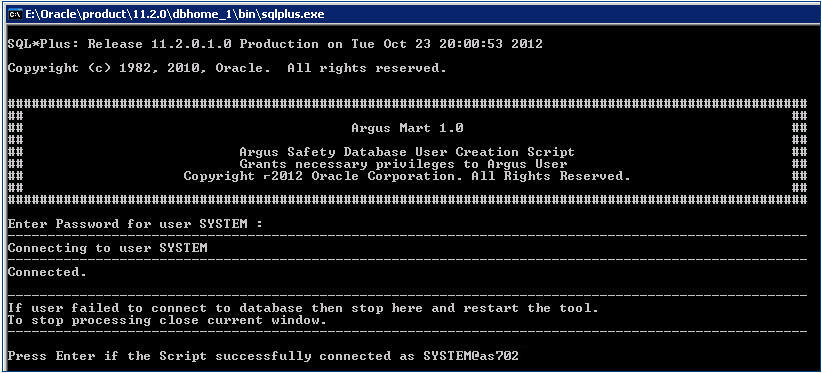
Verify that the script is successfully connected as SYSTEM User@<Argus Safety Database Name> as shown in the following figure:
Press Enter again to continue.
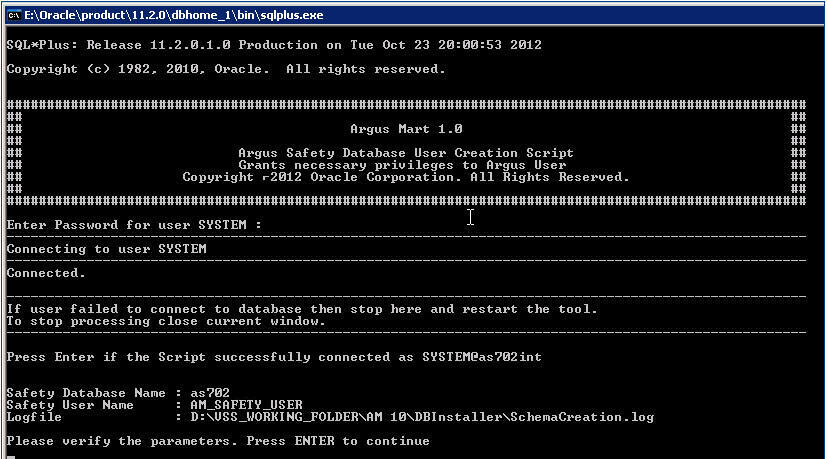
The system displays information about the Argus Safety database name, the name of the user to create, and the name of the log file, as depicted in the following figure:
Verify that the information is correct, and press Enter to continue. Wait till the system displays additional information about creating the user and granting privileges along with the log file details.
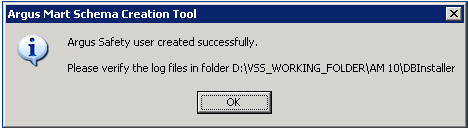
Press Enter to complete the installation. The system displays a message that the user account has been created successfully and lists the folder location of the log files, as shown in the following figure:
Click OK to close the message box. The system returns to the Argus Safety User Creation dialog box.
Click View Log File.
Review the information in the log file and check for any errors.
Close the log file.
Click Close to exit from the Argus Safety User Creation dialog box.
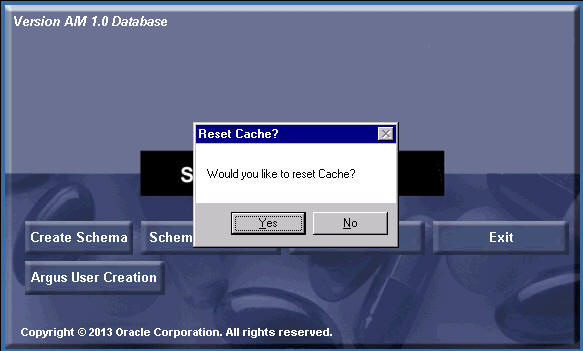
If the Schema Creation process is interrupted before completion and you need to restart it from the beginning, you must clear the Cache and re-run the Schema Creation Tool using a fresh database instance.
To clear the Cache:
Press and hold the CTRL key and right-click the mouse. The Schema Creation Tool prompts for confirmation that you want to reset the Cache.
Click Yes.
Argus Mart clears the cache and logs the action in the AMCreateLog.rtf file.
Note:
Before executing the steps for creating a new schema for AM, ensure that you have remote access to the SYS user.If you do not have remote access to SYS user, execute the sm_sys{grant}.sql script through SYS user. This SQL script is located in the following folder:
...\ArgusMart\Database\DBInstaller\SM_DDL\sm_sys{grant}.sql
Once you have created the user for the Argus Safety database, you can now create a new database schema for AM. To do so, execute the following procedure:
Start the AM Schema Creation tool. See Section 3.3, Starting the AM Schema Creation Tool. This displays the AM Schema Creation Tool, as shown in the following figure:
Click Create Schema. This displays the Oracle Database Connect dialog box, as shown in the following figure:
In the Oracle Database Connect dialog box:
Enter the password for the SYSTEM user in the Password field.
Enter the name of the AM database that you want to connect to, in the Argus Mart Database field.
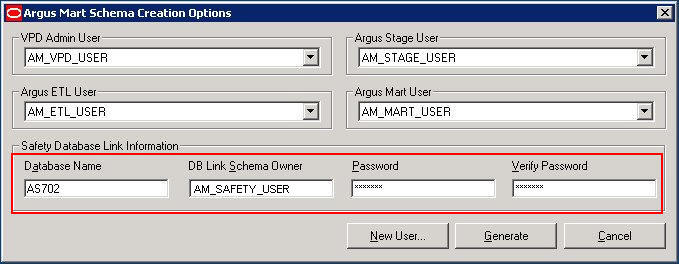
Click OK. This displays the Argus Mart Schema Creation Options dialog box, as depicted in the following figure:
Now we need to create the following four users using this screen:
VPD Admin User
Argus Stage User
Argus ETL User
Argus Mart User
You can create the users with names AM_VPD_USER, AM_STAGE_USER, AM_ETL_USER, and AM_MART_USER respectively so that you can easily remember and use them later in the installation process.
Click New User. This displays the New User dialog box, as displayed in the following figure:
In the New User dialog box:
Enter the name for the new user in the New User Name field.
Enter the password for the new user in the New User Password field.
Re-enter the password for the new user in the Re-enter Password field.
Select the default tablespace, where you want to store the database objects, from the Default Tablespace drop-down list.
Select the tablespace, where you want to store the database objects temporarily, from the Temporary Tablespace drop-down list.
Click OK.
Repeat steps 5(a) to 5(e) of this procedure to create three more users, which are referred as Argus Stage User, Argus ETL User, and Argus Mart User.
In the Argus Mart Schema Creation Options dialog box:
Select the Argus VPD user, which you have created using step 5 of this procedure, from the VPD Admin User drop-down list.
Select the Argus Stage user, which you have created using step 5 of this procedure, from the Argus Stage User drop-down list.
Select the Argus ETL user, which you have created using step 5 of this procedure, from the Argus ETL User drop-down list.
Select the Argus Mart user, which you have created using step 5 of this procedure, from the Argus Mart User drop-down list.
In the Safety Database Link Information section:
Enter the Argus Safety Database name, which you have used while creating the user for the Argus Safety database in the Database Name field. See step 3(b) of the section 3.4.1 , Creating User for the Argus Safety Database for detailed steps.
Enter the name of the user for the Argus Safety database in the Database Link Schema Owner field. See step 5(a) of the section 3.4.1 , Creating User for the Argus Safety Database for detailed steps.
Enter the password of the user for the Argus Safety database, in the Password field. See step 5(b) of the section 3.4.1 , Creating User for the Argus Safety Database for detailed steps.
Re-enter the password in the Verify Password field.
Click Generate. This displays the Oracle Database Connect dialog box, as shown in the following figure:
Enter the password for the Argus Stage User in the Password field.
Click OK.
This displays the Oracle Database Connect dialog box again, as shown in the following figure:
Enter the password for the Argus Mart User in the Password field.
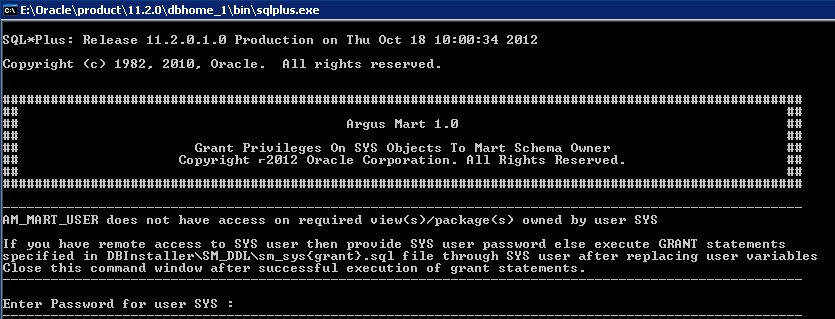
Click OK. This displays a command prompt, as shown in the following figure:
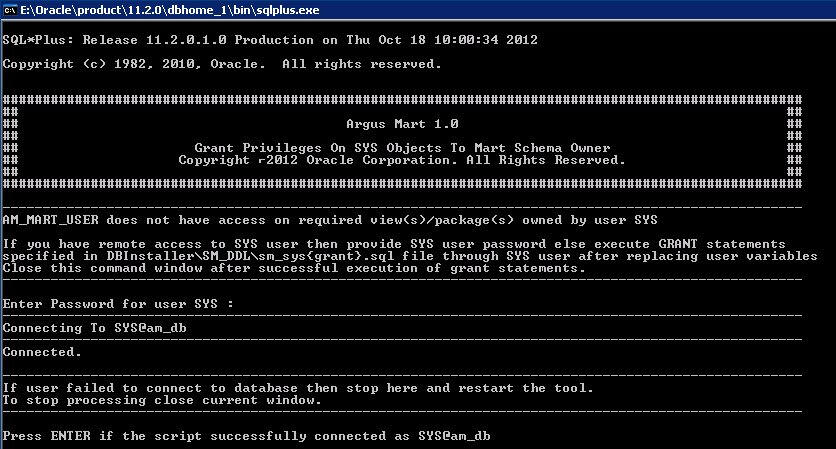
If you have remote access to the SYS user, enter the password for the SYS user and Press Enter to continue. This displays the following screen:
OR
If you do not have remote access to the SYS user, and you have already executed the sm_sys{grant}.sql script through SYS user, you would execute Step15 of this procedure. This SQL script is located at the following path:
...\ArgusMart\Database\DBInstaller\SM_DDL\sm_sys{grant}.sql
Verify that the script is successfully connected as <SYS User Name>@<Argus Mart Database Name> and press Enter. This displays the Grant succeeded message multiple times on the command screen and subsequently displays the location of the log file.
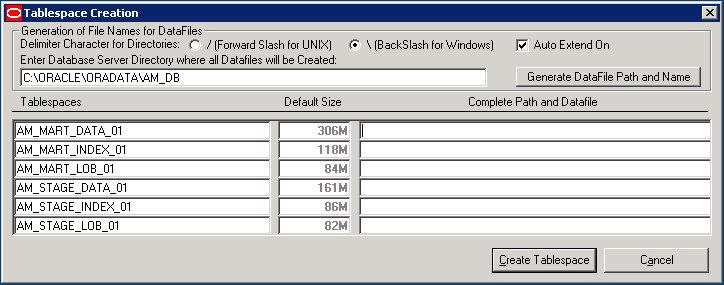
Verify the location of the log file and press Enter. This displays the Tablespace Creation dialog box, as shown in the following figure:
In the Tablespace Creation dialog box:
Enter the complete path to the directory for the tablespace data files used by Argus Mart, in the Enter Database Server Directory where all Data Files will be Created field.
Click Generate DataFile Path and Name. The system automatically fills in the Complete Path and Datafile column for all tablespaces, as shown in the following figure:
Click Create Tablespace to create all Tablespaces. If a TableSpace already exists, the system displays a warning message to use the existing Tablespace.
Click Yes to use the existing TableSpace.
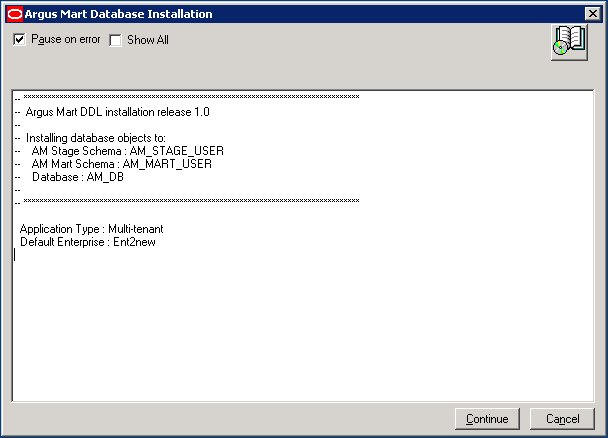
Wait until the system creates the tablespaces and opens the Argus Mart Database Installation dialog box, as shown in the following figure:
Click Continue to start the schema creation. The system executes the scripts, displays status information during the schema creation process, and reports when the update is complete, as shown in the following figure:
Click the Book icon to view the log file and check for errors. Alternatively, you can view the log file at any time at the following location: ...\ArgusMart\Database\DBInstaller\AMCreateLog.rtf
Click Finish to close the Argus Mart Database Installation dialog box. This completes the procedure to create a new database schema for AM.
To load data into the newly created AM database schema, execute the following procedure:
Start the AM Schema Creation tool. See Section 3.3, Starting the AM Schema Creation Tool. This displays the AM Schema Creation Tool, as shown in the following figure:
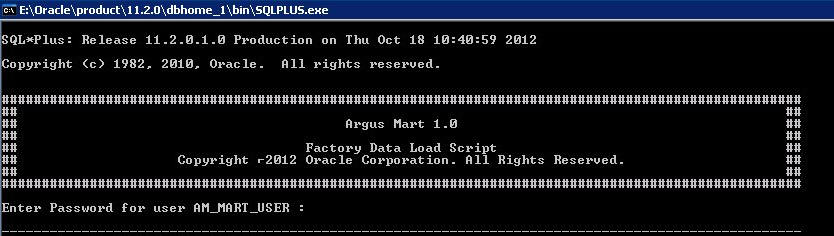
Click Factory Data. This displays a command prompt, as shown in the following figure:
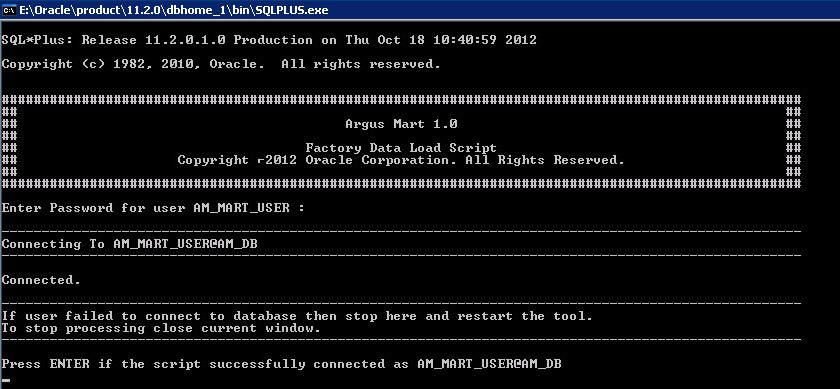
Enter the password for the Argus Mart user and Press Enter. This displays the following screen:
Verify that the script is successfully connected as <AM User Name>@<Argus Mart Database Name> and press Enter. The system displays messages about the creation of rows and subsequently displays the following message:
Press Enter. The system displays a confirmation message, as shown in the following figure:
Click OK to complete the procedure to load the factory data into the newly created AM database.
Once you have created the database schema for AM, you can also validate it using the AM Schema Creation tool. To do so, execute the following procedure:
Start the AM Schema Creation tool. See Section 3.3, Starting the AM Schema Creation Tool. This displays the AM Schema Creation Tool, as shown in the following figure:
Click Schema Validation. This displays the Oracle Database Connect dialog box, as shown in the following figure:
In the Oracle Database Connect dialog box:
Enter the password for the SYSTEM user in the Password field.
Enter the name of the AM database that you want to connect to, in the Argus Mart Database field.
Click OK. This displays the Schema Validation Utility dialog box, as shown in the following figure:
In the Schema Validation Utility Dialog Box:
Click Browse next to the Validation CTL Folder and File field. This displays the Schema Validation CTL File Name dialog box, as shown in the following figure:
Select the CTL file, which you want to validate, and click Open. This displays the complete path of the CTL file in the Schema Validation CTL File section. Once you select the location of the CTL file, the Validation LOG File Name (Record Diff) and Validation LOG File Name (Record Output) fields are also auto-populated with the <name of the CTL file>_Diff.log and <name of the CTL file>_Out.log names respectively.
In the Schema Validation Log Files section, click Browse next to the Select Log Files Folder field. This displays the Select Folder dialog box, as depicted in the following figure:
Select the folder, where you want to save the log files.
Click OK. This displays the name of the folder in the Select Log Files Folder field, as shown in the following figure:
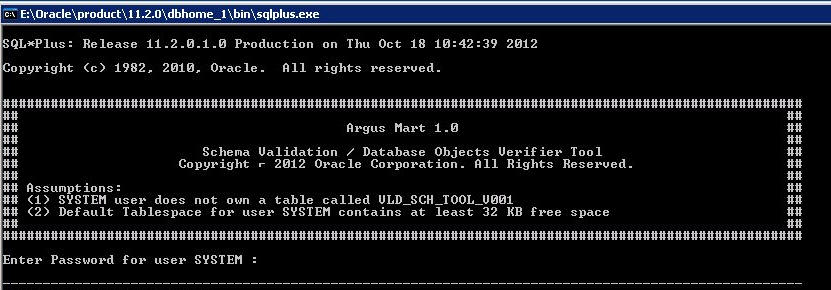
Click Validate Schema. The system displays the following command screen:
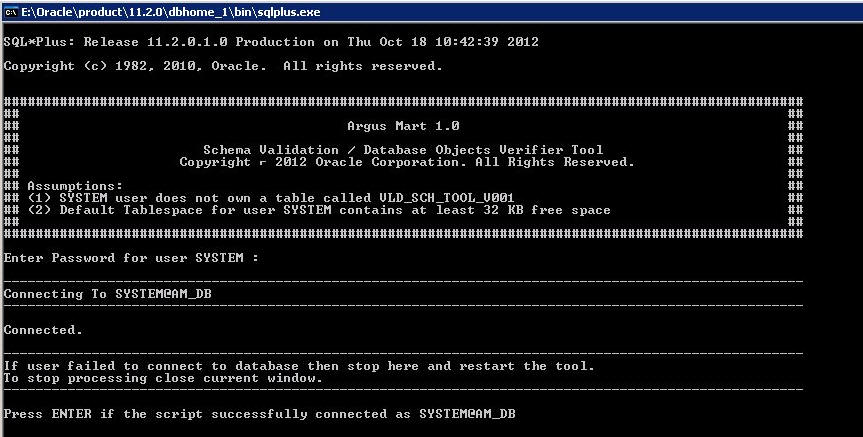
Enter the password for the SYSTEM user and press Enter. This displays the following command screen:
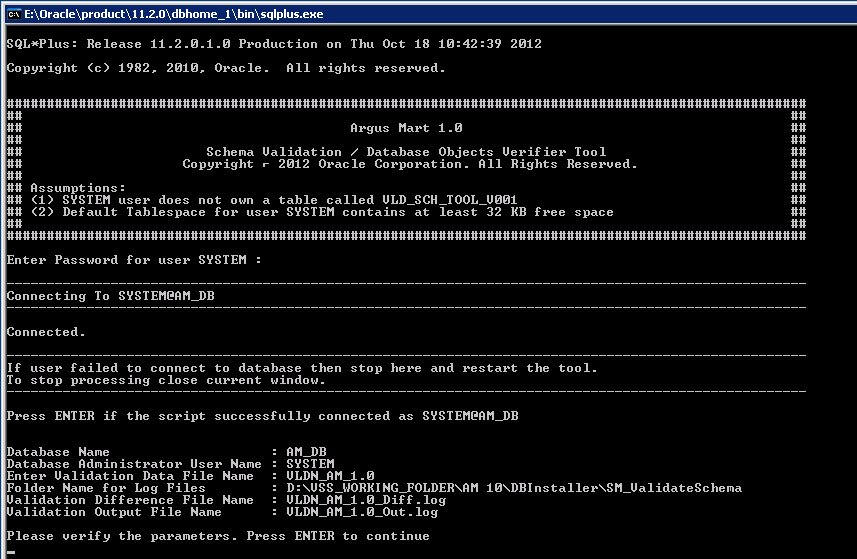
Verify that the script is successfully connected as <SYSTEM User Name>@<Argus Mart Database Name> and press Enter. This displays the following command screen:
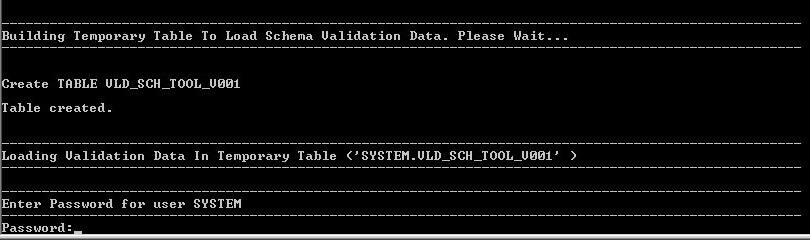
Review the information on the command screen and press Enter. This displays the following command screen:
Enter the password for the SYSTEM User and press Enter.
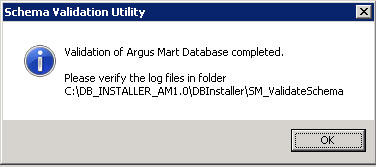
Continue to review the information on each screen and press Enter until the system displays the Schema Validation Utility dialog box along with the location of the log file, as shown in the following figure:
Click OK. This displays the Schema Validation Utility dialog box.
In the Schema Validation Utility dialog box, you can:
Click View Difference Log File to check for any schema discrepancies, such as missing objects.
Click View Output Log File to see the list of errors, if any, that occurred during schema validation.
Click Close to exit from the Schema Validation Utility dialog box.
|
Copyright © 2011, 2013, Oracle and/or its affiliates. All rights reserved. Legal Notices |
|