| Agile Product Lifecycle Management Administrator Guide Release 9.3.3 E39286-04 |
|

 Previous |
 Next |
| Agile Product Lifecycle Management Administrator Guide Release 9.3.3 E39286-04 |
|
Previous |
Next |
You can double-click Viewer and Files under System Settings to open the Viewer & Files window. You can set viewing preferences for files that are attached to Agile PLM objects.
The following table lists the properties on the General Information tab of the Viewer & Files window; elaborations about some of the properties follow.
Table 20-1 Viewer & Files window, General Information tab
| Property | Description | Default |
|---|---|---|
|
AutoPurge Enabled |
Determines whether old versions of attachments should be deleted from the Agile File Manager. |
No |
|
File Version Keep |
Dictates the number of versions to keep for archival purposes; used with AutoPurge Enabled set to Yes. Whether or not these versions include redlined versions depends on the settings of AutoPurge Enabled and Purge Redlined Files; see Note in text below. |
3 |
|
Purge Redlined Files |
Determines whether files with redlines are deleted, depending on the setting of AutoPurge Enabled. Overrides the File Version Keep preference. |
No |
|
Purge Historical Reports Unaccessed (in days) |
Dictates the number of days that a Historical Report is not accessed before it is automatically purged. |
30 |
|
Directly Use These Thumbnail Image Types |
This setting provides a list of file types (listed as the extension names) that will be directly converted to thumbnails. |
bmp, gif, jfif, jpe, jpeg, jpg, and png These are the default image types and the user should not remove or add to these. |
|
CAD Revision BOM Attribute |
This field lets the administrator enable a text field in the Documents class, which permits assigning Revision letters (A, B, C, and so on) to CAD modeling BOMs (structured BOMs). The process to set up this field is described in "CAD Revision BOM Attribute." |
— |
|
Upload File Size Limit (in MB) |
Defines the maximum size (in MB) of uploaded files for Java Client, Web Client, Portal Client, and SDK. The default value, 0, indicates "No Limit"; any non-negative integer sets the size limit in MB. Users get error message in Java & Web clients if a file is too large. Files that successfully upload (before a failure occurs) remain uploaded, other files (after a failure occurs) will not be uploaded. |
0 (= No limit to file size) |
|
Valid URL Prefixes |
Defines the list of valid URL prefixes that can be added as URL attachments If the user enters a URL prefix that is not in this list, then that URL is excluded from the URLs added to the Attachment table and an error message is displayed. The list of Valid URL Prefixes applies to the Web Client user interface, Java Client user interface, SDK, and Web Services. You can add and remove URL prefixes from the Valid URL Prefix list as needed. |
http:// https:// file: \\\\ sftp:// ftp:// ftps:// feed: afp:// gopher:// mailto: telnet:// wais:// mid: cid: www |
|
Control Upload File Types |
Allows you to control the file types that can be added as attachments in Agile PLM. Yes – Only file types that are in the File Type list can be added to Agile PLM. No – Any file type can be added to Agile PLM. See Specifying Supported File Types for AutoVue for Agile. |
No |
The following settings determine the circumstances under which files are purged or retained on the Agile PLM system and on users' local computers. Purging and retaining take place only during checkout and checkin routines.
Old versions of attachment files can be automatically deleted from the Agile File Manager. When files are checked in or checked out, the older versions of the File Folder object or Design object are automatically deleted after the checkout or checkin routine. The files in those deleted folder versions remain in file vault temporarily, and then they are moved to the purge folder when the AutoPurge task runs. Files are moved to the purge folder only if they are not referenced by another Agile object. See also "Purging Older Versions of Files" and "Purge Folder Version Privilege."
If AutoPurge Enabled is set to Yes, old file versions are deleted. To specify how many versions of the files you want to keep, use the File Version Keep field. See "File Version Keep" and "Purge Redlined Files."
If AutoPurge Enabled is set to No, old file versions of attachments are kept on the Agile PLM system.
|
Important: There is no operation to restore an autopurged file. AutoPurge is not an archive function. |
To enable or disable AutoPurge:
Under System Settings, double-click Viewer & Files. The Viewer & Files window appears.
In the Auto Purge Enabled drop-down list, select No (disabled) or Yes (enabled).
When you are finished, click Save.
Use this property to specify how many old versions of the files you want to keep. For example, if the value is set to3, then the three most recent versions of the file are archived. (The latest version is also kept.) Use this property when Auto Purge Enabled is set to Yes; if Auto Purge Enabled is set to No, all versions are kept. See "AutoPurge Enabled" and "Purge Redlined Files."
To specify the number of attachment versions to keep:
Under System Settings, double-click Viewer & Files. The Viewer & Files window appears.
In the File Version Keep field, type a number. The number indicates how many attachment versions you want to keep, in addition to the current version.
When you are finished, click Save.
The Purge Redlined File field determines whether redlined files are automatically deleted along with files without redlines, depending on the setting of Auto Purge Enabled.
With Auto Purge Enabled set to Yes and Purge Redlined File set to Yes, the value of File Version Keep is the number of versions that will be kept. All earlier redlined files are purged. With Auto Purge Enabled set to Yes and Purge Redlined File set to No, the value of File Version Keep is the number of versions (either redlined or non-redlined) that will be kept. All earlier redline files are also kept. See "AutoPurge Enabled."
To set the Purge Redlined File property:
Under System Settings, double-click Viewer & Files. The Viewer & Files window appears.
In the Purge Redlined File drop-down list, select No (disabled) or Yes (enabled).
When you are finished, click Save.
This setting provides a list of file types (listed as the extension names) that will be directly converted to thumbnails in Web Client without requiring the use of the view server because the conversion is done directly by the browser and occurs immediately when the file is attached. This setting also is a list of file types that can be used for the Replace function of manually specifying an image file to use for the thumbnail. The administrator can add supported image file types to this list. Be sure to have only one file type (entered in as an extension name) per line.
The default list of file types included in this field are:
bmp
gif
jfif
jpe
jpeg
jpg
png
|
Important: When Thumbnail settings are enabled, extra metafiles (cmf) are generated in the vault for assembly file types when viewed for the first time. |
For more information regarding Thumbnails, see Getting Started with Agile PLM, "Configuring a File Manager" and "Default Systemwide Preferences."
|
Note: Thumbnail images display in Web Client only. |
The file types listed in Directly Use These Thumbnail Image Types need to also be checked in the Auto Generate Thumbnail column of the File Association tab in order to be successfully rendered in the browser. It is possible to have no file types listed in Directly Use These Thumbnail Image Types and only have the file types checked in the Auto Generate Thumbnail column and successfully have those types rendered in the browser, but it takes much longer because it is using the view server.
It is necessary to restart the file server to successfully render these images once the settings have been changed.
See "Specifying Supported File Types for AutoVue for Agile."
This value identifies the attribute that is configured as part of Agile's EC CAD Connectors to hold the "As Saved" revision.
To set the CAD Revision BOM Attribute:
Double-click Viewer & Files.
From the CAD Revision BOM Attribute drop-down list, select the BOM attribute that you previously configured for holding the CAD Revision, as part of your EC installation. Click OK, then click Save.
To use the CAD Revision BOM Attribute to provide fixed BOM resolution for the viewer even though you are not using an Agile EC CAD Connector, you must manually store the current value of the Revision field, for each object in the BOM, in the BOM attribute you designate for "CAD Revision".
|
Note: If CAD Revision BOM Attribute field is left "blank," the system uses standard Agile BOM resolution to determine how to traverse the structure to find files. Standard resolution is considered "floating", in that child objects can "rev" forward even after the parent object is released. |
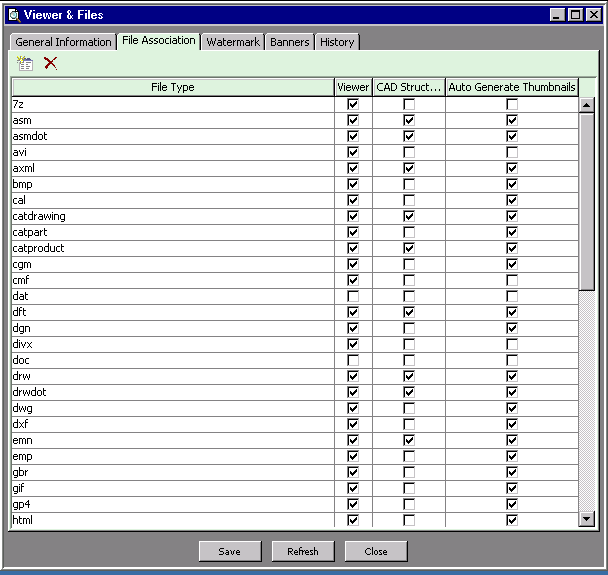
This section discusses the properties you can specify in the File Association tab.
In the File Type list on the File Association tab, you can select the types of files that users can view with AutoVue for Agile. The File Type list is also used to determine which file types can be added to Agile PLM as attachments when the Viewer & Files property Control Upload File Types is set to Yes. See Viewer & Files Properties
For each file type, you can select the following file association settings by selecting the check box in the appropriate column:
Viewer – When Viewer is selected, then a view action on any file of this file type causes the file to be displayed in the AutoVue for Agile viewer. If Viewer is not selected, then a view action opens the file in its native application
CAD Structure support – When CAD Structure supported is selected, then that particular file type will have the Viewer render the structure
Auto Generate Thumbnails – When Auto Generate Thumbnails is selected, then that particular file type will have the Viewer render a thumbnail image in Agile PLM
|
Note: The user must be assigned the ViewFile privilege to view attachments. |
For more information regarding Thumbnails, see Getting Started with Agile PLM, "Configuring a File Manager", "Directly Use These Thumbnail Image Types" and "Default Systemwide Preferences."
The "2D" file formats in the following table are automatically listed in the File Type list in Administrator. Current customers may also have additional file types listed after upgrading.
Table 20-2 File Types
| File extension | File type |
|---|---|
|
BMP |
Microsoft bitmap |
|
CAL |
CALS Group IV |
|
CGM |
Computer Graphics Metafile |
|
DGN |
Intergraph |
|
DOC |
Microsoft Word |
|
DWG |
AutoCAD Drawing File v 14, 2000 |
|
DXF |
AutoCAD Drawing Exchange Format |
|
EMN |
ECAD |
|
EMP |
ECAD |
|
GIF |
Graphic Interchange Format |
|
GP4 |
a neutral 2D viewable format |
|
JPG, JPEG |
Joint Photographic Experts Group |
|
PCX |
Microsoft Paintbrush |
|
|
Adobe Portable Document Format |
|
PLT |
HPGL & HPGL 2 |
|
PPT |
Microsoft PowerPoint |
|
PS |
Adobe Postscript |
|
SLDDRW |
SolidWorks 2D |
|
TIF, TIFF |
Tagged Image File Format |
|
TXT |
Text |
|
XLS |
Microsoft Excel |
|
ZIP |
Zip |
AutoVue for Agile is the integration of Oracle's AutoVue visualization tool with Agile PLM. For an updated list of file formats supported by AutoVue, see http://www.oracle.com/technetwork/documentation/autovue-091442.html.
File types are listed by extension. The View button is enabled by default, but if a user selects an attached file that has an unsupported file name extension, the system will throw an error.
|
Note: If you are the administrator of Agile PLM on a Chinese, Hebrew, or Swedish operating system, Agile recommends that you remove the Supported File Types property of all file-type extensions. This is because the AutoVue for Agile is not supported on those operating systems. For detailed information about using Agile PLM with international operating systems, contact the My Oracle Support website. |
To add or delete a file to the Supported File Types list:
Go to System Settings > Viewer & Files > File Association tab.
To delete a file type from the File Type list, select that line and click Delete.
To add a file type to the File Type list, click the New button, and then enter its name on the new line. You can also use Ctrl-C and Ctrl-V to copy and paste a list from one of the other file type fields or from another application.
When you are finished, click Save.
The Viewer & Files window includes a Watermark tab and a Banners tab. The settings on these tabs determine whether banners and watermarks appear on printouts of files attached to Agile PLM business objects, and the content of those banners and watermarks. These banners and watermarks appear on files printed with the AutoVue for Agile.
The only way to have no print appear is to make sure the Banner and Banner Text pairs (and Attribute Watermark/Attribute Watermark Text) are both blank: delete the text in the appropriate text field. For example, if you make Top Left Banner blank, you will then see an unwanted "Printed by:" because this was not deleted from Top Left Banner Text.
The following table lists the watermark properties; these can be set on the Watermarks tab.
Table 20-3 Watermarks tab properties
| Property | Description | Default Text or Setting |
|---|---|---|
|
Attribute Watermark |
The value of this attribute appears in the watermark as text after the Attribute Watermark Text. |
[Select from drop-down list. This becomes $ATTRIBUTENAME:] |
|
Attribute Watermark Text |
Text that appears before the text of the value in the Attribute Watermark. |
[None: enter your own text, including colon if appropriate.] |
|
Back Rev Watermark Text |
Watermark text that appears if the item object is not the latest revision. This property is available only for the Parts and Documents Banner & Watermark attributes. |
Back Revision |
|
Name |
Lists all the Agile PLM business classes for selection |
[one for each business class] |
|
Pending Rev Watermark Text |
Watermark text that appears if the Item object is a pending revision. This property is available only for the Parts and Documents Banner & Watermark attributes. |
Pending Revision |
|
Print Watermark |
Turns printed watermarking on (Yes) and off (No). |
No |
The following table lists the banner properties; these can be set on the Banners tab.
Table 20-4 Banner tab properties
| Property | Description | Default Text or Setting |
|---|---|---|
|
Name |
Lists all the Agile PLM business classes for selection |
[one for each business class] |
|
Bottom Left Banner |
Banner appears at the bottom of the printout, on the left, after the Bottom Left Banner Text. |
[object number] |
|
Bottom Left Banner Text |
Text that appears before the text that is the value of the Bottom Left Banner. |
$ATTRIBUTENAME: |
|
Bottom Middle Banner |
Banner appears at the bottom of the printout, in the middle, after the Bottom Middle Banner Text. |
Item: "Rev [letter] of Latest Released Revision" Empty for other classes |
|
Bottom Middle Banner Text |
Text that appears before the text that is the value of the Bottom Middle Banner. |
Item: "Rev:" Empty for other classes |
|
Bottom Right Banner |
Banner appears at the bottom of the printout, on the right, after the Bottom Right Banner Text. |
[Status for workflow class; Lifecycle Phase for non-workflow class] |
|
Bottom Right Banner Text |
Text that appears before the text that is the value of the Bottom Right Banner. |
"Status:" [or] "Lifecycle phase:" |
|
Top Left Banner |
Banner appears at the top of the printout, on the left, after the Top Left Banner Text. |
[Print User] |
|
Top Left Banner Text |
Text that appears before the text that is the value of the Top Left Banner. |
"Printed By:" |
|
Top Middle Banner |
Banner appears at the top of the printout, in the middle, after the Top Middle Banner Text. |
— |
|
Top Middle Banner Text |
Text that appears before the text that is the value of the Top Middle Banner. |
— |
|
Top Right Banner |
Banner appears at the top of the printout, on the right, after the Top Right Banner Text. |
[Print Date] |
|
Top Right Banner Text |
Text that appears before the text that is the value of the Top Right Banner. |
"Printed On:" |
Here are a few points about the watermark and banner settings:
All the properties except Print Watermark can be filled with your own text.
For any specific attachment, only one setting is available per banner or watermark property.
You cannot create multiline banners.
The variable "$ATTRIBUTENAME:" inserts the name of the attribute that is selected in the Attribute Watermark property or the banner properties.
Within the Banner Text and Attribute Watermark Text properties, it is possible to enter your own text before the "$ATTRIBUTENAME:" variable, but not after.
When you set values that specify text to appear in printed banners and watermarks, you select from a drop-down list of variables and attributes (fields that appear in Agile PLM clients). The following table lists and describes the choices.
Table 20-5 Banner and Watermark properties
| Variable in drop-down list for property | Default printed value and restriction |
|---|---|
|
Effective Date - Obsolete Date |
Effective from: [effective date] to: [obsolete date] Available for items only: Effective Date and Obsolete Date are derived from the Affected Items tab of the change that created the specific rev of the item. |
|
Page Number |
Page [page number] Also specifies the region of an image when a specific region is printed. |
|
Page Number and Page Count |
Page [page number] of [total pages] Also specifies the region of an image when a specific region is printed. |
|
Print Date |
[print date] |
|
Print User |
[user] |
|
Rev of Latest Released Revision |
[rev letter of latest released revision] Available for items only. |
|
Watermark Text |
The value specified for the Watermark Attribute property, regardless of whether that property is enabled. Available as a variable for banners only. |
|
Attribute |
[attribute name].[attribute value] Many selections: Attachments.[value], Change History.[value], Page Two.[value], Title Block.[value], Cover Page.[value], General Info.[value] |
To print watermarking and specify watermark text:
Under System Settings, double-click Viewer & Files. The Viewer & Files window appears.
Click the Watermark tab to bring it forward.
Double-click the watermark you want, and update the property setting for the class.
Select Yes in the Print Watermark drop-down list to enable watermark printing.
To select watermark text, in the Attribute Watermark the drop-down list, select an attribute. The value of this attribute will appear as watermark text when Print Watermark is set to Yes.
To specify custom text for back revisions and pending revisions, in the Back Rev Watermark Text or the Pending Rev Watermark Text field, type the text that you want to appear in the watermark or accept the default text.
When you are finished modifying the Watermark tab, click Save.
To specify a banner to print on Agile PLM object printouts:
Under System Settings, double-click Viewer & Files. The Viewer & Files window appears.
Click the Banners tab to bring it forward.
For each banner you want to appear (Bottom Left, Middle, or Right; or Top Left, Middle, or Right), select an attribute or variable from the drop-down list. The value of this attribute or variable will appear in the banner.
To remove the default text or enter new text in the banner, place your cursor in the corresponding text field of the banner, for instance, Bottom Left Banner Text, and delete or alter the text. Since this text appears before the value in Bottom Left Banner property, you may end this text with a colon.
To change a text property, in the corresponding text field of the banner, for instance, Bottom Left Banner Text, delete or alter the text, type the new text or variable in its place.
When you are finished modifying the Banners tab, click Save.