Installing the SSM3 Module

The following procedure describes how to install the SSM3 module onto the Acme Packet NIU card.

Prerequisites:

  • Place the new SSM3 module in an ESD-safe location.
  • Wear an ESD wrist strap or take similar equivalent actions to prevent static damage to the NIU card or other ESD-sensitive components.
  • Note the location of the SSM3 module connector on the NIU card.
  • #2 Phillips screwdriver
  • Standoff screws (stored after removing the SSM3 module or available with the new SSM3 module)

    To install the SSM3 module:
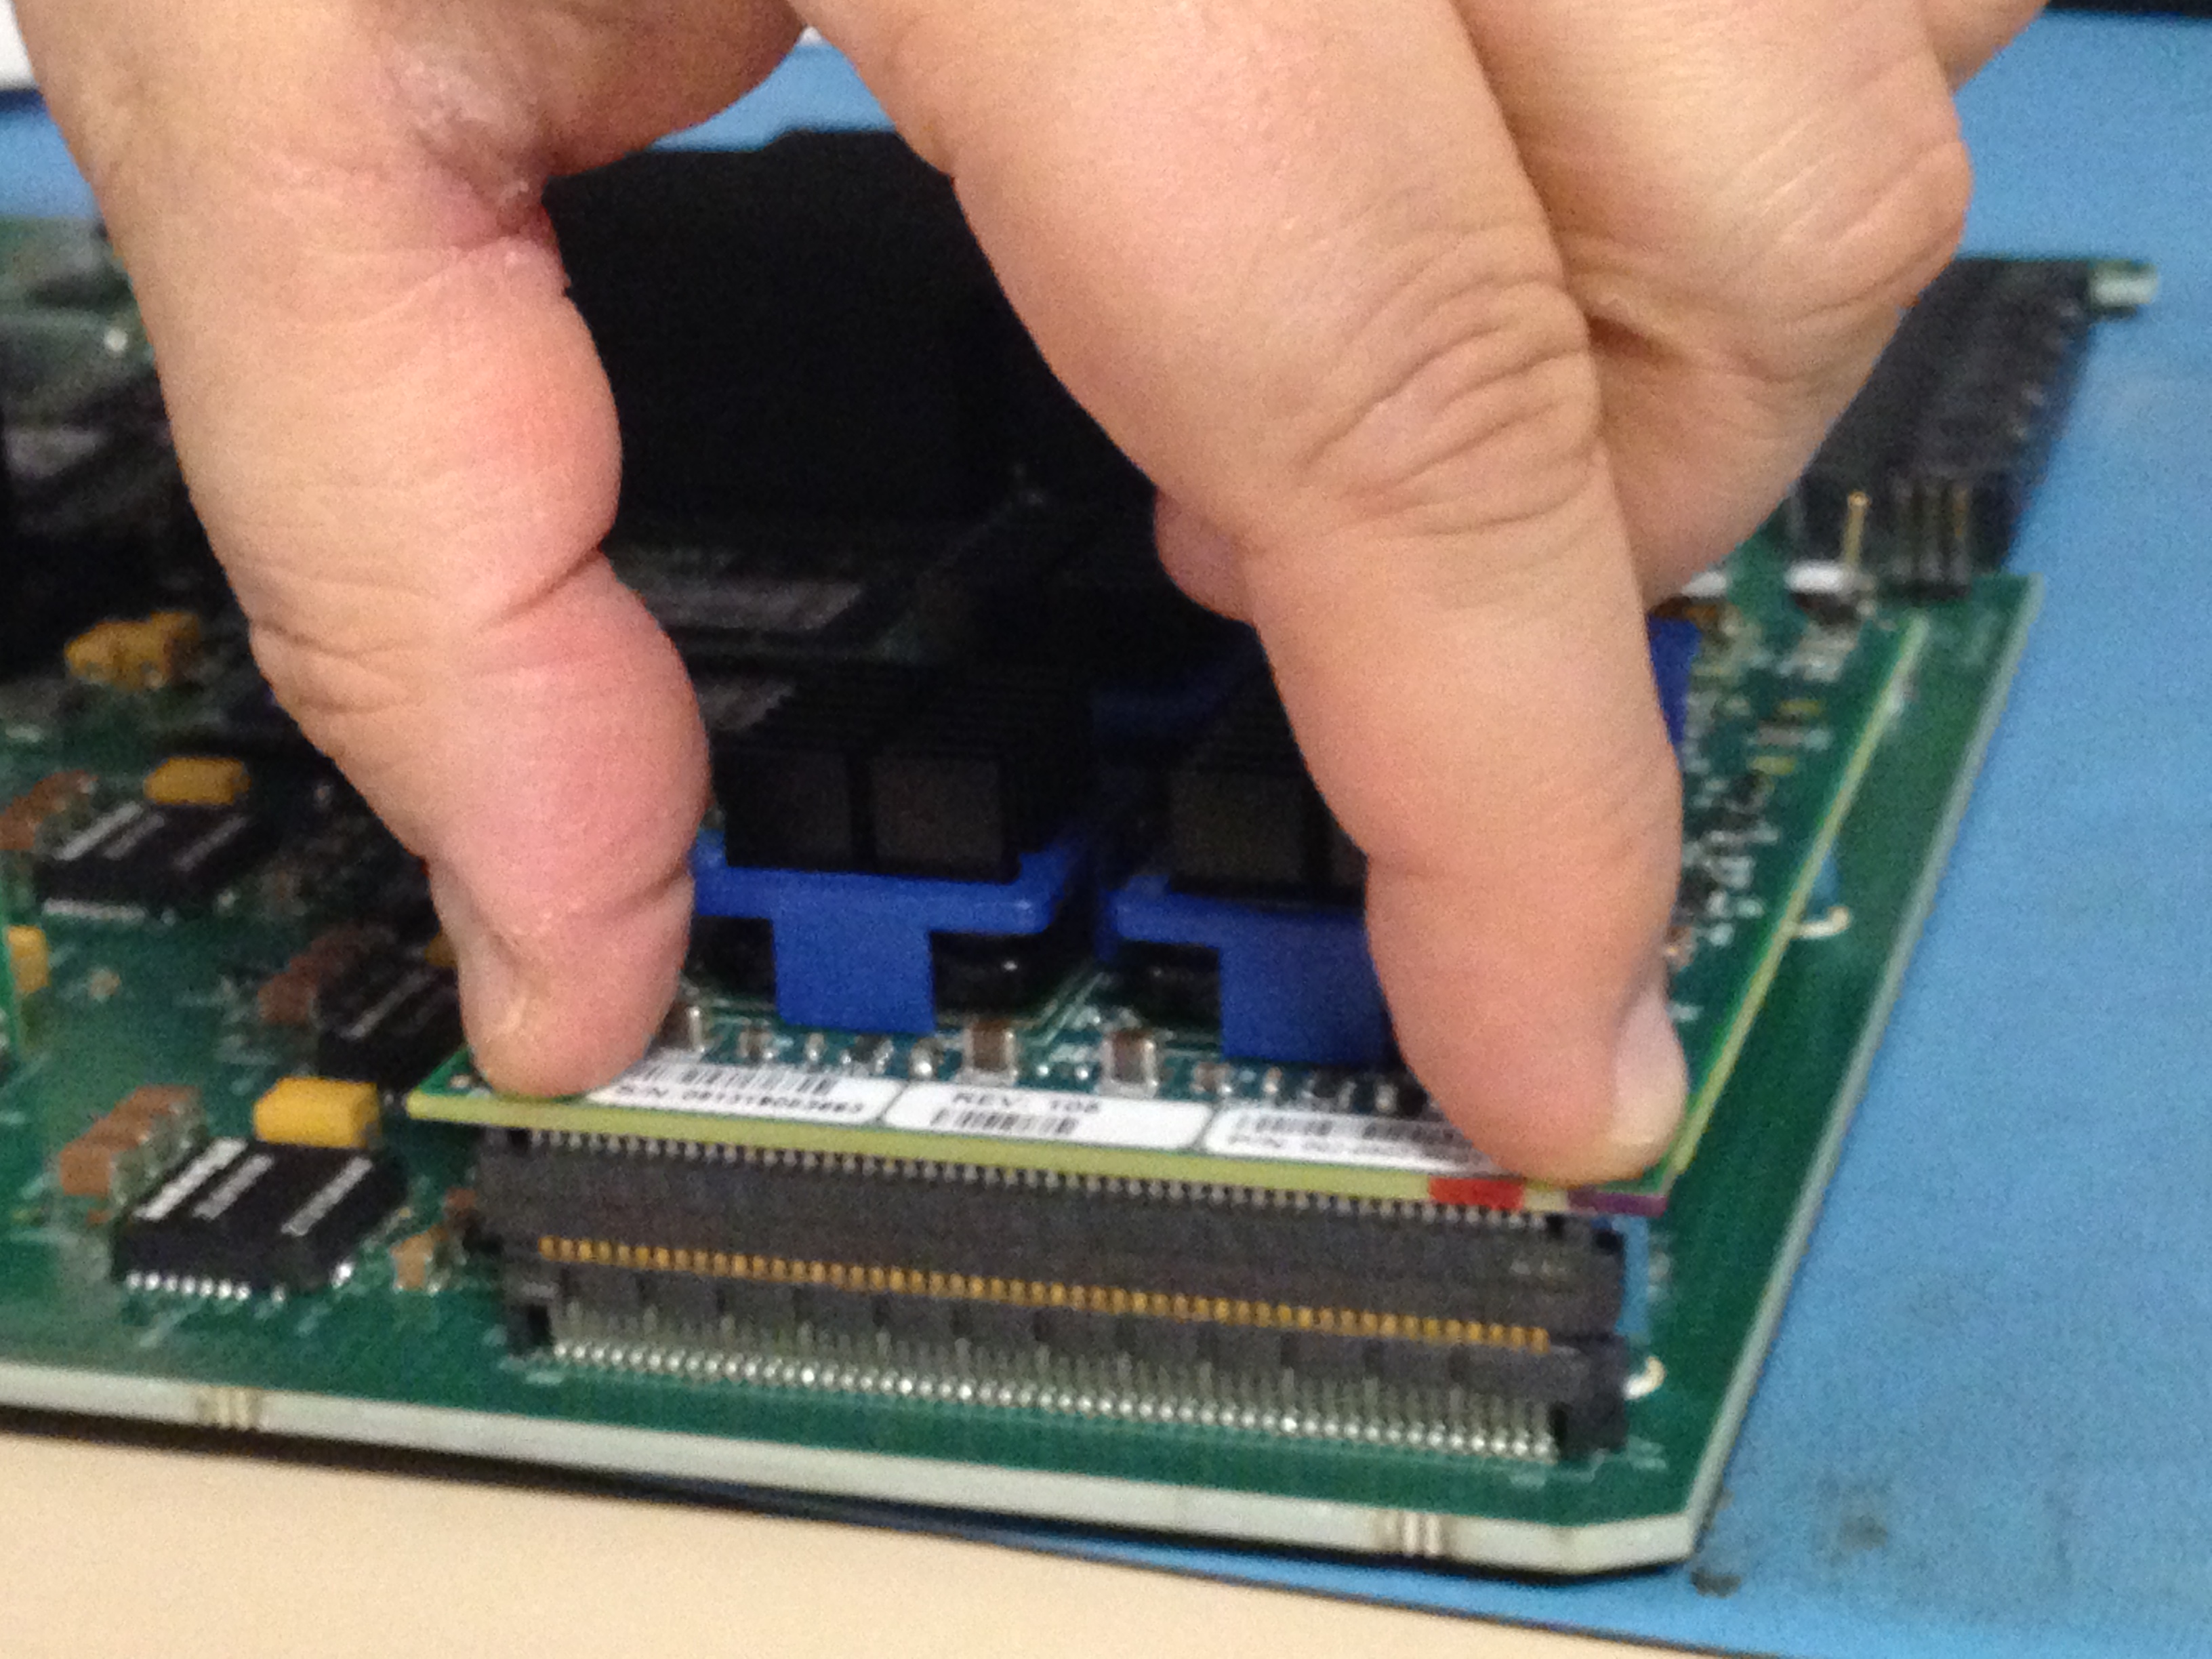
  1. Grasp the SSM3 module along either side of the connector between your thumb and index finger and join the module connector to the NIU connector by pressing evenly across the connector until the module is fully seated (see below).
    This picture shows someone properly installing the SSM3 module.

    Installing the SSM3 Module

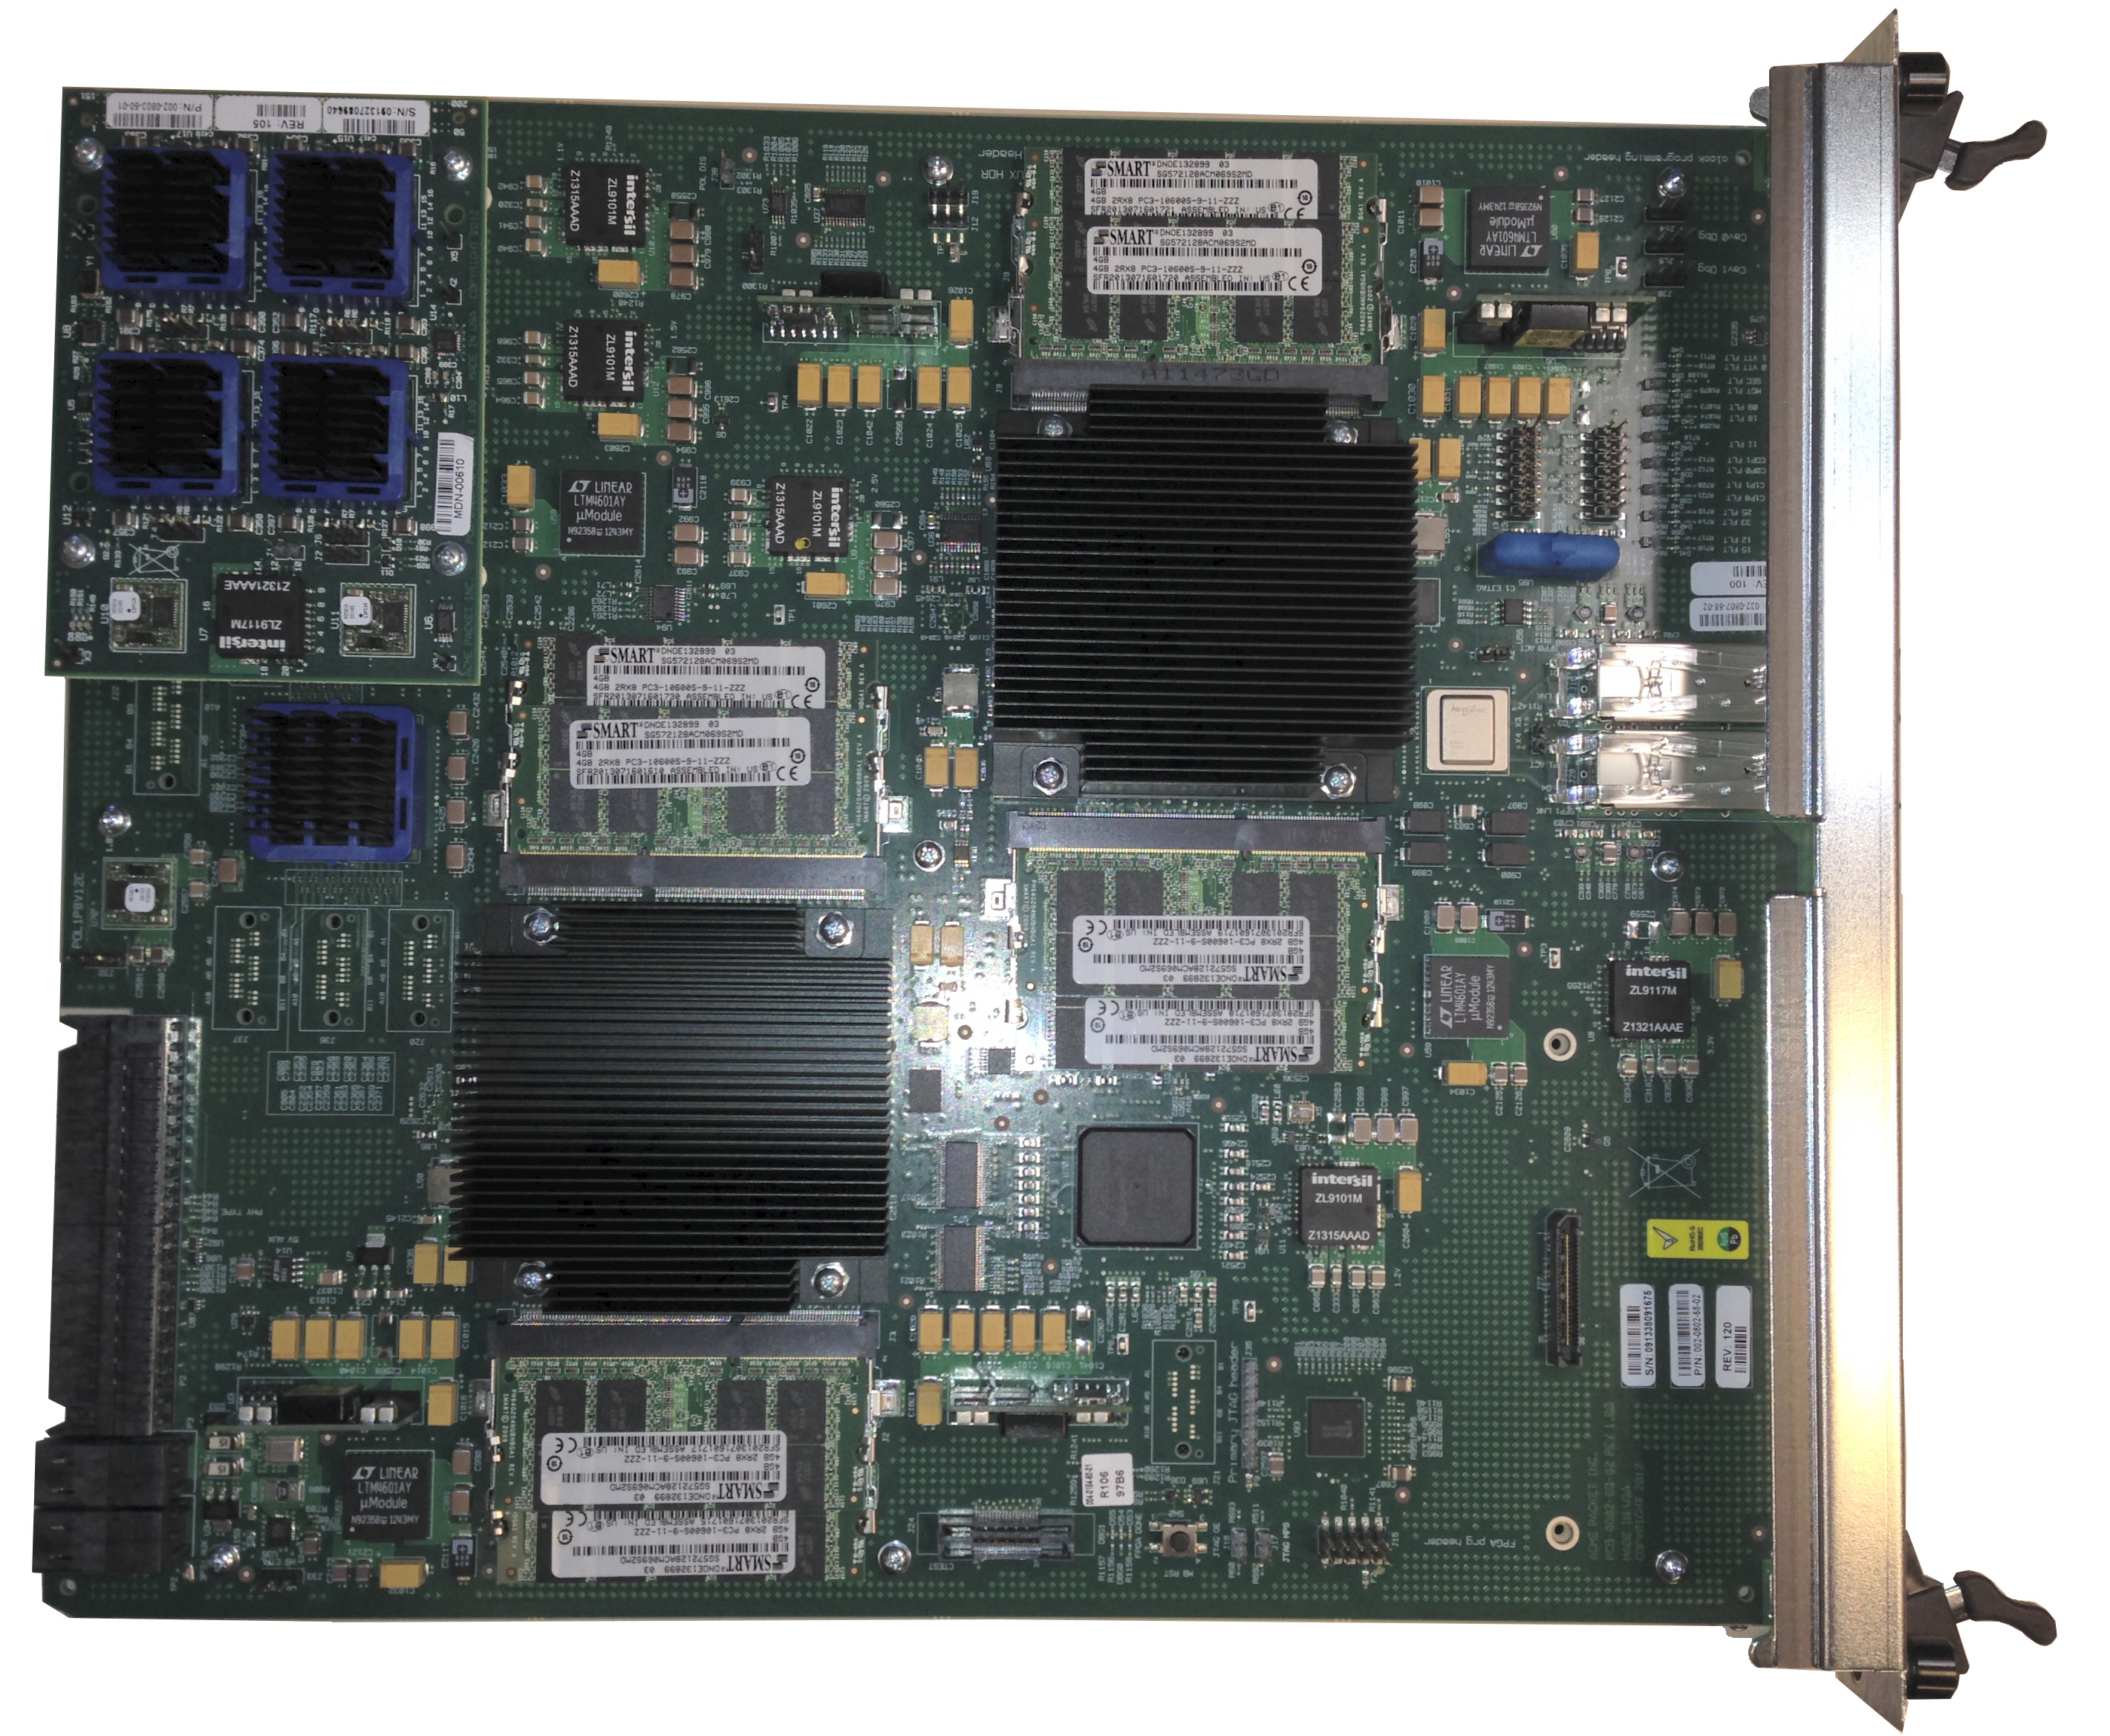
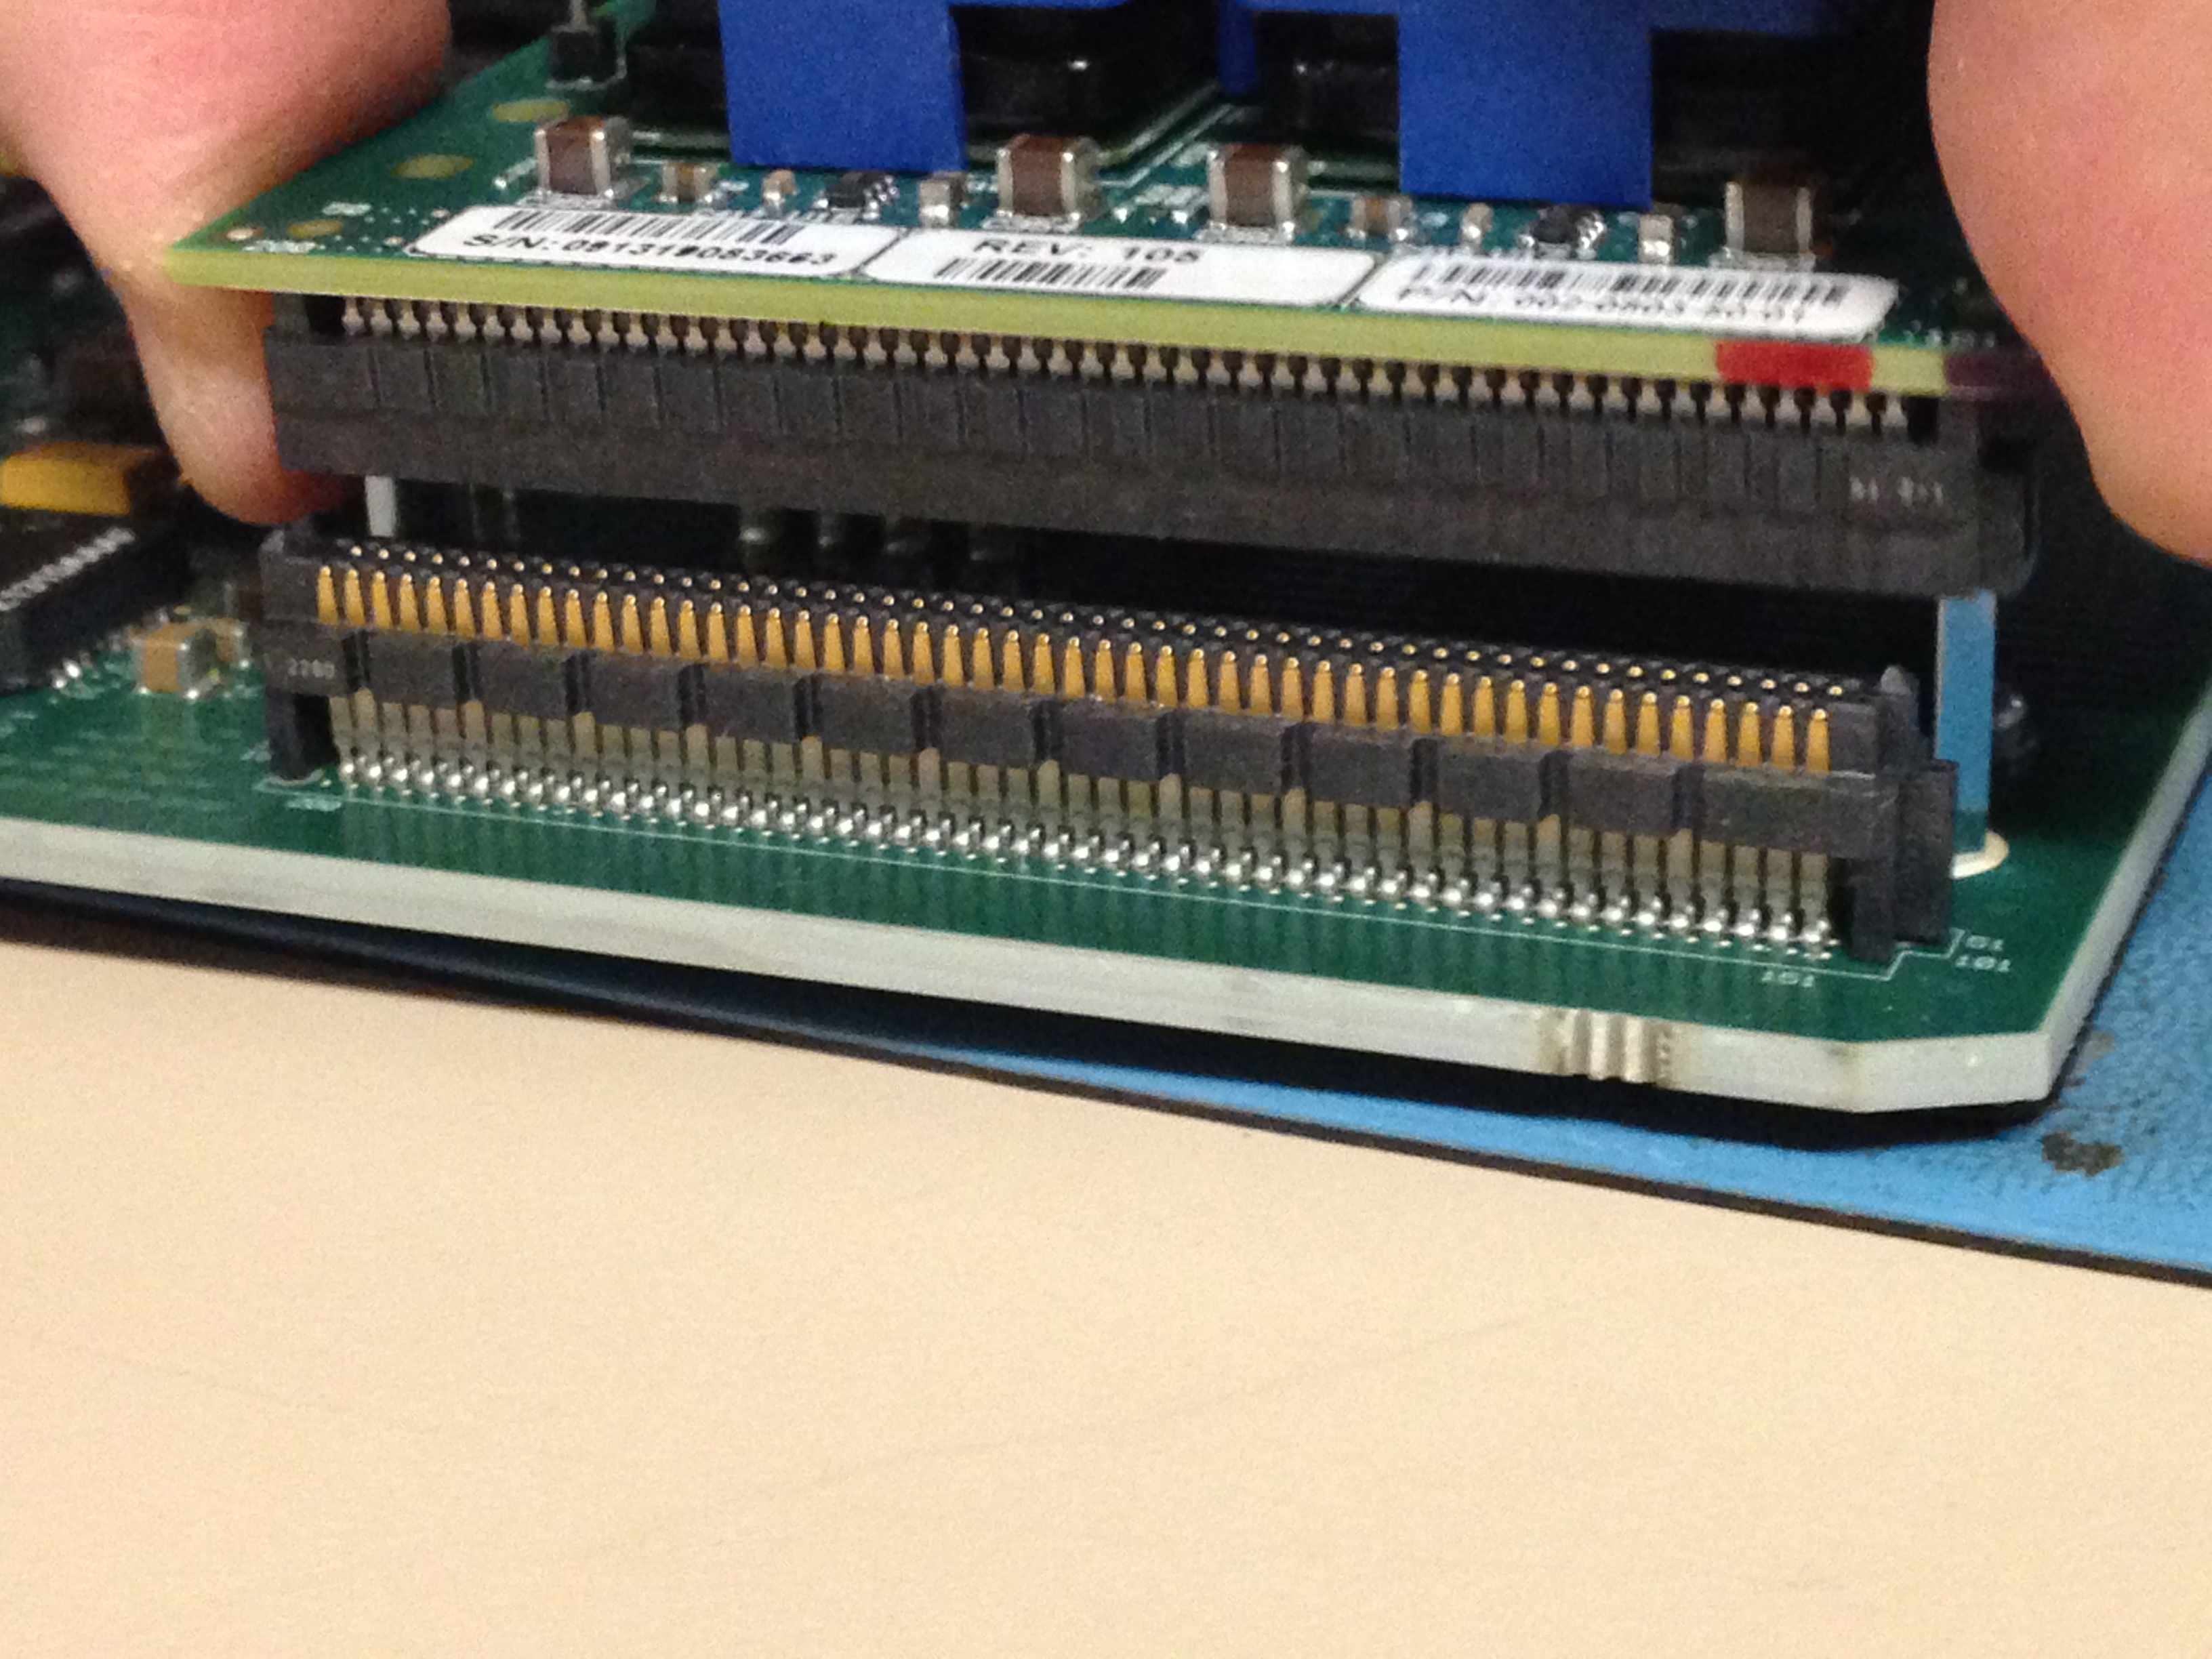
    Press evenly across the top of the connector to fully seat the SSM3 module on the NIU PCB as shown below. Note that the SSM3 is fastened to the NIU through four standoffs attached to the NIU as shown in the figures below.

    This picture shows someone properly fully seating the SSM3 module connector.

    Fully Seating the SSM3 Module Connector

  2. Using the Phillips screwdriver, insert and tighten the four standoff post screws to secure the SSM3 module to the PCB.
    This picture shows the location of the SSM3 module standoff posts.

    Location of the SSM3 Module Standoff Posts